Introduction
Setting up a powerful and efficient server rack to run PC games is essential for a smooth and immersive gaming experience. Whether you are a hardcore gamer or an eSports enthusiast, having the right components in your server rack is crucial to ensure optimal performance and stability.
In this article, we will explore the key components that you should include in your server rack to run PC games seamlessly. From processors to graphics cards, cooling systems to networking, we will cover everything you need to know to create the ultimate gaming setup in your server rack.
Before diving into the specifics, it’s important to note that the components you choose for your server rack will depend on your specific gaming preferences and requirements. It’s crucial to research and choose components that are compatible with each other to ensure smooth functioning and maximum performance.
Now, without further ado, let’s delve into the core components you need to consider for your gaming server rack.
Processor
The processor, also known as the central processing unit (CPU), is the brain of your gaming setup. It is responsible for carrying out all the calculations and computations required to run your PC games smoothly. When it comes to gaming, a powerful and efficient processor is a must-have component for optimal performance.
One of the most important factors to consider when choosing a processor for your server rack is its clock speed. A higher clock speed means that the processor can execute instructions more quickly, resulting in faster gaming performance. Additionally, multi-core processors are highly recommended for gaming setups as they can handle multiple tasks simultaneously, allowing for smoother gameplay and better multitasking capabilities.
Apart from clock speed and core count, it’s also essential to consider the architecture and cache size of the processor. Newer architectures tend to offer better performance and energy efficiency, while larger cache sizes allow the processor to store frequently accessed data, leading to faster processing times.
When it comes to specific processor models, both Intel and AMD offer excellent options for gaming setups. Intel’s Core i7 and Core i9 series processors are known for their strong single-core performance, making them ideal for gaming. On the other hand, AMD’s Ryzen processors provide great value for money, offering high core counts and competitive gaming performance.
While selecting a processor, it’s also vital to ensure compatibility with your motherboard. The processor socket on your motherboard should match the socket type of the processor you choose. Additionally, consider factors such as power consumption and cooling requirements to ensure that your server rack can handle the heat generated by the processor during intense gaming sessions.
To summarize, a high-performance processor is essential for a gaming server rack, providing the computing power needed to handle demanding PC games. Consider factors such as clock speed, core count, architecture, and cache size when selecting a processor. Whether you choose an Intel Core i7, Core i9, or an AMD Ryzen processor, make sure it is compatible with your motherboard and suits your gaming requirements. With the right processor, you can experience smooth gameplay and superior performance in your PC gaming sessions.
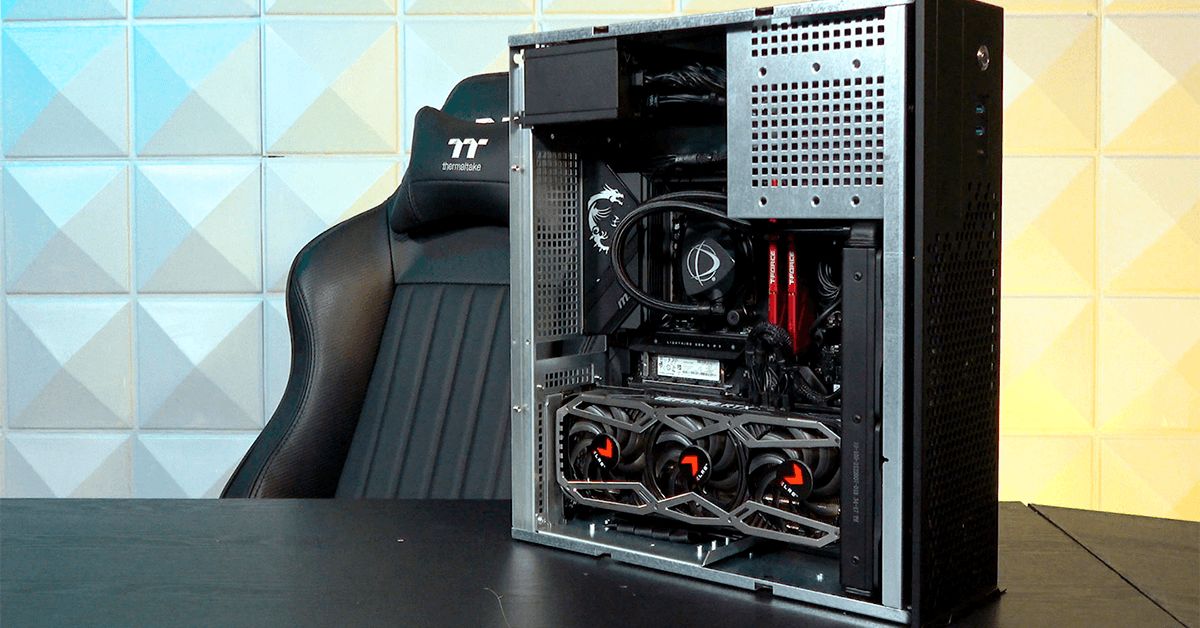
Graphics Card
When it comes to gaming, the graphics card is arguably the most important component in your server rack. It is responsible for rendering the visuals and graphics in your games and plays a crucial role in determining the overall gaming experience. A powerful graphics card is essential for smooth gameplay, high frame rates, and stunning visuals.
When choosing a graphics card for your gaming setup, there are several factors to consider. One of the primary considerations is the GPU (Graphics Processing Unit) model. Leading GPU manufacturers such as NVIDIA and AMD offer a wide range of options to suit different gaming needs and budgets. The higher-end models, such as the NVIDIA GeForce RTX series or the AMD Radeon RX series, are designed specifically for gaming enthusiasts and offer top-tier performance.
Memory is another crucial aspect when selecting a graphics card. The GPU’s dedicated video memory, commonly referred to as VRAM, stores and processes the graphical data required by your games. Having an ample amount of VRAM ensures smooth texture rendering, reduces stuttering, and allows for better graphics settings. It is recommended to choose a graphics card with at least 8GB of VRAM for optimal gaming performance.
Additionally, consider the GPU’s core clock speed and its number of CUDA cores (in the case of NVIDIA GPUs) or stream processors (in the case of AMD GPUs). Higher clock speeds and more cores result in better performance and smoother graphics rendering.
Connectivity options are also worth considering. Most modern graphics cards come with DisplayPort and HDMI ports, allowing you to connect multiple displays or high-resolution monitors for an immersive gaming experience. Ensure that the graphics card you choose has the necessary ports to accommodate your setup requirements.
Lastly, it’s important to consider the power requirements of the graphics card. Higher-end GPUs generally require more power, so make sure that your power supply unit (PSU) can provide sufficient wattage to support the graphics card. Additionally, be aware of any additional power connectors that the graphics card might require, such as 6-pin or 8-pin PCIe power connectors.
To sum up, a high-performance graphics card is essential for a gaming server rack. Consider factors such as GPU model, VRAM capacity, clock speed, and connectivity options when choosing a graphics card. Make sure that your power supply can handle the power requirements of the graphics card. With the right graphics card, you can enjoy visually stunning and immersive gaming experiences on your PC.
RAM
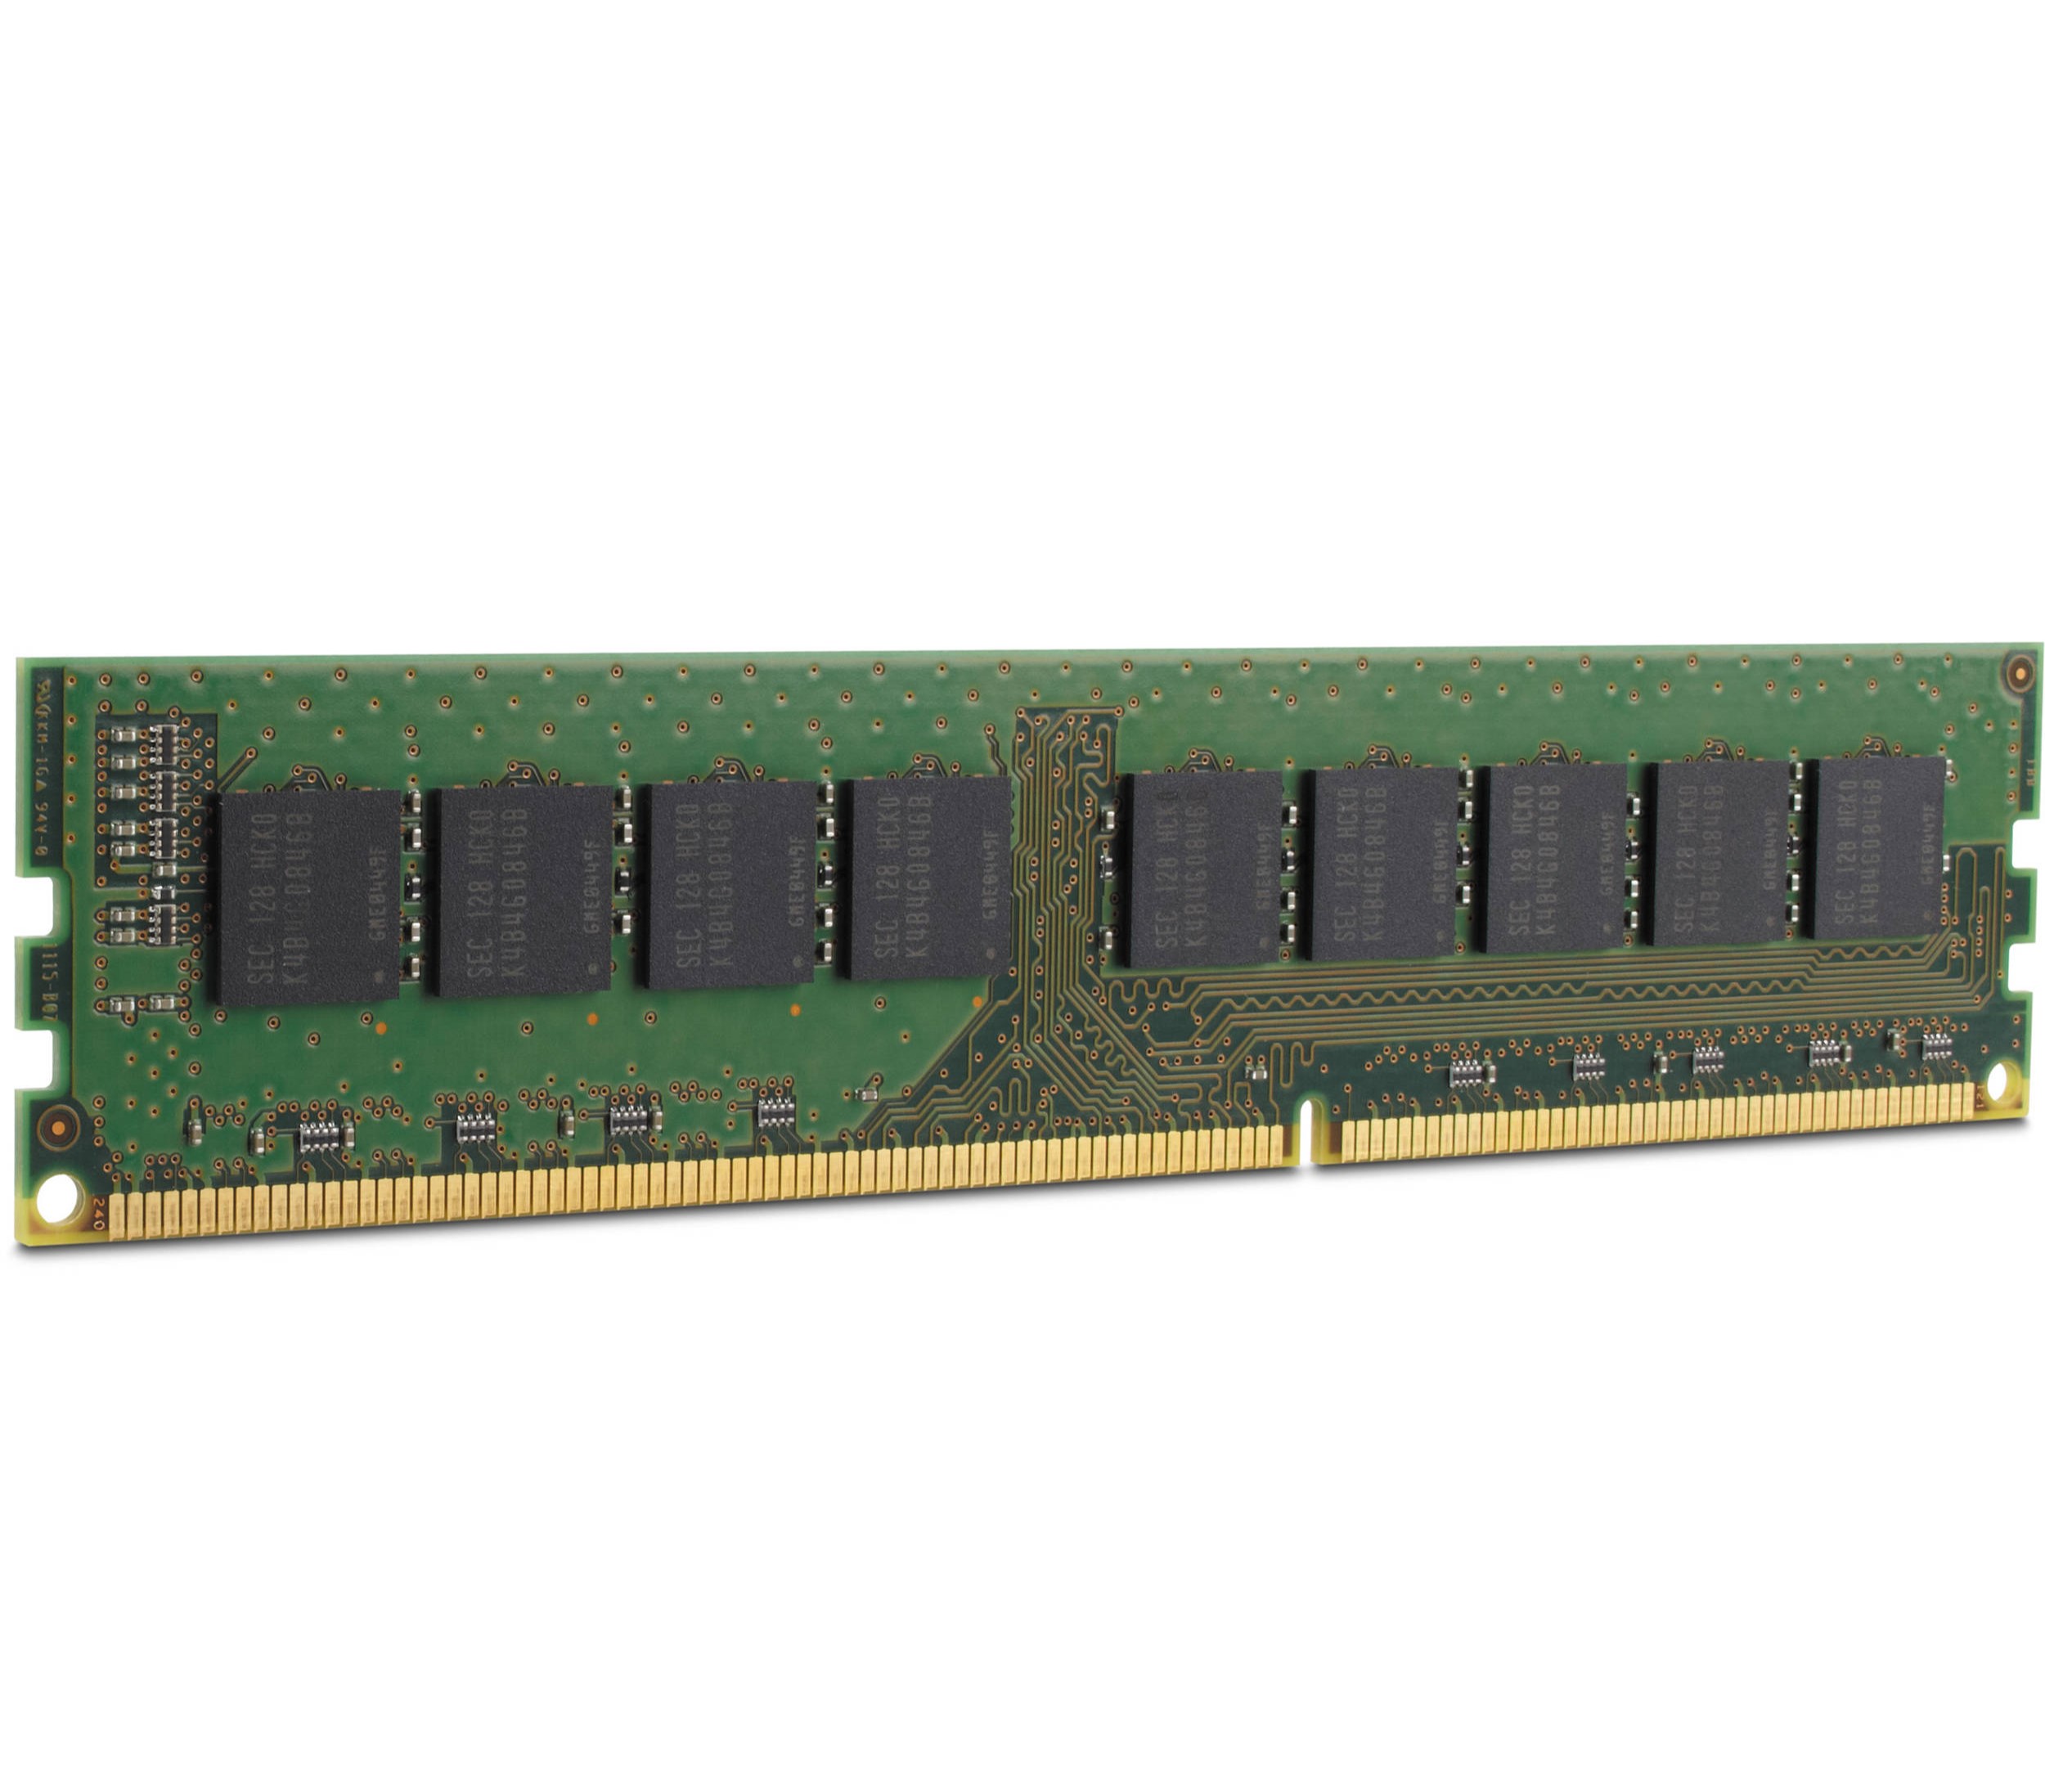
RAM (Random Access Memory) plays a critical role in gaming by providing fast and temporary storage for the data and instructions that your PC needs to run games smoothly. It allows for quick access to game assets, textures, and other resources, resulting in improved loading times and overall system responsiveness.
When it comes to RAM for a gaming server rack, the capacity and speed are two important factors to consider. The capacity of RAM determines how much data can be stored and accessed by the system at any given time. For optimal gaming performance, it is recommended to have a minimum of 16GB of RAM. However, if you frequently run memory-intensive games or multitask while gaming, consider upgrading to 32GB or even 64GB of RAM to ensure smooth and lag-free gameplay.
In addition to capacity, the speed of RAM, measured in megahertz (MHz), also impacts gaming performance. Higher RAM speeds allow for faster data transfer and can result in smoother gameplay and reduced loading times. It’s advisable to choose RAM modules with a speed of at least 3000MHz or higher for gaming purposes.
When selecting RAM for your server rack, make sure to check for compatibility with your motherboard and processor. Different motherboards and processors support specific types and speeds of RAM, so it’s crucial to choose modules that are compatible with your system. Refer to the motherboard’s specifications or the manufacturer’s website to ensure compatibility.
Another aspect to consider is the RAM form factor. The most common form factors for RAM modules are DIMM (Dual In-line Memory Module) and SO-DIMM (Small Outline Dual In-line Memory Module). DIMM modules are generally used in desktop systems, while SO-DIMM modules are common in smaller form factor systems like laptops. Ensure that you choose the appropriate form factor based on the configuration of your server rack.
Lastly, it’s essential to note that having more RAM does not necessarily translate to better gaming performance if your other components, such as the processor and graphics card, are not capable enough. It’s important to have a balanced configuration where all components work together harmoniously to deliver optimal gaming performance.
To sum up, RAM is a crucial component in a gaming server rack. Consider factors such as capacity, speed, compatibility, and form factor when selecting RAM modules. Aim for a minimum of 16GB of RAM with a speed of at least 3000MHz for optimal gaming performance. Remember to balance your system’s components to ensure a smooth and lag-free gaming experience.
Storage
Storage is an essential component of any gaming server rack as it stores your game files, operating system, and other data. It determines how quickly your games load, how smoothly they run, and how much data you can store on your system. When considering storage options for your server rack, there are two main types to consider: solid-state drives (SSD) and hard disk drives (HDD).
SSDs are the preferred choice for gaming due to their faster read and write speeds compared to traditional HDDs. They offer quick game load times, reduced loading screens, and faster data transfer rates. Some high-end SSDs even come in the form of NVMe (Non-Volatile Memory Express) drives, which offer lightning-fast speeds and low latency, further enhancing your gaming experience. It is recommended to install your operating system and frequently played games on an SSD for optimal performance.
HDDs, on the other hand, are known for their larger storage capacities and lower price per gigabyte. They are suitable for storing large game libraries or files that do not require fast access speeds, such as backups or less frequently played games. If you have a large collection of games or need vast amounts of storage, consider including an HDD in your server rack alongside the SSD.
To strike a balance between speed and capacity, many gamers opt for a combination of SSDs and HDDs in their server racks. They use an SSD as the primary drive for the operating system and frequently played games, while using an HDD for additional storage needs. This allows for fast loading times and ample storage space for a diverse game library.
When selecting storage drives, it’s important to consider factors such as storage capacity, speed, and reliability. It’s also worth noting that SSDs have a limited number of write cycles, which means they have a finite lifespan. However, modern SSDs have significantly improved durability and come with warranty periods that provide peace of mind.
In terms of storage connectivity, most modern motherboards support SATA (Serial ATA) and M.2 connections for SSDs, as well as SATA for HDDs. These connections ensure smooth integration with your server rack and easy installation of storage drives.
To summarize, storage plays a vital role in a gaming server rack. Consider using SSDs for your primary drive to ensure fast load times and smooth gameplay, while utilizing HDDs for additional storage. Choose drives with suitable storage capacity, speed, and connectivity options to meet your gaming and storage needs. With the right storage configuration, you can enjoy a vast library of games and quick access to your gaming files.
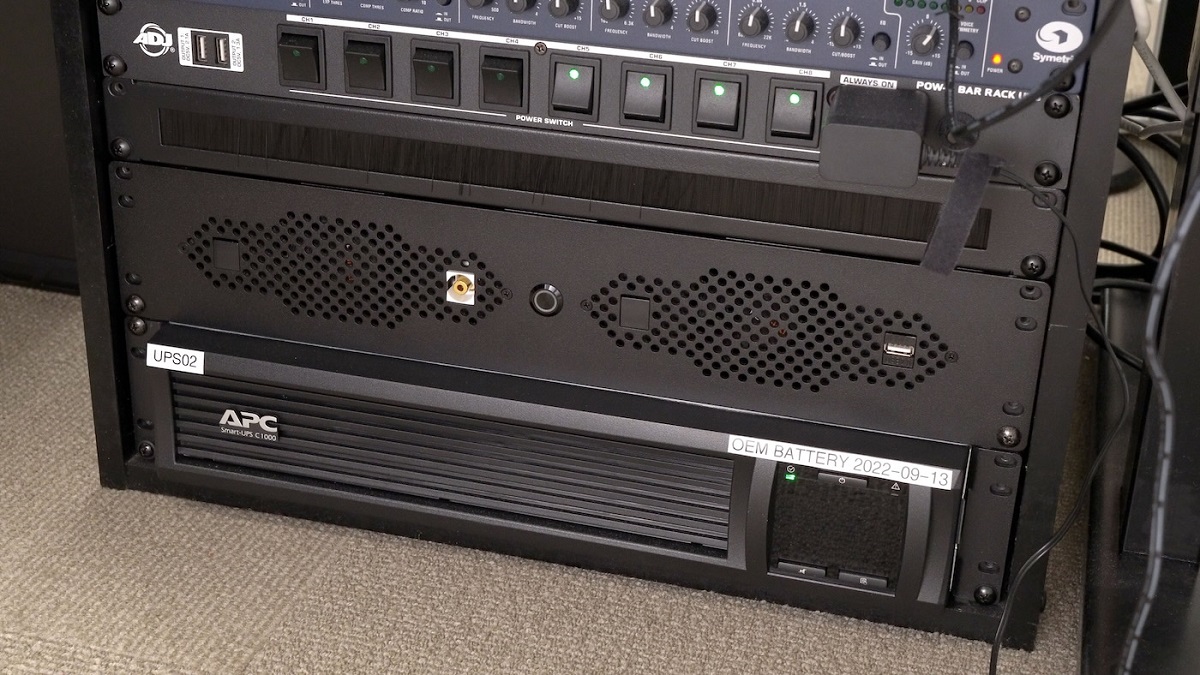
Power Supply
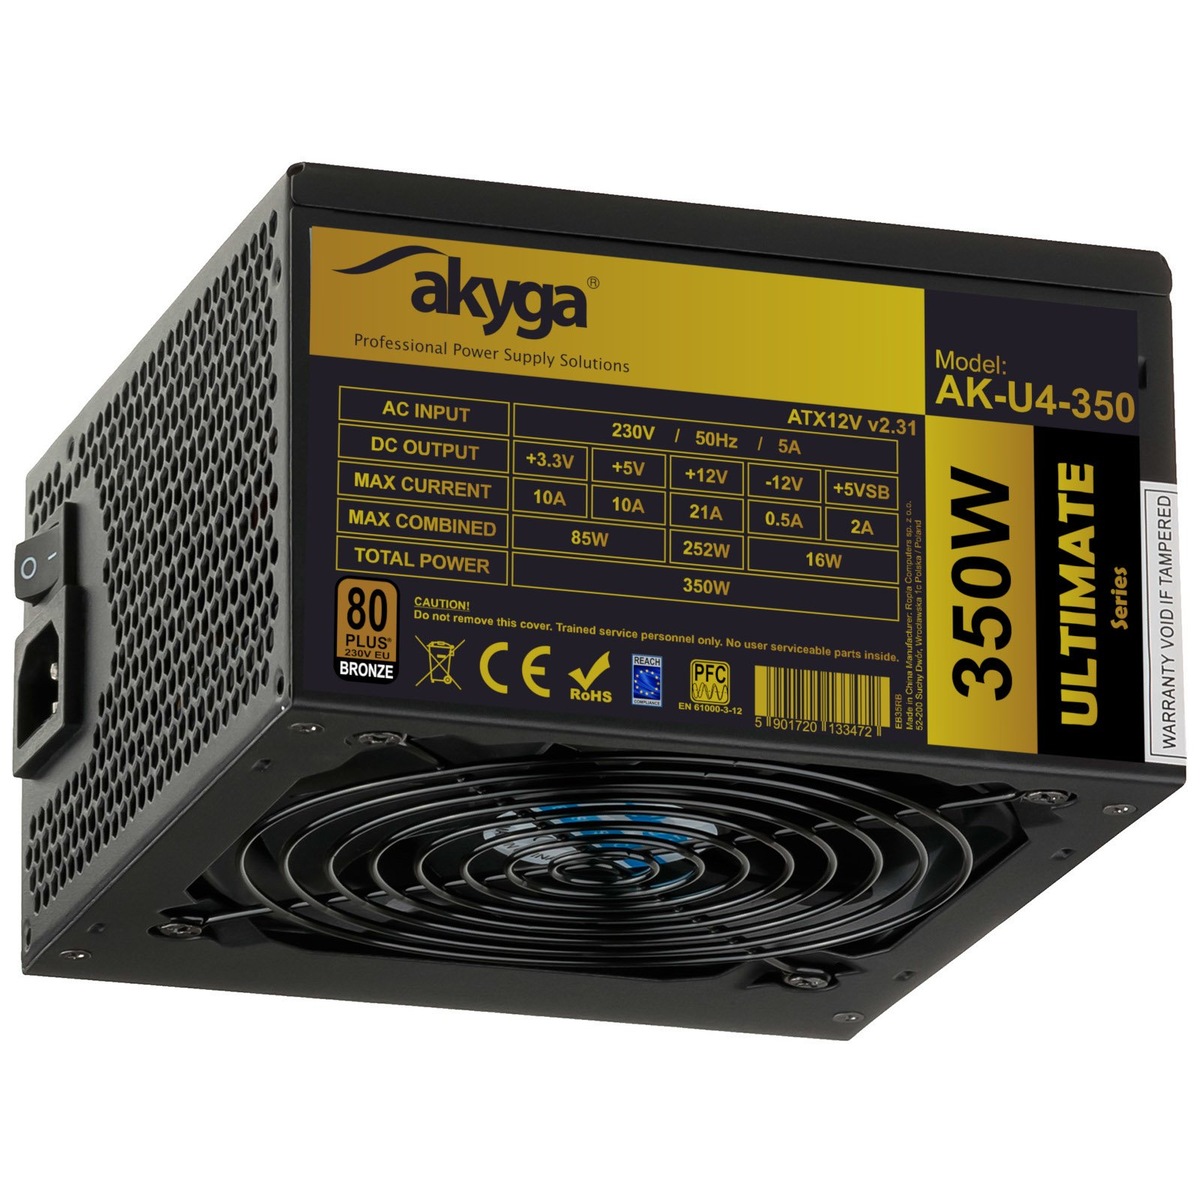
The power supply unit (PSU) is a crucial component in your gaming server rack as it delivers a steady and reliable power source to all the other components. It is responsible for converting the electrical power from the wall outlet into the appropriate voltage and current required by your PC components. Choosing the right power supply is essential to ensure stability, efficiency, and longevity of your gaming setup.
When selecting a power supply for your server rack, there are several factors to consider. One of the most important factors is the wattage rating of the PSU. The wattage determines how much power the PSU can deliver to your components. It’s recommended to calculate the total power consumption of your components, including the processor, graphics card, and other peripherals, and choose a PSU with a wattage rating that exceeds that total to provide sufficient headroom for future upgrades and stability.
Efficiency is another critical aspect to consider. Power supplies are rated based on their efficiency, which indicates how effectively they convert the AC power from the wall outlet to DC power for your components. Look for power supplies with high efficiency ratings, such as 80 Plus Bronze, Silver, Gold, or Platinum certifications. Higher efficiency means less energy waste, lower electricity bills, and reduced heat production.
Modularity is a feature to consider when choosing a power supply. Modular power supplies come with detachable cables, allowing you to connect only the cables you need for your components. This results in a cleaner and more organized cable management system, improving airflow and reducing clutter in your server rack.
It’s crucial to ensure that the power supply you choose has the necessary connectors and cables to support your components. Check the specifications of your motherboard and components to determine the required power connectors, such as 24-pin ATX, PCIe, and SATA connectors. Additionally, make sure the PSU has sufficient numbers of each type of connector to accommodate your components.
Another aspect to consider is the reliability and brand reputation of the power supply. Opt for reputable brands that have a track record of providing reliable and durable power supplies. Reading reviews and checking ratings from trusted sources can help you make an informed decision.
Lastly, consider the cooling options and noise level of the power supply. Look for power supplies with quiet fans and effective cooling technologies to ensure proper heat dissipation without excessive noise.
To sum up, choosing a reliable and efficient power supply is essential for your gaming server rack. Consider factors such as wattage, efficiency, modularity, compatibility, reliability, and cooling options when selecting a power supply. Ensure that it can provide enough power for your components and has the necessary connectors for proper integration. With a quality power supply, you can enjoy stable and efficient performance from your gaming setup.
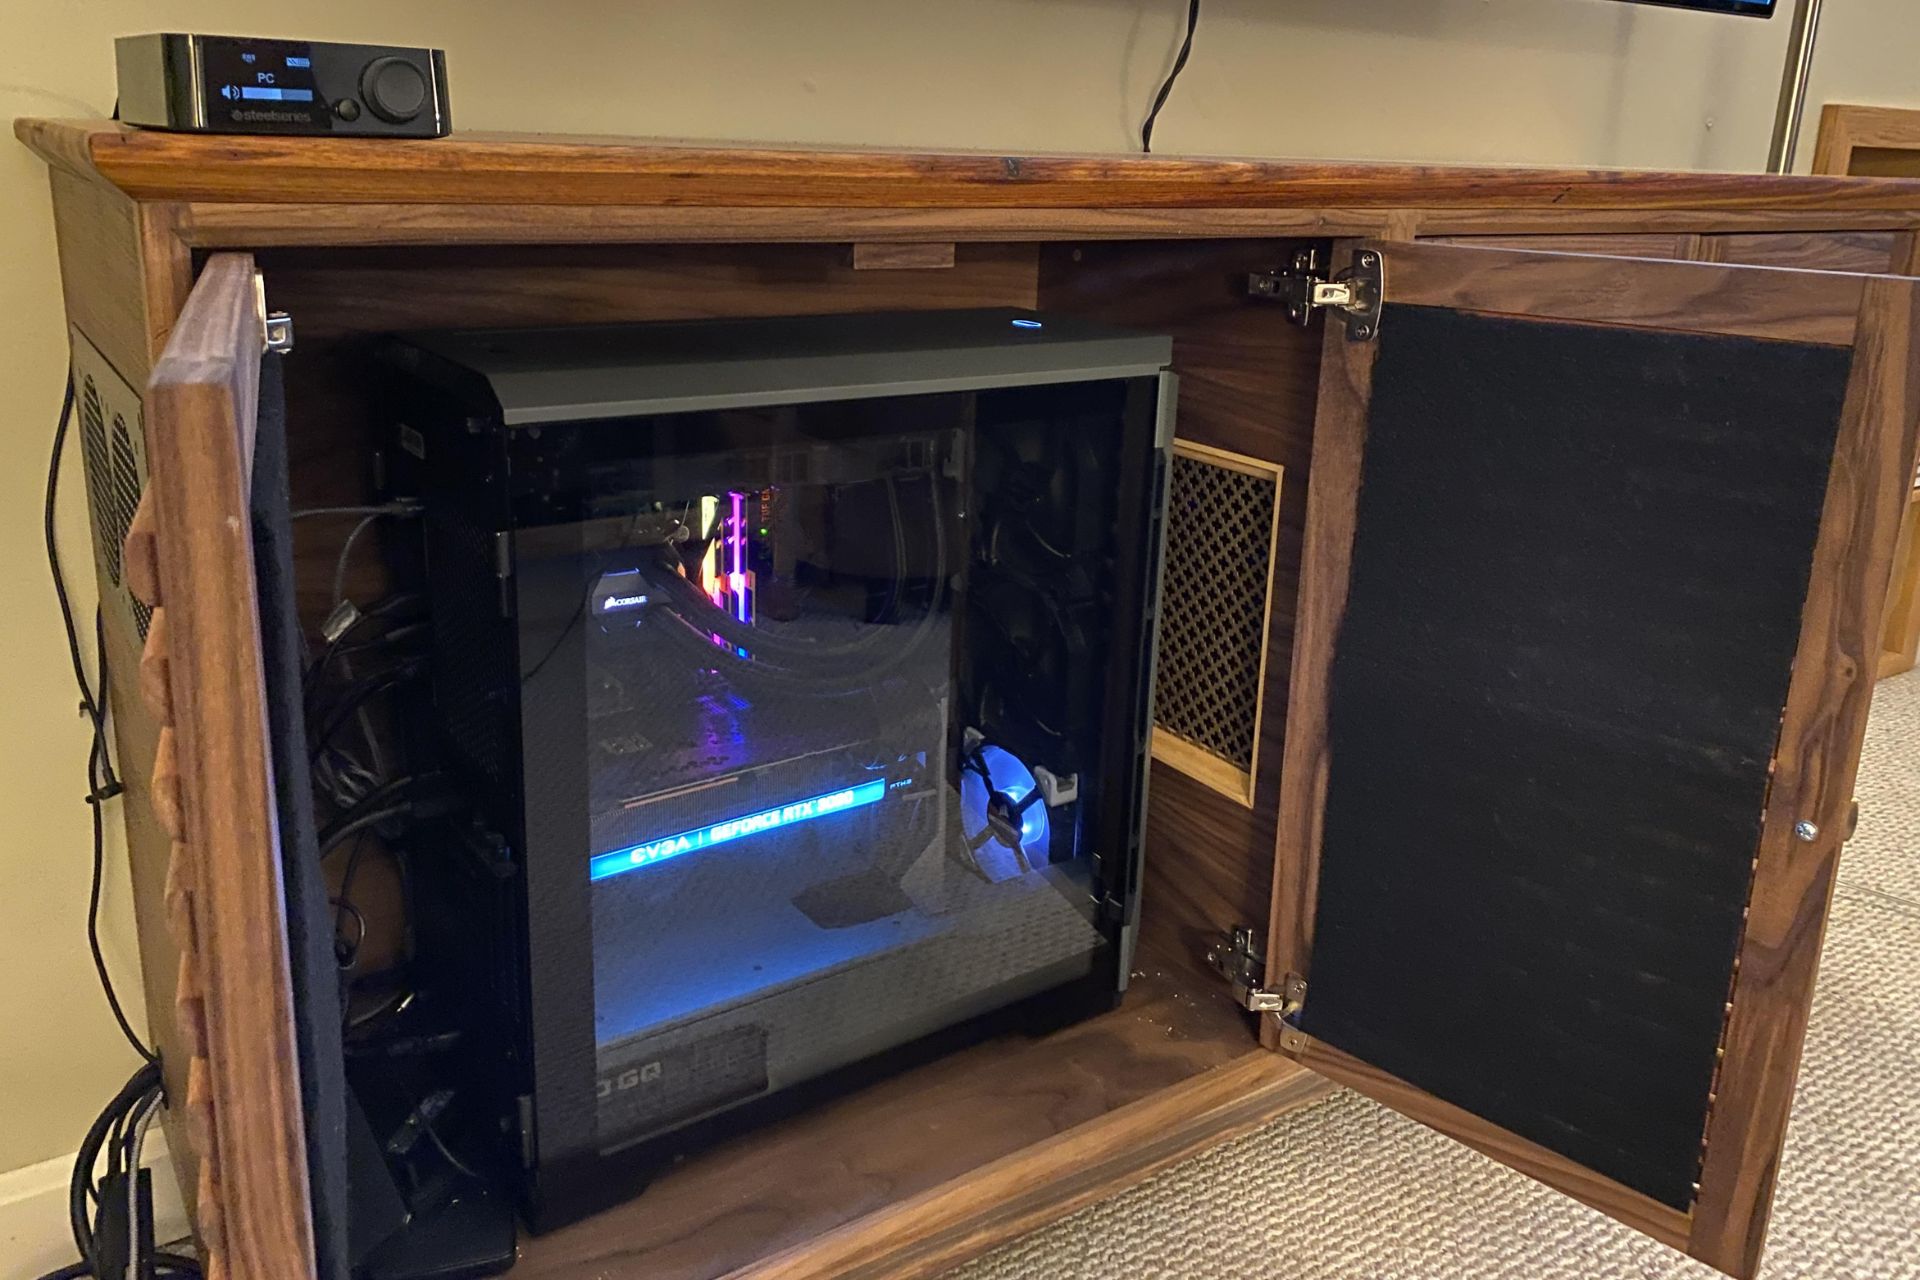
Cooling
Proper cooling is vital for maintaining the optimal performance and longevity of your gaming server rack. The high processing power of modern components generates a significant amount of heat, which can cause overheating and potential damage if not managed effectively. Therefore, implementing an efficient cooling system is crucial to ensure that your components operate within safe temperature ranges.
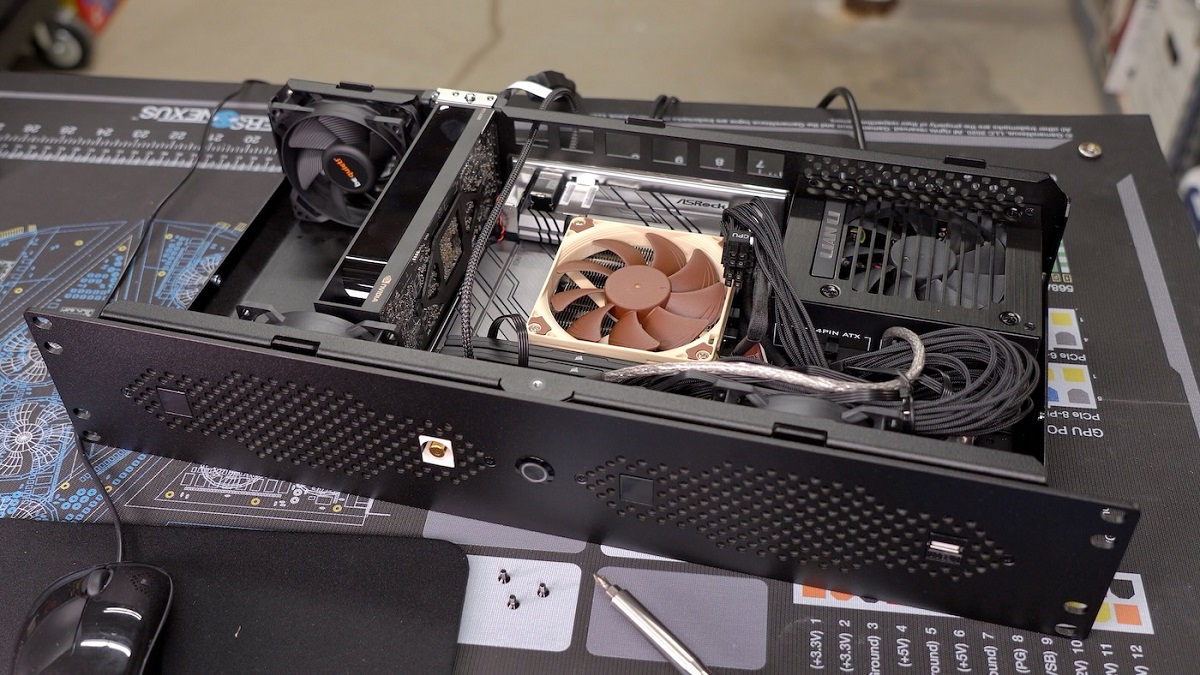
The first component to consider for cooling is the CPU cooler. Processors generate a substantial amount of heat, especially during intense gaming sessions. There are two main types of CPU coolers: air coolers and liquid coolers. Air coolers consist of a heatsink and a fan(s) to dissipate heat, while liquid coolers utilize a radiator, pump, and liquid coolant to cool the CPU. Both types have their advantages, and the choice depends on factors such as budget, space constraints, and cooling requirements.
Graphics cards also require proper cooling, as they can become hot during gaming sessions. Most modern graphics cards come with built-in cooling systems, typically consisting of fans and heatsinks. However, in a server rack setup, it’s essential to ensure that there is sufficient airflow around the graphics cards to prevent heat buildup. Consider adding additional case fans or investing in aftermarket cooling solutions, such as GPU coolers or water blocks, if necessary.
Overall case airflow is another critical aspect of cooling in a server rack. Good airflow ensures that cool air is brought in and hot air is expelled from the system efficiently. Proper cable management is an important factor in maintaining good airflow. Tidy and organized cables prevent obstructions and allow for smooth airflow throughout the server rack. Additionally, consider the placement and orientation of case fans to create a balanced airflow that covers all components.
When it comes to case fans, there are various sizes to choose from, including 120mm and 140mm fans. Larger fans tend to produce less noise while moving more air, resulting in improved cooling performance. It’s advisable to have a combination of intake and exhaust fans strategically placed to create positive air pressure inside the server rack, which helps keep dust out and promotes proper ventilation.
Dust accumulation can significantly impact cooling performance over time. Regular cleaning and maintenance are essential to prevent dust buildup on components and fans. Consider using dust filters on intake fans to reduce the amount of dust that enters your server rack. Periodically checking and cleaning the fans and components can help prolong their lifespan and maintain optimal cooling efficiency.
In addition to active cooling methods, passive cooling measures can also be incorporated into your server rack setup. This can include using heat sinks on components or investing in server rack cabinets with proper ventilation and airflow design.
To summarize, implementing an effective cooling system is crucial for a gaming server rack. Consider CPU coolers, graphics card cooling, case airflow, and proper cable management. Choose fans of suitable sizes and strategically place them for optimal airflow. Regularly clean and maintain your components to prevent dust accumulation. With the right cooling setup, you can ensure that your components stay cool and perform optimally during intense gaming sessions.
Networking
Networking is a crucial aspect of any gaming server rack, as it enables seamless online gaming, multiplayer experiences, and fast data transfer. Choosing the right networking components and optimizing your network setup can greatly enhance your gaming performance and reduce latency.
First and foremost, consider the type of network connection available to you. For gaming, a wired Ethernet connection is highly recommended over a wireless connection. Wired connections provide faster and more stable internet speeds, with lower latency and reduced packet loss. Ensure that your server rack has sufficient Ethernet ports to connect your gaming devices directly to the router or network switch.
When it comes to your router or network switch, opt for models with gigabit Ethernet ports and support for the latest networking standards such as Ethernet 2.5G, 5G, or even 10G. These higher-speed connections allow for faster data transfer rates and lower network congestion, resulting in smoother gaming experiences.
Quality of Service (QoS) or traffic prioritization settings on your router can significantly improve your gaming experience. These features allow you to prioritize gaming traffic over other types of network traffic, ensuring that your gaming data gets delivered with minimal delays. This can be particularly useful in households with multiple devices competing for bandwidth.
Another aspect to consider is the type of modem you are using. If you have a cable or DSL internet connection, make sure that your modem is capable of handling the maximum speed provided by your internet service provider. Upgrading to a faster modem can prevent network bottlenecks and ensure that you are getting the full speed of your internet connection.
For online gaming, a low-latency connection is crucial. Look for routers or switches that offer features like Quality of Service (QoS) or gaming-specific features such as “Gaming Mode”. These features optimize the network connection for gaming traffic, reducing latency, and providing a smoother gaming experience.
In addition to networking hardware, consider optimizing your network setup for gaming. This includes ensuring proper placement of your router or access point, minimizing interference from other electronic devices, and using Ethernet cables of high quality with proper shielding. Additionally, consider using network monitoring tools to identify and resolve any network issues or bottlenecks.
Lastly, it’s important to ensure that your internet service plan provides sufficient bandwidth for gaming. Check with your internet service provider to ensure that your plan offers the required upload and download speeds for your gaming needs, especially if you engage in high-bandwidth activities like streaming or hosting multiplayer games.
To summarize, selecting the right networking components and optimizing your network setup is essential for a gaming server rack. Use a wired Ethernet connection for better performance, ensure that your router or switch supports high-speed connections, and prioritize gaming traffic using QoS or traffic prioritization settings. Optimize your network setup and consider your internet service plan to ensure sufficient bandwidth for gaming. With an optimized network setup, you can enjoy smooth online gaming experiences and minimal latency in your gaming server rack.
Additional Peripherals
In addition to the core components of your gaming server rack, there are several additional peripherals that can enhance your gaming experience and make your setup more versatile and convenient.
One essential peripheral is a gaming keyboard. Gaming keyboards are designed with features such as programmable keys, customizable RGB lighting, and mechanical key switches for improved responsiveness. Consider your gaming preferences, whether it’s FPS, MMO, or general gaming, and choose a keyboard that offers the necessary features and comfortable ergonomics for long gaming sessions.
A gaming mouse is another crucial peripheral. Gaming mice often come with adjustable DPI (dots per inch) settings, programmable buttons, and ergonomic designs. Look for a mouse that suits your grip style and offers the features you need for your gaming genre. Additionally, consider investing in a mouse pad that provides a smooth and precise surface for accurate tracking and improved mouse movement.
To enhance your gaming audio experience, consider a gaming headset. Gaming headsets offer features such as surround sound, noise cancellation, and ergonomic designs for long-wearing comfort. Choose a headset that provides clear audio and has a good microphone for seamless communication with teammates during multiplayer gaming sessions.
A dedicated gaming controller or gamepad can be a great addition to your gaming setup, especially for console-style gaming or driving simulations. Ensure compatibility with your gaming platform and choose a controller that feels comfortable in your hands and offers precise controls.
If you enjoy live streaming or creating content, a high-quality webcam and microphone can greatly improve your streaming experience. Look for webcams that offer HD or Full HD resolution and have good low-light performance. For microphones, consider using a USB microphone or a dedicated gaming microphone that provides clear and crisp audio for your streams or in-game communication.
Streaming and content creation may also require additional peripherals such as capture cards, green screens, and lighting equipment. These peripherals allow you to record and stream your gameplay with professional quality and create captivating content for your audience.
Finally, don’t forget about the importance of a comfortable gaming chair and ergonomic desk setup. Gaming sessions can be long and demanding on your body, so investing in a chair that provides proper support and promotes good posture is essential. Additionally, ensure that your gaming desk has ample space for your equipment and allows for proper ergonomics to avoid strain and discomfort during extended gaming sessions.
In summary, additional peripherals can greatly enhance your gaming experience and make your server rack setup more versatile and convenient. Consider peripherals such as gaming keyboards, mice, headsets, controllers, webcams, microphones, and streaming equipment based on your gaming preferences and content creation needs. Don’t forget about the importance of a comfortable gaming chair and ergonomic desk setup. With the right peripherals, you can take your gaming experience to the next level and create professional-quality content.
Cable Management
Proper cable management is crucial for a clean and organized gaming server rack. It not only improves the aesthetics of your setup but also enhances airflow, reduces the risk of cable damage, and makes maintenance and troubleshooting easier. Here are some key tips for effective cable management in your gaming server rack.
Start by planning the layout of your components and consider the cable lengths needed to connect them. Measure and allocate the appropriate cable lengths to avoid excess cable slack or tight pulls that can strain the connectors or ports. Shorter cables are generally preferred to minimize clutter and maintain a cleaner appearance.
Use zip ties, Velcro straps, cable clips, or cable management channels to secure and organize cables. Bundle cables together and route them neatly along the sides or back of the server rack, keeping them away from fans or other moving parts. Avoid placing cables near heat sources to prevent heat damage.
Labeling cables can save you time and effort when troubleshooting or making changes to your setup. Use colored cable ties, labels, or cable sleeves to identify cables and their respective connections. This will make it easier to identify and trace specific cables when needed.
Consider using cable management accessories such as cable raceways or cable management trays to hide cables that run between components or along the floor. These accessories provide a cleaner and more professional look to your setup while also minimizing the risk of accidental cable disconnections or tripping hazards.
When connecting cables, use the proper connectors and follow the correct wiring standards to ensure a reliable and secure connection. Avoid excessive bending or sharp angles that can damage the cables or affect the signal quality. If necessary, use cable managers or clips to route cables along the edges of shelves or other surfaces to maintain a clean appearance.
Regularly inspect and maintain your cable management setup. Check for any loose or disconnected cables and secure them properly. Dust and debris can accumulate over time, so periodically clean out any dust or dirt that may accumulate around cable connections or in cable management channels.
Remember to document your cable management setup. Take photos or create diagrams detailing the placement and routing of cables. This documentation will come in handy for future maintenance, upgrades, or troubleshooting purposes.
In summary, effective cable management is essential for a clean, organized, and efficient gaming server rack. Plan your cable lengths, secure and label cables, and use cable management accessories to maintain a neat appearance. Follow proper wiring standards and regularly inspect and maintain your cable setup. With proper cable management, you can improve airflow, reduce cable clutter, and ensure a smooth and hassle-free gaming experience.
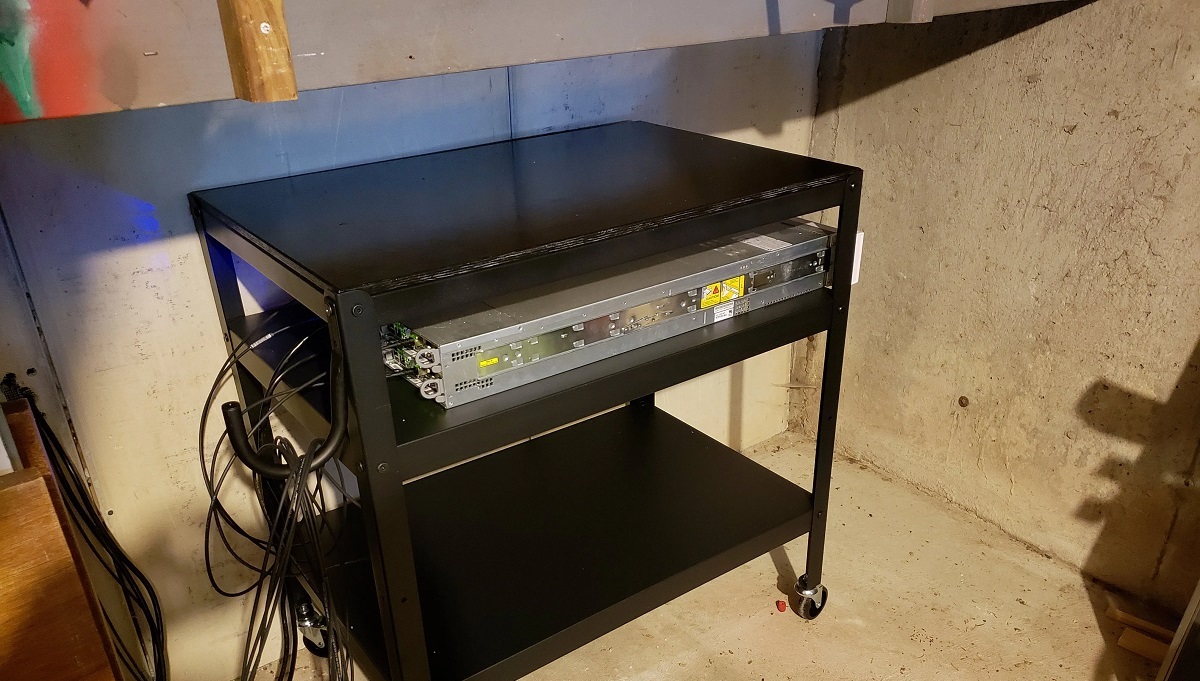
Rack Mounting Kit
To ensure the stability and proper organization of your gaming server rack, a rack mounting kit is an essential component. A rack mounting kit allows you to securely mount and install your server rack and its components within a standard rack enclosure. Here are some key considerations for selecting and using a rack mounting kit for your gaming setup.
Firstly, ensure that the rack mounting kit you choose is compatible with the size and form factor of your server rack. Standard rack sizes include 19-inch width and varying heights, such as 1U, 2U, or 4U. Measure the dimensions of your server rack and select a mounting kit that matches those measurements. It’s important to have a secure fit to prevent any instability or movement of the components.
Consider the weight capacity of the rack mounting kit. Different mounting kits have varying weight capacities, and it’s crucial to select a kit that can safely support the weight of your server rack and its components. This includes not only the weight of the server chassis but also any additional peripherals or accessories you may have installed.
Before installing your server rack into the mounting kit, ensure that all necessary preparation is done. This includes organizing cables, securing components, and making sure the rack is clean and free from any debris or obstructions. Arrange the components in a logical and accessible manner to make maintenance or upgrades more convenient in the future.
When mounting the server rack into the kit, align the screw holes on the rack with the corresponding holes in the mounting kit. Use the appropriate screws and ensure they are tightly secured to prevent any unwanted movement or vibration. Rack mounting kits often come with adjustable brackets or rails for easy installation and adjustment of the server rack’s position within the rack enclosure.
Proper ventilation and airflow are important considerations when using a rack mounting kit. Ensure that the design of the kit allows for sufficient air circulation around the server rack. This helps to prevent overheating and maintain the optimal performance of the components.
Regularly inspect and maintain the rack mounting kit to ensure its integrity and stability. Check for any loose screws or connections and tighten them as needed. If you need to make any changes or modifications to your server rack setup, follow the instructions provided with the mounting kit to ensure compatibility and safety.
In summary, a rack mounting kit is necessary for securely installing and organizing your gaming server rack. Choose a kit that is compatible with the size and weight capacity of your server rack, ensuring a secure fit. Prepare your server rack before installation and align the screw holes properly when mounting into the kit. Consider ventilation and airflow to maintain component performance. Regularly inspect and maintain the rack mounting kit to ensure stability and reliability. With a properly installed and maintained rack mounting kit, you can ensure the stability and functionality of your gaming server rack.
Conclusion
Setting up a gaming server rack requires careful consideration and selection of various components to ensure optimal performance, stability, and an immersive gaming experience. From powerful processors and graphics cards to ample RAM and storage, each component plays a crucial role in delivering smooth gameplay and stunning visuals. Additionally, peripherals such as gaming keyboards, mice, headsets, and controllers enhance the overall gaming experience.
Cooling and proper cable management are also essential aspects to keep your server rack running efficiently and organized. Ensuring proper airflow, utilizing cooling systems, and managing cables effectively contribute to better performance and reduce the risk of component damage. Furthermore, networking and a reliable internet connection are important for seamless online gaming and multiplayer experiences.
Lastly, a solid rack mounting kit helps securely organize and stabilize your server rack within a rack enclosure, ensuring the safety and integrity of your components. It’s essential to select a compatible kit and follow proper installation procedures to establish a reliable and accessible setup.
In conclusion, carefully selecting and integrating the right components, peripherals, cooling systems, networking solutions, and cable management techniques are key to optimizing your gaming server rack setup. Regular maintenance and upgrades can help keep your system running smoothly and efficiently. With the right configuration and attention to detail, your gaming server rack can provide an immersive gaming experience, allowing you to enjoy the latest PC games with the highest performance and visual quality.