Introduction
Welcome to the world of iPhone messaging! Sending your location through iMessage is a great way to let your friends and family know where you are without having to type out your exact address. Whether you want to meet up with someone or simply keep them informed about your whereabouts, sharing your location on iPhone iMessage is a breeze.
In this guide, we will walk you through the simple steps to send your location through iMessage on your iPhone. Whether you are using the Messages app to chat with a single individual or part of a group conversation, the process is virtually the same. So, let’s dive in and discover how easy it is to send your location with just a few taps!
Before we get started, make sure that you have a compatible iPhone and that you have enabled location services for the Messages app. To do this, go to your iPhone settings, scroll down and tap on “Privacy”, then “Location Services”. Make sure that “Location Services” is turned on and that “Messages” is set to “While Using”. This allows the Messages app to access your location when you want to send it. Now, let’s move on to the first step!
Step 1: Open the Messages app
The first step to send your location through iMessage is to open the Messages app on your iPhone. This app is represented by a green speech bubble icon, and it is typically located on your home screen or dock. Tap on the icon to launch the app.
Once you’ve opened the Messages app, you will see a list of your recent conversations. If you have an existing conversation where you want to send your location, simply tap on it to open the chat. If you want to start a new conversation, tap on the “New Message” icon, which is typically represented by a square with a pencil in it, located in the top-right corner of the screen.
Now that you have the Messages app open and either an existing conversation or a new message ready, we can move on to the next step. Remember to keep the app open throughout the process of sending your location.
Step 2: Start a new conversation or open an existing one
In this step, we will explore the options of starting a new conversation or opening an existing one to send your location through iMessage on your iPhone.
If you want to start a new conversation, tap on the “New Message” icon located at the top-right corner of the Messages app screen. This will open a blank message where you can enter the recipient’s name or phone number. Start typing the name or number, and a list of matching contacts will appear. Tap on the desired contact to select them as the recipient of your message.
If you prefer to send your location in an existing conversation, simply navigate to the conversation by selecting it from the list of recent chats in the Messages app. Scroll through your conversations until you find the one you want to send your location to.
Once you have the conversation open, you are ready to move on to the next step of sending your location in iMessage. Whether you’re starting a new conversation or opening an existing one, make sure to choose the recipient wisely, ensuring they are someone you trust to share your location information with.
Step 3: Tap on the “i” icon in the top-right corner of the screen
To send your location through iMessage on your iPhone, you need to access the options menu for the conversation. This can be done by tapping on the “i” icon located in the top-right corner of the screen. The “i” icon stands for information and represents additional details and settings for the conversation.
Once you tap on the “i” icon, a new screen will appear with various options for the conversation. These options include contact details, shared media, and more. Scroll down on this screen to locate the section labeled “Location”.
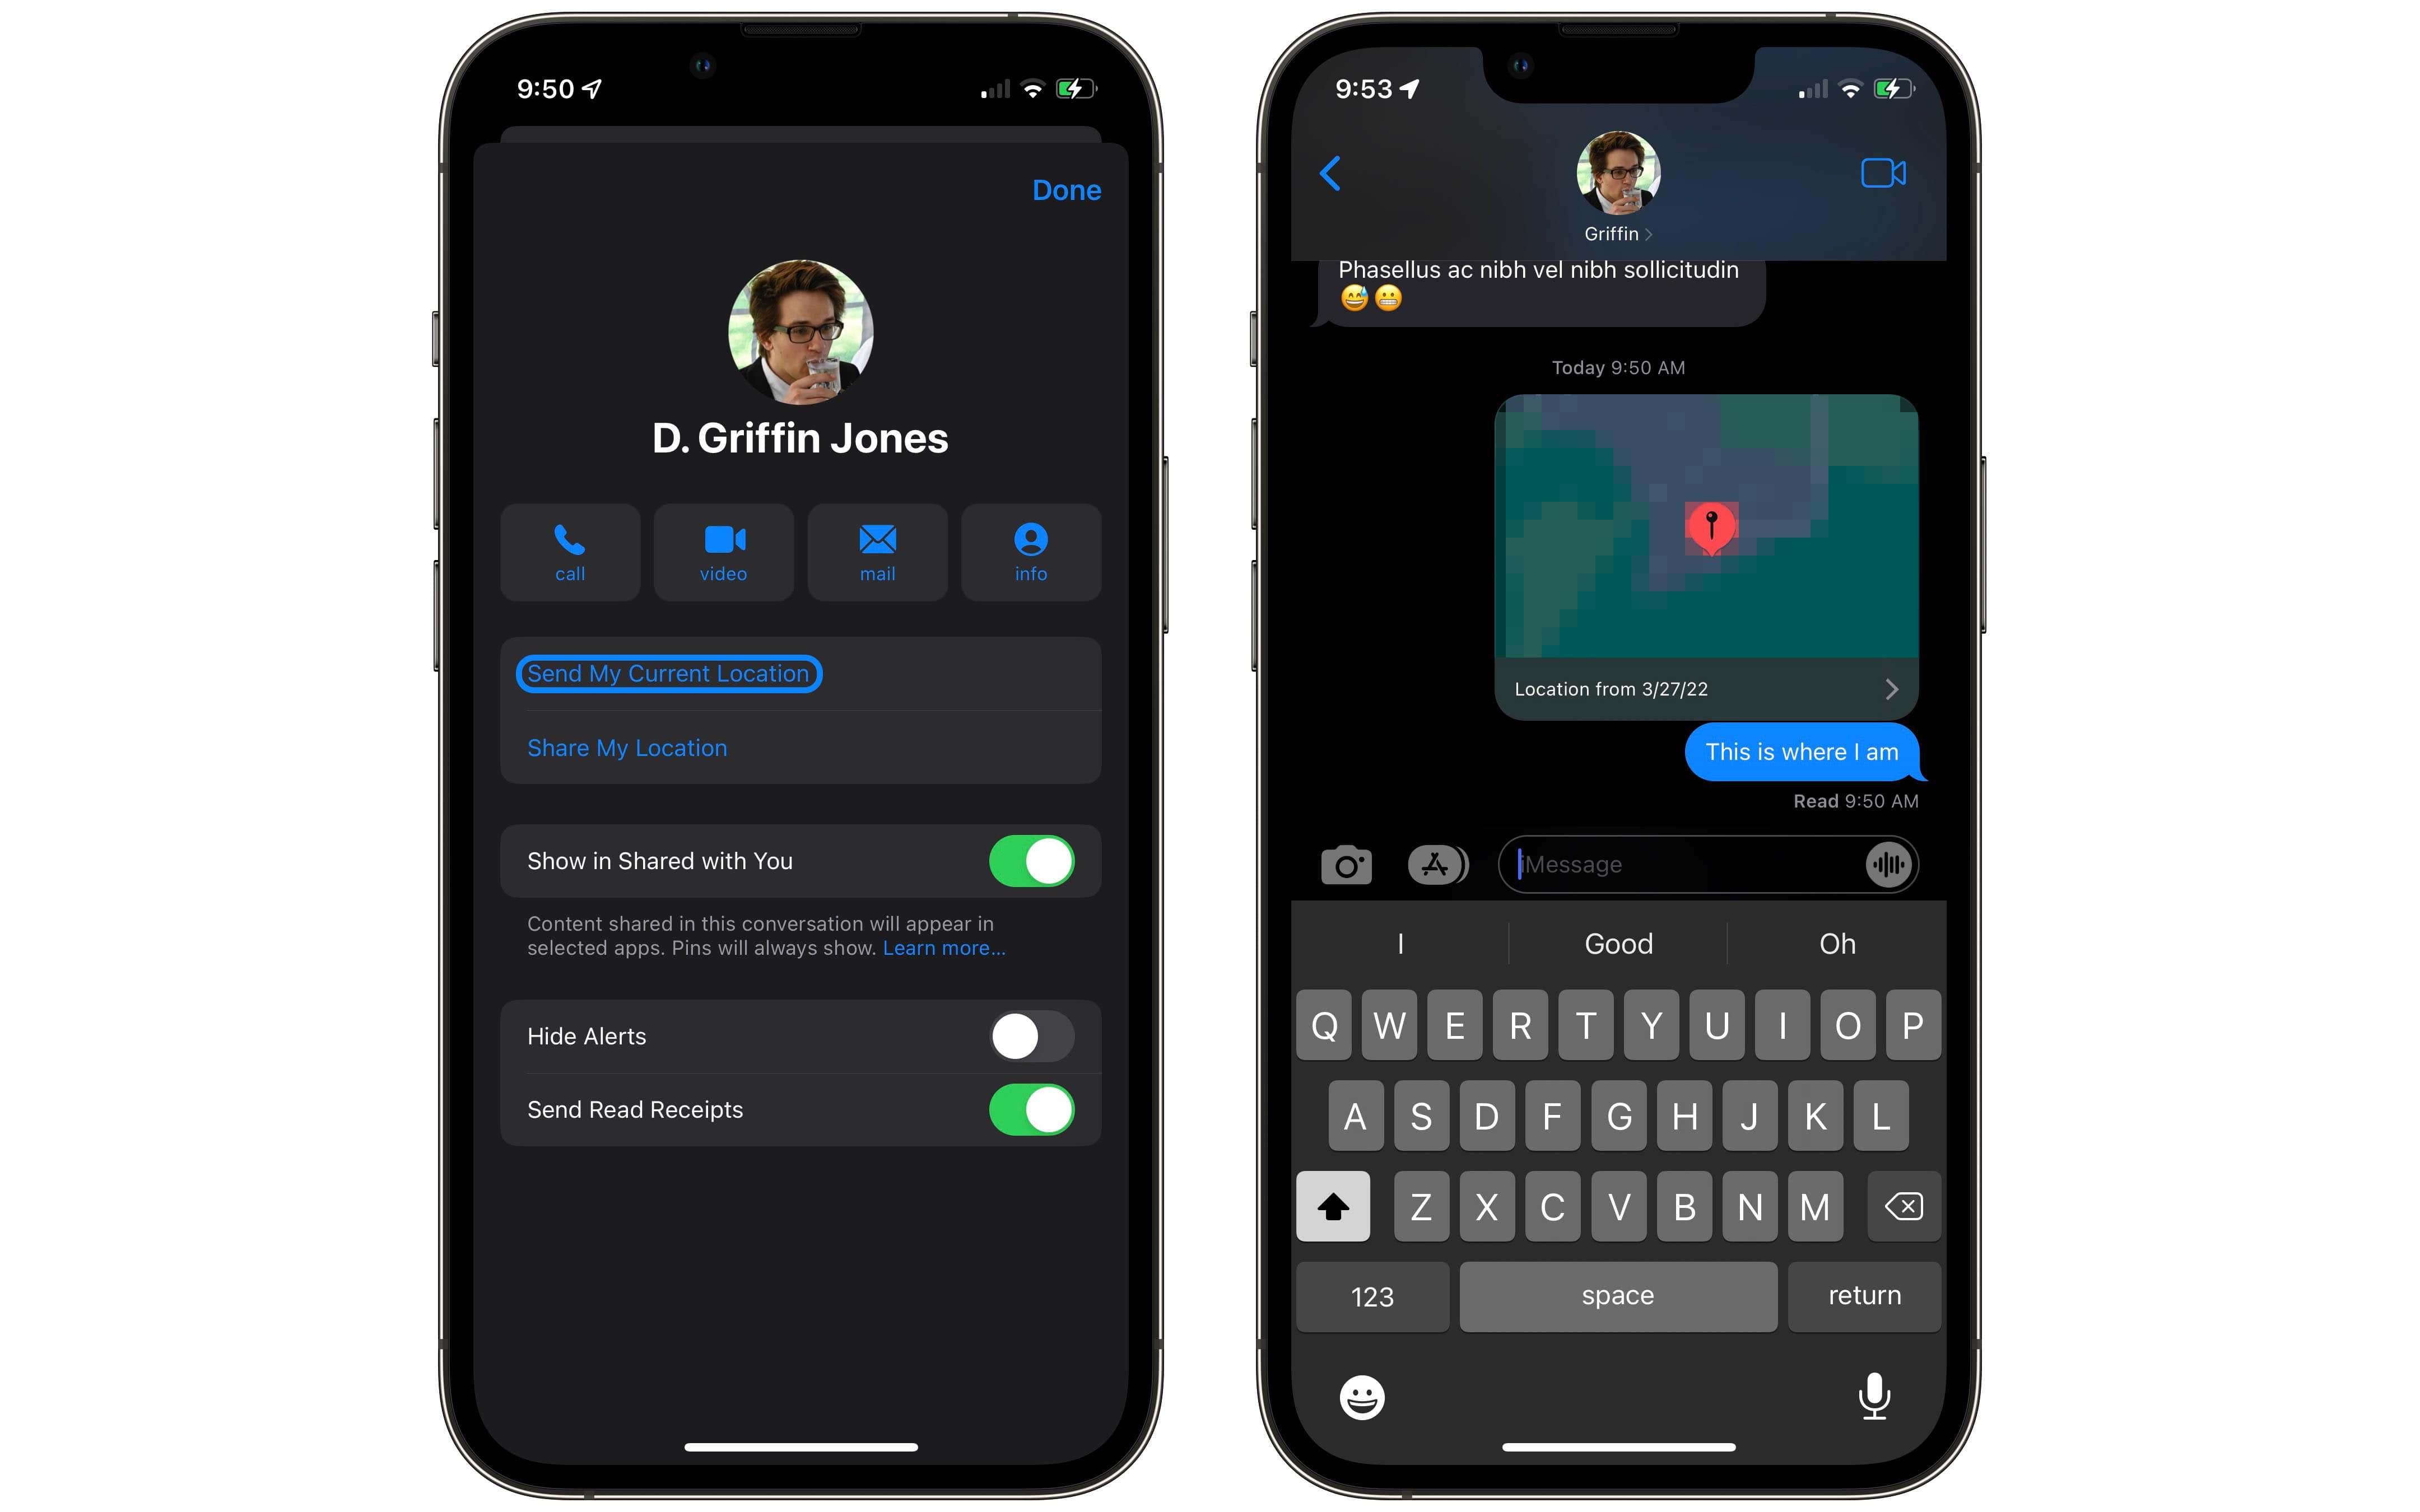
In the “Location” section, you will find different location-related options, such as sharing your current location or selecting a specific place on the map to send. Depending on your preferences, you can choose either “Send My Current Location” or “Share My Location”. Let’s explore these options in the next step.
Remember, tapping on the “i” icon is an essential step to access the location-sharing options in iMessage. Whether you want to share your current location or select a specific place on the map, make sure to follow this step to proceed.
Step 4: Select “Send My Current Location” or “Share My Location”
Once you have accessed the options menu by tapping on the “i” icon in the top-right corner of the screen, you will find the “Location” section. In this step, we will explore the options available within this section: “Send My Current Location” and “Share My Location”.
If you choose “Send My Current Location”, your iPhone will automatically generate a message with your current location coordinates. This option is great for quickly sharing your real-time whereabouts, especially if you’re meeting someone or need to provide directions.
On the other hand, if you select “Share My Location”, you have the additional choice of sharing your location for a specific duration. This is helpful if you want to give someone temporary access to your location, such as for a day, an hour, or even indefinitely. It’s worth noting that when you choose this option, your location will periodically update for the selected duration.
Whether you want to send your current location or share your location for a duration, tap on the corresponding option in the “Location” section. Once selected, you’re ready to proceed to the next step, where you can choose the specific duration or place to send.
By having these location-sharing options available, iMessage offers flexibility in sharing your location based on your preferences and needs.
Step 5: Choose the duration or specific location you want to send
After selecting either “Send My Current Location” or “Share My Location” in the “Location” section of the conversation options menu, it’s time to choose the duration or specific location you want to send through iMessage on your iPhone.
If you opted to send your current location, there’s no need to choose a duration or specific location as your iPhone will automatically generate a message with your real-time coordinates.
However, if you selected “Share My Location”, you will be presented with additional choices. To specify the duration, tap on the duration option displayed in the location-sharing settings. Depending on your iPhone model and software version, you might have preset durations such as “Share for One Hour” or “Share Until End of Day”. Alternatively, you can select “Custom” to manually set the duration for sharing your location.
Furthermore, you also have the option to select a specific location on the map to share with the recipient. To do this, tap on “Choose Location” or a similar button within the location-sharing settings. From there, you can search for a particular place or zoom in and out of the map to pinpoint the exact location you want to send in iMessage.
Once you have chosen the desired duration or specific location, you’re ready to move on to the final step of sending your location through iMessage. Let’s explore this step in the next section.
By providing these options to choose the duration or specific location, iMessage allows you to have control over the details of your location sharing.
Step 6: Tap “Send” to share your location in the iMessage conversation
After selecting the desired duration or specific location for sharing in the previous step, you’re now just one tap away from sending your location through iMessage on your iPhone.
In this final step, locate the “Send” button, typically indicated by a paper airplane icon, and tap on it to send your location. The location information will be embedded within the iMessage conversation, making it visible to the recipient(s).
Once you tap “Send,” the iMessage application will work in the background to send your location data. Depending on your internet connection and the size of the location data, it may take a few seconds for the message to be sent successfully. You will see the message “Sending Location” or a similar indication on the screen as the process takes place.
Once the message is sent, the recipient(s) will be able to view your location in the iMessage conversation. They can tap on the location thumbnail or text to open it in Apple Maps or any other preferred map application on their iPhone.
It’s important to note that the recipient(s) must have a compatible iPhone or Apple device and an active internet connection to view and open the shared location. Additionally, they may receive a notification regarding the shared location, depending on their settings.
Congratulations! You have successfully sent your location through iMessage on your iPhone. Now, you can stay connected and ensure that your friends and family know where you are.
Conclusion
Sending your location through iMessage on your iPhone is a simple and convenient way to keep your friends and family informed about where you are. By following the easy steps outlined in this guide, you can easily share your current location or a specific place with just a few taps.
Remember to have your iPhone’s location services enabled for the Messages app to access your location. This ensures that you can seamlessly send your location information to your desired recipients.
Starting from opening the Messages app to tapping the “i” icon, choosing the location-sharing options, and finally tapping “Send,” each step plays a crucial role in successfully sharing your location through iMessage.
Whether you’re meeting up with someone, providing directions, or simply keeping your loved ones informed, sending your location through iMessage is a valuable feature at your fingertips.
So, next time you want to let someone know where you are, try out these steps and enjoy the convenience of location sharing on your iPhone. Stay connected and safe with the power of iMessage.