Introduction
Welcome to the modern age, where capturing and sharing moments through videos has become a part of our daily lives. Whether it’s a funny clip, a precious memory, or an important event, sharing videos with friends, family, or colleagues has never been easier. If you own an iPhone and want to send a video via email, you’ve come to the right place.
The iPhone is known for its user-friendly interface and seamless integration with various apps, making it a breeze to share videos. In this guide, we’ll walk you through the step-by-step process of sending a video from your iPhone to your email, so you can easily share those cherished moments with anyone you choose.
We understand that not everyone is a tech expert, so we’ve broken down the process into simple, easy-to-follow steps. By the end of this guide, you’ll be confidently sending videos from your iPhone to email recipients like a pro.
Before we dive into the steps, it’s important to note that the exact steps may vary slightly depending on the version of iOS you have on your iPhone. However, the core process remains the same, so don’t worry if your screen looks a little different.
So, whether you want to email a video to share with loved ones or send a professional video to a client, read on to learn the simple steps to accomplish this from your iPhone.
Step 1: Open the Photos app
The first step to sending a video from your iPhone to email is to open the Photos app. This app is pre-installed on all iPhones and is where all your captured photos and videos are stored.
To find the Photos app, locate the icon on your home screen that resembles a multicolored flower. Tap on it to launch the app.
Once the Photos app is open, you’ll see different tabs at the bottom of the screen, such as Photos, For You, Albums, and Search. The “Photos” tab is selected by default, displaying your entire photo library in chronological order.
To navigate to the videos section, tap on the “Albums” tab located at the bottom-right corner of the screen. This will lead you to a page displaying various albums, including “Videos” under the “Media Types” section.
Tap on the “Videos” album to access all the videos stored on your iPhone. Here, you’ll find a collection of both recorded and downloaded videos.
If the video you want to send via email is located in a specific album or is the most recent video in your library, you may not need to navigate through different albums. Simply scroll through the videos displayed on the “Videos” page to find the one you want to send.
Once you’ve located the desired video, you’re ready to proceed to the next step.
Step 2: Choose the video you want to send
After opening the Photos app on your iPhone and accessing the “Videos” album, it’s time to choose the specific video you want to send via email.
Browse through the videos in the album by scrolling vertically or horizontally, depending on your iPhone model and how the videos are displayed. If you have a large collection of videos, you can use the search bar at the top of the screen to quickly locate the desired video by searching its title or any related keywords.
Once you’ve found the video you want to send, tap on it to open it in full-screen mode. You can then preview the video to ensure it’s the right one before proceeding.
If you’re unsure about which video to choose or you’re considering sending multiple videos, you can select multiple videos by tapping on the “Select” button or tapping and holding on a video thumbnail to enable selection mode. From there, you can tap on additional videos to add them to your selection.
It’s important to note that the length of the video you can send via email may depend on the email service provider and any size limitations they have in place. To avoid any issues, make sure the video you choose is within the allowable file size for email attachments.
Once you’ve made your selection, it’s time to move on to the next step – tapping the share button to initiate the email sending process.
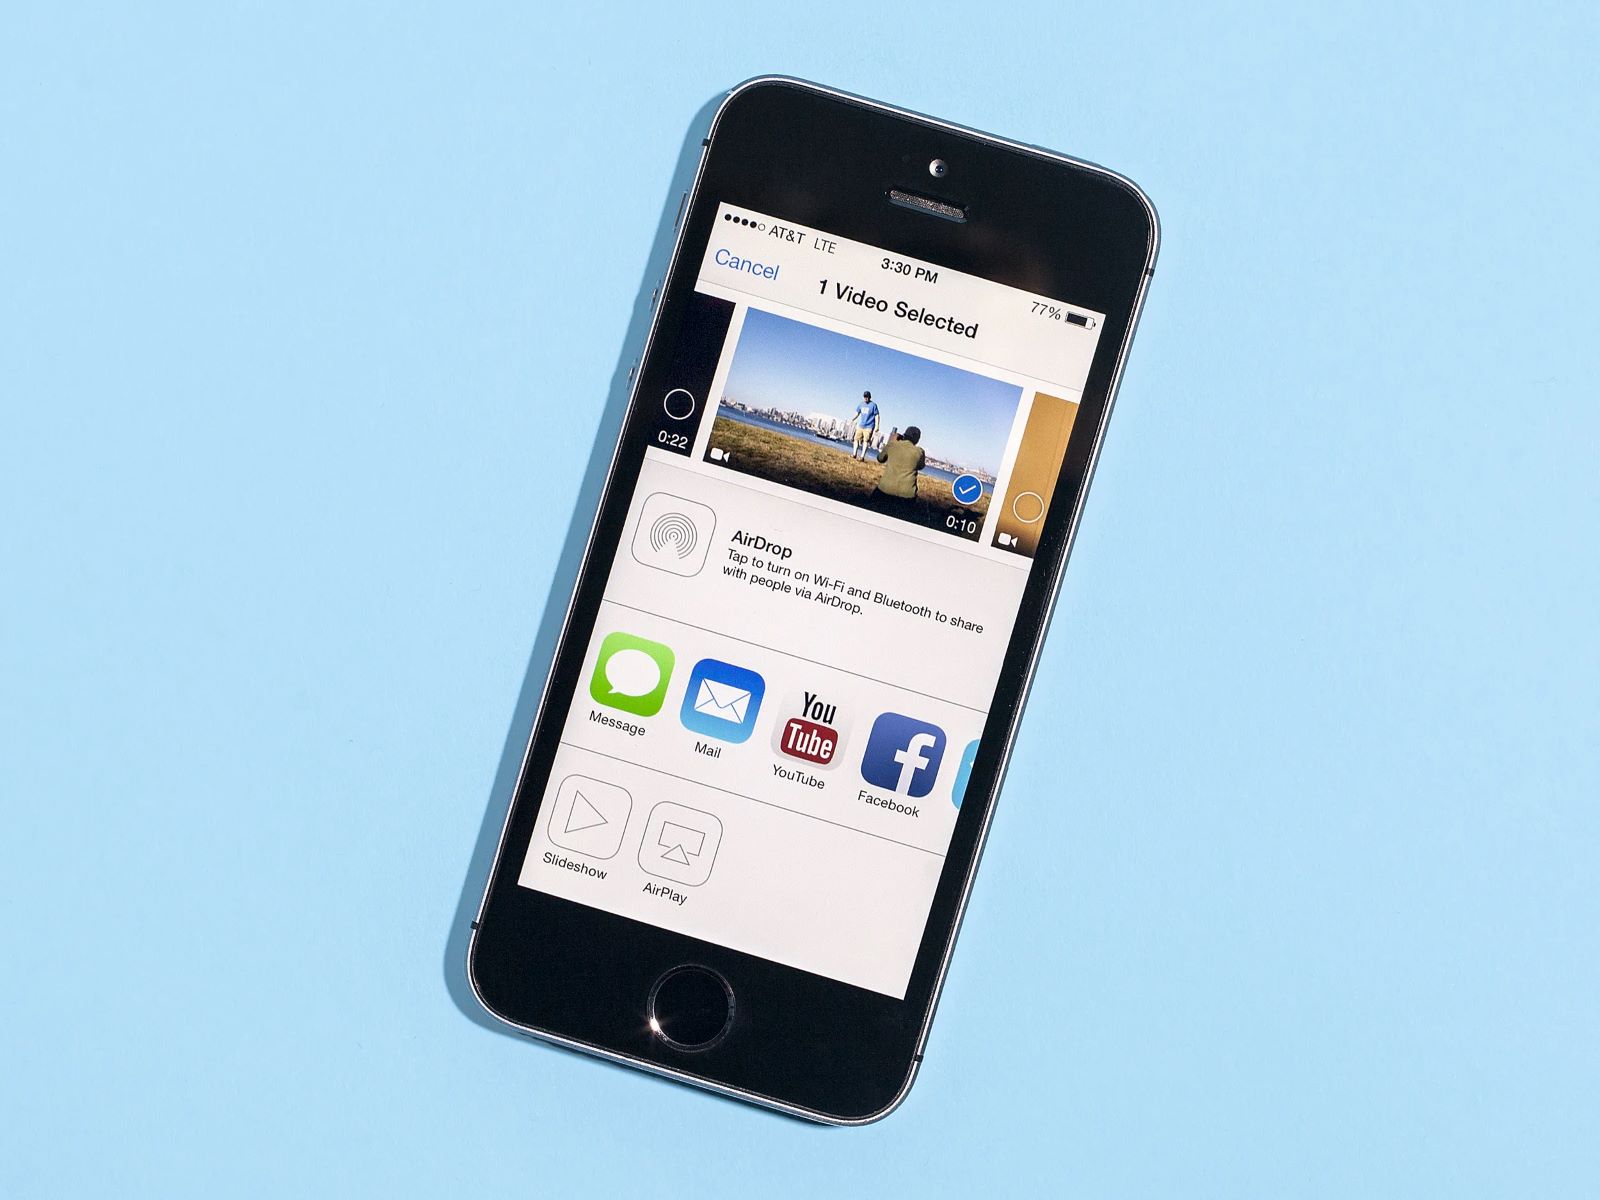
Step 3: Tap the share button
Once you’ve chosen the video you want to send from the Photos app on your iPhone, the next step is to tap the share button. This button allows you to access the various sharing options available, including sending the video via email.
To find the share button, look for the square box with an upward-facing arrow at the bottom-left corner of the screen. It’s typically located near the menu bar or directly beside the video playback controls.
Tapping the share button will open up a menu displaying different sharing options, such as Message, Mail, Airdrop, and more. In this case, we want to select the Mail option to send the video via email.
If you frequently use a specific sharing option, such as Mail, you may find it directly displayed on the menu without having to access the “More” option. This is dependent on your personal settings and usage history.
However, if you don’t see the Mail option on the initial menu, you can scroll horizontally or tap on the “More” option to reveal additional sharing options. Look for the Mail icon, which resembles an envelope, and tap on it to proceed.
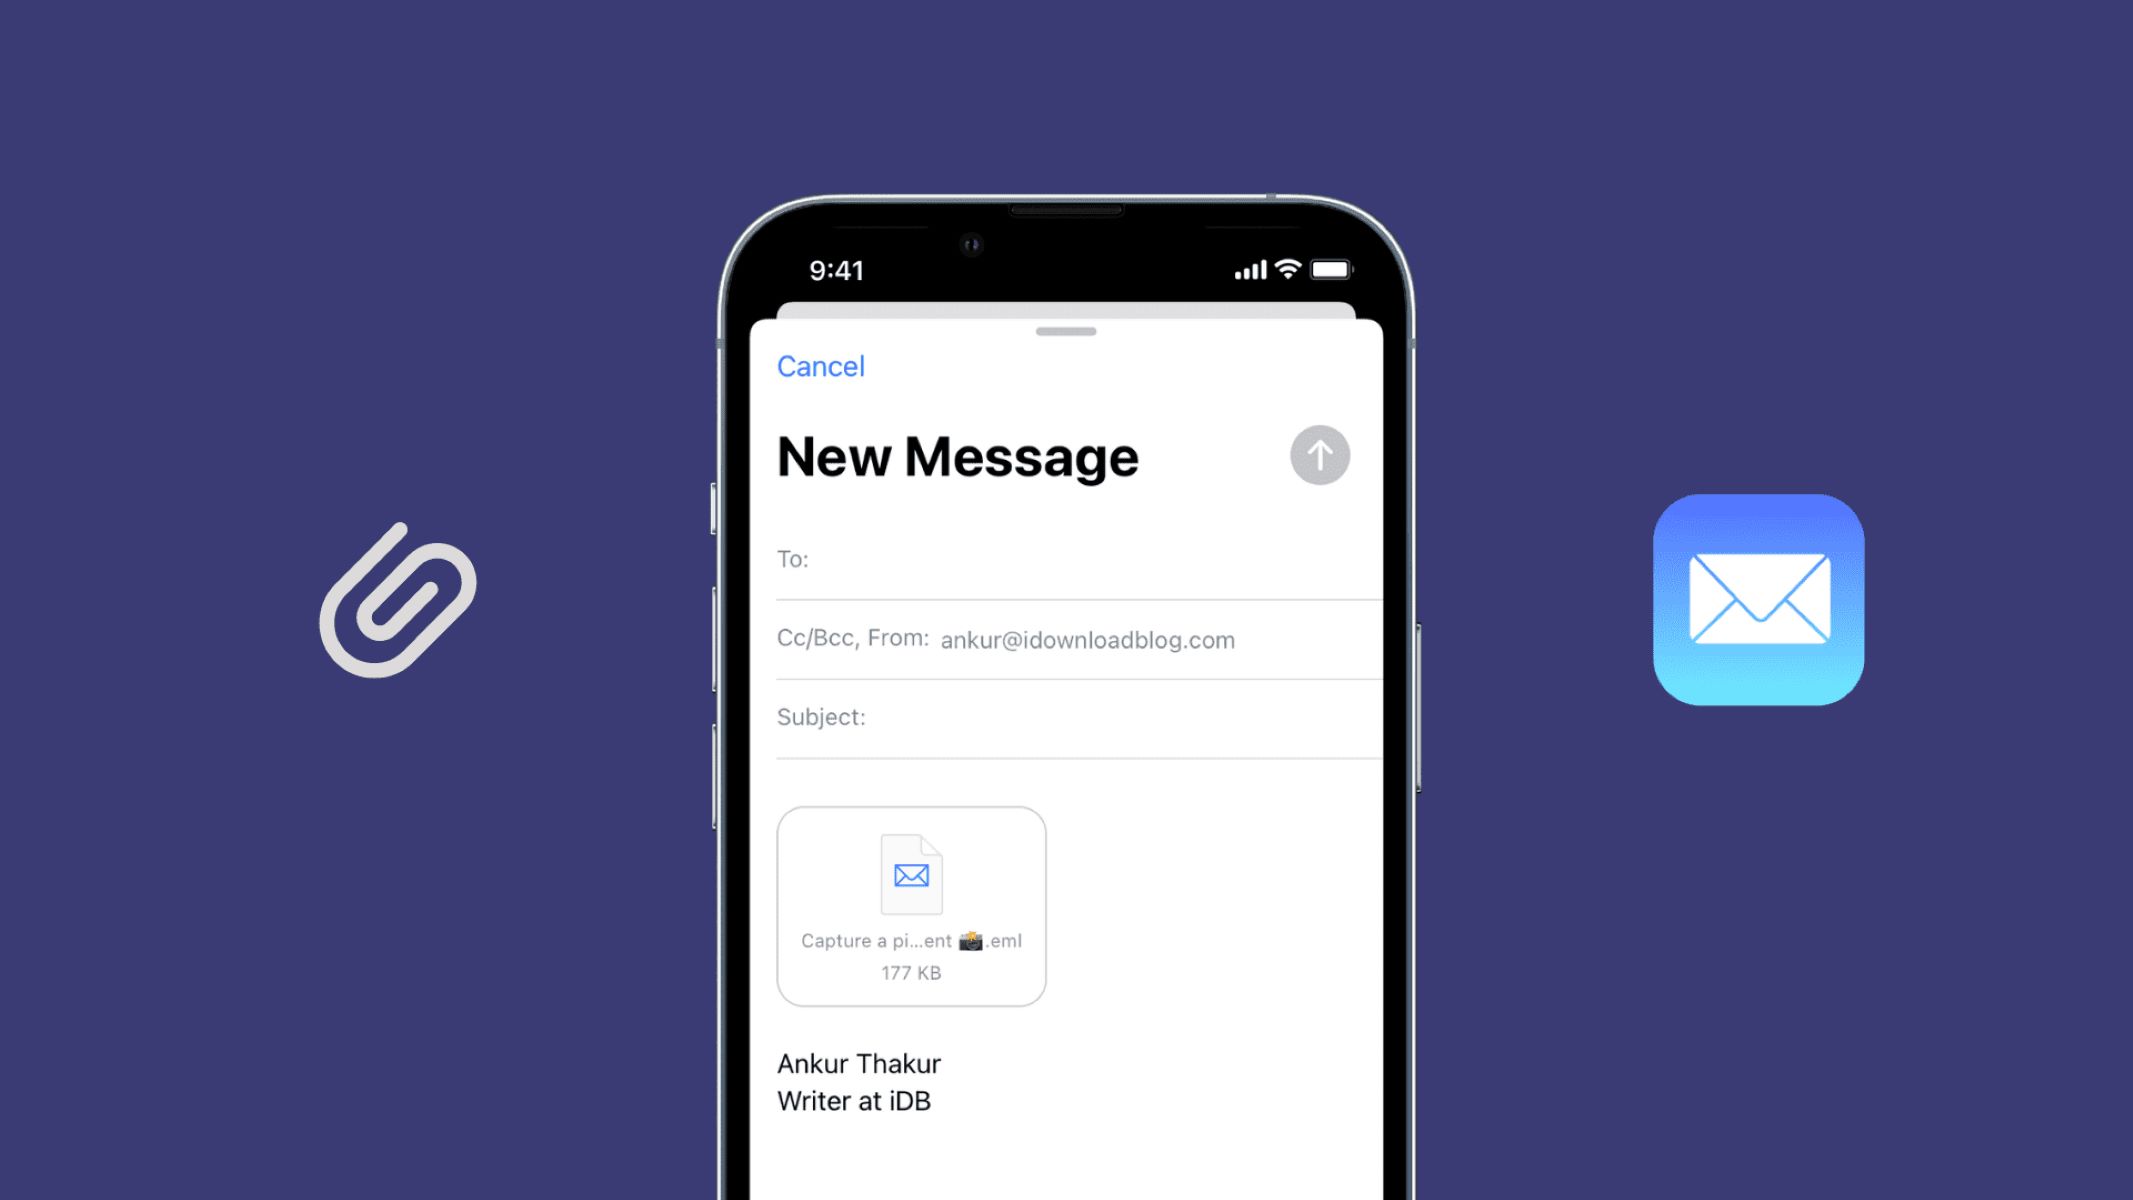
After tapping on the Mail option, your iPhone will automatically launch the Mail app with the selected video attached as a file. This will allow you to enter the recipient’s email address and proceed with the email composition process.
Now that you’ve tapped the share button and accessed the Mail option, it’s time to move on to the next step and enter the recipient’s email address.
Step 4: Select the Mail app
After tapping the share button in the Photos app and accessing the sharing options menu, the next step is to select the Mail app. This will ensure that the video you want to send is attached to an email and ready to be sent to the recipient.
Once you tap on the Mail option, your iPhone will automatically launch the Mail app. This is the default email client on iOS devices and is pre-installed on all iPhones.
Upon opening the Mail app, you will be presented with a new email composition screen. This screen allows you to enter all the necessary details such as the recipient’s email address, subject line, and additional message if desired.
If you have multiple email accounts set up on your iPhone, you may be prompted to choose which email account you want to use to send the video. Simply select the appropriate email account from the list to proceed.
Once you’ve selected the Mail app and are on the email composition screen, you’re ready to enter the recipient’s email address and move forward with sending the video via email.
In the next step, we’ll discuss how to enter the recipient’s email address and provide additional details such as the subject line and message (if desired).
Step 5: Enter the recipient’s email address
Now that you have selected the Mail app and are on the email composition screen, it’s time to enter the recipient’s email address. This is a crucial step to ensure that the video reaches the intended recipient.
In the “To” field of the email composition screen, you will see a blank space where you need to enter the email address of the person you want to send the video to. The “To” field is usually highlighted, making it easy to locate and start typing.
If you have the recipient’s email address stored in your Contacts app, you can start typing their name or email address, and your iPhone will suggest potential matches. This can save you time and ensure that you select the correct recipient.
However, if the email address is not saved in your contacts or if it’s a new recipient, simply start typing the complete email address from scratch. Take your time to ensure that you enter it correctly to avoid any delivery issues.
If you are sending the video to multiple recipients, you can separate their email addresses with commas. This allows you to send the video to multiple people simultaneously, making it convenient for groups or sharing with friends and family.
Once you have entered the recipient’s email address, double-check it for any typos or errors. It is crucial to verify the accuracy of the email address to ensure that the video reaches the right person.
When you’re confident that you have entered the correct email address, you’re ready to move on to the next step, where you can provide additional details such as the subject line and message (if desired).
Step 6: Add a subject and message (optional)
Once you have entered the recipient’s email address in the “To” field, you have the option to add a subject line and a message to accompany the video you’re sending. While these are optional steps, they can provide context and clarity to the recipient.
In the email composition screen, you will find a field labeled “Subject” below the “To” field. This is where you can add a concise and informative subject line that briefly describes the content of the email. For example, you can use a subject line like “Family Vacation Video” or “Client Presentation Video” to provide a clear indication of what the email contains.
Adding a subject line is beneficial as it helps the recipient understand the purpose of the email and enables them to prioritize their inbox accordingly. Additionally, it may also make it easier for the recipient to search for the video in their email archive if they need to access it at a later time.
In addition to a subject line, you have the option to include a message in the body of the email. This can be a personal note, additional information, or any instructions you want to provide to the recipient regarding the video. The message field is typically located below the subject line or may require you to scroll down to access it.
Adding a message can create a more personal and engaging experience for the recipient. You can share your thoughts, memories, or any context related to the video, making it more meaningful and enjoyable to watch.
Once you have added a subject line and message (if desired), take a moment to review your email and ensure everything is accurate and well-formatted. Double-check for any spelling or grammar mistakes, as well as any missing information or attachments.
When you’re satisfied with the subject line, message, and overall content of the email, you’re ready to proceed to the final step – tapping the send button to email the video.
Step 7: Tap Send to email the video
Once you have filled in the recipient’s email address, added a subject line, and optionally included a message, it’s time to send the email and deliver the video to the intended recipient.
To send the email, locate the send button on the email composition screen. It is usually represented by an arrow or paper plane icon, and it’s typically located at the top-right or bottom-right corner of the screen.
When you’re ready to send the email, simply tap on the send button. Your iPhone will initiate the sending process, uploading the video file and transmitting it via your chosen email account and service.
Depending on the size of the video file and your internet connection speed, it may take a few moments for the email to be sent. You may see a progress indicator or a sending animation on your screen during this process.
Once the email has been successfully sent, you will typically see a confirmation message on your screen. This message may vary depending on your email app and settings, but it will generally indicate that the email has been sent and provide any relevant details or feedback.
At this point, you can consider the video successfully emailed. The recipient will receive the email in their inbox, and the attached video can be downloaded and viewed on their device.
It’s always a good practice to double-check your sent folder or email app’s sent items to ensure that the video has been sent successfully. This provides reassurance that the email was delivered as intended.
Now that you have successfully sent the video via email, you can repeat these steps to send more videos or explore other sharing options available on your iPhone.
Conclusion
Sharing videos from your iPhone via email is a simple and convenient way to send memorable moments, important messages, or professional content to friends, family, colleagues, or clients. With the easy-to-follow steps outlined in this guide, you can confidently send videos from your iPhone to email recipients with ease.
The process begins by opening the Photos app and selecting the video you want to send. By tapping the share button within the app, you can then choose the Mail option to launch the Mail app, where you can enter the recipient’s email address.
While optional, adding a subject line and message can provide context, personalization, and a professional touch to the email. Once you have composed your email, including all desired details, simply tap the send button, and the email with the attached video will make its way to the intended recipient.
Remember, it is essential to ensure the video file size complies with email attachment limits and that you verify the accuracy of the recipient’s email address to avoid any delivery issues.
By following these steps, you can effortlessly share videos from your iPhone to email, allowing others to enjoy and experience the moments you capture.
Now it’s time to grab your iPhone, open the Photos app, and start sharing those incredible videos with the world. Happy emailing!