Introduction
Welcome to this comprehensive guide on how to screen record on your Samsung Galaxy device. Screen recording has become an essential feature for both personal and professional purposes, allowing you to capture and share your device’s screen activity in real-time. Whether you want to record a tutorial, save a video call, showcase your gaming skills, or demonstrate a bug to tech support, screen recording can be a valuable tool in your arsenal.
Before we dive into the specifics of screen recording on a Samsung Galaxy device, let’s first ensure that your device meets the necessary system requirements. Depending on the model and software version of your Samsung Galaxy, there may be slight variations in the screen recording functionality. However, the steps discussed in this guide should be applicable to most recent Samsung Galaxy devices.
Nowadays, screen recording has become increasingly popular amongst content creators, gamers, educators, and everyday users who want to capture and share their device’s screen activity. With the built-in screen recording feature on Samsung Galaxy devices, you can easily create high-quality video recordings without the need for third-party applications. Whether you want to document a step-by-step process, create engaging tutorials, or simply save an important video call, screen recording can be a useful tool in your digital arsenal.
The process of screen recording on Samsung Galaxy devices may vary slightly based on the model and software version. However, in this guide, we will cover the general steps you can take to enable screen recording and customize its settings to suit your needs. So, let’s get started and explore the world of screen recording on your Samsung Galaxy device!
Checking System Requirements
Before you begin screen recording on your Samsung Galaxy device, it’s essential to ensure that your device meets the necessary system requirements. While screen recording is a feature that is widely available on most Samsung Galaxy models, there may be slight variations depending on your device’s software version and specifications.
Firstly, make sure that you are running a compatible version of the Android operating system. Screen recording is typically available on Android 11 and above, but it’s always a good idea to check for any software updates to ensure that you have the latest features and optimizations.
Next, ensure that you have enough storage space on your device to save the screen recordings. Recording videos can take up a significant amount of storage, so it’s important to check if you have sufficient free space available. You can do this by going to your device’s settings, selecting “Storage,” and reviewing the available storage capacity.
Additionally, it’s recommended to have a device with sufficient processing power to ensure smooth and seamless screen recording. While most recent Samsung Galaxy devices should have no trouble handling screen recording, older or entry-level devices may experience performance issues. If you find that your device is struggling to record the screen smoothly, reducing the screen resolution or closing unnecessary background apps can help improve performance.
Lastly, it’s worth noting that some Samsung Galaxy models may have additional requirements, such as a minimum amount of RAM or specific hardware capabilities. To confirm the system requirements for screen recording on your specific device, you can refer to the user manual or visit the Samsung support website for detailed specifications.
By checking and meeting the necessary system requirements, you can ensure a smooth and hassle-free screen recording experience on your Samsung Galaxy device. Now that you have confirmed that your device meets the necessary prerequisites, let’s move on to enabling the screen recording feature.
Enabling Screen Recording
Enabling the screen recording feature on your Samsung Galaxy device is a straightforward process. While the exact steps may vary slightly depending on your device’s software version, the general procedure remains the same. Follow the simple steps below to enable screen recording:
- Swipe down from the top of your screen to access the notification panel.
- Look for the “Screen Recording” icon, usually represented by a circle containing a dot inside it. If you don’t see the icon, you may need to swipe left or right to access additional options.
- If you can’t find the screen recording icon in the notification panel, you can add it by editing the quick settings. Swipe down again to fully expand the notification panel, then tap the pencil icon or “Edit” button to customize the quick settings panel.
- Look for the “Screen Recorder” or “Screen Recording” option in the list of available tiles. Tap and hold the icon, then drag it to your desired position in the quick settings panel.
- Once you have added the screen recording icon to the quick settings panel, you can simply tap on it whenever you want to start a screen recording.
That’s it! You have successfully enabled the screen recording feature on your Samsung Galaxy device. The next section will walk you through the steps to use the built-in screen recorder and adjust its settings to enhance your recording experience.
Using the Built-in Screen Recorder
Now that you have enabled the screen recording feature on your Samsung Galaxy device, let’s explore how to use it effectively. The built-in screen recorder provides you with a range of options to capture and customize your screen recordings. Follow the steps below to start using the screen recorder:
- Open the app or screen that you wish to record. Make sure it’s in the foreground and ready for capture.
- Swipe down from the top of your screen to access the notification panel.
- Tap on the “Screen Recording” icon in the quick settings panel. A countdown will appear, after which the screen recording will begin.
- During the screen recording, you can access additional recording options by expanding the notification panel and tapping on the “Screen Recording” notification.
- To stop the screen recording, you can either tap the “Stop” button in the notification panel or tap on the screen recording icon in the quick settings panel.
- Once the recording is stopped, you will receive a notification that the screen recording has been saved. You can tap on the notification to access the recorded video.
Using the built-in screen recorder allows you to capture your device’s screen activity with ease. Whether you want to record a tutorial, save a video call, or showcase your gaming skills, the screen recorder provides a convenient way to capture high-quality videos directly on your Samsung Galaxy device.
It’s worth noting that the screen recorder can capture everything happening on your screen, including notifications and pop-up messages. If you wish to hide sensitive information or focus on specific content, you can use the screen recorder’s options to customize the recording area or enable features like the floating toolbar.
In the next section, we will explore how to adjust the screen recording settings to optimize your recordings and tailor them to your specific needs.
Adjusting Screen Recording Settings
When using the built-in screen recorder on your Samsung Galaxy device, you have the flexibility to adjust various settings to enhance your recording experience. These settings allow you to customize aspects such as video quality, orientation, audio recording, and more. Follow the steps below to adjust the screen recording settings:
- Open the screen recording feature by swiping down from the top of your screen and tapping on the “Screen Recording” icon in the quick settings panel.
- Expand the notification panel and tap on the “Screen Recording” notification to access the recording options.
- Tap on the “Settings” or “Gear” icon to access the screen recording settings menu.
- In the settings menu, you’ll find options to adjust the video resolution, frame rate, and orientation. Higher resolutions and frame rates result in better video quality but may also result in larger file sizes.
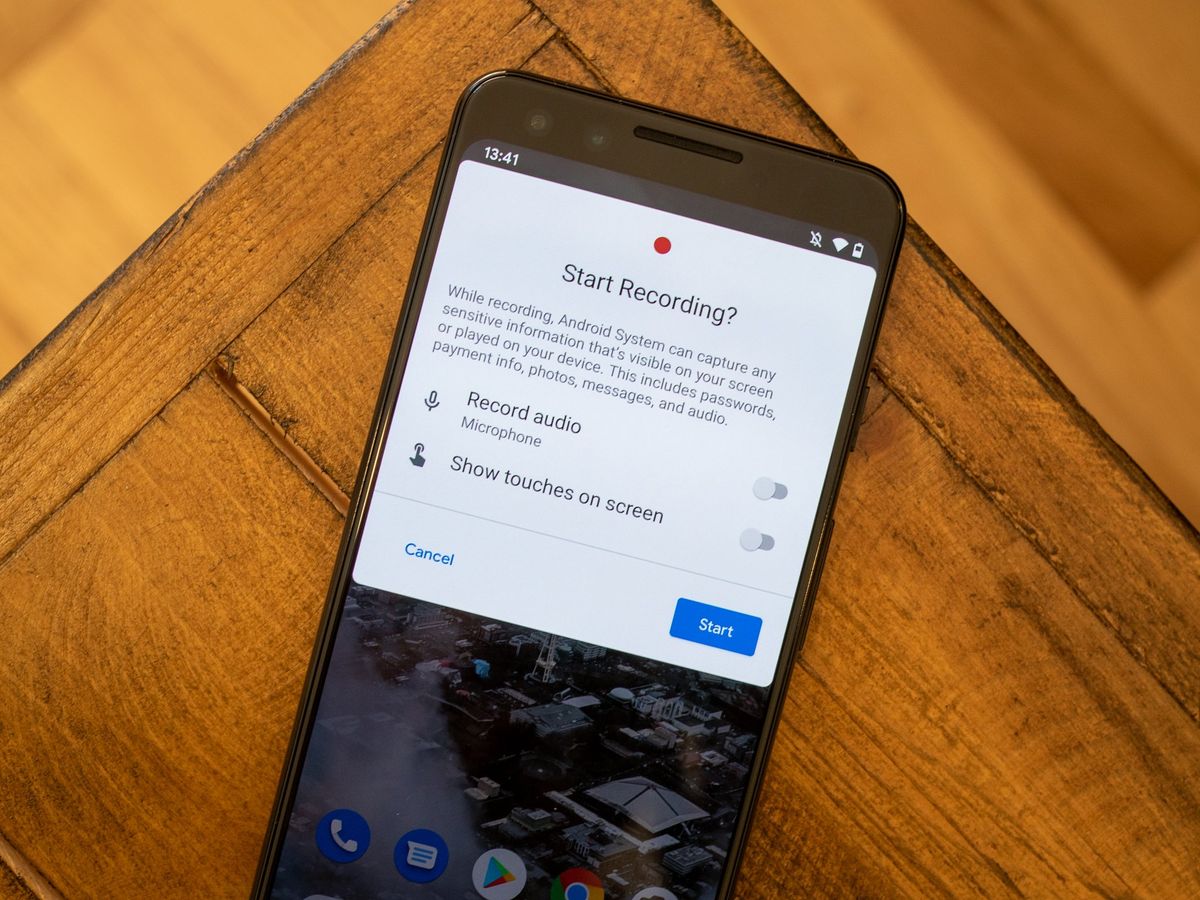
- You can enable or disable audio recording during the screen recording by toggling the “Record audio” option. This allows you to capture both internal device audio and microphone input.
- Other available settings may include the ability to show touches on the screen, customize the recording duration, enable or disable the floating toolbar, and more. Explore these options to configure the screen recording to your liking.
- Once you have adjusted the desired settings, exit the settings menu and start your screen recording as usual.
By adjusting the screen recording settings, you can customize the video quality, audio recording, and other options to suit your specific needs. Whether you require high-definition recordings, want to capture audio commentary, or simply need to optimize the recording settings based on your device’s performance, these settings provide you with the flexibility to tailor your screen recordings.
In the next section, we will discuss how to record audio while screen recording on your Samsung Galaxy device.
Recording Audio While Screen Recording
Recording audio while screen recording can add an extra layer of depth to your recordings, whether you’re creating tutorials, documenting gameplay, or capturing video calls. With the built-in screen recorder on your Samsung Galaxy device, you have the option to capture both internal system audio and external microphone input. Here’s how to record audio while screen recording:
- Open the screen recording feature by swiping down from the top of your screen and tapping on the “Screen Recording” icon in the quick settings panel.
- Expand the notification panel and tap on the “Screen Recording” notification to access the recording options.
- In the recording options menu, ensure that the “Record audio” option is enabled. This allows you to capture both internal audio, such as system sounds and app audio, as well as external audio from your device’s microphone.
- If you want to record only internal audio and mute the microphone input, you can disable the “Record with microphone” option. This can be useful if you’re recording gameplay or narrating a tutorial without needing to capture external audio.
- Once you have adjusted the audio settings to your preference, exit the recording options menu and start your screen recording as usual.
It’s important to note that recording audio while screen recording may not be available on all Samsung Galaxy devices or may require specific software versions. If you’re unable to record audio during screen recording, ensure that your device is updated to the latest software version, as newer updates often include improvements and new features.
By utilizing the audio recording options, you can enhance your screen recordings by capturing audio commentary, sound effects, or any other audio elements that enhance the viewing experience. Experiment with the audio settings and find the perfect balance between internal and external audio inputs for your recordings.
In the next section, we will delve into the process of recording gameplay on your Samsung Galaxy device.
Recording Gameplay on Samsung Galaxy
If you’re an avid gamer and want to showcase your skills or create content for platforms like YouTube or Twitch, recording gameplay on your Samsung Galaxy device can be a fantastic option. With the built-in screen recording feature, you can easily capture and share your gaming sessions. Here’s how to record gameplay on your Samsung Galaxy:
- Open the game that you want to record. Ensure that it’s in the foreground and ready for recording.
- Swipe down from the top of your screen to access the notification panel.
- Tap on the “Screen Recording” icon in the quick settings panel to start the recording countdown.
- Once the recording begins, play your game as usual. The screen recorder will capture all the gameplay action, including any taps or swipes on the screen.
- If you want to enable audio commentary or record external audio from your microphone, make sure to adjust the audio recording settings as mentioned in the previous section.
- To end the gameplay recording, either swipe down and tap the “Stop” button in the notification panel or tap on the screen recording icon in the quick settings panel.
- After stopping the recording, you will receive a notification indicating that the gameplay recording has been saved. Tap on the notification to access and view your recorded gameplay video.
Recording gameplay on your Samsung Galaxy device allows you to capture your gaming achievements, moments, and strategies. Whether you’re aiming to share your skills with others or preserve memorable gameplay experiences, the screen recording feature provides a convenient way to record high-quality gameplay videos.
During the recording, you can also leverage the screen recorder’s settings to control the video quality, adjust the audio settings, and customize the recording area. This gives you the flexibility to focus on specific aspects of the gameplay or provide additional commentary to enhance the viewer’s experience.
In the next section, we will explore how to edit and share your screen recordings on a Samsung Galaxy device.
Editing and Sharing Screen Recordings
Once you have recorded your screen on your Samsung Galaxy device, you may want to edit the recording to enhance its quality or add finishing touches before sharing it with others. Thankfully, there are several editing options available to you, along with various methods for sharing your screen recordings. Here’s how you can edit and share your screen recordings:
Editing:
- Locate the recorded screen recording in your device’s gallery or file manager.
- Tap on the recording to open it in a video playback application.
- Use a video editing app from the Google Play Store to trim, crop, add text, insert transitions, or apply filters to your screen recording.
- Save the edited video once you are satisfied with the changes.
By utilizing third-party video editing apps, you can unlock a wide range of editing options to personalize and refine your screen recordings. These apps often offer intuitive interfaces and powerful features that allow you to create professional-looking videos.
Sharing:
- Open the recorded screen recording in your device’s gallery or file manager.
- Select the share or export option, typically denoted by an icon with an arrow pointing outwards.
- Choose how you want to share your screen recording. You can send it via email, messaging apps, social media platforms, or directly upload it to video hosting sites such as YouTube or Vimeo.
- Follow the on-screen instructions to complete the sharing process.
When sharing your screen recordings, consider the platform or audience you intend to reach. Different platforms may have specific video format requirements or size limitations, so it’s important to choose the appropriate settings during the sharing process.
Additionally, you may also want to explore screen recording apps or software that offer built-in editing and sharing capabilities. These tools can simplify the process by providing an all-in-one solution for recording, editing, and sharing your screen recordings.
And there you have it! You can now edit and share your screen recordings on your Samsung Galaxy device, allowing you to create compelling content and share your knowledge, skills, and experiences with others.
In the next section, we will discuss some common troubleshooting tips for screen recording issues on Samsung Galaxy devices.
Troubleshooting Screen Recording Issues
While screen recording on your Samsung Galaxy device is typically a smooth and straightforward process, you may encounter some issues along the way. Luckily, there are several troubleshooting steps you can take to resolve common screen recording issues. Here are some troubleshooting tips to help you overcome screen recording problems:
No Screen Recording Icon:
- Ensure that your Samsung Galaxy device is running on a compatible version of the Android operating system, preferably Android 11 or above, as older versions may not have the screen recording feature.
- If you can’t find the screen recording icon in the notification panel, you can add it by editing the quick settings.
- Check if there are any software updates available for your device, as these updates often introduce new features and improvements.
Poor Performance or Lag:
- Close any unnecessary background apps that may be consuming system resources and affecting performance during screen recording.
- Reduce the screen resolution of your device, as higher resolutions can put a strain on the system and lead to performance issues.
- Ensure that you have sufficient free storage space on your device. Delete any unused files or apps to free up storage.
No Audio in Screen Recording:
- Check if the “Record audio” option is enabled in the screen recording settings. Ensure that the microphone permission is granted to the screen recording app.
- Make sure that your device’s volume is not muted or set too low. Increase the volume level and try recording again.
- If you are using an external microphone, ensure that it is properly connected to your device and working correctly.
Recording Quality Issues:
- Adjust the screen recording settings to a higher resolution and frame rate for better video quality, but keep in mind that this may result in larger file sizes.
- Ensure that there is sufficient lighting in the recording environment to prevent dark or grainy videos.
- Use a stable surface or tripod to prevent camera shake and ensure a steady recording.
If you have tried the troubleshooting steps above and are still experiencing issues with screen recording on your Samsung Galaxy device, it is recommended to reach out to the Samsung support team for further assistance. They can provide specific guidance based on your device model and software version.
In the next section, we will wrap up this guide on screen recording on Samsung Galaxy devices.
Conclusion
Screen recording on Samsung Galaxy devices is a powerful feature that allows you to capture and share your device’s screen activity with ease. Whether you need to record tutorials, document gameplay, save video calls, or create engaging content, the built-in screen recording feature provides a convenient method to capture high-quality videos.
In this guide, we discussed the process of enabling screen recording, adjusting settings, recording audio, capturing gameplay, editing recordings, and sharing them with others. By following the steps outlined in this guide, you can make the most out of the screen recording feature on your Samsung Galaxy device.
Remember to check the system requirements, ensure sufficient storage space, and keep your device updated to access the latest features and optimizations. Adjust the screen recording settings to customize your recordings and make them align with your specific needs. Whether it’s adjusting video quality, enabling audio recording, or hiding sensitive information, these settings allow for a personalized screen recording experience.
Moreover, explore different methods of editing your screen recordings, such as trimming, adding text, or applying filters, to enhance their quality and make them more engaging. Finally, choose the appropriate sharing methods based on your platform or audience, ensuring compatibility and optimizing the file size for a seamless sharing experience.
Should you face any issues with screen recording, refer to the troubleshooting tips mentioned in this guide. With troubleshooting steps, you can overcome common problems and ensure a smooth screen recording process.
Now that you’re equipped with the knowledge of screen recording on Samsung Galaxy devices, it’s time to unleash your creativity, share your expertise, and capture unforgettable moments. Whether it’s for personal or professional purposes, screen recording can be a valuable tool in your digital toolkit.
Enjoy recording and sharing your screen content with the world!