Introduction
Chromebooks have gained immense popularity for their sleek design, user-friendly interface, and seamless integration with Google’s suite of apps and services. Whether you’re using a Chromebook for work or personal use, being able to save pictures is an essential skill that you’ll likely need at some point. As a skilled SEO writer, I’ll guide you through various methods to save pictures on your Chromebook, ensuring that you have a clear understanding of each option.
In this article, we’ll explore four different methods to save pictures on your Chromebook. We’ll start by discussing how to save pictures directly from the web, followed by a guide on taking screenshots and saving them. We’ll then move on to saving pictures from external storage devices and explore the use of Chrome extensions to streamline the process. By the end of this article, you’ll have a comprehensive understanding of the options available, allowing you to save pictures effortlessly.
Whether you want to save images for future reference, create a personal photo collection, or use them in your creative projects, these methods will come in handy. So, let’s dive in and explore the various ways to save pictures on your Chromebook!
Method 1: Saving pictures from the web
One of the most common ways to save pictures on your Chromebook is by downloading them directly from the web. Whether it’s an image on a website, a social media platform, or a search engine, Chromebook makes it easy to save pictures with just a few clicks. Here’s how you can do it:
1. Start by browsing the web and find the picture you want to save. Right-click on the image, and a menu will pop up.
2. From the menu, select the “Save image as” option. This will open a file-saving dialog box.
3. Choose the location where you want to save the picture. You can select “Downloads” or create a new folder to keep your saved pictures organized.
4. Give the picture a descriptive name or keep the existing file name, and ensure that the file format is supported (such as .jpg or .png).
5. Click the “Save” button, and the picture will be downloaded and saved to the chosen location on your Chromebook.
You can also save pictures by dragging and dropping them from the web directly onto your desktop or a specific folder. This method is especially convenient if you want to quickly access the saved picture without navigating through multiple folders.
It’s important to note that some websites may have restrictions that prevent you from saving images. In such cases, you may not see the “Save image as” option when you right-click the picture. However, most websites allow image saving, making it a straightforward process for the majority of web images.
Now that you know how to save pictures from the web, you can easily keep a collection of images for personal use or reference. Let’s move on to the next method for saving pictures on your Chromebook: taking screenshots and saving them.
Method 2: Taking screenshots and saving them
Another convenient way to save pictures on your Chromebook is by taking screenshots. Chromebooks offer built-in tools that allow you to capture screenshots of your screen or specific areas. You can then save these screenshots as image files for future use. Here’s how you can do it:
1. Locate the screen or area you want to capture. It could be a webpage, a document, or any other content visible on your Chromebook’s screen.
2. To capture the entire screen, press the “Ctrl” + “Show windows” keys simultaneously. The “Show windows” key is usually located in the top row of keys, resembling a rectangle with two lines beside it.
3. To capture a specific area, press the “Ctrl” + “Shift” + “Show windows” keys simultaneously. After pressing these keys, your cursor will turn into a crosshair.
4. Click and drag the crosshair to select the area you want to capture. Release the mouse button to capture the screenshot.
5. After capturing the screenshot, you will see a notification at the bottom right corner of your screen. Click on the notification to open the screenshot.
6. At the top right corner of the screenshot, you’ll find options to annotate, crop, or save the image. Click on the disk icon to save the screenshot as an image file.
7. Choose the location where you want to save the screenshot, give it a descriptive name, and make sure the file format is supported (such as .jpg or .png).
8. Click the “Save” button, and the screenshot will be saved to the chosen location on your Chromebook.
Taking screenshots is a useful method for capturing images from your Chromebook’s screen, whether it’s to save important information, capture moments, or share visuals with others. This method allows you to save images without the need to download them from the web. However, keep in mind that screenshots may include elements like browser tabs or the Chromebook’s taskbar, depending on the area you capture.
Now that you know how to take screenshots and save them, let’s explore another method for saving pictures on your Chromebook: saving pictures from external storage devices.
Method 3: Saving pictures from external storage devices
Chromebooks offer the flexibility to save pictures directly from external storage devices like USB drives or SD cards. This method allows you to transfer pictures from your camera, smartphone, or any other device to your Chromebook with ease. Here’s how you can save pictures from external storage devices:
1. Connect your external storage device (USB drive, SD card, etc.) to your Chromebook’s USB port or SD card slot.
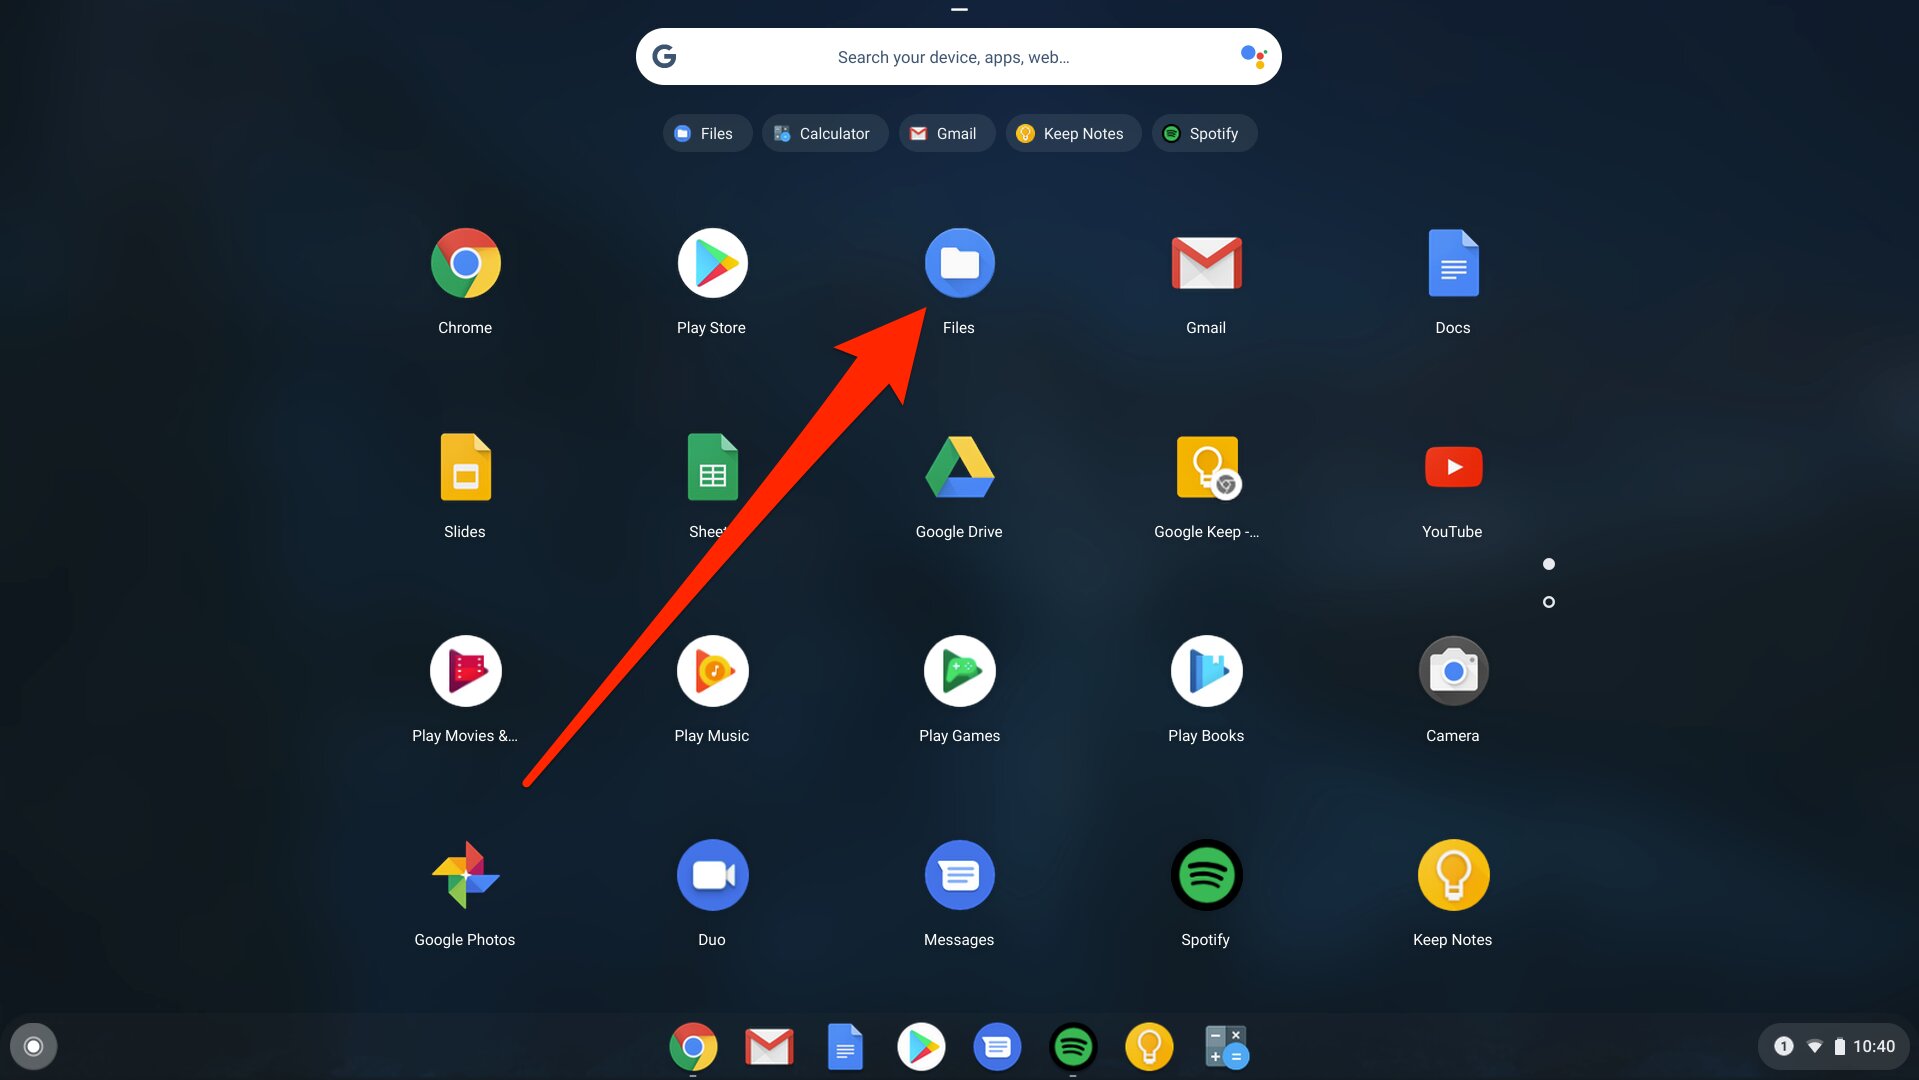
2. Open the “Files” app on your Chromebook. You can find it in the app launcher or by searching for “Files” in the search bar.
3. In the “Files” app, you’ll see the external storage device listed under “Devices” in the left sidebar. Click on the device to access its contents.
4. Navigate to the folder containing the pictures you want to save. You can browse through the folders and subfolders to find the desired images.
5. Once you’ve found the pictures you want to save, select and right-click on them. A menu will appear.
6. From the menu, select the “Copy” option to copy the selected pictures.
7. Now, navigate to the location on your Chromebook where you want to save the pictures. It can be the “Downloads” folder or any other folder of your choice.
8. Right-click on the destination folder and select the “Paste” option. The selected pictures will be copied to the chosen location, saving them on your Chromebook.
This method enables you to quickly and conveniently transfer pictures from external devices to your Chromebook. It’s especially useful when you want to save photos taken with your camera or smartphone directly to your Chromebook for editing, sharing, or organizing.
Now that you know how to save pictures from external storage devices, let’s move on to the final method: saving pictures using Chrome extensions.
Method 4: Saving pictures using Chrome extensions
If you’re looking for a more streamlined and efficient way to save pictures on your Chromebook, using Chrome extensions can be a game-changer. There are several extensions available that enhance your browsing experience and offer advanced image-saving capabilities. Here’s how you can save pictures using Chrome extensions:
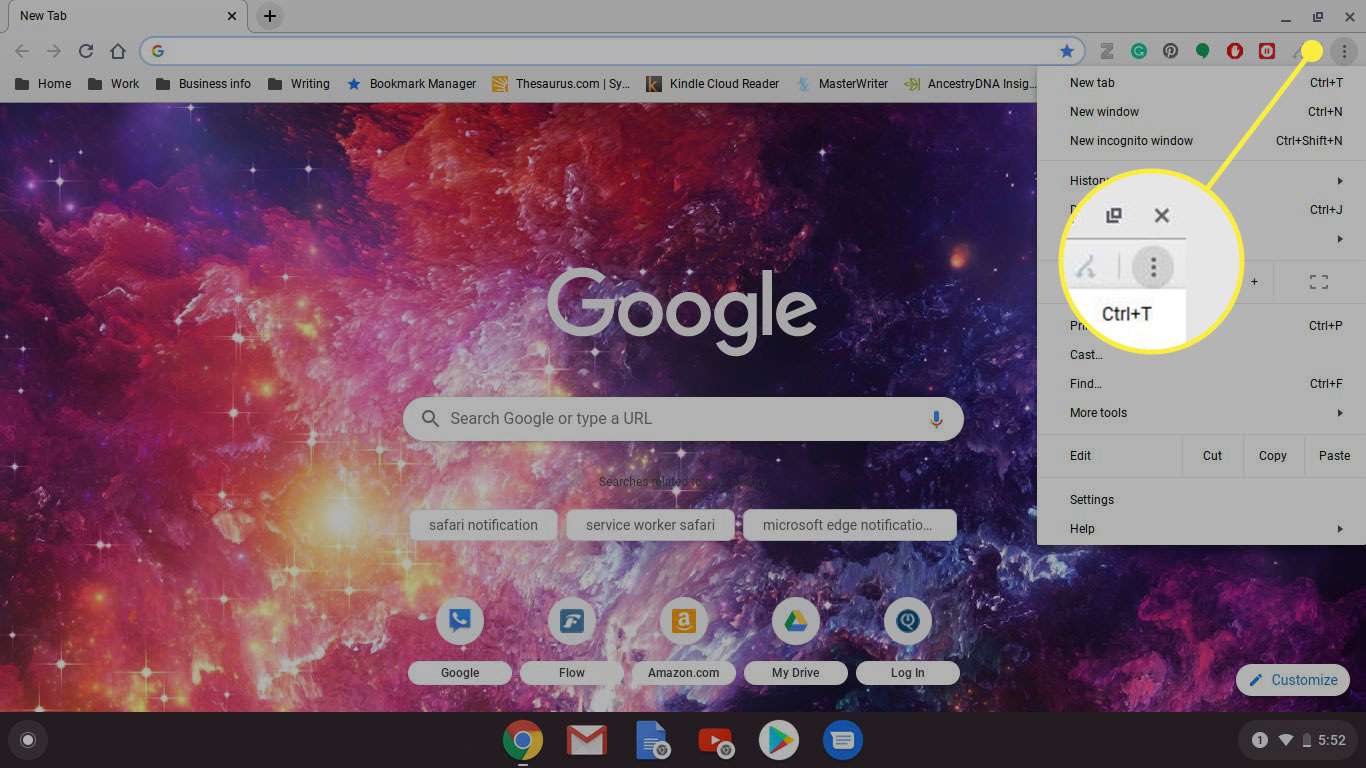
1. Start by opening the Chrome Web Store on your Chromebook. You can do this by clicking on the app launcher and selecting the “Chrome Web Store” icon.
2. In the search bar of the Chrome Web Store, enter keywords like “image downloader” or “picture saver” to find relevant extensions.
3. Explore the different extensions available and check their ratings and reviews to find a reliable and feature-rich option.
4. Once you’ve selected an extension, click on the “Add to Chrome” button to install it. You may need to grant necessary permissions for the extension to function properly.
5. After the extension is installed, you’ll usually see an icon added to the Chrome toolbar. Click on this icon to activate the extension.
6. Now, browse the web and find the picture you want to save. The specific functionality of the extension may vary, but in most cases, you can right-click on the image and select the “Save image” or similar option from the extension’s menu.
7. Choose the location where you want to save the picture, give it an appropriate name, and select the desired file format.
8. Click the “Save” or “Download” button, and the picture will be saved to the chosen location on your Chromebook.
Using Chrome extensions can be a convenient way to save pictures, as they often provide additional features like batch downloading or automated capturing of images from specific websites. These extensions can enhance your productivity and save you time when collecting or organizing images for various purposes.
With the knowledge of these four methods to save pictures on your Chromebook – saving pictures from the web, taking screenshots, saving pictures from external storage devices, and using Chrome extensions – you now have a comprehensive understanding of the options available to meet your picture-saving needs.
Conclusion
Being able to save pictures on your Chromebook is a fundamental skill that can enhance your creative projects, personal photo collection, or simply help you keep important visuals for future reference. In this article, we explored four different methods to save pictures on your Chromebook: saving pictures from the web, taking screenshots and saving them, saving pictures from external storage devices, and using Chrome extensions for advanced image-saving capabilities.
By saving pictures directly from the web, you can quickly download images you come across on websites, social media platforms, and search engines. Taking screenshots provides a convenient way to capture visuals from your Chromebook’s screen, whether it’s a full-screen capture or a specific area of interest. Saving pictures from external storage devices allows you to transfer images from cameras, smartphones, and other devices to your Chromebook effortlessly. Lastly, utilizing Chrome extensions empowers you with enhanced image-saving capabilities and features that streamline the process.
Remember to ensure that the methods you choose comply with copyright laws and the terms of use of the websites or platforms you’re accessing. Always respect intellectual property rights and use the saved pictures responsibly.
Now that you have a comprehensive understanding of these methods, you can choose the most suitable option based on your specific needs and preferences. So go ahead and start saving pictures on your Chromebook with confidence!