Introduction
Visual Studio Code is a versatile and user-friendly code editor that has gained immense popularity among developers. While it is primarily associated with web development using languages like HTML, CSS, and JavaScript, it also supports PHP, a powerful and widely used server-side scripting language. By configuring Visual Studio Code for PHP development, you can leverage its features to streamline your workflow and enhance productivity.
Setting up Visual Studio Code for PHP development involves installing the PHP extension, configuring the PHP executable path, and creating a PHP development environment. With these in place, you can write, run, and debug PHP code seamlessly within the editor. In addition, there are various extensions available that further enhance the PHP development experience.
In this article, we will guide you through the process of setting up Visual Studio Code for PHP development and explore its essential features. Whether you are a seasoned PHP developer or just getting started, this guide will help you harness the power of Visual Studio Code to write efficient and error-free PHP code.
Setting Up Visual Studio Code for PHP Development
Before diving into PHP development using Visual Studio Code, you need to ensure that your environment is properly configured. This involves installing the PHP extension and configuring the PHP executable path. Follow the steps below to get started:
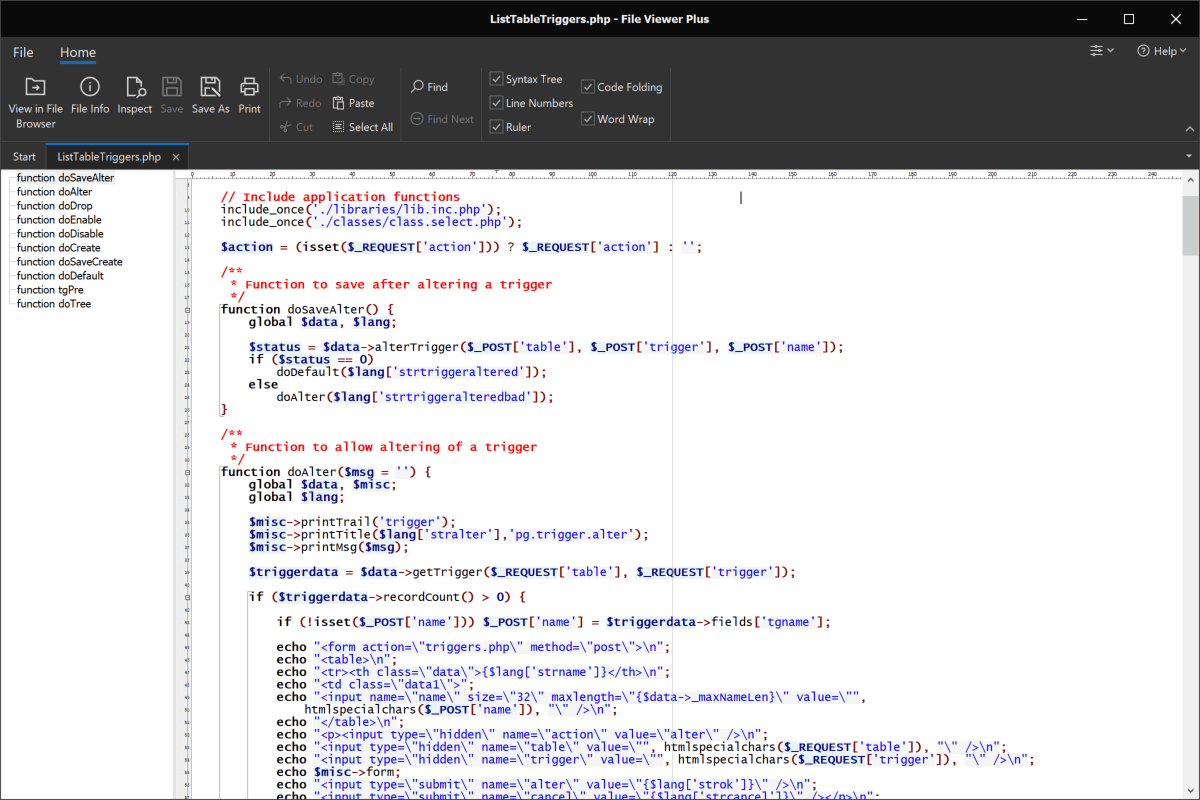
- Install the PHP Extension: Launch Visual Studio Code, and in the sidebar, click on the Extensions icon (or press Ctrl+Shift+X). Search for the “PHP” extension and click on “Install”. This extension provides support for PHP code formatting, syntax highlighting, code completion, and more. Once installed, you will need to reload Visual Studio Code for the changes to take effect.
- Configure the PHP Executable Path: After installing the PHP extension, you need to specify the path to the PHP executable on your system. This allows Visual Studio Code to run PHP code and provide features like linting and debugging. To configure the PHP executable path, open the Visual Studio Code user settings by clicking on File > Preferences > Settings (or press Ctrl+,). In the settings, search for “php.executablePath” and provide the absolute path to the PHP executable. If PHP is already installed on your system, you can typically find the executable path in the environment variables. Save the settings once the path is configured.
With the PHP extension installed and the executable path configured, you are now ready to set up your PHP development environment in Visual Studio Code. This involves creating a new PHP project and configuring any additional dependencies or settings specific to your project requirements.
Note: In order to run PHP code locally, you will need to have a server installed on your system. Popular options include Apache, Nginx, or PHP’s built-in web server. Make sure your chosen server is up and running before proceeding with PHP development in Visual Studio Code.
Installing the PHP Extension
The PHP extension is a crucial component for PHP development in Visual Studio Code. It provides various features and functionalities to make your coding experience more efficient and enjoyable. Here is a step-by-step guide on installing the PHP extension:
- Launch Visual Studio Code: Open Visual Studio Code and make sure you have it installed on your system.
- Access the Extensions View: Click on the Extensions icon in the sidebar, or use the shortcut Ctrl+Shift+X to open the Extensions view.
- Search for the PHP Extension: In the Extensions view, type “PHP” into the search bar to locate the PHP extension. It should be listed as “PHP IntelliSense” by Felix Becker.
- Install the PHP Extension: Click on the “Install” button next to the PHP extension in the search results. The installation process may take a few moments to complete.
- Wait for Installation: Once the installation is finished, the “Install” button will change to “Reload”. Click on the “Reload” button to reload Visual Studio Code and activate the PHP extension.
After completing these steps, the PHP extension will be successfully installed and ready to use. You can confirm its installation by checking the list of installed extensions in the Extensions view.
The PHP extension provides a range of powerful features for PHP development, including:
- Syntax Highlighting: The PHP extension highlights PHP syntax in your code, making it easier to read and understand.
- Code Completion: It offers intelligent code completions, suggesting PHP functions, classes, and variables as you type, speeding up your coding process.
- Linting: The PHP extension performs syntax and error checking in your code, highlighting any issues or potential problems.
- Debugging: It integrates with debuggers like Xdebug, allowing you to debug PHP code directly within Visual Studio Code.
- Formatting: The extension provides formatting options to automatically format your PHP code according to predefined coding standards.
With the PHP extension installed, you can now proceed to configure the PHP executable path for seamless PHP development in Visual Studio Code.
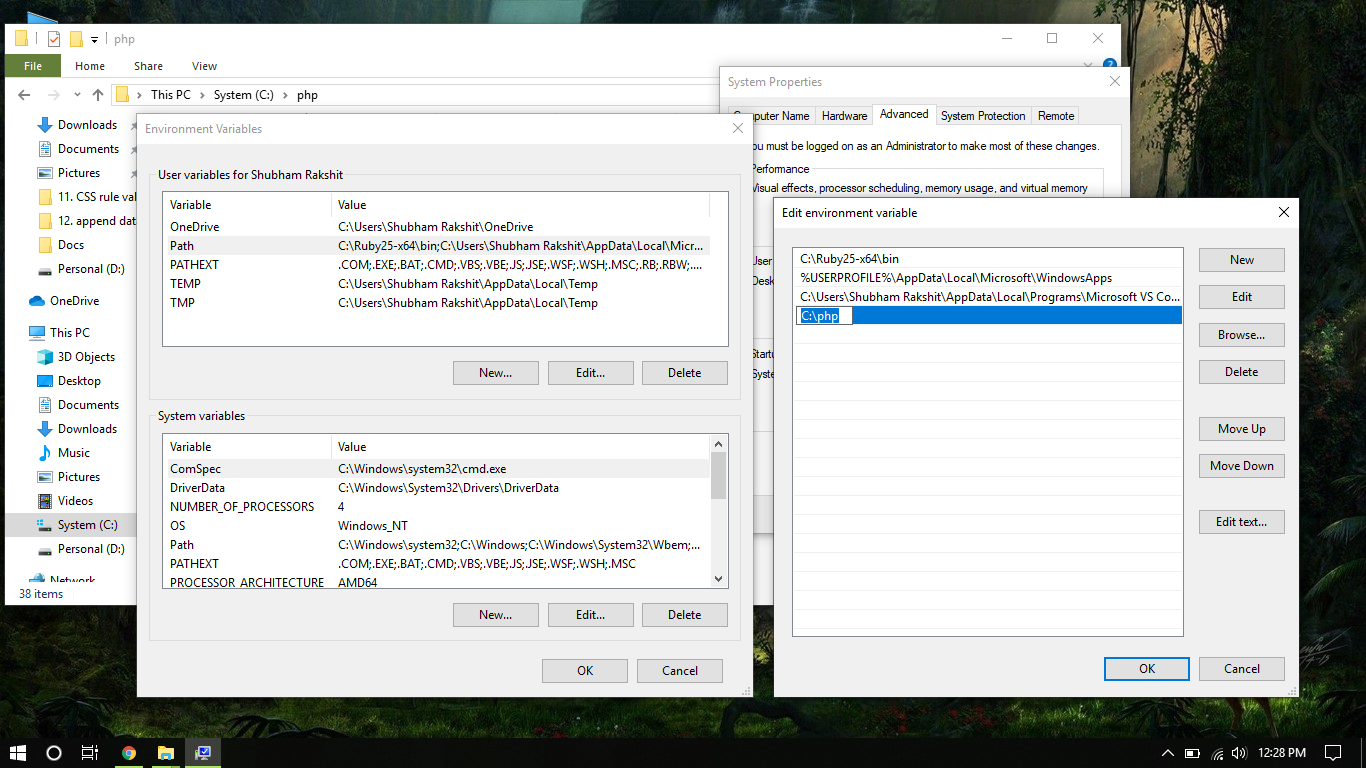
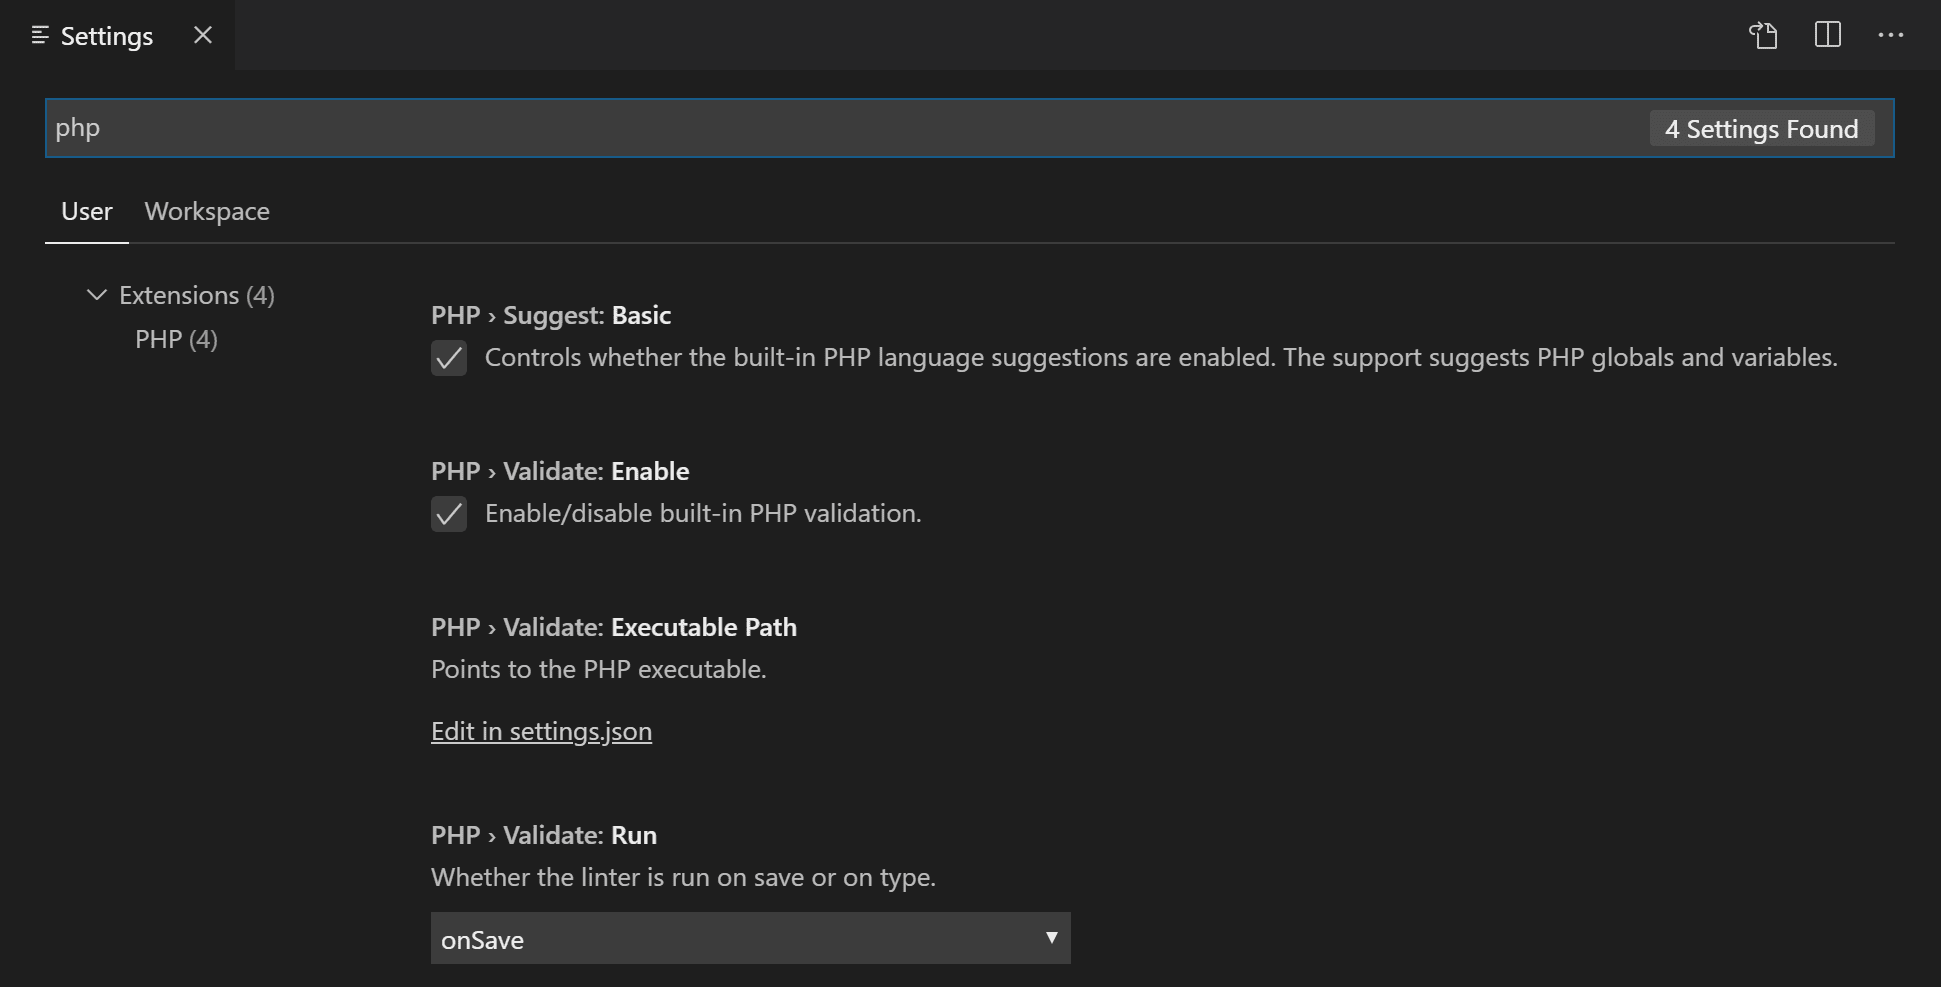
Configuring PHP’s Executable Path
After installing the PHP extension in Visual Studio Code, the next step is to configure the PHP executable path. This is necessary for Visual Studio Code to properly execute PHP code and provide various development features. Here’s how you can configure the PHP executable path:
- Open Visual Studio Code: Launch Visual Studio Code on your system.
- Access User Settings: Click on the “File” menu and select “Preferences”, then choose “Settings” (or use the shortcut Ctrl+,).
- Search for PHP Executable Path: In the search bar at the top of the Settings view, type “php.executablePath” to find the relevant setting.
- Specify the Absolute Path: Once you find the “php.executablePath” setting, click on the “Edit in settings.json” link below it. In the settings.json file, add the absolute path to the PHP executable on your system. For example, if PHP is installed in the default location on Windows, the path may be something like “C:/php/php.exe”.
- Save the Configuration: After specifying the PHP executable path, save the changes to the settings.json file and close it.
By configuring the PHP executable path, Visual Studio Code will be able to execute PHP code and provide features like code completion, linting, and debugging. It is essential to ensure that the PHP executable path is accurate and points to the correct location on your system.
If you are unsure about the PHP executable path on your system, you can find it by running the command php -v in your terminal or command prompt. This will display the PHP version and the path to the PHP executable.
Now that you have successfully configured the PHP executable path, you are ready to set up a PHP development environment and start writing PHP code in Visual Studio Code.
Setting Up a PHP Development Environment
Before diving into PHP development in Visual Studio Code, it’s important to set up a PHP development environment to ensure a smooth coding experience. Here are the steps to set up your PHP development environment:
- Install a Local Server: To run and test PHP code locally, you’ll need a server environment like Apache, Nginx, or PHP’s built-in server. Choose the server that best suits your needs and install it on your system. Make sure it is properly configured and running.
- Create a New PHP Project: In Visual Studio Code, create a new folder for your PHP project. Open the folder in Visual Studio Code by clicking on File > Open Folder and selecting the folder you just created.
- Create PHP Files: Inside the project folder, create your PHP files with the
.phpextension. You can create multiple files based on the structure of your project. - Include HTML and CSS: Since PHP is often used in conjunction with HTML and CSS, you can include those files within your PHP files using HTML and CSS tags.
- Start Local Server: Start your local server to serve the PHP files. This will allow you to access your PHP application through a web browser on your local machine.
- Access PHP Files: Open your web browser and access the PHP files by entering the URL of your local server along with the path to the PHP file. For example, if you’re using a local Apache server, you would enter something like
http://localhost/project/index.phpto access theindex.phpfile within theprojectfolder.
With these steps completed, you now have a fully functional PHP development environment using Visual Studio Code. You can create, edit, and run your PHP code seamlessly within the editor. Visual Studio Code’s integration with your local server allows for quick testing and debugging of PHP applications.
Setting up a PHP development environment is crucial for efficient and productive PHP programming. It ensures that your code runs smoothly and allows you to leverage the features provided by Visual Studio Code for PHP development.
Creating a New PHP Project
In Visual Studio Code, creating a new PHP project is a straightforward process. By organizing your PHP code within a dedicated project folder, you can easily manage your files and dependencies. Here’s how you can create a new PHP project in Visual Studio Code:
- Open Visual Studio Code: Launch Visual Studio Code on your system.
- Create a New Folder: Choose a location on your computer where you want to create your PHP project. Right-click on the desired location and select “New Folder”. Give the folder a name that identifies your project.
- Open the New Folder in Visual Studio Code: In Visual Studio Code, click on File > Open Folder and navigate to the location where you created your PHP project folder. Select the folder and click on the “Open” button.
- Initialize the PHP Project: With the project folder open in Visual Studio Code, open the integrated terminal by clicking on View > Terminal (or press Ctrl+`). In the terminal, navigate to the project folder using the
cdcommand. Once inside the project folder, run the commandphp -f index.phpto initialize a basic PHP file calledindex.php. This file will serve as the entry point of your PHP project.
After following these steps, your PHP project is created and ready to be developed in Visual Studio Code. You can now start adding more PHP files, include libraries or dependencies, and build your PHP application.
Creating a new PHP project provides a structured framework for organizing and managing your PHP code. It allows you to easily navigate through files, track changes, and collaborate with others if needed. Visual Studio Code’s intuitive interface and integrated terminal make it a powerful tool for PHP project development.
Writing PHP Code in Visual Studio Code
Now that you have set up Visual Studio Code for PHP development and created a new PHP project, it’s time to start writing PHP code in the editor. Visual Studio Code provides various features and functionalities that make coding in PHP a breeze. Here’s how you can write PHP code in Visual Studio Code:
- Open PHP Files: Open the PHP files within your project by navigating to them in the Visual Studio Code sidebar or using the “File > Open File” option. Alternatively, you can use the integrated terminal to create new PHP files using the command line.
- Code Editing Features: Visual Studio Code offers a range of code editing features to enhance your PHP coding experience. It provides syntax highlighting, auto-indentation, bracket matching, and more to help you write clean and understandable code.
- Code Completion: As you type PHP code, Visual Studio Code provides intelligent code completion suggestions. It offers suggestions for PHP functions, classes, variables, and more, saving you time and effort.
- Hover Information: Visual Studio Code allows you to hover over PHP code elements to view information about them. This includes details about functions, variables, and classes, assisting you in understanding and utilizing them effectively.
- Code Navigation: Visual Studio Code makes it easy to navigate through PHP files and within your code. You can use shortcuts like Ctrl+Click to jump to function or class definitions, or use the “Go to Definition” feature to navigate to specific code elements.
- Debugging Support: Visual Studio Code provides built-in debugging support for PHP. You can set breakpoints, step through the code, inspect variables, and evaluate expressions to troubleshoot and debug your PHP applications effectively.
These features and functionalities offered by Visual Studio Code empower you to write clean, efficient, and error-free PHP code. The editor’s intuitive interface and extensive plugin ecosystem further enhance the development experience, allowing you to customize and extend its capabilities as you see fit.
Take advantage of these features and experiment with different coding techniques to make the most out of your PHP development in Visual Studio Code.
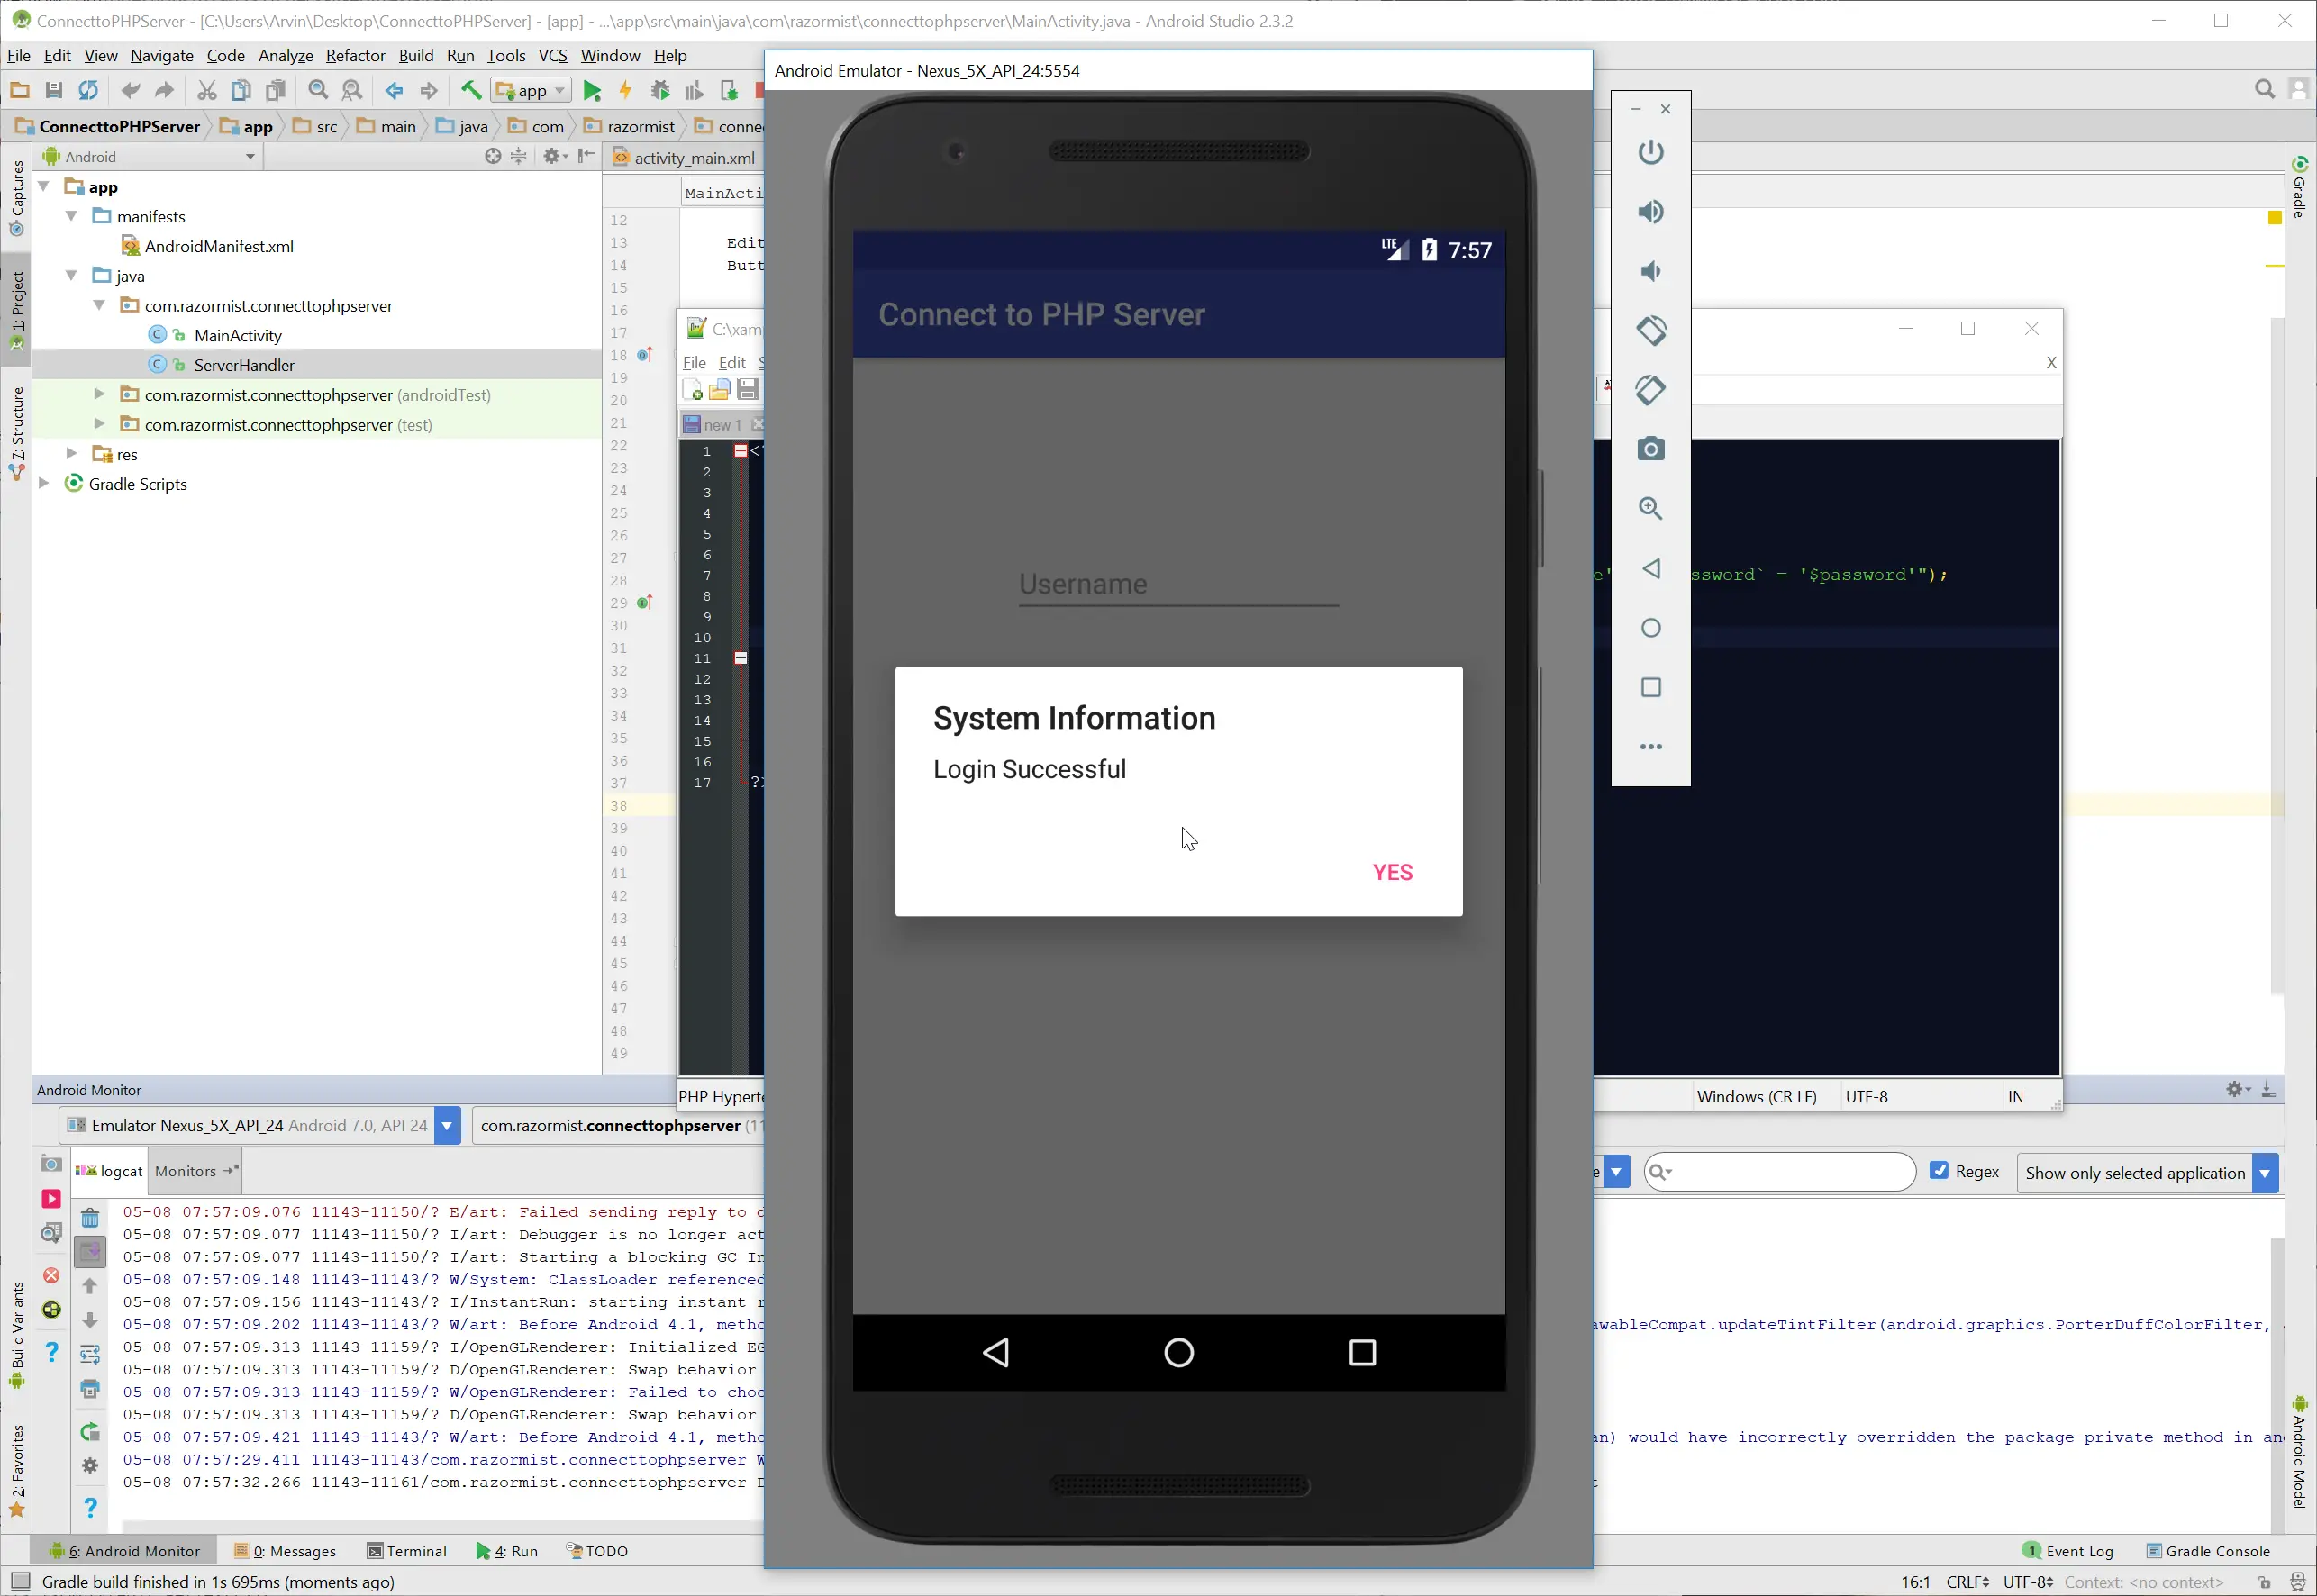
Running and Debugging PHP Code in Visual Studio Code
Visual Studio Code provides built-in support for running and debugging PHP code, allowing you to test and troubleshoot your applications directly within the editor. Here’s how you can run and debug PHP code in Visual Studio Code:
- Open the PHP File: Open the PHP file you want to run or debug in Visual Studio Code.
- Configure Launch Settings: Press
Ctrl+Shift+Dor click on the Debug icon in the sidebar to open the Debug view. In the Debug view, click on the gear icon to configure the launch settings. Select “PHP” as the environment and choose the appropriate launch configuration (e.g., “Listen for Xdebug” or “Launch current file”). - Set Breakpoints: Place breakpoints in your PHP code by clicking on the left gutter of the editor at the desired line. Breakpoints allow you to pause the execution of your code and inspect variables and values at specific points.
- Run and Debug: To run your PHP code, press
F5or click on the green play button in the Debug view. The code will execute, and if you have breakpoints set, the execution will pause at those breakpoints. You can then step through the code, inspect variables, and track the flow of your program. - Debug Console: Visual Studio Code provides a Debug Console where you can interactively execute PHP code while debugging. You can use it to run ad-hoc PHP statements, evaluate variables, and test specific parts of your code.
- Debugging Toolbar: The Debug Toolbar at the top of the editor provides buttons for controlling the debugging process. It allows you to step into, step over, and step out of code execution, as well as restart or stop the debugging session.
With these steps, you can effectively run and debug your PHP code in Visual Studio Code. The debugging features enable you to identify and fix issues in your code, improving the overall quality and reliability of your PHP applications.
Visual Studio Code’s integration with debugging tools like Xdebug provides a seamless debugging experience. Make sure to have the necessary environment and extensions properly configured to take full advantage of PHP debugging capabilities within the editor.
Testing PHP Code in Visual Studio Code
Testing is an essential part of developing robust and reliable PHP applications. With Visual Studio Code, you can streamline your testing process and ensure that your PHP code functions as expected. Here’s how you can test PHP code in Visual Studio Code:
- Write Test Cases: Create test cases to verify the functionality of your PHP code. These test cases should cover different scenarios and edge cases to ensure comprehensive testing.
- Use a Testing Framework: Choose a PHP testing framework that suits your needs, such as PHPUnit or Codeception. Install the chosen framework as a dependency within your PHP project.
- Configure Testing Environment: Set up your testing environment by creating a dedicated folder for test files and configuring the necessary settings for your chosen testing framework.
- Write Test Functions: Within your test files, write test functions that correspond to your test cases. These functions should use the testing framework’s assertions to verify the expected behavior of your PHP code.
- Run Tests: Use the testing framework’s command-line interface or a Visual Studio Code extension to run your tests. The framework will execute the test functions and report the results, indicating whether each test passed or failed.
- Inspect Test Results: Analyze the test results to identify any failures or errors. The testing framework should provide detailed feedback, allowing you to pinpoint the specific areas of your code that require attention.
- Iterate and Improve: If any tests fail, revisit your PHP code to understand the issues and make the necessary changes. Rerun the tests to ensure that the modifications have resolved the problems.
By incorporating testing into your PHP development workflow in Visual Studio Code, you can catch bugs and prevent regressions, increasing the reliability and quality of your PHP applications. Testing helps identify and fix issues early in the development process, ultimately saving time and effort in the long run.
Visual Studio Code offers features like integrated terminals, debugging support, and a wide range of extensions that can enhance your testing experience. Explore the available extensions and integrations to find tools that align with your specific testing needs.
Popular PHP Extensions for Visual Studio Code
Visual Studio Code has a vast ecosystem of extensions that can enhance your PHP development experience. These extensions provide additional features, productivity tools, and integrations that make coding in PHP more efficient and enjoyable. Here are some popular PHP extensions for Visual Studio Code:
- PHP IntelliSense: This extension provides intelligent code completion, allowing you to write PHP code faster by suggesting functions, classes, and variables as you type. It also supports code navigation, documentation lookup, and other helpful features.
- PHP Debug: The PHP Debug extension enables PHP debugging in Visual Studio Code by integrating with Xdebug, a popular PHP debugging tool. With this extension, you can set breakpoints, step through code, inspect variables, and debug your PHP applications with ease.
- PHP Intelephense: PHP Intelephense offers advanced code intelligence features like parameter suggestions, signature help, and automatic import suggestions. It provides accurate code completion and analyzes your project to offer suggestions based on your codebase.
- PHP DocBlocker: PHP DocBlocker simplifies documenting your PHP code by generating DocBlocks. It helps you create clean and clear PHP documentation by automatically generating DocBlock templates for classes, methods, and variables.
- Composer: The Composer extension assists with managing PHP dependencies using Composer, a popular PHP package manager. It provides commands to install/update packages, generate autoload files, and manage your project’s composer.json file.
- PHPUnit: The PHPUnit extension adds support for running and debugging PHPUnit tests within Visual Studio Code. It offers a test explorer, the ability to run individual tests or entire test suites, and provides detailed test reports and feedback.
- Laravel Blade Snippets: If you are working with the Laravel framework, the Laravel Blade Snippets extension is invaluable. It provides shortcuts and snippets for Blade templating syntax, making it easier and faster to write Blade templates in Visual Studio Code.
- Code Runner: Code Runner allows you to quickly run PHP code snippets and scripts directly within Visual Studio Code. It supports multiple programming languages and provides a convenient way to execute and test your PHP code without leaving the editor.
These are just a few examples of the popular PHP extensions available for Visual Studio Code. Explore the Visual Studio Code Marketplace to discover more extensions that cater to your specific PHP development needs. Remember to read the extension documentation and reviews to ensure compatibility and reliability.
By leveraging these PHP extensions, you can enhance your productivity, improve code quality, and make the most out of your PHP development experience in Visual Studio Code.
Conclusion
Visual Studio Code provides a powerful and versatile environment for PHP development. By following the steps outlined in this article, you can set up Visual Studio Code for PHP development, configure it to your preferences, and take advantage of its features to streamline your workflow.
Installing the PHP extension, configuring the PHP executable path, and creating a PHP development environment are essential steps to get started with PHP development in Visual Studio Code. Additionally, writing PHP code, running and debugging it within the editor, and testing your code ensure that your PHP applications are robust and reliable.
Visual Studio Code’s extensive ecosystem of extensions further enhances the PHP development experience. Popular PHP extensions like PHP IntelliSense, PHP Debug, and Composer provide additional functionalities, productivity boosts, and seamless integration with popular PHP frameworks and tools.
Whether you are a seasoned PHP developer or just starting with PHP programming, Visual Studio Code serves as a reliable and user-friendly code editor. Its flexibility, customizability, and support for PHP make it an excellent choice for developing PHP applications of any complexity.
It’s recommended to explore and experiment with the various features and extensions available in Visual Studio Code to tailor your PHP development environment to your specific needs and preferences. Stay up to date with the latest updates in the PHP community and continue honing your PHP skills to unlock the full potential of Visual Studio Code for PHP development.