Introduction
Welcome to the step-by-step guide on how to replace a hard disk drive on a Palo Alto 3050. Whether you are a seasoned IT professional or a tech-savvy enthusiast, understanding the process of replacing a hard disk drive is crucial in keeping your Palo Alto 3050 running smoothly.
A hard disk drive is an essential component of your Palo Alto 3050, responsible for storing vital data and running various applications. Over time, hard disk drives may experience wear and tear, leading to decreased performance and potential failure. A timely replacement is necessary to avoid any data loss or system downtime.
In this guide, we will walk you through the process of replacing the hard disk drive on your Palo Alto 3050, ensuring a seamless transition and minimal disruption to your network operations. We will cover the necessary preparations, the steps for shutting down and removing the old hard disk drive, installing the new drive, and verifying the replacement.
It is important to note that this guide assumes you have a basic understanding of Palo Alto Networks devices and are familiar with the necessary precautions while handling computer components. If you are unsure or uncomfortable performing the replacement, we recommend seeking assistance from a qualified IT professional.
Now, let’s dive in and learn how to replace a hard disk drive on your Palo Alto 3050, ensuring the continued performance and reliability of your network infrastructure.
Preparing for the Replacement
Before diving into the process of replacing the hard disk drive on your Palo Alto 3050, it is essential to ensure that you have all the necessary tools and equipment. Here are the steps you should follow to prepare for the replacement:
- Gather the required tools: First, make sure you have a Phillips-head screwdriver, an anti-static wrist strap, and a replacement hard disk drive with the proper specifications suitable for your Palo Alto 3050 model.
- Backup your data: Since replacing the hard disk drive involves transferring data, it is crucial to create a backup of all your important files and configurations. This way, you can easily restore your data once the replacement is complete.
- Obtain the replacement hard disk drive: Contact your preferred vendor or Palo Alto Networks support to acquire the correct replacement hard disk drive for your Palo Alto 3050. Ensure that the drive is compatible with your device’s specifications and comes with the necessary firmware.
- Read the Palo Alto 3050 manual: Familiarize yourself with the manufacturer’s guidelines and instructions provided in the Palo Alto 3050 manual. This will give you a better understanding of the replacement process and any specific precautions you need to take.
- Take safety precautions: Before working on any computer component, it is crucial to discharge any static electricity to prevent damage. Wear an anti-static wrist strap and work on an anti-static mat or grounded surface. Additionally, ensure that you are in a clean and well-ventilated environment to avoid dust and debris.
By following these preparatory steps, you will be ready to proceed with the replacement process confidently. Taking the time to gather the necessary tools and understand the instructions will help ensure a smooth and successful replacement of the hard disk drive on your Palo Alto 3050.
Shutting Down the Palo Alto 3050
Before you can begin replacing the hard disk drive on your Palo Alto 3050, it is crucial to shut down the device properly. Here are the step-by-step instructions:
- Save and close all active sessions: Make sure that any active sessions on the Palo Alto 3050 are saved and closed. This will prevent any data loss or interruption during the shutdown process.
- Access the Palo Alto 3050 management interface: Open a web browser and enter the IP address of the Palo Alto 3050 management interface. Log in with your administrator credentials to access the device’s management console.
- Navigate to the System tab: Once logged in, navigate to the “System” tab in the management interface. This tab contains various system-level settings and controls.
- Select the Operations tab: Within the System tab, select the “Operations” option. This will take you to the Operations page, where you can perform various system-level operations.
- Click on Shutdown: On the Operations page, locate the “Shutdown” option and click on it. A confirmation dialog will appear to ensure that you want to proceed with the shutdown.
- Confirm the shutdown: In the confirmation dialog, review the details and click on the “Okay” or “Confirm” button. This will initiate the shutdown process for the Palo Alto 3050.
- Wait for the device to power down: The Palo Alto 3050 will now begin the shutdown process. Wait patiently for the device to power down completely. The time it takes may vary based on the system configuration and load.
Once the Palo Alto 3050 has completely shut down, you are ready to proceed with the next steps in replacing the hard disk drive. It is essential to follow these shutdown instructions to ensure a safe and proper replacement process for your Palo Alto 3050.
Removing the Old Hard Disk Drive
With the Palo Alto 3050 properly shut down, it’s time to remove the old hard disk drive. Follow these step-by-step instructions for a successful removal process:
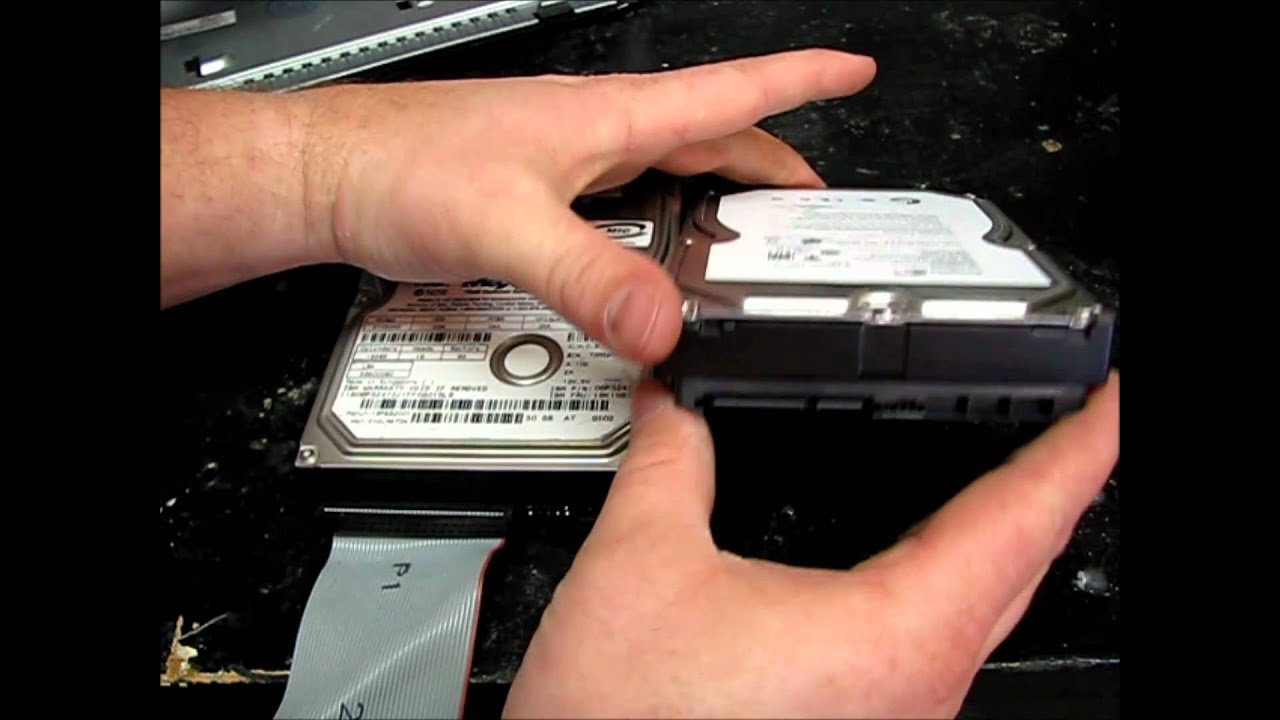
- Locate the hard disk drive: Open the chassis of the Palo Alto 3050 and locate the existing hard disk drive. It is usually located in a dedicated slot and secured with screws.
- Disconnect any cables: Before removing the hard disk drive, ensure that all cables connected to it are disconnected. This includes the power cable, data cable, and any other cables that may be attached.
- Remove the securing screws: Use a Phillips-head screwdriver to carefully remove the screws that secure the hard disk drive in place. Keep these screws in a safe place, as you will need them for installing the new drive later.
- Slide out the old hard disk drive: After removing the screws, gently slide out the old hard disk drive from its slot. Be cautious not to damage any other surrounding components or cables.
- Handle the old drive with care: Once the old hard disk drive is removed, handle it with care. Avoid dropping or rough handling, as it may cause further damage to the drive or result in data loss.
- Set aside the old drive: Place the removed hard disk drive in an anti-static bag or another safe location. It is recommended to properly dispose of the old drive according to your local regulations.
With the old hard disk drive successfully removed, you are now ready to move on to the next step – installing the new hard disk drive in your Palo Alto 3050. Take your time and ensure that you follow these instructions accurately to prevent any mishaps during the removal process.
Installing the New Hard Disk Drive
Now that the old hard disk drive has been removed from your Palo Alto 3050, it’s time to install the new drive. Follow these step-by-step instructions to ensure a successful installation:
- Prepare the new hard disk drive: Carefully unpack the new hard disk drive from its packaging, ensuring that you handle it with care to avoid any damage. Take note of any additional instructions provided by the manufacturer.
- Align the new drive: Align the new hard disk drive with the empty slot in the Palo Alto 3050. Ensure that the connectors on the drive are correctly aligned with the corresponding ports in the device.
- Secure the new drive: Once aligned, use the screws that were removed from the old drive to secure the new drive in place. Gently tighten the screws, being careful not to overtighten them.
- Reconnect the cables: Carefully reconnect the necessary cables to the new hard disk drive. This includes the power cable, data cable, and any other cables that were previously disconnected. Ensure they are securely connected.
- Double-check the connections: Before proceeding further, double-check that all the cables are connected properly. Loose or improperly connected cables can cause problems with data transfer or power supply to the new drive.
- Close the chassis: Once the new hard disk drive is securely installed and all connections are double-checked, close the chassis of the Palo Alto 3050. Ensure that all screws and fasteners are properly tightened.
With the new hard disk drive successfully installed, you are now ready to power on your Palo Alto 3050 and proceed with the verification process. It is important to follow these instructions accurately to ensure a smooth installation and prevent any damage to the new drive or surrounding components.
Powering On the Palo Alto 3050
With the new hard disk drive successfully installed in your Palo Alto 3050, it’s time to power on the device. Follow these step-by-step instructions to ensure a proper power-on process:
- Double-check the connections: Before powering on the Palo Alto 3050, double-check that all cables are securely connected to the new hard disk drive and other necessary components. This includes the power cable, data cable, and any other cables that were disconnected during the installation process.
- Ensure the power source is stable: Verify that the power source for the Palo Alto 3050 is stable and providing a consistent power supply. Use a surge protector or an uninterruptible power supply (UPS) if available to protect the device from power fluctuations.
- Power on the Palo Alto 3050: Locate the power button on the Palo Alto 3050 chassis and press it to power on the device. You may need to refer to the device’s manual for the exact location of the power button.
- Monitor the boot-up process: Once powered on, closely monitor the boot-up process of the Palo Alto 3050. The device will go through a series of self-tests and initialization procedures before becoming fully operational.
- Observe the new hard disk drive: Pay attention to any LED indicators or status lights on the new hard disk drive. These lights can provide valuable information about the drive’s status, such as power and activity.
- Wait for the device to fully boot: Depending on the system configuration and load, the Palo Alto 3050 may take a few minutes to fully boot up. Be patient and allow the device sufficient time to complete the boot process.
Once the Palo Alto 3050 has successfully powered on and completed the boot-up process, you can proceed with the final step of verifying the replacement to ensure that the new hard disk drive is functioning properly.
Verifying the Replacement
After powering on the Palo Alto 3050 with the new hard disk drive installed, it’s crucial to verify that the replacement was successful and the device is functioning properly. Follow these steps to ensure that the new drive is working as intended:
- Monitor device status: Observe the status indicators or lights on the Palo Alto 3050. Look for any error messages or warning signs related to the hard disk drive. If everything appears normal, it is a positive indication that the replacement was successful.
- Check disk detection: Access the Palo Alto 3050 management interface and navigate to the system settings. Look for the new hard disk drive in the list of detected devices. If it is listed and recognized by the system, it confirms that the replacement drive was installed correctly.
- Perform a disk health check: Utilize the built-in diagnostics or monitoring tools provided by Palo Alto Networks to check the health and condition of the new hard disk drive. Monitor the drive for any signs of high temperatures, excessive bad sectors, or other indicators of potential issues.
- Restore data from backup: If you created a backup of your data before replacing the hard disk drive, now is the time to restore it. Follow the appropriate procedures to restore your data and configurations on the Palo Alto 3050 to ensure continuity in network operations.
- Test data access and functionality: Once the data is restored, perform tests to ensure that you can access the data stored on the new hard disk drive and that all the device functionalities are working as expected. Test various network operations, such as routing, firewall rules, and VPN connectivity, to verify that the Palo Alto 3050 is fully operational.
By following these verification steps, you can confidently confirm that the replacement of the hard disk drive on your Palo Alto 3050 was successful. It is crucial to conduct these checks to ensure data integrity, system stability, and uninterrupted network operations.
Conclusion
Congratulations! You have successfully replaced the hard disk drive on your Palo Alto 3050. By following the step-by-step guide outlined in this article, you have ensured the continued performance and reliability of your network infrastructure.
Throughout the process, we emphasized the importance of proper preparation, careful handling of components, and thorough verification. These steps are crucial in minimizing the risk of data loss, system downtime, and potential damage to your Palo Alto 3050.
We started by preparing for the replacement, gathering the necessary tools, backing up data, and understanding the Palo Alto 3050 manual. We then proceeded with shutting down the device and safely removing the old hard disk drive. After that, we guided you through the installation of the new drive, ensuring proper alignment and secure connections.
With the new hard disk drive in place, we walked you through the process of powering on the Palo Alto 3050 and verifying the replacement. Monitoring status indicators, checking for disk detection, performing health checks, restoring data, and testing network operations were all critical steps to ensure a successful replacement.
Remember, if you ever encounter any issues or feel uncertain about performing the replacement yourself, it is always best to seek assistance from qualified professionals. Your network infrastructure is a vital component of your operations, and it’s important to handle it with care.
We hope that this guide has been helpful to you in replacing the hard disk drive on your Palo Alto 3050. By keeping your network equipment in good working condition, you can ensure the efficient and secure operation of your network and protect your valuable data.
Thank you for following along, and we wish you continued success in managing your Palo Alto 3050 and your network infrastructure!


