Introduction
RAM, or Random Access Memory, is a vital component of your computer that plays a crucial role in running applications and ensuring smooth multitasking. However, as you install more programs and perform various tasks on your Windows 11 system, RAM usage can quickly build up, leading to sluggish performance and reduced system efficiency.
If you find yourself constantly dealing with high RAM usage, there are several steps you can take to optimize and reduce it. By implementing these strategies, you can free up valuable memory resources and improve the overall speed and responsiveness of your computer.
In this article, we will explore some effective methods to reduce RAM usage in Windows 11. Whether you’re a casual user or a power user, implementing these techniques can significantly enhance your system’s performance and ensure a smoother computing experience.
It’s important to note that the specific methods mentioned here may vary depending on your system configuration and the programs you have installed. Nonetheless, these suggestions provide a solid starting point for reducing RAM usage and optimizing your Windows 11 system.
Before we dive into the strategies, it is crucial to understand the impact of high RAM usage on your system’s performance. When your computer’s RAM usage exceeds its available capacity, it starts relying on the hard drive’s virtual memory, which is significantly slower. As a result, you may experience slower application response times, system freezes, and excessive disk thrashing, known as “page file thrashing”.
By taking proactive measures to manage RAM usage effectively, you can improve your system’s stability, enhance multitasking capabilities, and ensure smooth performance even when running resource-intensive applications.
Check for Memory-Hungry Processes
One of the first steps in reducing RAM usage in Windows 11 is to identify and address memory-hungry processes. Some programs and background services may consume a large amount of memory, even when they’re not actively being used. Here’s how you can check for memory-hungry processes:
- Open the Task Manager by pressing Ctrl + Shift + Esc or right-clicking on the taskbar and selecting “Task Manager.”
- In the Task Manager window, click on the Processes tab.
- Click on the Memory column to sort processes in descending order by memory usage.
- Look for processes that are consuming a large amount of memory. These processes may include resource-intensive applications, browser tabs with high memory usage, or background services.
- If you identify any memory-hungry processes that you don’t need, right-click on them and choose End Task to terminate them.
It’s important to exercise caution when terminating processes, as terminating essential system processes can cause instability or result in data loss. Only end processes that you are certain are safe to terminate and are not critical for system operation.
In some cases, you may find that a specific program consistently consumes excessive memory. In such situations, consider upgrading or finding an alternative program with lower memory requirements.
By regularly checking for memory-hungry processes and terminating unnecessary ones, you can free up valuable memory resources and improve overall system performance. This step alone can make a significant difference in reducing RAM usage in Windows 11.
Disable Unnecessary Startup Programs
Windows 11 allows certain programs to launch automatically when you start your computer. While this feature can be convenient, having too many startup programs can significantly impact your system’s RAM usage. Disabling unnecessary startup programs can help reduce RAM consumption and improve overall system performance. Here’s how you can do it:
- Open the Task Manager by pressing Ctrl + Shift + Esc or right-clicking on the taskbar and selecting “Task Manager.”
- In the Task Manager window, click on the Startup tab.
- You’ll see a list of programs that launch at startup. Right-click on any program that you don’t need to open automatically and select Disable.
- Repeat the above step for each unnecessary program.
Be cautious when disabling startup programs. Ensure that you’re disabling only the programs you’re familiar with and don’t require to start automatically. Disabling critical system processes can cause startup issues or impact the functionality of certain applications.
In addition to using the Task Manager, you can also manage startup programs through the Settings app. Here’s how:
- Press Win + I to open the Settings app.
- Click on Apps and then select Startup from the left-hand menu.
- In the Startup Apps window, you’ll see a list of programs configured to start automatically. Toggle off the switch next to any unnecessary program to disable its automatic startup.
Disabling unnecessary startup programs not only reduces RAM usage but also helps improve startup times, allowing your computer to boot up faster.
Regularly reviewing and disabling unnecessary startup programs is a good practice to optimize RAM usage and ensure that only essential programs launch at startup. By reducing the number of programs running in the background, you’ll conserve system resources and enhance overall system performance.
Manage Background Apps
In addition to startup programs, background apps running in the background can consume a significant amount of RAM. Windows 11 allows certain apps to run in the background by default, even when you’re not actively using them. Managing and disabling unnecessary background apps can help reduce RAM usage and improve system performance. Here’s how you can do it:
- Open the Settings app by pressing Win + I.
- Click on Privacy & security in the left-hand menu.
- Under App permissions, click on Background apps.
- You’ll see a list of apps that are allowed to run in the background. Toggle off the switch next to any app that you don’t need running in the background.
- Repeat the above step for each unnecessary app.
It’s important to note that disabling background apps may affect certain functionalities or notifications associated with those apps. Consider your usage and needs before disabling background app permissions.
In addition to managing background apps through the Settings app, you can also disable individual app background processes using the Task Manager:
- Open the Task Manager by pressing Ctrl + Shift + Esc or right-clicking on the taskbar and selecting “Task Manager.”
- Click on the Processes tab.
- Look for any background processes related to apps you don’t need running in the background.
- Right-click on the processes and choose End Task to stop them from running.
By managing and disabling unnecessary background apps, you can free up valuable system resources, including RAM, which can lead to improved overall system performance and responsiveness.
It is recommended to regularly check and adjust background app permissions to ensure that only essential apps are allowed to run in the background. This practice can help optimize RAM usage and improve the efficiency of your Windows 11 system.
Adjust Visual Effects
Windows 11 offers various visual effects and animations to enhance the user experience. However, these visual effects can also consume valuable system resources, including RAM. Adjusting the visual effects settings can help reduce RAM usage and improve overall system performance. Here’s how you can do it:
- Open the Settings app by pressing Win + I.
- Click on System in the left-hand menu.
- On the System settings page, click on Display from the left-hand menu.
- Scroll down and click on Advanced display settings at the bottom.
- In the Advanced display settings window, click on Display adapter properties.
- In the new window that opens, click on the Advanced tab.
- Under the Performance section, click on the Settings button.
- In the Performance Options window, you can adjust various visual effects settings. To optimize RAM usage, select the Adjust for best performance option to disable all visual effects.
- If you prefer to keep some visual effects, you can manually deselect specific options while keeping others enabled.
- Click Apply and then OK to save the changes.
By adjusting the visual effects settings, you can reduce unnecessary animations, transitions, and other visual elements that consume system resources, including RAM. This can result in improved system responsiveness and reduced RAM usage.
It’s important to note that disabling visual effects may make your Windows 11 system appear less visually appealing. However, the trade-off is worth it if you prioritize performance and want to ensure optimal RAM utilization.
Additionally, if you prefer a more balanced approach, you can choose the Let Windows choose what’s best for my computer option, which allows Windows to automatically adjust the visual effects based on your system’s performance capabilities.
Regularly reviewing and adjusting the visual effects settings can help optimize RAM usage and enhance the overall performance of your Windows 11 system, particularly on computers with limited RAM capacity.
Disable Special Effects
Windows 11 includes various special effects and animations that add visual flair to your desktop and windows. While these effects can be visually appealing, they can also consume significant system resources, including RAM. Disabling special effects can help reduce RAM usage and improve overall system performance. Here’s how you can do it:
- Open the Settings app by pressing Win + I.
- Click on System in the left-hand menu.
- On the System settings page, click on Display from the left-hand menu.
- Scroll down and click on Advanced display settings at the bottom.
- In the Advanced display settings window, click on Display adapter properties.
- In the new window that opens, click on the Advanced tab.
- Under the Performance section, click on the Settings button.
- In the Performance Options window, select the Custom option.
- Now, uncheck the box next to Animate windows when minimizing and maximizing and other visual effects that you don’t need.
- Click Apply and then OK to save the changes.
By disabling special effects, such as window animations, menu fade-in, and thumbnail previews, you can conserve system resources, including RAM. This can lead to improved system responsiveness and reduced RAM usage.
When disabling special effects, keep in mind that it may affect the visual appeal and aesthetic experience of your Windows 11 desktop. However, the performance improvements can often outweigh the visual trade-offs, especially on systems with limited RAM capacity.
Alternatively, if you want to strike a balance between performance and visual appeal, you can choose the Custom option and selectively disable specific effects that you find less important.
Regularly reviewing and adjusting special effects can help optimize RAM usage and enhance the overall performance of your Windows 11 system. Experimenting with different settings will allow you to find the right balance between visual aesthetics and system performance based on your individual preferences and hardware capabilities.
Optimize Virtual Memory
Virtual memory, also known as the page file, is a system feature that allows your computer to use a portion of the hard drive as additional RAM. By optimizing the virtual memory settings, you can effectively manage the allocation of virtual memory and reduce the strain on your system’s physical RAM. Here’s how you can optimize virtual memory in Windows 11:
- Open the Settings app by pressing Win + I.
- Click on System in the left-hand menu.
- On the System settings page, click on About from the left-hand menu.
- Scroll down and click on Advanced system settings.
- In the System Properties window, go to the Advanced tab and click on the Settings button under the Performance section.
- In the Performance Options window, go to the Advanced tab, and under the Virtual memory section, click on the Change button.
- Uncheck the box that says Automatically manage paging file size for all drives.
- Select the Custom size option and enter the initial and maximum size values for the virtual memory. The recommended size is usually 1.5 times the amount of RAM installed on your system. For example, if you have 8 GB of RAM, you can set the initial and maximum size to 12 GB (12288 MB).
- Click Set and then OK to save the changes.
- Restart your computer for the new virtual memory settings to take effect.
By optimizing virtual memory, you can ensure that your system has enough virtual memory to handle demanding applications without relying excessively on physical RAM. This can help reduce RAM usage and improve system performance, particularly when running memory-intensive tasks or applications.
Keep in mind that setting the virtual memory too low or too high can affect system performance. It’s important to find the right balance based on your system’s RAM capacity and usage requirements. Additionally, if you have multiple drives, consider allocating the virtual memory to a different drive than your operating system drive to distribute the load.
Regularly reviewing and optimizing the virtual memory settings can help ensure efficient use of system resources and enhance overall system performance on your Windows 11 computer.
Uninstall Unused Software
Over time, you may accumulate a collection of software programs on your Windows 11 system that you no longer use or need. These unused programs can consume valuable disk space and memory resources, including RAM. Uninstalling such software can help reduce RAM usage and improve overall system performance. Here’s how you can uninstall unused software:
- Open the Settings app by pressing Win + I.
- Click on Apps in the left-hand menu.
- You’ll see a list of all installed apps on your system.
- Scroll through the list and identify the software programs that you no longer use or need.
- Click on the program you want to uninstall and select Uninstall.
- Follow the on-screen instructions to complete the uninstallation process.
- Repeat the above steps for each unused program you wish to remove.
It’s important to exercise caution when uninstalling software and ensure that you’re not removing any essential programs for your system’s smooth operation. Take note of the software you’re uninstalling and confirm that you no longer require it.
In addition to the Settings app, you can also use the traditional Control Panel to uninstall software:
- Open the Start menu and search for Control Panel.
- Open the Control Panel and navigate to Programs and then Programs and Features.
- You’ll see a list of installed programs.
- Select the program you want to uninstall and click on Uninstall at the top of the list.
- Follow the on-screen instructions to complete the uninstallation process.
- Repeat the above steps for each unused program you wish to remove.
By regularly uninstalling unused software, you can free up disk space, reduce memory consumption, and improve system performance. This practice not only helps optimize RAM usage but also keeps your Windows 11 system clutter-free and organized.
Remember to review your installed programs periodically and uninstall any unnecessary software to enhance the overall efficiency and performance of your Windows 11 computer.
Limit Chrome Extensions
Google Chrome is a popular web browser known for its extensive collection of extensions that provide additional features and functionality. However, having too many Chrome extensions installed can consume significant system resources, including RAM. Limiting the number of extensions you use can help reduce RAM usage and improve overall browser performance. Here’s how you can manage and limit Chrome extensions:
- Open Google Chrome on your Windows 11 system.
- Click on the three-dot menu icon in the top-right corner of the browser.
- Hover over More tools in the dropdown menu and select Extensions.
- You’ll be taken to the Extensions page where you can see a list of all installed extensions.
- Review the list and identify the extensions that you no longer need or use.
- To disable an extension, simply toggle off the switch next to it.
- If you want to remove an extension completely, click on the Remove button next to it.
- Repeat the above steps for each unnecessary or unused extension.
It’s important to note that some extensions may be essential for your browsing experience or work. It’s recommended to keep only the extensions you actively use and remove or disable those that are not essential.
Disabling or removing extensions can help reduce the memory footprint of Google Chrome and improve browsing performance, especially if you have numerous extensions installed.
Additionally, periodically reviewing your extensions can help you identify any problematic ones that may be causing excessive RAM usage or other performance issues. Consider researching and choosing lightweight alternatives for essential extensions to further optimize memory usage.
By limiting the number of Chrome extensions you have installed and keeping only the essential ones, you can significantly reduce RAM usage, improve browser performance, and ensure a smoother browsing experience on your Windows 11 system.
Use Lighter Apps
Another effective way to reduce RAM usage in Windows 11 is to opt for lighter apps or alternatives that are less resource-intensive. Lighter apps are designed to have a smaller memory footprint, allowing them to run efficiently even on systems with limited RAM. Here are some tips for using lighter apps:
- Consider using web-based or online alternatives: Many heavy desktop applications have web-based or online counterparts that offer similar functionality without the need for extensive system resources. For example, instead of using a resource-intensive video editor, you can opt for an online video editing tool.
- Explore lightweight versions of popular apps: Some popular applications, such as web browsers, have lighter versions specifically designed to consume fewer resources. For example, Google has a lightweight version of Google Chrome called Chrome Lite.
- Use mobile apps on your computer: Certain mobile apps are optimized to run smoothly on devices with lower memory capacities. You can use Android emulators or app players to install and use these mobile apps on your Windows 11 system.
- Consider open-source alternatives: Open-source software tends to be lightweight and optimized for better performance. Explore open-source alternatives to resource-intensive applications and see if they meet your requirements.
- Avoid running multiple resource-intensive apps simultaneously: Running multiple demanding applications simultaneously can quickly consume a large amount of RAM. If possible, close unnecessary apps or use them one at a time to minimize resource usage.
By using lighter apps and alternatives, you can significantly reduce RAM usage and improve system performance on your Windows 11 computer. Not only will this free up valuable memory resources, but it will also help ensure a smoother and more efficient computing experience.
Remember to assess your specific needs and requirements when choosing lighter apps. While they may have reduced resource requirements, they should still fulfill the functionalities you require without compromising productivity or usability.
Regularly exploring and experimenting with lighter app options can lead to a noticeable improvement in your system’s performance and help you make the most of the available RAM on your Windows 11 device.
Adjust Power Settings
Adjusting the power settings on your Windows 11 system can have a significant impact on RAM usage. By optimizing the power settings, you can control how your computer manages system resources, including RAM, and strike a balance between performance and energy efficiency. Here’s how you can adjust the power settings:
- Open the Settings app by pressing Win + I.
- Click on System in the left-hand menu.
- On the System settings page, click on Power & sleep from the left-hand menu.
- Under the Related settings section, click on Additional power settings.
- A new window will open, showing you the power plans available on your system.
- Select the power plan you are currently using and click on Change plan settings next to it.
- In the next window, click on Change advanced power settings.
- Look for the category called Processor power management and expand it.
- Under this category, look for Maximum processor state and set it to a lower value. This will limit the maximum performance of your processor, reducing the strain on RAM.
- Click Apply and then OK to save the changes.
It’s important to note that adjusting the power settings to limit the maximum processor state may result in slightly reduced performance for certain tasks. However, it can significantly reduce RAM usage and optimize system resources.
You can experiment with different power settings and values to find the right balance between performance and energy efficiency that suits your needs. You may also consider using the “Power Saver” power plan, which automatically optimizes power settings for lower resource usage.
By adjusting the power settings, you can effectively manage system resources, including RAM, and improve overall system performance and energy efficiency on your Windows 11 computer.
Update Drivers
Outdated or incompatible drivers can contribute to higher RAM usage and poor system performance on your Windows 11 computer. Drivers serve as a bridge between your hardware and the operating system, and keeping them up to date ensures optimal compatibility and performance. Here’s how you can update drivers to reduce RAM usage:
- Open the Start menu and search for Device Manager.
- Open the Device Manager and expand the categories to find the specific device for which you want to update the driver.
- Right-click on the device and select Update driver.
- Windows will search for the latest driver software online. If an update is available, follow the on-screen instructions to download and install it.
- Repeat the above steps for other devices as necessary, particularly for essential components like the graphics card, network adapter, and chipset.
Another convenient way to update drivers is by using third-party driver update software. These tools automatically scan your system, identify outdated drivers, and provide a streamlined process for updating them. However, exercise caution and research reputable software to ensure the security and legitimacy of the tool.
Regularly updating your drivers not only improves overall system performance but can also optimize resource utilization, including RAM. Updated drivers often include bug fixes, performance enhancements, and improved memory management, reducing the likelihood of memory-related issues and errors.
In addition to updating drivers, it’s also crucial to keep your Windows 11 operating system up to date. Windows updates often include important driver updates, performance improvements, and bug fixes that can enhance system stability and optimize resource usage.
By ensuring that your drivers and operating system are up to date, you can minimize compatibility issues, optimize RAM usage, and maintain a smoothly running Windows 11 system.
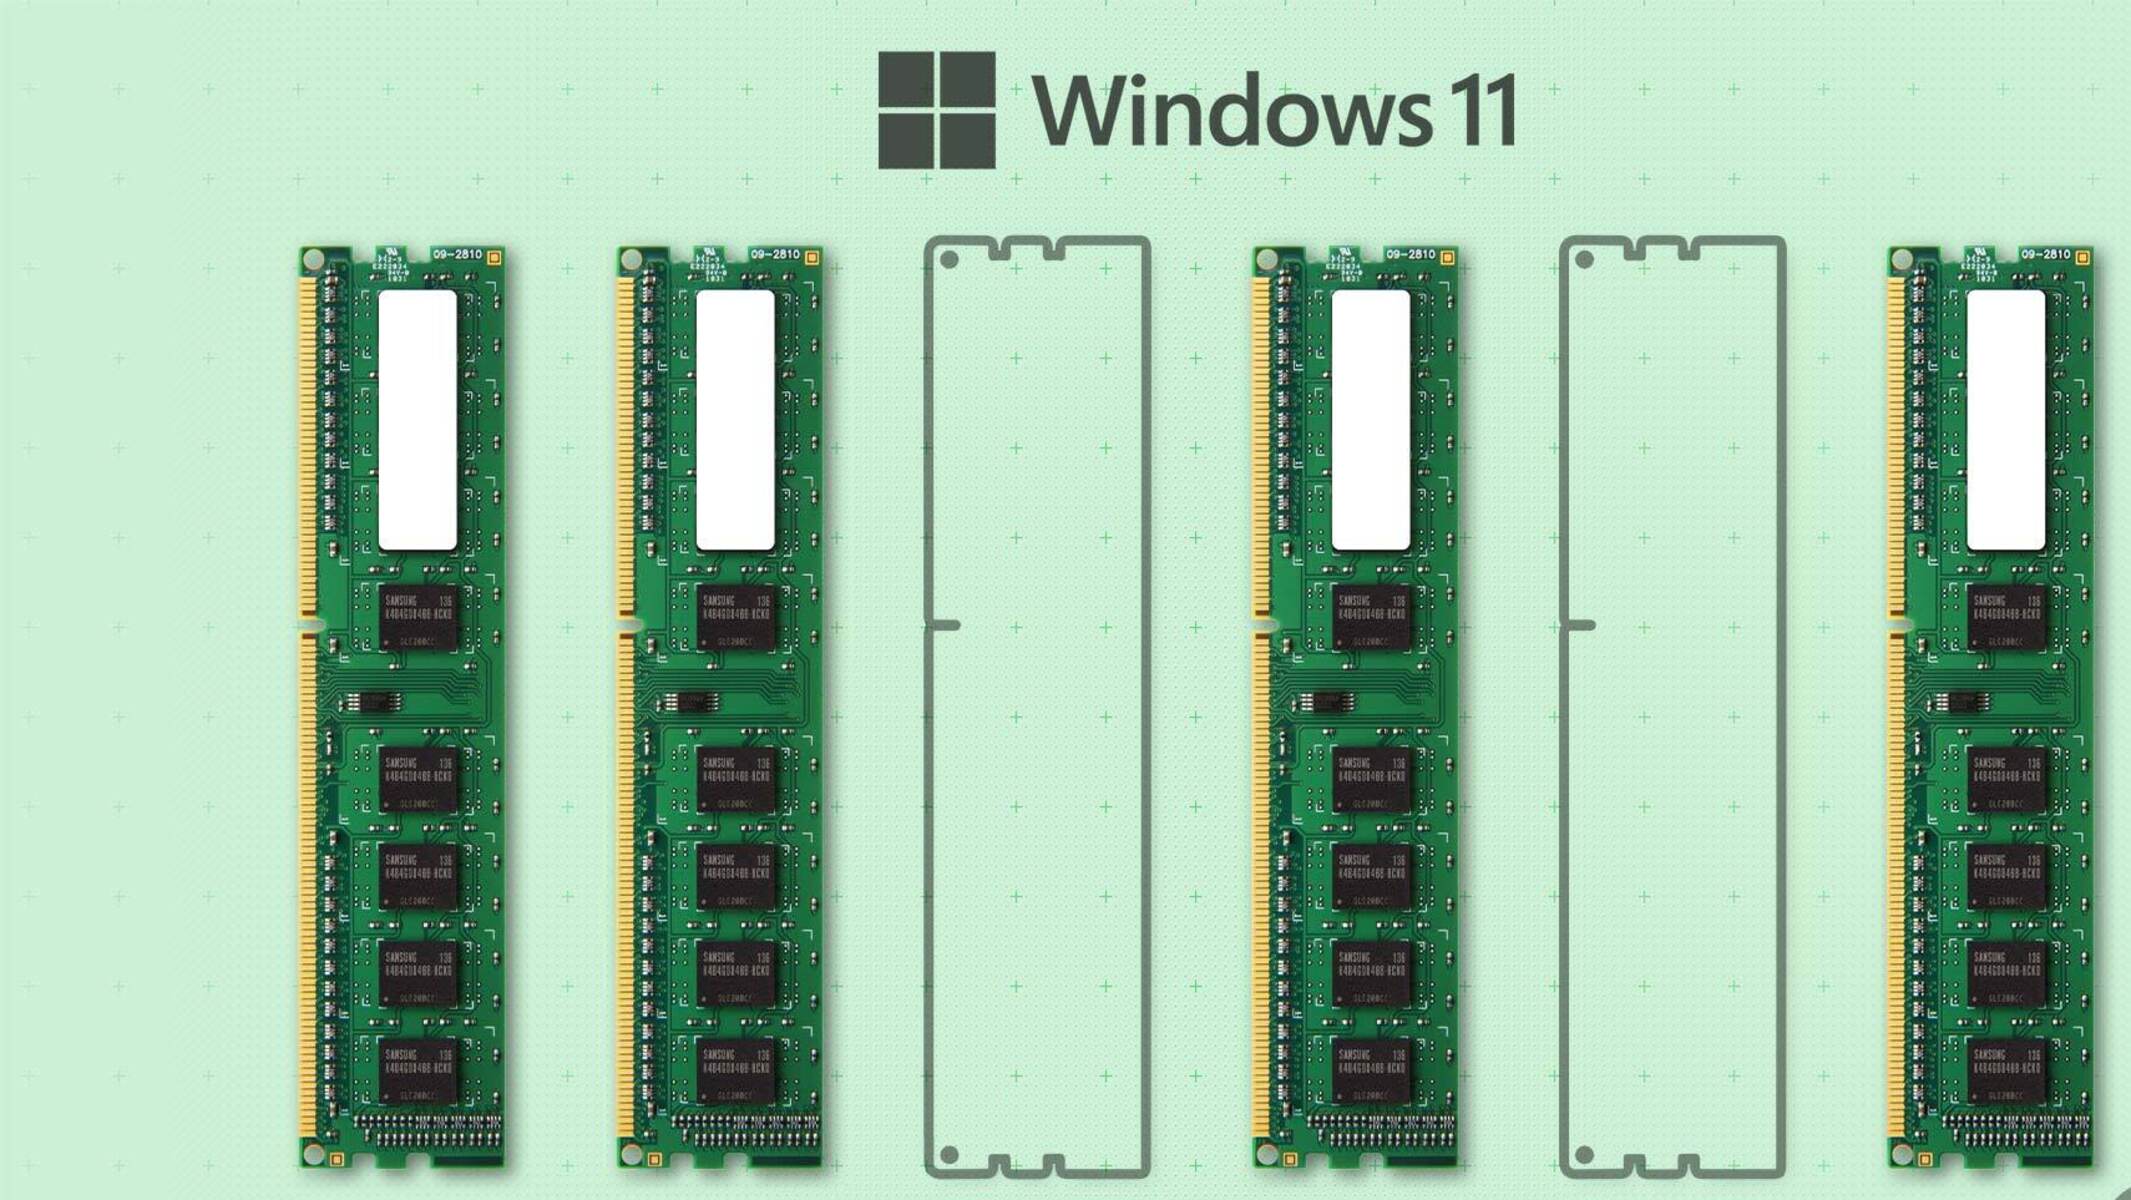
Upgrade RAM
If you’ve tried various optimization techniques and are still experiencing high RAM usage on your Windows 11 computer, it may be time to consider upgrading your RAM. RAM (Random Access Memory) is a vital hardware component that directly affects system performance, multitasking capabilities, and overall responsiveness. Upgrading your RAM can provide a substantial boost to your system’s memory capacity, allowing it to handle more demanding tasks and applications without excessive strain on resources. Here’s what you need to know about upgrading your RAM:
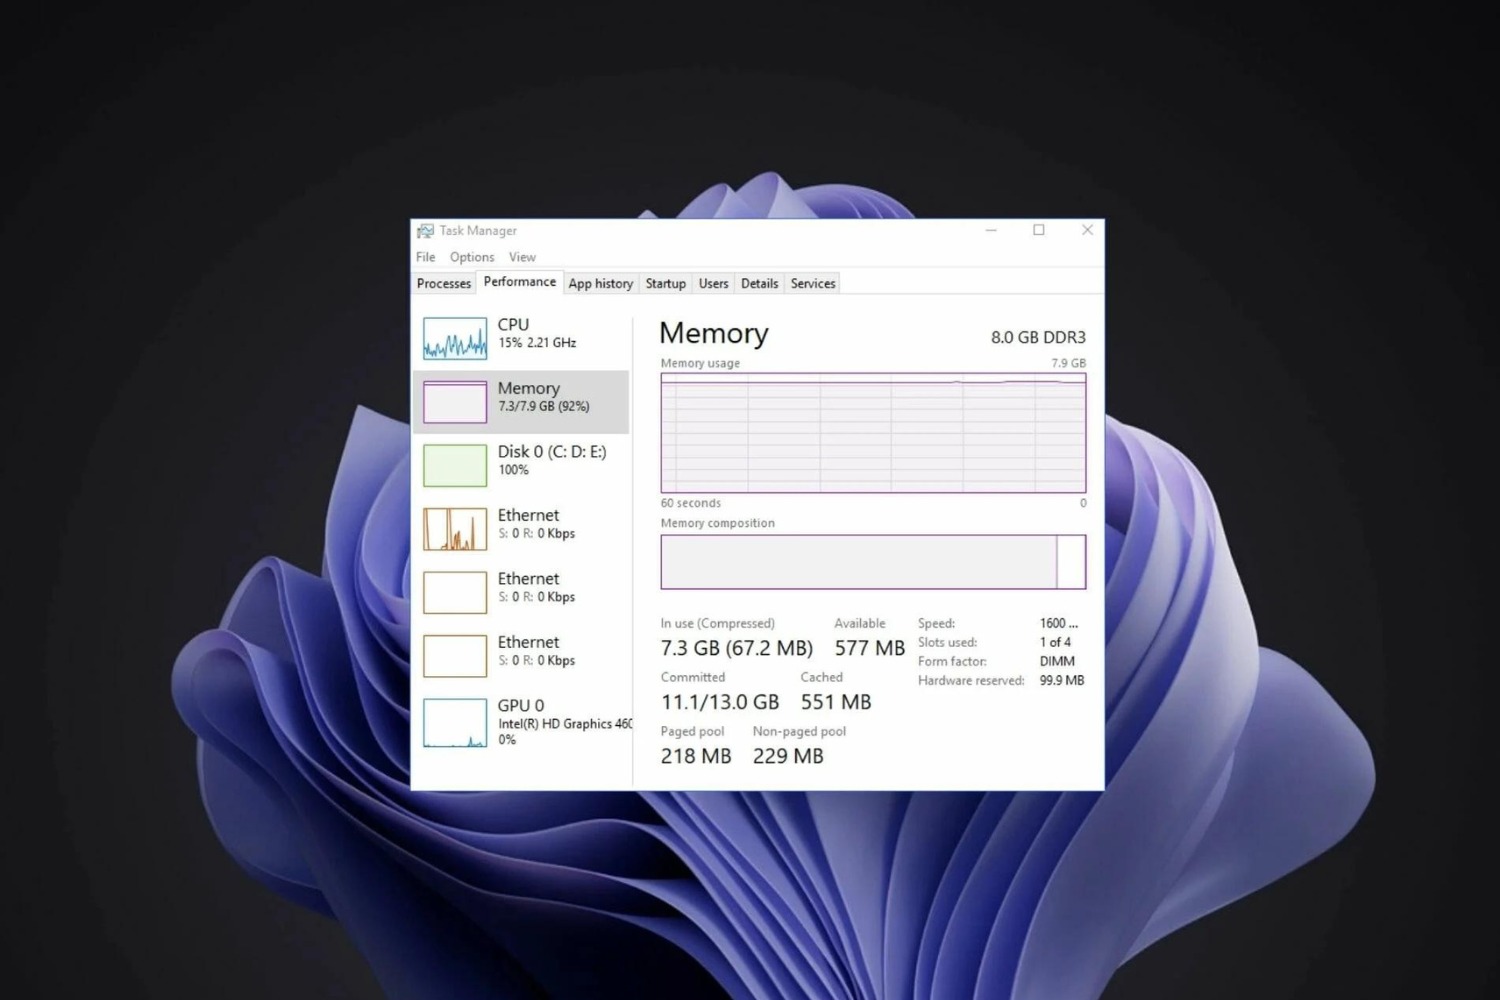
Determine your current RAM capacity: Check your computer’s specifications or use the Windows Task Manager to identify the amount of installed RAM. This will help you understand the maximum capacity and type of RAM that your system supports.
Identify RAM module compatibility: Different computer models and motherboards have specific requirements for RAM modules. It’s crucial to ensure compatibility with your system before purchasing new RAM. Check your computer’s documentation or consult with a technical expert to determine the compatible RAM module size, type, and speed.
Purchase and install the new RAM: Once you’ve identified the compatible RAM module, you can purchase it from reputable hardware retailers. Make sure to handle the RAM sticks carefully, follow the installation instructions provided by the manufacturer, and ensure proper grounding to avoid any damage to your components.
Restart and verify the new RAM: After installing the new RAM, restart your computer and check if the system recognizes the upgraded memory. You can verify this by accessing the Task Manager or using third-party hardware monitoring software to confirm the increased RAM capacity.
Upgrading your RAM can significantly improve multitasking, reduce the likelihood of memory-related issues, and offer a noticeable boost to overall system performance. With increased RAM capacity, your Windows 11 computer can handle resource-intensive applications, run virtual machines, and handle large files more efficiently.
It’s important to note that RAM upgrades require compatible hardware and some technical knowledge. If you are uncertain or uncomfortable performing the upgrade yourself, it’s advisable to seek assistance from a qualified technician to ensure a proper and successful installation.
By upgrading your RAM, you can ensure that your system has ample memory resources to handle today’s demanding applications and provide a smoother and more responsive Windows 11 experience.
Conclusion
Reducing RAM usage in Windows 11 is essential for optimizing system performance and ensuring a smooth computing experience. By implementing the strategies discussed in this article, you can effectively manage and reduce RAM usage, resulting in improved overall system responsiveness. From checking for memory-hungry processes to upgrading RAM, each approach plays a vital role in enhancing your Windows 11 system’s efficiency.
Remember to regularly review and manage memory-hungry processes, disabling unnecessary startup programs, and managing background apps. Adjusting visual effects and disabling special effects can also contribute to reducing RAM usage. Optimizing virtual memory allocation ensures efficient usage of RAM resources. Additionally, uninstalling unused software, limiting Chrome extensions, and using lighter apps are effective ways to minimize RAM consumption.
Managing power settings and updating drivers contribute to improved RAM usage optimization and overall system performance. And finally, if needed and compatible, upgrading RAM can provide a substantial boost to your system’s memory capacity.
It’s important to note that not all strategies may be relevant or necessary for every Windows 11 user. Each system configuration is unique, and it’s crucial to assess and implement the techniques that best suit your hardware capabilities and computing requirements.
By combining these strategies and keeping your Windows 11 system well-maintained and optimized, you can enjoy a more efficient, responsive, and enjoyable computing experience.