Introduction
Welcome to our guide on how to put thermal paste on your GPU. If you are a gamer or use your computer for resource-intensive tasks, you are likely familiar with the importance of maintaining optimal temperatures for your system. Over time, the thermal paste on your GPU can dry out or become less effective, resulting in higher temperatures and reduced performance. Applying fresh thermal paste is a simple yet effective solution to improve cooling and ensure your GPU runs at its best.
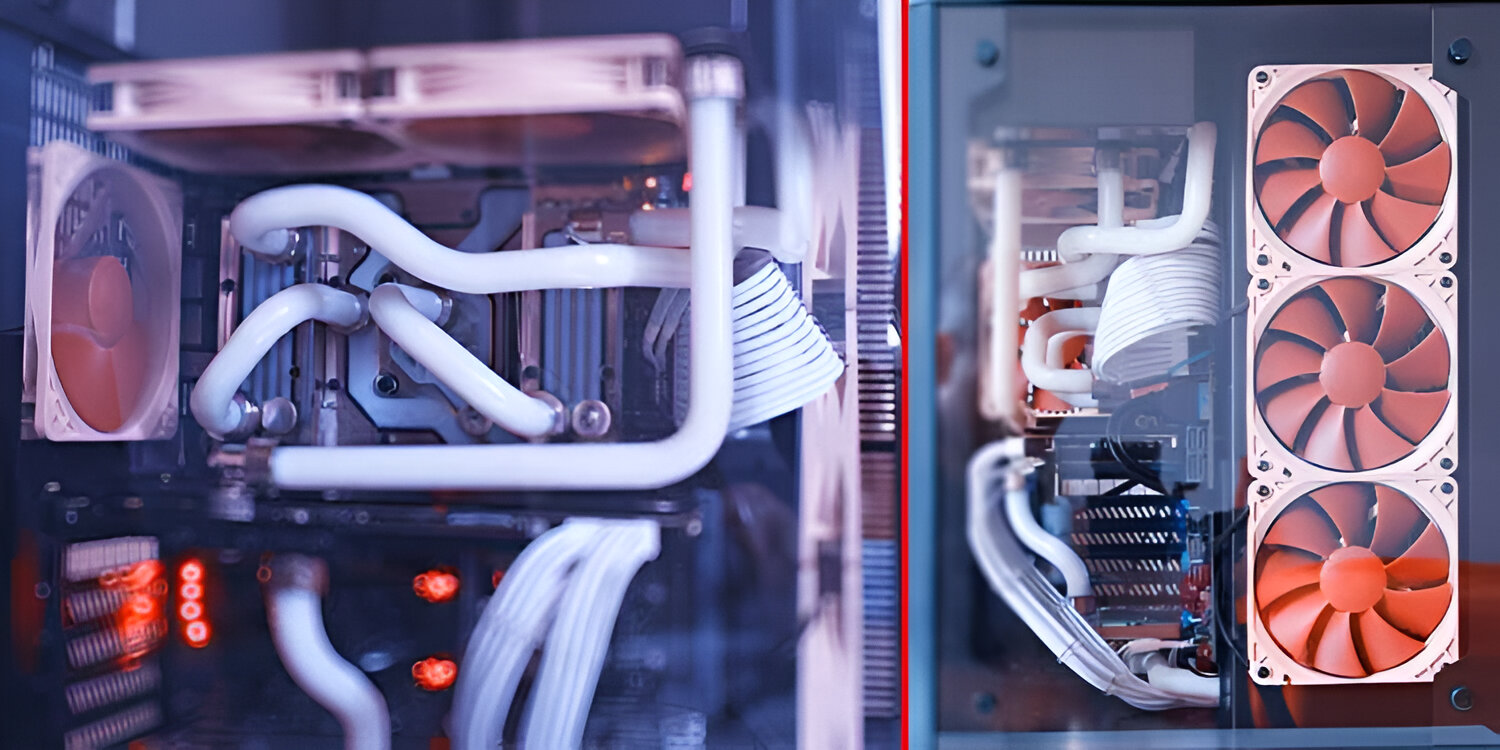
Thermal paste, also known as thermal compound, is a crucial component in heat dissipation. It is a high-conductivity substance that is applied between the GPU die and the heatsink. Its primary purpose is to fill in the microscopic gaps and imperfections between the two surfaces, enhancing the transfer of heat from the GPU to the heatsink. By improving thermal conductivity, the GPU can dissipate heat more efficiently, preventing overheating and maintaining optimal performance.
In this guide, we will walk you through the step-by-step process of applying thermal paste on your GPU. We will also provide tips on cleaning the GPU and removing the old thermal paste, ensuring you have a clean surface for a fresh application. With the right tools and a little bit of patience, you can significantly improve your GPU’s cooling efficiency and potentially extend its lifespan.
Please note that while applying thermal paste is a relatively simple process, it is crucial to take precautions and follow the guidelines carefully. Any mishandling can lead to damage to your GPU or void the warranty. If you are unsure or uncomfortable performing this process yourself, it is recommended to seek assistance from a professional or contact the GPU manufacturer for guidance.
Now, let’s gather the necessary tools and materials before we dive into the step-by-step guide.
What Is Thermal Paste and Why Is It Important?
Before we delve into the process of applying thermal paste to your GPU, let’s first understand what thermal paste is and why it plays a vital role in maintaining optimal temperatures for your system.
Thermal paste, also known as thermal compound, is a heat-conductive substance that is applied between the GPU die and the heatsink. It helps to fill in the microscopic imperfections and gaps between the two surfaces, ensuring efficient heat transfer. You may wonder why we need this extra layer when the GPU and heatsink are physically in contact with each other.
The answer lies in the nature of the surfaces themselves. The metal surfaces of the GPU die and the heatsink may appear smooth to the naked eye, but under microscopic examination, they are actually filled with tiny imperfections and irregularities. These imperfections prevent the surfaces from making direct and intimate contact, leading to air gaps and reduced heat transfer.
Thermal paste acts as a bridge between the GPU die and the heatsink, filling in these imperfections and creating a more effective heat transfer pathway. It has high thermal conductivity, allowing heat to pass through it more efficiently than air. By ensuring better thermal contact, thermal paste aids in dissipating heat away from the GPU, preventing overheating and maintaining optimal performance.
Without proper thermal paste or with dried-out thermal paste, heat transfer can be hampered, leading to increased temperatures. This can result in several issues, including GPU throttling, reduced performance, system instability, and potentially even permanent damage to the GPU. Therefore, it is important to periodically check the condition of your thermal paste and reapply it if necessary.
It’s worth noting that not all thermal pastes are created equal. There are different types and qualities available in the market, ranging from basic silicone-based thermal pastes to high-performance metal-based compounds. The choice of thermal paste depends on factors such as your system’s cooling needs, budget, and personal preferences.
In the next section, we will discuss the tools and materials you will need to complete the process of applying thermal paste to your GPU. Let’s get started!
Tools and Materials Needed
Before you begin the process of applying thermal paste to your GPU, it’s essential to gather the necessary tools and materials. Having everything prepared ensures a smooth and efficient application. Here’s a list of what you’ll need:
- Isopropyl Alcohol and Lint-free Cloth: You’ll need isopropyl alcohol (preferably 90% or higher concentration) and a lint-free cloth to clean the GPU and remove the old thermal paste. Isopropyl alcohol helps to dissolve and remove any residual grease or dirt, providing a clean surface to apply the new thermal paste.
- Thermal Paste: Of course, you’ll need thermal paste itself. As mentioned earlier, there are various types available, so choose one that suits your needs and budget. Silicone-based thermal pastes are generally more affordable and suitable for average users, while metal-based alternatives offer higher thermal conductivity and are ideal for users in need of top-tier cooling performance.
- Applicator: There are several options for applying thermal paste. Some thermal pastes come with a pre-applied applicator, such as a brush or spatula, making the process easier. If your thermal paste doesn’t include an applicator, you can use a plastic syringe, a small ziplock bag with a cut corner, or even a plastic spreader. The goal is to apply a thin and even layer of thermal paste.
- Disposable Gloves: While not mandatory, wearing disposable gloves can help keep your hands clean and prevent the transfer of oils and dirt onto the GPU and thermal paste. This is especially important if you’re working with high-performance thermal pastes that are more sensitive to contamination.
- Clean and Well-lit Workspace: Find a clean and well-lit workspace to perform the process. A clutter-free area with good lighting will help you see any small details and ensure precision during the application.
- Anti-static Wrist Strap (optional): While not strictly necessary, using an anti-static wrist strap can help protect your GPU from static discharge. If you have one available, connect it to a grounded part of your workspace to prevent accidental damage to your GPU.
Ensure you have all these tools and materials ready before you proceed. This will help you complete the process smoothly and efficiently, without any interruptions. Once you’re ready, we can move on to the step-by-step guide on how to apply thermal paste to your GPU.
Step-by-Step Guide to Applying Thermal Paste on GPU
Now that you have gathered all the necessary tools and materials, let’s dive into the step-by-step process of applying thermal paste to your GPU. Remember to follow these instructions carefully to ensure a successful application:
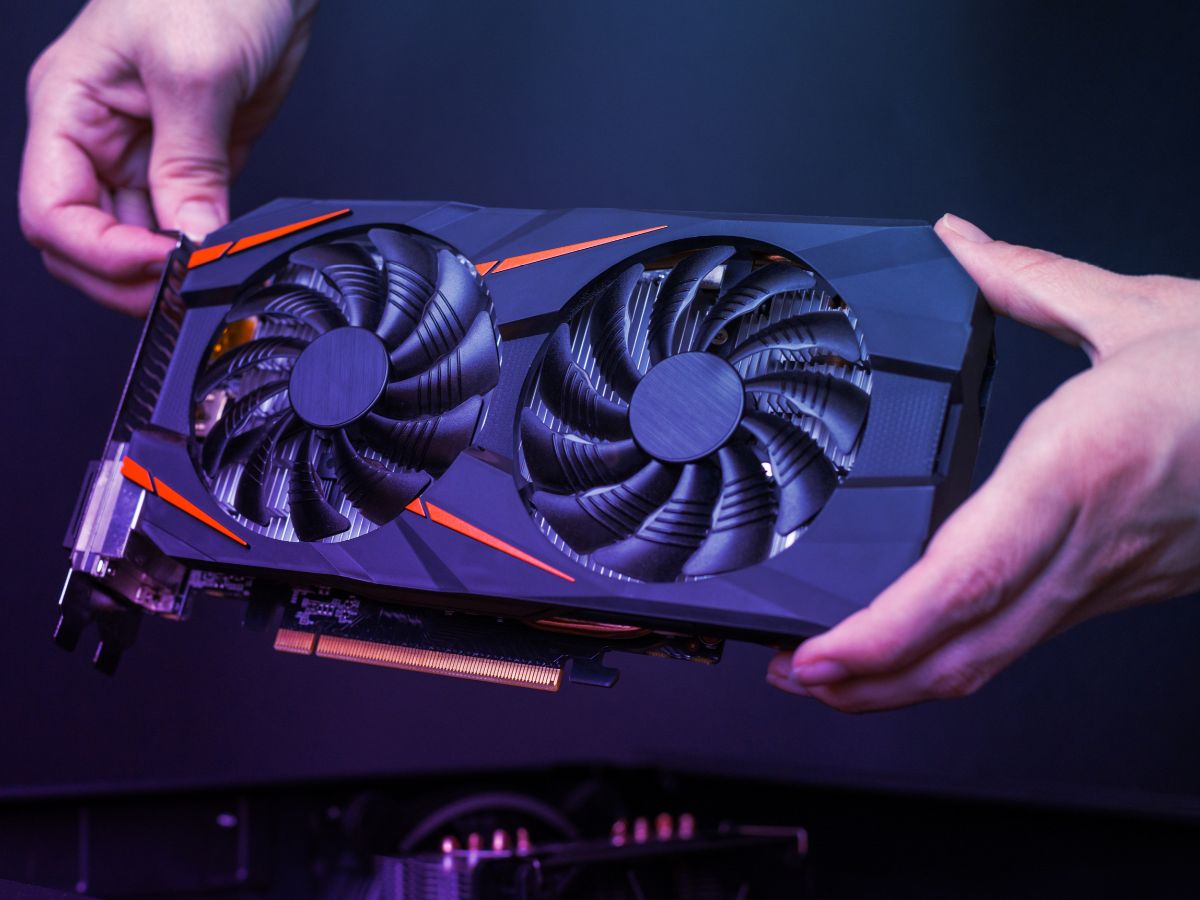
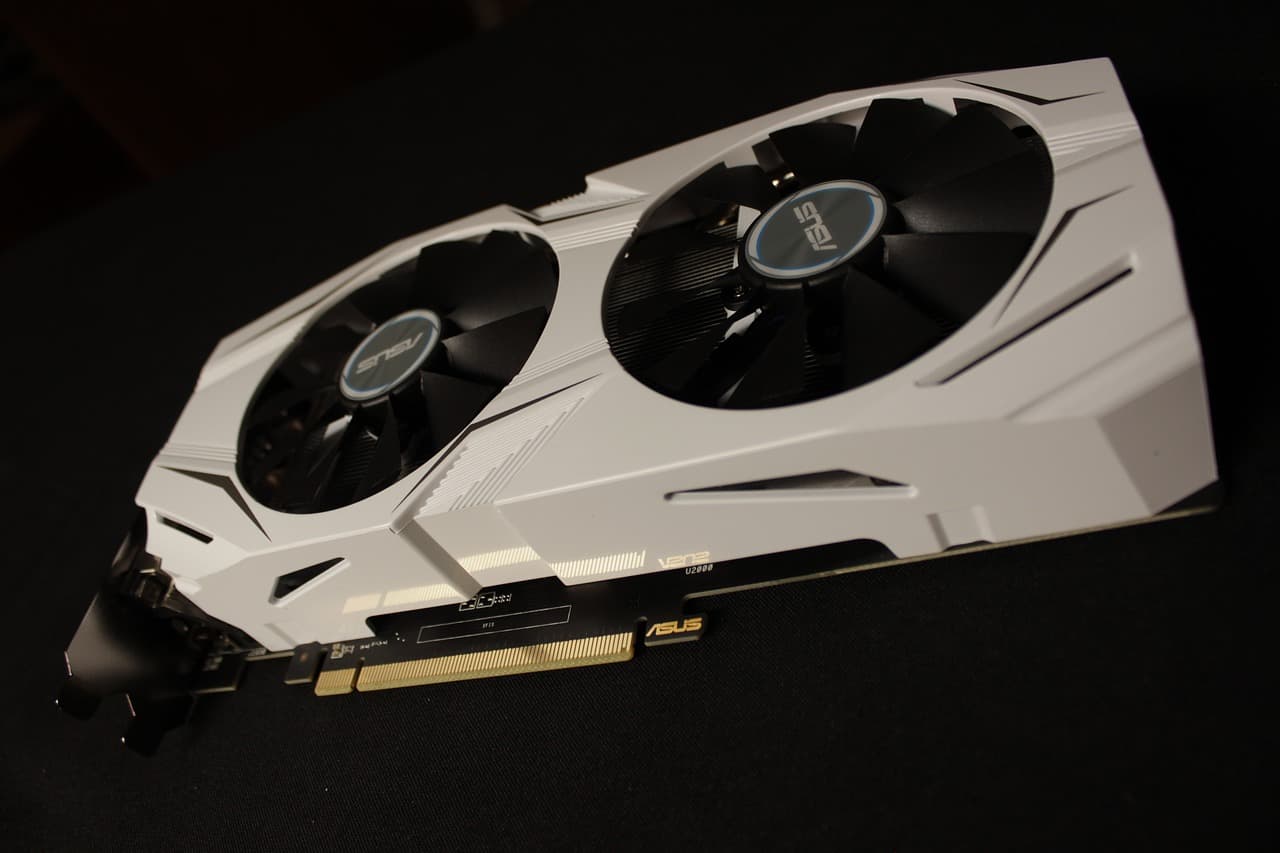
- Prepare the GPU: Start by turning off your computer and disconnecting all power sources. Carefully remove the GPU from its slot and place it on a clean, static-free surface.
- Clean the GPU: Put on the disposable gloves and use the lint-free cloth to wipe off any dust or debris from the GPU. Pour a small amount of isopropyl alcohol onto the cloth and gently clean the GPU’s surface, making sure to remove any old thermal paste residue. Take your time to ensure the surface is clean and dry before proceeding.
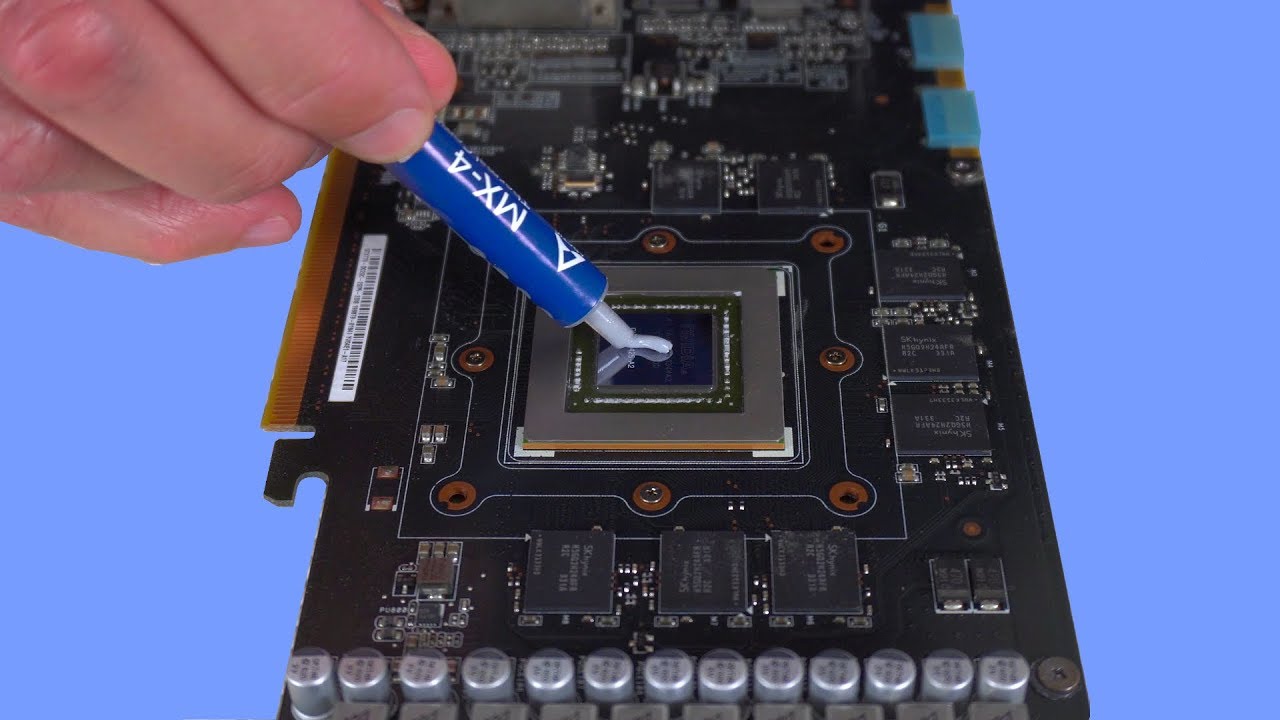
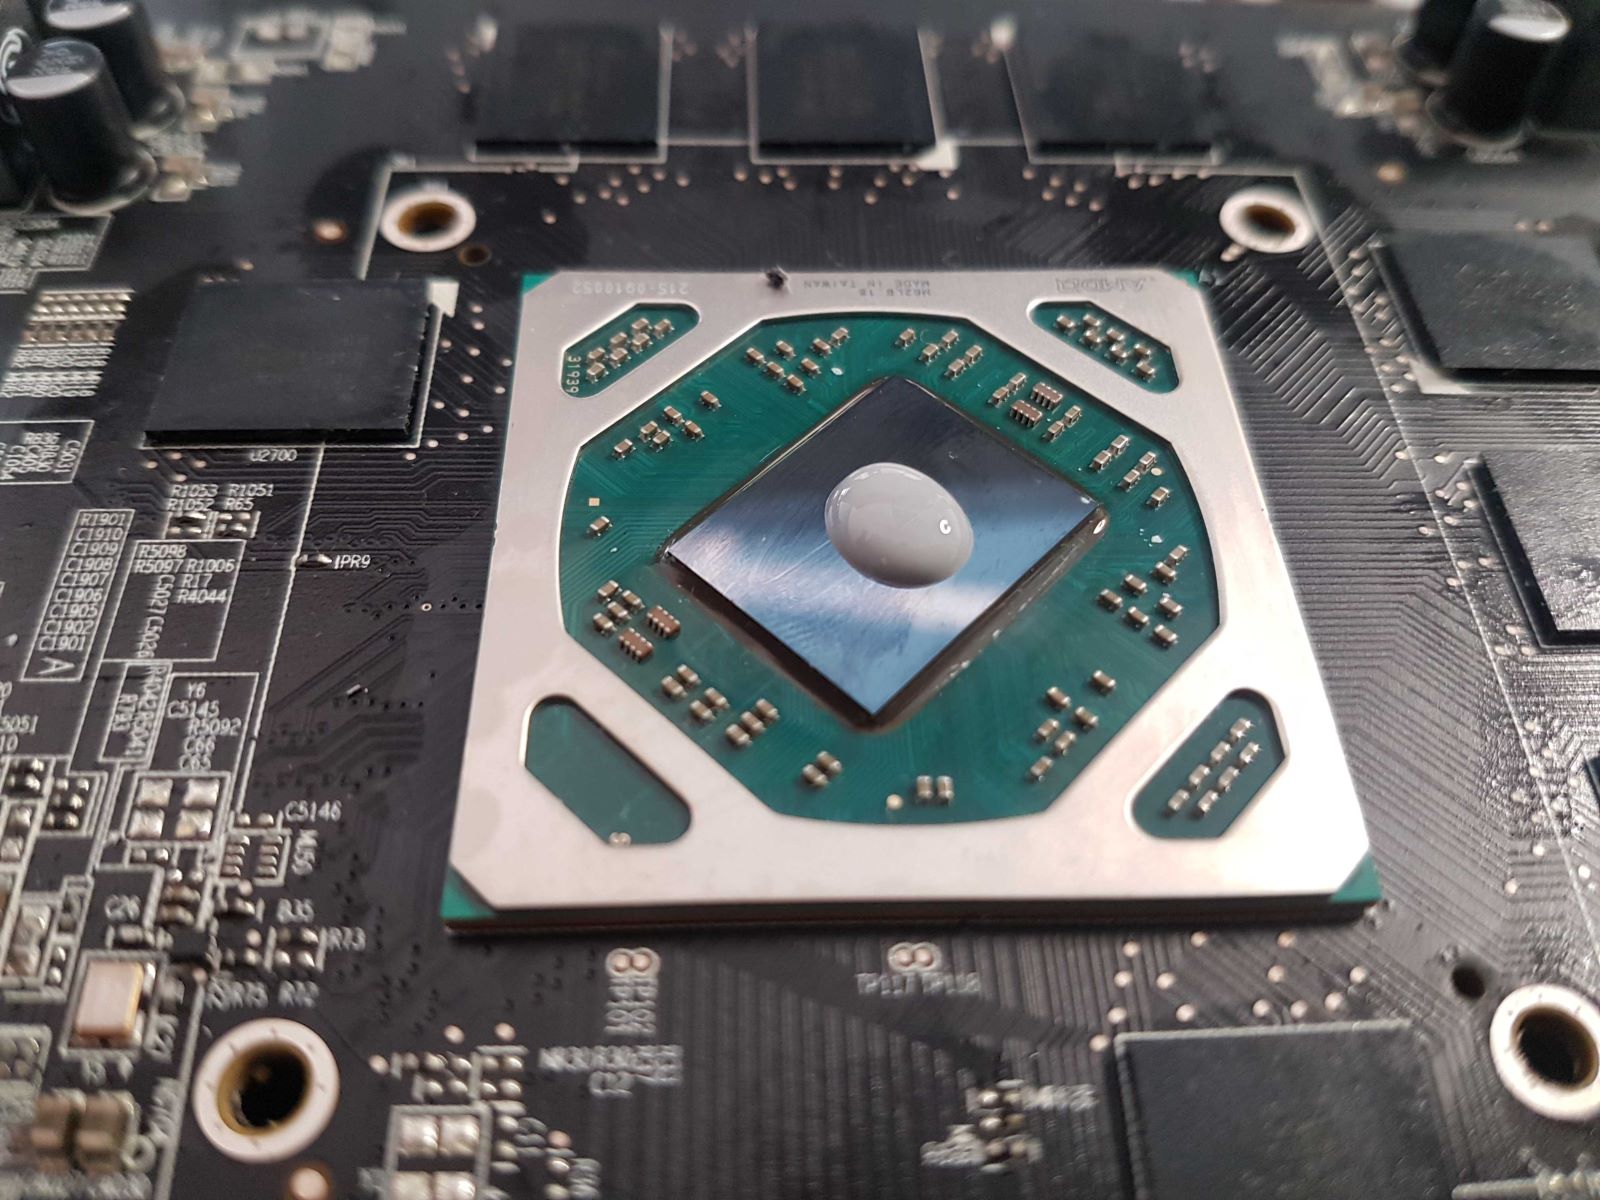
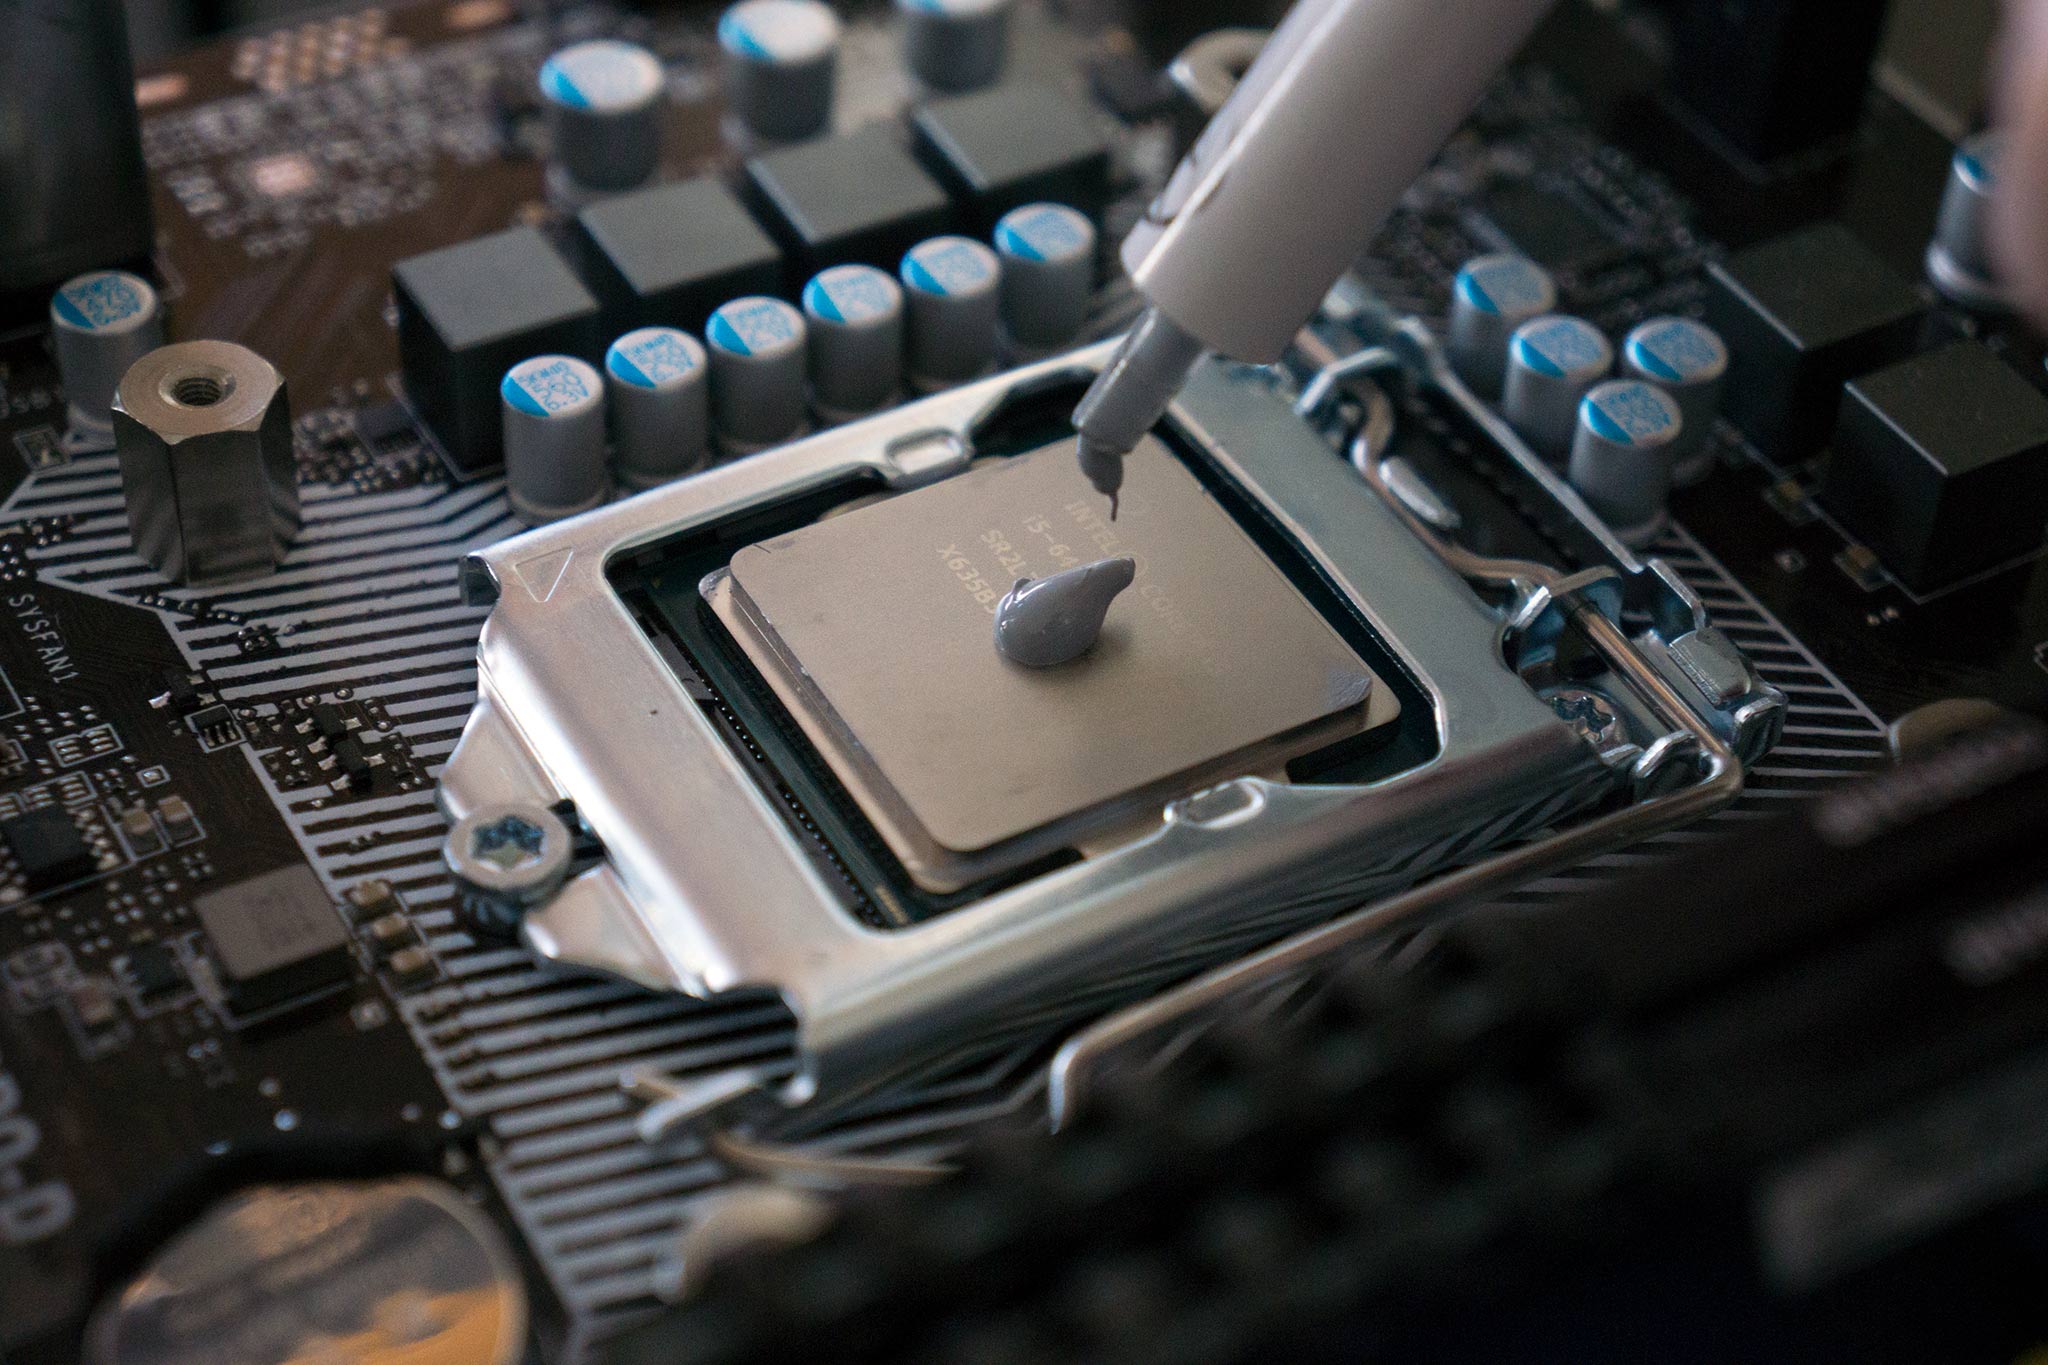
- Applying the Thermal Paste: Now, it’s time to apply the thermal paste. If your thermal paste comes with a pre-applied applicator, follow the instructions provided. If not, squeeze a small amount of thermal paste, roughly the size of a pea, onto the center of the GPU die. Using your preferred applicator, spread the thermal paste evenly in a thin layer, covering the entire surface of the die. Take care not to use too much paste, as excess can lead to poor heat transfer.
- Securing the GPU back in Place: After properly applying the thermal paste, carefully place the GPU back into its slot, ensuring it is properly aligned. Firmly press down until the GPU is securely seated in its slot. Double-check that any additional GPU power cables are reconnected as well.
- Testing the GPU Temperature: Once the GPU is back in place, power on your computer and monitor the GPU temperature. You can use software like MSI Afterburner or GPU-Z to monitor real-time temperatures. Run some demanding applications or games to stress the GPU and observe the temperature readings. If everything is functioning correctly, you should notice improved cooling performance and lower temperatures compared to before.
That’s it! You’ve successfully applied thermal paste to your GPU, providing better heat transfer and potentially improving overall system performance. Remember to periodically monitor your GPU temperatures and consider reapplying thermal paste every year or so, depending on usage and manufacturer recommendations.
In the next section, we will discuss cleaning the GPU and removing the old thermal paste in more detail.
Cleaning the GPU and Removing Old Thermal Paste
Before applying fresh thermal paste to your GPU, it’s crucial to properly clean the GPU and remove any remnants of the old thermal paste. This ensures a clean surface for optimal thermal conductivity. Follow these steps to clean your GPU:
- Prepare the GPU: Start by turning off your computer and disconnecting all power sources. Carefully remove the GPU from its slot and place it on a clean, static-free surface.
- Remove the Heatsink: Most GPUs have a heatsink attached with screws. Use the appropriate screwdriver to remove the screws and detach the heatsink from the GPU. Take note of the orientation and arrangement of any screws or brackets, as you’ll need to remember this for reassembly.
- Clean the Heatsink: Use a can of compressed air to blow away any loose dirt or debris from the heatsink. If there are any stubborn particles, you can gently wipe them away with a lint-free cloth. Make sure the heatsink is completely clean before proceeding.
- Remove the Old Thermal Paste: Apply a small amount of isopropyl alcohol to a lint-free cloth. Gently wipe the GPU die and the heatsink base to remove the old thermal paste. Be careful not to use excessive force, as you don’t want to damage any components. Repeat this process until both surfaces are clean and free of residue.
- Clean the Edges and Screw Holes: Inspect the edges and screw holes of the GPU and heatsink for any remaining thermal paste. Use a cotton swab dipped in isopropyl alcohol to clean these areas, ensuring a thorough removal of all old paste.
- Allow the Surfaces to Dry: After cleaning, let both the GPU die and the heatsink base air dry completely. Make sure that no moisture remains before proceeding with the thermal paste application.
By properly cleaning the GPU and removing the old thermal paste, you create a clean and smooth surface for the new thermal paste to adhere to. This ensures better heat transfer and improves the overall effectiveness of your cooling solution.
Now that the GPU and heatsink are clean and dry, you are ready to apply the fresh thermal paste. In the next section, we will guide you through the process of applying thermal paste for optimal heat dissipation.
Applying the Thermal Paste
With your GPU and heatsink surfaces thoroughly cleaned and dried, it’s time to apply the thermal paste. Follow these steps to ensure a proper and effective application:
- Choose the Right Amount: Using too much or too little thermal paste can both have negative effects on heat transfer. As a general guideline, a small pea-sized amount of thermal paste is sufficient for most GPUs. Avoid excessive application, as it can lead to the thermal paste oozing out and causing a mess.
- Center Application: Place the desired amount of thermal paste onto the center of the GPU die. The pressure from the heatsink will evenly distribute the paste across the surface. Be careful not to apply the thermal paste too close to the edges, as it can potentially spill over and create a mess during reassembly.
- Spread the Paste: To achieve an even layer of thermal paste, you’ll need to spread it across the entire surface of the GPU die. There are different methods you can use, depending on the type of applicator you have or personal preference. You can use a plastic spreader, a plastic syringe, or even a plastic bag with a cut corner. Gently and evenly spread the thermal paste across the die, ensuring proper coverage without any air bubbles.
- Avoid Excessive Pressure: When spreading the thermal paste, use light and even pressure. Applying too much force can lead to an uneven spread and damage the delicate electronic components. Take your time and ensure a smooth and consistent layer of thermal paste across the entire die.
- Double-Check for Even Coverage: After spreading the thermal paste, visually inspect the GPU die to ensure there are no gaps or areas with excessive paste. The goal is to achieve a thin and uniform layer for optimal thermal conductivity.
Remember, the key to applying thermal paste is to strike a balance between too little and too much. A proper application ensures maximum heat transfer efficiency and helps maintain optimal GPU temperatures.
Now that you’ve successfully applied the thermal paste, it’s time to secure the GPU back into its slot. In the next section, we will guide you through the process of safely reassembling your GPU.
Securing the GPU back in Place
With the thermal paste applied, it’s time to secure the GPU back into its slot and ensure proper installation. Follow these steps to safely reassemble your GPU:
- Align the GPU: Carefully place the GPU back into its slot, ensuring it is properly aligned with the PCIe slot on the motherboard. Apply gentle and even pressure to insert the GPU firmly into the slot.
- Secure the GPU: Once the GPU is properly aligned, use the screws or brackets that were removed earlier to secure it in place. Make sure that the GPU is snugly and securely fastened, but avoid over-tightening the screws, as this can cause damage to the GPU or the motherboard. Refer to the manufacturer’s guidelines for the recommended torque.
- Reconnect Power Cables: Take a moment to ensure that any power cables, such as PCIe power connectors, are properly connected to the GPU. Check that each cable is securely seated in its respective connector. It’s important to provide adequate power to the GPU for proper functioning.
- Check for Proper Clearance: Before powering on your system, make sure there is appropriate clearance around the GPU and that no cables or other components are obstructing the fan or heatsink. Proper airflow is essential for efficient cooling.
- Close the Computer Case: Once you have confirmed that the GPU is properly secured and there are no obstructions, close the computer case and fasten any screws or latches to secure it in place. Ensure that all cables are neatly organized and out of the way to promote airflow.
By following these steps, you will securely reassemble your GPU and ensure that it is properly installed in your computer. Now, it’s time to power on your system and check the GPU temperature to see the effect of the new thermal paste.
In the next section, we will guide you on how to test the GPU temperature and monitor its performance.
Testing the GPU Temperature
After applying thermal paste and securing your GPU back in place, it’s crucial to test the GPU temperature and monitor its performance to ensure that the thermal paste application was successful. Here’s how you can do it:
- Power on your System: Start your computer and let it boot up normally.
- Monitor the GPU Temperature: Install GPU monitoring software such as MSI Afterburner or GPU-Z to track the GPU temperature in real-time. These programs provide detailed information about your GPU’s performance, including temperature readings.
- Run Stress Tests: To stress your GPU and evaluate its thermal performance, you can run intensive graphics applications or benchmarking tools. Ideally, choose applications that push your GPU to its limits to get accurate temperature readings. Monitor the temperature during the stress test and observe how it behaves.
- Compare Results: Compare the new temperature readings with the previous ones before applying the thermal paste. If you notice a significant decrease in GPU temperatures, it indicates that the thermal paste application was successful in improving heat dissipation. Lower temperatures contribute to performance stability, reduce the risk of thermal throttling, and enhance the lifespan of the GPU.
- Repeat the Monitoring: Continue monitoring your GPU temperature during regular usage, such as gaming or resource-intensive tasks. This will help you gauge the effectiveness of the thermal paste application under normal conditions and ensure that your GPU remains within safe temperature limits.
If you notice that the temperature is still too high after applying thermal paste, it could indicate a need for further investigation. It’s possible that there are other factors affecting your GPU’s temperature, such as insufficient airflow or a malfunctioning cooling system. In such cases, it may be necessary to troubleshoot or seek professional assistance.
By keeping a close eye on your GPU temperature and ensuring it remains within safe operating limits, you can maximize its performance, improve stability, and prolong its overall lifespan.
In the next section, we will conclude our guide on how to put thermal paste on your GPU and summarize the key takeaways.
Conclusion
Applying thermal paste to your GPU is a simple yet effective way to enhance its cooling performance and maintain optimal temperatures. By following the steps outlined in this guide, you can successfully apply thermal paste and improve heat dissipation, ultimately maximizing your GPU’s performance and longevity.
We began by understanding the importance of thermal paste in facilitating heat transfer between the GPU die and the heatsink. We discussed the tools and materials needed for the application, including isopropyl alcohol, lint-free cloth, thermal paste, an applicator, disposable gloves, and a clean workspace.
Next, we provided a step-by-step guide on how to apply thermal paste to your GPU, emphasizing the significance of a proper amount and even spread of the paste on the GPU die. We highlighted the importance of securing the GPU back in its slot, reconnecting power cables, and ensuring adequate clearance for proper airflow.
We also discussed the crucial step of cleaning the GPU and removing the old thermal paste, emphasizing the need for a clean and dry surface. Proper cleaning ensures optimal adhesion and thermal conductivity for the new thermal paste.
After the thermal paste was applied and the GPU was secured, we discussed the importance of testing the GPU temperature to assess the effectiveness of the thermal paste application. By monitoring the GPU temperature during stress tests and regular usage, you can ensure that the thermal paste is enhancing heat dissipation and maintaining safe operating temperatures.
Remember, regular maintenance, including the periodic reapplication of thermal paste, is essential to keep your GPU operating at its best. Always refer to the manufacturer’s guidelines and consider seeking professional assistance if you are unsure or uncomfortable performing any of the steps outlined in this guide.
By following these guidelines, you can optimize the cooling performance of your GPU, improve stability, and extend its lifespan. Enjoy smoother and cooler gaming sessions or resource-intensive tasks with a well-maintained and efficiently cooled GPU!