Introduction
Welcome to this guide on how to put pictures on your Toshiba Ultrabook! Whether you want to transfer photos from a camera, device, USB drive, or cloud storage, this article will provide you with all the steps you need to follow.
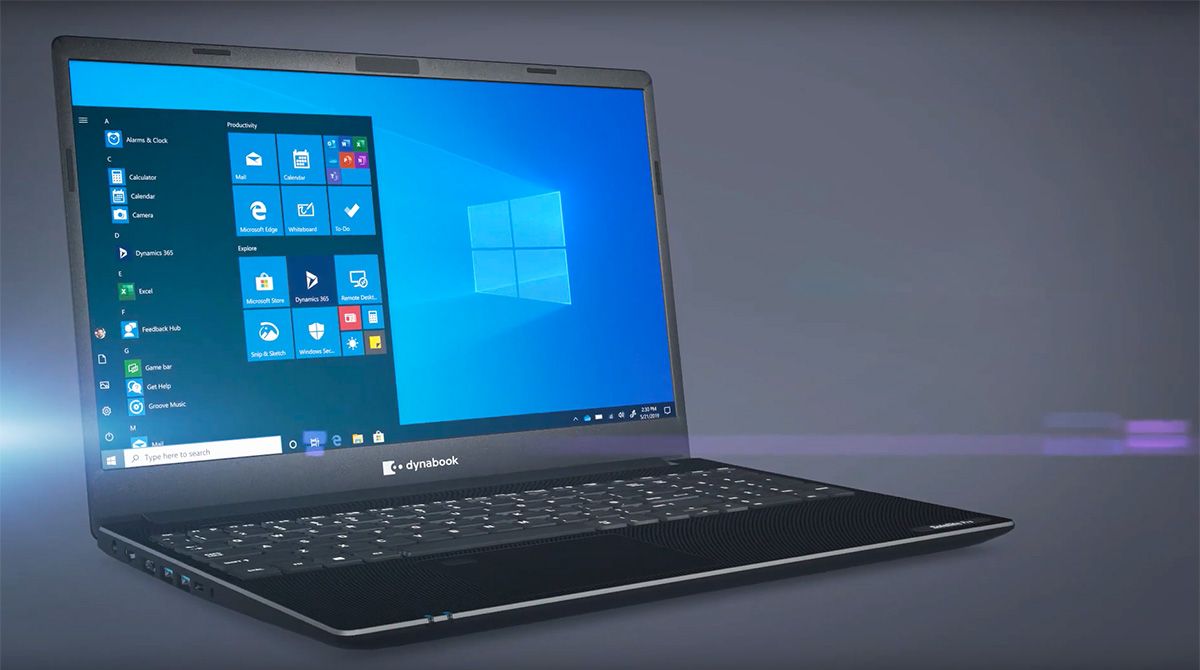
As a proud owner of a Toshiba Ultrabook, you have a sleek and powerful device at your fingertips that is perfect for storing and viewing your favorite photos. With its high-resolution display and ample storage capacity, you can easily enjoy your pictures in stunning detail.
Transferring photos to your Toshiba Ultrabook allows you to keep them safe and organized and provides the convenience of accessing them whenever you want. Whether you’re a photography enthusiast or simply want to cherish memorable moments, learning how to load pictures onto your Ultrabook is a valuable skill to have.
In this guide, we will explore various methods you can use to transfer pictures to your Toshiba Ultrabook. You can choose the method that suits your needs and preferences, whether it’s directly connecting a camera or device, using a USB drive or external storage, importing photos from a cloud storage service, utilizing an SD card reader, or even transferring photos wirelessly.
Remember, the process may vary slightly depending on the specific model of your Toshiba Ultrabook and the operating system it runs on. However, the general steps and principles will remain the same, ensuring you can put pictures on your Ultrabook with confidence.
So, without further ado, let’s explore each method in detail and get started on saving and enjoying your precious photo collection on your Toshiba Ultrabook!
Step 1: Connecting a Camera or Device
One of the easiest ways to transfer photos to your Toshiba Ultrabook is by directly connecting a camera or device. This method allows you to quickly and efficiently transfer your pictures without the need for additional cables or storage devices.
Before you begin, ensure that your camera or device is turned on and set to the appropriate mode for transferring photos. Here are the steps to connect a camera or device to your Toshiba Ultrabook:
- Using the USB cable provided with your camera or device, connect one end to your Ultrabook’s USB port, usually located on the side or back of the device.
- Connect the other end of the USB cable to the corresponding port on your camera or device.
- Your Toshiba Ultrabook will detect the connected camera or device and may display a prompt asking for permission to access the photos. Click on “Allow” or “OK” to proceed.
- Once the camera or device is recognized by your Ultrabook, a window may automatically appear displaying the available photos. If not, you can open the file explorer or photo management software on your Ultrabook to browse the connected camera or device.
- Select the photos you want to transfer by clicking on each photo or using the Ctrl or Shift key to select multiple photos.
- After selecting the photos, right-click on them and choose the “Copy” option.
- Navigate to the desired location on your Ultrabook where you want to save the photos.
- Right-click in the destination folder and choose the “Paste” option to transfer the selected photos to your Ultrabook.
- Wait for the transfer process to complete. The time required will depend on the number and size of the photos being transferred.
- Once the transfer is finished, you can safely disconnect the camera or device from your Ultrabook by removing the USB cable.
By following these steps, you can effortlessly transfer your photos from a camera or device to your Toshiba Ultrabook. Remember to properly disconnect the camera or device from your Ultrabook to avoid any data loss or corruption.
Step 2: Transferring Photos from a Camera or Device
If you have a collection of photos stored on a camera or device that you want to transfer to your Toshiba Ultrabook, there are a few methods you can use based on the available connectivity options. In this step, we will explore the different ways to transfer photos from a camera or device to your Ultrabook, including utilizing a USB cable, Bluetooth, or Wi-Fi connectivity.
Method 1: Using a USB Cable:
- Connect one end of the USB cable to your camera or device, and the other end to an available USB port on your Toshiba Ultrabook.
- Turn on your camera or device and set it to the appropriate transfer mode (e.g., USB transfer mode or Mass Storage mode).
- Your Ultrabook will detect the connected camera or device and may prompt you to allow access to the photos. Grant the necessary permissions to continue.
- Open the file explorer or photo management software on your Ultrabook to browse the connected camera or device.
- Select the desired photos you want to transfer, either individually or by using the Ctrl or Shift key to select multiple photos.
- Right-click on the selected photos and choose the “Copy” option.
- Navigate to the destination folder on your Ultrabook where you want to save the photos.
- Right-click in the destination folder and select the “Paste” option to initiate the photo transfer process.
- Wait for the transfer to complete, and once finished, safely disconnect the camera or device from your Ultrabook by removing the USB cable.
Method 2: Bluetooth Connectivity:
- Ensure that both your camera or device and Toshiba Ultrabook have Bluetooth capabilities and are turned on.
- Pair your camera or device with your Ultrabook by following the Bluetooth pairing instructions provided by the manufacturers.
- Once the devices are paired, go to the photo gallery or file management app on your camera or device.
- Select the desired photos you want to transfer.
- Look for the option to share or send the selected photos via Bluetooth. Choose your Ultrabook as the recipient.
- On your Ultrabook, accept the incoming file transfer request from the camera or device.
- Select the destination folder on your Ultrabook where you want to save the photos, and then click “OK” or similar to start the transfer.
- Wait for the transfer to complete, and once finished, disconnect the Bluetooth connection between the camera or device and your Ultrabook.
Method 3: Wi-Fi Connectivity:
- Ensure that both your camera or device and Toshiba Ultrabook are connected to the same Wi-Fi network.
- Download and install a file transfer app on your camera or device from your device’s app store.
- Launch the file transfer app on your camera or device and follow the on-screen instructions to set it up.
- Open the same file transfer app on your Ultrabook.
- Select the photos you want to transfer from your camera or device.
- Look for the option to transfer the selected photos via Wi-Fi or the file transfer app.
- Choose your Ultrabook as the destination device.
- On your Ultrabook, accept the incoming file transfer request from the camera or device.
- Select the destination folder on your Ultrabook where you want to save the photos, and then click “OK” or similar to begin the transfer.
- Wait for the transfer to complete, and once finished, close the file transfer app on both the camera or device and your Ultrabook.
By following these methods, you can easily transfer photos from your camera or device to your Toshiba Ultrabook using a USB cable, Bluetooth, or Wi-Fi connectivity. Choose the method that suits your preferences and available options, and enjoy your favorite photos on your Ultrabook!
Step 3: Using a USB Drive or External Storage
If you have photos stored on a USB drive or external storage device that you want to transfer to your Toshiba Ultrabook, you’re in luck! This method offers a convenient way to transfer photos, especially if you want to access a large collection of images or need to free up space on the USB drive or external storage. Here’s how you can use a USB drive or external storage to transfer photos:
- Connect your USB drive or external storage device to an available USB port on your Toshiba Ultrabook.
- Wait for your Ultrabook to recognize the connected USB drive or external storage device.
- Open the file explorer or file management software on your Ultrabook.
- Navigate to the USB drive or external storage device by clicking on its icon in the file explorer.
- Locate the folder or directory where your photos are stored on the USB drive or external storage.
- Select the photos you want to transfer by clicking on each photo or using the Ctrl or Shift key to select multiple photos.
- Right-click on the selected photos and choose the “Copy” option.
- Navigate to the desired location on your Ultrabook where you want to save the photos.
- Right-click in the destination folder and choose the “Paste” option to initiate the photo transfer process.
- Wait for the transfer to complete. The time required will depend on the number and size of the photos being transferred.
- Once the transfer is done, safely eject the USB drive or external storage device from your Ultrabook by right-clicking on its icon in the file explorer and selecting the “Eject” option.
- Remove the USB drive or disconnect the external storage device from your Ultrabook.
By following these simple steps, you can easily transfer your photos from a USB drive or external storage device to your Toshiba Ultrabook. This method offers flexibility and convenience, allowing you to organize and access your photos without taking up space on your Ultrabook’s internal storage.
Remember to keep your USB drive or external storage device in a safe place and make backups of your photos to avoid any potential data loss. Additionally, it’s a good practice to scan any external storage devices for viruses or malware before transferring photos to your Ultrabook.
Step 4: Importing Photos from a Cloud Storage Service
If you have photos stored in a cloud storage service such as Google Drive, Dropbox, or OneDrive, you can easily import them to your Toshiba Ultrabook. Importing photos from a cloud storage service provides the convenience of accessing your photos from anywhere and eliminates the need for physical storage devices. Here’s how you can import photos from a cloud storage service:
- Open your preferred web browser on your Toshiba Ultrabook.
- Visit the website or access the web application of the cloud storage service where your photos are stored.
- Sign in to your cloud storage account using your credentials.
- Navigate to the folder or directory where your photos are stored within the cloud storage service.
- Select the photos you want to import by clicking on each photo or using the Ctrl or Shift key to select multiple photos.
- Look for an option to download or export the selected photos. The exact wording may vary depending on the cloud storage service you are using.
- Choose the destination folder on your Toshiba Ultrabook where you want to save the imported photos.
- Click on the download or export button to initiate the photo import process.
- Wait for the photos to finish downloading or exporting. The time required will depend on the size of the photos and the speed of your internet connection.
- Once the import process is complete, you can access your imported photos from the designated folder on your Toshiba Ultrabook.
By following these steps, you can effortlessly import photos from your cloud storage service to your Toshiba Ultrabook. This method allows you to keep your photos organized and easily accessible, even without an internet connection once the photos are downloaded to your Ultrabook.
Remember to regularly backup your photos from the cloud storage service to ensure their safety and avoid any potential data loss. Additionally, make sure you have enough free storage space on your Toshiba Ultrabook to accommodate the imported photos.
Each cloud storage service may have unique features and settings, so familiarize yourself with the specific instructions provided by your chosen service to make the importing process as smooth as possible.
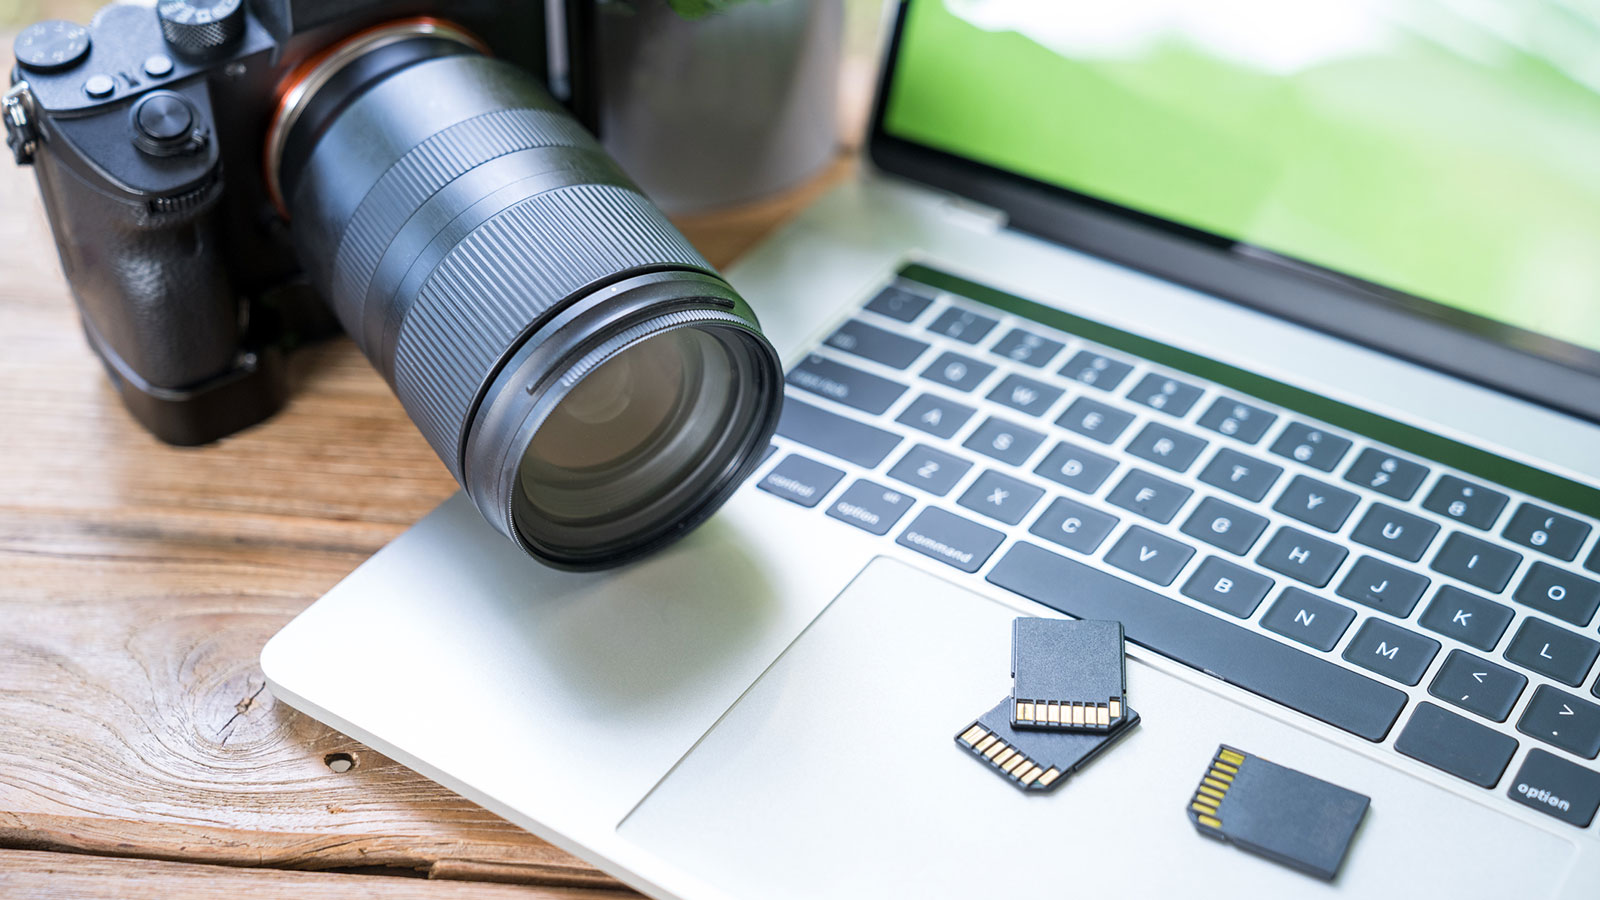
Step 5: Using an SD Card Reader
If you have photos stored on an SD card that you want to transfer to your Toshiba Ultrabook, using an SD card reader is a straightforward and efficient method. An SD card reader allows you to directly access the photos on your SD card and transfer them to your Ultrabook. Here’s how you can use an SD card reader to transfer your photos:
- Insert the SD card into the SD card slot of the SD card reader.
- Connect the SD card reader to an available USB port on your Toshiba Ultrabook.
- Your Ultrabook will detect the connected SD card reader and may display a notification or prompt notifying you that an SD card has been inserted.
- Open the file explorer or file management software on your Ultrabook.
- Navigate to the SD card reader by clicking on its icon in the file explorer.
- Locate the folder or directory where your photos are stored on the SD card.
- Select the photos you want to transfer by clicking on each photo or using the Ctrl or Shift key to select multiple photos.
- Right-click on the selected photos and choose the “Copy” option.
- Navigate to the desired location on your Ultrabook where you want to save the photos.
- Right-click in the destination folder and choose the “Paste” option to initiate the photo transfer process.
- Wait for the transfer to complete. The time required will depend on the number and size of the photos being transferred.
- Once the transfer is done, safely eject the SD card from the SD card reader by right-clicking on its icon in the file explorer and selecting the “Eject” option.
- Remove the SD card from the SD card reader.
Using an SD card reader provides a reliable and convenient way to transfer photos from an SD card to your Toshiba Ultrabook. It eliminates the need for cables or additional software and allows you to easily access and organize your photos.
Remember to handle the SD card and SD card reader with care to avoid any physical damage or data corruption. It’s also recommended to make backups of your photos to prevent any potential data loss.
If your Toshiba Ultrabook does not have a built-in SD card slot, you can purchase an external card reader that connects to your Ultrabook via USB. Ensure that the external card reader is compatible with your SD card type (e.g., SDHC, SDXC) for seamless photo transfer.
Step 6: Transferring Photos Wirelessly
If you prefer a wireless method to transfer photos from your other devices to your Toshiba Ultrabook, you’re in luck! You can utilize various wireless technologies such as Bluetooth, Wi-Fi, or cloud-based services to transfer your photos seamlessly. Let’s explore how you can transfer photos wirelessly:
Method 1: Bluetooth Connectivity:
- Ensure that both your Toshiba Ultrabook and the device you want to transfer photos from have Bluetooth capabilities and are turned on.
- Pair your Ultrabook and the other device by following the Bluetooth pairing instructions specific to each device.
- On your Ultrabook, open the file explorer or file management software.
- On the other device, locate the photos you want to transfer and select them.
- Choose the option to share or send the selected photos via Bluetooth.
- Select your Toshiba Ultrabook as the recipient device.
- Accept the incoming file transfer request on your Ultrabook.
- Select the destination folder where you want to save the transferred photos, then click “OK” or a similar option to begin the transfer process.
- Wait for the transfer to complete, and once done, disconnect the Bluetooth connection between your Ultrabook and the other device.
Method 2: Wi-Fi Connectivity:
- Ensure that both your Toshiba Ultrabook and the other device are connected to the same Wi-Fi network.
- On your Ultrabook, open the file explorer or file management software.
- On the other device, enable Wi-Fi sharing or file sharing functionality.
- On your Ultrabook, navigate to the other device’s shared folder or network location.
- Locate the photos you want to transfer on the other device and select them.
- Copy the selected photos and paste them into the desired folder on your Ultrabook.
- Wait for the transfer to complete, and once done, disconnect from the shared folder or network location on your Ultrabook.
Method 3: Cloud-based Services:
- Sign in to your cloud storage account on both your Toshiba Ultrabook and the other device.
- Upload the photos you want to transfer to your cloud storage account from the other device.
- On your Ultrabook, open the web browser and sign in to your cloud storage account.
- Navigate to the folder where the photos are stored.
- Select the desired photos and download them to a local folder on your Ultrabook.
- Wait for the download to complete, and once done, the transferred photos will be available on your Toshiba Ultrabook.
By using these wireless transfer methods, you can easily transfer photos from other devices to your Toshiba Ultrabook without the hassle of cables or physical connections. Choose the method that suits your needs and preferences, and enjoy the convenience of wireless photo transfers!
It’s important to ensure that both your Ultrabook and the other device have compatible wireless capabilities and are connected to the same network or paired via Bluetooth for successful data transfer. Additionally, be mindful of any limitations or restrictions imposed by the devices or software you are using.
Conclusion
Congratulations! You have learned various methods to put pictures on your Toshiba Ultrabook. Whether you prefer connecting a camera or device, using a USB drive or external storage, importing photos from a cloud storage service, utilizing an SD card reader, or transferring photos wirelessly, you now have a range of options at your disposal.
With the step-by-step instructions provided in this guide, you can easily transfer your cherished photos to your Toshiba Ultrabook, allowing you to keep them safe, organized, and readily accessible. Take advantage of the fantastic display and storage capacity of your Ultrabook to enjoy your favorite memories in stunning detail.
Remember to follow the recommended practices for each method, such as safely ejecting external devices, making backups of your photos, and ensuring compatibility between your devices and software.
By exploring these different methods, you can choose the one that best suits your needs and preferences. Feel free to mix and match these methods depending on the situation and the devices you have at hand. The flexibility offered by your Toshiba Ultrabook allows you to transfer photos conveniently and expeditiously.
Now, go ahead and start putting pictures on your Toshiba Ultrabook! Share your treasured moments, relive memories, and enjoy the pleasure of having your entire photo collection right at your fingertips.