Introduction
Welcome to the world of 3D printing! Over the past few years, 3D printing has gained popularity for its ability to transform digital designs into physical objects. Whether you’re a hobbyist, designer, or engineer, 3D printing offers incredible possibilities for bringing your ideas to life.
In this article, we will guide you through the process of printing with a 3D printer. From choosing the right printer to troubleshooting common issues, we’ve got you covered. So, if you’re ready to dive into the exciting world of 3D printing, let’s get started!
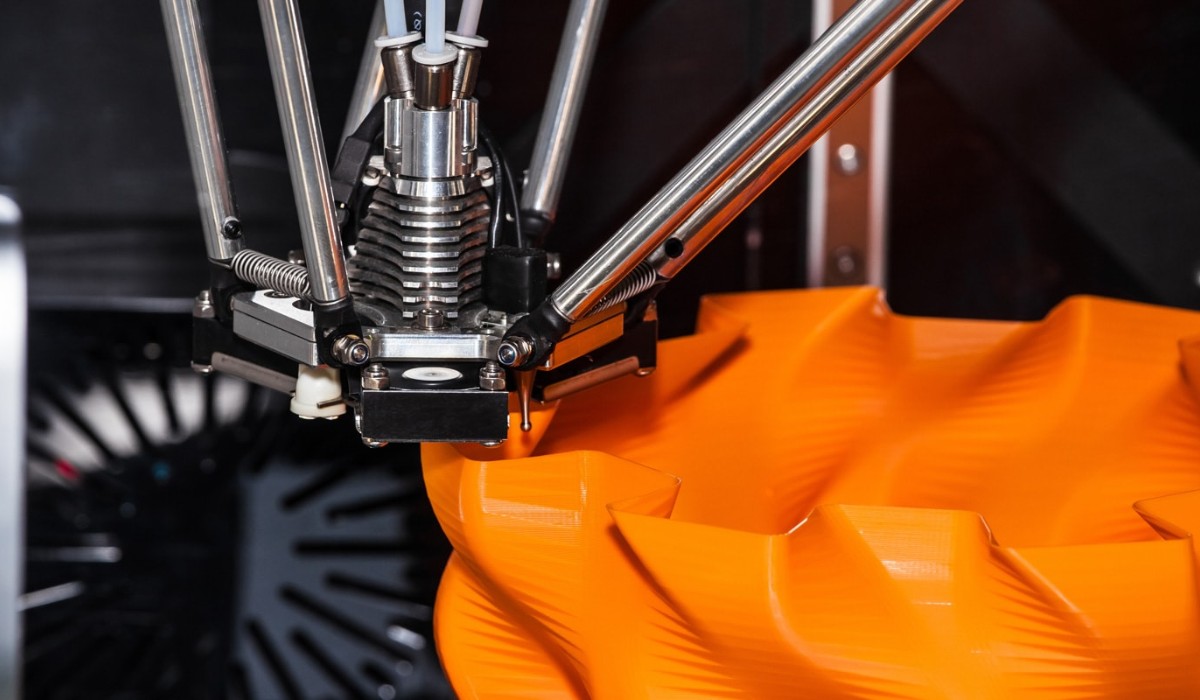
Before we jump into the technicalities, let’s take a moment to understand how 3D printing works. Unlike traditional manufacturing methods that involve subtractive processes like cutting or drilling, 3D printing is an additive process. It builds objects layer by layer, using a range of materials such as plastic, metal, or even food!
With the advancement of technology, 3D printers have become more affordable and accessible. This means you can now have your own 3D printer at home or work. But before investing in one, it’s crucial to understand your needs and choose the right printer for the job.
In the next section, we’ll explore the factors to consider when choosing a 3D printer, such as the printing technology, build volume, resolution, and price range. So, let’s move on to the next step and find the perfect 3D printer for your needs!
Choosing the Right 3D Printer
When it comes to choosing a 3D printer, there are several factors to consider to ensure that it meets your specific needs and requirements. Here are some key considerations to keep in mind:
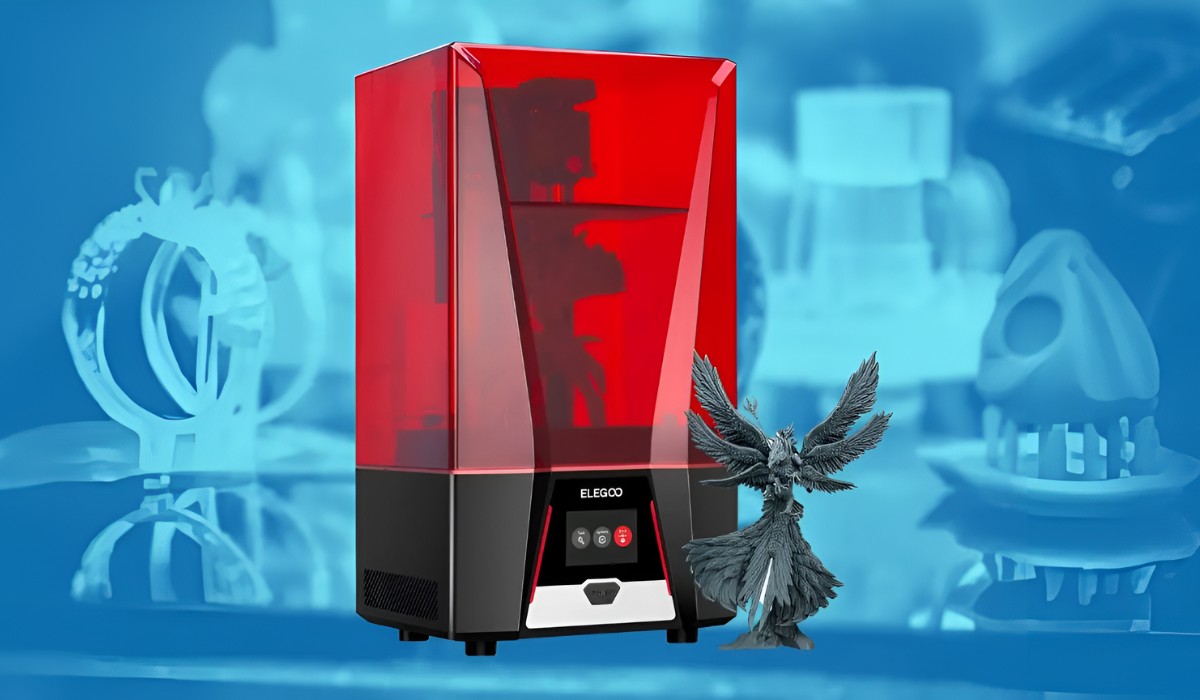
- Printing Technology: There are various 3D printing technologies available on the market, including Fused Deposition Modeling (FDM), Stereolithography (SLA), and Selective Laser Sintering (SLS). Each technology has its own advantages and limitations, so it’s important to understand which one is best suited for your intended applications.
- Build Volume: The build volume refers to the maximum size of the object that can be printed in a single job. Consider the size of the objects you plan to print and choose a printer with an appropriate build volume to accommodate your needs. Keep in mind that printers with larger build volumes tend to be more expensive.
- Resolution: The resolution of a 3D printer determines the level of detail and smoothness of the printed objects. Higher resolution printers produce finer details, but they typically come with a higher price tag. Assess your specific requirements to determine the level of resolution you need.
- Printing Materials: Different 3D printers support different types of materials. PLA and ABS are common thermoplastics used in FDM printers, while SLA printers can handle resins. Consider the materials you plan to use for your projects and ensure that the printer you choose supports them.
- Price Range: The cost of 3D printers can vary significantly. Set a budget and look for options within your price range. Keep in mind that higher-priced printers often come with more advanced features and capabilities.
Additionally, it’s always a good idea to read reviews and seek recommendations from other users to get an idea of a printer’s reliability and ease of use. Consider factors like customer support, software compatibility, and the availability of spare parts when making your decision.
By carefully considering these factors, you can choose a 3D printer that aligns with your specific requirements and helps you achieve your printing goals. Once you’ve selected the right printer, it’s time to move on to the next steps in the printing process.
Preparing the 3D Model
Before you can start printing, you’ll need to prepare a 3D model of the object you want to print. Here are the steps to prepare your 3D model:
- Create or Download: If you’re proficient in 3D design software, you can create your own 3D model from scratch. Alternatively, you can find a pre-made model from various online repositories and marketplaces. Make sure to choose a model that is compatible with your chosen printing technology and software.
- Optimize the Model: Once you have your 3D model, it’s important to optimize it for 3D printing. This includes checking for any errors or issues in the design, such as non-manifold geometry or intersecting parts. You can use software tools like Netfabb or Meshmixer to repair and optimize your model if needed.
- Position and Scale: Ensure that your model is oriented correctly and positioned properly on the virtual build plate. This will affect how it prints and ensures that it fits within the build volume of your printer. You may also need to scale the model if you want to print it at a different size than its original dimensions.
- Add Support Structures: Depending on the complexity of your model, you may need to add support structures to provide stability during the printing process. These support structures are temporary and are typically removed after printing. Most 3D slicing software offers automatic support generation tools.
- Export to STL: Once your model is optimized and prepared, you need to export it to a common file format called STL (Standard Tessellation Language). This format is widely used in the 3D printing industry and is compatible with most slicing software. Make sure to save your file in STL format to proceed to the next step.
By following these steps, you’ll have a ready-to-print 3D model that is optimized for your specific printer and printing technology. In the next section, we’ll explore the process of slicing your model and preparing it for printing.
Slicing the Model
Once you have your 3D model prepared, the next step is to slice it. Slicing is the process of converting the 3D model into a series of 2D layers, which the 3D printer can understand and print layer by layer. Here’s how to slice your model:
- Select Slicing Software: There are several slicing software packages available, such as Ultimaker Cura, PrusaSlicer, or Simplify3D. Choose a slicing software that is compatible with your 3D printer and install it on your computer.
- Import the Model: In your chosen slicing software, import the STL file of your 3D model. The software will analyze the model and provide you with options to adjust the print settings.
- Adjust Print Settings: In the slicing software, you can fine-tune the print settings to achieve the desired print quality and functionality. This includes adjusting parameters such as layer height, print speed, infill density, and support structure placement. Take your time to explore and experiment with these settings to achieve optimal results.
- Generate the G-Code: Once you’re satisfied with the print settings, you can generate the G-code file. G-code is a set of instructions that tells the 3D printer how to move, extrude filament, and build the object layer by layer. The slicing software will generate this file based on your selected settings.
- Save and Transfer: Save the G-code file onto an SD card or a USB drive, depending on how your 3D printer reads files. Insert the storage device into your printer and ensure that the file is accessible.
Now that your 3D model is sliced and ready, you can proceed to the next steps of setting up and starting the print. In the upcoming sections, we’ll explore loading the filament, calibrating the printer, and adjusting the print settings. So let’s move forward and bring your 3D model to life!
Loading the Filament
Before you can start a 3D print, you need to load the filament into your 3D printer. The filament is the material that will be melted and extruded to create the physical object. Here’s how to load the filament:
- Preheat the Printer: Turn on your 3D printer and allow it to preheat to the recommended temperature for the filament you’re using. This temperature varies depending on the type of filament, so consult the manufacturer’s guidelines.
- Locate the Filament Path: Identify the filament path, which is the pathway from the spool holder to the extruder. It usually involves threading the filament through a series of tubes or guides.
- Cut the Filament: Using a pair of scissors or filament snips, cut the end of the filament at a clean angle. This helps ensure a smooth and effortless feeding into the extruder.
- Insert the Filament: Insert the cut end of the filament into the designated opening in the extruder. Push it gently until it reaches the extruder gear or until you feel resistance.
- Start the Feeding Process: In the printer’s interface or control panel, find the option to start the filament feeding process. This varies depending on the printer model, but it usually involves selecting “Load Filament” or a similar command.
- Wait for Extrusion: As the printer starts to feed the filament, keep a close eye on the nozzle or extruder. You should see melted filament starting to extrude from the nozzle. This process primes the nozzle and removes any remaining air from the system.
- Secure the Filament: Once a steady stream of melted filament is extruding smoothly, you can secure the filament to prevent it from slipping out. Some printers have built-in mechanisms to hold the filament in place, while others may require manual adjustment or the use of clips.
With the filament successfully loaded, your 3D printer is now ready to begin the printing process. In the next sections, we’ll cover important steps like calibrating the printer and adjusting the print settings. So let’s continue our journey towards creating your 3D masterpiece!
Calibrating the Printer
Calibrating your 3D printer is a crucial step to ensure accurate and high-quality prints. Proper calibration helps fine-tune various aspects of the printer’s performance, such as bed leveling, nozzle height, and extrusion flow. Here’s how to calibrate your printer:
- Bed Leveling: Proper bed leveling is essential for ensuring that the first layer of your print adheres correctly. Most 3D printers have built-in or manual bed leveling mechanisms. Follow the manufacturer’s instructions to level the bed so that the distance between the nozzle and the bed is consistent across the entire build area.
- Nozzle Height: The distance between the nozzle and the bed is critical for achieving the correct layer adhesion and print quality. Use a sheet of paper or a feeler gauge to adjust the nozzle height, ensuring a slight resistance when sliding the paper between the nozzle and the bed. Repeat the process for each corner of the bed to maintain uniformity.
- Extrusion Flow Rate: Calibrating the extrusion flow rate helps to ensure that the proper amount of filament is being extruded. Print a calibration test, such as a single-layer cube, and measure the thickness of the printed walls with calipers. Adjust the flow rate in the slicing software until the printed walls match the desired thickness.
- Temperature Calibration: Temperature settings can significantly impact print quality and adhesion. Print a temperature tower or temperature calibration test and adjust the temperature settings for each section of the print until you achieve the best quality and adhesion. This ensures that the filament is melted at the optimal temperature for your specific printer and filament combination.
- Extruder Calibration: Accurate extruder steps-per-mm calibration ensures that the correct amount of filament is being extruded. Use a ruler or calipers to mark a specific length of filament, and then instruct the printer to extrude that length. Measure the extruded length and adjust the steps-per-mm setting in the printer’s firmware or software until the measured extrusion matches the desired length.
Calibrating your printer may require some trial and error, so patience and perseverance are key. Take the time to go through each calibration step, as it will greatly impact the quality and reliability of your printed objects.
With your printer calibrated, it’s time to fine-tune the print settings to achieve the desired results. In the next section, we’ll explore adjusting the print settings and initiating the print. So let’s move forward in our 3D printing journey!
Adjusting the Print Settings
Once your 3D printer is calibrated, the next step is to adjust the print settings to achieve the desired results. Fine-tuning these settings will help you achieve optimal print quality and ensure successful prints. Here’s how to adjust the print settings:
- Layer Height: The layer height determines the thickness of each printed layer. A smaller layer height produces finer details, but it also increases print time. Adjust the layer height in the slicing software based on your desired balance between quality and printing speed.
- Print Speed: The print speed determines how fast the extruder moves during printing. Higher print speeds can reduce print time but may sacrifice print quality. Experiment with different print speeds to find the optimal balance between speed and quality for your specific printer and filament.
- Infill Density: The infill density determines the amount of material used inside the printed object. Higher infill densities result in stronger and more solid prints, while lower densities save material and reduce print time. Adjust the infill density based on your desired strength and the purpose of the printed object.
- Support Structures: If your design requires support structures, adjust the support settings in the slicing software. You can choose between automatic support generation or manually placing support structures. Ensure that the supports are adequately placed to provide stability while being easy to remove after printing.
- Adhesion Methods: Proper adhesion to the print bed is crucial to prevent warping and ensure a successful print. Experiment with different adhesion methods such as a heated bed, painter’s tape, or a specialized adhesive like a glue stick or bed adhesion spray. Find the method that works best for your printer and filament combination.
- Retraction Settings: Retraction helps prevent oozing and stringing by pulling the filament back slightly when the printhead moves across empty spaces. Adjust the retraction distance and speed in the slicing software to minimize stringing and achieve cleaner prints.
Remember to save your adjusted print settings in the slicing software so you can easily load them for future prints. It’s also a good practice to keep detailed notes of your successful print settings for different materials, models, and configurations for future reference.
With the print settings optimized, you’re now ready to initiate the print. In the next section, we’ll explore the process of starting the print and monitoring its progress. So let’s move ahead and bring your design to life!
Initiating the Print
After preparing your 3D model, calibrating the printer, and adjusting the print settings, it’s time to initiate the print and bring your creation to life. Here’s how to get started:
- Prepare the Print Bed: Ensure that the print bed is clean and free from any debris or residue. If necessary, apply your chosen adhesion method, such as applying a thin layer of glue stick or placing painter’s tape, to enhance print bed adhesion.
- Load the Sliced File: Insert the storage device that contains the generated G-code file into your 3D printer. Use the printer’s interface or control panel to navigate to the correct location and select the file for printing.
- Double-Check Settings: Before starting the print, double-check the print settings on the printer’s interface to ensure that they match your desired configuration. Verify the print speed, layer height, infill density, and any other relevant settings.
- Initiate the Print: Once you’re satisfied with the settings, initiate the print by selecting the “Start Print” or a similar command on your printer’s interface. The printer will begin executing the G-code instructions and start the printing process.
- Monitor the Print: While the printer is running, carefully monitor the progress of the print. Pay attention to ensure that the layers are adhering properly, there are no issues with extrusion, and the print is proceeding smoothly.
- Address Issues Promptly: If you notice any problems during the print, such as warping, layer shifting, or excessive stringing, address them promptly. You may need to stop the print, adjust settings, or troubleshoot the issue to ensure a successful outcome.
- Record Details: It’s a good practice to keep a record of the print details, including the print duration, settings used, and any issues encountered. This information will be helpful for future reference and troubleshooting if needed.
- Wait for Completion: Sit back, relax, and wait for the printer to complete the print. Depending on the complexity, size, and settings, the print can take anywhere from a few minutes to several hours or even days.
Once the print is finished, resist the urge to remove it immediately. Allow it to cool down on the print bed to prevent any potential damage or distortion. Once cooled, carefully remove the completed print from the print bed and marvel at your creation!
With the print successfully completed, you have taken another step in mastering the art of 3D printing. In the next section, we’ll discuss important guidelines for removing and handling the completed print. So let’s proceed and explore these essential steps!
Monitoring the Print Process
During the 3D printing process, it’s important to actively monitor the print to ensure that everything is progressing as expected. By keeping an eye on the print, you can address any issues that may arise and achieve a successful outcome. Here are some key points to consider when monitoring the print process:
- Visual Inspection: Observe the print closely as it progresses layer by layer. Look for any signs of issues such as poor layer adhesion, inconsistent extrusion, or warping. Address these problems promptly to prevent them from affecting the overall quality of the print.
- Adherence to Bed: Keep an eye on the first few layers of the print to ensure that they are sticking properly to the print bed. If you notice any detachment or lifting, it may indicate an issue with bed leveling or adhesion. Stop the print if necessary and make the necessary adjustments before resuming.
- Extrusion Quality: Check the extrusion of filament from the nozzle to ensure that it is consistent and smooth. If you notice any signs of under-extrusion (gaps in the layers) or over-extrusion (stringing or blobbing), you may need to adjust the extrusion multiplier or temperature settings.
- Nozzle Clearance: Verify that the nozzle is not touching the printed layers or causing any unwanted contact. Improper nozzle clearance can result in scraping or deforming the part, leading to print failures. Adjust the bed leveling or nozzle height if needed.
- Print Speed: Monitor the print speed to ensure that it is consistent and within the desired range. Dramatic changes in print speed can affect the overall quality and accuracy of the print. Adjust the print speed settings if necessary to achieve the desired outcome.
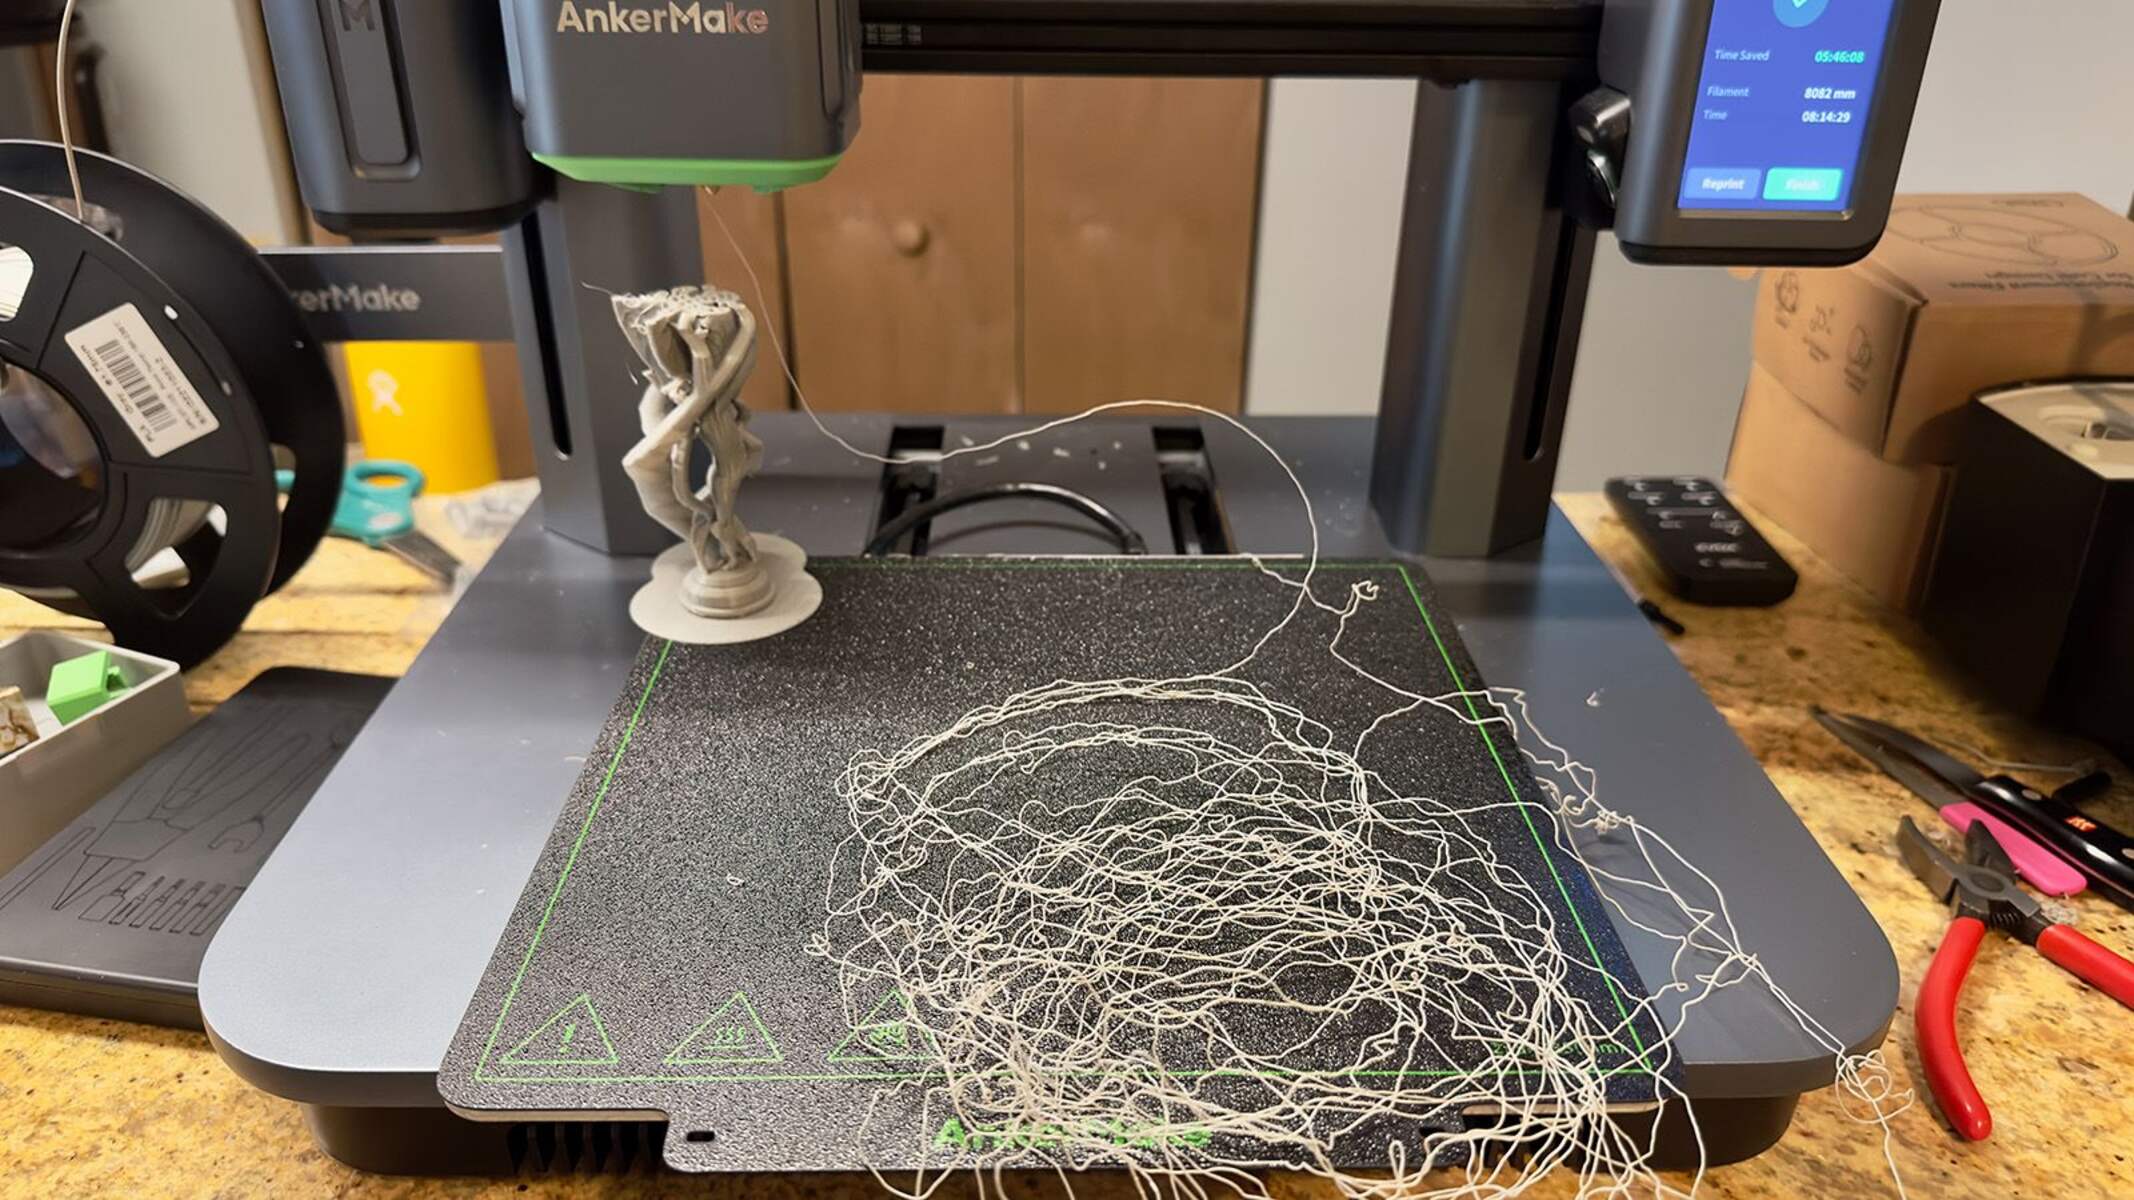
- Filament Jam or Tangles: Keep an eye on the filament path to ensure that it is moving smoothly without any tangles or jams. Filament issues can disrupt the printing process and lead to incomplete or failed prints. If you notice any problems, pause the print and address the filament issue before continuing.
- Environmental Factors: Consider the temperature, humidity, and airflow in the printing environment. Extreme temperature variations or high humidity levels can impact the print quality. Ensure that the printer is in a stable environment to minimize the chances of print issues.
By actively monitoring the print process, you can catch and resolve potential issues in real-time, reducing the likelihood of failed or poor-quality prints. Remember to document any observations or adjustments made during the print for future reference and troubleshooting purposes.
With a vigilant eye and a proactive approach, you’ll be able to successfully navigate the print process and achieve outstanding results. In the next section, we’ll discuss the essential steps for removing the completed print. So let’s continue our journey in the 3D printing world!
Removing the Completed Print
Once your 3D printer has finished printing, the next step is to carefully remove the completed print from the print bed. Proper removal techniques are crucial to ensure that your print is not damaged or distorted. Here are the steps to follow:
- Cooling Down: Allow the print to cool down completely before attempting to remove it. This helps prevent any accidental deformation and ensures that the print retains its shape and structural integrity.
- Check Adhesion: Gently test the adhesion of the print on the print bed by applying light pressure. If it feels securely attached, you can proceed with the removal process. If there are any concerns about adhesion, you may need to use a removal tool or gently pry the print away from the bed.
- Use a Removal Tool: Depending on the type of print bed surface and adhesion method used, you may need a removal tool such as a spatula, putty knife, or scraper to lift the print. Carefully insert the tool at the edge of the print and gently apply upward pressure to loosen it from the bed.
- Be Gentle: Take your time and work slowly when removing the print to avoid any sudden movements or excessive force. Applying too much pressure or using a sharp tool can damage the print or the print bed. Exercise caution to ensure a successful removal.
- Remove Supports: If your print includes support structures, carefully remove them using pliers, tweezers, or diagonal cutters. Take care not to damage or break any delicate parts of the print while removing the supports.
- Clean the Print Bed: After removing the print, clean the print bed by removing any remnants of filament or adhesive material. Use a soft cloth or sponge with isopropyl alcohol or soapy water (depending on the print bed material) to wipe away any residue.
- Inspect the Print: Once the print is removed, inspect it closely for any defects, imperfections, or support remnants. Use a small file or sandpaper to smooth out any rough edges or surfaces if necessary.
- Store or Finish: Depending on your intended use, either store the completed print in a safe place or proceed with any post-processing steps such as sanding, painting, or additional assembly. Follow any specific instructions or recommendations to achieve the desired final result.
By following these steps, you can safely and effectively remove your completed print from the printer bed without causing any damage. Remember to exercise caution and patience during the removal process to ensure the best outcome for your 3D print.
Now that you have successfully removed the completed print, it’s time to admire and enjoy your creation. In the next section, we’ll discuss common troubleshooting techniques to overcome any issues you may encounter along the way. So let’s continue our exploration of the fascinating world of 3D printing!
Troubleshooting Common Issues
3D printing can sometimes involve challenges, but with the right troubleshooting techniques, you can overcome common issues and achieve successful prints. Here are common issues and their possible solutions:
- Print Not Sticking to the Bed: If your print is not adhering properly to the print bed, ensure that the bed is clean and level. Consider adjusting the temperature, using adhesive materials like painter’s tape or glue stick, or experimenting with different bed surface coatings.
- Warping or Curling: Warping or curling of the print corners can occur due to temperature fluctuations or insufficient bed adhesion. Increase the bed temperature, use a heated enclosure, or try different adhesion techniques like a brim or raft.
- Layer Shifting: Layer shifting can occur if the print bed or the gantry is not properly aligned. Ensure that all mechanical components, including belts and pulleys, are tightened and functioning correctly. Check that the print bed is secure and the belts are properly tensioned.
- Under or Over-Extrusion: Inconsistent extrusion can result in gaps between layers (under-extrusion) or stringing and excess material (over-extrusion). Adjust the extrusion multiplier in the slicing software, check the nozzle for clogs, or calibrate the extruder steps-per-mm settings.
- Stringing and Oozing: Stringing occurs when the nozzle leaves thin strands of melted filament between different parts of the print. To reduce stringing, adjust the retraction settings in the slicing software or increase travel speed. Cleaning the nozzle can also help resolve this issue.
- Poor Surface Quality: If your print has rough or inconsistent surface quality, consider adjusting the print speed, layer height, or increasing the extrusion flow rate. Cleaning the print bed, ensuring proper nozzle clearance, and optimizing cooling settings can also help achieve better surface quality.
- Support Removal Difficulty: If removing support structures is challenging and leaves marks on the print, adjust the support settings in the slicing software. Consider using support interface layers or using water-soluble support materials if your printer supports it.
- Printing Filament Jams: Filament jams can occur due to various reasons, such as improper alignment, dust or debris blocking the extruder, or issues with the filament itself. Clear any blockages, check the filament path for obstructions, and verify that the filament is of good quality and within its proper storage conditions.
- Layer Inconsistencies: Inconsistent layer thickness can be caused by various factors, including improper bed leveling, incorrect temperature settings, or backlash in the printer’s mechanics. Re-level the print bed, ensure proper temperature control, and check for any mechanical issues such as loose belts or rods.
Remember that troubleshooting 3D printing issues often involves a process of trial and error. Don’t be discouraged if a solution doesn’t work immediately. Patience and perseverance are key as you continue to refine your settings and techniques.
By understanding common issues and their solutions, you can troubleshoot problems that may arise during the printing process, leading to more successful and satisfying outcomes. In the next section, we’ll conclude our article on 3D printing with some final thoughts and closing remarks. So let’s wrap things up!
Conclusion
Congratulations on completing this journey into the world of 3D printing! We have covered the essential steps involved in printing with a 3D printer, from choosing the right printer to troubleshooting common issues. By following these guidelines, you can create amazing 3D objects and bring your ideas to life.
Throughout this article, we discussed the importance of choosing the right 3D printer that aligns with your specific needs, considering factors such as printing technology, build volume, resolution, and price range. We also explored the steps involved in preparing the 3D model, slicing it, and adjusting the print settings for optimal results.
Moreover, we discussed the crucial steps of loading filament, calibrating the printer, initiating the print, monitoring the process, and safely removing the completed print. By paying close attention during each stage, you can ensure the best possible outcome and overcome any challenges that may arise along the way.
Additionally, we touched upon common troubleshooting techniques to address issues such as bed adhesion problems, warping, layer shifting, under/over-extrusion, stringing, and more. Remember, troubleshooting is an essential part of the 3D printing journey, and with patience and perseverance, you can overcome any obstacles that come your way.
As you continue to experiment and gain experience with 3D printing, don’t forget to share your knowledge with others and seek support from the vibrant 3D printing community. There is a wealth of resources, forums, and communities available where you can learn, collaborate, and exchange ideas.
Now that you have a solid foundation in 3D printing, it’s time to put your skills to use and unleash your creativity. From practical prototypes to intricate artistic designs, the possibilities are endless. So go ahead, explore, experiment, and enjoy the exciting world of 3D printing!