Introduction
Minecraft is a popular sandbox game that provides players with endless possibilities for creativity, exploration, and building. While playing alone can be enjoyable, playing with friends on the Minecraft PC version takes the experience to a whole new level. Collaborating with friends allows you to share ideas, construct amazing structures, go on adventures, and compete in thrilling mini-games.
In this guide, we’ll provide you with step-by-step instructions on how to play with friends on Minecraft PC. Whether you want to join an existing server, create a multiplayer world, or explore community servers, we’ll cover everything you need to know to get started.
By playing with friends, you’ll also be able to communicate with them in real-time using voice chat, allowing for seamless coordination and teamwork. We’ll explore the different methods of communication available and discuss how to troubleshoot any connection issues that may arise.
So gather your friends, log in to Minecraft PC, and get ready for countless hours of fun and adventure together. Let’s dive into the world of multiplayer Minecraft and discover the joy of playing with friends!
Finding a Server
Before you can start playing with friends on Minecraft PC, you’ll first need to find a server to join. A server is a dedicated Minecraft environment where players can connect and interact with each other. Here are a few ways to find a server:
- Official Minecraft Server Lists: The official Minecraft website provides a list of featured servers that you can browse through. These servers are well-moderated and offer a variety of game modes for different play styles. Simply visit the Minecraft website, navigate to the “Multiplayer” section, and explore the available options.
- Online Server Directories: There are numerous online directories that list Minecraft servers categorized by their game type, popularity, and community. Websites like “Minecraft Server List” and “Planet Minecraft” offer extensive lists of servers that you can explore. These directories often provide detailed server descriptions, player reviews, and ratings, helping you choose a server that suits your preferences.
- Recommendations from Friends: If you have friends who already play Minecraft, ask them for server recommendations. They might have personal favorites or be a part of a community server that welcomes new players. Playing on a server recommended by a friend can enhance the overall experience and provide a sense of familiarity.
When choosing a server, consider factors such as the server’s population, gameplay rules, available game modes, community atmosphere, and server stability. These factors can greatly impact your overall enjoyment and the type of experience you’ll have playing with your friends.
Once you’ve found a server that interests you, it’s time to connect and start playing with friends. In the next section, we’ll guide you through the process of joining a Minecraft server.
Joining a Server
After finding a Minecraft server that suits your preferences, the next step is to join the server and start playing with your friends. Follow these steps to join a server:
- Obtain the Server IP Address: Every Minecraft server has a unique IP address that you’ll need to connect to. Look for the IP address or server name provided by the server host or listed on the server directory. Make sure to copy the IP address accurately to avoid any connectivity issues.
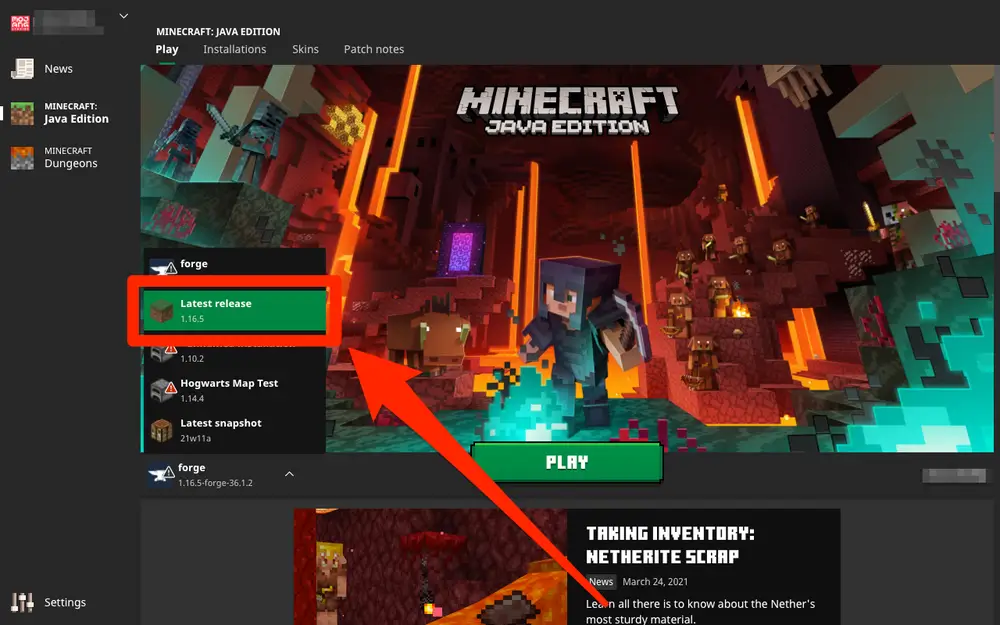
- Launch Minecraft: Open the Minecraft launcher on your PC and log in with your Minecraft account credentials. If you don’t have an account, you’ll need to create one before proceeding. Ensure that you’re using the latest version of Minecraft to ensure compatibility with the server.
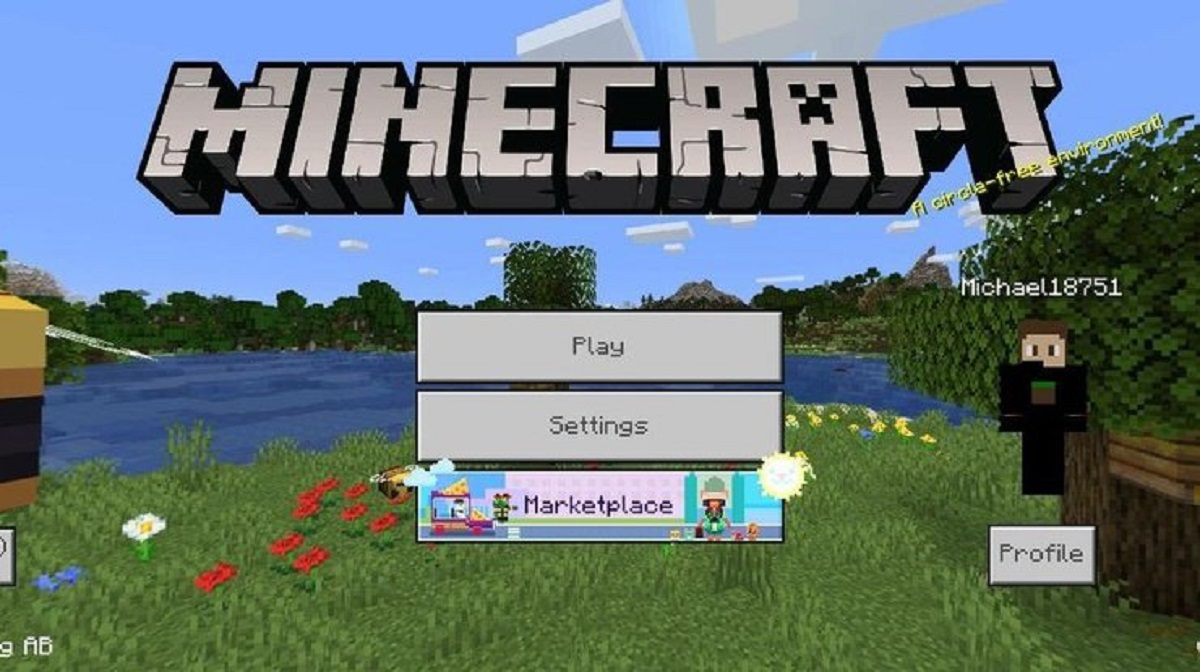
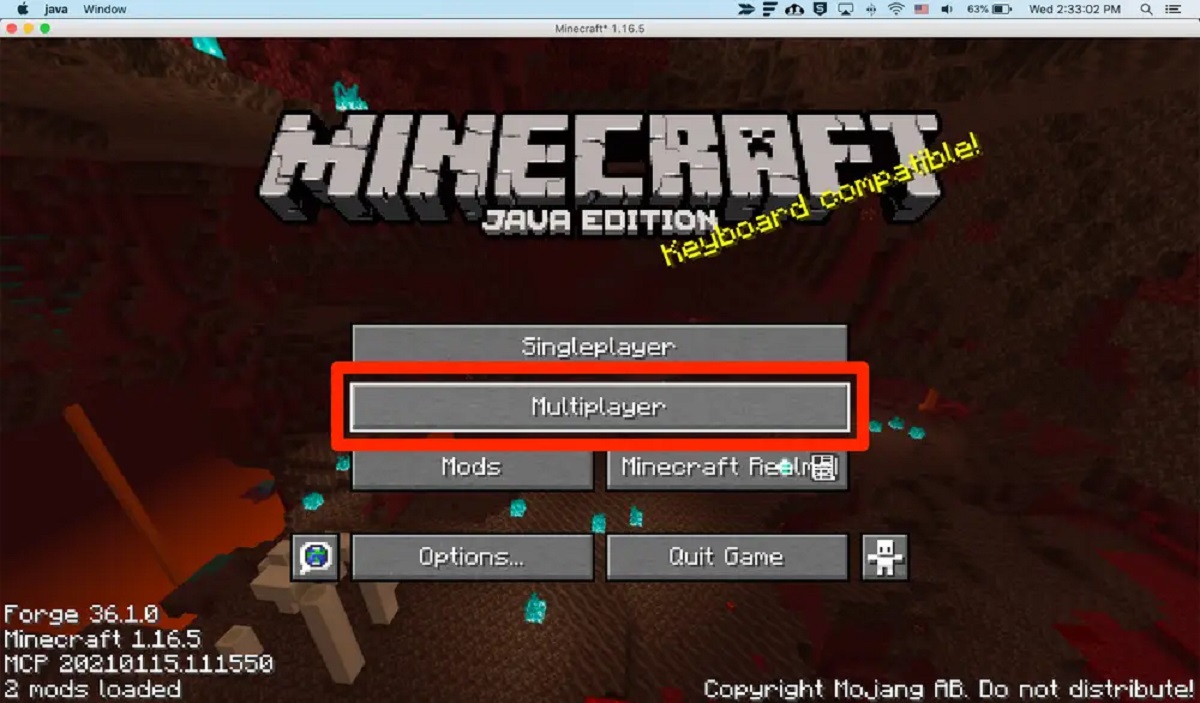
- Click on “Multiplayer” Mode: Once you’re in the Minecraft launcher, click on the “Multiplayer” button on the main menu. This will take you to the multiplayer screen, where you can manage your server connections.
- Add the Server: In the multiplayer screen, click on the “Add Server” button to add the server you want to join. Enter the server IP address or name in the respective fields, and you can also provide the server with a custom name for easier identification.
- Connect to the Server: After adding the server, it will appear in your server list. Select the server from the list and click on the “Join Server” button to connect. Minecraft will attempt to establish a connection with the server, and if successful, you’ll be taken to the server’s spawn area or lobby.
- Follow Server-Specific Instructions: Once you’ve joined the server, make sure to read any server-specific instructions or rules that are often displayed in the spawn area. These instructions might include further steps to take, commands to use, or additional settings to configure.
Now that you’re successfully connected to the server, you can start exploring, building, and playing with your friends. Coordinate with them to find each other in the server, initiate conversation using the in-game chat, and embark on exciting adventures together.
In the next section, we’ll explore how to create a multiplayer world on Minecraft PC, allowing you to have complete control over the gameplay settings and environment.
Creating a Multiplayer World
If you prefer to have more control over the gameplay settings and environment, you can create a multiplayer world on Minecraft PC. Creating your own world allows you to customize various aspects of the game, such as the difficulty level, game mode, and available resources. Follow these steps to create a multiplayer world:
- Open Minecraft: Launch Minecraft on your PC and log in with your Minecraft account credentials. Ensure that you have the latest version of the game installed to access all the features.
- Click on “Singleplayer” Mode: On the main menu, click on the “Singleplayer” button. This will take you to the singleplayer screen, where you can manage your singleplayer worlds.
- Create a New World: In the singleplayer screen, click on the “Create New World” button to start the world creation process. You’ll be prompted to enter a name for the world, choose a game mode (Survival, Creative, Adventure), and set other options such as world type and difficulty level.
- Enable LAN: Before generating the world, make sure to click on the “Allow Cheats: OFF” option and set it to “ON.” Enabling cheats will give you access to various commands that can be useful for managing the multiplayer world.
- Start the World: Once you’re satisfied with the settings, click on the “Create New World” button to start generating the world. Minecraft will begin creating the multiplayer world based on the specifications you provided.
- Share the LAN IP: After the world has been generated, press the “Esc” key to access the game menu. From there, click on the “Open to LAN” button. Minecraft will display an IP address and port number.
To allow your friends to join your multiplayer world, share the LAN IP address and port number with them. They can enter this information in the Minecraft multiplayer menu, “Direct Connect” option, to connect directly to your world as long as they are on the same local network.
Creating your own multiplayer world gives you the freedom to play with friends in a customized environment. Whether you want to focus on survival challenges, unleash your creativity in creative mode, or embark on adventure maps, creating a multiplayer world allows you to tailor the experience to your preferences.
In the next section, we’ll discuss how to invite friends to join your multiplayer world or server, ensuring that you can play together seamlessly.
Inviting Friends to Join
Playing Minecraft with friends is much more enjoyable, and fortunately, inviting them to join your multiplayer world or server is a straightforward process. Here’s how you can invite your friends to join your Minecraft gaming session:
- Sharing the Server IP: If you’re playing on an existing server, provide your friends with the IP address of the server. They can enter the IP address in the multiplayer menu or use the ‘Direct Connect’ option to join the same server as you. Make sure to double-check the accuracy of the IP address to avoid any connection issues.
- Sharing the LAN IP: If you’ve created a multiplayer world on your PC, share the LAN IP address and port number with your friends. This IP address is displayed when you open your world to LAN via the game menu. Your friends can use this information to join your world by selecting the ‘Direct Connect’ option and entering the LAN IP address.
- Using Third-Party Applications: There are several third-party applications and platforms that facilitate easy communication and invitation to Minecraft game sessions. Platforms like Discord, Skype, or Teamspeak can be used to share server information, voice chat, and coordinate gameplay with your friends. Simply create a group or join an existing one, and share the server IP or LAN IP details for easy access.
Remember to communicate with your friends and provide them with any additional instructions or rules specific to the server or world you’re playing on. This will ensure a seamless transition and an enjoyable experience for everyone involved.
By inviting your friends to join your Minecraft game sessions, you can collaborate on building massive structures, embark on exciting adventures, and compete in challenging mini-games together. The multiplayer aspect of Minecraft truly brings out the social and cooperative elements of the game, allowing you to create lasting memories with your friends.
In the next section, we’ll explore how you can manage multiplayer settings to customize your gaming experience further and cater to your preferences.
Managing Multiplayer Settings
When playing with friends on Minecraft PC, you have the option to manage various multiplayer settings to tailor the gaming experience to your preferences. Here are some key settings you can manage:
- Game Mode: As the host of the server or world, you have control over the game mode. You can switch between Survival, Creative, Adventure, or Spectator modes, depending on the type of gameplay you want to experience. Consider discussing with your friends and mutually deciding on the game mode that suits everyone’s interests.
- Difficulty Level: Adjusting the difficulty level can make the gameplay more challenging or relaxed. You can choose from Peaceful, Easy, Normal, or Hard difficulties. The selection of difficulty can affect factors like mob spawning, hunger depletion, and overall survival difficulty.
- Player Permissions: Configure player permissions to control the actions your friends can perform in your world or on the server. You can grant them privileges like building, breaking blocks, using commands, or even restrict them to certain areas. These permissions can be modified using commands or through server management plugins.
- World Options: Explore the world options to customize various aspects of the game environment. You can adjust the world size, biome distribution, generate structures, enable or disable the day-night cycle, and more. These options allow you to create a unique and customized world for you and your friends to enjoy.
- Data Packs and Mods: Utilize data packs and mods to enhance the gameplay experience. Data packs add new features, tweaks, or customizations to the game, while mods introduce additional content or gameplay mechanics. Ensure that all players have the required data packs or mods installed to maintain synchronization and prevent compatibility issues.
Depending on your technical expertise and the server configuration, you may need to use server management tools or plugins to access and modify some of these settings. It’s recommended to familiarize yourself with the available options and consult online resources or server documentation to make informed changes.
By effectively managing multiplayer settings, you can create a customized and enjoyable gaming experience for you and your friends. Experiment with different configurations, gather feedback, and iterate to find the optimal settings that provide maximum fun and engagement.
In the next section, we’ll explore the world of mini-games in Minecraft, where you and your friends can compete against each other or collaborate in exciting challenges.
Playing Mini-Games with Friends
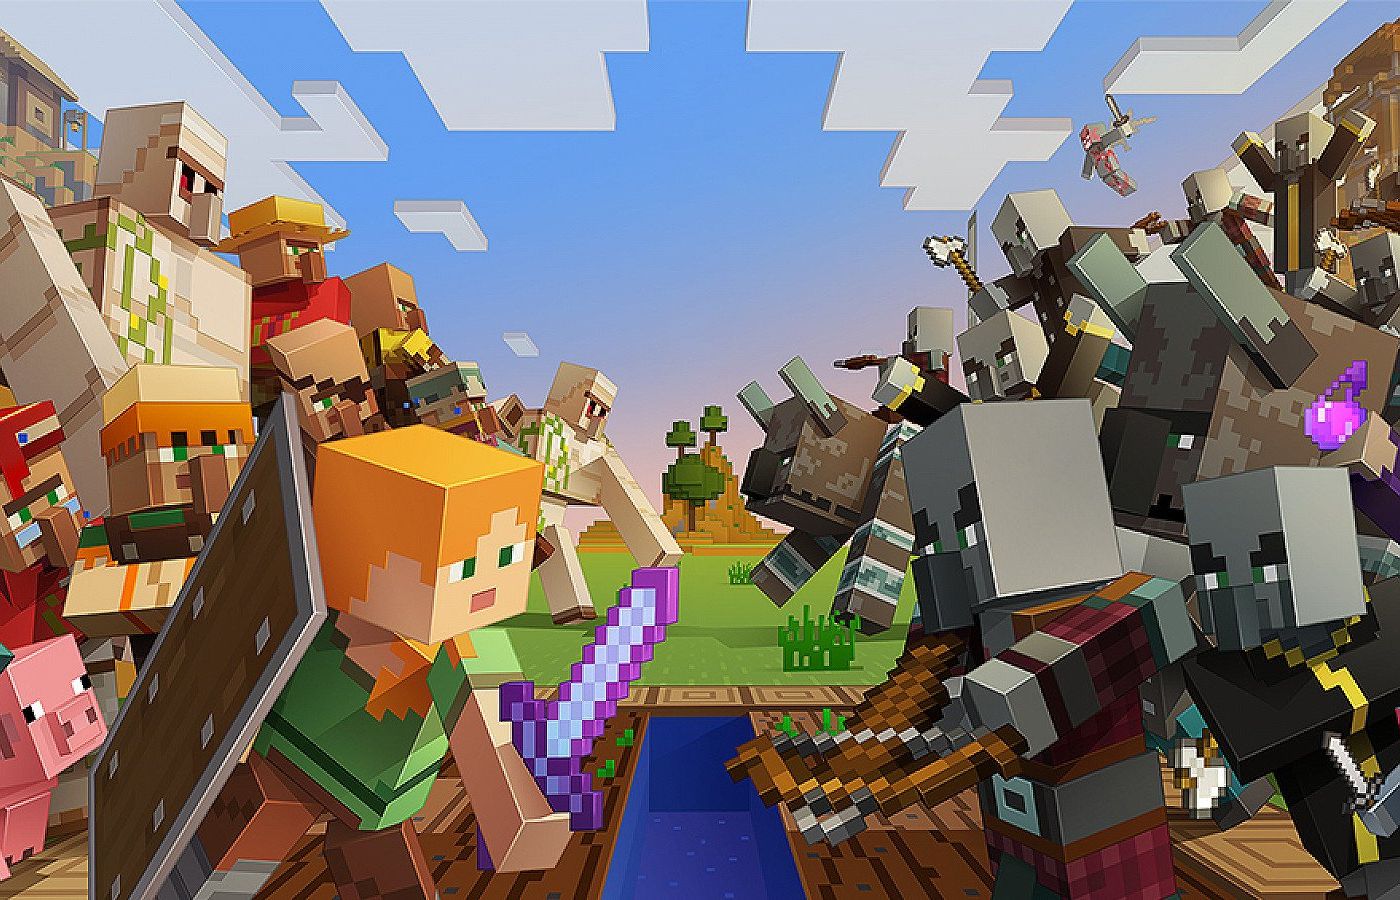
One of the most exciting aspects of playing Minecraft with friends is engaging in mini-games. Mini-games are specially designed game modes or challenges within Minecraft that allow you and your friends to compete or collaborate in unique ways. Here’s how you can enjoy mini-games with your friends:
- Official Mini-Games: Minecraft offers several official mini-games that you can access directly from the main menu. These mini-games include popular options like “Bed Wars,” “Hunger Games,” “Capture the Flag,” and more. Simply select the mini-game of your choice, invite your friends to join, and enjoy the fast-paced and action-packed gameplay.
- Community-Created Mini-Games: Minecraft has a vibrant community of players who have designed and created countless mini-games. These range from puzzle challenges and parkour courses to custom game modes and role-playing adventures. You can find these community mini-games on forums, server directories, or through the Minecraft Marketplace. Explore the creativity of the community and try out different mini-games with your friends.
- Create Your Own Mini-Games: If you’re feeling creative and want to take mini-games to the next level, consider designing your own. Minecraft provides various tools, such as command blocks and redstone, that you can use to create unique and custom mini-games. From scavenger hunts and puzzles to obstacle courses and racing tracks, the possibilities are endless. Unleash your creativity, collaborate with your friends, and create mini-games that cater to your collective interests.
Playing mini-games with friends adds an extra layer of competition, teamwork, and excitement to your Minecraft experience. It allows you to test your skills, strategize, and have fun in a more focused and intense setting. Mini-games also provide an opportunity to bond with your friends, share memorable moments, and create friendly rivalries.
Remember to communicate and agree upon the rules and objectives of the mini-games before starting. This ensures a fair and enjoyable experience for all participants. Additionally, encourage sportsmanship and celebrate both victories and defeats, as mini-games are all about having fun together.
In the next section, we’ll explore the world of community servers, where you can join vast multiplayer realms and interact with players from around the globe.
Exploring Community Servers
Community servers in Minecraft open up a whole new world of possibilities for playing with friends. These servers are created and managed by players from around the globe, offering unique game modes, themes, and communities to join. Here’s how you can explore and enjoy community servers:
- Research and Recommendations: Start by researching popular community servers and reading reviews or recommendations from other players. Online forums, server directories, and Minecraft communities are excellent sources to discover highly-rated and well-established servers. Look for servers that align with your interests, whether they offer creative-building, survival challenges, role-playing, or mini-games.
- Server Listings and Descriptions: Once you have a list of potential servers, visit their websites or server listings to learn more about them. Check for detailed descriptions, server features, rules, and any customization options they offer. It’s important to find a server that matches your playing style and has a community you’ll enjoy interacting with.
- Join the Server: After finding a community server that appeals to you, note down the server’s IP address and port number. Launch Minecraft and go to the multiplayer menu. Click on “Add Server” and enter the server information. Save the settings and select the server from your server list to join. As you connect, be mindful of any additional steps or requirements, such as registering on the server’s website or creating a specific character profile.
- Integrate into the Community: Upon entering a community server, take the time to explore and get familiar with the server’s rules and guidelines. Find out if they have a designated tutorial or spawn area that will introduce you to the server’s features and community. Engage with other players by introducing yourself and participating in group activities. Many community servers have forums, Discord channels, or in-game chat systems to help you connect and interact with fellow players.
- Contribute and Collaborate: Community servers thrive on participation and collaboration. If you enjoy the server and its community, consider contributing in any way you can. This could involve helping build structures, organizing events, or even proposing new ideas for server improvements. By actively engaging with the community, you’ll forge new friendships, form alliances, and create a more vibrant and enjoyable gaming experience.
Exploring community servers offers endless opportunities for friendship, creativity, and collaboration. Each server has its own unique atmosphere and gameplay elements, allowing you to dive into different virtual worlds and make lasting memories with friends.
In the next section, we’ll discuss the importance of using voice chat to communicate effectively during multiplayer gameplay.
Using Voice Chat to Communicate
Effective communication is key when playing Minecraft with friends, and using voice chat can greatly enhance the multiplayer experience. Voice chat allows you and your friends to communicate in real-time, making coordination, strategizing, and socializing much easier. Here’s how you can utilize voice chat:
- Third-Party Voice Chat Programs: There are several third-party voice chat programs available that you can use alongside Minecraft. Programs like Discord, TeamSpeak, or Microsoft Teams provide reliable voice communication platforms where you can create private voice channels for your group of friends. These programs often offer additional features like text chat, file sharing, and integration with other gaming platforms.
- Integrated Voice Chat Plugins: Some Minecraft servers have integrated voice chat plugins that allow you to communicate with other players within the game. These plugins provide a seamless in-game voice chat experience, eliminating the need for additional third-party software. Check if the server you’re playing on offers this feature, as it can enhance immersion and streamline communication.
- Setting Up Voice Chat Channels: When using third-party voice chat programs, create dedicated voice channels for specific activities or groups within your Minecraft session. This helps in organizing conversations and prevents cross-talk. For example, you can have separate channels for general conversation, building plans, or specific game modes. Set up channel permissions to ensure that only authorized players can access certain channels.
- Crafting a Welcoming Environment: Encourage your friends to use voice chat and ensure that all participants feel comfortable speaking up. Create an inclusive and welcoming environment where everyone has the opportunity to contribute and express themselves. Avoid talking over others and be mindful of background noise or distractions that may hinder communication.
- Combining Voice Chat with In-Game Chat: While voice chat is a great way to communicate, don’t neglect the in-game chat feature. It can be helpful for sharing important information or discussing plans that need to be documented for future reference. Utilize both voice chat and in-game chat to stay connected and ensure that all information is effectively communicated.
Using voice chat adds a personal touch to multiplayer gameplay, allowing you and your friends to connect on a more intimate level. It fosters stronger bonds, enables efficient teamwork, and enhances the overall gaming experience.
Remember to adjust microphone settings to ensure optimal audio quality, and always respect the privacy and comfort levels of other players in your group. By utilizing voice chat, you’ll maximize communication efficiency and create a seamless and immersive gaming atmosphere.
In the next section, we’ll explore common troubleshooting steps for resolving connection issues that may arise during multiplayer gameplay.
Troubleshooting Connection Issues
When playing Minecraft with friends, connection issues can occasionally arise and disrupt the multiplayer experience. Here are some common troubleshooting steps you can take to resolve these issues:
- Check Network Connectivity: Ensure that you have a stable internet connection. Try restarting your router or modem and reconnecting your PC to the network. Additionally, verify that other devices on your network are not hogging bandwidth, as this can affect your Minecraft connection.
- Verify Server Status: If you’re experiencing connection issues on a specific server, check the server’s status. Some servers may undergo maintenance or experience temporary outages. Visit the server’s website or social media channels to see if there are any announcements regarding connectivity issues.
- Restart Minecraft: Close and relaunch Minecraft to refresh the game and establish a clean connection. This can help resolve any temporary glitches or connection problems that may have occurred during gameplay.
- Update Minecraft: Ensure that you have the latest version of Minecraft installed. Updates often contain bug fixes and performance improvements that can address connection issues. The Minecraft launcher should automatically notify you if there is an update available.
- Disable Firewall or Antivirus Software: Sometimes, overly strict firewall or antivirus settings can block Minecraft from establishing a connection. Temporarily disable these security features and see if it resolves the connection issues. If the problem is resolved, you can add an exception to your firewall or antivirus settings to allow Minecraft to connect.
- Check Server Whitelist: If you’re playing on a private server that requires a whitelist, ensure that you and your friends are added to the server’s whitelist. Contact the server administrator if you’re unable to connect or if your name is missing from the whitelist.
- Test with Different Servers: If you’re encountering connection issues on a specific server, try connecting to a different server and see if the problem persists. This can help determine if the issue is server-related or if it’s specific to your computer or network.
- Contact Server Support: If you’ve exhausted all troubleshooting steps and are still experiencing connection issues, reach out to the server’s support team or administrator for assistance. They may be able to provide specific guidance or resolve any server-related issues that are causing connection problems.
By following these troubleshooting steps, you can effectively address most common connection issues in Minecraft and ensure a smoother multiplayer experience with your friends. It’s important to be patient and thorough in your troubleshooting efforts, as connectivity problems can have various causes.
If all else fails, consider seeking help from online Minecraft communities or forums where experienced players and server administrators can provide additional guidance and support.
Now that you know how to troubleshoot connection issues, you can continue enjoying Minecraft with your friends without disruptions.
Conclusion
Playing Minecraft with friends on the PC version adds a whole new layer of excitement and collaboration to the game. By following the steps outlined in this guide, you can easily join servers, create multiplayer worlds, invite friends to play, and explore the vast world of Minecraft together. Utilizing voice chat enhances communication and enables seamless coordination, while troubleshooting connection issues ensures a smooth multiplayer experience.
Whether you enjoy teaming up to build grand structures, engaging in thrilling mini-games, or embarking on exciting adventures, playing Minecraft with friends allows you to create lasting memories and forge stronger bonds. The wide range of community servers and customization options ensures that you can find a gameplay experience that aligns with your preferences. From survival challenges to creative endeavors, the possibilities are endless in the Minecraft universe.
Remember to embrace teamwork, sportsmanship, and creativity as you play with friends. Minecraft provides a platform for collaboration, problem-solving, and imaginative expression. By working together and exploring the diverse features of the game, you can fully immerse yourselves in this beloved sandbox experience.
Now, gather your friends, embark on epic journeys, and let your creativity flourish in the world of Minecraft PC multiplayer. Have fun, discover new adventures, and create unforgettable memories together!