Introduction
With the increasing size and complexity of modern games, it’s not uncommon to run out of storage space on your computer’s internal hard drive. Fortunately, there’s a solution – playing games off an external hard drive. This allows you to expand your storage capacity and keep your favorite games easily accessible.
Playing games off an external hard drive offers several benefits. Firstly, it frees up valuable space on your computer’s internal hard drive, allowing it to run more efficiently. You no longer have to worry about constantly uninstalling and re-installing games to make room for new ones.
Another advantage is portability. By storing your games on an external hard drive, you can play them on any computer that has the necessary system requirements. This is especially useful for gamers who travel frequently or have multiple gaming setups.
In addition, using an external hard drive can improve gaming performance, especially if your computer’s internal hard drive is slower or older. External drives often have faster read and write speeds, reducing load times and improving overall gameplay.
When it comes to choosing the right external hard drive for gaming, there are a few key factors to consider. The capacity of the drive is important, as it should be large enough to accommodate your game library. Generally, a minimum of 1TB is recommended, but you may need more if you have a large collection of games.
Furthermore, the connectivity options of the external hard drive are crucial. USB 3.0 or higher is recommended for faster data transfer speeds, ensuring smooth gameplay and minimal lag. Some drives also offer Thunderbolt or eSATA ports, which provide even faster connection options.
It’s also essential to choose a reliable and durable external hard drive from a reputable brand. Gaming requires frequent data access, and you don’t want to risk losing your precious game files due to a faulty drive. Look for drives with good reviews and warranties to ensure peace of mind.
Once you’ve selected the right external hard drive, you’ll need to format it properly for gaming on your specific operating system. Formatting the drive will prepare it for use and ensure compatibility with your computer. The process may vary depending on whether you’re using Windows, macOS, or Linux.
Benefits of Playing Games off an External Hard Drive
Playing games off an external hard drive offers a plethora of advantages that enhance your gaming experience. Let’s explore some of the key benefits:
1. Expanded Storage Capacity: One of the primary benefits of using an external hard drive for gaming is the ability to expand your storage capacity. As games continue to grow in size, it’s easy to run out of space on your computer’s internal hard drive. By utilizing an external hard drive, you can store a large collection of games without worrying about limited storage space.
2. Efficient Management of Game Library: With an external hard drive, you can manage your game library more efficiently. Instead of constantly uninstalling and reinstalling games to make room for new ones, you can simply transfer them to the external drive. This saves time and effort, ensuring that you always have access to your favorite games without sacrificing valuable system resources.
3. Portability: Another significant benefit is the portability offered by external hard drives. If you’re a gamer who frequently travels or has multiple gaming setups, playing games off an external hard drive is incredibly convenient. You can carry your entire game library with you, allowing you to play your favorite titles on any computer that meets the necessary system requirements.
4. Improved Performance: Gaming performance can significantly benefit from using an external hard drive. In scenarios where your computer’s internal hard drive is slower or older, using an external drive with faster read and write speeds can reduce load times and improve gameplay overall. This is especially noticeable in open-world games with vast environments, where faster storage access can result in smoother and more enjoyable gameplay.
5. Easy Setup and Installation: Setting up and installing games on an external hard drive is a straightforward process. Once you’ve connected the drive to your computer, you can easily transfer your games to the external storage. This eliminates the hassle of dealing with complex installation procedures and allows for quick access to your games whenever you’re ready to play.
6. Data Protection: By storing your games on an external hard drive, you can also protect your data. Hard drives can fail, and in unfortunate circumstances, your computer’s internal hard drive may become damaged, resulting in data loss. However, by keeping your games on an external drive, you can minimize the risk of losing your precious game files and progress. Additionally, external hard drives often come with protective features like encryption, password protection, and backup software, adding an extra layer of security.
Overall, playing games off an external hard drive provides a seamless gaming experience with expanded storage capacity, improved performance, and enhanced portability. It’s a practical solution for gamers who want to manage their game library effectively while enjoying the convenience of playing games on different computers.
Choosing the Right External Hard Drive for Gaming
When it comes to choosing an external hard drive for gaming, there are several factors to consider. Let’s explore the key aspects that you should keep in mind:
1. Storage Capacity: The storage capacity of the external hard drive is an essential consideration. Games nowadays can take up a significant amount of space, so it’s crucial to choose a drive with sufficient capacity to accommodate your game library. A minimum of 1TB is generally recommended, but if you have a vast collection of games or plan on installing larger titles, you might want to opt for a higher capacity drive.
2. Speed and Performance: Gaming requires fast read and write speeds to ensure smooth gameplay and reduce load times. Look for an external hard drive that supports USB 3.0 or higher for faster data transfer rates. This will help minimize any lag or stuttering during gameplay, allowing you to fully immerse yourself in the gaming experience.
3. Connectivity Options: Consider the connectivity options offered by the external hard drive. USB 3.0 is the most common and widely supported option, but if your computer has Thunderbolt or eSATA ports, you might want to consider a drive that offers these connections for even faster data transfer speeds. It’s important to ensure compatibility with your computer’s available ports.
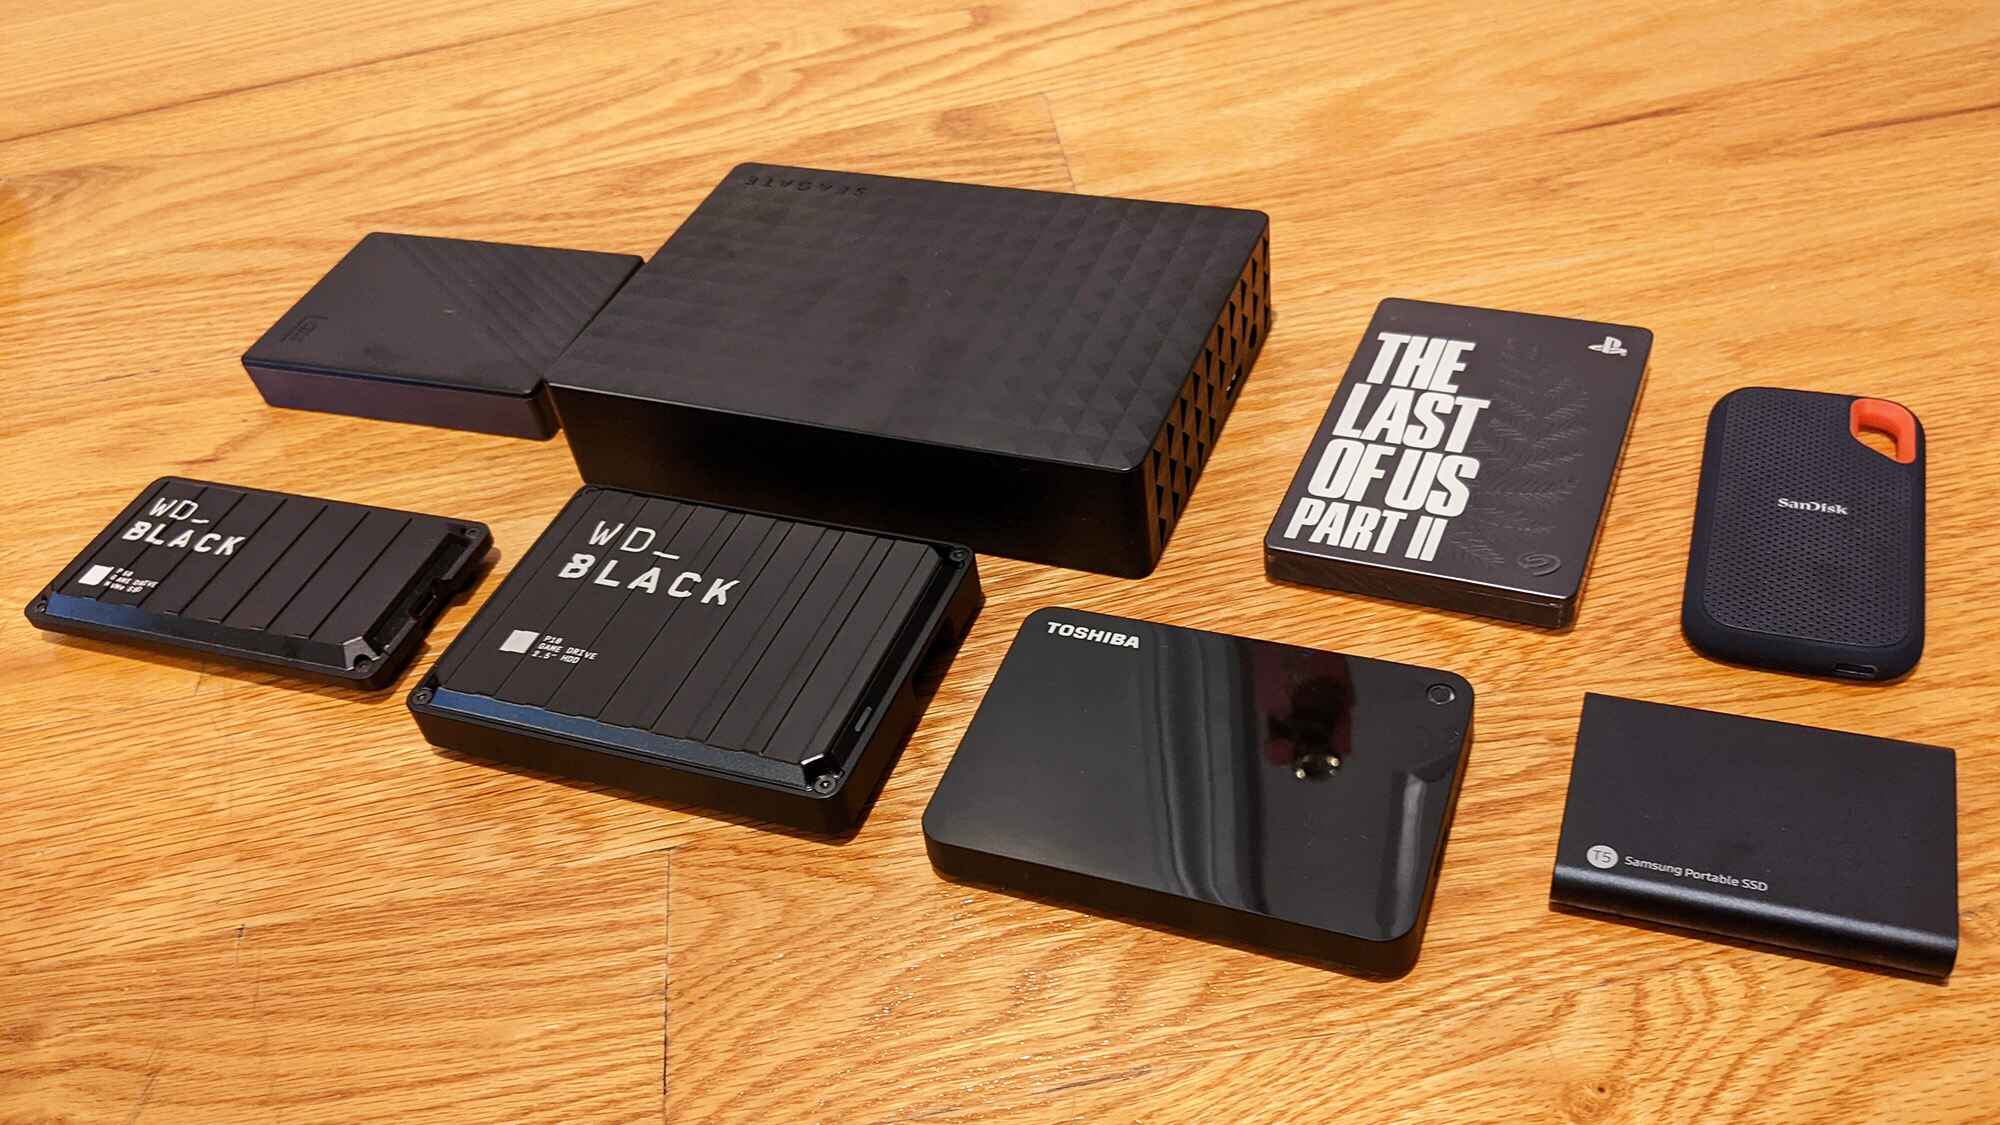
4. Durability and Reliability: Gaming involves frequent data access, so you’ll want an external hard drive that is reliable and durable. Look for drives from reputable brands with positive customer reviews, as this indicates their reliability. Additionally, check if the drive has shock resistance features or other protective measures to ensure it can withstand the rigors of regular use.
5. Pricing: Consider your budget when selecting an external hard drive for gaming. Prices can vary depending on factors such as storage capacity, brand, and additional features. It’s important to find a balance between affordability and meeting your gaming storage needs. Research different options to compare prices and make an informed decision.
6. Brand and Warranty: Lastly, it’s advisable to choose a well-known and reputable brand. Established brands often offer better customer support and reliable product warranties. A warranty will give you peace of mind, knowing that you can get assistance if any issues arise with your external hard drive.
By considering these factors, you can choose the right external hard drive that meets your gaming needs. Remember, finding the perfect balance of storage capacity, performance, connectivity, durability, and price will ensure a seamless gaming experience and allow you to enjoy your favorite games without any storage limitations.
Formatting the External Hard Drive for Gaming
Before you can start using an external hard drive for gaming, you need to format it properly to ensure compatibility with your operating system and gaming platform. The process may vary depending on whether you’re using Windows, macOS, or Linux. Here are the general steps to format your external hard drive for gaming:
1. Backup Important Data: Before formatting, it’s crucial to back up any important data stored on the external drive. Formatting will erase all data on the drive, so make sure you have a copy of any files you want to keep.
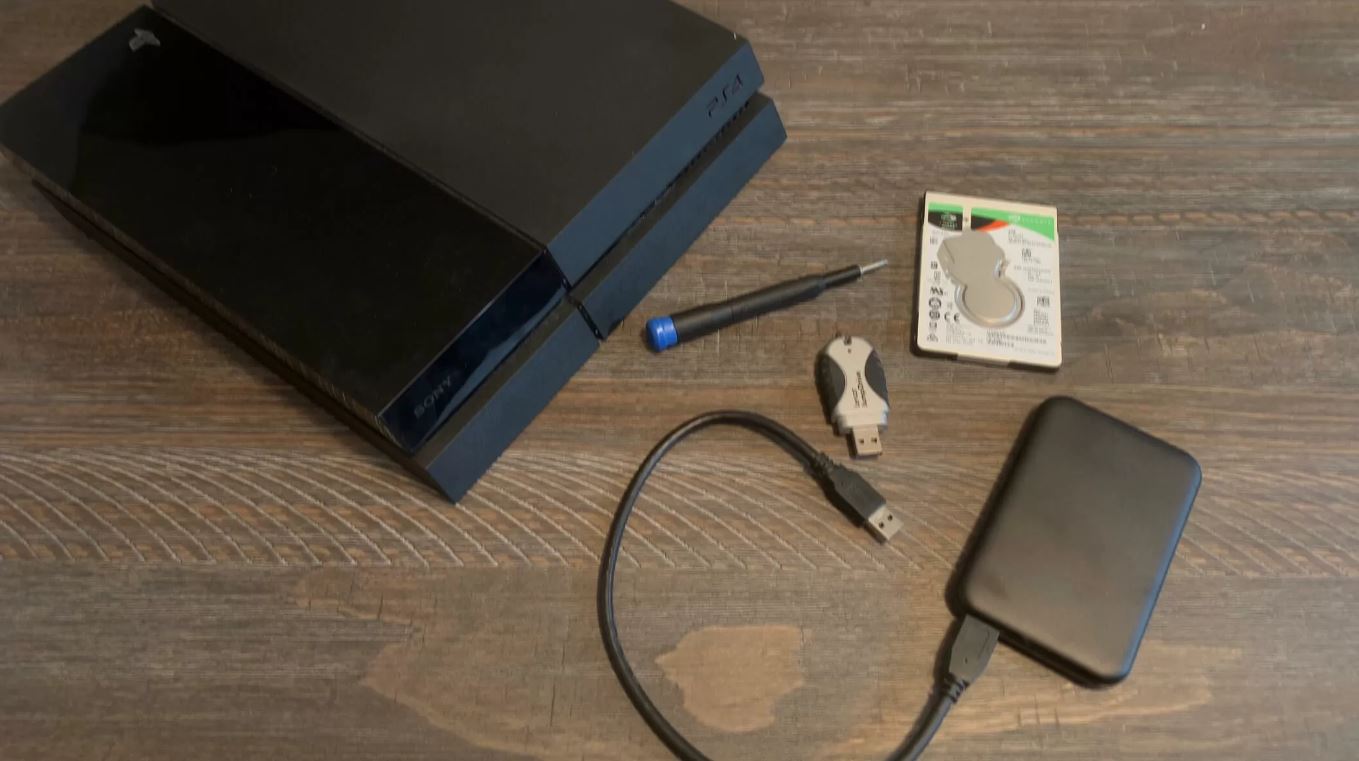
2. Connect the External Hard Drive: Connect the external hard drive to your computer using the appropriate cable (usually USB or Thunderbolt). Ensure that the drive is properly recognized and accessible by your operating system.
3. Windows: If you’re using Windows, open the Disk Management tool by right-clicking the “Start” button and selecting “Disk Management.” Locate your external hard drive in the list of disks and partitions. Right-click on the drive and select “Format.” Choose the desired file system (NTFS is recommended for Windows) and allocate a drive letter. Follow the prompts to complete the formatting process.
4. macOS: For macOS, open the “Disk Utility” by going to “Applications” > “Utilities” > “Disk Utility.” Select your external hard drive from the list of devices. Click on the “Erase” tab and choose the file system (macOS Extended (Journaled) is recommended). Enter a name and click on “Erase” to format the drive.
5. Linux: If you’re using Linux, you can format the external hard drive using the terminal and the appropriate commands. Open a terminal window and identify the drive you want to format using the “lsblk” or “fdisk -l” command. Once you’ve identified the correct device, use the “mkfs” command followed by the desired file system (e.g., ext4) to format the drive. Make sure to double-check the device identifier to avoid formatting the wrong drive.
6. Testing the Formatted Drive: After formatting, it’s a good idea to test the drive to ensure it’s working correctly. Copy some files or install a small game to verify that data can be written and read from the drive without any issues.
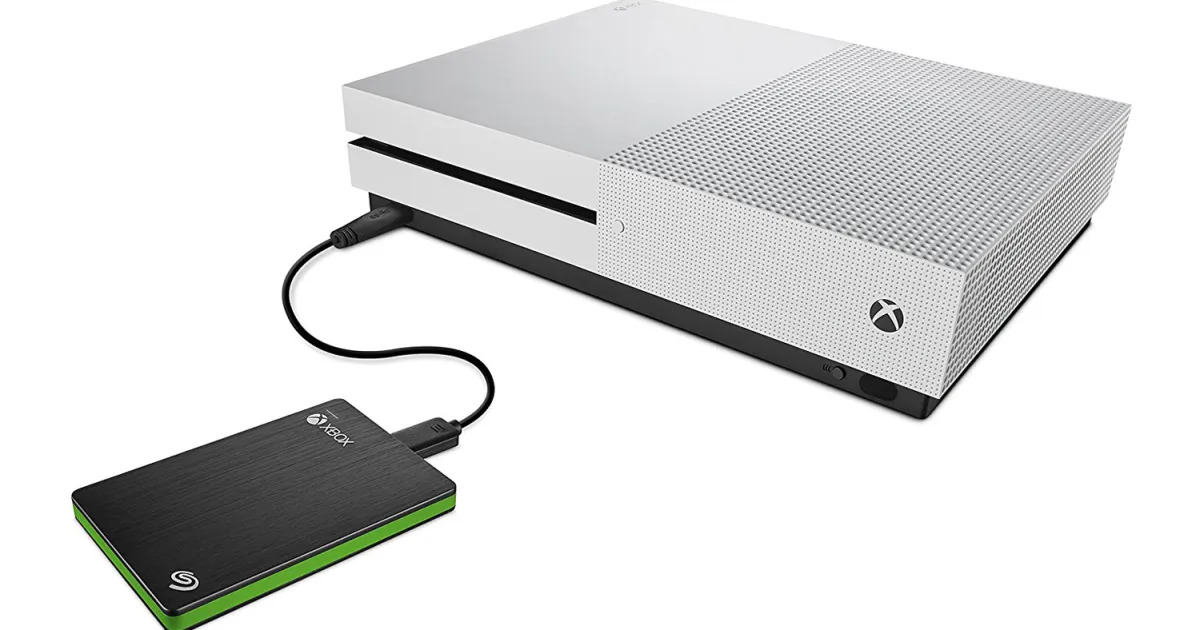
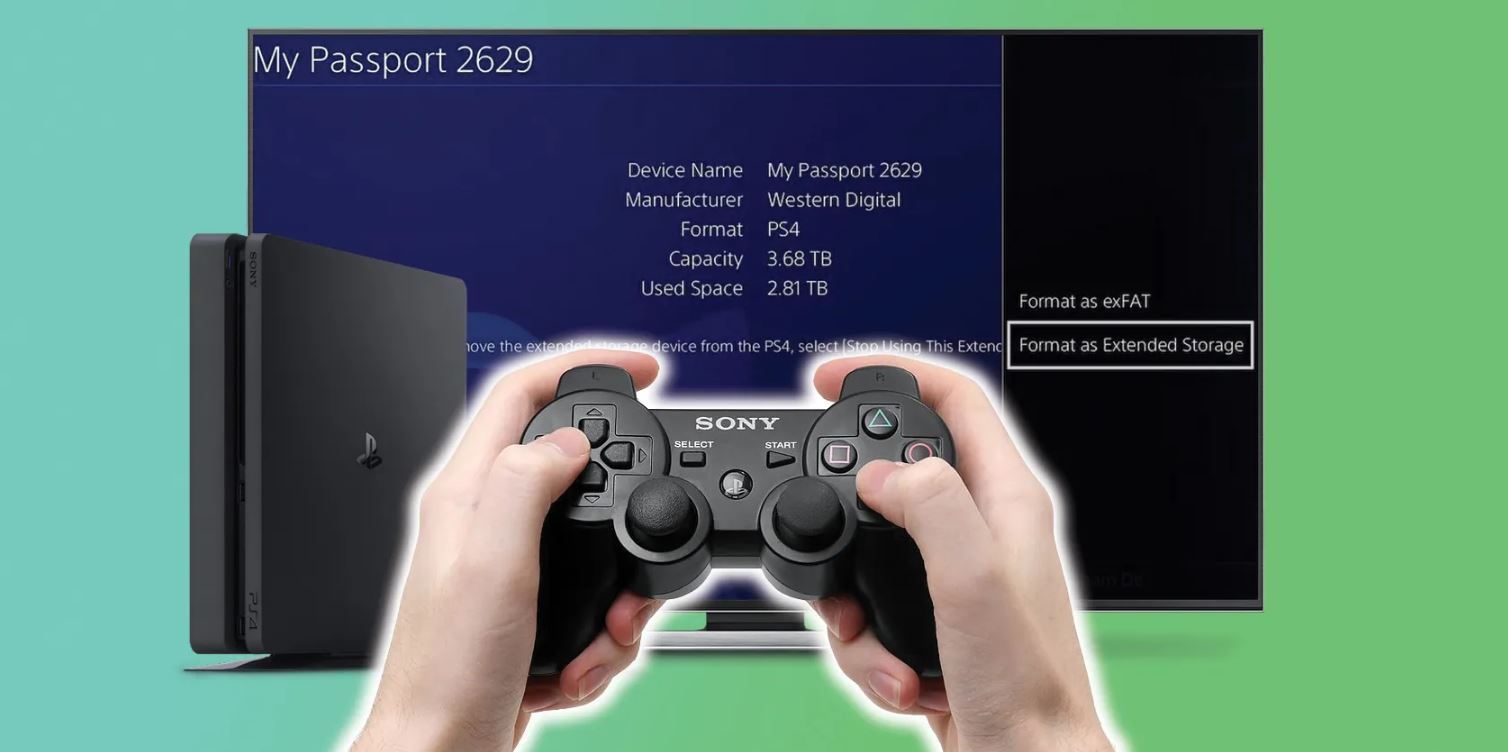
It’s worth mentioning that some gaming platforms, such as Xbox and PlayStation consoles, may have their own specific formatting requirements. Make sure to follow the instructions provided by the console manufacturer for formatting the external hard drive to be used with the gaming system.
By properly formatting the external hard drive for gaming, you will ensure compatibility with your operating system and gaming platform. Following the appropriate steps will enable you to take full advantage of the additional storage space and seamlessly store and access your games on the external drive.
Transferring Games to the External Hard Drive
Once you have successfully formatted your external hard drive for gaming, the next step is to transfer your games onto the newly formatted drive. This process may vary depending on the gaming platform you’re using and the specific game distribution platform (e.g., Steam, Epic Games, etc.) Here are the general steps to transfer games to the external hard drive:
1. Locate Game Files: Identify where your game files are currently stored on your computer’s internal hard drive. This will typically be in the default installation directory designated by the game distribution platform. For example, if you’re using Steam, the default folder may be “C:\Program Files (x86)\Steam\steamapps\common”.
2. Copy or Move Game Files: Once you’ve located the game files, you can either copy or move them to the external hard drive. Copying the files will create a duplicate on the external drive while leaving the original files intact. Moving the files will transfer them entirely to the external drive, freeing up space on the internal drive. The choice between copying and moving depends on your preferences and available storage space.
3. Paste Game Files: Open the file location on the external hard drive where you want to store your games. Create a dedicated folder for games if one doesn’t already exist. Right-click inside the folder and select “Paste” to transfer the game files from your internal drive to the external drive.
4. Linking Game Files: This step is essential if you’re using a game distribution platform like Steam. After transferring the game files to the external hard drive, you need to create a symbolic link or add a new game library location within the platform. This tells the platform where to find the game files on the external drive. Consult the specific instructions for your game distribution platform on how to link the game files.
5. Verifying Game Files: After transferring the games, it’s a good practice to verify the game files to ensure they were copied or moved correctly. This can help identify any corrupted or missing files. Most game distribution platforms provide an option to verify game files, so utilize that to ensure the integrity of your transferred games.
6. Testing and Launching Games: Once the game files have been transferred and linked, you can now test the games by launching them from the external hard drive. Open the game distribution platform, select the game from your library, and click on “Play.” The game should run from the external drive without any issues.
Note that the process may vary slightly depending on the game distribution platform you’re using, so be sure to consult the platform-specific documentation or support resources for detailed instructions.
By following these steps, you can successfully transfer your games to the external hard drive, freeing up space on your computer’s internal drive while still having easy access to your favorite games. Enjoy the benefits of expanded storage capacity and a more efficient gaming experience.
Setting up the Game Directories on the External Hard Drive
Once you have transferred your games to the external hard drive, it’s important to set up the game directories correctly to ensure smooth gameplay and easy organization. Setting up game directories involves creating a logical folder structure on the external drive and configuring the game settings within the respective game distribution platform. Here’s how you can set up the game directories on the external hard drive:
1. Organize Game Folders: Open the external hard drive and create a dedicated folder to house your game directories. This will serve as the main folder where you will keep all your games. You can name this folder anything you prefer, such as “Games” or “Game Library”.
2. Create Subfolders: Within the main game folder, create subfolders for each game or game category. This will help maintain a clean and organized structure for your game collection. For example, you can create subfolders based on genres (e.g., “Action”, “Adventure”, “RPG”), game series, or individual game titles. You can also create separate folders for different game distribution platforms if you have games from multiple sources.
3. Move Game Files: Move the game files from the default installation location on your external hard drive into the appropriate subfolders you created. This ensures that each game has its dedicated folder within the main game directory.
4. Update Game Settings: Launch the game distribution platform (e.g., Steam, Epic Games) and access the settings or preferences section. Look for the “Library” or “Download” settings, as this is where you can specify the new location for your games. Browse to the main game folder on the external hard drive and set it as the default installation directory for future game installations. Some platforms may also allow you to move existing games to the new location through their settings.
5. Verify Game Files: After updating the game settings, it’s a good idea to verify the game files within the game distribution platform. This will ensure that the platform recognizes the new game directories and validates the integrity of the game files on the external hard drive.
6. Launching Games: To play a game, simply open the game distribution platform, navigate to your library, and select the game you want to play. The platform will launch the game from the external hard drive, and you can start playing without any issues.
By setting up game directories on the external hard drive, you can keep your game collection organized and easily accessible. The logical folder structure helps you find specific games quickly, while configuring the game settings within the distribution platform ensures that the platform recognizes and properly launches the games from the external drive.
Launching Games from the External Hard Drive
Launching games from the external hard drive is a straightforward process once you have set up the game directories correctly. Whether you’re using a game distribution platform or launching games directly, here are the general steps to launch games from the external hard drive:
1. Game Distribution Platforms: If you’re using a game distribution platform like Steam, Epic Games, or GOG Galaxy, the process is typically seamless. Open the platform and navigate to your game library where all your installed games are listed.
2. Platform Interface: Within the game library interface, locate the game you want to play. The game should appear with its respective icon and title in your library.
3. Launching the Game: Once you’ve found the game you want to play, click on it or select the “Play” button. The game distribution platform will launch the game from the external hard drive, utilizing the game files stored in the corresponding game directory.
4. Direct Game Launch: In some cases, you may have games that don’t require a game distribution platform. To launch these games directly from the external hard drive, navigate to the game directory and locate the game executable file. Often, this will be an application file with a “.exe” extension or a similar file type that runs the game. Double-click on the executable file to launch the game.
5. Game Settings and Configuration: For both game distribution platforms and direct game launches, you can access the game settings and configuration options from within the game itself. This allows you to customize graphics settings, audio options, control bindings, and other preferences according to your liking.
6. Save Games and Progress: When playing games from the external hard drive, it’s important to ensure that your game progress and save files are stored correctly. Some games may automatically save progress to the appropriate folder within the game directory, while others may have separate settings for saving games. Make sure to double-check the save game and progress settings within each game to avoid any loss of data.
By following these steps, you can easily launch games from the external hard drive. Whether you’re using a game distribution platform or launching games directly, the process remains relatively similar. Enjoy the convenience of having your entire game library accessible on any computer with the necessary system requirements without worrying about storage limitations.
Troubleshooting Common Issues with Playing Games off an External Hard Drive
Playing games off an external hard drive can be incredibly convenient, but occasionally, you may encounter some issues. Here are some common problems that may arise when playing games from an external hard drive and how to troubleshoot them:
1. Game Not Launching: If a game fails to launch from the external hard drive, ensure that the game files are correctly copied or moved to the external drive. Double-check that the game directories and file paths match the settings within the game distribution platform. If the issue persists, try restarting your computer and ensuring that the external hard drive is properly connected.
2. Slow Load Times: If you experience slow load times while playing games from the external hard drive, it could be due to insufficient read/write speeds. Make sure that you’re using an external hard drive with fast transfer rates, such as USB 3.0 or higher. Additionally, ensure that the external hard drive is not fragmented. Running a disk defragmentation tool on the drive can help improve performance.
3. Lag or Stuttering: Lag or stuttering during gameplay can be caused by various factors. First, check if your computer meets the minimum system requirements of the game. Insufficient RAM or a slow processor can lead to performance issues. Additionally, make sure that the external hard drive is connected to a high-speed USB port and that it’s not being used for other data-intensive tasks while gaming.
4. Game Crashes: If a game crashes when played from the external hard drive, verify that the game files are intact and not corrupted. Ensure that the external hard drive is not experiencing any physical damage or connectivity issues. Updating your graphics card drivers and the game itself to the latest version can also help resolve compatibility issues that may cause crashes.
5. Save File Corruption: In some cases, save files may become corrupted when playing games from an external hard drive. To prevent data loss, regularly back up your game saves. Additionally, ensure that the external hard drive is not abruptly disconnected during gameplay, as it can lead to file corruption. Safely eject the drive or use the “eject” option in the operating system before unplugging it.
6. Insufficient Storage Space: If you run out of space on the external hard drive, consider uninstalling games that you don’t frequently play to make room for new ones. If you have a vast game library, you may need to upgrade to a larger capacity external hard drive to accommodate your needs.
7. Drive Recognition Issues: Sometimes, the external hard drive may not be recognized by the computer or the game distribution platform. Ensure that the drive is properly connected, and try plugging it into a different USB port. Testing the drive on another computer can help determine if the issue is related to the drive or the computer itself.
If you encounter persistent problems with gaming from an external hard drive, consult the respective game distribution platform’s support documentation, online forums, or reach out to their customer support for further assistance. Additionally, checking for updates for your operating system, game distribution platform, and game itself can often resolve compatibility issues and performance problems.
By troubleshooting these common issues, you can enjoy a seamless gaming experience when playing games from an external hard drive.
Conclusion
Playing games off an external hard drive can greatly enhance your gaming experience by providing expanded storage capacity, improved performance, and increased portability. It allows you to keep your game library organized, easily accessible, and frees up valuable space on your computer’s internal hard drive. Additionally, it offers the flexibility to play games on different computers, making it ideal for gamers who travel or have multiple gaming setups.
When choosing an external hard drive for gaming, consider factors such as storage capacity, speed and performance, connectivity options, durability, and price. Selecting a reliable and reputable brand ensures that your game files are securely stored and easily accessible whenever you want to play.
After selecting an appropriate external hard drive, formatting it correctly for your operating system is crucial. Following the specific steps for Windows, macOS, or Linux will ensure compatibility and optimum performance when gaming from the external drive.
Transferring games to the external hard drive requires moving or copying the game files to the appropriate directories and updating the settings within the game distribution platform. Proper setup and organization of game directories help keep your game library manageable and make it easier to locate and launch games.
Troubleshooting common issues such as game launch failures, slow load times, lag or stuttering, game crashes, save file corruption, insufficient storage space, and drive recognition problems can help overcome any obstacles and ensure a smooth gaming experience.
By following the guidelines and suggestions provided in this article, you can effectively play games off an external hard drive, expanding your storage capacity, improving performance, and enjoying gaming on the go. Embrace the convenience and flexibility that an external hard drive provides, and immerse yourself in endless hours of gaming pleasure.