How to Pay with Afterpay In-Store
Afterpay is a popular payment method that allows you to buy now and pay later, both online and in-store. It provides a convenient way to make purchases without immediately paying the full amount. If you’re wondering how to use Afterpay for in-store transactions, follow these simple steps:
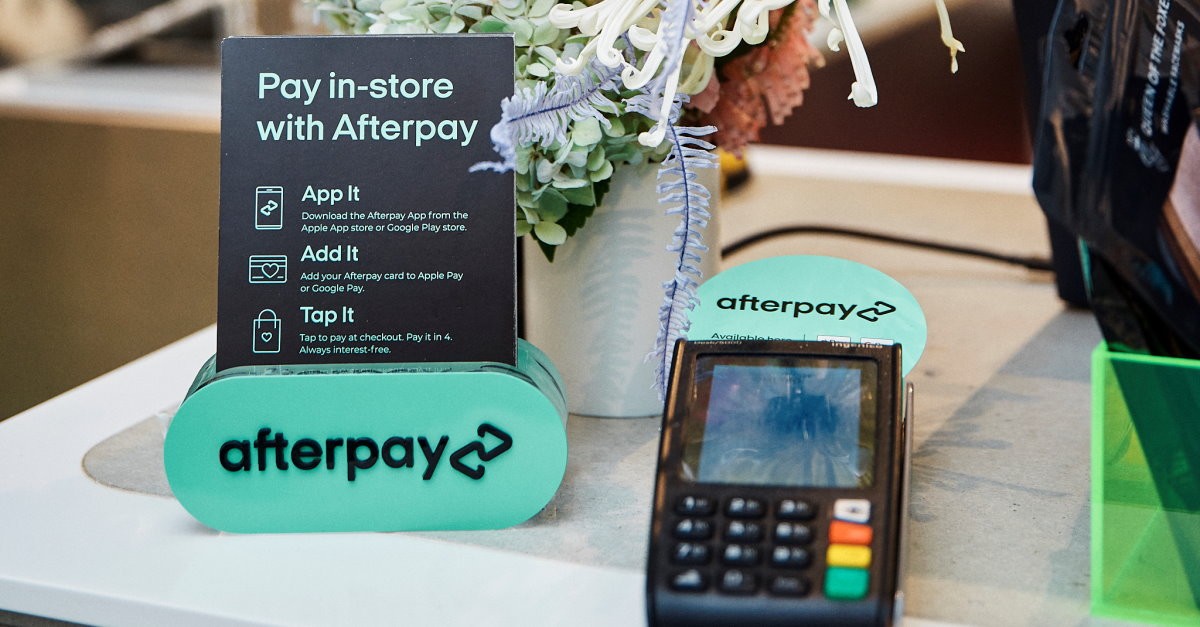
- Download the Afterpay App: Start by downloading the Afterpay app from your device’s app store. It’s available for both iOS and Android users.
- Create an Afterpay Account: Open the app and sign up for an Afterpay account using your email address and password. Alternatively, you can sign up with your Facebook or Google account for a seamless experience.
- Link a Payment Method: Once your account is set up, link a payment method, such as a debit or credit card. Afterpay accepts major card providers, and you can save multiple cards to your account for added convenience.
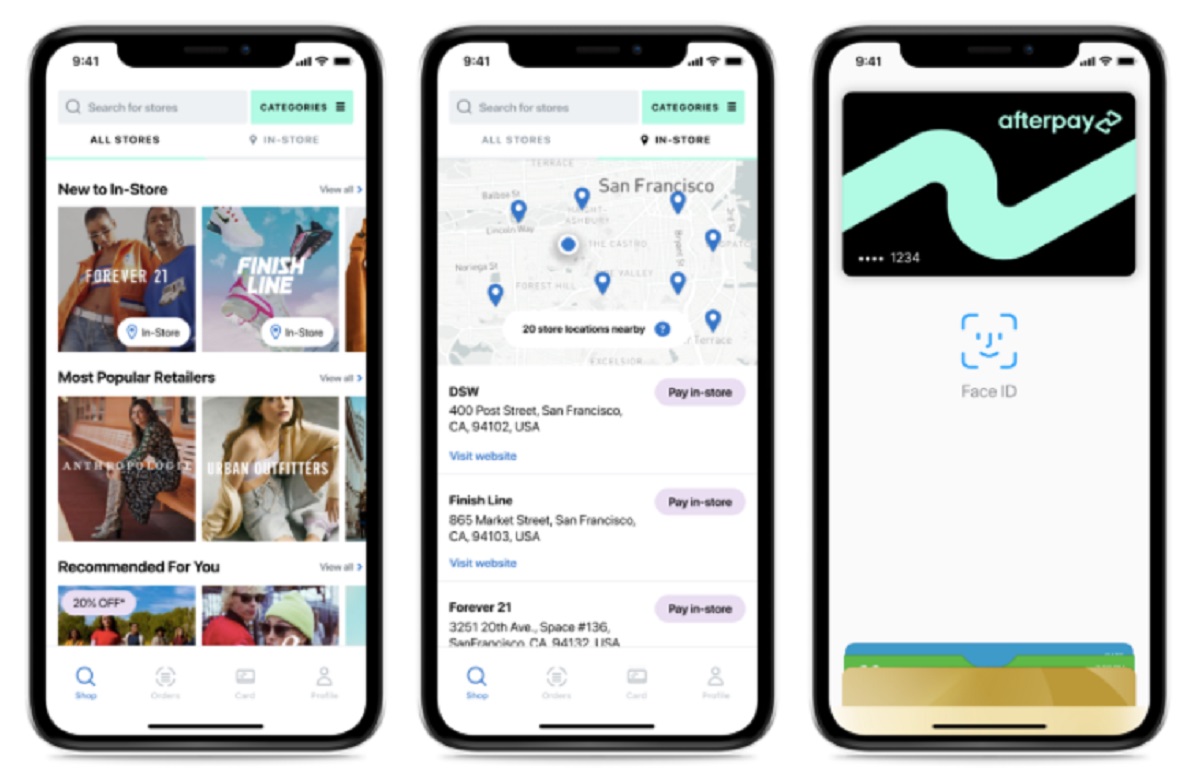
- Find Afterpay-Enabled Stores: Explore the app to discover the list of Afterpay-enabled stores in your area. These stores have partnered with Afterpay to offer this payment option to their customers.
- Shop In-Store: Visit one of the Afterpay-enabled stores and start browsing for the items you wish to purchase. Look for the Afterpay logo or signage indicating that Afterpay is accepted.
- Select Afterpay at Checkout: When you’re ready to pay, proceed to the checkout counter. Let the cashier know that you’d like to use Afterpay as your payment method.
- Generate a Barcode: Open the Afterpay app on your phone and generate a barcode for the transaction. The app will guide you through the process, ensuring that the barcode is properly generated for the specific store and purchase amount.
- Show the Barcode to the Cashier: Once you have the barcode, show it to the cashier. They will scan the barcode to initiate the Afterpay payment process.
- Confirm and Pay Later: After the barcode is scanned, you will receive an instant confirmation of your purchase. The total amount will be divided into four equal installments, and the first installment will be due at the time of the transaction. The remaining three installments will be automatically deducted from your linked payment method every two weeks.
- Keep Track of Payments and Repayments: Stay organized by keeping track of your payment schedule within the Afterpay app. You can view upcoming payments and repayment history to ensure timely repayments and avoid any late fees.
With these simple steps, you can seamlessly pay with Afterpay for your in-store purchases. Remember to use Afterpay responsibly, ensuring that you have the necessary funds for repayments to avoid any additional charges. Enjoy the flexibility and convenience that Afterpay brings to your shopping experience!
Download the Afterpay App
To start using Afterpay for in-store purchases, the first step is to download the Afterpay app on your smartphone. The app is available for both iOS and Android devices, making it accessible to a wide range of users.
Downloading the Afterpay app is easy and straightforward. Here’s how you can get started:
- Visit the App Store: If you’re an iPhone user, open the App Store on your device. For Android users, access the Google Play Store.
- Search for Afterpay: Use the search function within the app store to find the official Afterpay app. Look for the distinctive logo to ensure you download the correct app.
- Click on Install: Once you’ve located the Afterpay app, click on the “Install” button to begin the download process. Depending on your internet speed, the app should download relatively quickly.
- Wait for the Installation: After the download is complete, the app will automatically install on your device. This may take a few moments, so be patient during the installation process.
- Open the App: Once the installation is finished, locate the Afterpay app icon on your home screen or app drawer. Tap on it to open the app.
After opening the Afterpay app, you’ll be prompted to sign in or create a new account. If you don’t have an Afterpay account yet, follow the instructions to sign up using your email address, Facebook account, or Google account. Creating an account is quick and easy, requiring you to provide some basic information.
Make sure to keep your Afterpay app updated to access the latest features and enjoy a seamless experience while paying in-store with Afterpay. The app not only allows you to manage your Afterpay payments but also provides information on nearby Afterpay-enabled stores, exclusive offers, and promotions.
By downloading the Afterpay app, you gain access to a convenient platform that simplifies the payment process and enhances your shopping experience. Now that you have the Afterpay app installed on your device, you’re ready to create an account and start exploring the wide range of in-store options available to you.
Create an Afterpay Account
To make use of Afterpay for your in-store purchases, you’ll need to create an Afterpay account. Creating an account is quick and simple, and it allows you to enjoy the benefits of flexible payments and convenient shopping. Follow these steps to create your Afterpay account:
- Open the Afterpay App: Launch the Afterpay app on your smartphone by tapping on the app icon. If you haven’t downloaded the app yet, refer to the previous section for instructions on how to do so.
- Sign Up: At the login screen, you’ll see the option to sign up for a new account. Tap on the “Sign Up” link to proceed.
- Provide Your Information: After tapping on the “Sign Up” link, you’ll be prompted to provide some basic information. This includes your email address and a password that you’ll use to log into your Afterpay account. Alternatively, you can sign up using your Facebook account or Google account for a quicker registration process.
- Agree to Terms and Conditions: Before proceeding, make sure to read and understand Afterpay’s terms and conditions. Check the box to indicate that you agree to the terms and conditions of using Afterpay.
- Verify Your Email (if applicable): If you signed up using your email address, Afterpay will send a verification email to the address provided. Check your email inbox and follow the instructions to verify your email address. If you signed up through Facebook or Google, this step may not be necessary.
- Complete Your Profile: After your account is created and verified, you’ll have the option to complete your profile. This involves providing some additional personal details, such as your name, date of birth, and phone number. Completing your profile helps Afterpay verify your identity and ensure a secure payment process.
Once you’ve completed these steps, your Afterpay account will be ready to use. You can now link a payment method, browse Afterpay-enabled stores, and start making in-store purchases with ease.
Keep in mind that it’s important to provide accurate and up-to-date information when creating your Afterpay account. This ensures smooth transactions and helps Afterpay provide you with the best possible service. Additionally, make sure to keep your account credentials secure and avoid sharing them with others to protect your personal information and prevent unauthorized use of your account.
Creating an Afterpay account is the key to unlocking a world of convenient and flexible payment options. By following these simple steps, you can set up your account and start enjoying the benefits of Afterpay for your in-store purchases.
Link a Payment Method
After creating your Afterpay account, the next step is to link a payment method. This allows you to make purchases in-store using Afterpay by automatically deducting the payment from your selected payment method. Follow these steps to link a payment method to your Afterpay account:
- Open the Afterpay App: Launch the Afterpay app on your smartphone and log in using your Afterpay account credentials. If you’re not already logged in, enter your email address and password to access your account.
- Navigate to the “Payments” Section: Once you’re logged in, look for the “Payments” section within the app. This is usually located in the bottom navigation bar or in the account settings menu.
- Select “Link a Payment Method”: Within the “Payments” section, you’ll find an option to link a payment method. Tap on this option to proceed.
- Choose Your Payment Method: After tapping on “Link a Payment Method,” you’ll be presented with a list of available payment methods. Select your preferred option, which can include debit cards, credit cards, or linked bank accounts.
- Provide Payment Details: Depending on the payment method you choose, you’ll be required to enter the relevant details. This may include the card number, expiration date, CVV code, and billing address. If you’re linking a bank account, you may need to provide your account and routing number.
- Verify and Save: Once you’ve entered the necessary payment details, review the information for accuracy. Once you’re satisfied, tap on the “Save” or “Link” button to complete the process.
After following these steps, your payment method will be successfully linked to your Afterpay account. This means that when making purchases in-store using Afterpay, the payment will be automatically deducted from your chosen payment method in installments.
It’s important to ensure that you link a payment method that you have control over and that has sufficient funds available for the payments. This will help you avoid any missed payments or late fees. Additionally, make sure to keep your linked payment method up to date and update it if there are any changes, such as a new card or bank account.
Linking a payment method to your Afterpay account allows for a seamless payment experience when using Afterpay in-store. By following these simple steps, you can ensure that your payments are automatically deducted, making your shopping experience easier and more convenient.
Find Afterpay-Enabled Stores
One of the advantages of using Afterpay for in-store purchases is the extensive network of Afterpay-enabled stores. To take advantage of this payment method, you’ll need to find stores that accept Afterpay. Here are several ways to find Afterpay-enabled stores:
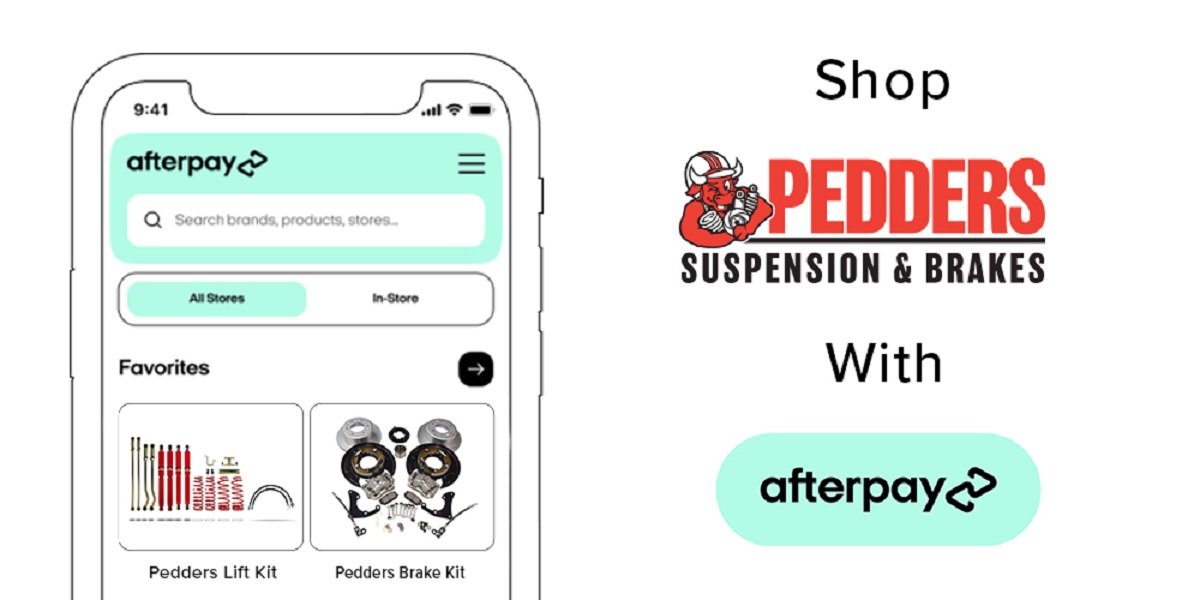
- Browse the Afterpay App: Open the Afterpay app on your smartphone and navigate to the “Explore” or “Stores” section. Here, you’ll find a directory of Afterpay-enabled stores categorized by different industries, including fashion, homeware, beauty, and more. Browse through the list to discover stores near you that accept Afterpay.
- Search the Afterpay Website: Visit the official Afterpay website and use their store directory feature. Enter your location or search for specific brands and retailers to see if they offer Afterpay as a payment option. This is especially helpful if you prefer browsing on a larger screen or do not have the app installed on your device.
- Ask Store Representatives: If you’re already in a physical store and want to know if they accept Afterpay, approach one of the store representatives and inquire about their payment options. They can provide you with information on whether they offer Afterpay and how to use it during checkout.
- Keep an Eye Out for Afterpay Logos: Pay attention to signage and logos displayed in stores. Afterpay often provides stickers or signage to indicate that their payment option is available. Look for the Afterpay logo on windows, display counters, or near the cash registers.
- Check Social Media: Many Afterpay-enabled stores promote their partnership through their social media channels. Follow your favorite brands or retailers on platforms like Instagram, Facebook, or Twitter to stay updated on their latest offers and payment options.
Regardless of the method you choose, finding Afterpay-enabled stores is relatively easy. Afterpay has a large network of retail partners, including both well-known brands and local businesses. This allows you to enjoy the flexibility of spreading your payments without compromising on where you can shop.
Remember to check the terms and conditions of using Afterpay at each store to ensure that you meet any minimum purchase requirements or other restrictions they may have in place. By leveraging the Afterpay app, website, store representatives, and social media platforms, you can easily find a variety of stores where you can pay with Afterpay and enjoy the benefits of flexible payments.
Shop In-Store
Once you have identified a store that accepts Afterpay, it’s time to start your in-store shopping experience. Shopping in-store with Afterpay is a straightforward process that allows you to explore the products and make your selections just like any other shopping trip. Here are some tips to make the most out of your in-store Afterpay experience:
- Prepare a Shopping List: Before heading to the store, create a shopping list of the items you need or want to purchase. This will keep you focused and help ensure that you stick to your budget.
- Take Note of Store Policies: Familiarize yourself with the store’s return or exchange policies, as these may differ when using Afterpay. Understanding the store’s policies beforehand will ensure a smooth shopping experience.
- Consider Product Availability: Check if the store has the items you’re looking for in stock. You can take advantage of the Afterpay app or website to browse the store’s inventory or get in touch with their customer service if you have specific inquiries.
- Ask for Assistance: If you need help or have any questions while shopping, don’t hesitate to ask the store staff for assistance. They can provide product recommendations, sizes, and further information about using Afterpay for your purchase.
- Try Before You Buy: If you’re unsure about the fit, color, or quality of a product, don’t hesitate to try it on or examine it closely. This way, you can ensure that you’re making a well-informed purchase.
- Compare Prices: Take the opportunity to compare prices within the store or with other retailers. Afterpay enables you to budget your payments, so making price comparisons can help you make a more cost-effective decision.
- Explore Additional Deals or Promotions: Some stores may have exclusive offers or promotions for Afterpay users. Look out for any additional discounts or rewards that you can take advantage of to make your shopping experience even more rewarding.
- Consider Future Payments: As you shop, keep in mind that you will be paying for your purchase in four equal installments. Ensure that you are comfortable with the payments and that you have the necessary funds in your linked payment method to cover the installments.
Remember, shopping with Afterpay in-store allows you to enjoy the flexibility of splitting your payments while still being able to physically browse and try on items before making a purchase. Take your time and enjoy the experience of shopping at your chosen store while taking advantage of the convenience that Afterpay offers.
Once you have selected the items you wish to purchase, head to the checkout counter to proceed with the Afterpay payment process, which we will cover in the next section.
Select Afterpay at Checkout
Once you have finished shopping and are ready to make your purchases in-store, it’s time to select Afterpay as your payment option at the checkout counter. Follow these steps to complete the payment process with Afterpay:
- Bring Your Items to the Checkout: Take your selected items to the checkout counter and inform the cashier that you would like to use Afterpay as your payment method.
- Provide the Required Information: The cashier will guide you through the payment process and may ask for some information to initiate the Afterpay transaction. This could include your email address associated with your Afterpay account.
- Verify the Transaction Amount: Confirm with the cashier the total amount that will be charged to your Afterpay account. Ensure that it matches your intended purchase and that you are aware of the payment schedule for the installments.
- Select Afterpay as Your Payment Method: On the payment terminal or the cashier’s device, you will be presented with different payment options. Choose “Afterpay” as your preferred payment method.
- Link Your Afterpay Account: The cashier may request you to present your Afterpay barcode, which can be generated through the Afterpay app on your smartphone. The barcode contains the information necessary to process your transaction.
- Process the Transaction: The cashier will then scan the barcode or input the required details into the system to complete the Afterpay transaction. Once the transaction is processed, you will receive an instant confirmation of your purchase.
It’s important to note that Afterpay divides your total purchase amount into four equal installments. The first installment is due at the time of the transaction, while the remaining three installments will be automatically deducted from your linked payment method every two weeks.
Remember that it’s crucial to keep track of the payment schedule and ensure that you have sufficient funds in your linked payment method to cover the installments. Failure to repay on time may result in late fees or restrictions on using Afterpay in the future.
By selecting Afterpay at checkout, you can enjoy the convenience of splitting your payments for your in-store purchases without any hassle. Take advantage of this seamless payment method to make your shopping experience even more enjoyable.
Generate a Barcode
Generating a barcode is a crucial step when using Afterpay for in-store purchases. The barcode contains the necessary information to process your transaction and ensures a seamless payment experience. Follow these steps to generate a barcode using the Afterpay app:
- Open the Afterpay App: Launch the Afterpay app on your smartphone and log in using your Afterpay account credentials. If you’re not already logged in, enter your email address and password to access your account.
- Find Your Purchase Details: Locate the specific purchase you want to generate a barcode for. This could be an individual item or the entire cart, depending on the store’s requirements.
- Tap on “Generate Barcode”: Within the purchase details, look for the option to generate a barcode. Tap on this button or link to initiate the barcode generation process.
- Review and Confirm: Before finalizing the barcode, carefully review the transaction details displayed on the screen. Make sure the purchase amount, store information, and other relevant details are correct.
- Generate the Barcode: If everything looks accurate, proceed to generate the barcode by tapping on the designated button. The app will then create a unique barcode specifically for your transaction.
- Display the Barcode: Once the barcode is generated, it will appear on your screen. Keep the app open and ensure that the barcode is easily visible and scannable by the cashier.
It’s important to note that the barcode is typically only valid for a limited time, so make sure to generate it shortly before reaching the checkout counter. If the barcode expires, you may need to generate a new one to complete your purchase.
Additionally, ensure that your smartphone screen brightness is adjusted to a level that allows the barcode to be easily scanned. If necessary, you can also take a screenshot of the barcode or zoom in to make it more accessible to the cashier.
Generating the barcode through the Afterpay app provides a convenient and secure way to complete your in-store purchase using Afterpay. By following these steps, you can generate a barcode quickly and effortlessly, ensuring a smooth payment process at the checkout counter.
Show the Barcode to the Cashier
After generating the barcode using the Afterpay app, the next step is to show the barcode to the cashier when you’re ready to complete your in-store purchase. Here’s how the process typically works:
- Approach the Checkout Counter: Bring your items to the checkout counter and inform the cashier that you will be using Afterpay as your payment method.
- Inform the Cashier About the Barcode: Let the cashier know that you have generated a barcode using the Afterpay app. They will be expecting this and will be ready to scan the barcode to initiate the payment process.
- Show the Barcode on Your Phone: Open the Afterpay app on your smartphone and navigate to the barcode screen. Ensure that your phone screen brightness is adjusted, so the barcode is visible and easy to scan. You can hold your phone steady or place it on the counter with the barcode facing up for the cashier to easily scan.
- Allow the Cashier to Scan the Barcode: Hand your phone to the cashier or position it within their reach so they can scan the barcode directly from your screen. The cashier will use a barcode scanner or the store’s point-of-sale system to read the barcode and retrieve the transaction information.
- Wait for Verification: Once the cashier scans the barcode, they will verify the transaction details displayed on their system, ensuring that the purchase amount and other information match with your intent.
It’s important to note that the barcode contains encrypted information, enabling the cashier to process the payment securely and accurately. This information includes details like the store’s identification, purchase amount, and Afterpay transaction reference number.
After the barcode is scanned and the transaction is verified, the cashier will proceed with finalizing the payment using Afterpay as your chosen payment method. You will typically receive an instant confirmation of your purchase.
Remember to keep your phone steady while the barcode is being scanned and ensure that the screen is not cracked or damaged, as this may hinder the scanning process. If there are any issues or difficulties scanning the barcode, don’t hesitate to ask the cashier for assistance.
Showcasing the generated barcode to the cashier is a crucial step in completing your in-store Afterpay transaction. By following these steps, you can ensure a seamless and efficient payment process at the checkout counter.
Confirm and Pay Later
After showing the barcode to the cashier, you will receive confirmation of your purchase and your payment details. With Afterpay, you have the convenience of paying for your in-store purchase later, in equal installments. Here’s what happens after you show the barcode:
- Instant Confirmation: Once the cashier scans the barcode and verifies the transaction, you will receive immediate confirmation of your purchase. The payment status will be updated in your Afterpay account, reflecting the amount due, purchase details, and the payment schedule.
- Divide into Installments: Afterpay divides the total purchase amount into four equal installments. The first installment is due at the time of the transaction, while the remaining three installments will be automatically deducted from your linked payment method every two weeks.
- Keep Track of Payments: It’s essential to keep track of your payment schedule to ensure that you have sufficient funds in your linked payment method. Consider setting reminders or enabling notification alerts to stay organized and avoid missing any payments.
- Monitor Repayments and Statements: Within the Afterpay app or website, you can access your repayment history and upcoming payment schedule. This allows you to monitor your payments, view detailed statements, and ensure that everything is on track.
- Avoid Late Fees: To avoid late fees and maintain a positive Afterpay experience, make sure to repay your installments on time. Afterpay provides flexibility, but it’s crucial to manage your budget responsibly and ensure funds are available for the scheduled payments.
Using Afterpay to pay later allows you to immediately enjoy your purchases without the need to pay the full amount upfront. It offers a more flexible way of managing your finances while still indulging in the things you love.
Remember, it’s essential to be responsible and mindful of your budget when utilizing Afterpay. Keep an eye on your linked payment method, ensure timely repayments, and adjust your spending habits accordingly to maintain healthy financial habits.
By following these steps, you can confirm your in-store purchase and enjoy the convenience of paying later with Afterpay, allowing you to manage your finances more effectively while still enjoying your desired products.
Keep Track of Payments and Repayments
Once you’ve completed your in-store purchase with Afterpay, it’s important to stay organized and keep track of your payments and repayments. By staying informed and proactive, you can ensure a smooth and hassle-free experience. Here’s how to effectively manage your Afterpay payments:
- Refer to the Afterpay App or Website: Afterpay provides a user-friendly platform where you can access all the information related to your payments. Log in to the Afterpay app on your smartphone or visit the Afterpay website to view your payment schedule, upcoming payments, and the overall status of your account.
- Monitor Your Repayment History: Within the Afterpay app or website, you can review your repayment history. This allows you to track previous payments, ensure they were processed correctly, and stay updated on any outstanding amounts.
- Schedule Payments in Your Calendar: To help you remember payment due dates, consider scheduling reminders in your calendar or setting alarms on your phone. This will ensure that you are reminded to have sufficient funds available in your linked payment method for the automated deductions.
- Set Up Payment Notifications: Enable notifications within the Afterpay app or configure notifications on your smartphone to receive reminders about upcoming payments. This can help you stay on top of your repayment obligations and avoid any potential late fees.
- Track Your Budget and Cash Flow: Keep an eye on your overall financial situation to ensure that you have enough funds to cover your Afterpay installments. Consider creating a budget to manage your expenses effectively and avoid any financial strain.
- Resolve Any Issues Promptly: If you encounter any discrepancies with your payments or have questions about your Afterpay account, reach out to Afterpay’s customer support for assistance. Promptly addressing any issues can help prevent complications and ensure a smooth payment experience.
By actively managing and monitoring your Afterpay payments, you can maintain control over your finances and avoid unnecessary stress. Remember, it’s important to fulfill your payment obligations and make timely repayments to enjoy a positive Afterpay experience.
Additionally, staying informed about your payment history and taking steps to ensure smooth transactions will help you build trust with Afterpay and potentially increase your spending limit. This allows you to make larger purchases in the future while still benefiting from the flexibility of Afterpay’s payment installments.
Take advantage of the tools provided by Afterpay to stay organized and in control of your payments. By doing so, you can enjoy the convenience of paying later while maintaining a healthy financial outlook.