Introduction
Partitioning your SSD drive in Windows 11 can be a useful way to organize and manage your data effectively. Whether you want to create separate partitions for your operating system, programs, documents, or media files, the process is relatively straightforward. By dividing your SSD drive into multiple partitions, you can enhance data organization, improve system performance, and safeguard important files.
In this guide, we will walk you through the step-by-step process to partition your SSD drive in Windows 11 using the built-in Disk Management tool. This method is recommended for beginners as it does not require any third-party software and ensures compatibility with the operating system.
Before proceeding, it’s crucial to note that partitioning a drive involves modifying its existing structure. Therefore, it is recommended to back up your important data to an external storage device or cloud service before initiating any partitioning operations. This precautionary step will prevent data loss in case of any unforeseen issues during the partitioning process.
Once you’ve secured your data, let’s dive into the process of partitioning your SSD drive in Windows 11!
Step 1: Open the Disk Management Tool
The first step in partitioning your SSD drive in Windows 11 is to open the Disk Management tool. This integrated utility provides a graphical interface that allows you to manage and configure your disk drives.
To access the Disk Management tool, you can follow these steps:
- Press the Windows key + X on your keyboard to open the Quick Access menu.
- From the menu, select “Disk Management.” This will launch the Disk Management window.
- Alternatively, you can open the Run dialog by pressing the Windows key + R and then type “diskmgmt.msc” without quotes. Hit Enter to open the Disk Management tool directly.
Once the Disk Management tool is open, you will see a list of disk drives connected to your computer. The SSD drive you want to partition will be listed here, along with any other connected drives.
It’s important to note that if your SSD drive is brand new and has not been initialized, you will be prompted to initialize it. Proceed with the initialization process, and then you can continue with the partitioning steps.
Now that you have successfully opened the Disk Management tool and located your SSD drive, you can proceed to the next step of the partitioning process, which is selecting the SSD drive.
Step 2: Select the SSD Drive
Once you have opened the Disk Management tool in Windows 11, the next step is to select the SSD drive that you want to partition. This will allow you to perform partitioning operations specifically on that drive.
To select the SSD drive, follow these steps:
- Locate the SSD drive in the list of drives displayed in the Disk Management tool. You can identify it by the drive name and capacity.
- Right-click on the SSD drive and select the “Shrink Volume” option from the context menu. This will initiate the process of shrinking the existing volume to create free space for the new partition.
By selecting the “Shrink Volume” option, the Disk Management tool will calculate the amount of available space that can be shrunk from the existing volume. This process may take a few seconds depending on the size of the drive and the amount of data stored on it.
After the calculation is complete, you will be presented with the “Shrink” dialog box, which displays the total size of the volume, the amount of space available to shrink, and a field to enter the desired size for the new partition.
At this stage, you can specify the size for the new partition based on your requirements. It’s important to note that the size is measured in megabytes (MB) and that each partition you create will consume space from the total available free space on the drive.
Once you have selected the SSD drive and calculated the amount of available space to shrink, you are ready to proceed to the next step of the partitioning process, which is actually shrinking the volume to create free space for the new partition.
Step 3: Shrink the Volume
After selecting the SSD drive in the Disk Management tool and determining the amount of space available to shrink, the next step is to actually shrink the volume. This will create free space on the drive for the new partition.
To shrink the volume, follow these steps:
- In the “Shrink” dialog box, enter the desired size for the new partition in the “Enter the amount of space to shrink in MB” field. Alternatively, you can use the automatically calculated size displayed in the dialog box.
- Click on the “Shrink” button to initiate the process of shrinking the volume.
The Disk Management tool will now start shrinking the volume based on the specified size. This process may take a few minutes, and the duration will depend on the size of the volume and the speed of your SSD drive.
Once the shrinking process is complete, you will see the existing volume reduced in size, with the unallocated space appearing as a new entry on the disk. This unallocated space is the free space that will be used to create the new partition.
It’s important to note that the size of the new partition can only be as large as the amount of available unallocated space. If you need a larger partition, you may need to consider shrinking the volume further or reallocating space from other partitions on the drive.
Now that you have successfully shrunk the volume and created free space on the SSD drive, you can move on to the next step of the partitioning process, which is creating a new partition using the allocated space.
Step 4: Create a New Partition
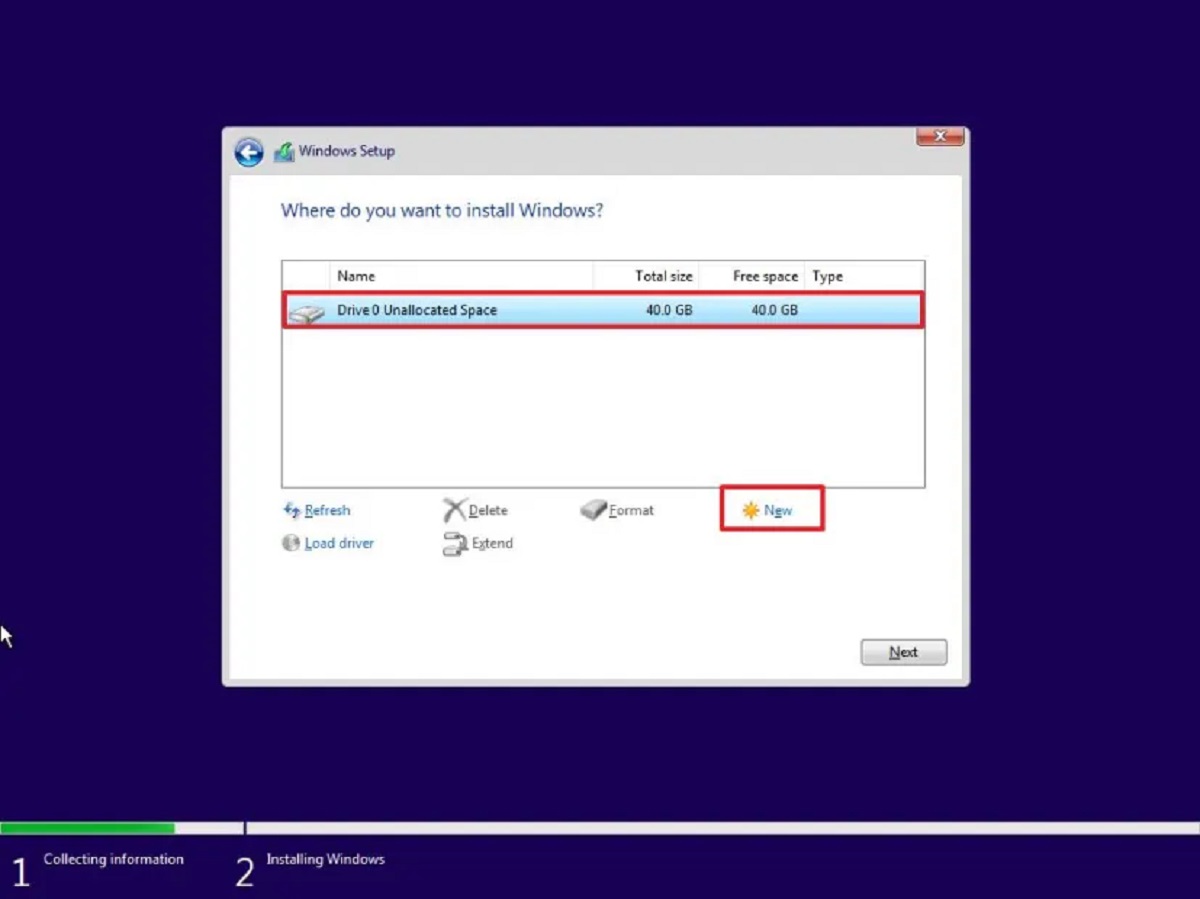
With the volume on your SSD drive successfully shrunk and free space available, you can now proceed to create a new partition using that allocated space. This will provide you with a separate storage area for your files and data.
To create a new partition, follow these steps:
- Right-click on the unallocated space on the SSD drive that you generated in the previous step.
- From the context menu, select the “New Simple Volume” option. This will open the “New Simple Volume Wizard.”
- In the wizard, click “Next” to proceed to the next step.
- Specify the size for the new partition. By default, the wizard will pre-select the maximum available size based on the unallocated space. You can either adjust the size or proceed with the default setting.
- Click “Next” to continue.
- Assign a drive letter to the new partition. You can choose a letter from the available options or allow Windows to automatically select one for you.
- Click “Next” to proceed.
- Select the file system for the new partition. The default selection is usually NTFS, which is recommended for most use cases.
- Click “Next” to continue.
- Provide a name or label for the new partition. This is optional, but it can be helpful for easy identification.
- Click “Next” to proceed.
- Review the settings and configuration for the new partition.
- Click “Finish” to create the new partition.
Once you complete these steps, the Disk Management tool will create the new partition using the allocated free space on your SSD drive. You will now see the new partition listed in the Disk Management window, with its assigned drive letter and file system.
Congratulations! You have successfully created a new partition on your SSD drive using the unallocated space. The next step is to assign a drive letter to the new partition.
Step 5: Assign a Drive Letter
After creating a new partition on your SSD drive, the next step is to assign a drive letter to the newly created partition. A drive letter allows you to access and manage the partition easily through the Windows File Explorer or any other file management tool.
To assign a drive letter to the new partition, follow these steps:
- Right-click on the newly created partition in the Disk Management window.
- From the context menu, select the “Change Drive Letter and Paths” option.
- In the subsequent window, click the “Add” button to assign a new drive letter.
- Select the desired drive letter from the drop-down menu, or click “Browse” to choose a letter not in use.
- Once you have selected the drive letter, click “OK” to confirm.
- The newly assigned drive letter will now be associated with the partition.
After completing these steps, you should see the newly assigned drive letter associated with the partition in the Disk Management window. This drive letter will also be visible in the Windows File Explorer, allowing you to access the partition and store files in it.
It’s important to note that you can change the assigned drive letter at any time using the “Change Drive Letter and Paths” option in the Disk Management tool. This allows you to customize the drive letter based on your preferences or organizational needs.
With the drive letter successfully assigned to the new partition, you are one step closer to utilizing it for your data storage needs. The final step is to format the partition before you can start using it.
Step 6: Format the Partition
After assigning a drive letter to the newly created partition on your SSD drive, the final step in the partitioning process is to format the partition. Formatting prepares the partition to store data by initializing the file system and creating the necessary structures for file storage.
To format the partition, follow these steps:
- Right-click on the newly created partition in the Disk Management window.
- From the context menu, select the “Format” option.
- In the “Format” dialog box, specify the volume label for the partition. This will be the name of the partition as it appears in the Windows File Explorer.
- Choose the file system for the partition. The default selection is typically NTFS, which is recommended for most use cases due to its support for large files, security features, and compatibility with Windows.
- Ensure that the “Perform a quick format” option is checked. This speeds up the formatting process, but if you want to perform a full format (which scans for bad sectors on the disk), you can uncheck this option.
- Click “OK” to start the formatting process.
Once you click “OK,” the Disk Management tool will begin the formatting process. This may take a few minutes, depending on the size of the partition and the speed of your SSD drive.
After the formatting process is complete, you will see the status change to “Healthy” in the Disk Management window, indicating that the partition is now ready for data storage.
With the new partition successfully formatted, you can start using it to store files, install applications, or organize your data as desired.
Remember, formatting a partition erases all existing data on it. So, make sure to back up any important data before initiating the formatting process.
Congratulations! You have completed the process of partitioning and formatting your SSD drive in Windows 11. You now have separate storage areas on your drive, allowing you to efficiently manage and organize your files.
Conclusion
Partitioning your SSD drive in Windows 11 is a valuable process that can help you optimize data organization, improve system performance, and protect important files. By following the step-by-step guide outlined above, you can easily create separate partitions on your SSD drive using the built-in Disk Management tool.
Throughout this guide, we have covered the essential steps involved in partitioning your SSD drive:
- Opening the Disk Management tool to access your drive.
- Selecting the SSD drive you want to partition.
- Shrinking the volume to create free space.
- Creating a new partition using the available space.
- Assigning a drive letter to the new partition.
- Formatting the partition to prepare it for data storage.
Following these steps allows you to tailor your SSD drive to your specific needs, separating your data into distinct storage areas and enhancing overall efficiency.
As always, it’s important to back up your important data before performing any disk operations to prevent data loss. Additionally, make sure to allocate appropriate sizes for each partition and choose file systems that best suit your requirements.
Now that you have successfully partitioned your SSD drive, you can enjoy the benefits of improved data management, system performance, and enhanced data protection. Take full advantage of your newly created partitions to organize your files and maximize the potential of your SSD drive.
We hope this guide has been helpful in guiding you through the partitioning process. If you have any questions or run into any issues, consult the Windows 11 support documentation or seek assistance from knowledgeable professionals to ensure a smooth and successful partitioning experience.