Introduction
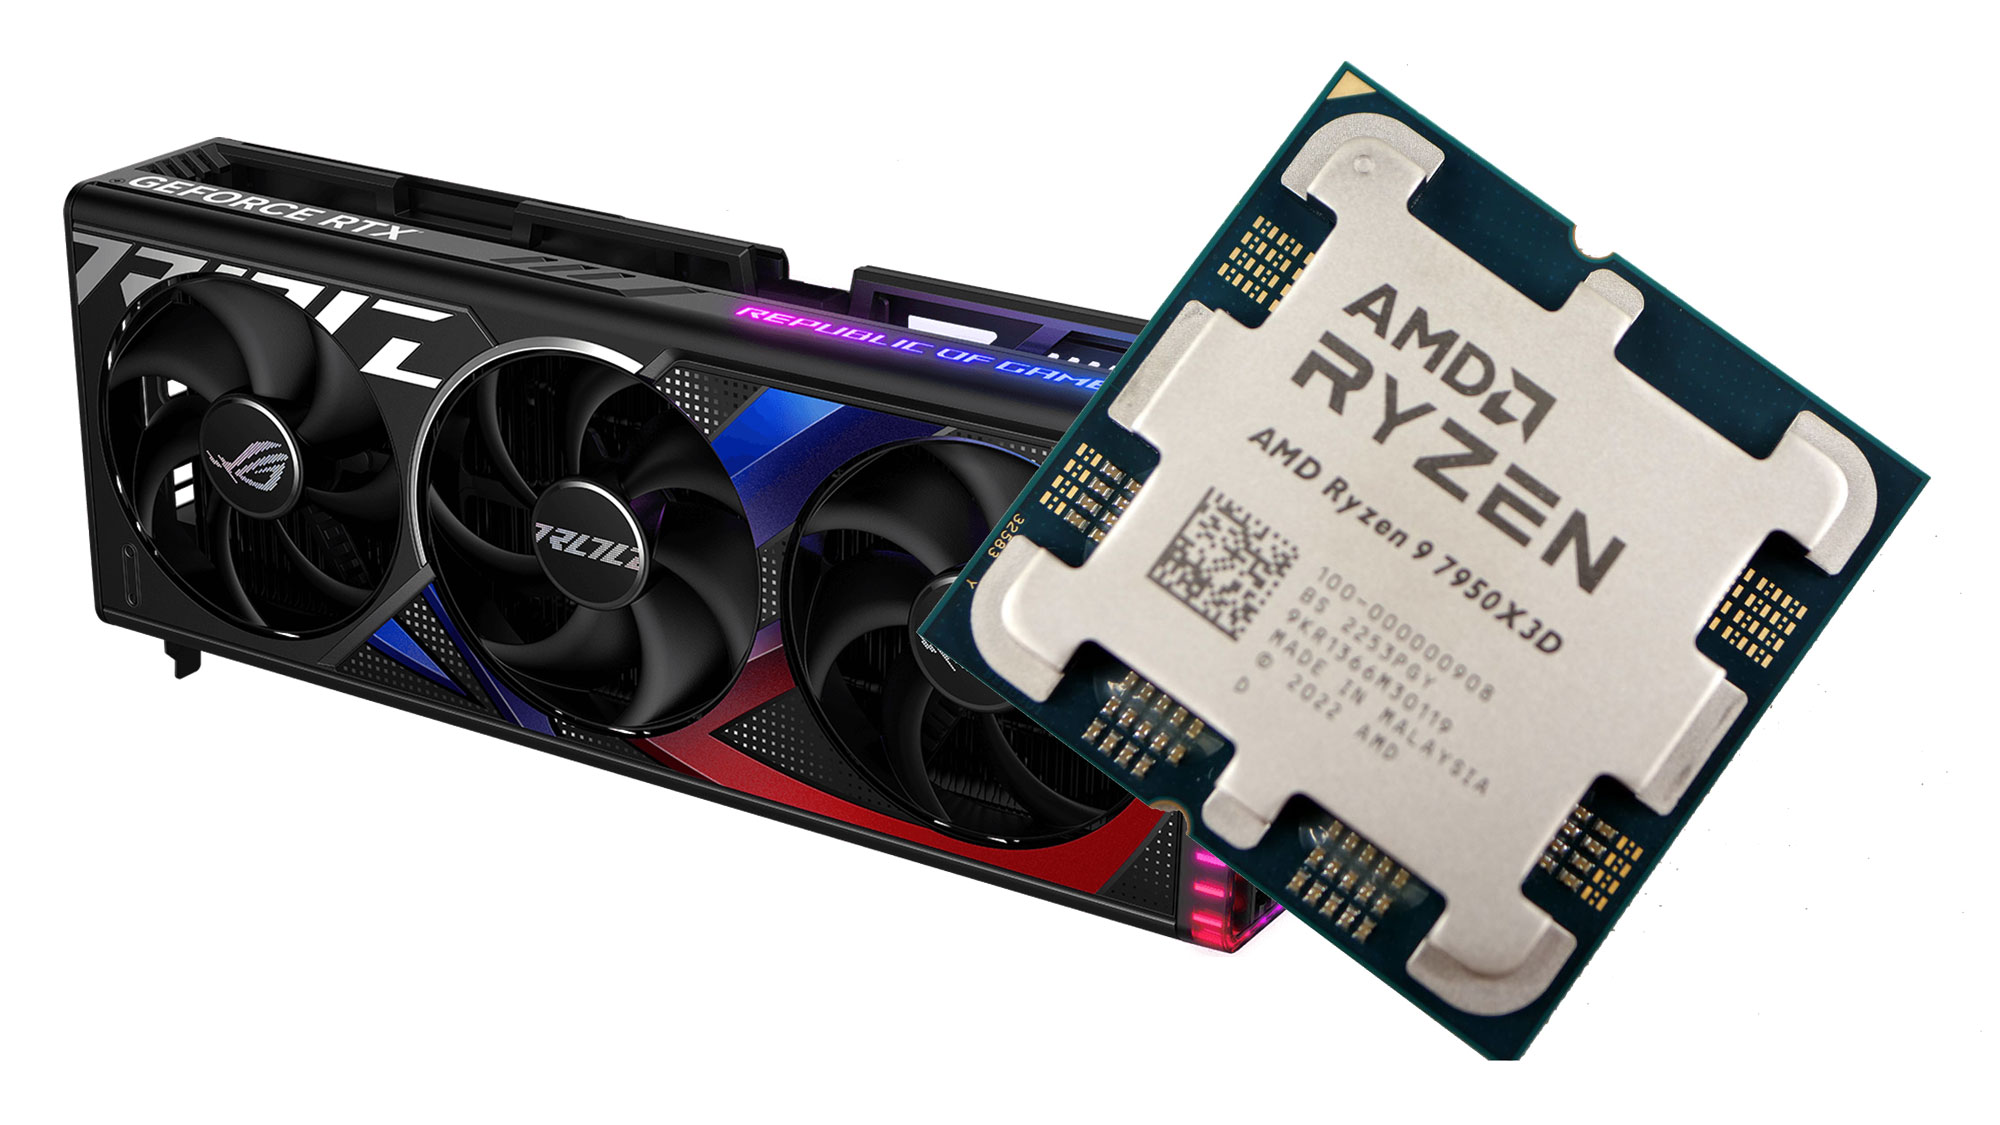
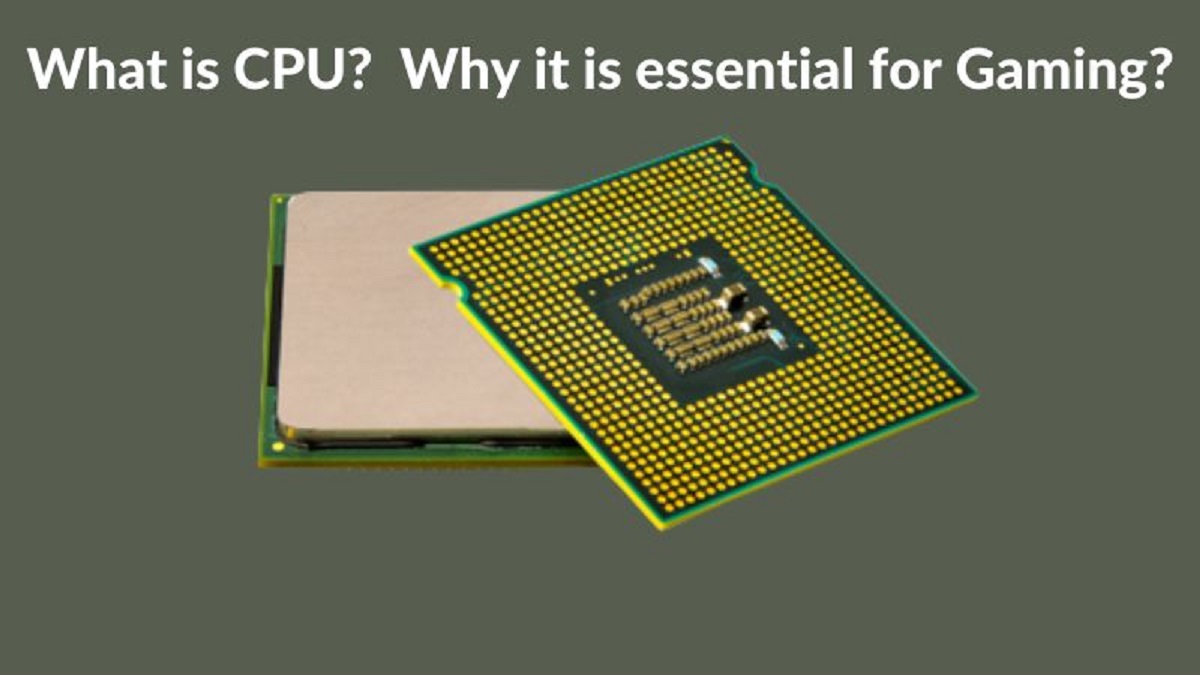
Overclocking is the process of increasing the clock speed and performance of a computer’s CPU (Central Processing Unit) and GPU (Graphics Processing Unit). It involves pushing these components beyond their factory-set limits to achieve higher speeds and better performance. This practice has gained popularity among tech enthusiasts, gamers, and professionals who seek to extract every ounce of power from their hardware.
By overclocking your CPU and GPU, you can potentially experience faster data processing, smoother graphics rendering, and better overall system performance. However, it is essential to approach overclocking with caution as it can have potential drawbacks and risks if done improperly.
In this article, we will explore the world of overclocking and provide you with a step-by-step guide on how to safely overclock your CPU and GPU. We will also discuss the benefits and risks associated with overclocking, the tools and software you’ll need, and best practices to follow to ensure a successful overclocking experience.
Before we dive into the details, it’s important to note that overclocking can void the warranty of your computer components, and it may cause instability or even damage your hardware if not done correctly. Therefore, it’s essential to proceed with caution and take the necessary precautions to minimize the risks involved.
Now, let’s delve into the fascinating world of overclocking and discover how you can maximize the performance of your CPU and GPU.
What is Overclocking?
Overclocking is the practice of increasing the operating frequency (clock speed) of a computer’s CPU and GPU beyond their default settings. In simple terms, it involves pushing these components to run at higher speeds than intended by the manufacturer.
By overclocking, you essentially unlock the full potential of your hardware and achieve improved performance. The CPU and GPU are responsible for executing the majority of computations and processing tasks on your computer. By increasing their clock speed, you can boost the performance of your system, resulting in faster data processing, improved multitasking capabilities, and enhanced gaming experiences.
Typically, CPUs and GPUs are designed with a specific clock speed range that ensures stability and longevity. However, these components often have more power to offer than what is initially provided by the manufacturer. Overclocking allows you to tap into this additional potential and squeeze out every bit of performance from your hardware.
Overclocking is particularly popular among gamers and professionals who require high-performance systems for graphic-intensive tasks such as video editing, 3D rendering, and scientific simulations. By overclocking, they can achieve better frame rates in games, reduce render times, and improve overall productivity.
It’s important to note that overclocking is not without its risks. When you increase the clock speed, you also increase power consumption and heat generation. This can lead to higher temperatures and potentially reduce the lifespan of your hardware if not properly managed. Therefore, it is crucial to keep an eye on temperatures and ensure that your system stays within safe operating limits.
Additionally, manufacturers typically set their components’ clock speeds conservatively to ensure stability and prevent overheating. By overclocking, you may encounter system instability, crashes, or even damage to your hardware if pushed too far. It’s important to understand the limitations of your specific hardware and exercise caution when overclocking.
In the next section, we will explore the various benefits you can expect from overclocking your CPU and GPU. Understanding these advantages will help you decide whether overclocking is right for you.
Benefits of Overclocking
Overclocking your CPU and GPU can yield several benefits, particularly in terms of improved performance and enhanced user experience. Let’s explore some of the advantages you can expect from overclocking:
- Increased Speed and Performance: Overclocking allows you to achieve higher clock speeds, resulting in faster data processing and improved overall system performance. This can have a significant impact on tasks that rely heavily on CPU and GPU power, such as gaming, video editing, and 3D rendering. By overclocking, you can experience smoother gameplay, reduced rendering times, and more efficient multitasking capabilities.
- Better Gaming Experience: Gamers often overclock their CPUs and GPUs to gain a competitive edge. Overclocking can lead to higher frame rates, reduced input lag, and overall smoother gameplay. This translates to a more immersive and enjoyable gaming experience with improved graphics and faster loading times.
- Cost-Efficiency: Overclocking can be a cost-effective way to increase the performance of your existing hardware. Instead of purchasing expensive upgrades or new components, overclocking allows you to make the most of your current CPU and GPU by maximizing their potential. This is particularly beneficial for budget-conscious individuals who want to squeeze out extra performance without breaking the bank.
- Customization and Flexibility: Overclocking provides you with the opportunity to customize your computer’s performance to suit your specific needs. You have control over how much you overclock and can fine-tune the settings to achieve a balance between performance, stability, and temperature. This level of customization allows you to tailor your system to meet the demands of different tasks and applications.
- Extended Lifespan: Contrary to popular belief, when done correctly, overclocking can actually extend the lifespan of your components. By increasing the clock speed, you reduce the workload on individual cores and spread it across multiple cores. This helps to distribute heat more efficiently and can lead to cooler operating temperatures. Additionally, overclocking allows you to get more use out of your hardware before needing to upgrade.
While the benefits of overclocking are enticing, it’s crucial to exercise caution and be aware of the potential risks involved. In the next section, we will discuss the precautions you should take and the risks associated with overclocking.
Precautions and Risks
While overclocking can provide numerous benefits, it also carries certain risks that need to be taken into consideration. It’s important to understand these risks and follow specific precautions to ensure a safe overclocking process. Let’s explore some of the precautions and risks associated with overclocking:
- Warranty Void: Overclocking your CPU and GPU usually voids the warranty provided by the manufacturer. This means that if any issues arise with your hardware during or after the overclocking process, you may not be able to claim warranty or receive support from the manufacturer.
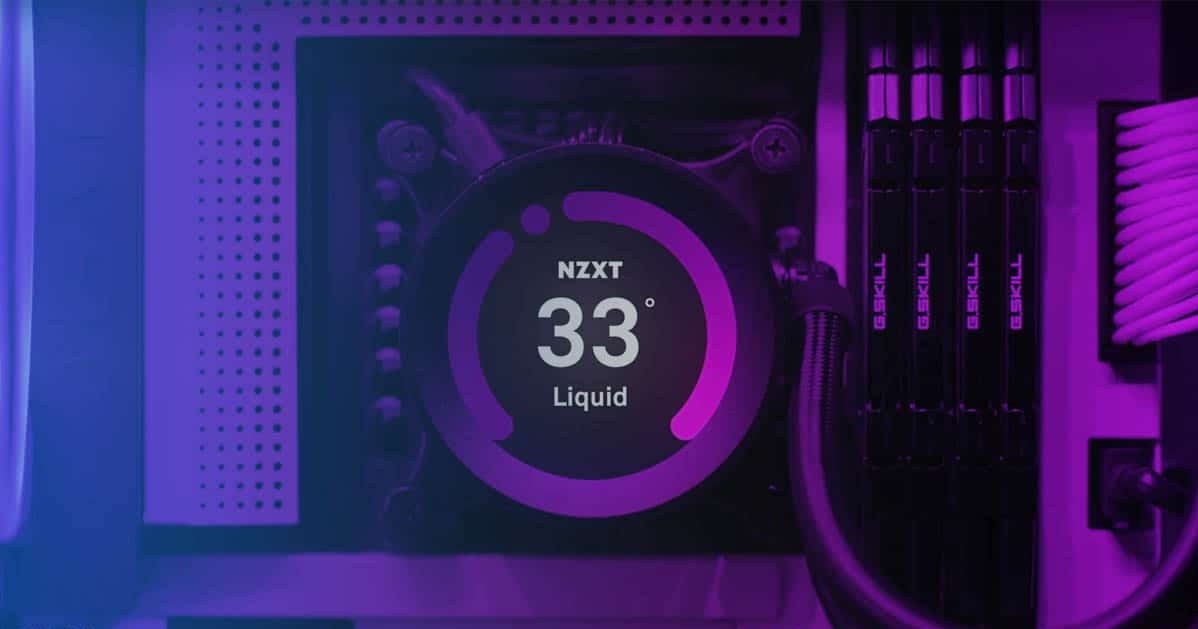
- Increased Heat Generation: Overclocking increases the power consumption and heat generation of your CPU and GPU. This can lead to higher operating temperatures, potentially causing instability and reducing the lifespan of your components. It’s crucial to monitor temperatures and invest in adequate cooling solutions such as aftermarket CPU coolers and case fans to ensure optimal heat dissipation.
- System Instability: Overclocking beyond the limits of your hardware can result in system instability. This may manifest as crashes, freezes, or error messages. Finding the stable maximum overclock for your specific hardware requires careful trial and error, adjusting settings incrementally, and stress testing your system to ensure stability.
- Component Damage: Pushing your hardware too far or applying incorrect voltage settings during overclocking can cause permanent damage to your CPU or GPU. Understanding the specific limitations and voltage requirements for your components is crucial to avoid damaging them during the overclocking process.
- Data Loss: Overclocking is a delicate process, and if not done correctly, it can lead to data loss or corruption. It’s essential to back up important files and ensure system stability before embarking on the overclocking journey.
To mitigate these risks, it’s important to do thorough research on your specific hardware model, consult resources such as user forums and overclocking guides, and follow best practices. It’s also recommended to keep track of the changes you make during the overclocking process, including the settings and voltages applied, for troubleshooting purposes in case issues arise.
Understanding the precautions and risks associated with overclocking will help you approach the process with a clear understanding of what to expect. In the next section, we will discuss the tools and software you’ll need to successfully overclock your CPU and GPU.
Tools and Software Needed
Before you embark on overclocking your CPU and GPU, it’s important to gather the necessary tools and software to ensure a smooth and successful process. Here are the essential tools and software you’ll need:
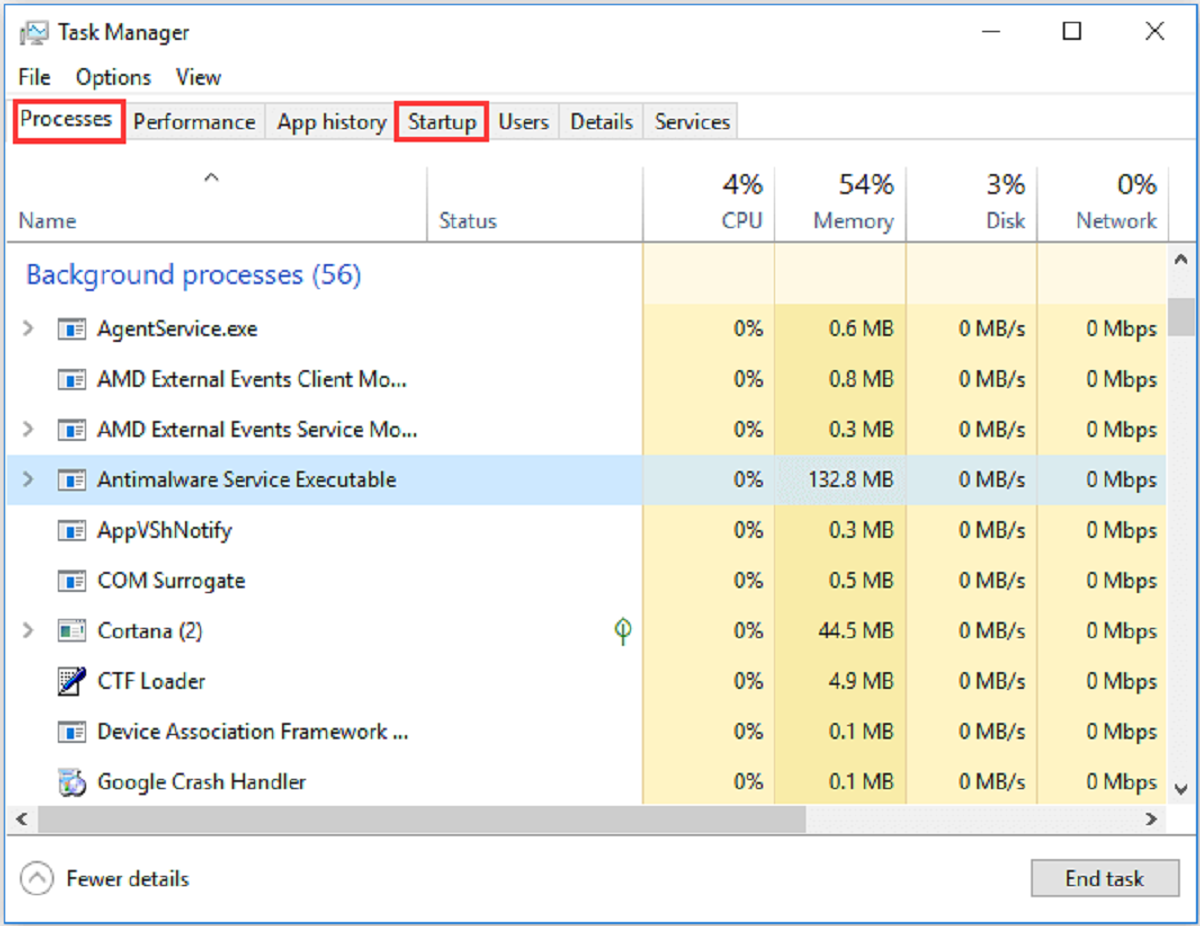
- Hardware Monitoring Software: To monitor temperatures, voltages, and other crucial system information, you’ll need reliable hardware monitoring software. Examples include CPU-Z, GPU-Z, Core Temp, and MSI Afterburner. These tools provide real-time data about your CPU and GPU, allowing you to keep an eye on temperatures and make informed decisions during the overclocking process.
- Benchmarking Software: Benchmarking software is crucial for assessing the impact of your overclocking efforts and comparing performance before and after overclocking. Popular benchmarking tools like 3DMark and Cinebench evaluate your system’s performance and provide a numerical score to gauge improvements. These software applications also stress test your system, helping you identify stability issues or potential bottlenecks.
- UEFI/BIOS: Overclocking necessitates making adjustments to your CPU and GPU settings, such as increasing the clock speed or adjusting voltage parameters. This is typically done through the UEFI (Unified Extensible Firmware Interface) or BIOS (Basic Input/Output System). Accessing your UEFI or BIOS interface allows you to modify settings safely. Consult your motherboard’s manual to learn how to access and navigate the UEFI/BIOS interface effectively.
- Stress Testing Software: Stress testing your CPU and GPU is essential to ensure the stability of your overclocked settings. Prime95, AIDA64, and Intel Burn Test are popular stress testing tools for CPUs, while FurMark and MSI Kombustor are widely used for stress testing GPUs. These applications subject your hardware to intense workloads, helping identify stability issues, inadequate cooling, or reliability concerns.
- System Backup and Recovery Tools: While overclocking, there is always a chance of encountering unexpected issues or instability. It’s crucial to back up your important files and have a system recovery plan in place. Tools like Clonezilla and Macrium Reflect can create system backups and disk images, allowing you to restore your system to a previous state if needed.
Having these tools and software at your disposal will ensure that you have the necessary resources to monitor, adjust, and stress test your system during the overclocking process. Remember to always download these tools from trusted sources and keep them updated to benefit from the latest features and bug fixes.
With your tools and software ready, let’s move on to the practical aspect of overclocking. In the next sections, we will provide step-by-step guides on how to overclock your CPU and GPU safely.
Step-by-Step Guide to Overclocking CPU
Overclocking your CPU can provide a significant performance boost, especially for demanding tasks such as gaming, video editing, and rendering. Here is a step-by-step guide to safely overclocking your CPU:
- Research and Preparation: Start by researching your specific CPU model to understand its overclocking potential and limitations. Read forums, guides, and user experiences to gain insights and gather information about stable overclock settings for your CPU.
- Temperature Monitoring and Cooling: Ensure that you have proper cooling solutions in place before you start overclocking. Invest in a high-quality CPU cooler and ensure good airflow throughout your system. Monitor temperatures during the overclocking process to prevent overheating.
- Access UEFI/BIOS: Restart your computer and access the UEFI/BIOS interface. The key to enter the UEFI/BIOS setup may vary depending on your motherboard manufacturer (common keys include Del, F2, and F10). Refer to your motherboard’s manual to find the correct key.
- Adjust CPU Multiplier: Locate the CPU Frequency or Clock Ratio setting in the UEFI/BIOS and increase the default value by a small increment. A common starting point is a 0.5 increase. Save the changes and exit the UEFI/BIOS interface to reboot the system.
- Stress Test and Monitor: After rebooting, stress test your CPU using software like Prime95 or AIDA64. Monitor the temperatures and stability of your system during the stress test. If the system remains stable with acceptable temperatures, proceed to the next step.
- Adjust CPU Voltage: If stability issues occur during stress testing, you may need to increase the CPU voltage. However, be cautious and increase the voltage gradually, as excessive voltage can damage the CPU. Monitor temperatures after adjusting the voltage to ensure they remain within safe limits.
- Repeat and Fine-Tune: Repeat the process of increasing the CPU multiplier, stress testing, and adjusting the voltage until you reach your desired overclocked CPU speed. Remember to monitor temperatures and stability throughout the process.
- Benchmark and Monitor: Once you have achieved your desired overclock settings, run benchmarking software like Cinebench or 3DMark to evaluate your system’s performance improvements. Monitor temperatures and ensure stability during the benchmarking process.
Remember that every CPU is unique, and the overclocking potential may vary. Take your time, be patient, and don’t rush the process. Keep an eye on temperatures, voltages, and stability throughout the overclocking process to prevent any damage to your CPU or system.
In the next section, we will provide a step-by-step guide on overclocking your GPU, allowing you to maximize its performance for graphic-intensive tasks.
Step-by-Step Guide to Overclocking GPU
Overclocking your GPU can significantly enhance graphics performance, leading to smoother gameplay and improved rendering capabilities. Here is a step-by-step guide to safely overclocking your GPU:
- Research and Preparation: Start by researching your specific GPU model to understand its overclocking potential and recommended settings. Read forums, guides, and user experiences to gather information about stable overclock settings for your GPU.
- Temperature Monitoring and Cooling: Ensure that you have proper cooling in place before you start overclocking. Clean the GPU’s cooling solution, ensure proper airflow in your system, and consider aftermarket GPU coolers if necessary. Monitoring temperatures during the overclocking process is crucial to prevent overheating.
- Install GPU Overclocking Software: Download and install reliable GPU overclocking software such as MSI Afterburner, EVGA Precision X1, or AMD Radeon Software. These software solutions provide you with the tools to adjust clock speeds, voltages, and fan curves for your GPU.
- Incrementally Increase Core Clock: Open the GPU overclocking software and locate the Core Clock (or GPU Clock) slider. Start by increasing the clock speed by a small increment, such as 50 MHz. Apply the settings and save it as a profile.
- Stress Test and Monitor: Run a stress test for the GPU using software like FurMark or MSI Kombustor while monitoring temperatures and stability. If the system remains stable with acceptable temperatures, proceed to the next step.
- Incrementally Increase Memory Clock: After verifying the stability of the core clock, it’s time to increase the memory clock. Locate the Memory Clock slider in the overclocking software and increase it by a small increment, such as 50 MHz. Apply the settings and save it as a profile.
- Stress Test and Monitor: Run another stress test to ensure the stability of the new memory clock. Monitor temperatures and stability during the test. If all is well, proceed to the next step.
- Fine-Tune and Test: Repeat the process of increasing the core clock and memory clock in small increments, stress testing, and monitoring stability and temperatures. Fine-tune the clock speeds until you reach your desired overclocked settings.
- Benchmark and Monitor: Finally, run benchmarking software like 3DMark or Heaven Benchmark to evaluate the performance improvements achieved through overclocking. Monitor temperatures, stability, and overall system performance during the benchmarking process.
Throughout the GPU overclocking process, it’s crucial to monitor temperatures and stability consistently. Keep an eye on the GPU’s temperature, power consumption, and fan speeds to ensure they remain within safe limits. Should any instability or temperature issues arise, revert to the previous stable settings and make adjustments accordingly.
Remember that each GPU is unique, and overclocking potential can vary. Be patient, take your time, and don’t rush the process. By carefully overclocking your GPU, you can maximize its performance for gaming and other graphically demanding tasks.
In the next section, we will provide some useful tips and best practices to help you get the most out of your overclocking experience.
Tips and Best Practices
To ensure a successful and safe overclocking experience, consider following these tips and best practices:
- Research and Understand: Before you start overclocking, conduct thorough research on your specific CPU and GPU models. Understand the capabilities, limitations, and recommended settings for stable overclocking.
- Incremental Changes: Overclock in small increments to avoid pushing your hardware beyond its limits right away. Gradually increase clock speeds and voltages, testing for stability and monitoring temperatures along the way.
- Stress Testing: Stress test your CPU and GPU with software such as Prime95, AIDA64, FurMark, or MSI Kombustor to ensure stability and identify any potential issues. Stress testing helps you find the maximum stable overclock for your hardware.
- Monitor Temperatures: Keep a close eye on temperatures throughout the overclocking process, using hardware monitoring software. Excessive heat can lead to instability and damage your components. Invest in high-quality cooling solutions to keep temperatures in check.
- Keep an Eye on Voltages: Pay attention to the voltages applied to your CPU and GPU during overclocking. Avoid excessive voltages, as they can cause overheating and potentially damage your hardware.
- Backup and Restore: Create system backups and disk images before starting the overclocking process. In case of instability, data loss, or unsuccessful overclock attempts, you can restore your system to a previous state.
- Monitor System Stability: After achieving your desired overclocking settings, continue monitoring your system for stability. Run benchmarking software regularly to assess performance improvements and ensure long-term stability.
- Document Your Settings: Maintain a record of your overclocking settings, including clock speeds, voltages, and stability results. This documentation can serve as a reference point for future overclocking endeavors or troubleshooting.
- Respect Your Hardware’s Limits: It’s important to understand that every CPU and GPU has its limits. Pushing your hardware too far beyond its capabilities can lead to instability, reduced lifespan, or even permanent damage. Always respect the limits of your specific components.
- Stay Up-to-Date: Keep your hardware drivers, UEFI/BIOS, and overclocking software up to date. New updates often bring bug fixes, performance improvements, and compatibility enhancements that can benefit your overclocking experience.
Following these tips and best practices will help you achieve a stable and successful overclocking result while minimizing the risks associated with pushing your hardware beyond its default settings.
In the next section, we will discuss benchmarking and stress testing, essential steps to ensure the stability and performance of your overclocked system.
Benchmarking and Stress Testing
Benchmarking and stress testing are vital steps in the overclocking process to evaluate the stability and performance of your CPU and GPU. Let’s delve into the importance of benchmarking and stress testing:
Benchmarking: Benchmarking is the process of assessing the performance of your system by running standardized tests. It allows you to compare your system’s performance before and after overclocking, providing measurable data to gauge the effectiveness of your overclocking efforts. Popular benchmarking software such as 3DMark, Cinebench, and Geekbench evaluate different aspects of your hardware’s performance, including graphics rendering, CPU calculations, and overall system speed.
By benchmarking your system, you can track improvements in frame rates, rendering speeds, and compute performance, helping you determine the effectiveness of your overclocking settings. It also provides a baseline to identify potential issues or bottlenecks that may arise during overclocking.
Stress Testing: Stress testing involves subjecting your CPU and GPU to intense workloads to assess stability and temperature under heavy load. Stress testing software such as Prime95, AIDA64, FurMark, and MSI Kombustor puts a significant load on your hardware, simulating real-world scenarios and ensuring that your overclocked settings can withstand demanding tasks without crashing or causing instability.
During stress testing, monitoring the temperatures and voltages of your CPU and GPU is crucial. High temperatures can indicate inadequate cooling or the need to reevaluate your overclocking settings. By stress testing, you can identify stability issues, verify that your cooling solution is efficient, and fine-tune your overclocked configurations for optimal performance and reliability.
Both benchmarking and stress testing should be performed at various stages of your overclocking process, such as after each increment of clock speed or voltage adjustment. This allows you to monitor the impact of changes, identify stability issues early on, and ensure consistent performance gains throughout the overclocking journey.
By incorporating benchmarking and stress testing into your overclocking process, you can measure the real-world performance improvements achieved and verify the stability of your system. These steps provide essential data to help you make informed decisions, fine-tune your overclocking settings, and ensure a reliable and high-performing overclocked system.
In the final section, we will address common troubleshooting techniques to help you overcome challenges that may arise during the overclocking process.
Troubleshooting Common Issues
During the overclocking process, you may encounter various challenges or issues that can affect the stability or performance of your system. Understanding common troubleshooting techniques can help you overcome these obstacles. Here are some common issues and their potential solutions:
System Instability: If your system becomes unstable after overclocking, such as experiencing crashes, freezes, or blue screens, it could indicate that your settings are too aggressive. To troubleshoot this issue, revert to the last stable settings and incrementally decrease the clock speed or voltage until stability is achieved. Remember to stress test after each adjustment to verify stability.
Overheating: Overclocking increases power consumption, which can lead to higher temperatures. If your CPU or GPU is running too hot, it may cause thermal throttling or system instability. Ensure proper cooling, clean your cooling solution regularly, consider upgrading to more efficient coolers, and adjust fan speeds in the UEFI/BIOS or GPU overclocking software. If temperatures remain problematic, lower the clock speed or voltage to reduce heat output.
Blue Screens of Death (BSODs): If you encounter BSODs after overclocking, it usually indicates instability. Start by checking the error code displayed on the blue screen. This code provides a clue to the underlying issue. Common causes include inadequate voltage, incompatible settings, or aggressive overclocks. Troubleshoot by adjusting voltage, decreasing clock speeds, or ensuring compatibility with other hardware components.
Screen Artifacts or Graphic Glitches: Artifacts or glitches on the screen, such as distorted textures, random dots, or flickering, can occur if the GPU is overclocked too aggressively. Lower the GPU core clock or memory clock in small increments until the artifacts disappear or decrease. You can also increase the voltage slightly to stabilize the GPU if necessary, but monitor temperatures closely to avoid overheating.
Unresponsive System: An unresponsive system may occur due to unstable settings or inadequate power delivery. Ensure that your power supply unit (PSU) can handle the increased power demands of the overclocked system. Additionally, check for loose connections or faulty components that may be causing power delivery issues. If the problem persists, revert to stable settings and consider upgrading your PSU.
Data Corruption or Loss: Although rare, overclocking can cause data corruption or loss if stability issues arise. To minimize the risk, regularly back up your important files and documents to an external storage device or cloud storage. This way, if an instability issue occurs, you can restore your system from a recent backup without significant data loss.
Remember, troubleshooting requires patience and careful observation. Maintain a record of your overclocking settings and any changes made during troubleshooting, as this will help you identify patterns and find optimal settings for your hardware.
In the next section, we will conclude our exploration of CPU and GPU overclocking, summarizing the key takeaways from this guide.
Conclusion
Overclocking your CPU and GPU can be an exhilarating way to unlock the full potential of your hardware and achieve enhanced performance. By increasing clock speeds and adjusting voltages, you can experience faster data processing, smoother graphics rendering, and improved overall system performance. However, overclocking should be approached with caution and proper understanding of the risks involved.
In this article, we discussed what overclocking is and the benefits it can offer, such as increased speed, better gaming experiences, cost-efficiency, customization, and extended lifespan of components. We also highlighted the precautions and risks associated with overclocking, emphasizing the importance of temperature monitoring, incremental changes, and backing up your data.
We provided a step-by-step guide to overclocking your CPU and GPU, stressing the importance of research, stress testing, and monitoring to ensure stability and maximize performance gains. We also covered useful tips and best practices to follow throughout the overclocking process, including benchmarking, monitoring temperatures, and documenting settings.
Additionally, we discussed common troubleshooting techniques that can help you overcome challenges such as system instability, overheating, blue screens, artifacts, and unresponsiveness. By applying these troubleshooting methods, you can address issues that may arise during the overclocking process and return your system to a stable state.
Remember, overclocking carries inherent risks, including voiding warranties, potential hardware damage, and data loss. It is essential to understand the limits of your hardware, monitor temperatures, and test for stability to ensure a safe and successful overclocking experience.
Ultimately, with careful research, preparation, and adherence to best practices, you can unleash the full potential of your CPU and GPU through overclocking. By experimenting with different settings and finding the optimal balance between performance, stability, and temperature, you can customize your system to meet your specific needs and achieve an improved computing experience.