Introduction
Welcome to this guide on how to move your Lightroom photos to an external hard drive. If you are an avid photographer or digital artist, chances are you have a vast collection of images that can quickly consume your computer’s storage space. Moving your Lightroom photos to an external hard drive not only helps to free up space on your computer but also ensures that your precious photo library remains safe and easily accessible.
In this article, we will provide a step-by-step tutorial on how to accomplish this task smoothly. From selecting the right external hard drive to updating file paths in Lightroom, we will cover all essential aspects of the process to help you seamlessly transfer your photos.
Before we dive into the details, it’s important to note that Lightroom stores your images in a catalog, which contains metadata, previews, and instructions on how to access the original files stored elsewhere on your computer. When moving your photos to an external hard drive, we need to ensure that both the catalog and the original image files are relocated correctly.
So, if you’re ready to free up valuable space on your computer’s hard drive and gain flexibility in managing your photo library, let’s get started on this journey of moving your Lightroom photos to an external hard drive.
Why Move Lightroom Photos to an External Hard Drive
If you’re wondering why you should consider moving your Lightroom photos to an external hard drive, here are some compelling reasons:
- Storage Space: Lightroom is a powerful tool for managing and editing your photos, but as your collection grows, it can quickly consume a significant amount of storage space on your computer. By moving your photos to an external hard drive, you can free up valuable space on your computer’s hard drive for other applications and files.
- Improved Performance: As your Lightroom catalog becomes larger and more complex, it can slow down the performance of the application. By offloading your photos to an external hard drive, you can reduce the strain on your computer’s resources and enjoy faster and smoother performance when working with Lightroom.
- Portability: One of the key advantages of using an external hard drive is the ability to easily transport and access your photo library anywhere. Whether you’re traveling or working on multiple devices, having your photos stored on an external hard drive allows you to take your entire collection with you without the need for internet access.
- Data Redundancy: Hard drives can fail, and computers can crash, resulting in potential data loss. By moving your Lightroom photos to an external hard drive, you create a backup of your valuable image files, providing an added layer of protection and peace of mind.
- Scalability: External hard drives are available in various sizes, ranging from a few terabytes to tens of terabytes. This scalability gives you the flexibility to expand your photo library without worrying about running out of storage space on your computer.
By moving your Lightroom photos to an external hard drive, you can optimize your computer’s performance, enhance data security, and enjoy the convenience of accessing your photo library wherever you go. So, let’s proceed to the next steps to learn how to move your Lightroom photos to an external hard drive.
Step 1: Selecting the External Hard Drive
The first step in moving your Lightroom photos to an external hard drive is selecting the right drive to meet your storage needs. Here are a few factors to consider when making your selection:
- Storage Capacity: Assess the size of your current photo library and estimate how much space you will need for future growth. Consider getting an external hard drive with a capacity that accommodates your existing collection and provides ample room for future additions.
- Interface: External hard drives come with various connectivity options, including USB, Thunderbolt, and USB-C. Ensure that your chosen drive is compatible with your computer and offers a reliable and fast connection for data transfer.
- Reliability: Look for external hard drives from reputable brands known for their reliability and durability. Read reviews and consider factors such as warranty and customer support to make an informed decision.
- Portability: Depending on your needs, you may prefer a portable external hard drive that you can easily carry with you or a desktop drive that remains stationary. Consider your lifestyle and working preferences when selecting the form factor of the drive.
- Data Transfer Speed: Consider the speed at which data can be transferred to and from the external hard drive. Faster transfer speeds can significantly improve the efficiency of moving your Lightroom photos.
Once you have selected the external hard drive that meets your requirements, you are ready to move on to the next step of creating a folder structure on the drive. This will ensure that your photos are organized and easily accessible when working with Lightroom. Remember to choose a drive that allows for future expansion so that you have room to grow your photo library.
Step 2: Creating a Folder Structure on the External Hard Drive
Once you have chosen the right external hard drive, the next step is to create a folder structure that will organize your photos and make them easily accessible in Lightroom. A well-organized folder structure is crucial for efficient photo management. Here’s how you can create a folder structure on your external hard drive:
- Main Folder: Start by creating a main folder on your external hard drive. You can name it something like “Lightroom Photos” or “Photo Library”. This main folder will serve as the top-level container for all your photo-related folders.
- Categories or Projects: Within the main folder, create subfolders to categorize your photos. This will depend on your personal preference and the way you like to organize your images. You can create folders based on date, location, event, or any other criteria that make sense for your collection.
- Yearly or Monthly Folders: If you prefer a more chronological organization, you can further divide your subfolders into yearly or monthly folders. This can help you easily locate photos based on when they were captured or added to your collection.
- Additional Subfolders: Depending on your workflow and preferences, you can create additional subfolders within each category or project folder. These subfolders can be used to organize specific types of photos, such as portraits, landscapes, or events.
- Keywords and Metadata: As you create folders and organize your photos, consider incorporating keywords and metadata to help with searching and filtering in Lightroom. This can include information like location, keywords, and other relevant details that will make it easier to find specific photos.
By creating a well-structured folder system, you will have a clear hierarchy of folders that organizes your photos logically. This will not only make it easier to find and manage your photos but also streamline the process of updating file paths in Lightroom, which we will cover in the next steps.
Now that you have set up the folder structure on your external hard drive, it’s time to move on to the crucial step of moving the Lightroom catalog and previews, ensuring a smooth transition to the new location.
Step 3: Moving the Lightroom Catalog and Previews
Now that you have created a well-structured folder system on your external hard drive, it’s time to move the Lightroom catalog and previews. The Lightroom catalog contains all the information about your photos, including metadata, edits, and organization. The previews are the rendered versions of your images that allow for quick browsing and editing without accessing the original files.
- Locating the Lightroom Catalog: Start by locating the Lightroom catalog on your computer’s hard drive. By default, the catalog is usually stored in the “Pictures” folder on both Windows and Mac systems. You can also find the catalog location by going to Lightroom’s Preferences and checking the Catalog tab.
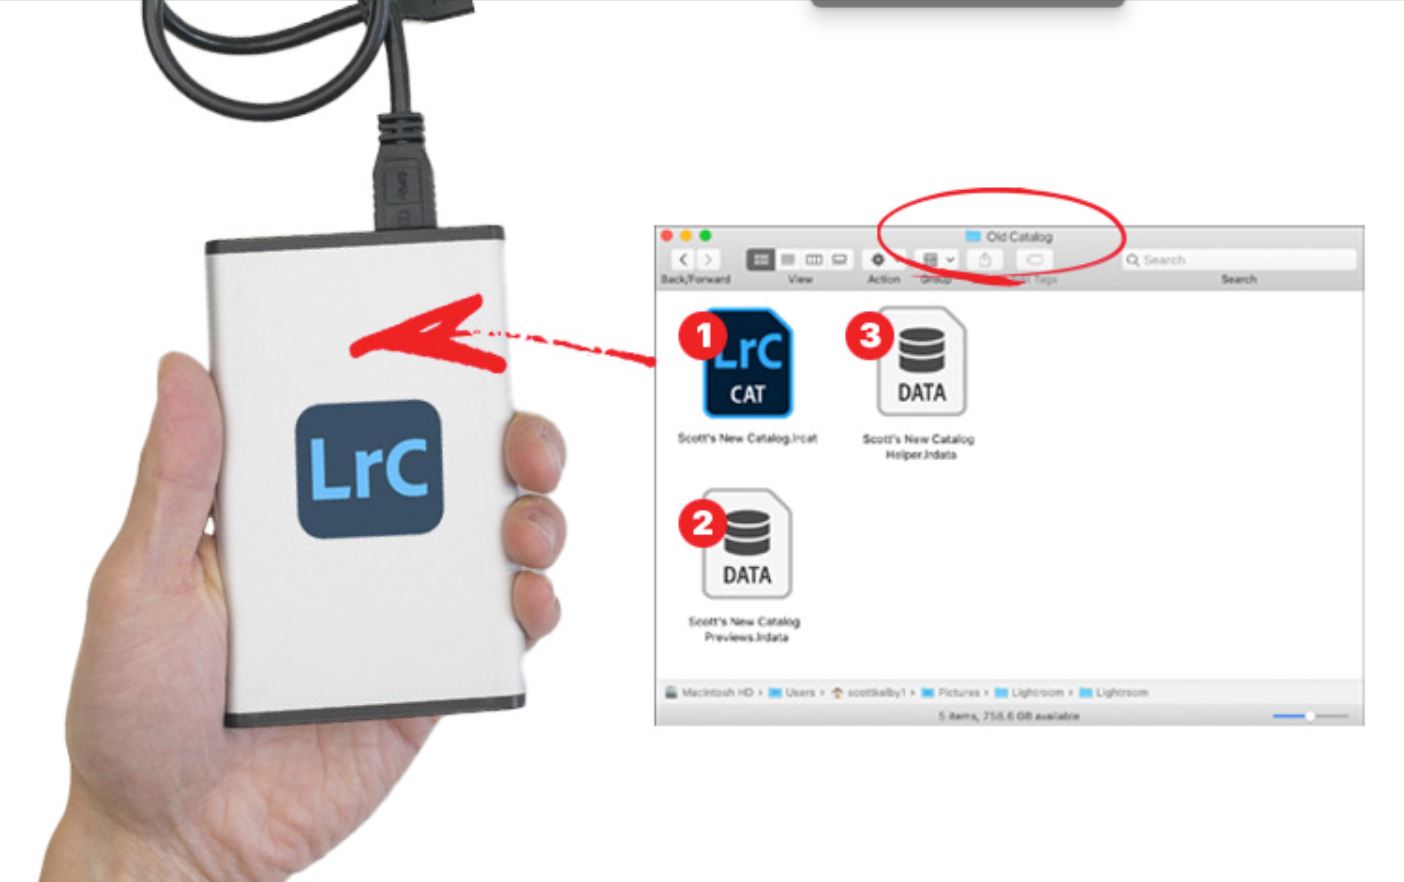
- Copying the Catalog: Once you have located the Lightroom catalog, copy it to the main folder you created on your external hard drive. This will ensure that all the information stored in the catalog is transferred to the new location.
- Copying Previews: Next, locate the folder containing the Lightroom previews. The previews folder is typically found in the same directory as the Lightroom catalog. Copy the entire folder to the main folder on your external hard drive.
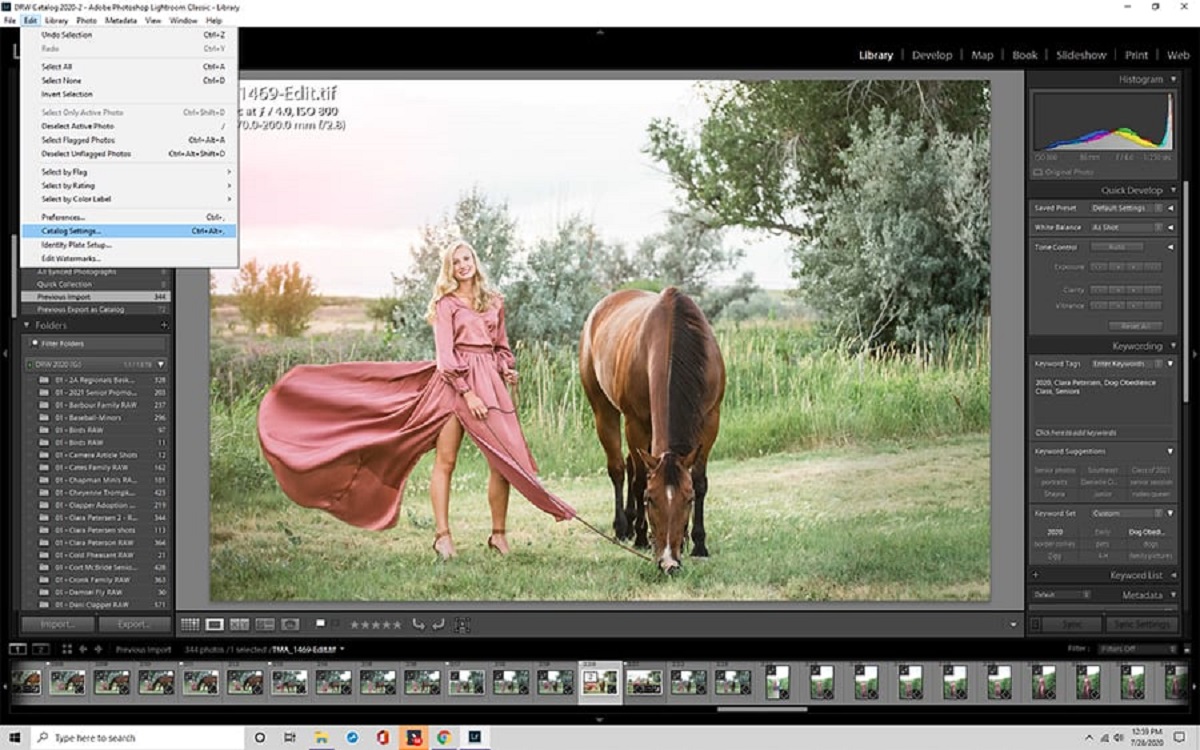
- Updating Catalog Location: Open Lightroom and go to the Catalog Settings. Choose the new catalog location by navigating to the main folder on your external hard drive. Lightroom will prompt you to confirm the new location.
- Verifying Catalog and Previews: After updating the catalog location, open Lightroom and ensure that all your photos and edits are intact. Lightroom should automatically recognize the updated catalog and previews folder on the external hard drive.
Transferring the Lightroom catalog and previews to the external hard drive ensures that all your metadata, edits, and organization information remain intact. It also allows Lightroom to access the previews for quick browsing and editing. With this step completed, you are now ready to move the original photos to the external hard drive in the next step.
Note: It is important to create regular backups of your Lightroom catalog and previews, even after moving them to the external hard drive. This will protect your data in case of any unforeseen events.
Step 4: Moving the Original Photos
With your Lightroom catalog and previews successfully transferred to the external hard drive, it’s time to move the original photos to their new location. This step ensures that Lightroom can still access the original image files even though they are no longer stored on your computer’s hard drive. Here’s how you can proceed:
- Locating the Original Photos: Begin by identifying the current location of the original photos on your computer. By default, Lightroom stores the photos in a folder hierarchy based on the date they were imported. You can also choose a different folder structure if you prefer.
- Copying the Photos: Once you have located the folder or folders containing the original photos, copy them to the appropriate location within the folder structure you created on the external hard drive. This step may take some time depending on the size of your collection.
- Preserving Metadata: It is important to preserve all the metadata associated with your photos during the transfer. This includes information such as keywords, star ratings, and captions. When copying the photos, make sure to retain this metadata.
- Updating Lightroom: After moving the original photos, it’s time to let Lightroom know about their new location. In Lightroom, go to the Library module and locate one of the photos that you have moved. Right-click on the photo and select “Locate…” from the drop-down menu. Navigate to the new location of the photo on the external hard drive. Lightroom will update the file path for that photo and automatically recognize the new location for the rest of the photos.
Once you have successfully moved the original photos and updated their file paths in Lightroom, you can be confident that Lightroom will be able to access and manage your images from the external hard drive. This step ensures that you have enough space on your computer’s hard drive while giving you the convenience of organizing and editing your photos in Lightroom.
Now that your photos have been moved, it’s essential to verify and test the move in the next step to ensure that everything has been transferred correctly.
Step 5: Updating File Paths in Lightroom
After moving your Lightroom photos to an external hard drive, it’s crucial to update the file paths in Lightroom. By doing so, you ensure that Lightroom can locate and access the photos from their new location. Let’s walk through the process of updating file paths in Lightroom:
- Open Lightroom: Launch Lightroom and navigate to the Library module where you manage your photo library.
- Locate Missing Photos: Lightroom will display a warning icon next to the folders and photos it can no longer find in their previous location. These missing photos will be listed under the “Folders” panel and the “All Photographs” collection.
- Reconnect Missing Folders: Right-click on the missing folder, and from the context menu, choose “Find Missing Folder…” Lightroom will prompt you to locate the folder on the external hard drive.
- Update File Paths: Once the missing folder is reconnected, Lightroom will automatically update the file paths for the photos within that folder. Repeat this process for any other missing folders or individual photos.
- Verify Missing Photos: After updating the file paths, Lightroom should update the previews and display the photos in the Library module. Verify that all the previously missing photos are now accessible and displayed correctly.
- Backup and Recheck: It is always a good practice to create a backup of your Lightroom catalog after updating file paths. This ensures that if anything goes wrong in the future, you have a backup to restore. Additionally, double-check your photo library to ensure that all photos are accessible and functioning as expected.
Updating file paths in Lightroom allows the software to establish a connection with your relocated photos on the external hard drive. It ensures that Lightroom can manage your photo library seamlessly and saves you from any potential confusion or frustration when working with your photos.
With the file paths successfully updated, you can now proceed to the final step of verifying and testing the move to ensure a smooth transition to the external hard drive.
Step 6: Verifying and Testing the Move
After completing all the previous steps of moving your Lightroom photos to an external hard drive, it’s essential to verify and test the move to ensure that everything has been transferred correctly. This final step will help ensure that your photo library is accessible and functional without any issues. Here’s how you can verify and test the move:
- Open Lightroom: Launch Lightroom and navigate to the Library module to view your photo library.
- Check Folder Structure: Inspect the folder structure on the external hard drive to ensure that it matches the folder structure you created during the move. Make sure all your categorized folders and subfolders are present and organized correctly.
- Review Majormetadata: Examine a few random photos and verify that the essential metadata, such as keywords, ratings, and captions, has been preserved. This ensures that your organizational efforts haven’t been compromised during the move.
- Test Editing Functions: Select a few images and test Lightroom’s editing functions to ensure they are working properly. Try making adjustments to exposure, color, and other settings to verify that Lightroom can access and modify the images from the external hard drive without any issues.
- Scan for Missing Photos: Perform a thorough scan of your photo library in Lightroom to check for any missing photos or broken links. Lightroom should be able to locate and display all your images without any warnings or error messages.
- Update Backup: Once you have verified that the move to the external hard drive was successful, update your backup system to include the new location of your Lightroom catalog and photo library files. This ensures that you have an additional layer of protection for your valuable photo collection.
By carefully verifying and testing the move, you can have peace of mind knowing that your photos are securely stored on the external hard drive and readily accessible through Lightroom. This step is essential for confirming the success of the entire process and ensuring that there are no lingering issues or discrepancies in your photo library.
Congratulations! You have successfully moved your Lightroom photos to an external hard drive, freeing up valuable space on your computer and ensuring the safety and accessibility of your photo library. Enjoy the benefits of a streamlined workflow and the convenience of managing your photos with Lightroom.
Conclusion
Moving your Lightroom photos to an external hard drive is a smart and practical solution for freeing up space on your computer while keeping your valuable photo library safe and easily accessible. Throughout this guide, we have walked you through the step-by-step process of moving your photos, from selecting the right external hard drive to updating file paths in Lightroom. By following these steps, you can seamlessly transition your photo library to the external hard drive and enjoy the benefits it offers.
We discussed the reasons why moving your Lightroom photos to an external hard drive can be advantageous, such as freeing up storage space, improving performance, ensuring data redundancy, and providing scalability. We also emphasized the importance of creating a well-structured folder system to organize your photos and enable easy management within Lightroom.
Each step in the process was covered in detail, including selecting the external hard drive, creating a folder structure, moving the Lightroom catalog and previews, transferring the original photos, updating file paths in Lightroom, and finally, verifying and testing the move.
Remember that after successfully moving your photos to the external hard drive, it’s important to regularly back up your Lightroom catalog and photos to protect against any potential data loss.
By following this guide, you have taken a significant step in optimizing your Lightroom workflow and ensuring the longevity and accessibility of your photo library. With your photos safely stored on the external hard drive, you can continue to explore your creativity and passion for photography without worrying about storage limitations.
We hope this guide has been helpful in assisting you with moving your Lightroom photos to an external hard drive. Enjoy the extra space, enhanced performance, and peace of mind that come with this simple yet effective solution. Happy editing and capturing unforgettable moments!