Introduction
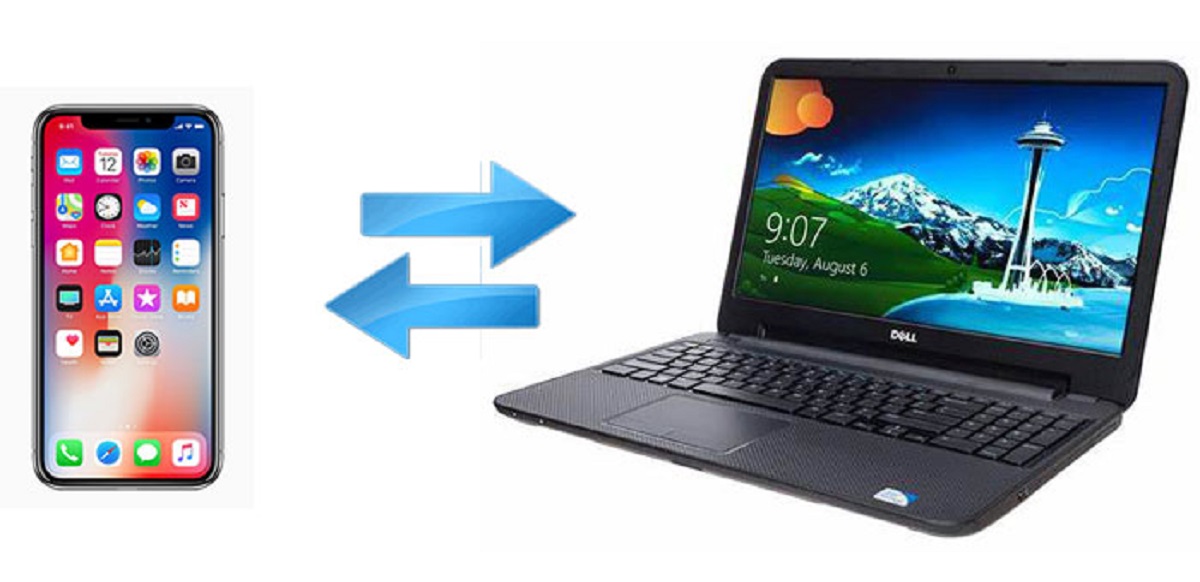
When it comes to transferring files from your iPhone to a PC, it may seem like a daunting task. However, with the right methods, it can be a breeze. Whether you want to transfer photos, videos, documents, or any other file type, this article will guide you through the process step by step.
Having your files stored on your PC can provide you with more flexibility and ease of access. It allows you to do more with your files, such as editing photos or organizing documents, using the various applications available on your computer. Additionally, having a backup of your important files on your PC provides an extra layer of security.
In this article, we will explore four different methods to transfer files from your iPhone to a PC. First, we will discuss using a USB cable, which is a common and straightforward method. Then, we will explore using iCloud, an Apple cloud storage service that enables wireless file transfer. Next, we will look at using iTunes, a software provided by Apple for managing iOS devices. Lastly, we will delve into using AirDrop, a wireless file-sharing feature available on newer iPhone models.
By the end of this article, you will have a clear understanding of how to transfer your files from your iPhone to your PC using one of these methods. So let’s get started with the first method, using a USB cable.
Method 1: Using a USB Cable
One of the most straightforward methods to transfer files from your iPhone to a PC is by using a USB cable. This method allows you to connect your iPhone directly to your computer and transfer files quickly and efficiently.
To start the process, ensure that you have the necessary equipment. You will need a Lightning-to-USB cable, which typically comes with your iPhone. Additionally, make sure that your computer is running the latest version of iTunes or an equivalent file management software.
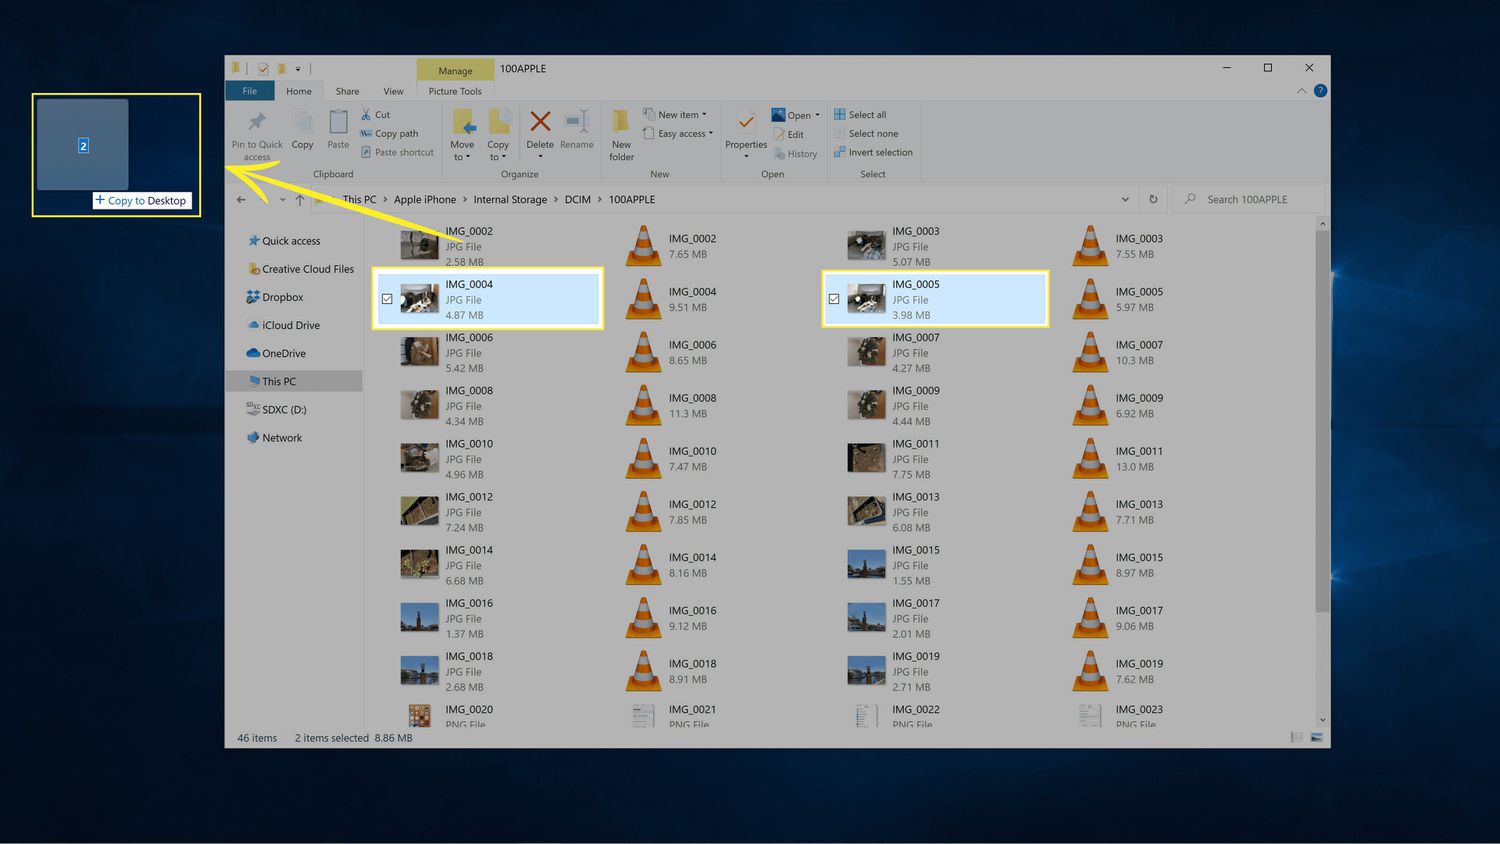
Here are the steps to transfer files using a USB cable:
- Connect your iPhone to your PC using the Lightning-to-USB cable.
- If prompted on your iPhone, unlock it by entering your passcode or using Face ID or Touch ID.
- On your PC, open iTunes or your preferred file management software.
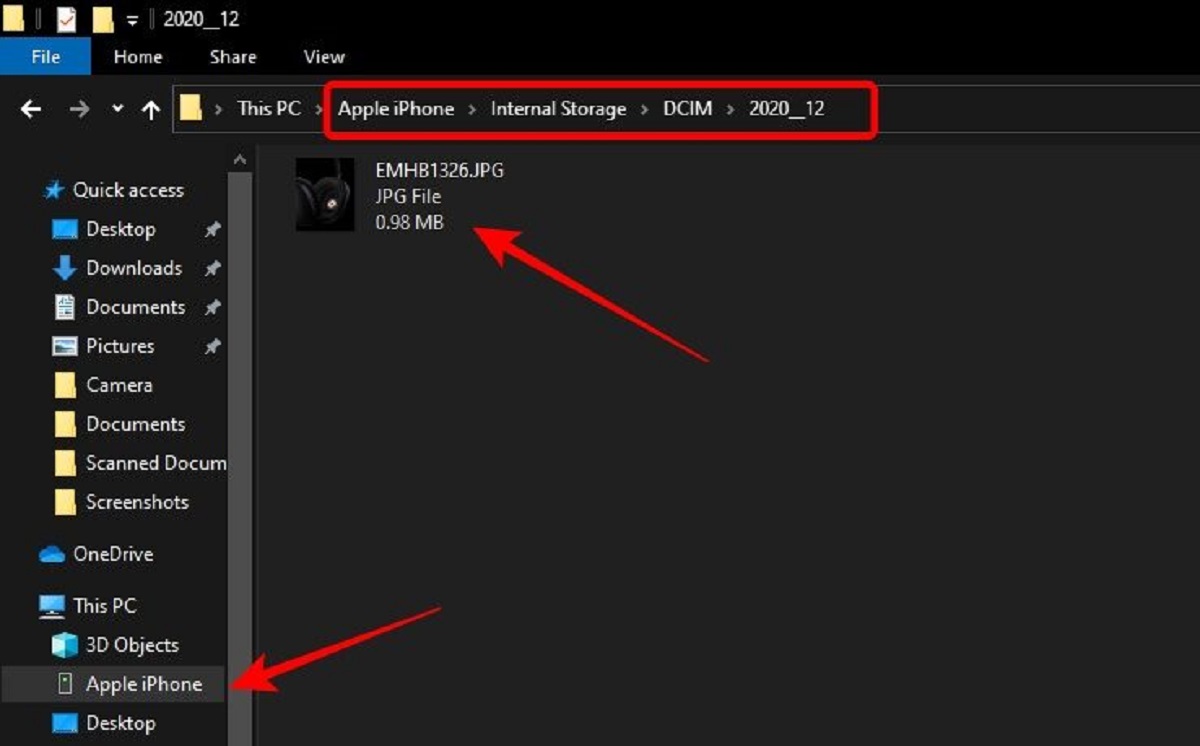
- Within the software, you should see your iPhone listed as a device. Click on it to access your iPhone’s contents.
- Select the files you want to transfer from your iPhone to your PC. These can include photos, videos, documents, and more.
- Once you have selected the files, choose the destination folder on your PC where you want to save them.
- Click the “Transfer” or “Sync” button, depending on the software you are using, to initiate the file transfer process.
- Wait for the transfer to complete. The time required will depend on the size and number of files being transferred.
- Once the transfer is finished, you can safely disconnect your iPhone from your PC.
Using a USB cable provides a reliable and secure way to transfer files between your iPhone and PC. It also allows for faster transfer speeds compared to wireless methods.
Now that you know how to transfer files from your iPhone to your PC using a USB cable, let’s explore another method: using iCloud.
Method 2: Using iCloud
If you prefer a wireless solution to transfer files from your iPhone to your PC, using iCloud is a convenient option. iCloud is Apple’s cloud storage service that allows you to store and sync files across all your Apple devices, including your iPhone and your PC.
Before you can use iCloud to transfer files, make sure that you have an active iCloud account and that iCloud is enabled on your iPhone. Also, ensure that you have a stable internet connection on both your iPhone and your PC.
Here are the steps to transfer files using iCloud:
- On your iPhone, go to “Settings” and tap on your Apple ID at the top of the screen.
- Select “iCloud” and make sure that the various file categories, such as Photos, Contacts, and Documents, are enabled for iCloud backup.
- Once iCloud is set up on your iPhone, open a web browser on your PC and go to the iCloud website (www.icloud.com).
- Sign in to your iCloud account using your Apple ID and password.
- Once you’re logged in, you will see various icons representing different file types, such as Photos, Notes, and iCloud Drive.
- Click on the appropriate icon to access the files you want to transfer from your iPhone.
- Select the files you want to transfer by either clicking on them individually or using the “Select All” option.
- Click the “Download” button or the appropriate download option to save the selected files to your PC.
- Choose the destination folder on your PC where you want to save the downloaded files.
- Wait for the download process to complete. The time required will depend on the size of the files and your internet connection speed.
Using iCloud to transfer files provides the advantage of wireless synchronization, ensuring that your files are always up to date across all your devices. It also allows you to access your files from any web browser, making it convenient even when you don’t have your iPhone with you.
Now that you know how to transfer files from your iPhone to your PC using iCloud, let’s explore another method: using iTunes.
Method 3: Using iTunes
Using iTunes is another reliable method to transfer files from your iPhone to your PC. iTunes is a software developed by Apple that allows you to manage and sync your iOS devices, including transferring files.
To use iTunes for file transfer, ensure that you have the latest version of iTunes installed on your PC. You will also need a USB cable to connect your iPhone to your computer.
Here are the steps to transfer files using iTunes:
- Connect your iPhone to your PC using the USB cable.
- If prompted on your iPhone, unlock it by entering your passcode or using Face ID or Touch ID.
- On your PC, open iTunes.
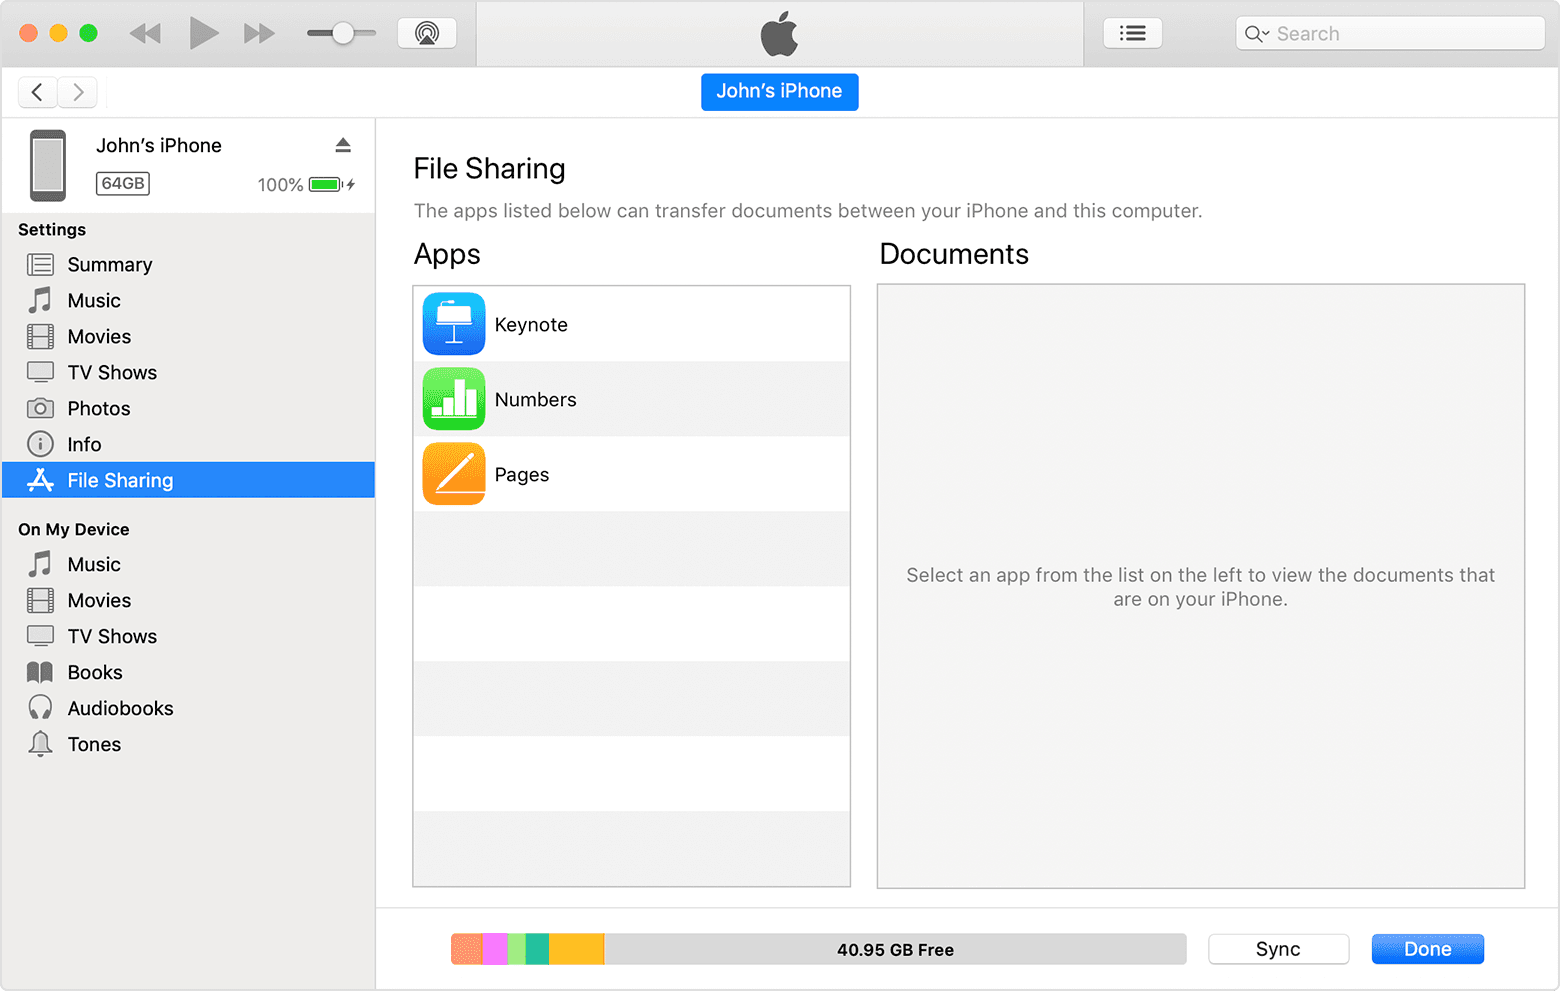
- In iTunes, you should see your iPhone icon in the top left corner. Click on it to access your iPhone’s settings.
- Within the iPhone settings, navigate to the “File Sharing” section.
- Under “File Sharing,” you will see a list of apps on your iPhone that support file sharing.
- Select the app from which you want to transfer files.
- Your files for that app will appear on the right side of the iTunes window.
- Select the files you want to transfer and click the “Save to” button or drag them to a folder on your PC.
- Choose the destination folder on your PC where you want to save the files.
- Wait for the transfer to complete. The time required will depend on the size and number of files being transferred.
Using iTunes allows for more granular control over which files you transfer from your iPhone to your PC. It also enables you to manage and organize your files within specific apps.
Now that you know how to transfer files from your iPhone to your PC using iTunes, let’s explore another method: using AirDrop.
Method 4: Using AirDrop
If you have a newer iPhone and a Mac computer, you can take advantage of AirDrop, a built-in feature that allows for fast and easy file transfer between Apple devices. AirDrop uses Bluetooth and Wi-Fi to create a direct connection between devices, making it a convenient and efficient method for transferring files.
Before using AirDrop, ensure that both your iPhone and Mac are connected to the same Wi-Fi network and have Bluetooth turned on. Also, make sure that AirDrop is enabled on both devices.
Here are the steps to transfer files using AirDrop:
- On your iPhone, open the file or files you want to send. This can include photos, videos, documents, and more.
- Tap on the “Share” icon, typically represented by a square with an arrow pointing upwards.
- Within the sharing options, you should see the AirDrop icon and the name of your Mac computer.
- Tap on the name of your Mac to send the files via AirDrop.
- On your Mac, you will receive a notification prompting you to accept the incoming file transfer.
- Click “Accept” to initiate the file transfer.
- Wait for the transfer to complete. The time required will depend on the size and number of files being transferred.
- Once the transfer is finished, you can find the transferred files in the designated destination folder on your Mac.
Using AirDrop provides a seamless and wireless method for transferring files between your iPhone and Mac. It eliminates the need for cables or additional software, making it extremely convenient.
Congratulations! You now have four different methods to choose from when transferring files from your iPhone to your PC. Whether you prefer a USB cable, iCloud, iTunes, or AirDrop, you can select the method that suits your needs and preferences.
Remember to consider factors such as file size, available storage space, and the speed of your internet connection when choosing the appropriate method. Enjoy the flexibility and convenience of having your files readily available on your PC.
Conclusion
Transferring files from your iPhone to your PC is essential for various reasons, such as backup, editing, and easier management. In this article, we explored four different methods to accomplish this task: using a USB cable, iCloud, iTunes, and AirDrop.
If you prefer a direct and straightforward approach, using a USB cable is the way to go. It allows for fast and reliable file transfer, making it a popular choice for many users.
For those who prefer a wireless solution, iCloud offers a convenient way to sync and access your files across all your Apple devices. With a few simple steps, you can transfer files seamlessly and securely.
If you like a more comprehensive file management experience, iTunes is an excellent option. It provides granular control over transferring files between your iPhone and PC, making it ideal for organizing and managing specific apps.
With the advent of AirDrop, transferring files between your iPhone and Mac has never been easier. This wireless method relies on direct device-to-device connections and is perfect for those who want a hassle-free and quick transfer process.
Remember to consider factors such as file size, available storage space, and internet connection speed when choosing the method that best suits your needs.
Now that you have a clear understanding of these methods, you can confidently transfer your files from your iPhone to your PC whenever needed. Enjoy the convenience of having your files readily accessible on your computer and the ability to perform various tasks with ease.
Start exploring these methods today and enhance your file management experience between your iPhone and PC.