Introduction
An external hard disk drive is a great addition to any computer setup, providing you with extra storage space to keep your files and documents. However, have you ever wondered if it is possible to make your hard disk drive available to other people on your network? The good news is, it is indeed possible!
By following a few simple steps, you can make your hard disk drive accessible to other users, allowing them to view and share files seamlessly. Whether you want to share important work documents, family photos, or media files, this guide will walk you through the process of making your hard disk drive available to others.
Before we dive in, it is important to note that this tutorial is aimed at Windows users. The steps may vary slightly depending on your operating system, so make sure to adjust accordingly. Additionally, please ensure that you have administrative access to your computer in order to make the necessary changes and configurations.
Now, let’s get started on the journey to making your hard disk drive accessible to others!
Understanding the Basics
Before we jump into the technical steps, it’s important to understand some key concepts that will help you in making your hard disk drive available to others.
Firstly, let’s talk about connecting the hard disk drive. An external hard disk drive usually connects to your computer using a USB or Thunderbolt cable. It is essential to ensure that the cable is properly inserted into both the drive and the computer to establish a stable connection.
Next, formatting the hard disk drive is necessary to prepare it for use. Formatting creates a file system on the drive that allows it to store and organize data. When formatting, you will be prompted to select a file system, such as NTFS or FAT32. NTFS is the recommended option for most users as it supports larger file sizes and offers better file security.
After formatting, assigning a drive letter to the hard disk drive is essential. A drive letter is a unique identifier that Windows uses to distinguish different storage devices. By assigning a drive letter, you give the hard disk drive its own identity within the system.
Once you have assigned a drive letter, you need to share the hard disk drive. Sharing allows other users on the network to access the drive’s contents. You can control the level of access by setting permissions, which determine what actions others can take, such as read-only or full access.
Finally, to make the hard disk drive available on a network, you need to configure network sharing settings. This involves specifying the network location and enabling sharing features to ensure that the drive is visible and accessible to other network users.
Having a solid understanding of these basic concepts will make it much easier to follow the subsequent steps. Now, let’s dive into the detailed instructions on how to make your hard disk drive available to others!
Step 1: Connecting the Hard Disk Drive
The first step in making your hard disk drive available to others is to establish a proper connection between the drive and your computer. Follow these simple steps to ensure a successful connection:
- Start by locating the USB or Thunderbolt port on your computer. This is usually found on the side or back of the device.
- Take the appropriate cable (USB or Thunderbolt) that came with your hard disk drive and connect one end to the drive itself.
- When plugging in the cable, make sure it is firmly inserted into the port on the drive to avoid any connectivity issues.
- Now, connect the other end of the cable to the USB or Thunderbolt port on your computer. Again, ensure a secure connection to prevent any disruptions.
- Once connected, you should see a notification on your computer indicating that a new device has been detected. Wait for a moment as the computer recognizes and installs the necessary drivers for the hard disk drive.
- After the drivers are successfully installed, you can now access the hard disk drive on your computer by opening the File Explorer (Windows key + E) and locating the newly connected drive under “This PC” or “My Computer”.
By following these steps, you have established a solid connection between your computer and the hard disk drive. Now, you are ready to move on to the next step: formatting the drive to prepare it for use.
Step 2: Formatting the Hard Disk Drive
After connecting the hard disk drive to your computer, the next step is to format it in order to prepare it for use. Formatting creates a file system on the drive that allows you to store and organize data. Follow these steps to format your hard disk drive:
- Open the File Explorer by pressing the Windows key and E simultaneously.
- Locate and right-click on the connected hard disk drive in the “This PC” or “My Computer” section.
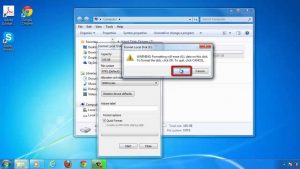
- From the context menu, select “Format”.
- A new window will open, allowing you to configure the formatting options. Select the desired file system for your hard disk drive. The recommended file system for most users is NTFS, as it offers better performance and security. However, if you intend to use the drive with older devices or operating systems, you may want to consider using FAT32.
- Optionally, you can also specify a volume label for the drive. This is the name that will be displayed for the drive in the File Explorer.
- Double-check the formatting settings to ensure they are accurate and click on the “Start” button to begin the formatting process.
- Wait for the formatting process to complete. The duration will vary depending on the size of the hard disk drive.
- Once the formatting is finished, you will see a notification indicating that the process was successful.
- Your hard disk drive is now formatted and ready for use on your computer.
Formatting the hard disk drive is an essential step to ensure compatibility and optimal performance. By following these steps, you have successfully formatted your drive and are now ready to move on to the next step: assigning a drive letter.
Step 3: Assigning a Drive Letter
After formatting your hard disk drive, the next step is to assign a drive letter to it. Assigning a drive letter allows your computer to recognize and differentiate the connected storage devices. Follow these steps to assign a drive letter to your hard disk drive:
- Open the File Explorer by pressing the Windows key and E simultaneously.
- On the top menu of the File Explorer, click on the “Computer” or “This PC” tab.
- Locate and right-click on the formatted hard disk drive that you want to assign a drive letter to.
- From the context menu, select “Change Drive Letter and Paths”.
- In the new window that appears, click on the “Add” button.
- Choose the option to “Assign the following drive letter” and select a letter from the dropdown menu. If you prefer, you can let the system automatically assign a drive letter by choosing the “Assign the following drive letter automatically” option.
- Click on “OK” to save the changes and assign the drive letter.
- Once the process is completed, you will receive a notification confirming that the drive letter has been successfully assigned.
- You can now see the hard disk drive with the assigned drive letter in the File Explorer and access its contents.
Assigning a drive letter ensures that your computer can identify and access the hard disk drive easily. It is an important step in making your drive available to others. With the drive letter properly assigned, you can now move on to the next step: sharing the hard disk drive.
Step 4: Sharing the Hard Disk Drive
Now that you have connected, formatted, and assigned a drive letter to your hard disk drive, it’s time to share it with others on your network. Sharing the hard disk drive allows other users to access and interact with its contents. Follow these steps to share your hard disk drive:
- Open the File Explorer by pressing the Windows key and E simultaneously.
- Locate and right-click on the hard disk drive that you want to share.
- From the context menu, select “Properties”.
- In the Properties window, navigate to the “Sharing” tab.
- Click on the “Advanced Sharing” button.
- Tick the box that says “Share this folder” to enable sharing for the selected hard disk drive.
- You can leave the default share name intact or provide a custom name for the shared drive.
- Under the “Permissions” section, you can configure the level of access that other users will have. By clicking on the “Permissions” button, you can set specific permissions, such as read-only access or full control, for different users or groups.
- Once you have adjusted the sharing settings and permissions, click on “OK” to save the changes.
By sharing the hard disk drive, you have made it accessible to other users on your network. They can now locate and access the drive by its shared name or through the network location. However, ensuring proper permissions and access controls is crucial to maintain data security. Now that you have shared the drive, let’s move on to the next step: configuring permissions.
Step 5: Configuring Permissions
After sharing your hard disk drive, it is important to configure permissions to control the level of access that other users will have. Permissions allow you to determine what actions users can take, such as reading, writing, modifying, or deleting files. Follow these steps to configure permissions for your shared hard disk drive:
- Open the File Explorer by pressing the Windows key and E simultaneously.
- Locate and right-click on the shared hard disk drive you want to configure permissions for.
- From the context menu, select “Properties”.
- In the Properties window, navigate to the “Sharing” tab.
- Click on the “Advanced Sharing” button.
- In the Advanced Sharing window, click on the “Permissions” button.
- In the Permissions window, you will see a list of users and groups with their respective permissions.
- To add a new user or group, click on the “Add” button and enter the name or email address of the user or group.
- Once you have added the user or group, you can specify the desired permission level by checking the appropriate boxes under the “Allow” column. For example, you can allow full control, read, or write permissions.
- If needed, you can also remove or modify permissions for existing users or groups by selecting the user or group and using the corresponding buttons.
- After configuring the permissions, click on “OK” to save the changes.
By configuring permissions, you have fine-tuned the access rights for your shared hard disk drive. This ensures that only authorized users have the desired level of access. Configuring permissions is an essential step for maintaining data security and privacy. With permissions properly set, you are now ready to move on to the next step: allowing access on a network.
Step 6: Allowing Access on a Network
After sharing your hard disk drive and configuring permissions, the next step is to allow access to the drive on your network. This ensures that other users can discover and connect to the shared drive. Follow these steps to allow access to your shared hard disk drive on a network:
- Open the Control Panel on your computer.
- Click on the “Network and Internet” category.
- Under “Network and Sharing Center,” click on the “Change advanced sharing settings” link.
- In the Advanced Sharing Settings window, expand the “Home or Work” network profile if it is not already expanded.
- Make sure that “Turn on network discovery” and “Turn on file and printer sharing” are both enabled.
- Scroll down and ensure that “Public folder sharing” is turned off if you do not want to share your hard disk drive publicly.
- Click on the “Save changes” button to apply the settings.
By allowing access on a network, you have made your shared hard disk drive discoverable by other users on your network. They can now access the drive by searching for it through the network or by entering the network location in the File Explorer’s address bar. Keep in mind that users will still need valid credentials (e.g., username and password) and sufficient permissions to access the shared drive. Now, you’re all set to enjoy the benefits of a shared hard disk drive on your network!
Troubleshooting Common Issues
While setting up and sharing your hard disk drive on a network, you may encounter some common issues. Here are a few troubleshooting tips to help resolve these problems:
- Drive not recognized: If your computer fails to recognize the connected hard disk drive, double-check the cable connections and ensure that the drive is properly powered on. You can also try connecting the drive to a different USB or Thunderbolt port on your computer.
- Formatting errors: If you encounter errors while formatting your hard disk drive, make sure that the drive is not write-protected. If it is, you may need to remove the write protection or use a different storage device.
- Permissions issues: If other users on the network are unable to access the shared drive, verify the permissions and make sure that they have the required access rights. Check the sharing settings, permissions, and network discovery settings to ensure they are properly configured.
- Firewall blocking access: Sometimes, a firewall can block network access to the shared drive. Check your firewall settings and make sure that the necessary ports and protocols are allowed for network sharing.
- Network connectivity problems: If you are unable to access the shared drive from other devices, ensure that all devices are connected to the same network. Restarting your router and checking network settings can also help resolve connectivity issues.
- Outdated drivers: Make sure that you have the latest drivers for your hard disk drive and network adapter. Outdated drivers can sometimes cause compatibility issues or prevent proper sharing on the network.
- User authentication errors: If users are prompted for username and password when accessing the shared drive, ensure that they are providing the correct credentials and have the necessary permissions to access the drive. You may need to set up user accounts and passwords on the computer hosting the shared drive.
If you encounter any other issues while setting up or sharing your hard disk drive on a network, consulting the user manual or contacting the manufacturer’s customer support can provide further assistance. Troubleshooting may require advanced knowledge or the help of a technical expert, so don’t hesitate to seek professional help if needed. With these troubleshooting tips, you can effectively troubleshoot and resolve common issues that may arise during the process.
Conclusion
Congratulations! You have successfully learned how to make your hard disk drive available to others on a network. By following the steps outlined in this guide, you have connected, formatted, assigned a drive letter, shared, and configured permissions for your hard disk drive. Additionally, you have enabled network access, allowing other users to discover and connect to the shared drive.
Sharing your hard disk drive opens up a world of possibilities for collaboration, file sharing, and convenient access across devices. Whether it’s for work, personal, or entertainment purposes, making your hard disk drive available on a network can greatly enhance your productivity and convenience.
Remember to take into consideration the security aspects of sharing your drive. Setting appropriate permissions and maintaining strong passwords are essential to ensure that only authorized individuals can access your data.
If you encounter any issues or have specific requirements, refer to the troubleshooting section or seek assistance from technical support for further guidance.
Now that you possess the knowledge and skills to make your hard disk drive available to others, you can enjoy seamless file access, sharing, and collaboration with your network users. Embrace the convenience and flexibility that sharing your hard disk drive brings, and make the most out of your networked environment.