Introduction
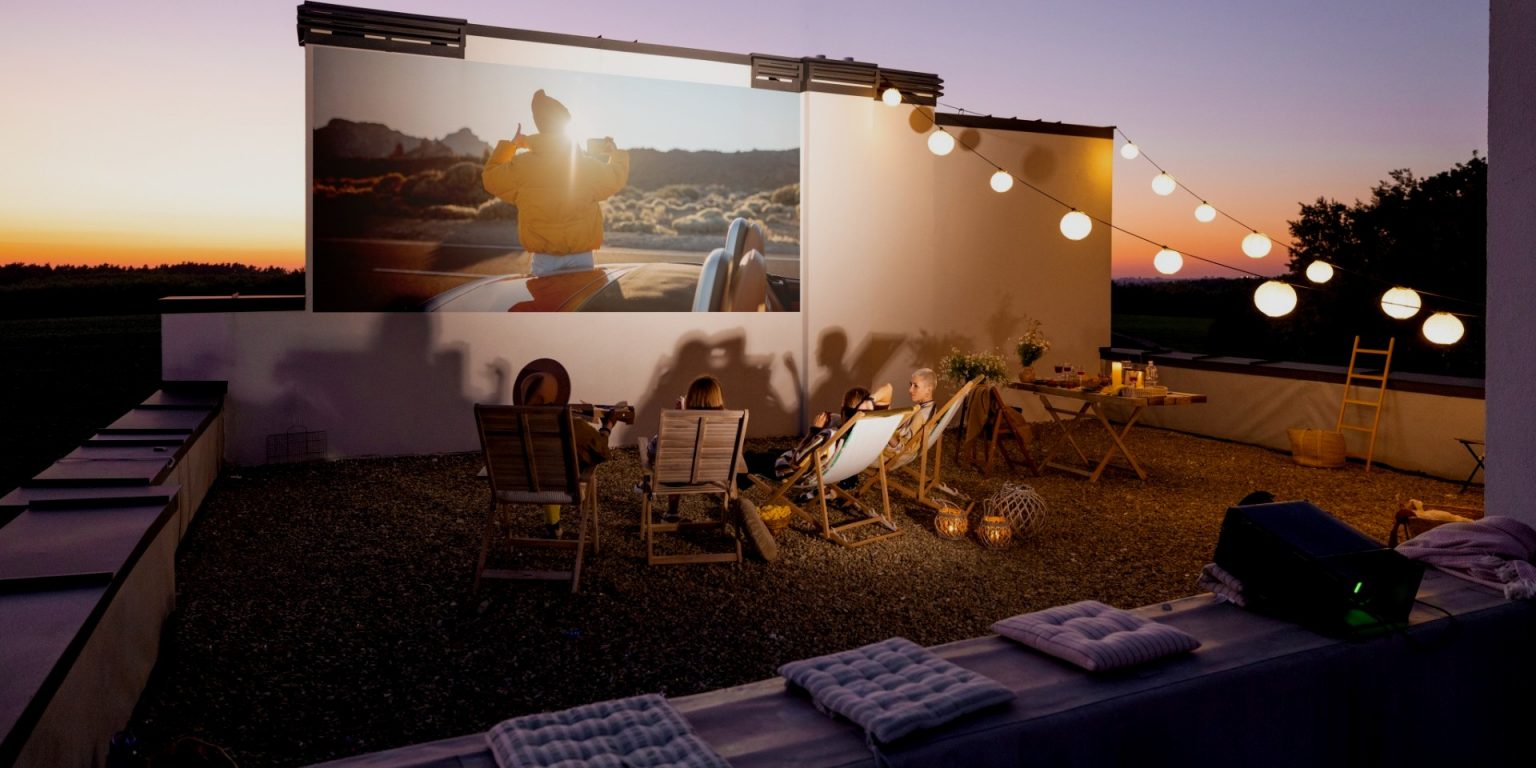
Welcome to the world of outdoor movie nights! There’s something magical about gathering under the stars, surrounded by friends and loved ones, and enjoying a movie projected onto a big screen. If you’ve been longing to create your own outdoor cinema experience but thought it was too complicated or expensive, think again. With a little bit of creativity and some basic materials, you can easily build your own outdoor projector screen.
Creating an outdoor projector screen is a fun and rewarding DIY project that allows you to enjoy your favorite movies, sports events, or even video games in the great outdoors. Whether you have a large backyard, a cozy patio, or even a rooftop terrace, this guide will walk you through the simple steps to make your outdoor movie dreams come true.
In this guide, we’ll outline the materials you’ll need and provide a step-by-step tutorial on how to construct your own outdoor projector screen. From measuring and cutting the wood to attaching the screen material and setting up the projector, we’ve got everything covered. So, grab your tools and let’s get started!
Before we dive into the project, it’s important to note that while building an outdoor projector screen is relatively straightforward, it does require some basic woodworking skills and tools. If you’re unfamiliar with handling power tools or aren’t comfortable with DIY projects, it’s always a good idea to seek assistance from someone more experienced or consider hiring a professional.
Now, without further ado, let’s jump right into the materials needed for this project.
Materials Needed
Before you start building your outdoor projector screen, make sure you have the following materials on hand:
- 4 pieces of pine wood boards (2×4 inches) – These will serve as the frame of the projector screen.
- Plywood or MDF board – This will be used as the backing for the screen material.
- Projector screen fabric or blackout cloth – Choose a material that is durable, easy to clean, and provides a high-quality projection surface.
- Screws and nails – These will be used to secure the frame and attach the screen material.
- Sandpaper or a sander – This will be used to smooth the wood surfaces.
- Paint or exterior stain – If you want to give your projector screen a polished look, consider painting or staining the wood frame.
- Eye hooks and rope – These will be used to secure the projector screen to a support structure, such as a fence or poles.
- Tools – You will need a saw to cut the wood, a drill or screwdriver to attach the pieces, and a staple gun or adhesive to secure the screen material.
- Measuring tape, pencil, and ruler – These basic measuring tools will help you accurately cut the wood and align the components.
It’s worth noting that the size and quantity of these materials will depend on the specific dimensions of your projector screen. Before purchasing the materials, measure the space where you plan to set up the screen and determine the desired screen size. This will help you determine the appropriate lengths of wood and the amount of screen fabric needed.
Once you have gathered the necessary materials, you’re ready to move on to the next step: measuring and cutting the wood for the frame.
Step 1: Measure and Cut the Wood
The first step in building your outdoor projector screen is to measure and cut the wood for the frame. Here’s how to do it:
- Measure the area where you plan to set up the projector screen. This will help you determine the dimensions of the frame.
- Using a measuring tape, mark the desired length and width of the screen on the pine wood boards. Make sure to account for any additional space you may need for the frame.
- Use a saw to cut the wood boards according to your measurements. Make sure to cut with precision and maintain straight lines for a professional-looking frame.
- Double-check the cut pieces to ensure they are all of equal length and width. If needed, make any necessary adjustments.
Remember to wear appropriate safety gear, such as goggles and gloves, while cutting the wood to prevent any accidents or injuries.
Once you have the wood pieces cut to the desired dimensions, you’re ready to move on to the next step: sanding the wood to ensure a smooth surface.
Step 2: Sand the Wood
After measuring and cutting the wood for your outdoor projector screen, it’s important to sand the surfaces to create a smooth finish. Here’s how you can do it:
- Start by selecting a fine-grit sandpaper (around 120-150 grit) or use a handheld sander if you have one. This will help remove any rough edges, splinters, or imperfections on the wood surface.
- Gently run the sandpaper over the cut edges and surfaces of the wood boards. Sand in the direction of the wood grain to prevent any scratches or damage.
- Continue sanding until the wood feels smooth to the touch. Be sure to pay attention to the corners and edges, as these areas can be more prone to roughness.
- Once you’ve sanded all the wood pieces, use a clean cloth or brush to remove any dust or debris.
Sanding the wood not only helps create a polished appearance but also ensures that there are no rough edges that could potentially damage the screen material. It provides a smooth and even surface for attaching the screen fabric in the next steps of the process.
Once you’ve completed the sanding process, you’re ready to move on to the next step: assembling the frame of the projector screen.
Step 3: Assemble the Frame
With the wood cut and sanded, it’s time to assemble the frame for your outdoor projector screen. Follow these steps to ensure a sturdy and secure construction:
- Lay out the wood pieces on a flat surface, such as a workbench or the ground, in the shape of a rectangle. Position the shorter pieces inside the longer ones to create the frame.
- Align the corners of the wood pieces and ensure they are flush. You can use clamps or ask someone to hold the pieces together while you work.
- Pre-drill pilot holes in each corner and along the longer sides where the wood pieces will be joined together. This will prevent the wood from splitting when inserting the screws.
- Secure the wood pieces together using screws. Start by inserting screws into the pilot holes at the corners and then along the longer sides of the frame. Continue adding screws until the frame feels sturdy and there is no movement between the wood pieces.
- Double-check the frame for any gaps or misalignments. Make any necessary adjustments to ensure the frame is square and evenly balanced.
Once the frame is securely assembled, you’ll be ready to move on to the next step: attaching the screen material.
Having a well-built frame is crucial as it will provide the necessary structure and support for the screen material, allowing for a smooth and enjoyable projection experience.
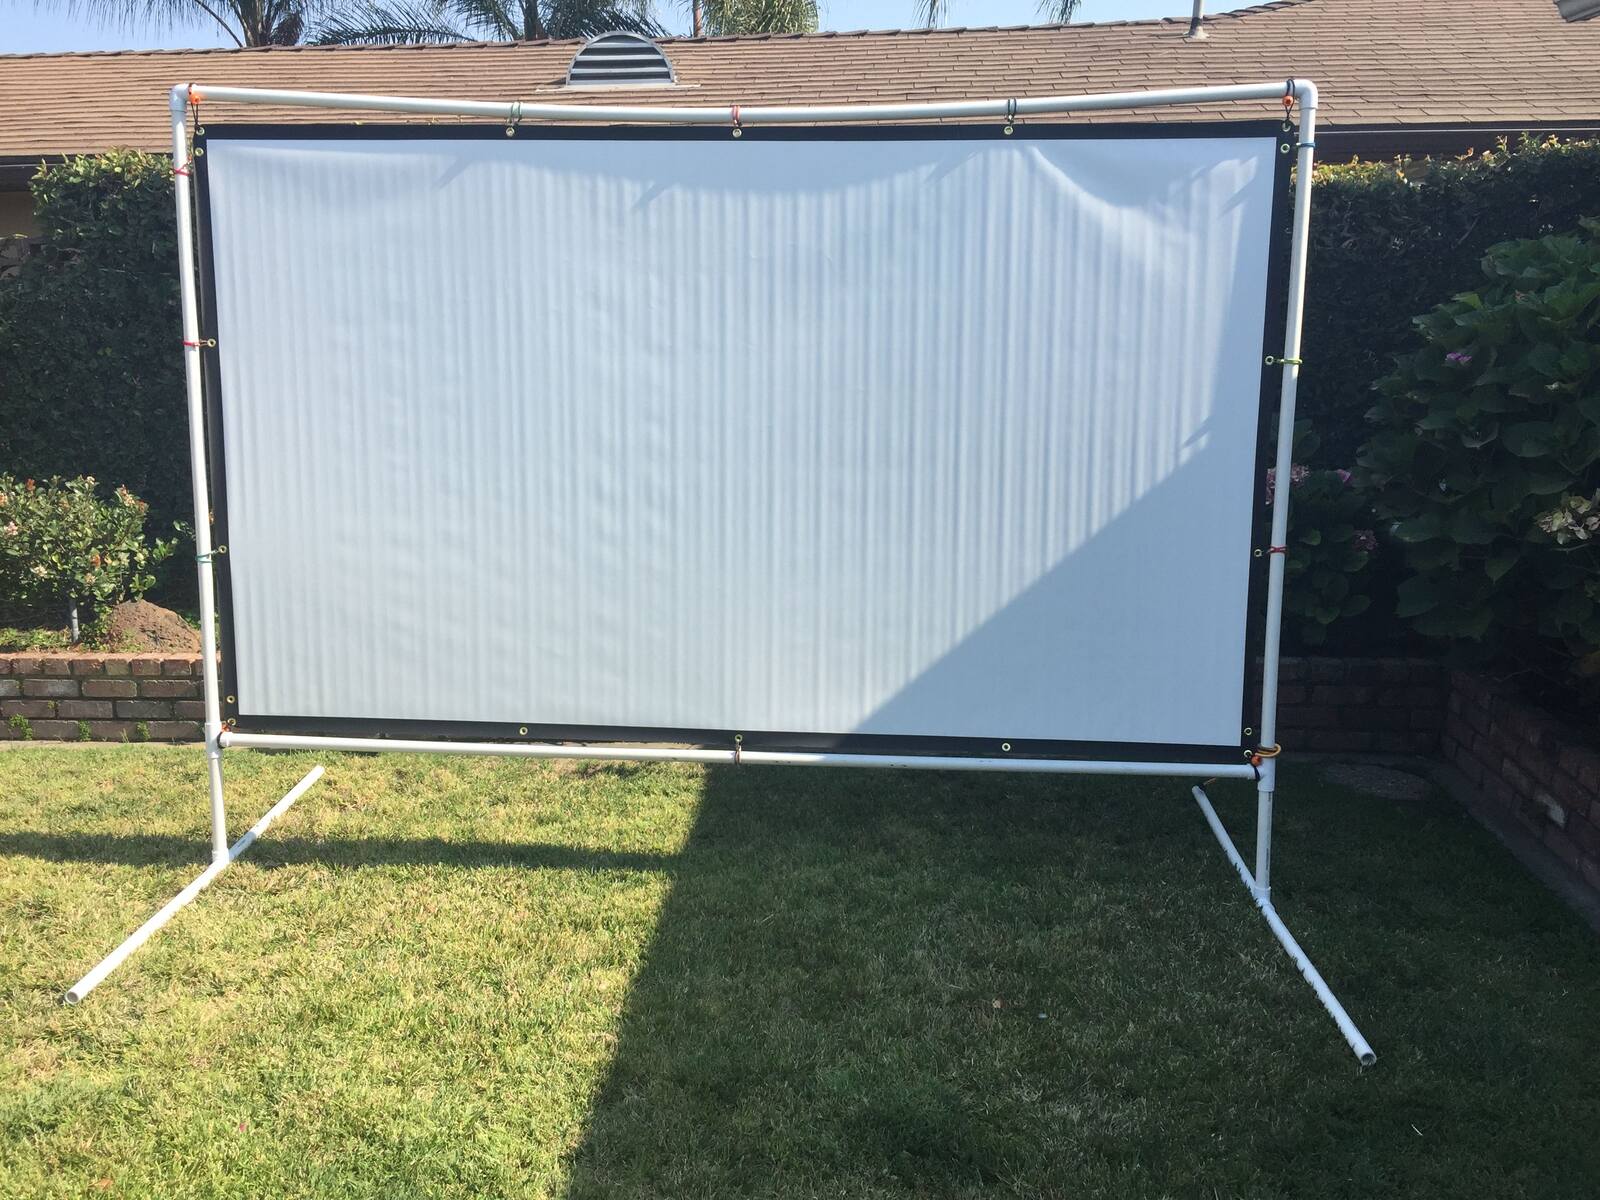
Step 4: Attach the Screen Material
Now that the frame is assembled, it’s time to attach the screen material to create the projection surface for your outdoor projector screen. Follow these steps to securely attach the screen material:
- Spread out the projector screen fabric or blackout cloth on a flat surface near the frame. Ensure that the fabric is free from wrinkles or creases.
- Position the frame on top of the screen fabric, making sure it is centered and aligned.
- Starting from one side, staple or use adhesive to secure the screen material to the wood frame. Begin in the middle of the side and work your way to the edges, spacing the staples or adhesive approximately 6-8 inches apart.
- Continue attaching the screen material along the remaining sides of the frame, ensuring that the fabric is taut and smooth as you go.
- Once all sides are secured, check for any loose spots or wrinkles in the fabric. Gently stretch and adjust the material as needed to achieve a flat and even surface.
- Trim off any excess screen material, leaving a clean edge around the frame.
Be careful not to pull the screen fabric too tightly, as this may cause distortion or strain on the material. It should be taut enough to eliminate significant wrinkles but still have some give.
Attaching the screen material is a crucial step to ensure a seamless and high-quality projection surface. Take your time during this step to achieve optimal results.
Once the screen material is securely attached, it’s time to move on to the next step: installing eye hooks and rope for easy setup.
Step 5: Install Eye Hooks and Rope
With the screen material securely attached to the frame, it’s time to install eye hooks and rope to easily set up and adjust your outdoor projector screen. Follow these steps to complete this step:
- First, determine where you will be setting up the projector screen. Choose a suitable location such as a fence, trees, or poles.
- Measure and mark the desired positions for the eye hooks on the top corners of the frame. Ensure that the eye hooks are aligned and evenly spaced.
- Using a drill, create pilot holes at the marked positions. This will make it easier to screw in the eye hooks.
- Gently screw the eye hooks into the pilot holes until they are securely in place. Make sure they are tight and can support the weight of the projector screen.
- Once the eye hooks are installed, cut two lengths of rope that are long enough to reach from the eye hooks to the support structure you will be using.
- Attach one end of each rope to the eye hooks, making a secure knot or using a carabiner for added convenience.
- Take the other end of each rope and secure it to the chosen support structure. This could be a fence post, tree branch, or any other suitable anchor point.
- Ensure that the ropes are tightened evenly to keep the projector screen taut and stabilized during use.
Installing eye hooks and rope provides a convenient and adjustable way to set up your outdoor projector screen. It allows for easy removal and adjustment, making it simple to adapt to different viewing locations and screen heights.
With the eye hooks and rope in place, you’re ready to move on to the next step: setting up the projector for your outdoor movie night!
Step 6: Set Up the Projector
Now that your outdoor projector screen is complete, it’s time to set up your projector for the ultimate outdoor movie experience. Follow these steps to ensure a seamless setup:
- Decide on the placement of your projector. Consider factors such as distance from the screen, angle of projection, and any obstructions or lighting conditions in the surroundings.
- Position the projector on a stable surface such as a table, tripod, or projector stand. Make sure it is level and securely placed.
- Connect your source device, such as a laptop, DVD player, or media streaming device, to the projector using the appropriate cables. Ensure that the cables are securely connected and there are no loose connections.
- Adjust the projector settings to optimize the image quality for outdoor viewing. This may include adjusting brightness, contrast, keystone correction, and aspect ratio.
- Focus the projector by adjusting the lens until the image appears sharp and clear on the projector screen. Take your time to ensure the best possible image quality.
- If necessary, adjust the position or angle of the projector to align the image with the center of the projector screen.
- Ensure that the projector is securely positioned and there is no risk of it being knocked over or damaged during the movie night.
Remember to test your setup before your actual outdoor movie night. This will give you the opportunity to make any adjustments or troubleshoot any technical issues beforehand.
With your projector set up and ready to go, you’re just one step away from enjoying your own personal outdoor cinema!
Step 7: Enjoy Your Outdoor Movie Night
Congratulations! You have completed all the necessary steps to create your own outdoor projector screen. Now it’s time to sit back, relax, and enjoy your outdoor movie night. Follow these suggestions to make the most of your experience:
- Gather your friends, family, or loved ones and invite them to join you for a memorable outdoor movie night.
- Set up comfortable seating arrangements such as blankets, chairs, or bean bags to ensure everyone can relax and enjoy the movie in comfort.
- Consider creating a cozy ambiance by adding some outdoor lighting, such as string lights or lanterns, to enhance the atmosphere.
- Prepare some delicious snacks and refreshing beverages to complete the movie night experience. Popcorn, nachos, and refreshing drinks are always a hit.
- Once everything is set up, gather around the outdoor projector screen and start your movie. Sit back, relax, and immerse yourself in the big-screen experience under the stars.
- Don’t forget to enjoy the ambiance and embrace the unique experience of watching a movie outdoors. Take in the fresh air, the sound of nature, and the thrill of a shared experience.
- After the movie, take some time to appreciate the effort and creativity that went into building your own outdoor projector screen. It’s a fantastic accomplishment that will provide endless hours of entertainment.
Remember, outdoor movie nights are not limited to just movies. You can also use your projector screen for watching sports events, playing video games, or even hosting a karaoke night. The possibilities are endless!
Enjoy the magic of your very own outdoor cinema and create lasting memories with your loved ones. Relish the joy of watching your favorite movies under the open sky, and cherish the unique experience that your homemade outdoor projector screen provides.
Conclusion
Congratulations on successfully creating your very own outdoor projector screen! By following the steps outlined in this guide and utilizing some basic materials and tools, you’ve brought the magic of the big screen to your outdoor space. Whether it’s for movie nights, sports events, or gaming sessions, your outdoor projector screen will provide hours of entertainment and create unforgettable moments.
Building an outdoor projector screen is not only a fun DIY project but also a cost-effective way to enjoy the thrill of the cinema in the comfort of your own backyard. With careful measurements, precise cutting, and secure assembly, you’ve created a durable frame that provides stability and support to the screen material. By attaching the screen fabric with precision and setting up the project correctly, you’ve ensured a clear and immersive viewing experience.
Remember, the success of your outdoor movie nights also depends on the ambiance you create. Consider adding cozy seating, outdoor lighting, and delightful snacks to enhance the atmosphere and make your movie nights truly special. The possibilities are endless, and you can customize your outdoor projector screen experience to suit your preferences and the space available.
So go ahead, invite your friends and family, and indulge in the joy of outdoor cinema. With your homemade outdoor projector screen, you have the freedom to enjoy your favorite movies, sports, or games under the stars, creating cherished memories and fostering a sense of togetherness.
Thank you for choosing this guide to help you build your outdoor projector screen. We hope this project not only provides entertainment but also inspires you to embark on more DIY initiatives to enhance your living space. Now, sit back, relax, and enjoy the magic of your very own outdoor movie theater!