Introduction
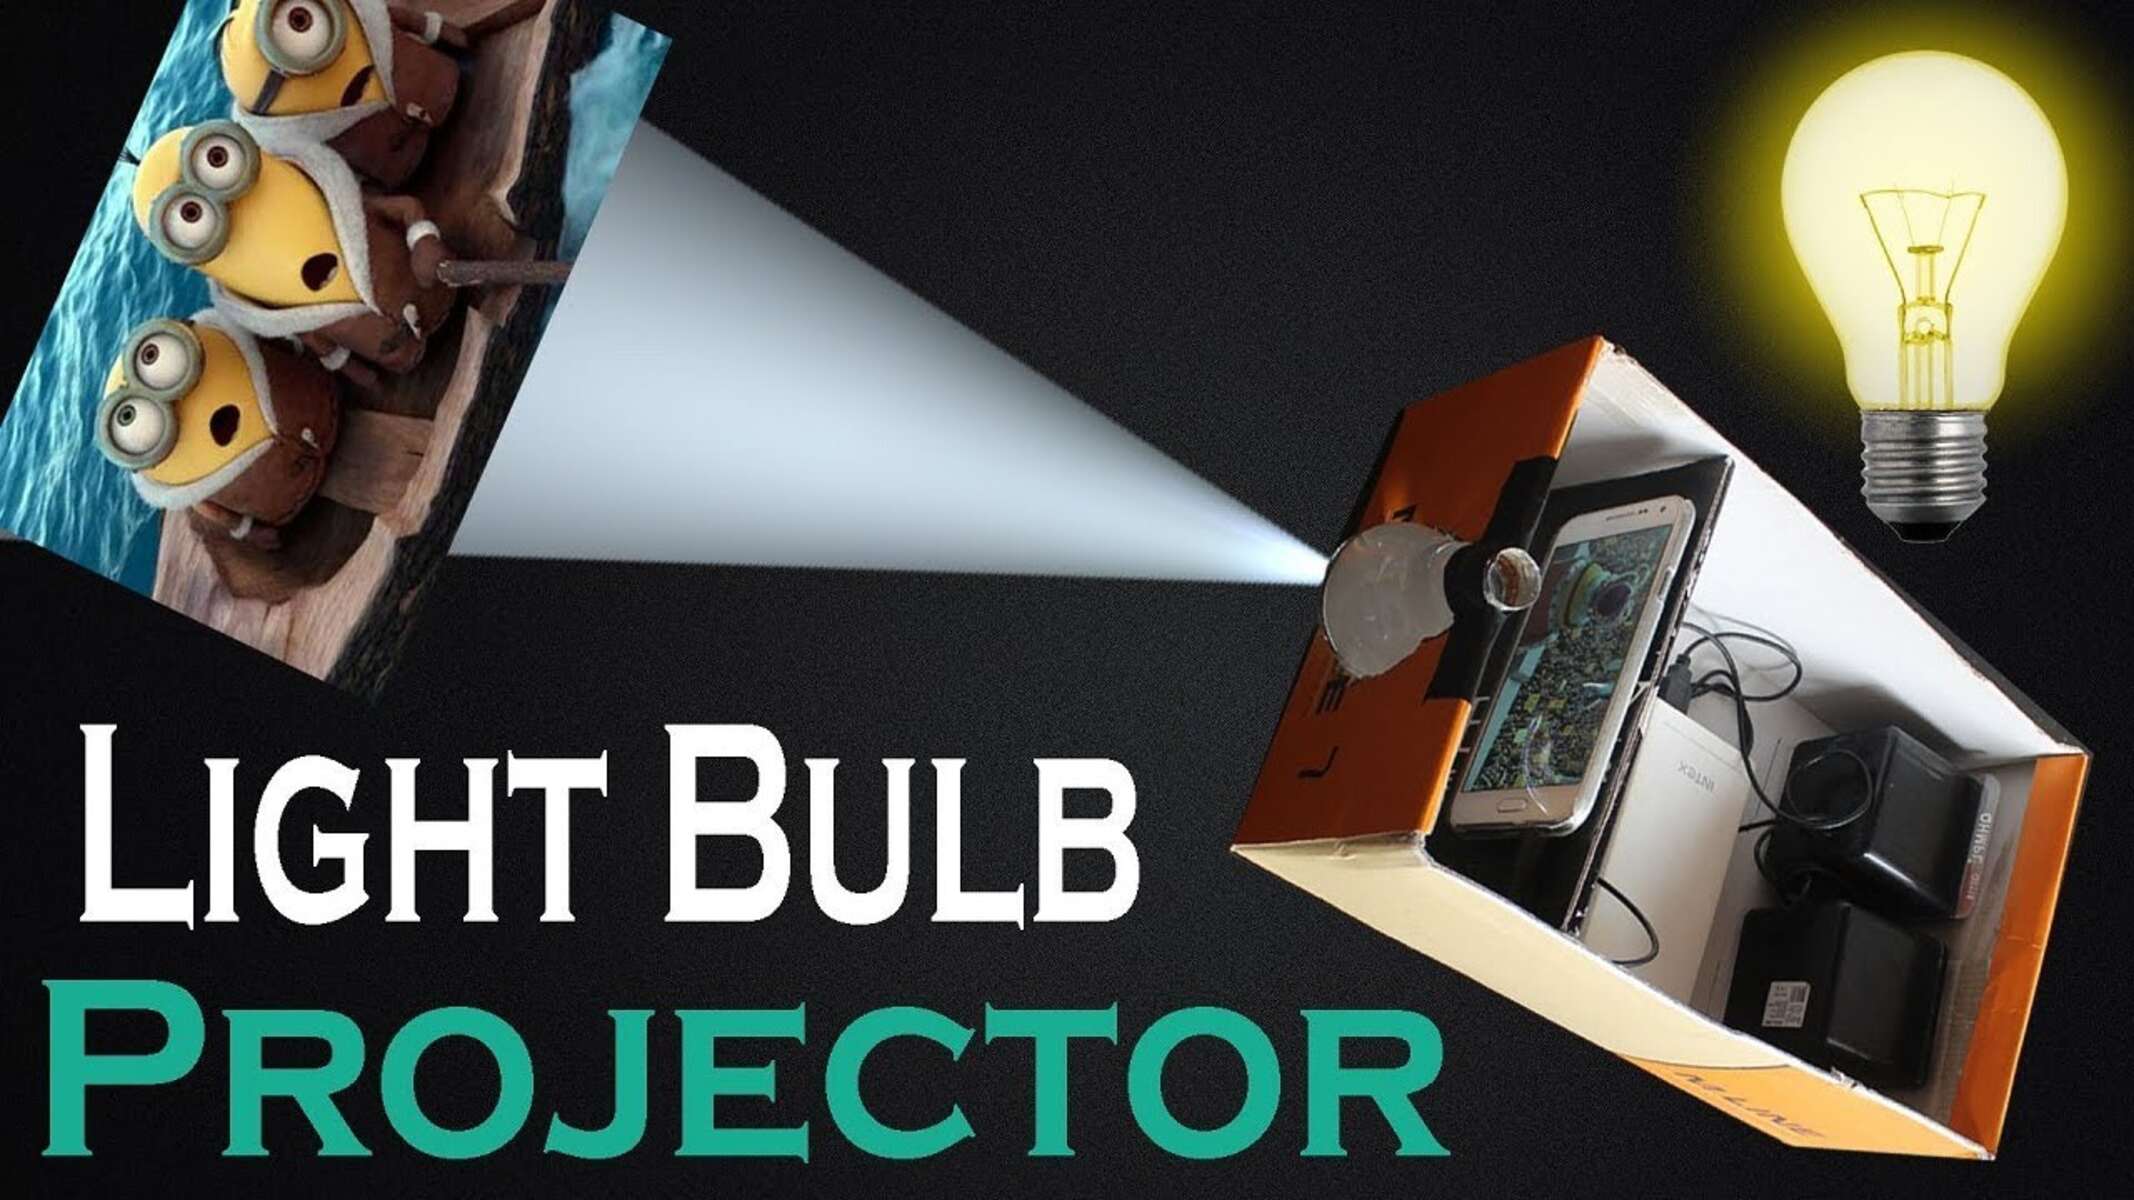
Have you ever wanted to enjoy a movie or a slideshow on a big screen, but didn’t have a projector at hand? Don’t worry! In this article, we will show you how to make a projector without a magnifying glass. By following these simple steps, you can create your very own DIY projector using common materials that you may already have lying around the house.
A projector is a device that projects an image or video onto a large surface, allowing for a larger and more immersive viewing experience. Traditionally, projectors use lenses and mirrors to focus and magnify the image, but in this DIY project, we will explore an alternative method that doesn’t require a magnifying glass.
By utilizing a smartphone and a few household items, you can transform your device into a makeshift projector. This budget-friendly solution is perfect for impromptu movie nights, sharing photos with friends and family, or even displaying presentations for work or school.
So, whether you’re looking to enjoy a movie under the stars or create a mini home theater experience, join us as we guide you through the process of making a projector without a magnifying glass. Let’s get started!
Materials Needed
To create your DIY projector without a magnifying glass, you will need the following materials:
- A cardboard box – This will serve as the main structure of your projector.
- A small mirror – The mirror will be used to reflect the image from your smartphone onto the screen.
- A sharp craft knife – This will be used to cut holes and shapes in the cardboard.
- A ruler – It will help in measuring and marking lines accurately.
- Gaffer tape or duct tape – This will help secure the various components together.
- A smartphone – The smartphone will act as the source of the image or video you want to project.
- Scissors – You will need scissors to cut out cardboard pieces and other materials.
- A pencil or pen – It will be used to mark measurements and trace shapes on the cardboard.
- Optional: A tripod or stable surface – This will provide stability to the projector during use.
These materials are widely available and can be found in your local crafts store or repurposed from items you may already have at home. Once you have gathered all the necessary materials, you are ready to start building your DIY projector without a magnifying glass.
Step 1: Gather the Supplies
Before you begin constructing your projector, it’s important to gather all the necessary supplies in one place. This will make the process smoother and more efficient. Here’s a step-by-step guide on how to gather the supplies for your DIY projector:
- Find a suitable workspace – Look for a clean and well-lit area where you can comfortably work on your projector without any distractions. A table or a workbench would be ideal.
- Collect the materials – Refer to the materials list mentioned earlier in this article. Make sure you have all the required items at hand before you proceed. Double-check that you have everything to avoid interruptions during the construction process.
- Organize the materials – Arrange the materials in an orderly manner on your workspace. This will make it easier to access them as you progress through the construction steps. Keep the tools separate and within reach for convenience.
- Prepare the smartphone – If you haven’t done so already, ensure that your smartphone is fully charged and that the media you want to project is ready. This will save you time later on when you’re testing your DIY projector.
By taking the time to gather all the necessary supplies and prepare yourself for the construction process, you can ensure a smooth and successful experience. Once you have everything ready, you can move on to the next step of creating your DIY projector without a magnifying glass – building the box frame.
Step 2: Create the Box Frame
Now that you have all the supplies ready, it’s time to start building the box frame for your DIY projector. The box frame will provide the structure and support for the other components of the projector. Follow these steps to create the box frame:
- Choose a suitable cardboard box – Find a cardboard box that is large enough to fit your smartphone and has enough depth to house the other components of the projector. A shoebox or a small shipping box should work well.
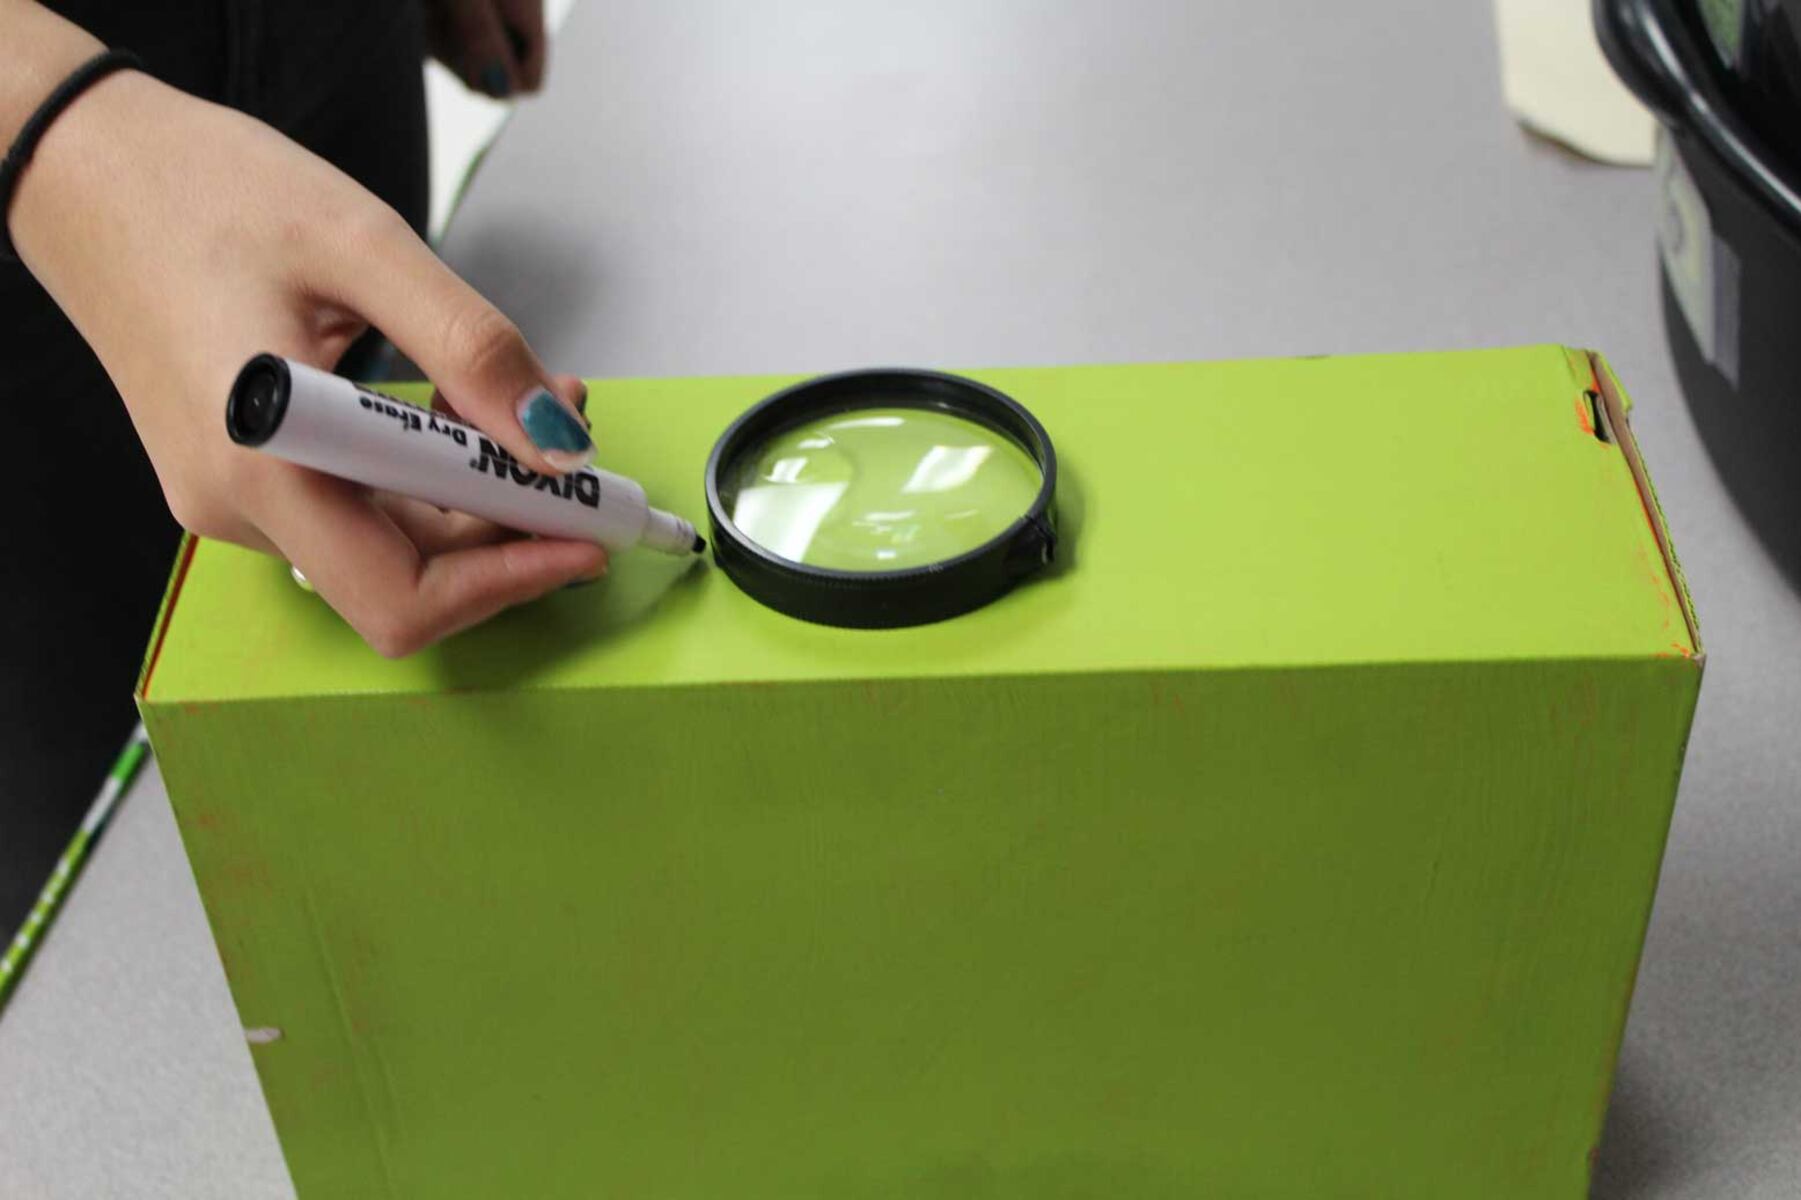
- Measure and mark the dimensions – Using a ruler and a pencil or pen, measure the dimensions of your smartphone and mark them on one side of the box. Make sure to leave some space around the edges to allow for adjustments and secure fitting.
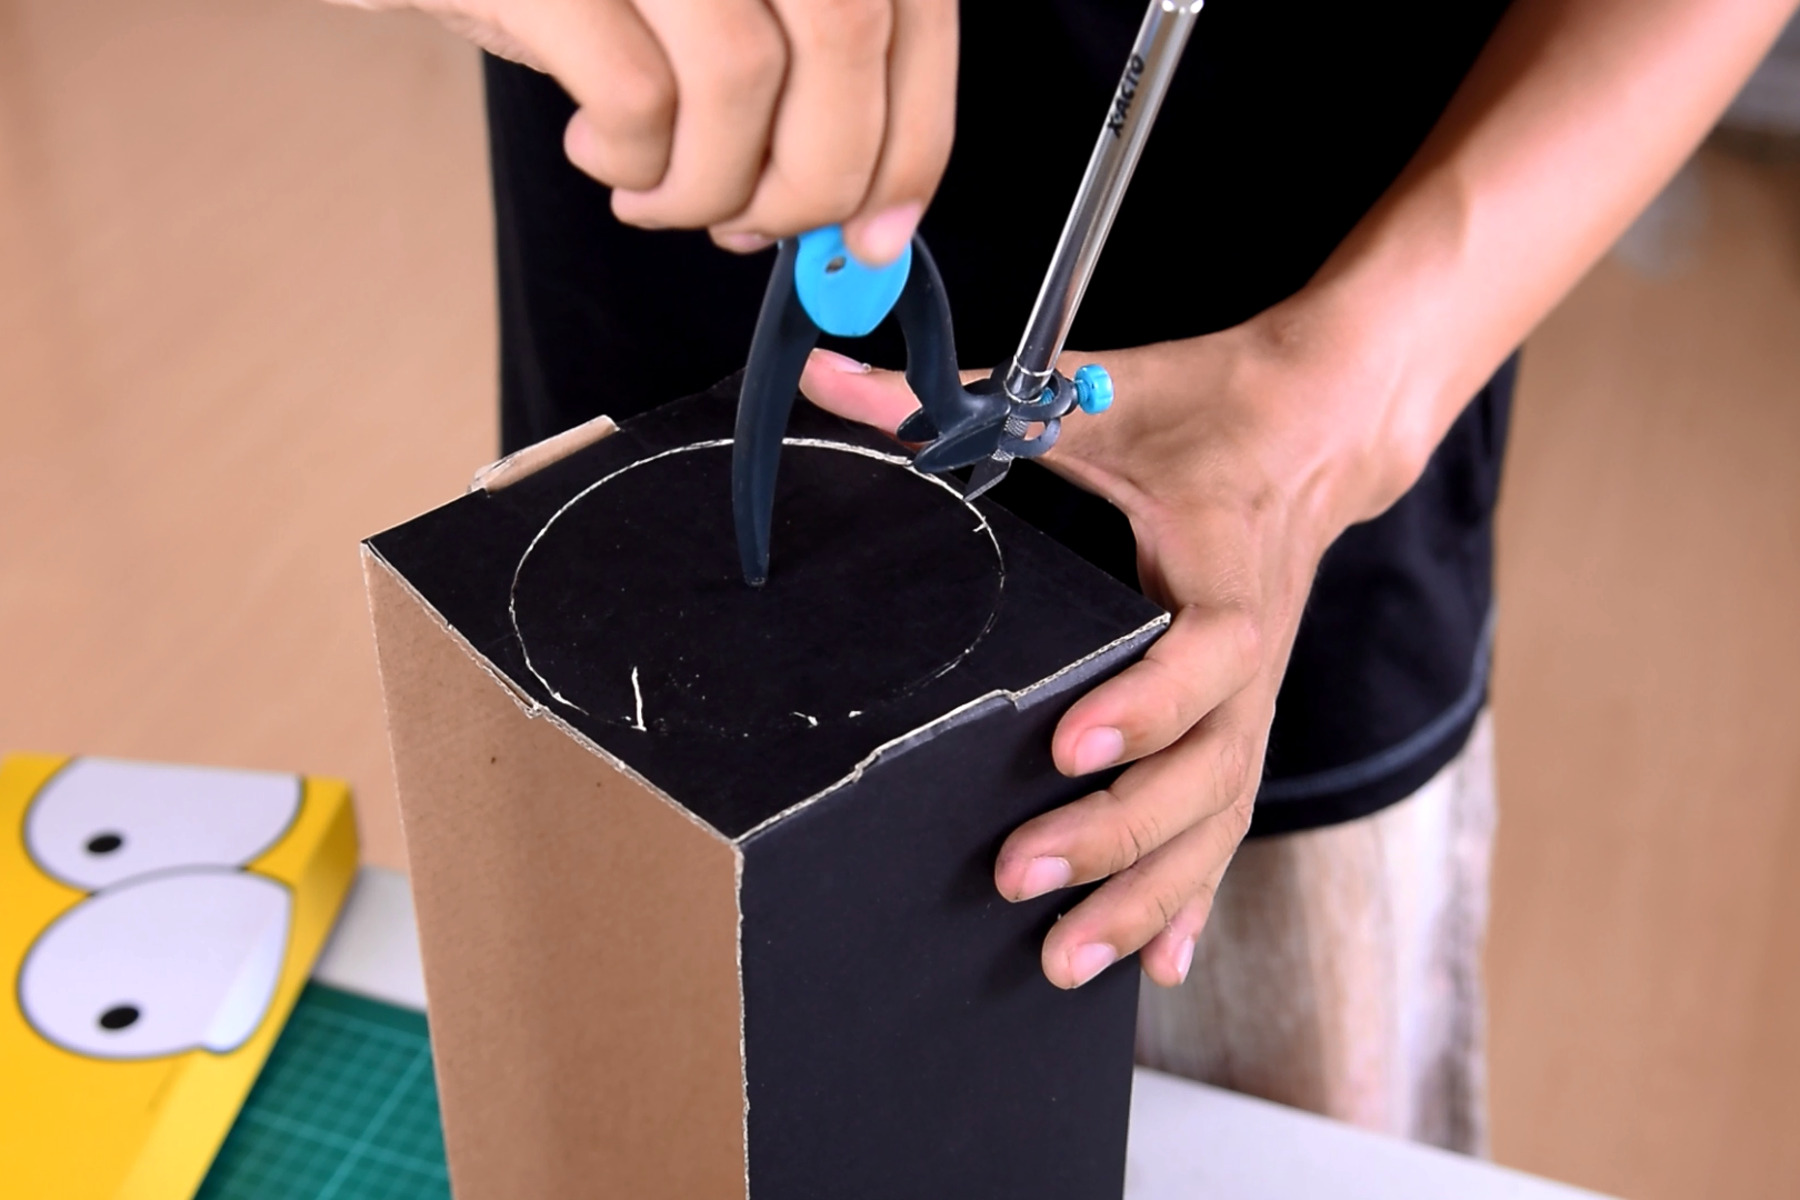
- Cut out the opening – With a sharp craft knife, carefully cut out the marked rectangle on one side of the box. Take your time and make smooth and precise cuts to ensure a clean opening.
- Trim the box if needed – Depending on the size of your smartphone, you may need to trim down the length or height of the box to achieve a snug fit. Measure and mark the required dimensions and cut the excess cardboard using the craft knife.
- Secure the box – Use gaffer tape or duct tape to reinforce the corners and edges of the box frame. This will provide additional stability and longevity to your DIY projector.
Once you have completed these steps, you will have a sturdy box frame ready for the next stage of the construction process. Building the box frame is a crucial step as it forms the foundation for the rest of the components to be added. With the frame in place, you can move on to the next step – attaching the mirror.
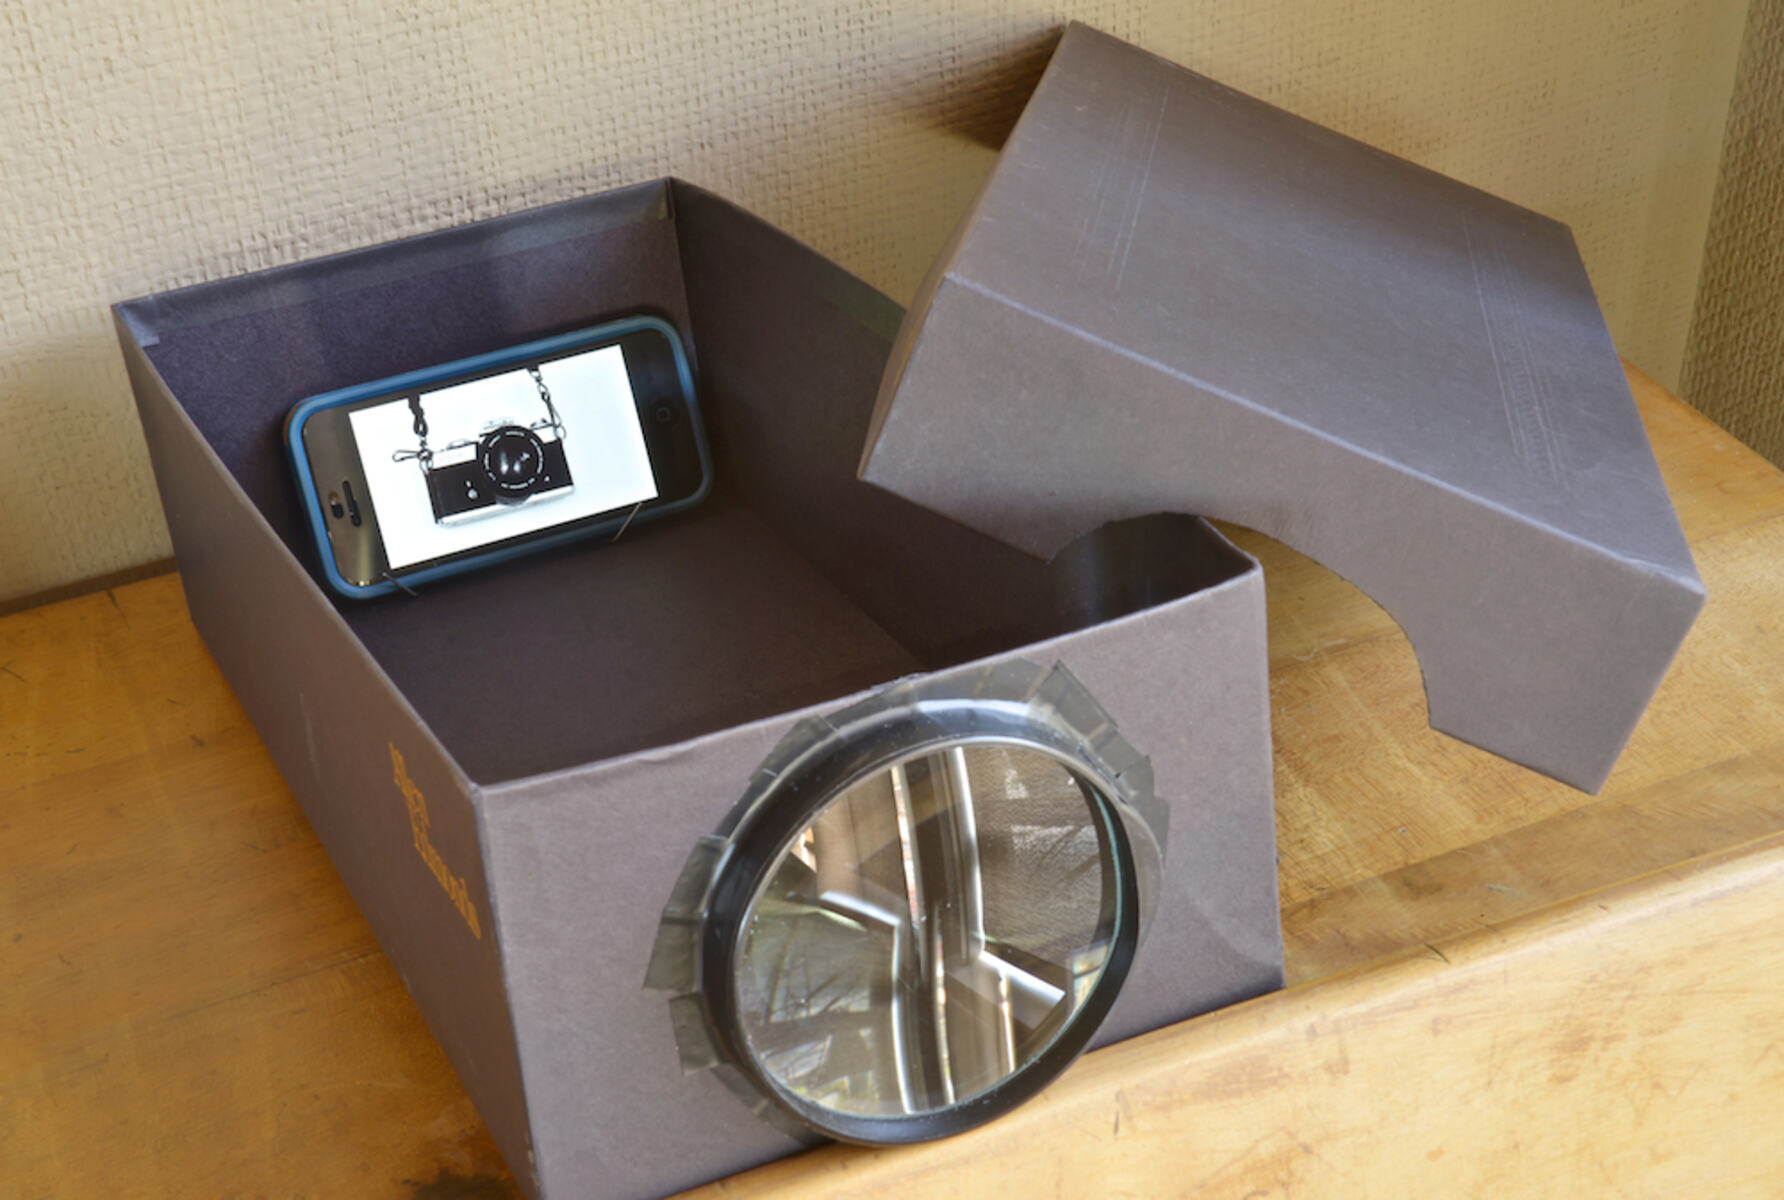
Step 3: Attach the Mirror
In this step, you will attach the mirror inside the box frame to reflect the image from your smartphone onto the screen. Proper positioning and alignment of the mirror are essential to ensure a clear and focused projection. Follow these instructions to attach the mirror:
- Measure the size of the mirror – Place the mirror inside the box frame and measure the dimensions. Make sure that the mirror fits comfortably and leaves enough space for the other components.
- Mark the position – Use a pencil or pen to mark the position where the mirror will be placed inside the box frame. You can trace the outline of the mirror or mark the corners for reference.
- Secure the mirror – Apply a small amount of gaffer tape or duct tape to the back of the mirror and carefully attach it to the marked position inside the box frame. Ensure that the mirror is securely fastened and doesn’t move or shift when the box is handled.
- Check the angle – Close the box and position it at a slight angle, around 45 degrees. This will allow the projected image to be reflected onto a flat surface or screen. Adjust the angle of the mirror if necessary to achieve the desired projection angle.
Attaching the mirror is a crucial step in creating your DIY projector without a magnifying glass. The mirror will allow the image or video from your smartphone to be reflected onto a larger surface, creating a projected display. Once you have properly attached the mirror, you can move on to the next step of securing the smartphone holder.
Step 4: Secure the Smartphone Holder
In this step, you will secure the smartphone holder inside the box frame. The smartphone holder will hold your device in place and ensure that it remains steady throughout the projection process. Here’s how you can secure the smartphone holder:
- Choose a suitable holder – Look for a small object that can securely hold your smartphone in a vertical position. This can be a small plastic stand, a clip, or even a DIY holder made from a cardboard tube or a binder clip.
- Position the holder – Determine the best position for the smartphone holder inside the box frame. Ideally, it should be placed in front of the mirror, allowing the projected image to be reflected onto the screen or surface.
- Secure the holder – Use gaffer tape or duct tape to attach the smartphone holder to the inside of the box frame. Make sure to position it firmly and securely so that the smartphone doesn’t move or wobble during use.
- Test the smartphone holder – Before proceeding to the next step, insert your smartphone into the holder and ensure that it is held securely in place. Adjust the smartphone holder if needed to achieve a stable and balanced position.
Securing the smartphone holder is an important step in the construction process, as it ensures that your device remains in the correct position for the projection. By properly securing the holder, you can enjoy a steady and reliable projection experience. Once you have successfully secured the smartphone holder, you can move on to the next step of adjusting the focal length.
Step 5: Adjust the Focal Length
In this step, you will adjust the focal length of your DIY projector. The focal length determines the clarity and sharpness of the projected image. By following these steps, you can achieve the optimal focal length for your projector:
- Dim the lights – Before adjusting the focal length, make sure the room is dark or dimly lit. This will enhance the visibility of the projected image.
- Place your DIY projector on a stable surface – Set up your projector on a tripod or any stable surface. It should be positioned so that the projected image falls directly onto the screen or surface where you want the projection to be displayed.
- Adjust the distance – Move your DIY projector closer to or further away from the screen or surface to find the best focal length. Experiment with different distances until the projected image appears clear and focused.
- Fine-tune the focus – Once you have found the approximate focal length, use the focus adjustment feature on your smartphone’s camera to fine-tune the image. Tap on the area you want to focus on and adjust the focus manually for a sharper projection.
- Test and make adjustments – After adjusting the focal length and focus, test your DIY projector by playing a video or displaying an image. Take note of any areas that need further adjustment and make the necessary changes until you are satisfied with the clarity and sharpness of the projected image.
Adjusting the focal length of your DIY projector is crucial to achieve optimal image quality. By taking the time to experiment with different distances and fine-tuning the focus, you can ensure a clear and focused projection. Once you are satisfied with the focal length, you can move on to the final step – testing the projector.
Step 6: Test the Projector
Now that you have completed the construction and adjustments of your DIY projector without a magnifying glass, it’s time to put it to the test. Follow these steps to test your projector:
- Find a suitable surface – Choose a flat and smooth surface where you want to project the image. This can be a blank wall, a projector screen, or even a white sheet.
- Ensure a dark environment – Dim the lights or create a dark environment to enhance the visibility of the projected image.
- Power on your smartphone – Make sure your smartphone is powered on and the media you want to project is ready.
- Position your DIY projector – Set up your DIY projector on a stable surface and ensure that it is aligned with the surface where you want to project the image.
- Start the projection – Play the video or display the image on your smartphone and position it in the smartphone holder. Adjust the focus and the angle of the mirror if necessary for the best image quality.
- Evaluate the projected image – Step back and view the projected image on the surface. Assess the clarity, sharpness, and brightness of the image. Make any final adjustments to the distance, focus, or positioning of the projector to enhance the image quality.
Testing your DIY projector is crucial to ensure that it is functioning properly and that you are achieving the desired projected image quality. Take some time to adjust and fine-tune the settings until you are satisfied with the results.
With the successful completion of this step, congratulations! You have now created your DIY projector without a magnifying glass. Enjoy your favorite movies, videos, and images on a larger screen with a true DIY spirit.
Conclusion
Creating a DIY projector without a magnifying glass is a fun and budget-friendly project that allows you to enjoy a larger viewing experience without the need for expensive equipment. By following the steps outlined in this article, you can build your own projector using common household items.
Throughout the construction process, we learned how to gather the necessary supplies, create the box frame, attach the mirror, secure the smartphone holder, adjust the focal length, and finally, test the projector. Each step plays a crucial role in ensuring the functionality and image quality of your DIY projector.
Remember that while this DIY projector can provide an enjoyable viewing experience, it may not match the quality of a professional projector. However, it offers a great option for impromptu movie nights, sharing photos and videos, or even displaying presentations for work or school.
Now that you have completed the construction and testing of your DIY projector, feel free to explore different surfaces, experiment with image settings, and customize the experience to suit your preferences. Get creative and make the most out of your DIY creation.
Enjoy the satisfaction of your DIY project and embrace the possibilities of projecting on a larger screen. Gather your friends and family, sit back, and immerse yourself in the enchanting world of movies, videos, and memories. Happy projecting!