Introduction
Welcome to the world of Kahoot, a fun and interactive learning platform that engages students and participants of all ages. Whether you’re a teacher looking to make your lessons more exciting or a group organizer seeking to entertain and educate your audience, Kahoot is the perfect tool for you.
Kahoot allows you to create, share, and play interactive quizzes, surveys, and discussions. With its user-friendly interface and customizable features, you can design engaging learning experiences that cater to your specific needs and goals.
In this article, we will guide you through the process of creating a Kahoot, step by step. From setting up your account to analyzing the results, we’ll cover everything you need to know to start using this fantastic platform effectively.
Whether you’re a novice or an experienced user, this article will provide valuable insights and tips to help you make the most out of your Kahoot experience. So, let’s dive in and explore the exciting world of Kahoot!
Setting Up a Kahoot Account
Before you can start creating your own Kahoot quizzes and engaging with your audience, you’ll need to set up a Kahoot account. Follow these simple steps to get started:
- Visit the Kahoot website (www.kahoot.com) and click on the “Sign up” button located at the top-right corner of the homepage.
- You’ll be presented with two options: “Sign up as a teacher” or “Sign up as a student”. Choose the option that best suits your needs. If you’re an educator or an organizer, select “Sign up as a teacher”. If you’re a student or a participant, choose “Sign up as a student”.
- If you choose to sign up as a teacher, you’ll be asked to provide some basic information, such as your name, email address, and a password. Fill in the required fields and click “Sign up” to proceed.
- If you sign up as a student, you may be prompted to enter a game PIN provided by your teacher. This allows you to join a Kahoot session organized by your teacher or facilitator.
- Once you’ve successfully signed up, you’ll be taken to your Kahoot dashboard. Here, you can start creating your own Kahoots or explore the library of existing Kahoots created by other users.
Setting up a Kahoot account is quick and straightforward. Whether you’re an educator, student, or a participant, having an account allows you to fully access and enjoy all the features Kahoot has to offer. Now that you have your account set up, let’s move on to creating your very first Kahoot!
Creating a New Kahoot
Now that you have your Kahoot account set up, it’s time to create your very own Kahoot quiz! Follow these steps to create a new Kahoot:
- On your Kahoot dashboard, click the “Create” button located on the top right corner of the screen. This will take you to the Kahoot creator page.
- Start by giving your Kahoot a title. This title should be descriptive and engaging, as it will attract players to join and participate. You can also choose to add a cover image to make your Kahoot visually appealing.
- Next, select the appropriate Kahoot type: Quiz, Survey, or Discussion. A quiz is great for testing knowledge, a survey helps gather opinions, and a discussion allows for open-ended responses.
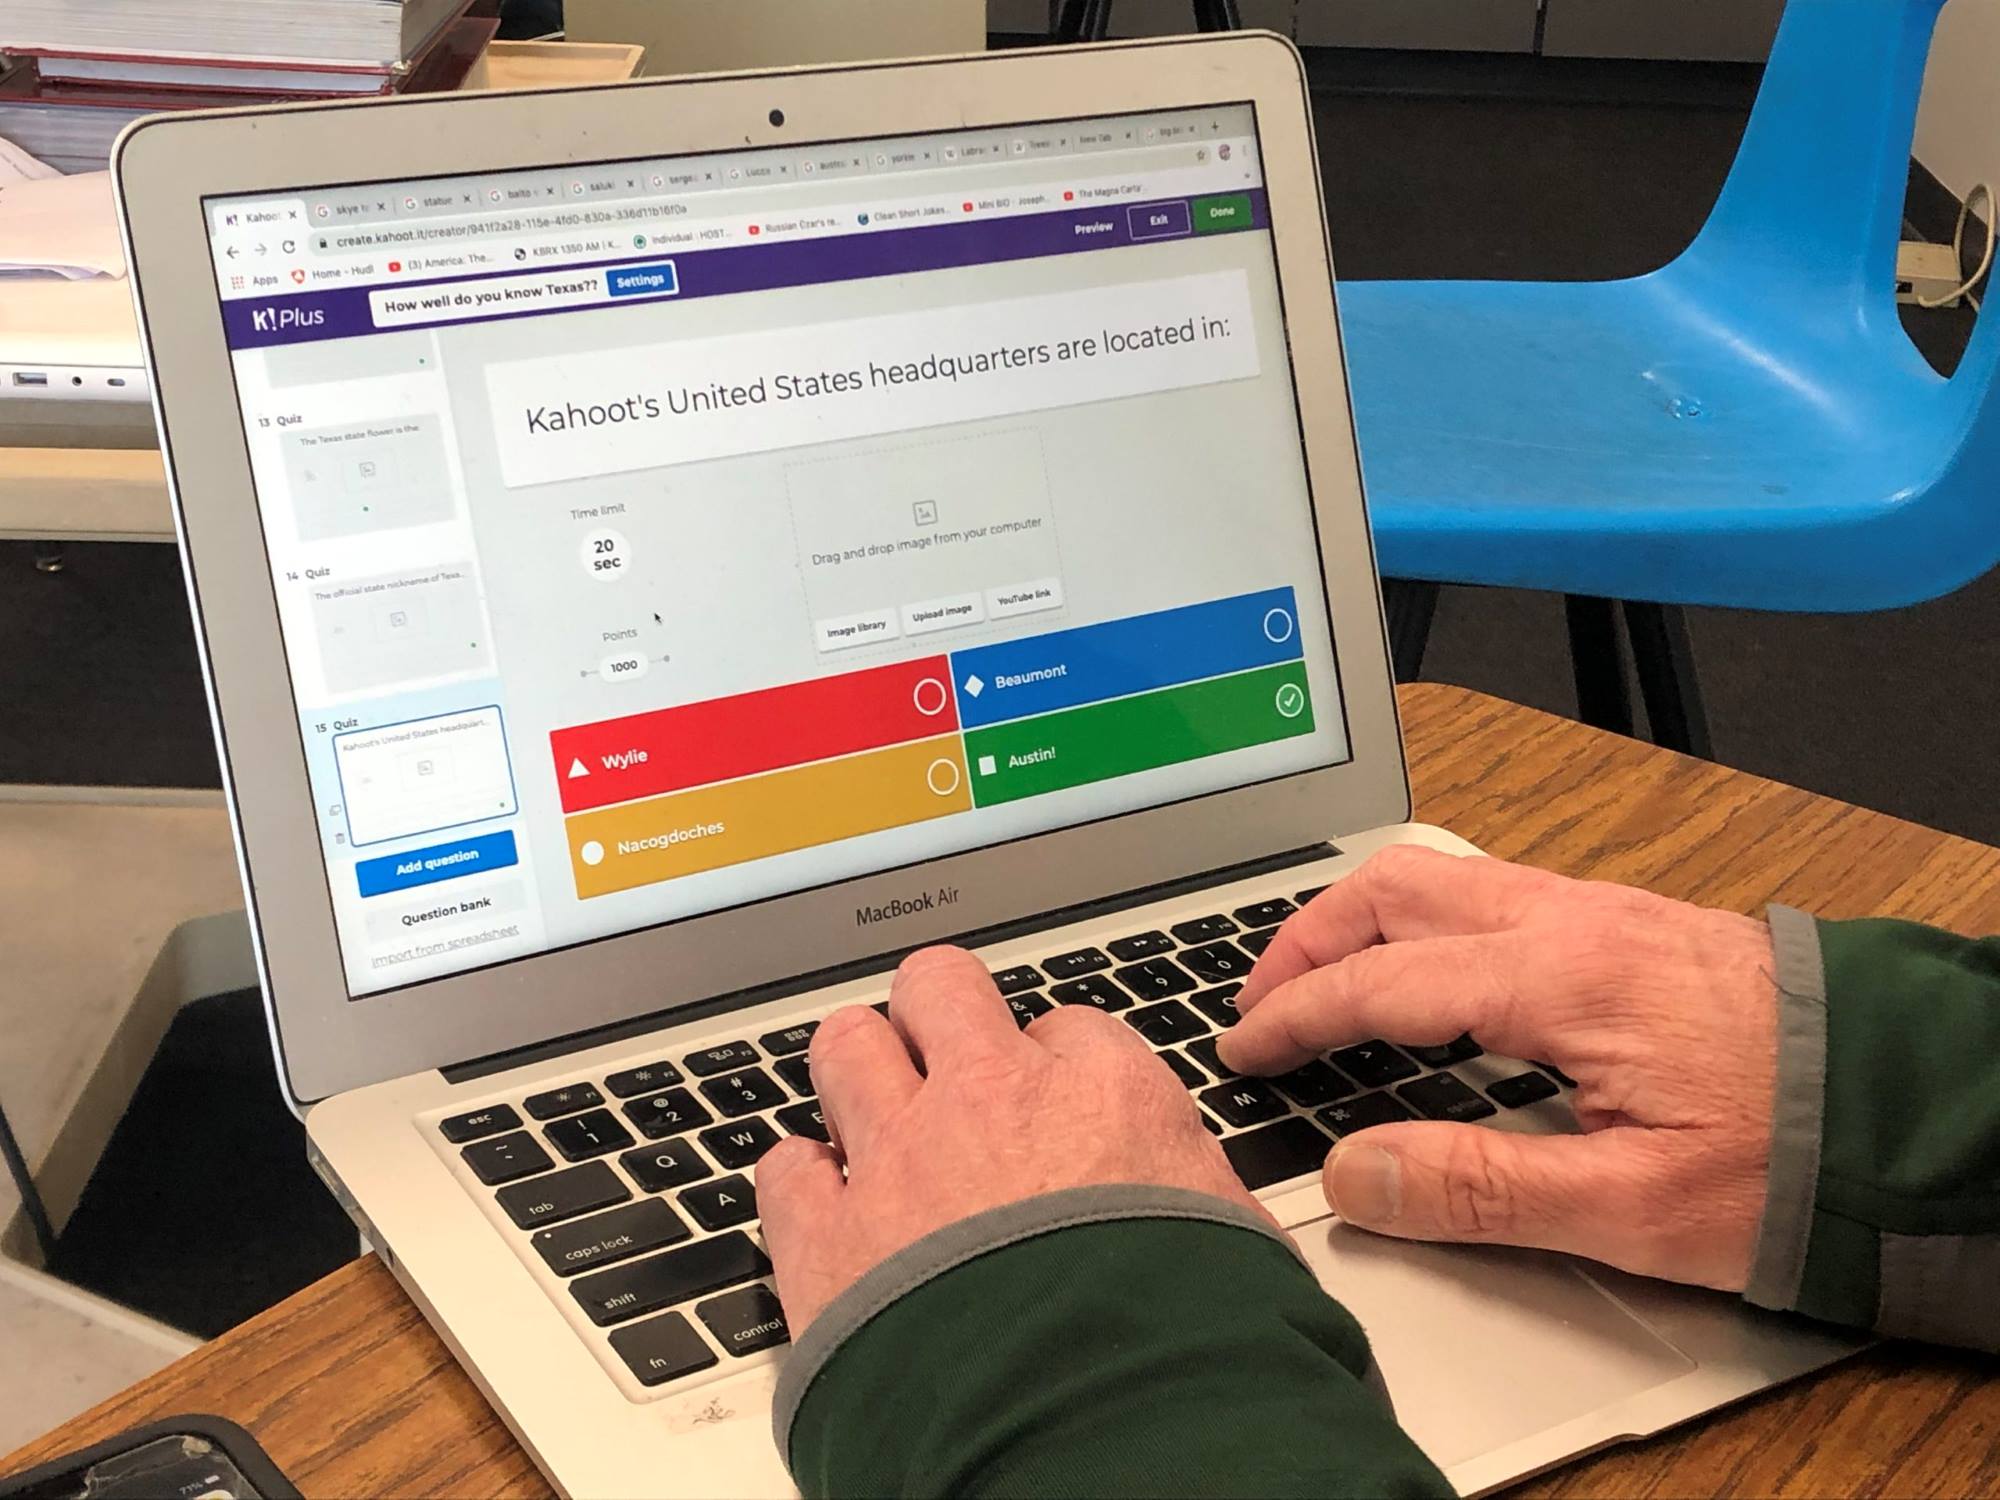
- With the Kahoot type selected, you can now add your questions. Click on the “Add question” button and fill in the question and answer choices. You can also set a correct answer for each question.
- For a more engaging experience, you can include images and videos in your questions. Simply click on the image or video icon to upload or search for multimedia content.
- Set a time limit for each question to keep the game moving at an appropriate pace. This will ensure that participants don’t spend too much time on a single question.
- Add points to each question to assign value to correct answers. You can also include bonus points or negative points to make the game more exciting.
- Customize the settings of your Kahoot, such as choosing a public or private mode, allowing players to see the answer choices, or enabling the Kahoot to be played in team mode.
- Once you’ve finished creating your Kahoot, click on the “Save” button to save your progress.
- Preview your Kahoot to ensure everything is set up correctly. Make any necessary edits or changes before finalizing your creation.
- Congratulations! You have successfully created a new Kahoot. Now, it’s time to share your Kahoot and play it with a group of enthusiastic participants.
Creating a new Kahoot is a fun and exciting process that allows you to design customized quizzes, surveys, or discussions. Let your creativity shine and engage your audience with interactive learning experiences. With your Kahoot now created, let’s move on to the next step: choosing a title and theme for your Kahoot.
Choosing a Title and Theme for Your Kahoot
The title and theme of your Kahoot play a crucial role in attracting participants and setting the tone for your interactive quiz. Follow these tips to choose an engaging title and theme for your Kahoot:
- Make it catchy and descriptive: Choose a title that grabs attention and clearly indicates what the Kahoot is about. A creative and captivating title will entice more players to join in.
- Reflect the content: Ensure that the title accurately represents the topic or subject matter of your Kahoot. This will prevent confusion among the participants and set their expectations.
- Consider the target audience: Tailor the language and tone of the title to appeal to your specific audience. If the Kahoot is for a younger age group, use language that resonates with them.
- Choose a theme that enhances engagement: Select a theme that complements the content of your Kahoot and keeps participants engaged visually. Kahoot offers a variety of themes to choose from, including educational, festive, or general themes.
- Align with the learning objectives: If your Kahoot is for educational purposes, align the title and theme with the learning objectives of the quiz. This will create a cohesive and meaningful learning experience for the participants.
- Customize the theme: Kahoot allows you to customize the theme by modifying the background color, font, and other visual elements. Consider incorporating your organization or school’s branding to create a consistent look and feel.
- Keep it appropriate: Ensure that the title and theme are suitable for the intended audience and venue where the Kahoot will be played. Avoid using offensive or controversial content that could detract from the learning experience.
- Test it out: Before finalizing your title and theme, get feedback from colleagues, students, or trusted individuals. Their input can help you refine and improve your choice.
Choosing an appealing title and theme for your Kahoot is an important step in creating an immersive and enjoyable learning experience. Take your time, be creative, and consider the preferences and interests of your participants. Once you’ve chosen the perfect title and theme, it’s time to move on to adding questions and answers to your Kahoot.
Adding Questions and Answers
Now that you have chosen a title and theme for your Kahoot, it’s time to add questions and answers that will engage and challenge your participants. Follow these steps to add questions and answers to your Kahoot:
- On the Kahoot creator page, click on the “Add question” button.
- Type in your question in the provided space. Make sure it is clear and concise, and avoid any ambiguity.
- Add the answer choices by clicking on the “Add choice” button. Include at least two or more choices for participants to select from.
- Specify the correct answer by clicking on the checkbox next to the appropriate choice. Only one answer can be correct.
- If desired, you can assign points to each question by entering a value in the “Points” field. This allows you to assign different weights to different questions based on their level of difficulty or importance.
- Repeat the process to add more questions to your Kahoot. You can have as few or as many questions as you like, depending on the length and depth of your quiz.
- To make your Kahoot more engaging, consider adding images or videos to accompany the questions. Click on the image or video icon to upload or search for multimedia content that relates to the question.
- Review your questions and answers to ensure accuracy and coherence. Double-check for any spelling or grammatical errors.
- Make adjustments and edits as needed. You can reorder the questions by dragging and dropping them into the desired sequence.
Adding questions and answers is a crucial step in creating an engaging and interactive Kahoot. Ensure that your questions are clear, challenging, and aligned with your learning objectives or quiz theme. By providing appealing and well-crafted questions, you can create an exciting learning experience that keeps participants actively involved. Now that you have added questions and answers, let’s move on to the next step: including images and videos in your Kahoot.
Including Images and Videos in Your Kahoot
Enhance the visual appeal and engagement of your Kahoot by incorporating images and videos. Adding multimedia elements not only makes your quiz more visually appealing but also helps to reinforce concepts or provide additional context. Follow these steps to include images and videos in your Kahoot:
- While creating or editing a question in your Kahoot, look for the image or video icon in the toolbar.
- Click on the icon to bring up the media upload options. You can choose to upload an image or video directly from your device, or search the web for relevant content.
- If uploading an image, select the desired file from your computer or device. Ensure that the image is in a supported format and is of appropriate quality.
- If embedding a video, provide the video URL from platforms like YouTube or Vimeo. Kahoot will automatically embed the video into the question.
- Once the image or video has been added, you can resize it, move it around, or delete it if necessary. Make sure the multimedia element is appropriately placed to enhance the understanding or engagement of the question.
- Consider incorporating images or videos that are relevant to the question or reflect the topic of your Kahoot. Visuals can aid comprehension, make the content more memorable, and create a dynamic learning experience.
- Remember to preview your Kahoot to ensure that the images or videos are displaying correctly and add value to the questions without causing any distraction.
- You can add multiple images or videos throughout the quiz, depending on the number of questions and the relevance of visuals to your content.
- Take into account copyright and fair use regulations when using images or videos from external sources. It’s best to create or obtain your own visual content to avoid any legal issues.
Including images and videos in your Kahoot can significantly enhance the overall experience for participants. Visual elements add depth, context, and engagement, making the learning process more dynamic and enjoyable. Now that you know how to incorporate multimedia, let’s proceed to the next step: setting time limits for questions in your Kahoot.
Setting Time Limits for Questions
Setting time limits for questions in your Kahoot helps create a sense of urgency and keeps the game moving at a steady pace. It also adds an element of challenge and excitement for participants. Follow these steps to set time limits for questions in your Kahoot:
- While creating or editing a question in your Kahoot, locate the timer icon in the toolbar.
- Click on the timer icon to bring up the time limit options. Kahoot offers default time limits, such as 20 seconds or 30 seconds, or you can choose to customize the time duration.
- Select the desired time limit for the question. Consider the complexity of the question and the expected response time when choosing a suitable duration.
- If desired, you can set different time limits for different questions to add variety and challenge throughout the game. Some questions may require more time for reflection or calculations, while others can be answered quickly.
- Setting appropriate time limits ensures that participants are not spending too much time on a single question, which keeps the energy and momentum of the game high.
- At the same time, be mindful of providing enough time for participants to read and understand the question, process the information, and choose their answer. Striking the right balance is crucial for an engaging and challenging experience.
- Preview your Kahoot to check if the time limits are reasonable and aligned with the level of difficulty of each question. Adjust the durations as needed.
- Keep in mind that players will see a countdown timer on their devices, indicating the remaining time to answer the question. This visual cue adds excitement and encourages participants to respond promptly.
Setting time limits for questions in your Kahoot adds an element of excitement and urgency, making the game more challenging and engaging. Carefully consider the complexity of the questions and ensure that the time limits are reasonable and fair for all participants. Now that you’ve set time limits, let’s move on to the next step: adding points and rewards to your Kahoot.
Adding Points and Rewards
Incorporating points and rewards into your Kahoot quiz adds a competitive element and motivates participants to actively engage and strive for a higher score. Follow these steps to add points and rewards to your Kahoot:
- In the Kahoot creator page, navigate to the question you want to assign points to.
- Click on the “Add points” button, usually located near the answer choices or at the bottom of the question.
- Enter the number of points you want to assign for a correct answer. Consider the difficulty level of the question and the desired point distribution throughout the quiz.
- To make the game more exciting, you can also include bonus points for answering the question quickly or deduct points for incorrect answers.
- Repeat the process for each question, assigning appropriate points based on the difficulty or importance of each question.
- Consider incorporating rewards or incentives for participants who achieve the highest scores. This could involve recognizing and celebrating the top performers at the end of the quiz.
- Kahoot also offers a leaderboard feature that allows participants to see their rankings in real-time. This can foster healthy competition and encourage participants to strive for a higher score.
- Keep in mind that the point system should be fair and transparent. Explain the scoring system to participants before starting the quiz to avoid any confusion.
- Remember to strike a balance between challenging participants and providing opportunities for success. A rewarding point system ensures that participants feel motivated and accomplished.
- Preview your Kahoot to ensure that the points and rewards are accurately assigned and reflect your intended scoring system.
Adding points and rewards to your Kahoot adds excitement and motivation, making the learning experience more engaging and interactive. By providing opportunities for participants to earn and compete for points, you can create a dynamic and competitive atmosphere. Now that you have added points and rewards, let’s move on to customizing the settings of your Kahoot.
Customizing the Kahoot Settings
Customizing the settings of your Kahoot allows you to tailor the experience to fit your specific needs and preferences. From privacy settings to game options, follow these steps to customize the settings of your Kahoot:
- On the Kahoot creation page, locate the “Settings” tab usually located at the top-left corner of the screen.
- Click on the “Settings” tab to access the customization options.
- Choose between a public or private mode for your Kahoot. Public mode allows anyone to view and play your Kahoot, while private mode restricts access to those with a game PIN.
- Decide whether you want to allow players to see the answer choices during the game. This can be helpful for educational purposes or disabled for increased difficulty.
- Enable team mode if you want participants to play in teams rather than as individuals. This fosters collaboration and teamwork during the quiz.
- Consider enabling the “Two-step join” option to prevent unauthorized participants from joining the game. This provides an added layer of security for your Kahoot.
- Customize the Kahoot’s cover image, background color, font, and other visual elements based on your preferences or organization’s branding.
- Set other game options, such as the ability to shuffle questions, show answers in random order, or allow players to skip or go back to previous questions.
- Preview your Kahoot to ensure that the customized settings are applied correctly and aligned with your intended experience.
- Make any necessary adjustments or changes to the settings based on your review.
Customizing the settings of your Kahoot allows you to create a personalized and tailored experience for your participants. From privacy controls to game options, take the time to customize the settings based on your specific needs and requirements. By doing so, you can ensure that your Kahoot delivers the desired learning outcomes and engages participants in an interactive and enjoyable way. Now that you have customized the settings, let’s move on to the next step: previewing and editing your Kahoot.
Previewing and Editing Your Kahoot
Previewing and editing your Kahoot is an essential step to ensure that everything is set up correctly and meets your expectations. Follow these steps to preview and edit your Kahoot:
- On the Kahoot creation page, locate the “Preview” button, usually located at the top-right corner of the screen.
- Click on the “Preview” button to enter the preview mode. This allows you to view your Kahoot as it would appear to participants.
- Go through each question, paying attention to the question wording, answer choices, points, and multimedia elements like images or videos. Ensure that everything is accurate, clear, and aligned with your intended learning objectives.
- If you find any mistakes or areas for improvement, click on the “Edit” button to return to the Kahoot creator page.
- Make the necessary adjustments or changes to the questions, answers, multimedia, or settings. Take your time to refine and polish your Kahoot until you’re satisfied with the final result.
- Once you’ve made the edits, click on the “Save” button to save your progress. This will update your changes and ensure that the latest version is available for participants to play.
- Repeat the preview and editing process as necessary until you feel confident that your Kahoot is ready for use.
- Consider sharing your Kahoot with colleagues or peers for an additional review. They can provide valuable feedback and suggestions for further improvement.
- Remember to periodically review and update your Kahoot to ensure that it remains up-to-date and relevant to the topics or subjects being covered.
Previewing and editing your Kahoot allows you to fine-tune the details, correct any errors, and ensure that your quiz meets your objectives. Take the time to carefully review each question and element to create a seamless and engaging experience for your participants. With your Kahoot now previewed and edited, you’re ready to move on to the next step: creating a Kahoot challenge or sharing it with others to play.
Creating a Kahoot Challenge
Take your Kahoot experience to the next level by creating a Kahoot Challenge. This allows participants to play your Kahoot individually at their own pace, either as a revision tool or for additional practice. Follow these steps to create a Kahoot Challenge:
- On your Kahoot dashboard, select the Kahoot you want to turn into a challenge by clicking on it.
- In the Kahoot details page, click on the “Challenge” button located next to the “Play” button.
- Customize the challenge settings by selecting the duration of the challenge. This determines how long participants have to complete the Kahoot challenge.
- Consider enabling the “Nickname generator” option. This feature generates unique nicknames for participants, ensuring anonymity and a level playing field.
- Decide whether you want participants to see the correct answers after each question or at the end of the challenge.
- Choose whether or not to enable leaderboards. Leaderboards show participants their rankings compared to other challenge takers, adding a competitive element.
- Generate the challenge link. This link allows participants to access and play the Kahoot Challenge.
- Share the challenge link with your audience via email, social media, or any other preferred method. Provide clear instructions on how to access and complete the challenge.
- Inform participants about the duration, rules, and any rewards or incentives associated with completing the challenge.
- Monitor the progress of participants by accessing the challenge results from your Kahoot dashboard. This provides insights into individual performance and allows you to track the impact of the challenge.
Creating a Kahoot Challenge provides flexibility for participants to engage with your quiz on their own time. It serves as an effective way to reinforce learning, assess understanding, or provide additional practice. By tailoring the challenge settings and effectively sharing the link, you can create an engaging and interactive experience for your audience. Now that you know how to create a Kahoot Challenge, let’s move on to the next step: sharing your Kahoot with others.
Sharing Your Kahoot with Others
Sharing your Kahoot with others allows you to engage a wider audience and make your quiz accessible to participants. Here are a few methods to share your Kahoot:
- Share the Kahoot link: On your Kahoot dashboard, click on the desired Kahoot. You will find the “Share” button next to the “Play” button. Click on it to copy the Kahoot link. You can paste this link in emails, messaging platforms, or on social media to reach your target audience.
- Use the game PIN: If you prefer to host a live game, click on the “Play” button on your Kahoot dashboard. You will be provided with a game PIN. Share this PIN with your participants, who can enter it on the Kahoot website or app to join the game.
- Embed your Kahoot: Embedding your Kahoot is a great option if you have a website or online platform. On the Kahoot details page, click on the “Embed” button. Copy the provided embed code and paste it into the HTML of your webpage. This allows visitors to directly access and play your Kahoot.
- Collaborate with others: Kahoot allows multiple users to collaborate on a single Kahoot, adding questions and contributions. Click on the “Collaborate” button on the Kahoot details page and invite others to join your Kahoot creation team.
- Share via Google Classroom or other LMS: If you are an educator using Google Classroom or another Learning Management System (LMS), you can easily integrate your Kahoot. Look for the integration options within your LMS and follow the provided instructions.
- Encourage participants to create remixes: By allowing others to remix your Kahoot, you invite them to customize and modify it to suit their needs. Collaboration and remixing contribute to a vibrant and diverse collection of Kahoot quizzes.
- Consider privacy settings: Depending on the nature of your Kahoot and your audience, you may want to adjust the privacy settings. You can choose to make your Kahoot public, private, or viewable to specific individuals or groups.
- Promote your Kahoot: Maximize the reach of your Kahoot by promoting it through various channels. Share it on social media platforms, announce it in newsletters or class announcements, or collaborate with other educators to exchange Kahoots.
- Collect feedback: Encourage participants to provide feedback on your Kahoot. This can help you improve future quizzes and tailor your content to better meet the needs of your audience.
Sharing your Kahoot with others increases engagement and makes your quiz accessible to a wider audience. Explore the various sharing methods and choose the ones that best suit your needs and target audience. By spreading the word about your Kahoot, you create opportunities for interactive learning and collaboration. Now that you know how to share your Kahoot, it’s time to move on to the next step: playing your Kahoot with a group!
Playing Your Kahoot with a Group
Playing your Kahoot with a group adds an element of excitement and competition. It allows participants to engage in a fun and interactive learning experience together. Follow these steps to play your Kahoot with a group:
- Ensure that all participants have a device connected to the internet, such as a smartphone, tablet, or computer.
- As the host, access your Kahoot dashboard and select the desired Kahoot.
- Choose how you want to host the game. You can select between “Classic” mode or “Team” mode. In Classic mode, players compete individually. In Team mode, players form teams and collaborate.
- If you opt for Classic mode, share the game PIN with the participants. They can enter this PIN on the Kahoot website or app to join the game.
- If you choose Team mode, divide participants into teams and assign them a team name or color.
- Explain the rules and instructions of the game to the participants. Mention any specific guidelines or additional rules for your Kahoot.
- Start the game by clicking on the “Play” button. This will initiate the Kahoot session, and the questions will be displayed on the main screen.
- Participants can view the questions and answer choices on their devices. They should select the correct answer within the given time limit.
- As the host, monitor the game on your device. You will see the number of participants, their answers, and the points awarded for each correct response.
- At the end of the game, you can display the leaderboard to announce the top performers and celebrate their achievements.
- Encourage discussion and learning after each question. Take the opportunity to elaborate on the correct answer and provide additional insights.
- Consider having a prize or reward for the top performers to make the experience even more exciting and engaging.
- If time permits, you can play multiple rounds of the Kahoot or try different Kahoot quizzes to cater to different interests and topics.
- Collect feedback from the participants after the game to assess their experience and make improvements for future Kahoot sessions.
Playing your Kahoot with a group creates a collaborative and engaging learning environment. Whether it’s in a classroom, a corporate team-building event, or a social gathering, this interactive experience fosters engagement and encourages active participation. Now that you know how to play your Kahoot with a group, it’s time to move on to the next step: analyzing the results of your Kahoot.
Analyzing the Results of Your Kahoot
After playing your Kahoot, it’s important to analyze the results to gain insights into participant performance and to evaluate the effectiveness of your quiz. Follow these steps to analyze the results of your Kahoot:
- Access your Kahoot dashboard and select the Kahoot for which you want to analyze the results.
- Click on the “Reports” tab to view the detailed results and analytics.
- Review the overall performance metrics, such as the average score and time taken to answer each question. This provides an understanding of the quiz’s difficulty level and participant engagement.
- Examine the individual player results to identify top performers and areas where participants may have struggled. This information can help guide future discussions or targeted interventions.
- Explore the question-specific data, including the percentage of participants who answered correctly for each question. This allows you to assess the difficulty level of each question and adjust future quizzes accordingly.
- Consider downloading the report for offline analysis or sharing it with colleagues for collaborative review.
- Identify any patterns or trends in participant responses. Are there specific questions that many participants struggled with? Are there topics that require further reinforcement or clarification?
- Take note of the feedback and comments provided by participants during or after the Kahoot. These can offer valuable insights into their learning experiences and highlight areas for improvement.
- Reflect on your own facilitation or hosting of the game. Were there any issues or challenges that arose during the session? Were the instructions clear, and did participants understand the gameplay?
- Use the data and insights gathered from analyzing the results to refine future Kahoot quizzes and adapt your teaching or training strategies as needed.
- Consider sharing the results and observations with participants to foster discussion and encourage continuous learning and improvement.
Analyzing the results of your Kahoot provides valuable feedback on participant performance and engagement. By examining the data and insights, you can further enhance your teaching or training methods, adjust the difficulty level of future quizzes, and address any areas of weakness that may have been identified. Now that you know how to analyze the results of your Kahoot, you can continuously improve and deliver more impactful learning experiences.
Conclusion
Congratulations! You have now learned how to create, customize, share, and analyze your own Kahoot quizzes. By following the steps outlined in this guide, you can engage your audience with interactive learning experiences that are both educational and enjoyable.
Kahoot provides a user-friendly platform for designing quizzes, surveys, and discussions that cater to your specific needs and objectives. Whether you’re an educator, corporate trainer, or someone looking to gamify learning, Kahoot offers a range of customizable features to make your quizzes engaging and interactive.
Setting up a Kahoot account is quick and simple, allowing you to take full advantage of the platform’s features. From creating a new Kahoot and choosing titles and themes to adding questions, images, and videos, you have the tools to create a dynamic learning experience.
Remember to customize the settings of your Kahoot to align with your goals and preferences. Whether it’s privacy settings, time limits, or the inclusion of points and rewards, personalized settings enhance the overall engagement and excitement of your Kahoot.
Sharing your Kahoot with others is key to expanding your audience and reaching a wider range of participants. Utilize the various sharing methods available, such as Kahoot links, game PINs, embedding, or collaborating with other creators, to make your quizzes accessible to all.
After playing your Kahoot with a group, take the time to analyze the results. This allows you to gain valuable insights into participant performance, identify areas for improvement, and adapt your teaching or training strategies accordingly.
Overall, Kahoot is a powerful tool that enriches traditional quizzes and captivates participants with its interactive features. So, embrace the Kahoot experience and let your creativity shine as you create engaging and educational quizzes that will leave a lasting impact on your learners.