Introduction
Are you craving a creamy and delicious yogurt but can’t tolerate dairy? Don’t worry, because with the help of your electric pressure cooker, you can create a delightful dairy-free yogurt right in your own kitchen! Whether you have dietary restrictions or simply prefer a plant-based lifestyle, making dairy-free yogurt is easier than you think.
Yogurt has long been a popular and nutritious food, loved for its probiotic benefits and versatility. However, traditional yogurt is made from dairy milk, which can be problematic for those with lactose intolerance, dairy allergies, or those following a vegan diet. Fortunately, you can still enjoy the tangy goodness of yogurt by opting for a dairy-free alternative.
Now, you may be wondering, how can you achieve that creamy and thick yogurt texture without using dairy? The key lies in selecting the right ingredients and using your trusty electric pressure cooker. In this article, we will guide you through the step-by-step process of making dairy-free yogurt and share some tips for achieving the perfect texture and flavor.
So, get ready to stock your fridge with homemade dairy-free yogurt that can be enjoyed on its own, or used in a variety of recipes such as smoothies, dressings, or even frozen desserts. Let’s dive into the world of dairy-free yogurt creation and discover the endless possibilities that await.
Choosing the Right Ingredients
When it comes to making dairy-free yogurt in your electric pressure cooker, selecting the right ingredients is crucial. Instead of dairy milk, you will be using plant-based alternatives that can provide the same creamy and tangy taste. Here are some key ingredients to consider:
- Plant-Based Milk: Choose a plant-based milk that suits your taste preferences. Popular options include almond milk, soy milk, coconut milk, or oat milk. Ensure that the milk you choose is unsweetened and without any added flavors.
- Yogurt Starter: To create that tangy yogurt flavor and kickstart the fermentation process, you will need a yogurt starter. Look for a dairy-free yogurt starter culture or opt for a small amount of store-bought dairy-free yogurt that contains live active cultures. Make sure it does not contain any milk or dairy.
- Sweetener (Optional): If you prefer a slightly sweeter yogurt, you can add a touch of natural sweetener such as maple syrup, agave nectar, or a pinch of stevia. Keep in mind that the yogurt will become tangier as it ferments, so adjust the sweetness accordingly.
- Thickening Agents (Optional): If you prefer a thicker yogurt consistency, you can incorporate thickening agents such as cornstarch, tapioca starch, or agar-agar. These ingredients will help mimic the texture of traditional yogurt.
- Flavorings and Add-ins: Once you have the base ingredients sorted, you can get creative with flavorings and add-ins. Consider adding vanilla extract, fruit puree, or even spices like cinnamon or nutmeg to enhance the taste of your dairy-free yogurt.
It’s important to check the labels of all the ingredients you use to ensure that they are truly dairy-free and suitable for your dietary needs. Now that you have your ingredients lined up, let’s dive into the step-by-step process of making dairy-free yogurt in your electric pressure cooker.
Step-by-step Guide to Making Dairy-Free Yogurt in Your Electric Pressure Cooker
Making dairy-free yogurt in your electric pressure cooker is a simple and rewarding process. Follow these steps to create your own batch of creamy and delicious yogurt:
- Step 1: Sterilize Your Equipment: Start by ensuring that all your utensils, jars, and electric pressure cooker insert are properly sterilized. This will help create an optimal environment for fermentation and prevent any unwanted bacteria from contaminating your yogurt.
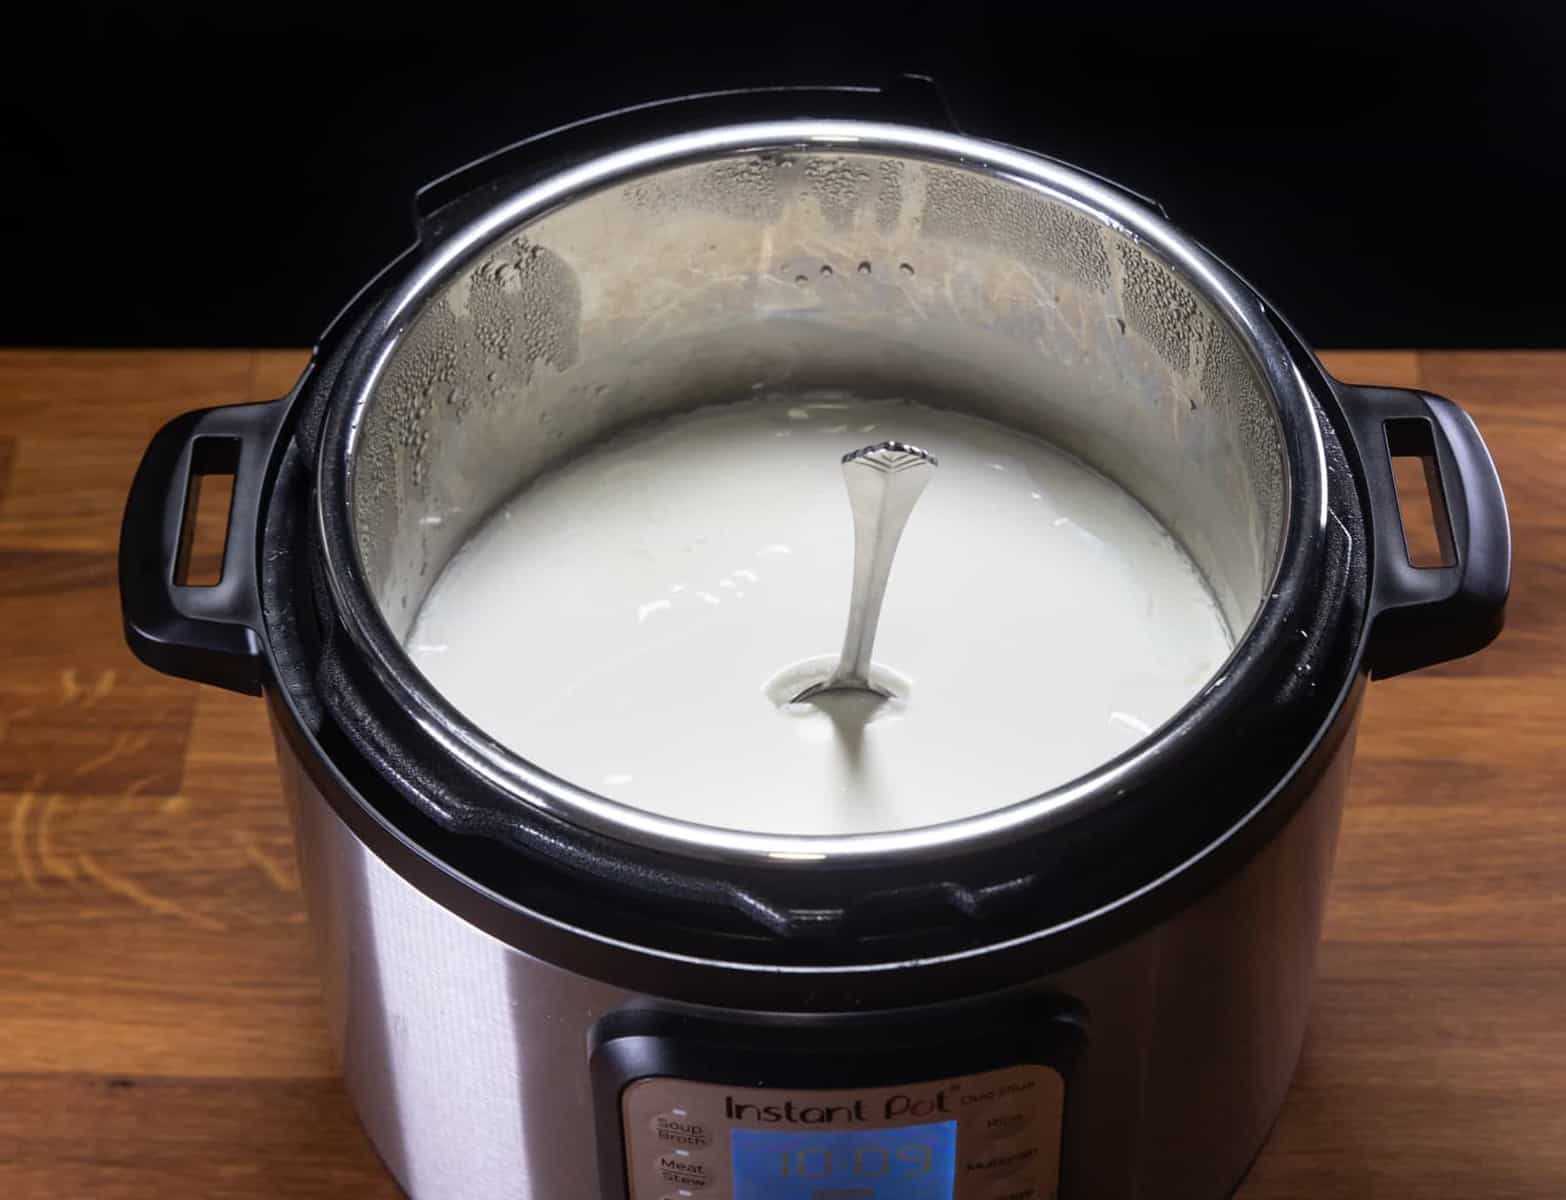
- Step 2: Heat the Plant-Based Milk: Pour your chosen plant-based milk into the electric pressure cooker insert. Place the insert inside the pressure cooker, close the lid, and set it to the “Yogurt” function. Heat the milk until it reaches a temperature of 180°F (82°C), which helps kill any unwanted bacteria and enzymes present in the milk.
- Step 3: Cool the Milk: Once the milk reaches the desired temperature, remove the electric pressure cooker insert from the cooker and allow it to cool down to around 110°F (43°C). Use a food thermometer to accurately gauge the temperature.
- Step 4: Add the Yogurt Starter: Gently whisk in your chosen yogurt starter or starter culture into the cooled milk. Ensure that it is well incorporated into the mixture, as this will help initiate the fermentation process and develop the yogurt’s characteristic tanginess.
- Step 5: Fermentation Time: Place the lid back on the electric pressure cooker insert and return it to the pressure cooker. Set the cooker to the “Yogurt” function or a low-temperature setting and allow the yogurt to ferment for 8 to 12 hours. The longer the fermentation time, the tangier and thicker the yogurt will become.
- Step 6: Check for Desired Consistency: After the fermentation time is complete, check the consistency of your yogurt. If you prefer a thicker yogurt, you can strain it through a cheesecloth or nut milk bag for a few hours to remove any excess liquid.
- Step 7: Refrigerate and Enjoy: Transfer your dairy-free yogurt into a clean jar or containers and refrigerate for at least 4 hours, allowing it to cool and further set. Once chilled, your homemade dairy-free yogurt is ready to be enjoyed! Serve it plain, as a topping, or incorporate it into your favorite recipes.
Experiment with different fermentation times and flavor combinations to find your perfect dairy-free yogurt recipe. Remember to save a small portion of your homemade yogurt as a starter for your next batch. Now, let’s explore some tips to ensure that you achieve the ideal texture for your dairy-free yogurt.
Tips for Achieving the Perfect Dairy-Free Yogurt Texture
Creating a smooth and creamy texture is key when making dairy-free yogurt in your electric pressure cooker. Here are some helpful tips to ensure that you achieve the perfect consistency:
- Use a Thickening Agent: If you prefer a thicker yogurt, consider incorporating a thickening agent such as cornstarch, tapioca starch, or agar-agar. These ingredients can help give your yogurt a more gel-like texture.
- Strain the Yogurt: After the fermentation process, you can strain the yogurt through a cheesecloth or nut milk bag to remove any excess liquid. This will result in a thicker and creamier yogurt.
- Try Different Milk Brands: Not all plant-based milks are created equal. Experiment with different brands and varieties to find one that produces a texture you love. Some milks naturally yield a thicker yogurt consistency.
- Don’t Overheat the Milk: Heating the milk to the correct temperature is important, but be careful not to overheat it. Boiling the milk or exceeding the recommended temperature can affect the texture and quality of the yogurt.
- Choose the Right Yogurt Starter: Opting for a high-quality dairy-free yogurt starter or starter culture is essential. Look for starters with live active cultures specifically designed for plant-based yogurt making.
- Be Patient with Fermentation: The fermentation process is crucial for developing the texture and tanginess of your yogurt. Make sure to allow enough time for the yogurt to ferment, typically between 8 to 12 hours, for the best results.
- Avoid Disturbing the Yogurt: Once you have added the yogurt starter and placed the lid on the pressure cooker, avoid unnecessary movement or opening the lid frequently. Disturbing the process can affect the fermentation and texture of the yogurt.
- Refrigerate to Set: After the fermentation is complete, refrigerate the yogurt for at least 4 hours to allow it to cool and set further. This will help achieve a firmer and more enjoyable texture.
By following these tips, you can experiment and fine-tune your dairy-free yogurt making process to achieve the desired texture every time. Now, let’s explore some flavorful variations and additions for your dairy-free yogurt.
Flavour Variations and Additions for Your Dairy-Free Yogurt
One of the best things about making your own dairy-free yogurt is the ability to customize the flavors and add delicious toppings. Here are some creative ideas to elevate the taste of your yogurt:
- Fruit Puree: Add a burst of natural sweetness and fruity flavor by stirring in your favorite fruit puree. Try options like strawberry, blueberry, mango, or raspberry for a refreshing twist.
- Vanilla Extract: Enhance the aroma and add a hint of sweetness to your dairy-free yogurt by incorporating a dash of vanilla extract. This classic flavor pairs well with almost any topping or mix-in.
- Spices: Experiment with spices to give your yogurt a warm and enticing flavor. Sprinkle in a pinch of cinnamon, nutmeg, or cardamom for a cozy and aromatic yogurt experience.
- Nuts and Seeds: Add a delightful crunch and nutty flavor to your yogurt by sprinkling in a handful of chopped nuts like almonds, walnuts, or cashews. You can also try adding chia seeds or flaxseeds for an extra boost of nutrition.
- Granola: Top your yogurt with some homemade or store-bought granola for a satisfying crunch and added texture. Choose a granola variety that complements the flavors in your yogurt, such as one with dried fruits or nuts.
- Honey or Maple Syrup: For a touch of natural sweetness, drizzle some honey or maple syrup over your yogurt. These sweeteners pair well with various flavors and can elevate the taste of your creation.
- Cocoa Powder: If you’re a chocolate lover, mix in a teaspoon of unsweetened cocoa powder to transform your dairy-free yogurt into a rich and indulgent treat. You can also add a sprinkle of chocolate chips for extra decadence.
- Herbs: Don’t be afraid to experiment with herbs like mint, basil, or lavender to infuse a unique and refreshing flavor into your yogurt. Just make sure to finely chop the herbs before adding them.
Get creative with your dairy-free yogurt by combining multiple flavors and toppings or creating your own unique combinations. The possibilities are endless, and you have the freedom to cater to your taste preferences. Now, let’s move on to the important topic of storing and preserving your dairy-free yogurt.
Storing and Preserving Your Dairy-Free Yogurt
Once you have made your delicious dairy-free yogurt, it’s important to store and preserve it properly to maintain its freshness and quality. Follow these tips to ensure that your yogurt stays at its best:
- Refrigeration: After your dairy-free yogurt has set, transfer it to a clean jar or airtight containers with lids. Place them in the refrigerator to cool and firm up further. Refrigeration will help extend the shelf life of your yogurt.
- Expiration Date: Label your yogurt container with the date you made it. Dairy-free yogurt typically stays fresh for about 7 to 10 days in the refrigerator, but this can vary depending on the ingredients used and the fermentation process.
- Single-Serve Portions: If you prefer individual servings, divide your yogurt into smaller containers before refrigerating. This way, you can easily grab a serving and reduce the risk of contamination from repeated opening and closing.
- Separation: It’s normal to see some separation in your dairy-free yogurt as it sits in the refrigerator. Simply give it a stir before consuming to reincorporate any liquid that may have separated from the solids.
- Freezing: If you have a surplus of dairy-free yogurt, consider freezing it in ice cube trays or silicone molds. Once frozen, transfer the yogurt cubes into a freezer-safe bag or container for long-term storage. Thaw individual portions as needed.
- Thawing Frozen Yogurt: When thawing frozen dairy-free yogurt, allow it to defrost in the refrigerator overnight or at room temperature for a few hours. Stir well before consuming to ensure a smooth and consistent texture.
- Quality Check: Before consuming any stored yogurt, always perform a visual and sniff test. If you notice any unusual odor, discoloration, or off flavors, it’s best to discard it to avoid any potential foodborne illnesses.
By following these storage guidelines, you can maximize the lifespan of your dairy-free yogurt and enjoy its deliciousness for longer. Now, let’s address some frequently asked questions about making dairy-free yogurt in an electric pressure cooker.
Frequently Asked Questions About Making Dairy-Free Yogurt in an Electric Pressure Cooker
1. Can I use any type of plant-based milk to make dairy-free yogurt?
Yes, you can use a variety of plant-based milks such as almond milk, soy milk, coconut milk, or oat milk. Choose a milk that suits your taste preferences and dietary needs. Make sure it is unsweetened and free from any added flavors or sweeteners.
2. Can I use store-bought dairy-free yogurt as a starter?
Yes, you can use a small amount of store-bought dairy-free yogurt that contains live active cultures as a starter. Look for a yogurt that does not contain any milk or dairy ingredients. Alternatively, you can also opt for a dairy-free yogurt starter culture specifically designed for plant-based yogurt making.
3. How do I achieve a thicker consistency for my dairy-free yogurt?
If you prefer a thicker yogurt, you can add a thickening agent such as cornstarch, tapioca starch, or agar-agar during the preparation process. You can also strain the yogurt using a cheesecloth or nut milk bag to remove excess liquid and achieve a thicker texture.
4. Can I flavor my dairy-free yogurt with natural sweeteners?
Yes, you can sweeten your yogurt with natural sweeteners such as maple syrup, agave nectar, or a pinch of stevia. Keep in mind that the yogurt will become tangier as it ferments, so adjust the sweetness accordingly.
5. How long does it take to ferment dairy-free yogurt in an electric pressure cooker?
The fermentation time for dairy-free yogurt in an electric pressure cooker is typically between 8 to 12 hours, depending on the desired tanginess and thickness. You can experiment with different fermenting times to find your preferred taste and texture.
6. Can I freeze dairy-free yogurt?
Yes, you can freeze dairy-free yogurt. Transfer it into ice cube trays or silicone molds and freeze until solid. Once frozen, transfer the yogurt cubes into a freezer-safe bag or container for long-term storage. Thaw individual portions as needed.
7. How long does dairy-free yogurt last in the refrigerator?
Dairy-free yogurt typically stays fresh for about 7 to 10 days in the refrigerator. However, this can vary depending on the ingredients used and the fermentation process. Always perform a visual and sniff test before consuming stored yogurt to ensure its quality.
These are just a few of the commonly asked questions about making dairy-free yogurt in an electric pressure cooker. With practice and experimentation, you’ll be able to perfect your own unique dairy-free yogurt recipe. Now, it’s time for you to get started on your delicious homemade dairy-free yogurt journey!
Conclusion
Creating homemade dairy-free yogurt in your electric pressure cooker is a wonderful way to enjoy a creamy and nutritious treat without the use of dairy products. By choosing the right ingredients, following a step-by-step guide, and incorporating flavor variations, you can achieve a delicious and satisfying yogurt experience in the comfort of your own kitchen.
Remember to select a plant-based milk that suits your taste preferences and dietary needs, and use a dairy-free yogurt starter or starter culture to kickstart the fermentation process. Take advantage of the versatility of dairy-free yogurt by adding fruit purees, spices, nuts, seeds, or even sweeteners to create a personalized flavor profile.
Throughout the process, ensure proper sterilization of your equipment, monitor the temperature of the milk, and be patient with the fermentation process. By following these tips and tricks, you can achieve the ideal texture and tanginess for your dairy-free yogurt.
Once your yogurt is ready, store it properly in the refrigerator to maintain its freshness and quality. Feel free to experiment with freezing and thawing techniques to prolong the life of your dairy-free yogurt while still retaining its amazing taste.
By making your own dairy-free yogurt, you have full control over the ingredients and can cater to your specific dietary needs and preferences. Say goodbye to store-bought options and unlock a world of creativity and flavor combinations with homemade dairy-free yogurt.
So, grab your electric pressure cooker, gather your ingredients, and embark on a journey to make the perfect dairy-free yogurt. Your taste buds and your body will thank you for it!