Introduction
In today’s digital age, virtualization has become an essential tool for professionals and enthusiasts alike. VMware Workstation 12 Player is a powerful software that allows you to run multiple operating systems on a single machine. With its advanced features, you can create and manage virtual machines effortlessly. One of the key functionalities provided by VMware Workstation 12 Player is the Disc Manager, which allows you to manage and configure virtual disks for your virtual machines.
Launching the Disc Manager in VMware Workstation 12 Player is a straightforward process that can be done within a few simple steps. Whether you are a seasoned professional or a beginner, this article will guide you through the process of launching the Disc Manager in VMware Workstation 12 Player.
By understanding how to use the Disc Manager effectively, you can optimize your virtual machine configurations, improve performance, and enhance your overall user experience. So, without further ado, let’s get started with the step-by-step process of launching the Disc Manager in VMware Workstation 12 Player.
Step 1: Install VMware Workstation 12 Player
The first step to launching the Disc Manager in VMware Workstation 12 Player is to install the software on your computer. VMware Workstation 12 Player is available for both Windows and Linux operating systems. Follow these steps to install it:
- Visit the official VMware website and download the installation file for VMware Workstation 12 Player.
- Once the download is complete, locate the installation file and double-click on it to begin the installation process.
- Follow the on-screen instructions to proceed with the installation. You may be prompted to accept the license agreement and choose the destination folder for the installation.
- During the installation, you may also be asked to input your administrator credentials to authorize the installation.
- After you have completed the installation, launch VMware Workstation 12 Player from the desktop shortcut or the Start menu.
Once VMware Workstation 12 Player is installed on your computer, you are now ready to proceed to the next step of launching the Disc Manager.
It is worth mentioning that VMware Workstation 12 Player is a feature-rich virtualization software that offers not only the Disc Manager but also a wide array of tools for managing virtual machines. It provides a user-friendly interface, seamless integration with the host operating system, and extensive customization options to meet your specific needs.
With VMware Workstation 12 Player installed on your computer, you have unlocked the potential to leverage virtualization technology and explore new possibilities for running multiple operating systems simultaneously. Let’s continue to the next step and launch the Disc Manager in VMware Workstation 12 Player.
Step 2: Download Disc Manager
Before you can launch the Disc Manager in VMware Workstation 12 Player, you need to ensure that you have the software downloaded on your computer. The Disc Manager is a separate component that comes bundled with VMware Workstation 12 Player. Follow these steps to download the Disc Manager:
- Visit the official VMware website and navigate to the downloads section.
- Locate the VMware Workstation 12 Player download page and click on the download button.
- Depending on your operating system, choose the appropriate version of VMware Workstation 12 Player and initiate the download.
- Wait for the download to complete, which may take a few minutes depending on your internet connection speed.
- Once the download is finished, navigate to the location where the file was saved.
- Double-click on the downloaded file to start the installation process.
- Follow the on-screen instructions to install the Disc Manager component of VMware Workstation 12 Player.
After the installation is complete, you will have the Disc Manager ready for use within VMware Workstation 12 Player. The Disc Manager provides a comprehensive set of tools and features that allow you to create, manage, and configure virtual disks for your virtual machines.
Downloading the Disc Manager is a necessary step to unleash the full potential of VMware Workstation 12 Player. By having access to the Disc Manager, you gain the ability to optimize disk performance, allocate storage efficiently, and manage virtual machine configurations effectively.
Now that you have successfully downloaded the Disc Manager, it’s time to move on to the next step and launch VMware Workstation 12 Player to access the Disc Manager.
Step 3: Launch VMware Workstation 12 Player
With VMware Workstation 12 Player and the Disc Manager downloaded and installed on your computer, you are now ready to launch VMware Workstation 12 Player and access the Disc Manager. Follow these steps to launch VMware Workstation 12 Player:
- Locate the VMware Workstation 12 Player shortcut on your desktop or navigate to it through the Start menu.
- Double-click on the shortcut to open the application.
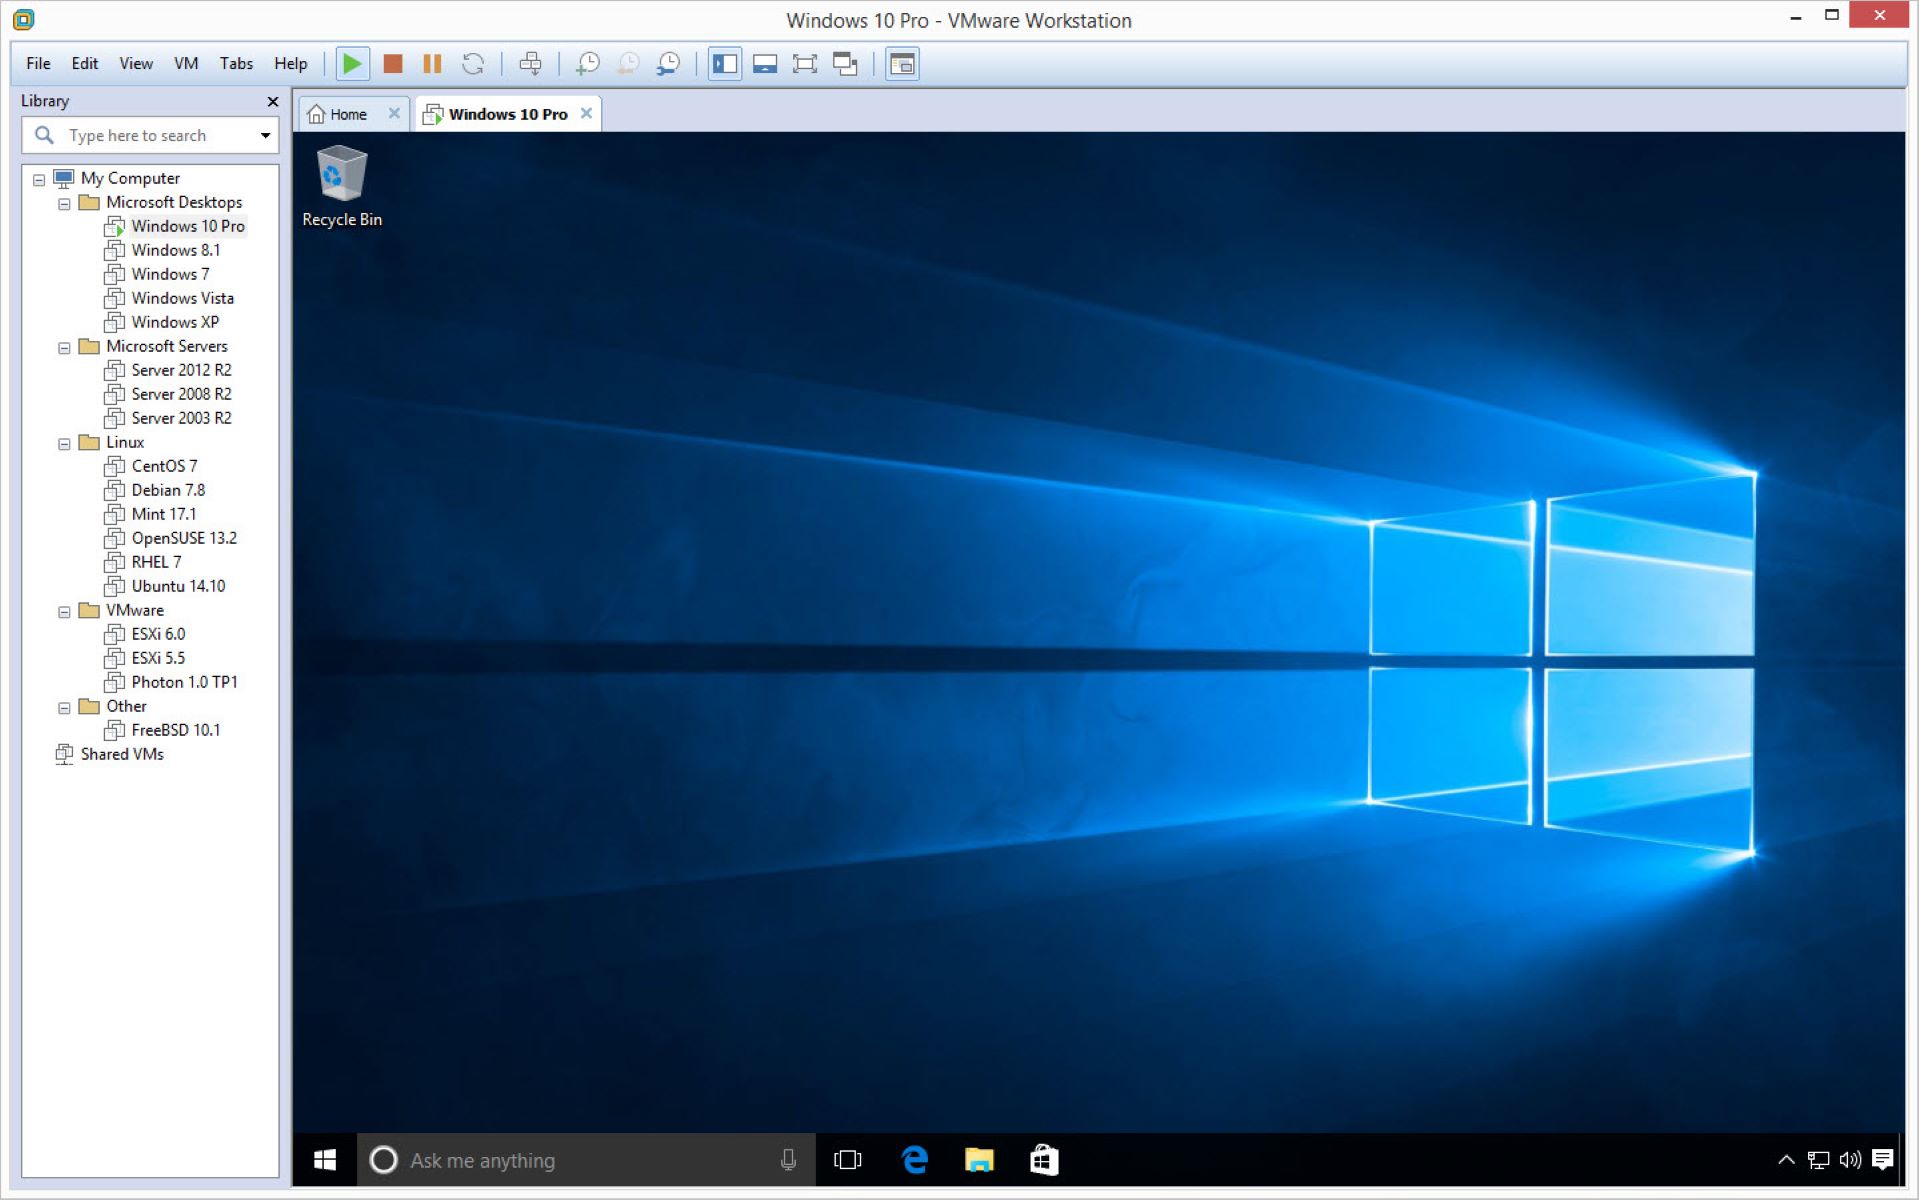
- Once VMware Workstation 12 Player is launched, you will be presented with the home screen. This screen provides you with easy access to your virtual machines, disc images, and various configuration options.
- Take a moment to familiarize yourself with the interface of VMware Workstation 12 Player. You will notice that it provides you with a menu bar at the top, a toolbar below it, and a navigation panel on the left side of the window.
- From the home screen, you can browse your existing virtual machines, create new ones, and access advanced features such as the Disc Manager.
Launching VMware Workstation 12 Player is a simple process that grants you access to a world of virtualization possibilities. Whether you are a developer, a tester, or an enthusiast, VMware Workstation 12 Player provides you with the tools you need to run multiple operating systems seamlessly on a single machine.
Now that you have successfully launched VMware Workstation 12 Player, it’s time to proceed to the next step and open the Disc Manager to manage your virtual disks effectively.
Step 4: Open Disc Manager
Now that you have launched VMware Workstation 12 Player, it’s time to open the Disc Manager and start managing your virtual disks. The Disc Manager is a powerful tool that allows you to create, modify, and manage the virtual disks used by your virtual machines. Follow these steps to open the Disc Manager:
- In the VMware Workstation 12 Player interface, locate and click on the “File” tab in the menu bar.
- From the drop-down menu, select “Open…” to open the file manager.
- In the file manager, navigate to the location where your virtual machines are stored. This is usually a folder designated by VMware Workstation 12 Player during the installation process.
- Once you have located the folder, select the virtual machine for which you want to open the Disc Manager.
- Right-click on the virtual machine and choose “Open Disc Manager” from the options menu.
By following these steps, the Disc Manager window will appear, displaying a list of the virtual disks associated with the selected virtual machine. From here, you can perform various actions such as adding new virtual disks, resizing existing disks, formatting disks, and managing disk settings.
The Disc Manager provides you with a user-friendly interface that makes it easy to navigate and manage your virtual disks. It allows you to optimize your storage resources, configure disk performance settings, and ensure the efficient allocation of disk space for your virtual machines.
Now that you have successfully opened the Disc Manager, you can proceed to the next step and add a new virtual machine using the Disc Manager in VMware Workstation 12 Player.
Step 5: Add a New Virtual Machine in Disc Manager
Now that you have the Disc Manager open in VMware Workstation 12 Player, it’s time to add a new virtual machine. Adding a new virtual machine allows you to create a separate environment to install and run an operating system of your choice. Follow these steps to add a new virtual machine using the Disc Manager:
- In the Disc Manager window, click on the “Add” button located at the top-left corner of the interface. This will open the New Virtual Machine Wizard.
- Choose the appropriate option for creating a new virtual machine. You can select “Typical” for a standard configuration or “Custom” for advanced customization options.
- Specify the location where you want to store the virtual machine files and provide a name for the virtual machine.
- Select the operating system you want to install from the available options. If your desired operating system is not listed, you can choose “Other” and select the correct version manually.
- Set the amount of memory and the number of processors you want to allocate to the virtual machine. These settings may vary depending on the system requirements of the operating system you are installing.
- Choose whether you want to use physical disks or create a new virtual disk for the virtual machine. If you are using a physical disk, make sure to select the correct device from the list.
- Specify the virtual disk parameters such as the size, format, and storage location.
- Review the virtual machine settings and make any necessary adjustments.
- Click “Finish” to create the new virtual machine.
By following these steps, you have successfully added a new virtual machine using the Disc Manager in VMware Workstation 12 Player. This virtual machine is now ready for installation and configuration of the operating system of your choice.
The ability to add and manage virtual machines gives you the flexibility to create isolated environments for testing, development, or experimentation purposes. VMware Workstation 12 Player allows you to run multiple virtual machines simultaneously, providing you with a powerful and versatile virtualization platform.
Now that you have added a new virtual machine, it’s time to move on to the next step and customize the virtual machine settings according to your requirements.
Step 6: Customize Virtual Machine Settings
After adding a new virtual machine in the Disc Manager of VMware Workstation 12 Player, it’s time to customize the virtual machine settings to meet your specific requirements. Customizing the settings allows you to allocate resources, configure hardware options, and optimize the performance of your virtual machine. Follow these steps to customize the virtual machine settings:
- In the VMware Workstation 12 Player interface, locate the newly added virtual machine in the library or navigation panel.
- Right-click on the virtual machine and select “Settings” from the context menu. This will open the Virtual Machine Settings window.
- Explore the different categories of settings available, such as hardware, options, and advanced settings.
- In the “Hardware” tab, you can configure various aspects of the virtual machine hardware, such as the number of processors, the amount of memory, and the network adapter settings.
- Under the “Options” tab, you can specify additional settings, such as power management, sharing folders between the virtual machine and the host system, and integrating the guest operating system with the host system.
- In the “Advanced” tab, you have access to more advanced settings, including virtual machine compatibility, virtualization engine options, and CPU performance settings.
- Make any necessary adjustments to the settings based on your specific needs. You can modify the hardware allocation, optimize performance settings, and enable/disable various features.
- Once you have customized the virtual machine settings to your satisfaction, click “OK” to save the changes and apply them to the virtual machine.
By customizing the virtual machine settings, you can tailor the configuration to optimize the performance, compatibility, and functionality of the virtual machine. This allows you to create an environment that closely matches your desired specifications and requirements.
VMware Workstation 12 Player offers advanced customization options, giving you the flexibility to tweak settings and fine-tune the virtual machine according to your specific needs. This level of control ensures that you have an optimal virtualization experience and can make the most of the resources available on your host system.
Now that you have customized the virtual machine settings, it’s time to proceed to the next step and configure the virtual disk for the virtual machine.
Step 7: Configure Virtual Disk
Once you have customized the virtual machine settings in VMware Workstation 12 Player, the next step is to configure the virtual disk for the virtual machine. The virtual disk is where the operating system and data will be stored for the virtual machine. Follow these steps to configure the virtual disk:
- In the Virtual Machine Settings window, navigate to the “Hardware” tab.
- Click on the “Hard Disk” option to select the virtual disk for configuration.
- Under the “Hard Disk” section, you will have several options to configure the virtual disk. You can adjust the size, select the disk type (such as IDE or SCSI), choose the disk location, and decide whether to allocate the disk space immediately or on demand.
- If you need to resize the virtual disk, you can do so by selecting the “Resize” option and specifying the desired new size.
- Additionally, you can take advantage of advanced features such as disk encryption and splitting the disk into multiple files for easier management.
- Make the necessary adjustments to the virtual disk configuration based on your requirements.
- Once you have configured the virtual disk settings, click “OK” to save the changes.
By configuring the virtual disk, you can optimize storage allocation, accommodate the space requirements of the operating system and applications, and ensure efficient utilization of disk resources.
VMware Workstation 12 Player offers a range of options for virtual disk configuration, allowing you to tailor the disk settings to meet your specific needs. The flexibility and control provided by VMware Workstation 12 Player help you create virtual machines that perform optimally and provide a seamless user experience.
Now that you have successfully configured the virtual disk, it’s time to move on to the next step and adjust additional virtual machine settings related to hardware and networking.
Step 8: Adjust Virtual Machine Hardware and Networking Settings
After configuring the virtual disk in VMware Workstation 12 Player, it’s important to adjust the hardware and networking settings of the virtual machine. This step allows you to allocate resources effectively, optimize performance, and establish network connectivity. Follow these steps to adjust the virtual machine hardware and networking settings:
- In the Virtual Machine Settings window, navigate to the “Hardware” tab.
- Review the existing hardware settings and make necessary adjustments according to your requirements.
- For processor settings, you can adjust the number of virtual processors allocated to the virtual machine.
- Specify the amount of memory allocated to the virtual machine based on the system requirements of the operating system or applications.
- Under the “Network Adapter” section, choose the appropriate network adapter type and configure networking settings.
- For network settings, you can select the network connection type, such as bridged or NAT, to establish connectivity between the virtual machine and the host system or the external network.
- If needed, you can also customize additional hardware settings such as display, USB devices, sound, and other peripherals.
- After making the necessary adjustments, click “OK” to save the changes.
Adjusting the virtual machine hardware and networking settings allows you to fine-tune resource allocation, optimize network connectivity, and ensure compatibility with the host system and other virtual machines.
VMware Workstation 12 Player provides a wide range of hardware options and network adapters, giving you the flexibility to configure the virtual machine according to your specific requirements. These settings enable you to create an environment that closely mirrors the hardware and networking configurations you need for your virtual machine.
Now that you have adjusted the virtual machine hardware and networking settings, it’s time to proceed to the final step, saving the configuration and launching the virtual machine.
Step 9: Save and Launch Virtual Machine
After customizing and adjusting the virtual machine settings in VMware Workstation 12 Player, it’s time to save your configuration and launch the virtual machine. Saving the configuration ensures that your changes are applied and preserved for future use. Follow these steps to save and launch the virtual machine:
- In the Virtual Machine Settings window, click “OK” to save the changes you made to the virtual machine configuration.
- Return to the VMware Workstation 12 Player interface.
- Locate the virtual machine in the library or navigation panel.
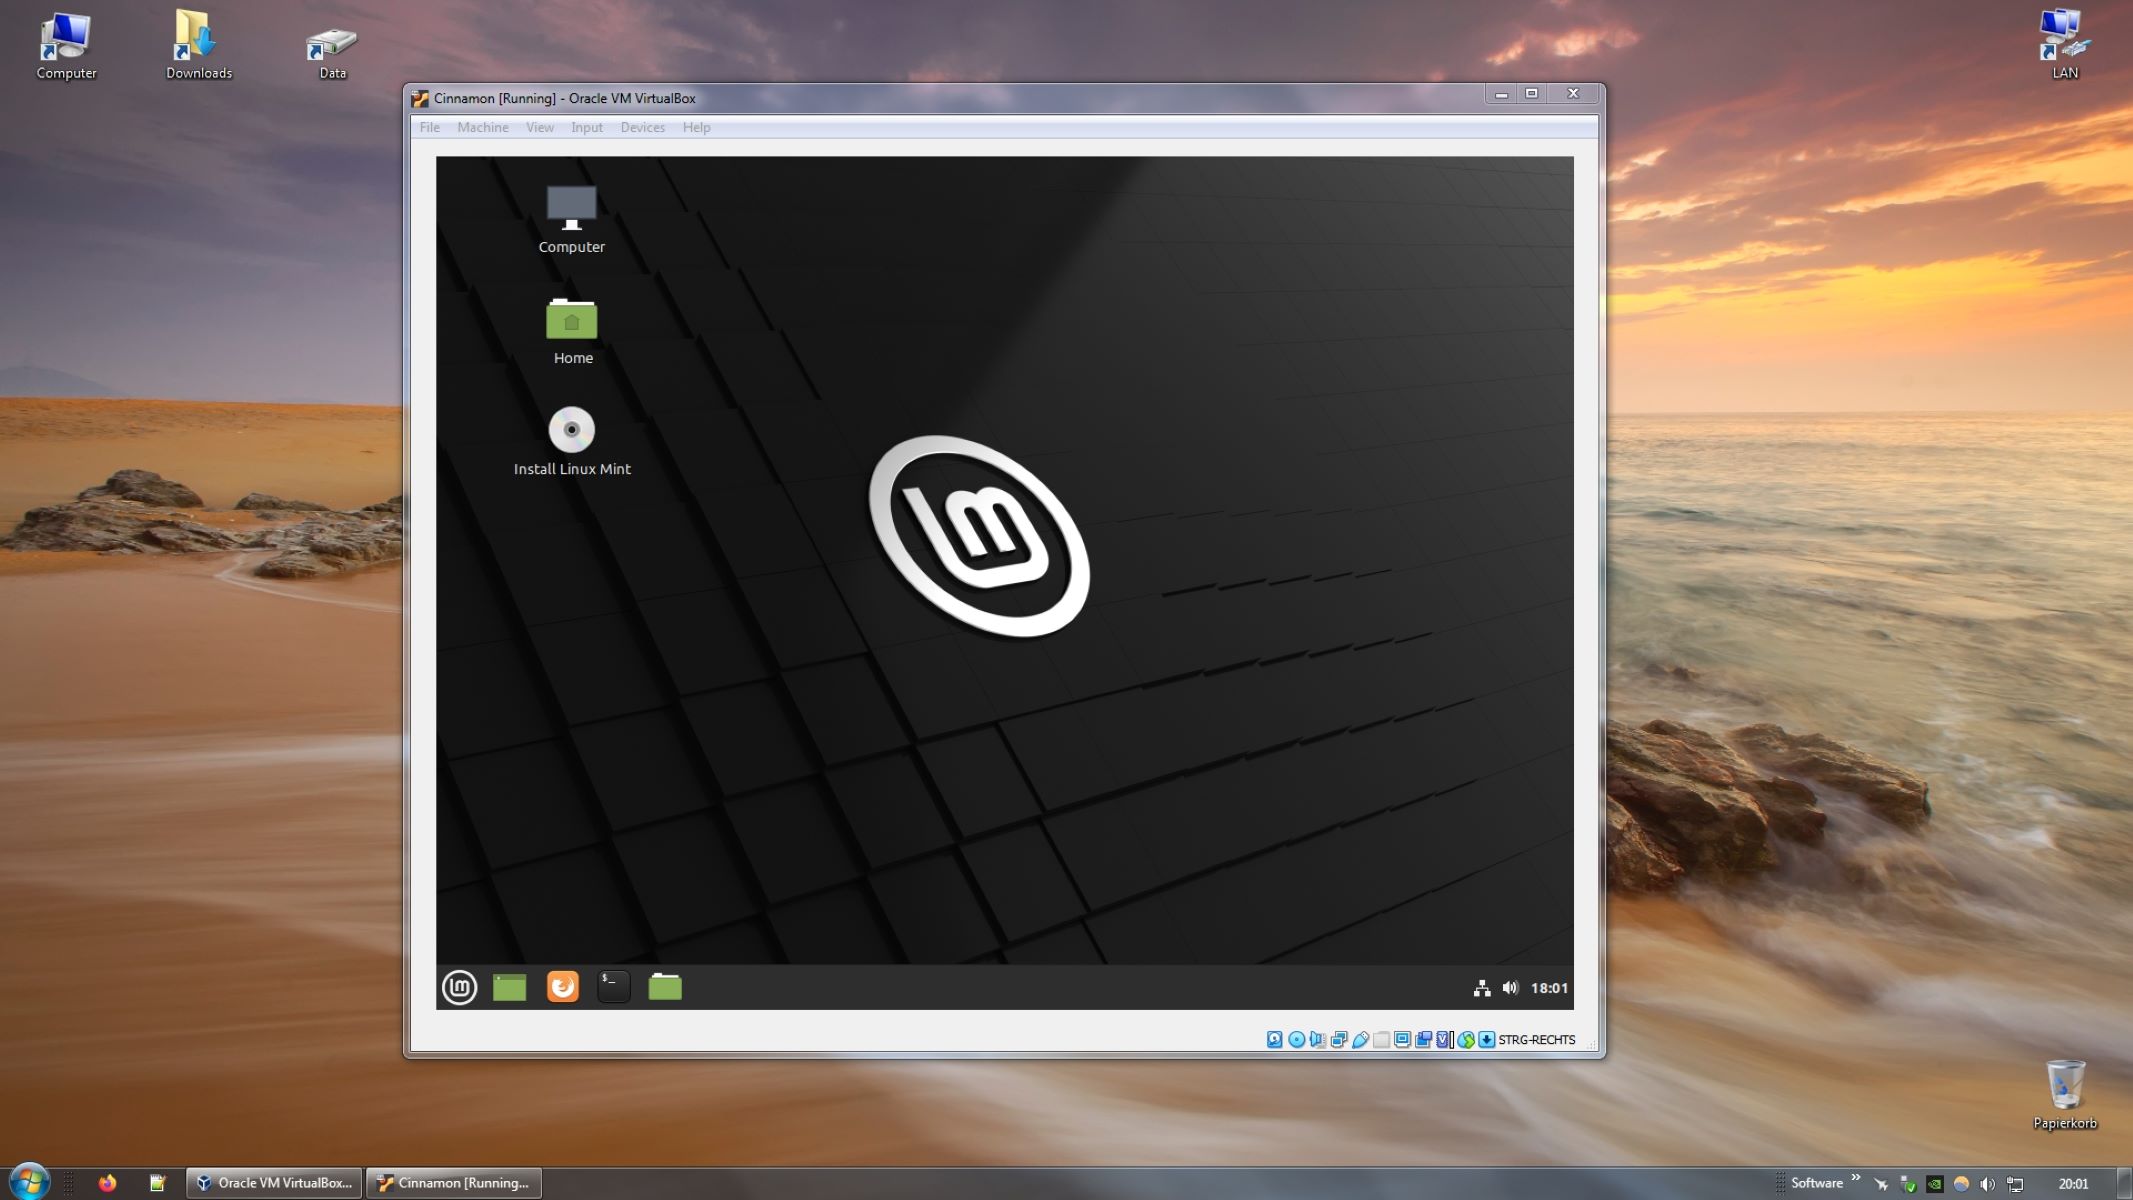
- Right-click on the virtual machine and select “Power On” or “Start” to launch the virtual machine.
- The virtual machine will start booting up, and you will have the opportunity to install the operating system or launch the existing installed operating system.
- Follow the on-screen instructions to proceed with the operating system installation or login to the virtual machine.
By saving the configuration and launching the virtual machine, you can begin running the operating system and accessing the applications and functionalities within the virtual machine environment.
VMware Workstation 12 Player provides a seamless and reliable virtualization experience, allowing you to run multiple operating systems simultaneously and leverage the power of virtualization technology.
Now that you have successfully saved and launched the virtual machine, you can begin exploring the capabilities of the operating system within the virtual environment.
Conclusion
Virtualization has become an essential tool for various professionals and enthusiasts, and VMware Workstation 12 Player offers a robust platform for running multiple operating systems on a single machine. Throughout this guide, we have explored the process of launching the Disc Manager in VMware Workstation 12 Player and managing virtual machines effectively.
By following the step-by-step instructions, you have learned how to install VMware Workstation 12 Player, download the Disc Manager, launch the software, open the Disc Manager, add a new virtual machine, customize its settings, configure the virtual disk, adjust hardware and networking settings, and finally save and launch the virtual machine.
With these skills, you can harness the full potential of VMware Workstation 12 Player and enjoy the benefits of virtualization. Whether you are a developer testing different operating systems, a system administrator setting up isolated environments, or an enthusiast exploring new technologies, VMware Workstation 12 Player empowers you with a versatile virtualization platform.
Remember to regularly update your VMware Workstation 12 Player software to access new features, bug fixes, and security enhancements. Additionally, familiarize yourself with the documentation and community forums to stay updated on the latest tips, best practices, and troubleshooting advice.
By utilizing the Disc Manager, customizing virtual machine settings, and leveraging the advanced features of VMware Workstation 12 Player, you can create a flexible, efficient, and high-performing virtualization environment.
So, go ahead and explore the possibilities that VMware Workstation 12 Player offers. Launch the Disc Manager, create virtual machines, test applications, and discover the power of virtualization at your fingertips!