Introduction
Welcome to the world of jailbreaking, where you can unlock the full potential of your iPod Touch 4G! Jailbreaking allows you to gain access to additional features, customization options, and a vast array of third-party apps that are not available through the official Apple App Store. If you’re looking to break free from the restrictions imposed by Apple on your device, you’ve come to the right place.
Before we dive into the step-by-step process of jailbreaking your iPod Touch 4G, it’s important to note that this procedure carries some risks. Jailbreaking your device may void your warranty and could potentially cause instability or security vulnerabilities. However, if you understand the risks and are willing to proceed, jailbreaking can open up a whole new world of possibilities.
In this guide, we’ll walk you through the necessary steps to successfully jailbreak your iPod Touch 4G. From backing up your data to installing the jailbreak tool, we’ve got you covered. Just keep in mind that every device and software version can have slight variations in the jailbreaking process, so it’s crucial to follow the instructions carefully and ensure compatibility.
Please note that jailbreaking is a legal process in many countries, including the United States, but it may void your warranty with Apple. Make sure to check the specific laws and regulations in your country before proceeding.
Ready to take control of your iPod Touch 4G and unleash its full potential? Let’s dive into the world of jailbreaking!
Disclaimer
Before we proceed, it’s important to understand that jailbreaking your iPod Touch 4G comes with some risks and limitations. While jailbreaking is a widely practiced technique, it is not endorsed or supported by Apple. Therefore, it’s crucial to proceed at your own risk and fully understand the implications.
1. Warranty Void: Jailbreaking your device may void your warranty with Apple. Once your iPod Touch 4G is jailbroken, Apple may refuse to provide any support or service for your device, even if the issue is unrelated to the jailbreak. It’s important to consider this before proceeding.
2. Stability and Security: Jailbreaking involves modifying the operating system of your iPod Touch 4G, which can introduce instabilities and security vulnerabilities. While most jailbreaks are well-tested, there is always a risk of encountering unexpected issues, such as crashes, freezes, or even data loss. It’s crucial to be prepared for these potential risks.
3. Compatibility: Jailbreaking methods can vary depending on the firmware version and device model. Ensure that the jailbreak tool you are using is compatible with your specific iPod Touch 4G model and iOS version. Using an incompatible tool may result in failure or adverse effects on your device.
4. App Store Limitations: Jailbreaking gives you access to third-party app stores, such as Cydia, which host a wide range of apps not available on the official Apple App Store. However, it’s important to note that not all apps are guaranteed to be safe or free from malware. Exercise caution and only download from trusted sources.
5. Restore and Unjailbreak: If you decide to remove the jailbreak and return your iPod Touch 4G to its original state, the process may not always be straightforward. Restoring your device through iTunes may not completely remove all traces of the jailbreak, and there is always a risk of data loss or device instability during the unjailbreaking process.
By proceeding with the jailbreaking process, you acknowledge and accept the risks involved. It’s essential to perform thorough research, follow reliable instructions, and make informed decisions. We are not responsible for any damage, malfunction, or loss of data that may occur during or after the jailbreaking process. Proceed with caution, and remember to back up your data before proceeding.
Prerequisites
Before you begin the jailbreaking process for your iPod Touch 4G, there are a few prerequisites you need to have in place:
- iPod Touch 4G: Ensure that you have an iPod Touch 4G device. This guide is specifically for this model. Jailbreaking methods can vary for different device models, so make sure you have the correct model.
- Computer: You will need a computer (Windows or Mac) to download and install the necessary files and tools required for the jailbreaking process.
- USB Cable: Ensure that you have a compatible USB cable to connect your iPod Touch 4G to your computer. Make sure the cable is in good working condition.
- iTunes: Install the latest version of iTunes on your computer. iTunes is essential for backing up your data and restoring your device, if needed, during the jailbreaking process.
- Backup: Create a backup of your iPod Touch 4G data before proceeding with the jailbreak. This step is crucial to ensure that your data is safe before any modifications are made to the device.
- Internet Connection: Ensure that you have a stable internet connection to download the required files and tools. A slow or unreliable internet connection may cause issues during the process.
It’s essential to follow these prerequisites carefully before proceeding with the jailbreaking process. Having these prerequisites in place will help ensure a smooth and successful jailbreak for your iPod Touch 4G.
Step 1: Backup your data
Before you start the jailbreaking process for your iPod Touch 4G, it is crucial to back up your data. This ensures that you have a copy of all your important files, settings, and app data in case anything goes wrong during the jailbreak or if you need to restore your device later on. Here’s how to back up your iPod Touch 4G:
- Connect your iPod Touch to your computer: Use the USB cable to connect your iPod Touch 4G to your computer. Make sure your computer has iTunes installed and running.
- Open iTunes: Once your device is connected, open iTunes on your computer. It should recognize your iPod Touch and display it in the iTunes interface.
- Select your iPod Touch: Click on your iPod Touch device icon in the upper-left corner of the iTunes window. This will take you to the device summary page.
- Backup Options: On the device summary page, you will find various backup options. Choose the backup method that suits your needs:
- iCloud Backup: If you have iCloud enabled on your iPod Touch 4G and you want to back up your data to the cloud, click on “Back Up Now” under the “Manually Back Up and Restore” section. Make sure you have a reliable internet connection for this option.
- Computer Backup: If you want to back up your data directly to your computer, choose the “This computer” option under the “Automatically Back Up” section. You can also encrypt your backup by ticking the “Encrypt iPhone backup” option and setting a password. This will save your sensitive data, such as passwords and health data, in the backup.
Once you have selected your backup method, click on the “Back Up Now” button. The backup process may take some time, depending on the size of your data. Ensure that you do not disconnect your iPod Touch from the computer until the backup process is complete.
After the backup is complete, you will have a secure copy of your data stored either on iCloud or your computer. This ensures that even if something goes wrong during the jailbreaking process, you can restore your iPod Touch and recover all your data.
Now that you have successfully backed up your data, you are ready to proceed to the next step of the jailbreaking process.
Step 2: Download the necessary files
Once you have backed up your data, it’s time to download the necessary files for the jailbreaking process. Here’s what you need to do:
- Research and choose a jailbreak tool: There are various jailbreak tools available, each suitable for different iOS versions and device models. Do some research to find a reliable and compatible jailbreak tool for your iPod Touch 4G. Popular options include tools like Pangu, Redsn0w, and Absinthe.
- Visit the official website: Once you’ve decided on a jailbreak tool, go to the official website of the tool developer. Look for the section or page that provides downloads for the specific tool.
- Download the jailbreak tool: On the official website, you should find a download link for the jailbreak tool. Click on the link to start the download process. Make sure you choose the version of the tool that is compatible with your iPod Touch 4G and the iOS version it is currently running.
- Check for additional files and instructions: Some jailbreak tools may require additional files or instructions to ensure a successful jailbreak process. Look for any additional files or guides provided on the official website, and download them if necessary.
Ensure that you only download jailbreak tools from legitimate sources, such as the official developer’s website. This helps to minimize the risk of malware or other security threats.
Once you have downloaded the necessary files, make sure to keep them in a safe and easily accessible location on your computer. You will need these files in the following steps of the jailbreaking process.
Now that you have the required files, you are one step closer to jailbreaking your iPod Touch 4G. It’s time to move on to the next step and prepare your device for the jailbreak.
Step 3: Update your iPod Touch
Before proceeding with the jailbreaking process, it’s important to ensure that your iPod Touch 4G is running the latest available iOS version. Updating your device’s software will help ensure that the jailbreak process is compatible and successful. Here’s how to update your iPod Touch:
- Connect your iPod Touch to Wi-Fi: Make sure your iPod Touch is connected to a stable Wi-Fi network. This is crucial for downloading and installing the software update.
- Go to the Settings app: Launch the Settings app on your iPod Touch. You can find it on your home screen.
- Tap on General: In the Settings app, scroll down and tap on “General.” It is usually located towards the top of the list.
- Tap on Software Update: Within the General settings, look for the “Software Update” option. Tap on it to proceed.
- Check for updates: Your iPod Touch will now check for available software updates. If a new update is available, you will see a message indicating the version and a “Download and Install” button. Tap on this button to start the update process.
- Enter your passcode: If prompted, enter the passcode for your iPod Touch to authorize the update. If you don’t have a passcode, you can skip this step.
- Agree to the terms and conditions: You will be presented with the terms and conditions of the software update. Read them carefully and tap on “Agree” to proceed.
- Wait for the update to complete: Your iPod Touch will now download and install the software update. This process may take some time, so it’s important to have a stable internet connection and sufficient battery life.
Once the software update is complete, your iPod Touch will restart with the latest iOS version installed. It’s important to note that updating your device will remove the jailbreak, if it was previously installed. Therefore, it’s recommended to update your device before attempting the jailbreak.
With your iPod Touch updated to the latest iOS version, you are now ready to proceed with the next steps of the jailbreaking process.
Step 4: Disable passcode and Find My iPod
Before proceeding with the jailbreaking process, it’s important to disable the passcode and Find My iPod feature on your iPod Touch 4G. Disabling these settings will help ensure a smooth and uninterrupted jailbreak process. Here’s how to disable the passcode and Find My iPod:
- Go to the Settings app: Locate and launch the Settings app on your iPod Touch. It can be found on your home screen.
- Tap on Touch ID & Passcode or Face ID & Passcode: Depending on the model of your iPod Touch and the iOS version you are running, you will either see “Touch ID & Passcode” or “Face ID & Passcode.” Tap on the option that corresponds to your device.
- Enter your passcode: If you have a passcode set on your iPod Touch, you will need to enter it to proceed further.
- Disable the passcode: In the Touch ID & Passcode or Face ID & Passcode settings, you will see an option to disable the passcode. Tap on “Turn Passcode Off” or “Disable Passcode” to remove the passcode from your device. You may be prompted to enter your passcode again to confirm.
- Return to the Settings app: Once the passcode is disabled, use the back button or swipe from the left edge of the screen to return to the main Settings menu.
- Tap on your Apple ID: In the Settings app, locate and tap on your Apple ID, which is located at the top of the screen.
- Tap on iCloud: Within your Apple ID settings, you will find “iCloud” listed. Tap on it to proceed.
- Tap on Find My iPod: On the iCloud settings page, scroll down and locate “Find My iPod.” Tap on it to access the Find My iPod settings.
- Disable Find My iPod: To disable Find My iPod, toggle off the switch next to “Find My iPod.” You may be prompted to enter your Apple ID password to confirm the action.
Once you have disabled the passcode and Find My iPod, your iPod Touch 4G is ready for the jailbreaking process. Disabling these settings helps prevent any conflicts or interruptions during the jailbreak process.
Now that you’ve taken these necessary steps, you can proceed with the next steps and prepare your iPod Touch for jailbreaking.
Step 5: Put your iPod Touch into DFU mode
In order to successfully jailbreak your iPod Touch 4G, you will need to put it into Device Firmware Update (DFU) mode. DFU mode allows for low-level communication with the device’s firmware, making it essential for the jailbreak process. Here’s how to put your iPod Touch into DFU mode:
- Connect your iPod Touch to your computer: Use the USB cable to connect your iPod Touch 4G to your computer. Ensure that iTunes is open and running on your computer.
- Power off your iPod Touch: Press and hold down the power button located at the top or side of your iPod Touch until the “Slide to power off” slider appears on the screen. Slide it to power off your device.
- Press and hold the Home button: While keeping your iPod Touch connected to the computer, press and hold down the Home button (the circular button at the front of your device).
- Press and hold the Power button: While continuing to hold the Home button, also press and hold down the Power button (located at the top or side of your device).
- Keep holding both buttons: Hold both the Home button and Power button simultaneously for about 10 seconds.
- Release the Power button: After 10 seconds, release the Power button while continuing to hold the Home button.
- Continue holding the Home button: Keep holding the Home button for another 5-10 seconds until you see a message in iTunes stating that your device has been detected and is in recovery mode.
Note that the screen of your iPod Touch will remain black during DFU mode, indicating that the device is in the correct state for the jailbreak process.
Putting your iPod Touch into DFU mode can take a few attempts to get it right. If you see the Apple logo or any other image on the screen, it means you have entered recovery mode rather than DFU mode. In such cases, restart the process and try again.
Once DFU mode is successfully activated, you are ready to proceed with the jailbreaking process. Ensure that your iPod Touch remains connected to the computer throughout the next steps.
Step 6: Install the jailbreak tool
With your iPod Touch in DFU mode, it’s time to install the jailbreak tool onto your computer. The jailbreak tool will be used to facilitate the jailbreaking process on your device. Follow these steps to install the jailbreak tool:
- Locate the downloaded jailbreak tool: Find the jailbreak tool that you downloaded in Step 2. It is typically in the form of a zip or executable file.
- Extract the files: If the jailbreak tool is in a zip file format, extract the contents to a folder on your computer using an extraction tool such as WinRAR or 7-Zip.
- Run the jailbreak tool: Double-click on the executable file of the jailbreak tool to run the application. Make sure your iPod Touch is still connected to the computer.
- Follow the on-screen instructions: The jailbreak tool will provide on-screen instructions guiding you through the jailbreaking process. Read and follow the instructions carefully to proceed.
- Wait for the jailbreak to complete: The jailbreak tool will begin the process of jailbreaking your iPod Touch. This process can take several minutes to complete. Be patient and do not disconnect your device during the process.
- Restart your iPod Touch: Once the jailbreak process is complete, you will be prompted to restart your iPod Touch. Follow the instructions provided by the jailbreak tool to restart your device.
During the installation process, ensure that you have a stable internet connection and sufficient battery life on your device. This will help ensure a smooth jailbreaking experience.
It’s important to note that the jailbreak tool you choose may have specific requirements or instructions. Make sure to read the documentation or any accompanying user guides provided by the jailbreak tool developer for any additional information.
Now that you have successfully installed the jailbreak tool, you are ready to proceed with the next steps and complete the jailbreaking process on your iPod Touch 4G.
Step 7: Jailbreak your iPod Touch
With the jailbreak tool installed and your iPod Touch connected to the computer, it’s time to initiate the jailbreaking process. Follow these steps to jailbreak your iPod Touch 4G:
- Launch the jailbreak tool: Open the jailbreak tool that you installed in the previous step. Ensure that your iPod Touch is still connected to the computer.
- Confirm device detection: The jailbreak tool should detect your iPod Touch automatically. Make sure that your device is recognized by the tool. If not, try reconnecting your device and relaunching the tool.
- Begin the jailbreak: Look for a button or option within the jailbreak tool that starts the jailbreaking process. Click on it to initiate the jailbreak.
- Follow the on-screen instructions: The jailbreak tool will provide you with step-by-step instructions on how to proceed with the jailbreak. Follow these instructions carefully to ensure a successful jailbreak.
- Wait for the jailbreak to complete: The jailbreak tool will now perform a series of tasks to jailbreak your iPod Touch. This process may take several minutes to complete. Do not disconnect your device during this time and refrain from using your iPod Touch.
- Confirm successful jailbreak: Once the jailbreaking process is complete, the jailbreak tool will display a message indicating the success of the jailbreak. It may also prompt you to restart your iPod Touch.
- Disconnect your iPod Touch: After confirming the successful jailbreak, safely disconnect your iPod Touch from the computer by unplugging the USB cable.
Congratulations! You have successfully jailbroken your iPod Touch 4G. Now, your device is ready to explore the exciting world of customization and third-party apps that come with jailbreaking.
Remember, while jailbreaking can offer unique advantages, it also comes with potential risks, such as security vulnerabilities and stability concerns. Make sure to research and download tweaks, themes, and apps only from reliable sources to enhance your jailbroken experience.
Now that your iPod Touch is jailbroken, it’s time to move on to the next step and install Cydia, the popular app store for jailbroken devices.
Step 8: Install Cydia
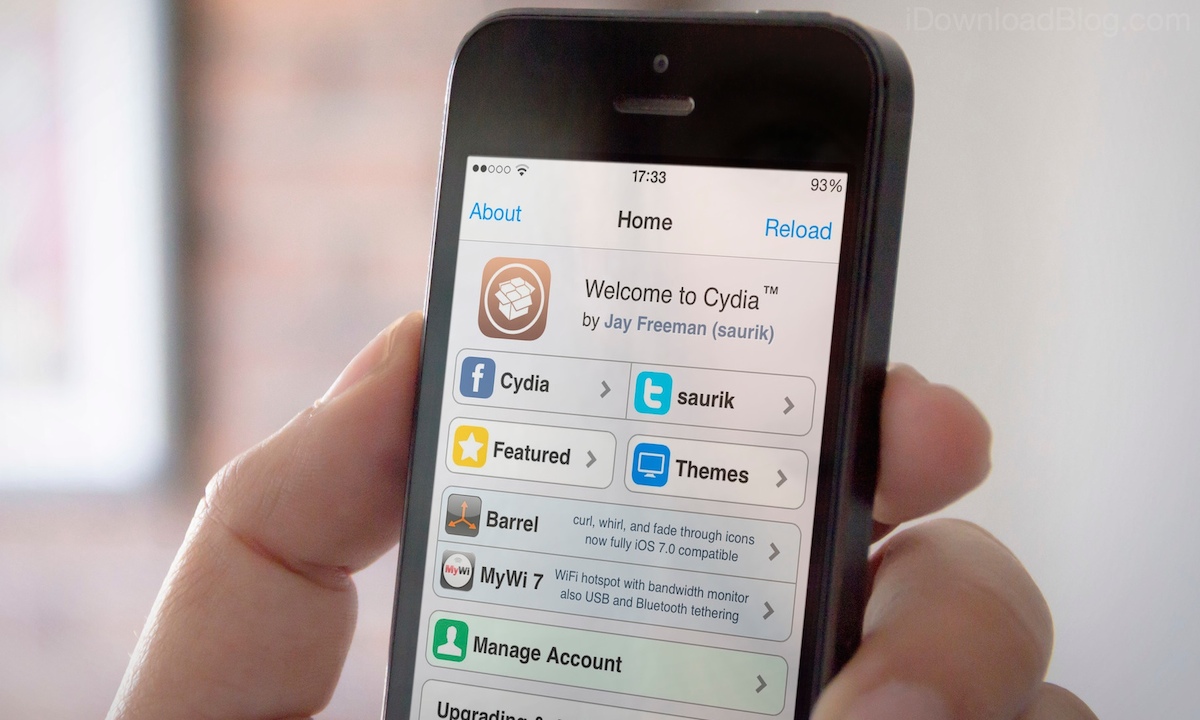
Cydia is the go-to app store for jailbroken devices, offering a vast range of tweaks, themes, and modifications that can enhance your iPod Touch 4G experience. Follow these steps to install Cydia on your jailbroken device:
- Launch Cydia: On your iPod Touch’s home screen, locate and tap on the Cydia app icon to launch the application.
- Initial setup: When you launch Cydia for the first time, it will need to perform some initial setup tasks. Allow Cydia to complete these tasks, which may involve configuring system files and repositories.
- Update packages: After the initial setup, Cydia will present you with various packages and updates available for installation. It’s important to update these packages to ensure compatibility and stability. Tap on the “Upgrade Essential” or “Upgrade All” button to begin the update process.
- Browse and install packages: Once the packages are updated, you can start exploring the vast library of tweaks, themes, and modifications available in Cydia. Browse through the different categories and packages, read descriptions, and reviews, and choose the ones you want to install.
- Install selected packages: When you find a package you want to install, tap on it to access the details page. From here, tap on the “Install” button and follow the on-screen prompts to complete the installation process for the selected package.
- Respring your iPod Touch: After installing a package, Cydia may prompt you to respring your device. This process allows the changes to take effect and ensures smooth functioning of the installed tweaks. Follow the prompts to respring your iPod Touch.
- Enjoy your newly installed tweaks: Once your iPod Touch has resprung, the installed tweaks and modifications will be ready to use. You can access them through the Settings app or by using dedicated icons that may have been added to your device’s home screen.
Remember to explore Cydia carefully and install packages from trustworthy sources. Some packages may require additional dependencies or specific settings, so read the instructions and descriptions thoroughly before installation.
With Cydia installed and functional on your iPod Touch 4G, you can now enjoy the vast customization options and additional functionalities that come with a jailbroken device.
Keep in mind that Cydia also provides tools for managing and removing installed packages, allowing you to customize and tweak your device as per your preferences.
Now that you have successfully installed Cydia, you can proceed to the final step and restore your data and settings to complete the jailbreaking process.
Step 9: Restore your data and settings
Now that you have successfully jailbroken your iPod Touch 4G and installed Cydia, it’s time to restore your data and settings. This step will allow you to bring back your previously backed-up information and ensure a seamless transition to your jailbroken device. Follow these steps to restore your data and settings:
- Connect your iPod Touch to your computer: Use the USB cable to connect your iPod Touch 4G to your computer. Ensure that iTunes is open and running on your computer.
- Launch iTunes: Once your device is connected, open iTunes on your computer. It should recognize your iPod Touch and display it in the iTunes interface.
- Select your iPod Touch: Click on your iPod Touch device icon in the upper-left corner of the iTunes window. This will take you to the device summary page.
- Restore your backup: On the device summary page, you will find a section titled “Backups.” Choose the backup that you created before starting the jailbreak process.
- Start the restoration process: Click on the “Restore Backup” button to initiate the restoration process. You may be prompted to enter your Apple ID password to confirm the action.
- Wait for the restore to complete: iTunes will now restore your data and settings to your iPod Touch. This process may take some time, depending on the size of your backup and the amount of data being restored.
- Restart your iPod Touch: Once the restoration process is complete, you will be prompted to restart your iPod Touch. Follow the instructions provided by iTunes to restart your device.
After your iPod Touch restarts, you will find that all your previously backed-up data and settings have been restored to your device. This includes your apps, contacts, messages, photos, and more.
It’s important to note that by restoring your data and settings, you will retain your jailbreak and the installed tweaks and modifications. You can now continue exploring Cydia and further customize your device.
Congratulations! You have successfully completed the jailbreaking process and restored your data and settings. Enjoy the newfound freedom and customization options on your jailbroken iPod Touch 4G.
Conclusion
Congratulations on successfully jailbreaking your iPod Touch 4G! You have unlocked a world of customization and additional features, thanks to the jailbreak process and the installation of Cydia. By following the step-by-step guide, you have gained the knowledge and skills to take full control of your device and explore a wide range of tweaks, themes, and modifications.
It’s important to remember that jailbreaking your iPod Touch 4G comes with some risks, including the possibility of voiding your warranty and encountering stability or security issues. It’s crucial to thoroughly research and understand the implications of jailbreaking before proceeding. Additionally, always exercise caution when installing tweaks and modifications from third-party sources and ensure they come from trusted developers.
With a jailbroken device, you have the freedom to customize your iPod Touch to reflect your personal style and preferences. From enhancing the user interface to gaining access to exclusive apps and functionalities, the possibilities are endless. However, it’s necessary to approach jailbreaking responsibly, maintain regular backups of your data, and stay updated on the latest security patches and updates for both your device and installed tweaks.
We hope this guide has provided you with the necessary knowledge and confidence to navigate the jailbreaking process. Remember to always stay informed, consider the risks, and enjoy the new possibilities that jailbreaking brings to your iPod Touch 4G.