Introduction
Welcome to our comprehensive guide on how to build your own 4G signal booster. In today’s digital age where nearly everything relies on a stable and fast internet connection, having a strong 4G signal is crucial. Whether you’re living in a remote area with poor signal reception or you simply want to improve the signal strength in your home or workplace, building your own 4G signal booster can be a cost-effective and rewarding solution.
A 4G signal booster, also known as a cellular repeater or amplifier, is a device that enhances the signal strength and coverage of your existing 4G network. It works by amplifying the weak signal from the nearest cell tower and rebroadcasting it, ensuring a stronger and more reliable signal throughout your desired area.
While there are many commercial 4G signal boosters available on the market, building your own has its advantages. Not only can it save you money, but it also allows for customization and flexibility to suit your specific needs.
This guide will walk you through each step of the process, from understanding the components needed to building the booster and testing its performance. We’ll also provide tips and tricks for maximizing its efficiency while troubleshooting common issues that may arise.
It’s important to note that building a 4G signal booster requires basic technical knowledge and familiarity with electronic components. If you’re not confident in your abilities, it’s always best to seek professional help or opt for a commercial solution. With that said, let’s dive into the world of 4G signal boosters and discover how to build one for yourself.
Understanding 4G Signal Boosters
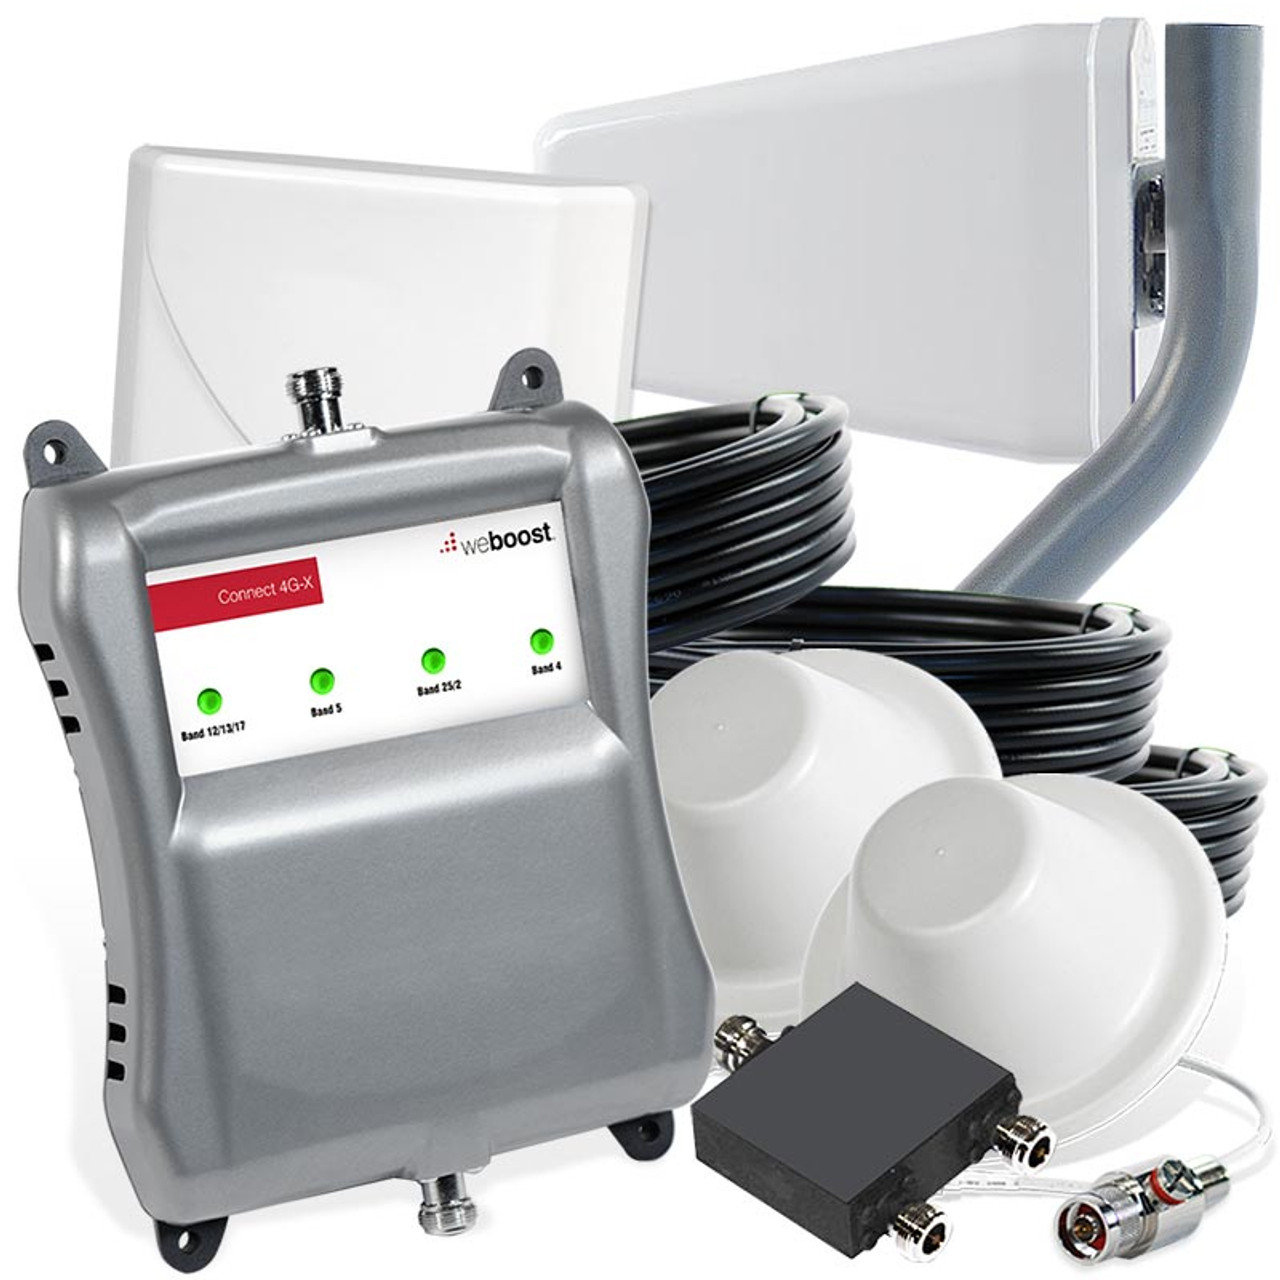
Before we begin building our DIY 4G signal booster, it’s crucial to have a thorough understanding of how these devices work. A 4G signal booster consists of three main components: an external antenna, an amplifier, and an internal antenna.
The external antenna is responsible for capturing the weak 4G signal from the nearest cell tower. It should be mounted in a location where it can receive the strongest signal possible. The amplifier then takes the captured signal and amplifies it to a higher power level. Finally, the internal antenna rebroadcasts the boosted signal within the desired area.
When setting up a 4G signal booster, it’s important to consider the frequency bands supported by your provider. Each cellular network operates on specific frequency bands, so it’s crucial to choose a booster that is compatible with the frequency band used by your network.
Furthermore, 4G signal boosters come in different types, including cradle boosters, plug-and-play boosters, and building-wide boosters. Cradle boosters are designed for a single device and require the device to be placed in the cradle to benefit from boosted signal. Plug-and-play boosters, on the other hand, can improve signal strength for multiple devices simultaneously. Building-wide boosters provide coverage for larger areas such as homes, offices, or commercial buildings.
It’s worth noting that while 4G signal boosters can significantly improve signal strength and coverage, they cannot create a signal where there is none. In other words, if you’re in an area with no 4G coverage, a signal booster won’t be able to help. The booster simply amplifies the existing signal to enhance its reach and strength.
Another important aspect to consider while using a 4G signal booster is the legality of its usage. Different countries have different regulations regarding the use of signal boosters, so it’s crucial to research and ensure that you’re compliant with local laws and regulations.
By understanding the components and functionality of a 4G signal booster, you’ll be better equipped to build and optimize your own booster in the following sections. So, let’s move on to the next step and gather the necessary components.
Components Needed for Building a 4G Signal Booster
Building your own 4G signal booster requires a few essential components. Before you get started, make sure you have the following items:
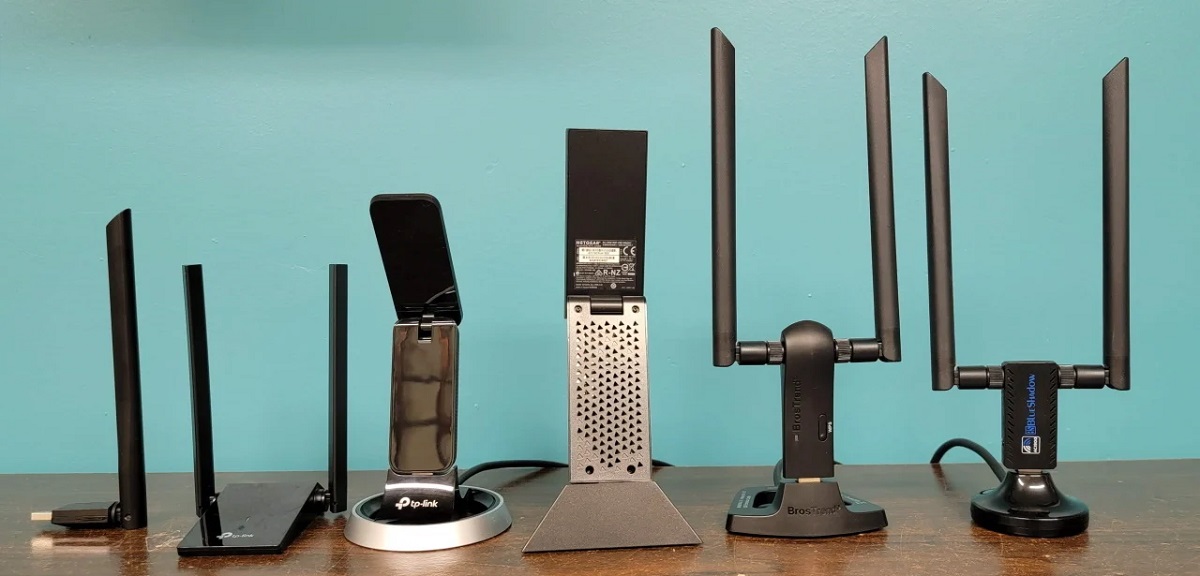
- External antenna: This is responsible for capturing the weak 4G signal from the nearest cell tower. You’ll need to choose an antenna that is compatible with the frequency bands used by your cellular network. There are different types of external antennas available, including directional antennas, omnidirectional antennas, and Yagi antennas. Consider the coverage area and signal strength in your location when selecting the appropriate antenna.
- Amplifier: The amplifier boosts the signal strength received by the external antenna. It’s important to choose an amplifier that is compatible with the frequency bands used by your network. Amplifiers can vary in terms of power output, gain, and other features, so consider your specific requirements when selecting the right one.
- Internal antenna: The internal antenna rebroadcasts the boosted signal within the desired area. Like the external antenna, it’s important to choose an internal antenna that is compatible with the frequency bands used by your cellular network. Internal antennas come in various types, including dome antennas, panel antennas, and ceiling-mounted antennas. Select the one that best suits your coverage needs.
- Coaxial cables: Coaxial cables are used to connect the external antenna, amplifier, and internal antenna. Ensure that you choose high-quality cables that are the appropriate length for your setup.
- Power supply: Most 4G signal boosters require a power supply to operate. Make sure you have a suitable power supply that meets the requirements of your amplifier.
- Mounting hardware: Depending on your setup, you may need mounting hardware such as brackets, clamps, or poles to securely install the external and internal antennas.
Additionally, it’s recommended to have basic tools like a drill, screws, and cable ties for the installation process. Before purchasing any components, double-check the compatibility with your network’s frequency bands and ensure that they meet the necessary certifications and standards.
With these components in hand, you’re now ready to move on to the next section, where we’ll guide you through the step-by-step process of building your DIY 4G signal booster.
Step-by-Step Guide to Building a DIY 4G Signal Booster
Now that you have gathered all the necessary components, let’s dive into the step-by-step process of building your own 4G signal booster:
- Select an optimal location: Find a suitable location to install your external antenna. It should be positioned to receive the best possible 4G signal from the nearest cell tower. The higher the antenna is mounted, the better the signal reception.
- Install the external antenna: Use the mounting hardware to securely install the external antenna in the chosen location. Ensure that it is firmly fixed and aligned properly.
- Connect the coaxial cable: Connect one end of the coaxial cable to the external antenna and the other end to the amplifier’s input port. Ensure the cable is properly connected and tightened.
- Mount the amplifier: Find a suitable location to mount the amplifier. It should be close to a power source and away from excessive heat or moisture. Use the provided mounting hardware to secure the amplifier in place.
- Connect the internal antenna: Attach one end of the coaxial cable to the output port of the amplifier and the other end to the internal antenna. Make sure the connections are secure and tight.
- Power on the system: Plug in the power supply to the amplifier and connect it to a power source. Turn on the amplifier and ensure it is receiving power.
- Test the signal: With the signal booster powered on, check the signal strength on your connected devices. You should notice an improvement in the signal strength and coverage. Walk around the area to ensure that the signal is being rebroadcasted effectively.
- Adjust and optimize: If needed, fine-tune the position of the external and internal antennas to achieve the best possible signal strength and coverage. Make small adjustments and test the signal again until you are satisfied with the results.
It’s important to note that the effectiveness of your DIY 4G signal booster will depend on various factors such as the signal strength in your location, the quality of the components used, and proper installation. Experimenting with different locations for the external and internal antennas may be necessary to find the optimal setup.
With the step-by-step process complete, you are now ready to enjoy a stronger and more reliable 4G signal. However, before we conclude, let’s move on to the next section, where we will discuss testing and calibrating your 4G signal booster to ensure optimal performance.
Testing and Calibrating Your 4G Signal Booster
Once you have built and installed your DIY 4G signal booster, it’s essential to test and calibrate it to ensure optimal performance. Here are some steps to follow:
- Check signal strength: Use a signal strength app or the signal bars on your mobile device to measure the improvement in signal strength. Compare the signal strength with and without the booster to gauge its effectiveness.
- Test different areas: Walk around the boosted area with your mobile devices and test the signal strength in different locations. This will help you identify any weak spots or areas that may require adjustment.
- Adjust antenna positions: If you notice any areas with weak signal strength, consider adjusting the position and orientation of the external and internal antennas. Small changes in their placement can have a significant impact on signal reception and coverage.
- Monitor data speeds: Run speed tests using a reliable internet speed testing tool. Measure the download and upload speeds to ensure that your booster is not only improving signal strength but also enhancing data transfer speeds.
- Optimize coverage area: If you’re using a building-wide booster, evaluate the coverage area within your home or office. Make sure that the boosted signal reaches all desired areas without any dead zones or significant signal drop-offs.
During the testing phase, it’s essential to have patience and be willing to make adjustments as needed. Experiment with different antenna positions and test the signal strength in various parts of the boosted area to achieve the best results.
If you notice any issues or unexpected behavior with your 4G signal booster, refer to the troubleshooting section in the upcoming section of this guide. Understanding and resolving common issues can help you get the most out of your DIY signal booster.
By thoroughly testing and calibrating your 4G signal booster, you can fine-tune its performance and ensure a stronger and more reliable connection throughout your desired coverage area. Now that you’re up to speed with testing and calibrating, let’s move on to the next section where we’ll provide you with tips and tricks to maximize the performance of your 4G signal booster.
Tips and Tricks for Maximizing the Performance of Your 4G Signal Booster
Now that your DIY 4G signal booster is up and running, here are some tips and tricks to help you make the most out of its performance:
- Optimize antenna placement: Continuously experiment with the position and orientation of the external and internal antennas. Small adjustments can have a significant impact on signal strength and coverage. Consider using a signal strength app or a visual signal meter to locate the best spots.
- Minimize cable length: Keep the length of the coaxial cable between the external antenna and the amplifier as short as possible. Excessive cable length can introduce signal loss and decrease overall performance.
- Use high-quality components: Invest in high-quality components to ensure optimal performance and durability. Cheap or low-quality cables, antennas, or amplifiers may not provide long-lasting and consistent results.
- Avoid signal interference: Keep the external and internal antennas away from potential sources of interference, such as large metal objects, electronics, or obstructive buildings. This can prevent signal degradation and maximize the booster’s performance.
- Regularly clean and inspect the components: Over time, dust, dirt, and other debris can accumulate on the antennas, affecting their performance. Regularly clean the antennas and inspect all components to ensure they are in good working condition.
- Stay informed about network changes: Cellular networks are constantly evolving, with new cell towers and frequency bands being added. Stay updated with your network provider to know about any changes that could affect the compatibility and performance of your signal booster.
- Comply with local regulations: Make sure you comply with all local laws and regulations pertaining to the use of signal boosters. Different countries have specific guidelines and restrictions, so ensure that you’re using your signal booster legally and without causing interference to other users.
By implementing these tips and tricks, you’ll be able to maximize the performance and effectiveness of your DIY 4G signal booster. Regular maintenance and adjustments will help maintain its performance over time.
However, if you encounter any issues or problems, refer to the troubleshooting section in the upcoming part of this guide. It provides solutions to common problems and helps you troubleshoot any challenges you may face with your signal booster.
With these tips in mind, you’re well on your way to enjoying a stronger and more reliable 4G signal. Next, let’s move on to the final section of this guide, where we’ll discuss how to troubleshoot common issues with your 4G signal booster.
Troubleshooting Common Issues with 4G Signal Boosters
While 4G signal boosters are an effective solution for enhancing signal strength and coverage, you may encounter some common issues along the way. Here are a few troubleshooting steps to help you address these issues:
- Weak or no signal: If you’re experiencing a weak or no signal, check the placement of your external antenna. Ensure that it is positioned in an area with the best possible signal reception. You can use a signal strength app or visual signal meter to aid in finding the optimal location.
- Signal oscillation: If you notice fluctuations or oscillations in signal strength, it may be due to misalignment of the external antenna. Adjust the position and orientation of the antenna to stabilize the signal. Additionally, check for any loose connectors or damaged cables that may be causing interference.
- Interference or noise: If you’re experiencing interference or noise in the boosted signal, ensure that the external and internal antennas are away from other electronic devices and potential sources of interference. Keeping them clear of large metal objects or obstructive buildings can also help minimize interference.
- Overload or oscillation: If your signal booster exhibits overload or oscillation, it may be caused by excessive signal strength. Try placing an attenuator between the external antenna and the amplifier to reduce the incoming signal to a manageable level.
- Poor data speeds: If your boosted signal isn’t translating into improved data speeds, make sure your network provider supports the frequency bands used by your signal booster. It’s also essential to ensure that you have a stable and reliable internet connection from your service provider.
- Power issues: If your signal booster is not receiving power or experiencing power-related problems, double-check all connections, including the power supply and cables. Make sure everything is properly connected and that the power supply meets the requirements of your amplifier.
If you’ve followed these troubleshooting steps and are still experiencing issues with your 4G signal booster, it may be beneficial to consult with a professional or contact the manufacturer for further assistance. They can provide specialized support and guidance to help resolve any persistent problems you may encounter.
By pinpointing and resolving these common issues, you’ll be able to enjoy the full benefits of your DIY 4G signal booster. Now that we’ve covered troubleshooting, let’s wrap up this guide.
Conclusion
Congratulations! You have reached the end of our guide on how to build a DIY 4G signal booster. By following the step-by-step instructions and implementing the tips and tricks provided, you now have the knowledge and tools to enhance your 4G signal strength and coverage.
A DIY 4G signal booster can be a cost-effective solution, allowing you to tailor it to your specific needs and location. However, it’s important to remember that building a signal booster requires technical knowledge and familiarity with electronic components. If you’re unsure or uncomfortable with the process, it’s always best to seek professional help or opt for a commercial solution.
Throughout this guide, we explored the components needed for building a 4G signal booster, the step-by-step process of constructing and testing it, and various tips and troubleshooting suggestions. By understanding the fundamentals of signal boosters and being proactive in resolving any issues, you can ensure optimal performance and enjoy a stronger and more reliable 4G signal.
Remember to comply with local regulations and keep yourself informed about any network changes that may affect your signal booster’s compatibility and performance. Regular maintenance, such as cleaning the components and inspecting for any damage, will help prolong the lifespan of your signal booster.
We hope that this guide has been informative and helpful in your journey to improve your 4G signal strength. Enjoy the benefits of a stronger signal for faster browsing, seamless streaming, and improved communication.
Thank you for choosing our guide, and happy boosting!