Introduction
Welcome to the guide on how to install Windows on a mini PC! Mini PCs have gained popularity for their compact size and versatility, making them excellent choices for anything from basic computing tasks to multimedia entertainment centers. If you’ve recently acquired a mini PC or are planning to do so, this article will walk you through the process of installing Windows, ensuring that your device is ready to accomplish all your computing needs.
Installing Windows on a mini PC may seem daunting, but with the right guidance, it can be a straightforward and rewarding experience. By following the step-by-step instructions outlined in this guide, you’ll have your mini PC up and running with Windows in no time.
Before diving into the installation process, it’s essential to prepare yourself and your mini PC. Make sure you have the necessary equipment and an understanding of the basic concepts involved. This includes having a bootable USB drive, familiarity with BIOS settings, and a valid license for the Windows version you plan to install.
Throughout this guide, we’ll cover each step in detail, providing clear instructions and useful tips to ensure a successful installation. We’ll start by preparing for installation, creating a bootable USB drive, and configuring the BIOS settings. Then, we’ll proceed with the actual installation process and guide you on completing the setup.
Once Windows is installed, we’ll walk you through installing essential drivers and updates, customizing Windows settings to suit your preferences, and installing the necessary software to enhance your experience. Lastly, we’ll discuss the importance of ensuring your mini PC’s security and provide tips on securing your new Windows installation.
By the end of this guide, you’ll be equipped with the knowledge and confidence to install Windows on your mini PC smoothly. So, let’s get started and transform your mini PC into a powerful and efficient computing tool!
Step 1: Prepare for Installation
Before you embark on the Windows installation process, it’s crucial to ensure that you are fully prepared. This step will help you gather the necessary tools and information to proceed smoothly.
The first thing you’ll need is a bootable USB drive containing the Windows installation files. To create a bootable USB drive, you’ll require a blank USB stick with a minimum capacity of 8GB. Make sure the USB drive is formatted correctly and doesn’t have any important data on it, as the process will erase its contents.
Next, you’ll need a valid license for the Windows version you plan to install. This can be either a retail copy or a digital license key. Ensure that you have easy access to this license information during the installation process.
It’s also a good idea to back up any important files and documents you have on your mini PC. While the installation process usually does not delete existing files, it’s better to be safe than sorry. Create a backup on an external storage device or utilizing an online cloud storage service to safeguard your data.
Additionally, make a note of the make and model of your mini PC, as well as any specific hardware details that may be important for driver installation later on. This information will help ensure that you install the correct drivers and updates for your device.
Lastly, make sure you have a stable internet connection. This will allow you to download any necessary updates and drivers during the installation process, ensuring that your operating system is up to date and your mini PC is functioning optimally.
By taking the time to properly prepare for the installation process, you’ll set yourself up for a smoother and hassle-free experience. With a bootable USB drive, a valid license, a backup of your important files, knowledge of your mini PC’s details, and a stable internet connection, you’re now ready to move on to the next step: creating a bootable USB drive.
Step 2: Create a Bootable USB Drive
Now that you’re prepared, it’s time to create a bootable USB drive that contains the Windows installation files. This will allow you to start the installation process on your mini PC.
To create a bootable USB drive, you’ll need a tool like Rufus, a popular and easy-to-use software for this purpose. Start by downloading Rufus from the official website and install it on your computer.
Once installed, insert your blank USB drive into a USB port on your computer. Launch Rufus and select your USB drive from the device dropdown menu. Make sure that Rufus has automatically detected the correct USB drive, as selecting the wrong one may result in data loss.
Next, you’ll need to select the Windows ISO file that you downloaded or have on hand. In Rufus, click on the dropdown menu next to “Boot selection” and browse for the Windows ISO file. Once selected, Rufus should automatically configure the necessary settings for the bootable USB drive.
Ensure that the partition scheme is set to “MBR” and the file system is set to “FAT32”. You can leave the other settings as they are, as they should be preconfigured correctly. However, double-check that the “Create a bootable disk using” option is selected and that it is set to “ISO Image” if it isn’t already.
Once you’ve reviewed all the settings, double-checking that everything is correct, click on the “Start” button in Rufus. A warning message will appear, stating that all data on the selected USB drive will be destroyed. Confirm that you have the correct drive selected and click on “OK” to proceed.
Rufus will now begin creating the bootable USB drive. This process may take some time, so have patience. Once it’s completed, you’ll see a message indicating that the process was successful.
With your bootable USB drive ready, you’ve now completed an essential step in installing Windows on your mini PC. In the next step, we’ll guide you on how to configure the BIOS settings to ensure a seamless installation process.
Step 3: Configure BIOS Settings
Configuring the BIOS settings is a crucial step to ensure that your mini PC recognizes and boots from the bootable USB drive. The BIOS, or Basic Input/Output System, is a firmware that runs before the operating system, and accessing it allows you to make important hardware-level changes.
Start by restarting your mini PC and enter the BIOS setup. The key to access the BIOS may vary depending on your mini PC’s manufacturer, but commonly used keys include F2, Del, Esc, or F10. Refer to your mini PC’s user manual or the manufacturer’s website for the exact key.
Once inside the BIOS setup, navigate to the “Boot” or “Boot Priority” section. Here, you’ll find a list of devices that your mini PC can boot from. Change the boot priority so that the USB drive is set as the primary boot device. Some BIOS screens allow you to use the “+” and “-” keys to rearrange the boot order, while others may require you to select a device and press a designated key to move it up or down the list.
Make sure to save your changes before exiting the BIOS. This is typically done by pressing the F10 key or selecting the “Save and Exit” option. Confirm the changes and restart your mini PC.
Upon restarting, your mini PC should now boot from the USB drive. If it doesn’t, restart again and enter the BIOS setup to double-check the boot order. Ensure that the USB drive is properly connected and functional.
Configuring the BIOS settings correctly is essential in ensuring a successful Windows installation on your mini PC. It may take a few attempts to get the settings right, but once your mini PC boots from the USB drive, you’re all set to proceed with the installation process in the next step.
Step 4: Install Windows
With your mini PC configured to boot from the USB drive, it’s time to proceed with the installation of Windows. Follow these steps to install the operating system on your mini PC:
- Ensure that the bootable USB drive containing the Windows installation files is inserted into your mini PC.
- Restart your mini PC and let it boot from the USB drive. You should see the Windows installation screen.
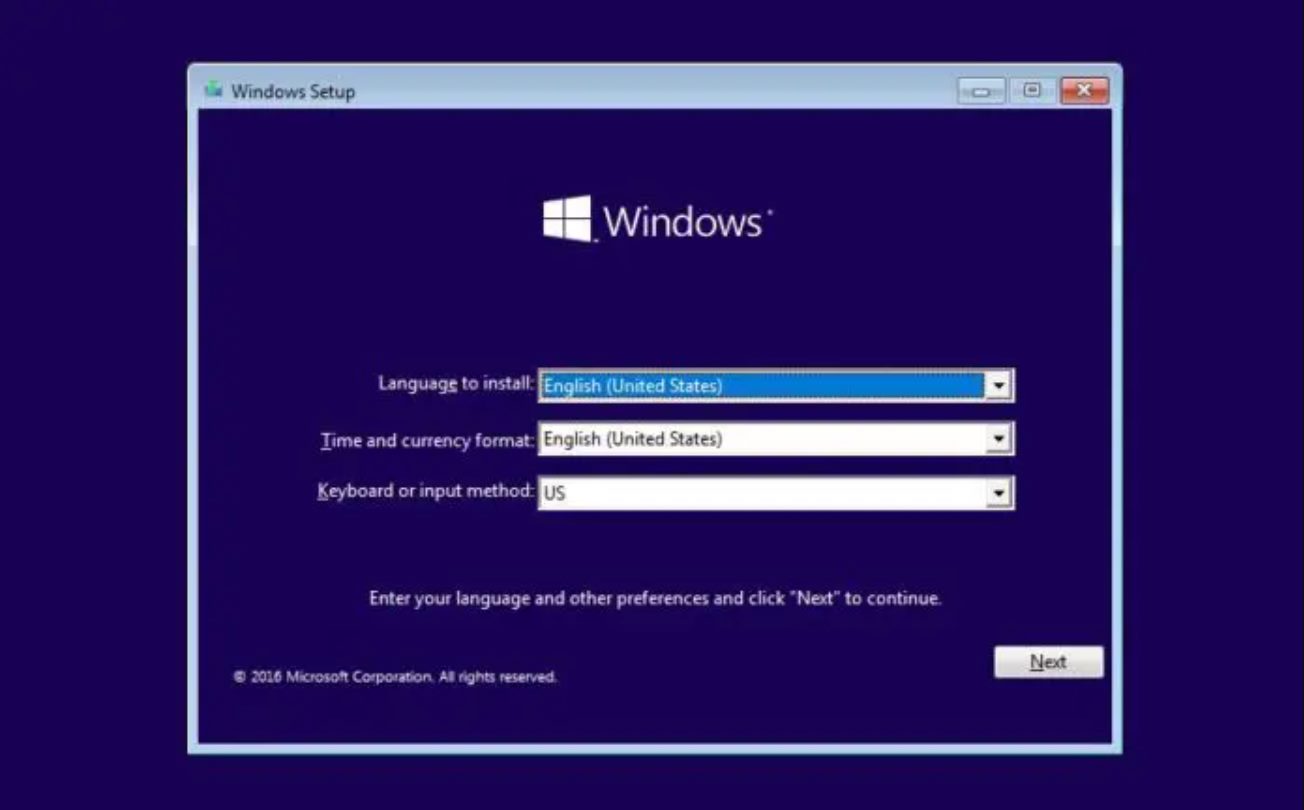
- Select your language preferences, time and currency format, and keyboard layout. Click on the “Next” button to continue.
- Click on the “Install Now” button to start the installation process.
- Enter your valid license key when prompted and click on the “Next” button.
- Read and accept the terms of the license agreement, then click on the “Next” button.
- Choose the type of installation you want. If you’re installing Windows on a new mini PC, select “Custom: Install Windows only (advanced)”.
- Select the partition where you want to install Windows and click on the “Next” button. If the drive has existing partitions, you may need to delete them first. Be cautious and double-check that you’re selecting the correct partition.
- Windows will now begin the installation process. The process may take some time, so sit back and be patient.
- Once the installation is complete, your mini PC will restart.
Follow the on-screen prompts and provide any additional information as required, such as setting up your user account and choosing privacy settings. Windows will guide you through these steps to finalize the installation process.
After completing these steps, your mini PC will have Windows installed and ready to use. Congratulations! You’ve successfully installed Windows on your mini PC. In the next step, we’ll cover post-installation tasks, such as driver installation and system updates.
Step 5: Complete the Installation Process
After Windows is installed on your mini PC, there are a few important tasks to complete to ensure a smooth and fully functional operating system. Follow these steps to complete the installation process:
- Once your mini PC has restarted, you’ll be prompted to set up your user account. Enter your preferred username and password, and any other requested details. Click on the “Next” button to continue.
- Windows will offer various options to personalize your experience, such as choosing a color theme, enabling or disabling Cortana, and customizing privacy settings. Select your preferences and click on the “Next” button to proceed.
- Next, Windows will check for and install any available updates. It’s crucial to keep your operating system up to date for security and performance reasons. Ensure that your mini PC is connected to the internet, and let Windows download and install the necessary updates. This step may take some time, depending on your internet speed and the number of updates.
- After the updates are installed, your mini PC may need to restart again. Allow it to do so, and Windows will continue the installation process.
- Once your mini PC has restarted, it’s a good idea to install the necessary drivers for your hardware components. Check the manufacturer’s website for your mini PC model and download the latest drivers for your specific operating system. Install these drivers to ensure optimal performance and compatibility.
- Along with drivers, you may also need to install any additional software or applications that are essential for your needs. Examples include antivirus software, productivity tools, media players, or specific device management software.
- Take some time to explore the Windows settings and customize them to your liking. Adjust display settings, update power management preferences, configure network settings, and personalize the desktop background and theme.
By completing these steps, you’ll have successfully completed the installation process and set up your mini PC with Windows. It’s important to regularly update your drivers and software as new versions are released to ensure optimal performance and security. Enjoy exploring and using your mini PC with the full functionality of Windows!
Step 6: Install Drivers and Updates
With Windows installed on your mini PC, it’s important to install the necessary drivers and updates to ensure optimal performance and compatibility. This step will guide you through the process of installing drivers and keeping your system up to date.
Firstly, check the manufacturer’s website for your mini PC model. Look for the “Support” or “Downloads” section, where you can find the latest drivers specifically designed for your hardware components and operating system. Download the appropriate drivers and follow the instructions provided by the manufacturer to install them.
Common drivers that you may need to install include those for the graphics card, audio devices, network adapters, and chipset. Pay attention to any special instructions or prerequisites mentioned by the manufacturer, as they may be crucial for proper installation.
Additionally, Windows has a built-in Windows Update feature that enables you to download and install the latest updates provided by Microsoft. To access Windows Update, go to the Start menu, click on “Settings,” and then choose “Update & Security.” From there, click on the “Check for updates” button to search for available updates.
Ensure that your mini PC is connected to the internet during this process to download and install the updates. It may take some time, depending on the size and number of updates available. Restart your mini PC if prompted to complete the installation of certain updates.
Regularly checking for and installing driver updates and Windows updates will help keep your system running smoothly, fix security vulnerabilities, and improve compatibility with newer software applications.
Once you’ve installed the necessary drivers and updates, consider configuring automatic updates in the Windows Update settings. This will ensure that your mini PC stays up to date without requiring manual intervention.
Remember to periodically check the manufacturer’s website for any new driver releases that might improve performance or address any known issues. Updating your drivers is an ongoing process that helps keep your mini PC optimized and functioning at its best.
By following these steps and installing the latest drivers and updates, you’ll be ready to make the most of your mini PC’s capabilities and enjoy a stable and efficient computing experience.
Step 7: Customize Windows Settings
Windows provides a wealth of customization options that allow you to personalize your mini PC to suit your preferences and needs. Customizing the Windows settings will help you maximize productivity, enhance visual appeal, and tailor the operating system to your specific requirements. Follow these steps to customize Windows settings:
- Start by accessing the Settings menu. You can do this by clicking on the Start button and selecting “Settings.” Alternatively, you can press the Windows key + I to open the Settings directly.
- Explore the different categories within the Settings menu, such as System, Personalization, Accounts, and more. Each category contains specific settings that you can customize.
- Personalization: Customize the desktop background, select a color scheme, and choose your preferred accent color. You can also customize the lock screen, taskbar, and Start menu to suit your style.
- System: Adjust the display settings, manage notifications, configure power and sleep settings, and personalize the taskbar, among other options.
- Accounts: Manage your user account settings, including signing in options, synchronization settings, and managing other accounts on your mini PC.
- Privacy: Review and configure privacy settings to control how your mini PC handles your data and interacts with other devices and apps.
- Update & Security: Configure Windows Update settings, manage antivirus and firewall settings, and enable important security features such as BitLocker.
- Accessibility: Customize accessibility options to make Windows easier to use for individuals with visual, auditory, or mobility impairments.
Take some time to familiarize yourself with the different settings and adjust them according to your preferences. Experiment with different options to find what works best for you.
In addition to the built-in settings, you can also explore the Microsoft Store to find and install apps and extensions that enhance your Windows experience. Browse various categories such as productivity, entertainment, utilities, and more to discover apps that meet your specific needs.
Customizing the Windows settings allows you to create a tailored and personalized environment that fits your workflow and preferences. Take advantage of the extensive customization options available in Windows to make your mini PC truly your own.
Step 8: Install Essential Software
Once you’ve customized the Windows settings, it’s time to install essential software that will enhance the functionality and productivity of your mini PC. While the specific software you need may vary based on your requirements, below are some general categories to consider:
- Antivirus Software: Protect your mini PC from malware and other security threats by installing a reputable antivirus software. Choose a reliable program that offers real-time scanning, automatic updates, and robust protection against various types of threats.
- Productivity Tools: Install productivity software such as word processors, spreadsheets, and presentation tools that will help you create and manage documents effectively. Microsoft Office suite is a popular choice, but there are also free alternatives like LibreOffice and Google Workspace.
- Internet Browsers: Install one or more internet browsers, such as Google Chrome, Mozilla Firefox, or Microsoft Edge. Having multiple browsers can be helpful for compatibility testing and flexibility in your browsing experience.
- Media Players: Install a media player to enjoy your favorite music, movies, and videos. Popular options include VLC Media Player, Windows Media Player, and iTunes.
- File Compression/Extraction: Install a file compression and extraction program like WinRAR or 7-Zip. These tools allow you to compress and decompress files and folders, making it easier to manage and share large files.
- Cloud Storage: Set up a cloud storage service such as Google Drive, Dropbox, or Microsoft OneDrive. These services offer convenient and secure cloud storage, allowing you to access your files from anywhere and easily share them with others.
- Backup Software: Consider installing a backup solution to regularly back up your important files and folders. This ensures that you have a copy of your data in case of hardware failure, accidental deletion, or other unforeseen events.
- Specialized Software: Install any specialized software that aligns with your specific needs, such as graphic design tools, video editing software, programming environments, or accounting software.
Take advantage of the vast range of software options available to enhance your mini PC’s capabilities and cater to your unique requirements. Be mindful of downloading software from reputable sources to ensure they are safe and free from malware.
Remember, it’s essential to periodically update your software to maintain their performance, security, and stability. Set up automatic updates wherever possible, or regularly check for updates to keep your software up to date.
By installing essential software on your mini PC, you’ll be equipped with the tools necessary to stay productive, entertained, and efficient in your computing tasks.
Step 9: Securely Set Up Windows
Securing your mini PC is crucial to protect your data, privacy, and overall system integrity. By following these steps, you can ensure a secure setup for your Windows operating system:
- Enable Windows Security Features: Activate built-in security features such as Windows Defender, which provides real-time protection against viruses, malware, and other threats. Keep Windows Defender and other security features updated regularly to stay protected.
- Use a Strong Password: Set a strong and unique password for your user account. Use a combination of uppercase and lowercase letters, numbers, and special characters. Consider using a password manager to securely store your passwords and enable two-factor authentication whenever possible for an extra layer of security.
- Set up a Firewall: Windows includes a built-in firewall that monitors and controls incoming and outgoing network traffic. Ensure that the firewall is enabled to block unauthorized access to your mini PC.
- Regularly Update Software: Keep all software, including the operating system, drivers, and installed applications, up to date. Software updates often include important security patches that address vulnerabilities.
- Be Cautious of Email Attachments and Downloads: Exercise caution when opening email attachments or downloading files from unfamiliar sources. Malicious files can compromise your mini PC’s security. Scan files with antivirus software before opening or executing them.
- Use a Virtual Private Network (VPN): If you frequently connect to public Wi-Fi networks, consider using a VPN to encrypt your internet traffic and protect your online activities from prying eyes.
- Regularly Backup Your Data: Set up a backup solution to regularly back up your important files. This ensures that you have a copy of your data in case of accidental deletion, hardware failure, or other unforeseen circumstances.
- Practice Safe Browsing Habits: Be cautious when browsing the internet and avoid clicking on suspicious links. Stick to trusted websites, and if a website asks for sensitive information, ensure that it is secured with HTTPS.
- Periodically Review Privacy Settings: Regularly review and update your privacy settings to control how your mini PC handles your data and interacts with apps and services.
- Educate Yourself about Common Security Best Practices: Stay informed about common security threats and best practices to protect your mini PC. Stay updated on the latest security trends and follow recommended measures to keep your system secure.
By following these steps and adopting safe computing practices, you can significantly enhance the security of your mini PC and enjoy a safer computing experience.
Conclusion
Congratulations! You’ve successfully installed Windows on your mini PC and completed the essential steps to set it up. By following this guide, you’ve prepared your mini PC, created a bootable USB drive, configured the BIOS settings, installed Windows, customized the settings, installed necessary software, and secured your system.
With Windows installed, your mini PC is now a powerful computing tool ready to serve your needs. As you explore and use your mini PC, continue to keep it updated with the latest drivers and Windows updates to ensure optimal performance and security.
Remember to regularly back up your important files and practice safe computing habits, such as using strong passwords, being cautious of emails and downloads, and keeping your antivirus software up to date.
Customize your mini PC to suit your preferences, downloading and installing additional software as needed for productivity, entertainment, and specialized tasks.
As technology continues to evolve, stay curious and open to learning new ways to maximize your mini PC’s potential. Take advantage of online resources, forums, and tutorials to further enhance your knowledge and skills.
We hope this guide has been helpful in guiding you through the installation process and setting up your mini PC with Windows. Enjoy your mini PC and make the most of its compact size and versatility!