Introduction
Welcome to our guide on how to install a wireless Ring doorbell. The Ring doorbell is a popular home security device that allows you to monitor your front door and receive notifications on your smartphone when someone is at your door. It provides added security and convenience by allowing you to see and speak to visitors from wherever you are.
Installing a Ring doorbell is a relatively simple process that you can do on your own. In this guide, we will walk you through the steps to set up your Ring doorbell and get it up and running in no time. Whether you are a tech novice or a seasoned DIYer, we’ve got you covered.
Before we jump into the installation process, it’s essential to gather the necessary tools and materials to ensure a smooth installation. You will need a few basic tools such as a screwdriver, drill, level, and measuring tape. Additionally, ensure that you have a stable Wi-Fi connection and a compatible smartphone to download the Ring app for setup and configuration.
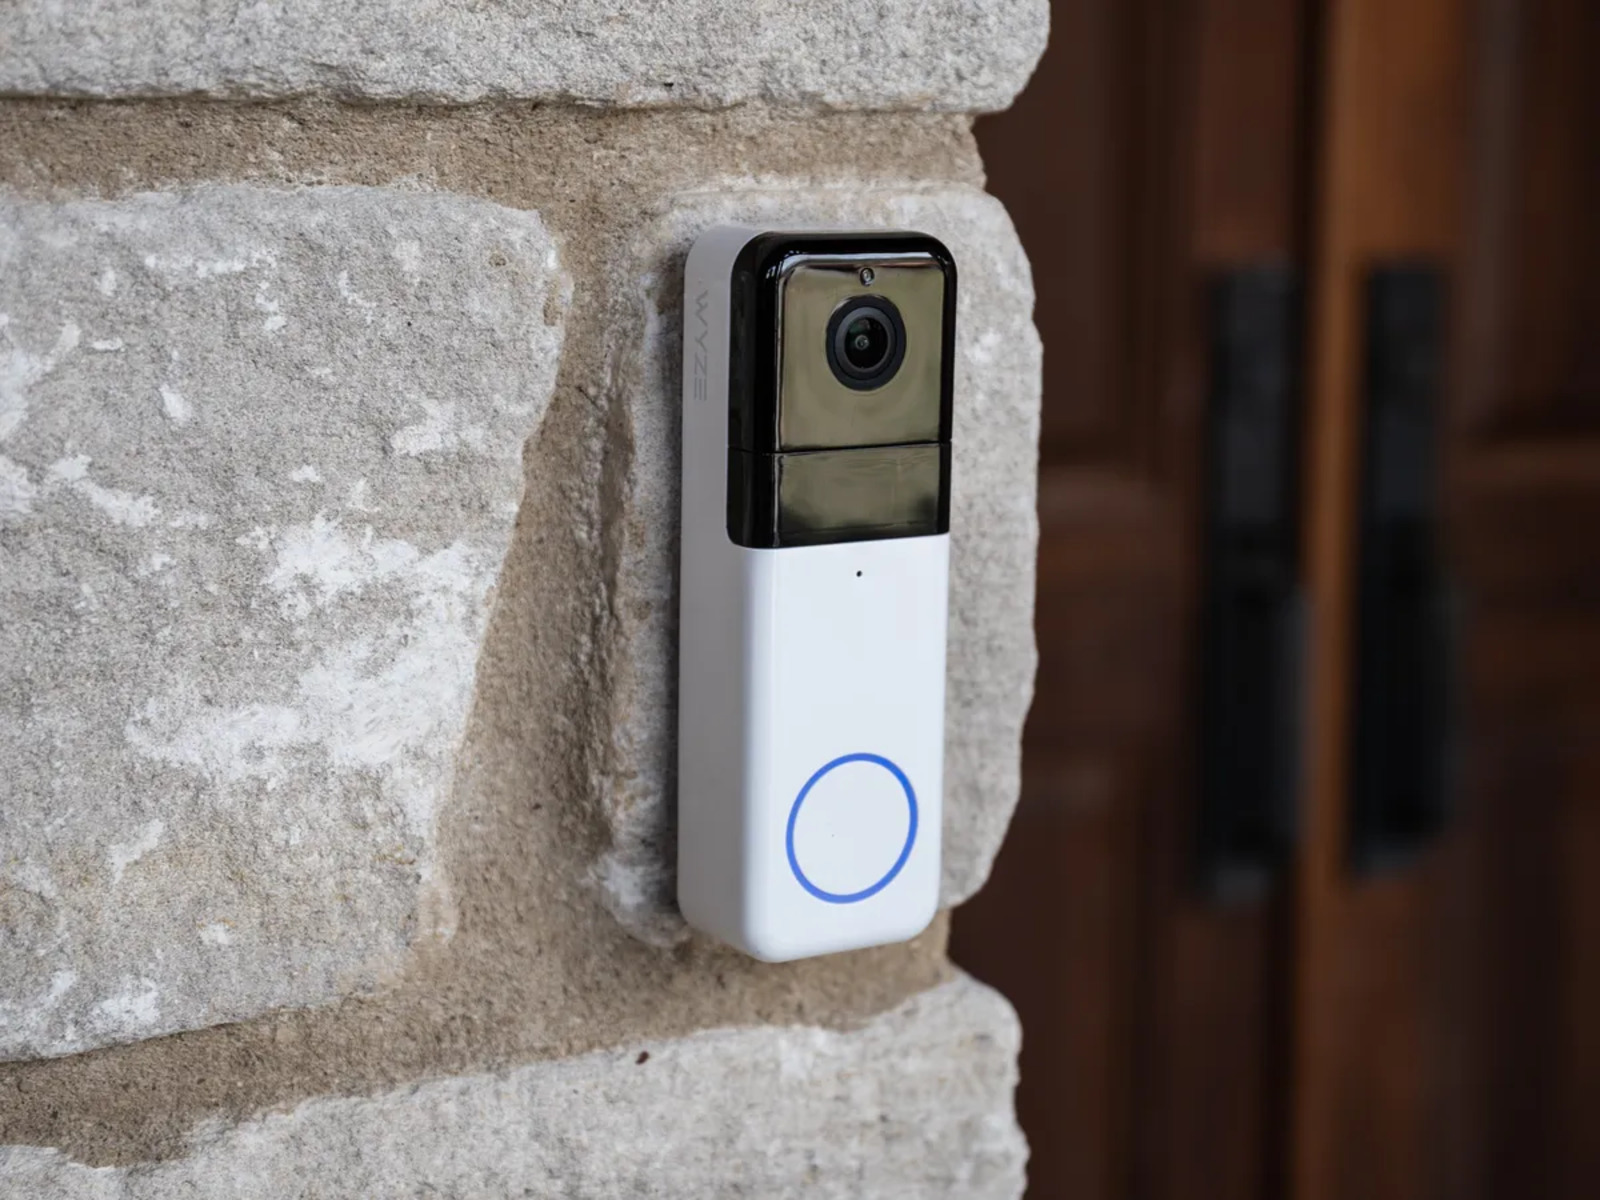
Choosing the best location for your Ring doorbell is crucial for optimal performance. It should have a clear view of your front door and the area you want to monitor. Make sure the doorbell is positioned at a height where it’s easily accessible for visitors, but not too low to the ground to avoid theft or vandalism.
Once you’ve determined the perfect spot, it’s time to download the Ring app on your smartphone. This app will be your command center for managing your Ring doorbell and accessing its features. It’s available for both iOS and Android devices and provides a user-friendly interface for configuration and control.
Preparing your doorbell for installation involves a few simple steps. First, power off your existing doorbell at the circuit breaker or by disconnecting the wires. Remove any existing doorbell and clean the installation area. This will ensure a clean and smooth surface to mount your Ring doorbell.
In the next section, we will guide you through the process of installing the mounting bracket for your Ring doorbell. Stay tuned!
Step 1: Gather the necessary tools and materials
Before you can begin installing your Ring doorbell, it’s essential to gather all the necessary tools and materials. Having everything prepared beforehand will make the installation process much smoother and more efficient. Here are the items you will need:
- A screwdriver (both Phillips and flathead)
- A power drill
- A level
- A measuring tape
- A pencil
- A ladder or step stool (if needed)
- The Ring doorbell and its mounting bracket
- Screws and anchors provided with the Ring doorbell
- A stable Wi-Fi connection
- A smartphone with the Ring app downloaded
Make sure you have the appropriate screwdriver heads for the screws on your Ring doorbell and mounting bracket. The screwdriver should fit securely and allow for easy tightening or loosening of the screws during installation.
A power drill will be necessary to create holes for mounting the bracket and for any additional screws or anchors required for installation. Choose a drill bit that matches the size of the screws or anchors you will be using.
Using a level is crucial to ensure that your Ring doorbell is installed straight and upright. It will help you avoid any unevenness or slant that may affect the functionality and aesthetics of the doorbell.
A measuring tape or ruler will come in handy for taking accurate measurements and determining the appropriate placement of your Ring doorbell. Make sure to measure the distance between your doorbell and your Wi-Fi router to ensure a strong and stable connection.
In addition to the tools, you will also need to have the Ring doorbell and its mounting bracket. These are typically included in the package when you purchase a Ring doorbell. Ensure that you have all the necessary components and inspect them for any damage or defects before proceeding with the installation.
The screws and anchors provided with the Ring doorbell are designed to secure the mounting bracket and the doorbell itself. Make sure you have the correct type and size of screws and anchors for your specific model of Ring doorbell.
Last but not least, you will need a stable Wi-Fi connection and a smartphone with the Ring app downloaded. These will be essential for setting up and configuring your Ring doorbell, as well as for receiving notifications and accessing the various features offered by the device.
Once you have gathered all the necessary tools and materials, you are ready to proceed to the next step: choosing the best location for your Ring doorbell.
Step 2: Choose the best location for your Ring doorbell
Choosing the right location for your Ring doorbell is essential for optimal performance and functionality. Here are some factors to consider when selecting the best spot:
1. Clear view: Ensure that the chosen location provides a clear and unobstructed view of your front door and the surrounding area. This will enable your Ring doorbell to capture high-quality video footage and accurately detect any motion or activity.
2. Height and accessibility: Mount your Ring doorbell at a height that allows easy access for visitors to press the doorbell button. However, make sure it’s not placed too low to the ground, as this could make it vulnerable to theft or vandalism.
3. Wi-Fi signal strength: Check the Wi-Fi signal strength at your desired location. A strong and stable Wi-Fi connection is necessary for seamless communication between the Ring doorbell and your smartphone. If the signal is weak, consider moving your Wi-Fi router closer or utilize a Wi-Fi range extender to boost the signal strength.
4. Lighting conditions: Consider the lighting conditions at the installation spot. Avoid placing the Ring doorbell directly facing direct sunlight or a bright light source, as this may cause glare or affect the image quality. Additionally, ensure that the area is adequately lit during the evening or nighttime hours for better visibility.
5. Weather protection: Ensure that the chosen location provides adequate protection against harsh weather conditions such as rain, snow, or extreme heat. This will help prolong the lifespan of your Ring doorbell and prevent any water or moisture damage.
6. Existing doorbell wiring: If you are replacing an existing doorbell and utilizing its wiring, choose a location that allows easy access to the existing wiring. This will simplify the installation process and avoid the need for additional wiring work.
Once you have identified the ideal location, mark it using a pencil or tape. Double-check your measurements and ensure that the marking aligns with your desired placement. This will help you during the mounting process.
Remember, the chosen location should meet all the criteria mentioned above to ensure the best performance and functionality of your Ring doorbell. Taking the time to find the perfect spot will enhance the effectiveness of your home security system.
Once you have selected the optimal location, you can proceed to the next step: downloading the Ring app on your smartphone.
Step 3: Download the Ring app
The Ring app is essential for setting up and managing your Ring doorbell. It allows you to configure various settings, receive real-time notifications, and access the doorbell’s video feed from your smartphone. Here’s how to download the Ring app:
1. Check compatibility: Before downloading the app, ensure that your smartphone is compatible with the Ring app. The Ring app is available for both iOS and Android devices. Visit the respective app store (App Store for iOS, Google Play Store for Android) and search for the Ring app to confirm compatibility.
2. Open the app store: Once you have confirmed compatibility, open the app store on your smartphone. The icon for the app store may vary depending on your device’s operating system.
3. Search for the Ring app: In the app store’s search bar, type in “Ring” and press enter. The search results will display the Ring app as one of the options.
4. Select and install: Tap on the Ring app from the search results to access its download page. On the app’s download page, you will find an “Install” or “Get” button. Tap on it to start the download and installation process. The app store may require you to enter your Apple ID or Google account password to initiate the download.
5. Wait for the installation to complete: Once you tap on the install button, the app store will begin downloading and installing the Ring app on your smartphone. The installation time may vary depending on your internet connection speed.
6. Open the Ring app: After the installation is complete, you can open the Ring app by locating its icon on your smartphone’s home screen or app drawer. Tap on the icon to launch the app.
7. Create a Ring account: When you open the Ring app for the first time, you will be prompted to create a Ring account if you don’t already have one. Follow the on-screen instructions to set up your account. You will need to provide an email address and create a password to proceed.
8. Sign in and set up your Ring doorbell: Once you have created your Ring account, sign in to the Ring app using your account credentials. The app will guide you through the process of setting up your Ring doorbell, including connecting it to your Wi-Fi network and configuring the desired settings.
Make sure to follow all the instructions provided by the app to ensure a successful setup. If you encounter any issues during the setup process, refer to the Ring app’s help documentation or contact Ring’s customer support for assistance.
Now that you have downloaded the Ring app, you are ready to prepare your doorbell for installation in the next step.
Step 4: Prepare your doorbell for installation
Before you can install your Ring doorbell, it’s important to prepare your existing doorbell and the installation area. This step will ensure a smooth and hassle-free installation process. Here’s what you need to do:
1. Power off your existing doorbell: Start by turning off the power to your existing doorbell. You can do this by either switching off the circuit breaker that controls the doorbell or disconnecting the wires. This step is crucial for your safety during the installation process.
2. Remove any existing doorbell: If you have an old doorbell installed, remove it from the mounting bracket. Carefully unscrew the doorbell and detach it from the wiring. Keep the wiring accessible, as you will be using it to connect your Ring doorbell.
3. Clean the installation area: Take a moment to clean the area where you will be mounting your Ring doorbell. Remove any dirt, dust, or debris that could interfere with the installation process or affect the adhesive’s effectiveness. You can use a clean cloth or a mild cleaning solution for this purpose.
4. Check for compatibility: Ensure that your existing doorbell wiring is compatible with the Ring doorbell. Most traditional wired doorbell systems are compatible with the Ring doorbell. However, if you are uncertain, consult the Ring app or refer to the product documentation for guidance.
5. Inspect the wiring: Take a close look at the wiring that was connected to your old doorbell. Check for any signs of damage, fraying, or loose connections. If necessary, repair or replace the wiring before proceeding with the installation to ensure a secure and reliable connection.
6. Measure and mark the installation spot: Use a measuring tape and a pencil to mark the exact spot where you will be mounting your Ring doorbell. Take accurate measurements to ensure proper alignment and positioning. The marking will serve as a guide during the installation process.
7. Keep the mounting hardware accessible: Locate the mounting bracket and the screws that came with your Ring doorbell. Keep them nearby and easily accessible during the installation. This will save you time and effort when it’s time to attach the doorbell to the mounting bracket.
By following these preparation steps, you will be ready to proceed with the installation of your Ring doorbell smoothly. Taking the time to prepare the doorbell and the installation area will help ensure a secure and reliable installation.
Now that you have prepared your doorbell, you can move on to the next step: installing the mounting bracket.
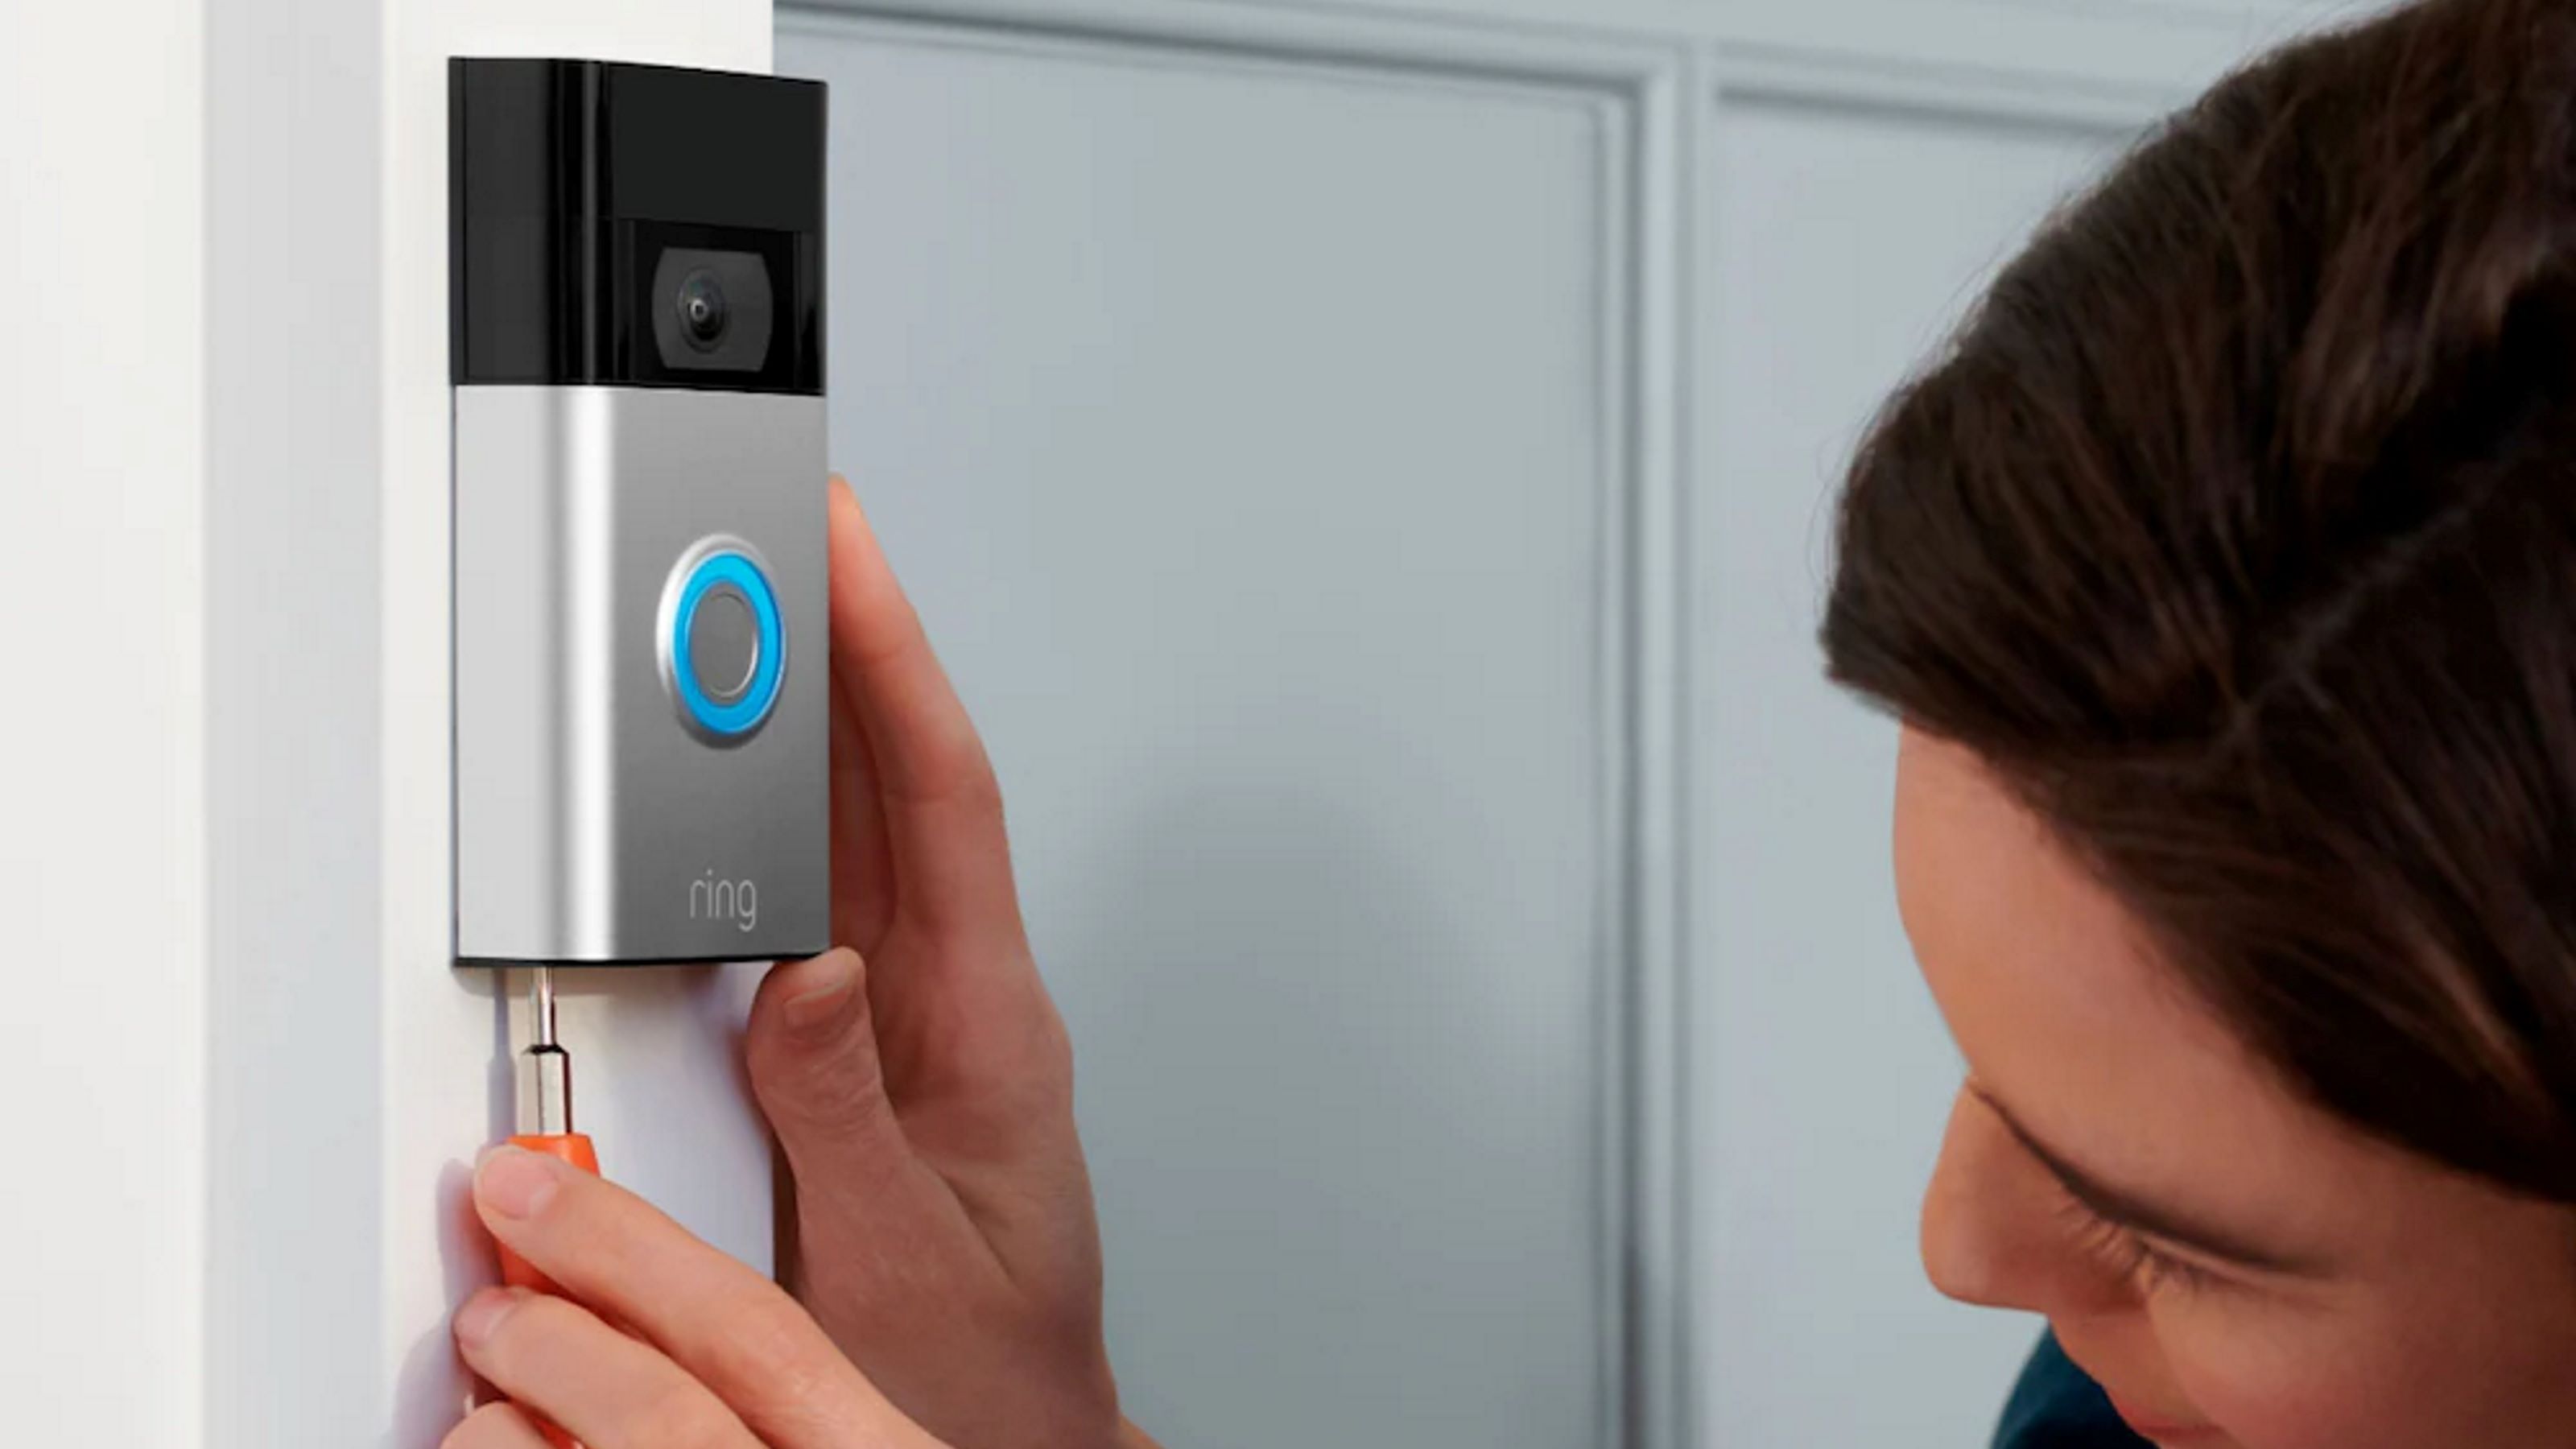
Step 5: Install the mounting bracket
Now that you have prepared your doorbell and the installation area, it’s time to install the mounting bracket for your Ring doorbell. The mounting bracket provides a secure and sturdy base for attaching the doorbell. Here’s how to install it:
1. Align the mounting holes: Hold the mounting bracket against the wall or door frame in the desired location. Make sure the bracket is straight and aligned with your previous markings. Check that the mounting holes on the bracket align with the markings you made for installation.
2. Mark the screw holes: With the mounting bracket held firmly against the wall, use a pencil or a marker to mark the positions of the screw holes on the wall. These markings will serve as a guide when drilling the holes for mounting the bracket.
3. Drill pilot holes: Using an appropriate drill bit, drill small pilot holes into the marked positions on the wall. The pilot holes help guide the screws and prevent the wall from cracking or splitting during installation. Make sure to drill the holes to the appropriate depth for a secure fit.
4. Insert wall anchors (if needed): Depending on your wall’s composition and the provided hardware, you may need to insert wall anchors into the pilot holes. Wall anchors provide additional support and stability. Gently tap the wall anchors into the pilot holes until they are flush with the wall.
5. Attach the mounting bracket: Line up the mounting bracket with the pilot holes and wall anchors (if used). Insert the screws through the mounting bracket’s holes and into the pilot holes or wall anchors. Use a screwdriver or a drill to tighten the screws securely, but be careful not to over-tighten and damage the bracket or wall.
6. Check for stability: Once the mounting bracket is securely attached, give it a gentle shake to ensure it is stable and properly anchored. If it feels loose or wobbly, double-check the screws’ tightness or consider using additional hardware like wall anchors to provide added stability.
7. Verify alignment: Take a step back and visually inspect the mounting bracket’s alignment and orientation. Ensure that it is level and aligned with your door frame or the desired viewing angle. Making any adjustments at this stage will be much easier than once the doorbell is attached.
Congratulations! You have successfully installed the mounting bracket for your Ring doorbell. The bracket provides a secure foundation for attaching the doorbell and ensures a stable and reliable installation.
Next, you will move on to the next step: connecting the wires to your Ring doorbell.
Step 6: Connect the wires
With the mounting bracket securely installed, it’s time to connect the wires to your Ring doorbell. Properly connecting the wires ensures the doorbell receives power and allows it to function as intended. Here’s how to connect the wires:
1. Identify the doorbell wires: Locate the wiring that was previously connected to your old doorbell. The wires are typically labeled “front” or “trans” for the transformer wire and “rear” or “chime” for the wire that leads to your chime box. Note the colors of the wires for reference during the connection process.
2. Strip the wire ends: Carefully strip the insulation off the ends of the doorbell wires using wire strippers or a sharp utility knife. Remove about 1/4 inch of insulation to expose the copper wire underneath. Be cautious not to cut or damage the actual wires.
3. Attach the wires to the screw terminals: Loosen the screw terminals on the back of your Ring doorbell by turning them counterclockwise. Insert the stripped end of each wire into the corresponding terminal. For example, the front/trans wire goes into the front or trans terminal, and the rear/chime wire goes into the rear or chime terminal.
4. Secure the wires: Once the wires are inserted into the screw terminals, tighten the screws by turning them clockwise. Ensure that the wires are securely fastened to the terminals but avoid over-tightening, as this can damage the wires or terminals.
5. Test the connections: Before proceeding, test the connections by gently tugging on the wires to ensure they are secure. It’s important to have a solid and reliable connection to prevent any interruption in power or functionality.
6. Insulate the wire connections: After confirming that the wires are securely connected, you can insulate the wire connections. This can be done by wrapping each wire connection with electrical tape, or you can use wire nuts to cover and protect the exposed wires. Insulating the connections helps prevent any accidental contact with the wires and ensures a safe installation.
7. Check for proper fit: Make sure the wire connections and any excess wire are neatly tucked inside the mounting bracket. The doorbell should fit properly against the bracket without any obstruction or difficulty.
By following these steps, you have successfully connected the wires to your Ring doorbell. The proper connection ensures a steady power supply, allowing your doorbell to function correctly. Now, you can move on to the next step: attaching the doorbell to the mounting bracket.
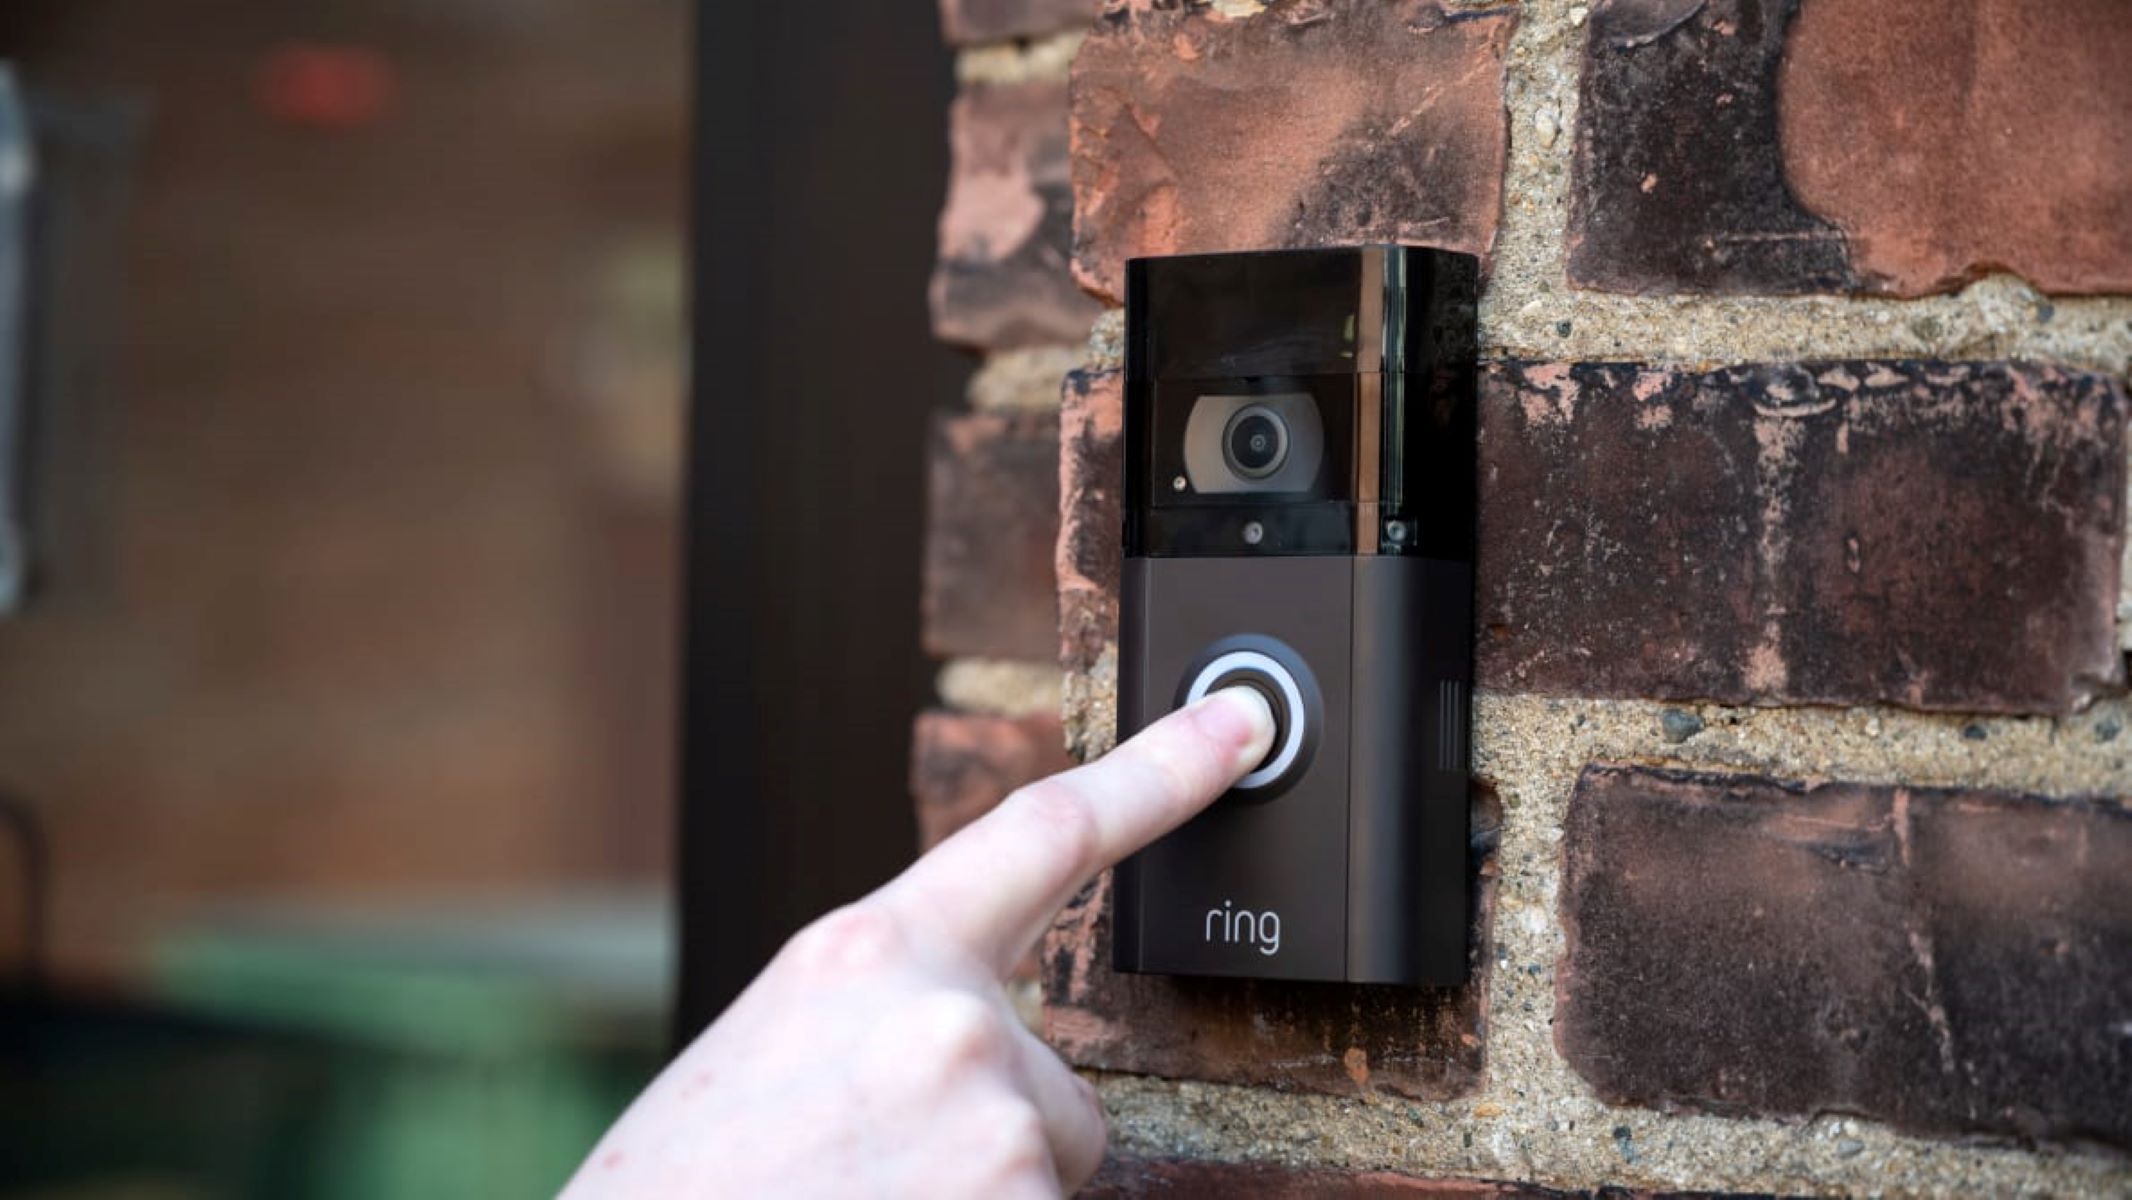
Step 7: Attach the doorbell to the mounting bracket
With the wires securely connected, it’s time to attach your Ring doorbell to the mounting bracket. Properly attaching the doorbell ensures a stable and secure installation. Here’s how to do it:
1. Align the doorbell: Hold the Ring doorbell in front of the mounting bracket, aligning the screw holes on the back of the doorbell with those on the mounting bracket. Ensure that the doorbell is level and straight to achieve an aesthetically pleasing result.
2. Insert the screws: Once aligned, insert the provided screws through the screw holes on the doorbell and thread them into the corresponding holes on the mounting bracket. Use a screwdriver or a drill with an appropriate screwdriver bit to tighten the screws. Ensure that the doorbell is secure and snug against the mounting bracket, but avoid over-tightening.
3. Test the doorbell: After attaching the doorbell, give it a gentle push or tap to ensure that it is tightly secured and doesn’t wobble or come loose. This step is essential to ensure that the doorbell remains in place and functions properly.
4. Double-check the alignment: Step back and visually inspect the doorbell to verify its alignment and position. Ensure that it is level and straight, and that it fits seamlessly against the mounting bracket. Any necessary adjustments can be made at this stage before moving on.
5. Attach any additional accessories (if applicable): Depending on your specific Ring doorbell model, there may be additional accessories such as faceplates or corner brackets that can be attached for added customization or enhanced viewing angles. Follow the manufacturer’s instructions provided with the accessories for proper attachment.
6. Verify the doorbell’s functionality: After attaching the doorbell, test its functionality to ensure it is working correctly. Press the doorbell button or trigger a motion event to verify that you receive the expected notifications on your smartphone via the Ring app. This step confirms that the doorbell is successfully connected and integrated with your home security system.
By following these steps, you have successfully attached your Ring doorbell to the mounting bracket. The doorbell should be securely in place, ready to provide you with enhanced security and convenience. Now, you can move on to the next step: setting up and configuring your Ring doorbell in the app.
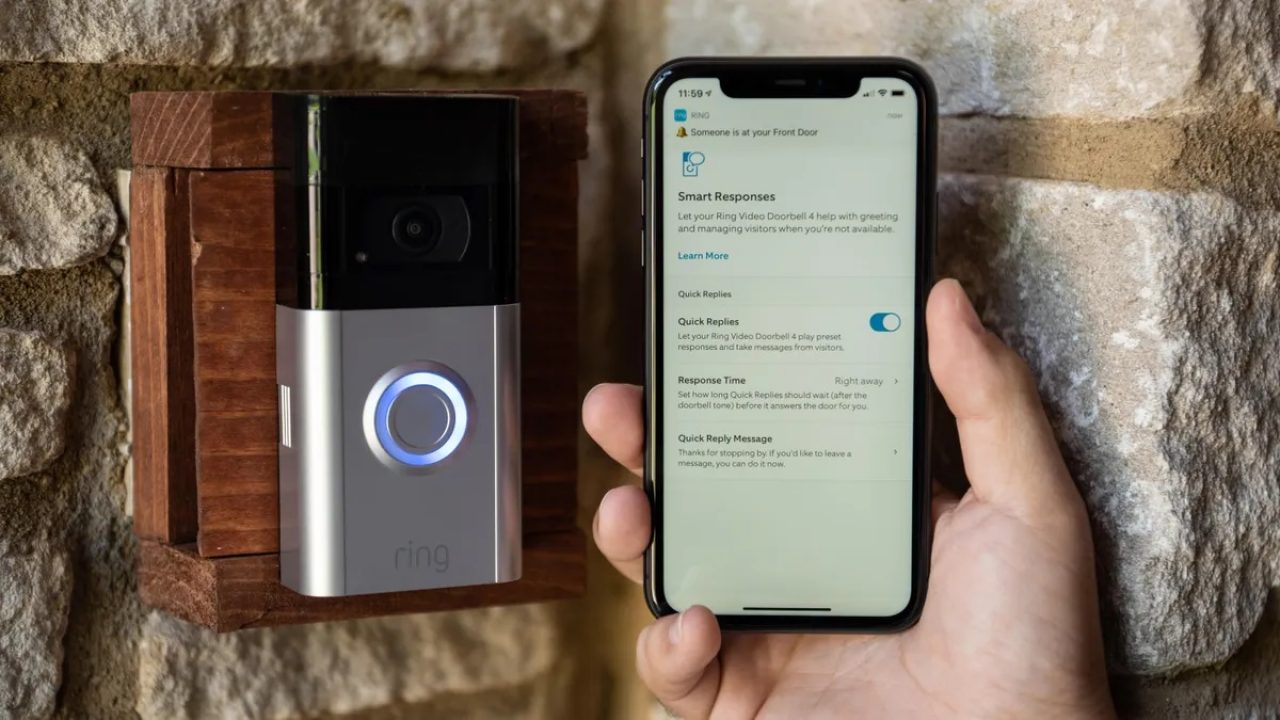
Step 8: Set up and configure your Ring doorbell in the app
Now that your Ring doorbell is securely attached, it’s time to set it up and configure it using the Ring app. The app provides a user-friendly interface for customizing your doorbell’s settings and accessing its features. Follow these steps to set up and configure your Ring doorbell:
1. Launch the Ring app: Open the Ring app on your smartphone. If you haven’t already logged in, enter your Ring account credentials to access your device’s settings.
2. Tap on “Set Up a Device”: In the app’s interface, locate and tap on the “Set Up a Device” option. The app will guide you through the setup process.
3. Select your Ring doorbell model: Choose the specific Ring doorbell model you are setting up from the provided options. Ensure that you select the correct model to access the appropriate setup instructions and settings.
4. Follow the on-screen instructions: The app will provide step-by-step instructions to guide you through the setup process. It will prompt you to perform various tasks, such as connecting your doorbell to your Wi-Fi network, naming your doorbell, and configuring settings like motion detection and alert preferences.
5. Connect your doorbell to Wi-Fi: During the setup process, the app will guide you through connecting your doorbell to your home Wi-Fi network. Follow the instructions carefully to ensure a successful connection. This step is crucial for enabling remote access and receiving real-time notifications on your smartphone.
6. Customize your preferences: Once your doorbell is connected, you can customize various settings according to your preferences. This includes adjusting motion detection sensitivity, setting up activity zones, choosing the alert tones, and deciding how and when you receive notifications on your smartphone.
7. Set up additional features (if applicable): Depending on your Ring doorbell model and subscription plan, there may be additional features that you can set up, such as video recording, cloud storage, or integration with other smart home devices. Explore the app’s options to access these features and follow the prompts to configure them.
8. Test the functionality: Once you have completed the setup and configuration steps, it’s important to test the functionality of your Ring doorbell. Verify that you receive notifications for doorbell presses and motion events, ensure that the live video feed is accessible, and test any additional features or integrations you have set up.
By following these steps, you have successfully set up and configured your Ring doorbell using the Ring app. The app allows you to customize your doorbell’s settings and access its wide range of features, empowering you to enhance your home security and convenience.
Next, we’ll move on to the final step: testing your Ring doorbell and making any necessary adjustments to its settings.
Step 9: Test your Ring doorbell and adjust settings
After setting up and configuring your Ring doorbell, it’s important to test its functionality and make any necessary adjustments to its settings. This step ensures that your doorbell is working properly and meets your specific needs. Here’s how to test and adjust your Ring doorbell:
1. Test the doorbell button: Press the doorbell button to ensure that it triggers the expected response. Check if you receive a notification on your smartphone through the Ring app and if the doorbell chime or any connected devices, like smart speakers, produce the desired sound. If there are any issues, ensure that the doorbell is connected to a stable Wi-Fi network and that the doorbell button is functioning correctly.
2. Test the motion detection: Move around the area that the Ring doorbell is monitoring to test its motion detection capability. Verify if you receive notifications when motion is detected and if the doorbell starts recording video automatically. Adjust the sensitivity and detection zones in the app’s settings if necessary to avoid false alarms or ensure optimal detection.
3. Adjust the audio and video settings: Check the audio and video quality of your Ring doorbell by using the live view feature in the Ring app. Assess the clarity of the audio during two-way communication and the resolution of the captured video. If needed, adjust the settings in the app to enhance the audio and video quality to your satisfaction.
4. Evaluate the night vision: Test the night vision capabilities of your Ring doorbell by viewing the live feed in low-light or dark conditions. Ensure that the infrared LEDs provide sufficient illumination, allowing clear visibility in the nighttime video recordings. Adjust the settings in the app if necessary to improve the night vision performance.
5. Explore advanced features: If your Ring doorbell model includes advanced features such as facial recognition, advanced motion detection, or integration with other smart home devices, take the time to explore and test these features. Familiarize yourself with their functionalities and make any adjustments to ensure they meet your requirements.
6. Make additional adjustments: Based on your testing and experience using the Ring doorbell, you may need to fine-tune its settings further. This may include modifying motion detection sensitivity, adjusting notification preferences, or creating custom motion zones for more precise detection. Continuously monitor and adjust the settings as needed to optimize your Ring doorbell’s performance.
7. Seek help if needed: If you encounter any issues during the testing process or have questions about specific settings, consult the Ring app’s help documentation or reach out to Ring’s customer support. They can provide guidance and assistance to ensure that your Ring doorbell functions seamlessly.
By completing these testing and adjustment steps, you can ensure that your Ring doorbell is working effectively and tailored to your preferences. Regularly test and fine-tune the doorbell’s settings to maintain its optimal performance and enhance your home security experience.
Congratulations! You have successfully installed, set up, and tested your Ring doorbell. You can now enjoy the added security and convenience it brings to your home. If you ever need to make changes to your doorbell’s configuration or settings, refer back to the Ring app for easy access and control.
Conclusion
Congratulations on successfully installing and setting up your wireless Ring doorbell! By following the steps outlined in this guide, you have taken an important step towards enhancing the security and convenience of your home.
We started by gathering the necessary tools and materials for the installation, ensuring that you were well-prepared to proceed. Next, we guided you through choosing the best location for your Ring doorbell, taking into account factors such as visibility, accessibility, and Wi-Fi signal strength.
With the location determined, we then walked you through downloading the Ring app, which serves as your central hub for managing and controlling your Ring doorbell. The app allows you to customize settings, receive real-time notifications, and access the doorbell’s video feed from your smartphone.
After downloading the app, we guided you through preparing your doorbell and the installation area for the mounting process. This involved removing any existing doorbell, cleaning the area, and ensuring compatibility with the Ring doorbell and its wiring.
You then installed the mounting bracket, providing a secure base for attaching the Ring doorbell. With the bracket in place, you connected the doorbell to the existing wiring, ensuring a reliable power supply for proper functionality.
Once the doorbell was properly connected, you attached it to the mounting bracket, ensuring a stable and secure installation. We then guided you through the process of setting up and configuring your Ring doorbell using the Ring app, allowing you to customize settings and access a range of features according to your preferences.
After setting up and configuring the doorbell, it was important to test its functionality and make any necessary adjustments. This involved testing the doorbell button, motion detection, audio and video quality, night vision, and exploring any advanced features that your specific Ring model offers.
By completing these steps and adjustments, you have successfully installed and set up your Ring doorbell. It is now ready to provide you with enhanced security, peace of mind, and convenience for your home.
Remember, regularly monitor and adjust the doorbell’s settings as needed to ensure it continues to meet your specific requirements. Be proactive in testing and maintaining your Ring doorbell to ensure its optimal performance and effectiveness over time.
Thank you for choosing Ring and taking the initiative to secure your home with a wireless doorbell. Enjoy the added security and convenience it brings to your life!