Introduction
Welcome to this guide on how to install macOS on an external hard drive. Installing macOS on an external hard drive can be a useful option for those who want to have a portable version of the operating system or need additional storage space. Whether you want to create a bootable drive for troubleshooting purposes or simply want to carry your macOS installation with you, this guide will walk you through the necessary steps.
Before we begin, it’s important to note that this process involves performing advanced tasks on your computer, which may carry certain risks. Ensure that you have a complete backup of all your important data before proceeding. Additionally, make sure you have the necessary technical knowledge and confidence to follow the steps accurately.
In this guide, we will cover the requirements for this installation, including preparing the external hard drive, downloading the macOS installer, creating a bootable drive, and finally installing macOS on the external hard drive. We will also discuss how to set up macOS on the external hard drive once the installation is complete. By the end of this guide, you will have a fully functional macOS installation on your external hard drive.
Keep in mind that installing macOS on an external hard drive may have some limitations compared to running it on the internal drive of your Mac. While it is possible to boot and run macOS from an external drive, it may not perform as well as a native installation on the internal drive. However, it can still be a convenient option for certain situations.
Now that you have an overview of what we will be covering, let’s dive into the requirements needed for installing macOS on an external hard drive.
Requirements
Before you proceed with installing macOS on an external hard drive, there are a few requirements that you need to fulfill. These include:
- An external hard drive: You will need an external hard drive with sufficient storage capacity to install macOS. It is recommended to use a high-speed USB 3.0 or Thunderbolt drive for optimal performance.
- macOS installer: You will need a copy of the macOS installer from the App Store. Make sure you have a stable internet connection to download the installer.
- Mac computer: You will need a Mac computer to perform the installation process. The computer should meet the minimum system requirements for the version of macOS you plan to install on the external hard drive.
- Backup: It is crucial to create a backup of all your important data before proceeding with the installation process. This will ensure that your data is safe in case of any issues during the installation.
- USB flash drive: You will need a USB flash drive with a capacity of at least 16GB to create a bootable drive for the macOS installer. Make sure the flash drive is empty as it will be formatted during the process.
- Internet connection: A stable internet connection is required to download the macOS installer, as well as any updates or drivers that may be needed during the installation process.
By ensuring that you have these requirements in place, you will be well-prepared to proceed with the installation process. In the next section, we will guide you through the first step of preparing the external hard drive for the macOS installation.
Step 1: Prepare the external hard drive
The first step in installing macOS on an external hard drive is to prepare the drive for the installation. Follow these steps to ensure that the external hard drive is properly formatted and ready for use:
- Connect the external hard drive to your Mac: Use a compatible cable to connect the external hard drive to your Mac computer. Make sure the connection is secure.
- Backup any important data: Before proceeding with the formatting process, it is crucial to backup any important data on the external hard drive. Formatting will erase all existing data on the drive, so ensure that you have a copy of everything you need.
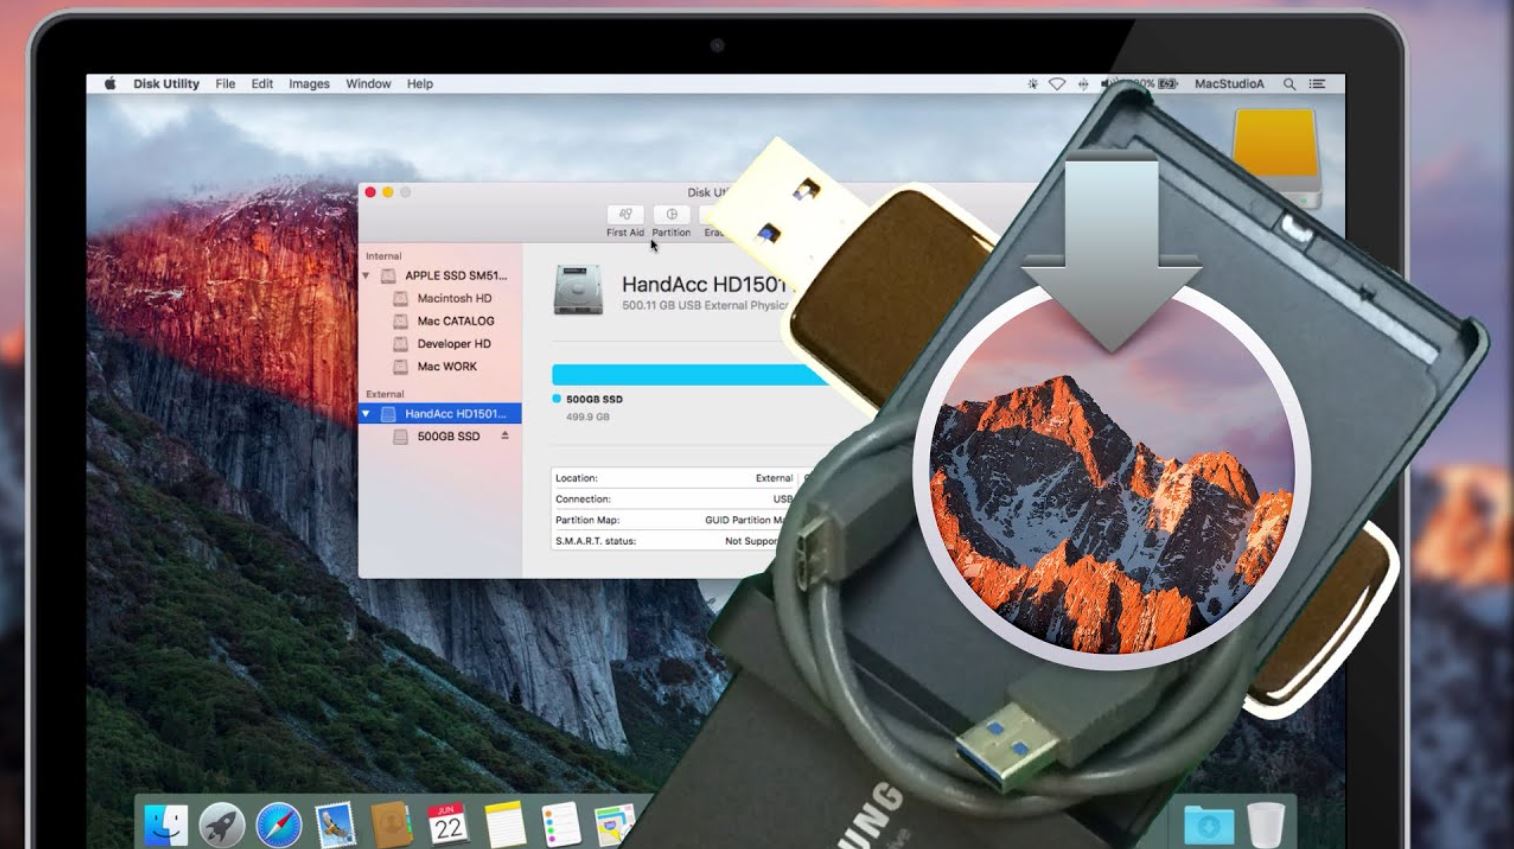
- Open Disk Utility: Go to the Applications folder, then select Utilities, and open Disk Utility.
- Select the external hard drive: In the sidebar of Disk Utility, locate and select the external hard drive that you want to format for the macOS installation.
- Erase the drive: Click on the Erase tab in the Disk Utility window. Choose a name for the drive and select the appropriate format. For macOS installations, it is recommended to use the Mac OS Extended (Journaled) format. Click “Erase” to begin the formatting process. Note that this will erase all data on the drive, so double-check that you have backed up any necessary files.
- Wait for the formatting process to complete: The formatting process may take a few minutes, depending on the size of the external hard drive. Once it is completed, you will see a notification.
Once the formatting process is complete, your external hard drive is now ready to be used for the installation of macOS. In the next section, we will guide you through the process of downloading the macOS installer.
Step 2: Download macOS installer
After preparing the external hard drive, the next step is to download the macOS installer. Follow these steps to download the installer from the App Store:
- Launch the App Store: Go to your Applications folder and open the App Store.
- Search for macOS: In the search bar at the top-right corner of the App Store window, type “macOS” and press Enter. This will display the available macOS versions.
- Choose the desired macOS version: Select the macOS version you wish to install from the search results. Make sure to choose a version that is compatible with your Mac and meets your requirements.
- Click on “Download”: On the macOS version page, click on the “Download” button. This will initiate the download of the macOS installer. The download size may vary depending on the macOS version you have chosen.
- Wait for the download to complete: The download progress will be displayed in the Launchpad or the Purchased tab of the App Store. Depending on your internet speed, this process may take some time.
Once the download is complete, you will have the macOS installer file saved in your Applications folder. Do not proceed to the next step until the download is finished. In the next section, we will guide you through the process of creating a bootable macOS drive using a USB flash drive.
Step 3: Create a macOS bootable drive
Creating a bootable macOS drive allows you to install macOS on the external hard drive. Follow these steps to create a bootable drive using a USB flash drive:
- Insert the USB flash drive: Plug the USB flash drive into your Mac’s USB port.
- Open Disk Utility: Go to the Applications folder, select Utilities, and open Disk Utility.
- Select the USB flash drive: In Disk Utility, locate and select the USB flash drive from the sidebar.
- Erase the drive: Click on the Erase tab in the Disk Utility window. Choose a name for the drive and select the format as “Mac OS Extended (Journaled)”. Click “Erase” to format the USB flash drive. Note that this will erase all data on the drive, so make sure you have backed up any necessary files.
- Download and open Terminal: Go to the Applications folder, select Utilities, and open Terminal.
- Enter the command: In the Terminal window, enter the command appropriate for the macOS version you downloaded. Replace “InstallerName.dmg” with the name of the macOS installer file you downloaded. Press Enter to execute the command.
- Enter your password: Terminal will prompt you to enter your administrator password. Enter the password and press Enter. Note that you won’t see any characters as you type your password; this is normal.
- Confirm the operation: Terminal will display a warning stating that the USB flash drive will be erased. Type “Y” and press Enter to confirm and proceed with the process.
- Wait for the process to complete: The process of creating the bootable macOS drive may take a while. The Terminal will display the progress, and once it’s finished, you will see a “Done” message.
sudo /Applications/Install\ macOS\ InstallerName.dmg/Contents/Resources/createinstallmedia --volume /Volumes/UntitledNow you have successfully created a bootable macOS drive using the USB flash drive. In the next step, we will guide you through the process of booting from the external hard drive.
Step 4: Boot from the external hard drive
Now that you have a bootable macOS drive, the next step is to boot your Mac from the external hard drive. Follow these steps to boot from the external hard drive:
- Shut down your Mac: From the Apple menu, select “Shut Down” to turn off your Mac completely.
- Connect the external hard drive: Make sure the external hard drive is connected to your Mac.
- Turn on your Mac: Press the power button to turn on your Mac.
- Immediately press the Option key: As soon as you hear the startup chime, press and hold the Option key on your Mac’s keyboard.
- Select the external hard drive: After a few moments, you will see the Startup Manager screen, which displays all available startup disks. Use the arrow keys to select the external hard drive from the list, then press Enter.
- Wait for the boot process: Your Mac will now start up from the external hard drive. Be patient as this process may take a few minutes to complete.
Once your Mac has successfully booted from the external hard drive, you will see the macOS installer screen. In the next section, we will guide you through the process of installing macOS on the external hard drive.
Step 5: Install macOS on the external hard drive
Now that you have booted your Mac from the external hard drive, it’s time to install macOS on the drive. Follow these steps to install macOS on the external hard drive:
- Select the language: On the macOS installer screen, choose your preferred language and click “Continue”.
- Agree to the terms: Read the macOS software license agreement and click “Agree” to proceed.
- Choose the external hard drive: In the installer window, select the external hard drive you prepared for the installation. Click “Install” to continue.
- Enter your administrator password: You may be prompted to enter your administrator password. Provide the password and click “Install Software”.
- Wait for the installation to complete: The installation process may take some time. Your Mac will restart during the process, so make sure to leave it plugged in. Once the installation is complete, your Mac will automatically boot into the newly installed macOS on the external hard drive.
During the installation process, your Mac may restart multiple times. This is normal, so do not interrupt or power off your Mac until the installation is finished.
After the installation is complete, your Mac will start up using the freshly installed macOS on the external hard drive. In the next step, we will guide you through the process of setting up macOS on the external hard drive.
Step 6: Set up macOS on the external hard drive
Once you have successfully installed macOS on the external hard drive, you need to set it up to personalize your experience. Follow these steps to set up macOS on the external hard drive:
- Select your country or region: On the setup screen, choose your country or region and click “Continue”.
- Choose a keyboard layout: Select the keyboard layout that matches the keyboard you are using and click “Continue”.
- Transfer information (optional): If you want to transfer information from an existing Mac or a Time Machine backup, you can use the Migration Assistant during the setup process. Follow the on-screen instructions to transfer your data or choose “Don’t transfer any information now” to skip this step.
- Sign in with your Apple ID: If you have an Apple ID, you can sign in to access iCloud, the App Store, and other Apple services. Enter your Apple ID and password, or click “Set Up Later” if you prefer to skip this step.
- Agree to the terms and conditions: Read and agree to the terms and conditions presented on the screen to proceed.
- Create a computer account: Enter your full name, account name, password, and password hint. You can also choose whether to enable FileVault encryption and to allow your Apple ID to reset the password for this account.
- Set up Siri (optional): Choose whether to enable Siri, Apple’s virtual assistant, on your Mac. You can activate Siri by using your voice or by clicking its icon on the menu bar.
- Choose your desired options: Customize your Mac’s settings by selecting options such as screen time, analytics, and app analytics. You can also choose whether to use the Find My app and location services.
- Choose a look for your Mac (optional): Decide whether you want your Mac to have a light or dark appearance. You can always change this setting later in the System Preferences.
Once you have completed the setup process, you will be taken to the macOS desktop on the external hard drive. You can now start using macOS on the external hard drive, installing your favorite apps, customizing the system settings, and accessing your files and data.
Congratulations! You have successfully set up macOS on your external hard drive. Enjoy the flexibility and convenience of having a portable macOS installation.
Conclusion
Installing macOS on an external hard drive provides you with a portable and customizable macOS installation that you can take with you wherever you go. This guide has walked you through the step-by-step process of preparing the external hard drive, downloading the macOS installer, creating a bootable drive, booting from the external hard drive, installing macOS, and setting up your new macOS installation.
By following these steps, you have gained the ability to run macOS from the external hard drive, allowing you to carry your personal settings, files, and apps with you. This can be particularly useful for troubleshooting purposes or when you want to use macOS on a different computer without altering its internal drive.
Remember to keep in mind the limitations of running macOS from an external hard drive compared to a native installation on the internal drive. While it provides portability and convenience, it may not offer the same performance as a directly installed macOS. Nonetheless, it remains a viable option for various situations.
As always, it is essential to back up your data before proceeding with any advanced tasks on your computer. Take the necessary precautions and follow the instructions carefully to ensure a successful installation.
Now that you have completed the installation process, you can enjoy the benefits of having macOS on an external hard drive. Explore all the features and functionalities of macOS and make the most of your portable macOS installation.
Thank you for following this guide. We hope you found it informative and helpful. Enjoy your macOS experience on the external hard drive!