Introduction
Installing Native Instruments on an external hard drive can be a game-changer for music producers, DJs, and anyone who relies on their software for creating or playing music. With limited storage space on our computers, having the ability to install resource-intensive programs like Native Instruments on an external hard drive offers numerous benefits. In this article, we will explore the advantages of installing Native Instruments on an external hard drive, along with a step-by-step guide to help you through the installation process.
Native Instruments is renowned in the music industry for its powerful and versatile software, offering a vast array of virtual instruments, effects, and sound libraries. However, installing this software on your computer’s internal hard drive can quickly consume valuable storage space. Over time, as you accumulate more instruments and libraries, it can significantly affect your system’s performance and limit your creative capabilities.
By installing Native Instruments on an external hard drive, you’ll free up space on your computer’s internal drive, allowing it to run more efficiently. Additionally, an external hard drive provides the flexibility to work seamlessly across multiple computers, as you can easily connect the drive to any compatible device and access your installed Native Instruments software. This is especially beneficial for DJs who need to use their software on different systems for performances, or music producers who collaborate with others and share projects.
Beyond the convenience and storage benefits, installing Native Instruments on an external hard drive also eliminates the need for frequent software reinstallation. If you find yourself needing to reformat your computer or upgrade to a new one, you won’t have to go through the tedious process of reinstalling all your Native Instruments software. Simply connect the external hard drive to your new or reformatted computer and continue working on your projects without any hassle.
In the following sections, we will delve into the necessary considerations before installing Native Instruments on an external hard drive, provide a step-by-step guide to perform the installation, troubleshoot common issues that may arise during the process, and offer tips on optimizing Native Instruments performance on an external hard drive. So, let’s get started and unlock the full potential of your Native Instruments software by installing it on an external hard drive.
Benefits of Installing Native Instruments on an External Hard Drive
Installing Native Instruments on an external hard drive offers a plethora of benefits for music producers, DJs, and enthusiasts alike. Let’s explore some of the key advantages of opting for this setup.
1. Increased Storage Capacity: One of the primary benefits of installing Native Instruments on an external hard drive is the significant increase in available storage space. Native Instruments libraries and sound packs can consume a substantial amount of disk space, especially if you utilize multiple instruments or large sample libraries. By utilizing an external hard drive, you can expand your storage capacity without sacrificing your computer’s internal storage for other essential files and applications.
2. Portability and Flexibility: With Native Instruments installed on an external hard drive, you gain the freedom to work on your projects from any computer. This level of portability is especially useful for musicians and DJs who often find themselves working on different machines or collaborating with other artists. Simply plug in your external hard drive, and you can access your entire Native Instruments library, presets, and projects wherever you go.
3. Improved Performance: The intensive nature of Native Instruments software can put a strain on computer resources and impact performance. When installed on an external hard drive, Native Instruments can utilize the drive’s dedicated resources, relieving the burden on your computer’s internal processes. This can result in smoother playback, faster load times, and increased overall system performance, allowing you to focus on your creative process without interruptions caused by lag or slowdowns.
4. Easy System Migration and Backup: Installing Native Instruments on an external hard drive simplifies the process of migrating your software and projects to a new computer. Instead of painstakingly transferring all the necessary files, simply connect the external hard drive to the new system, and you’re ready to resume work without any disruptions. Additionally, an external hard drive allows for easy and reliable backup of your Native Instruments files, providing peace of mind knowing your valuable projects are safe and secure.
5. Reduced Clutter: As your collection of Native Instruments libraries and sound packs continue to grow, they can quickly consume your computer’s available storage space. With an external hard drive, you can keep your system clutter-free by storing your instruments, sample libraries, and project files separately. This not only frees up valuable space on your computer but also makes it easier to organize and locate your Native Instruments content, saving you time and effort in the long run.
In summary, installing Native Instruments on an external hard drive provides numerous benefits, including increased storage capacity, portability, improved performance, easy system migration and backup, and reduced clutter on your computer. By utilizing an external hard drive, you can optimize your workflow, enhance your creative capabilities, and enjoy the versatility that comes with having your Native Instruments software on the go. Now, let’s move on to the considerations you should keep in mind before proceeding with the installation process.
Things to Consider Before Installing Native Instruments on an External Hard Drive
Before proceeding with the installation of Native Instruments on an external hard drive, there are several important factors to consider. Taking these into account will help ensure a smooth installation process and optimal performance. Let’s dive into the key considerations:
1. Compatibility: Ensure that your chosen external hard drive is compatible with your computer’s operating system and meets the required specifications for Native Instruments software. Check the system requirements provided by Native Instruments to ensure compatibility and avoid potential compatibility issues down the line.
2. Drive Speed: The speed of the external hard drive plays a crucial role in the performance of Native Instruments software. Look for a drive with a fast transfer rate, ideally using USB 3.0 or Thunderbolt, to ensure quick and efficient data access. Bear in mind that slower drives may result in longer loading times and reduced overall performance.
3. Storage Capacity: Consider the amount of storage space required for your Native Instruments libraries and sound packs. Calculate the size of your existing collection and estimate the space you’ll need for future expansions. Ensure the external hard drive has enough capacity to accommodate your current and future needs, preventing any storage limitations or the need to upgrade in the near future.
4. File Management: Organizing and managing your Native Instruments files is crucial for efficient workflow and easy access. Plan a file management system that includes categorizing instruments, sample libraries, and project files. Creating a logical folder structure will prevent confusion and save time when searching for specific files. Additionally, consider implementing a backup strategy to protect your valuable Native Instruments content in case of data loss or hardware failure.
5. Power Supply: Some external hard drives may require an additional power source, while others can be powered solely through the USB or Thunderbolt connection. Ensure that your chosen drive’s power requirements align with your setup. If you plan on using the drive in different locations, a bus-powered drive (powered by the computer) is more convenient, while a drive with an external power supply might be suitable for stationary setups.
6. Security and Encryption: Protecting your Native Instruments files from unauthorized access is essential, especially if you work in shared environments or handle sensitive projects. Consider encryption options provided by the external hard drive or implementing additional security measures to safeguard your data and prevent any potential breaches or data leaks.
By taking these considerations into account, you can ensure a seamless installation and optimal performance of Native Instruments software on an external hard drive. Now that we’ve covered the key considerations, let’s move on to the step-by-step guide that will take you through the installation process.
Step-by-Step Guide to Installing Native Instruments on an External Hard Drive
Installing Native Instruments on an external hard drive requires careful execution to ensure a successful and hassle-free process. Follow these step-by-step instructions to install Native Instruments software on your external hard drive:
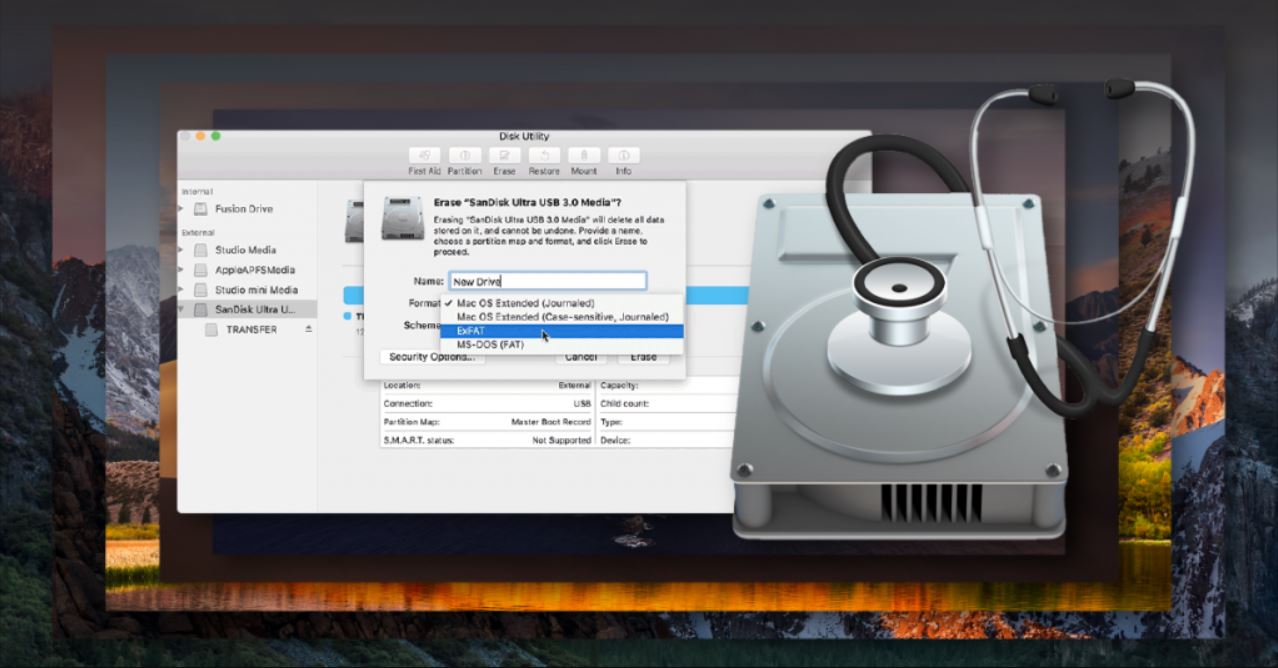
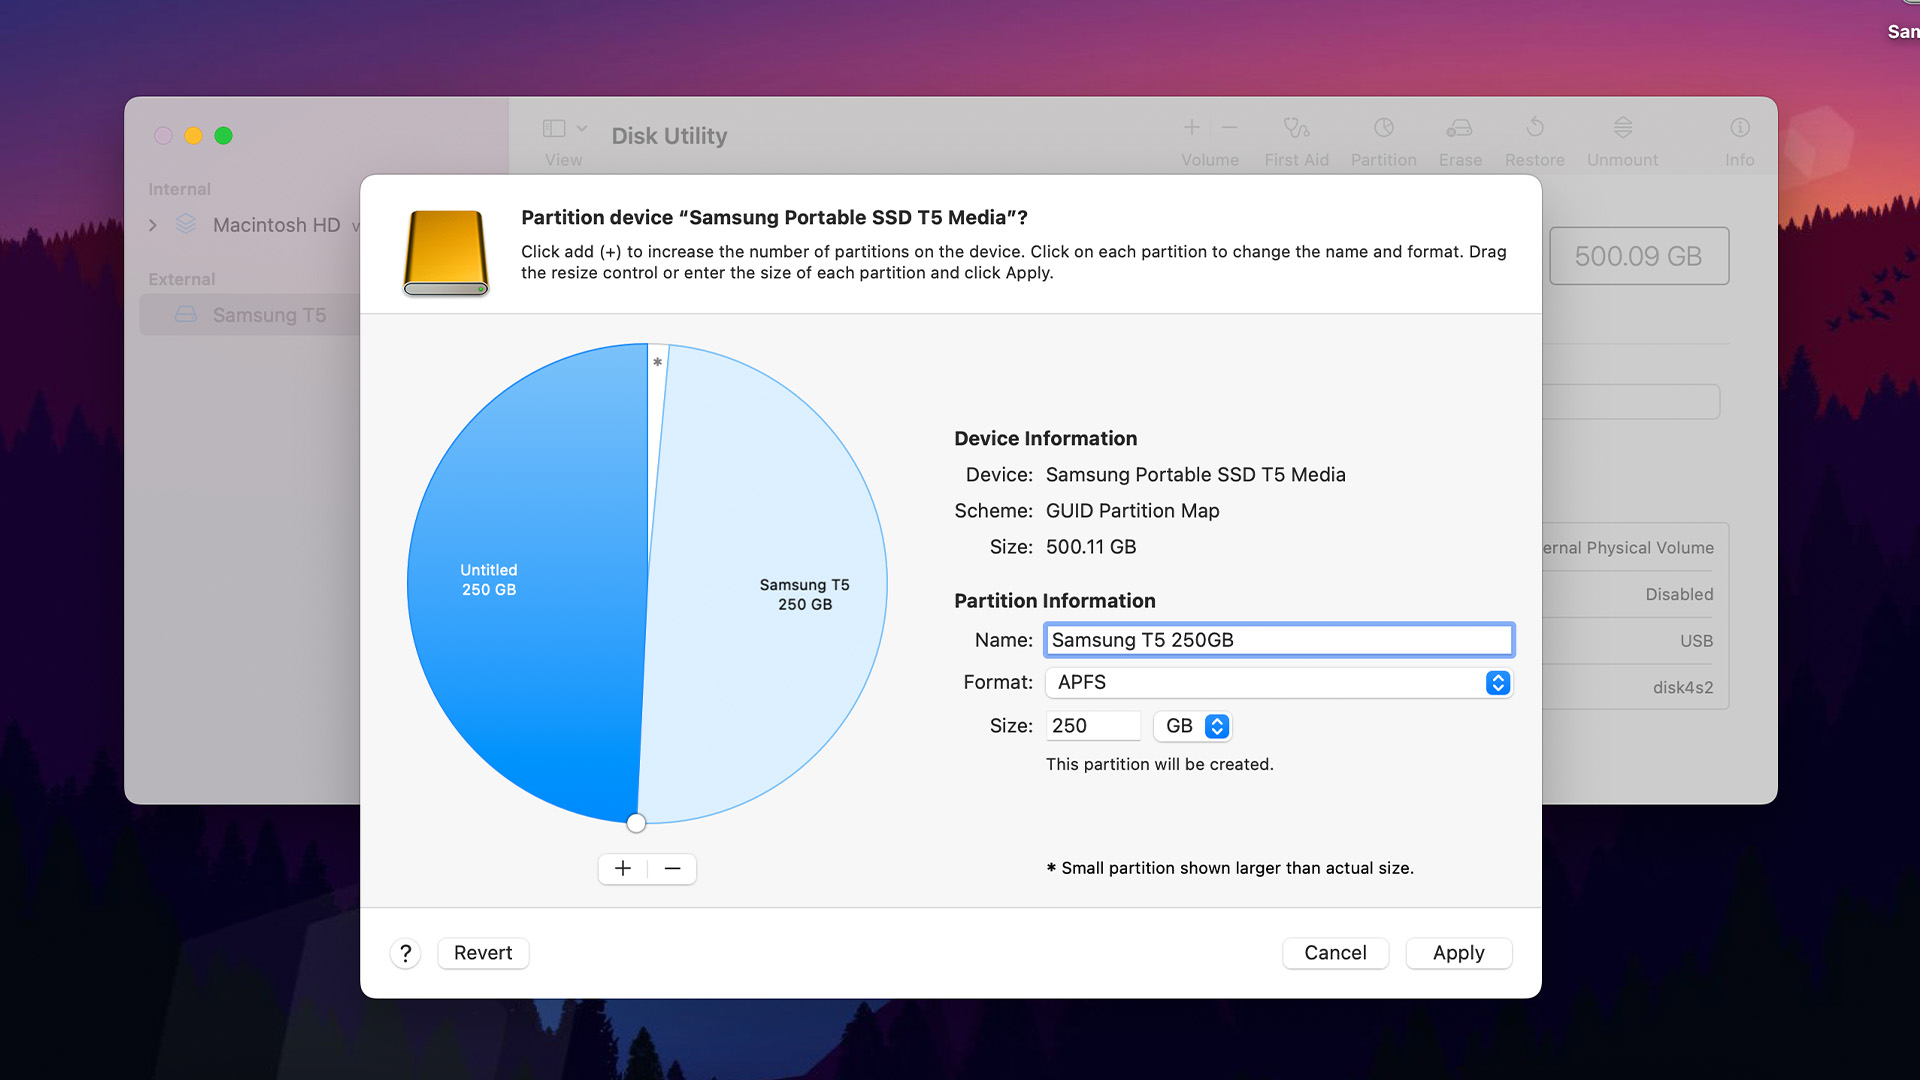
- Choose the Right External Hard Drive: Select a compatible external hard drive with sufficient storage capacity and fast transfer speeds. Ensure the drive is formatted to a compatible file system for your operating system (such as exFAT or HFS+).
- Prepare the External Hard Drive: Connect the external hard drive to your computer and format it if necessary. Formatting erases all data on the drive, so make sure to back up any important files before proceeding.
- Download Native Access: Native Access is a free application provided by Native Instruments that manages installations and updates for their software. Download and install Native Access from the Native Instruments website.
- Launch Native Access: Open Native Access on your computer. If prompted, sign in with your Native Instruments account credentials or create a new account.
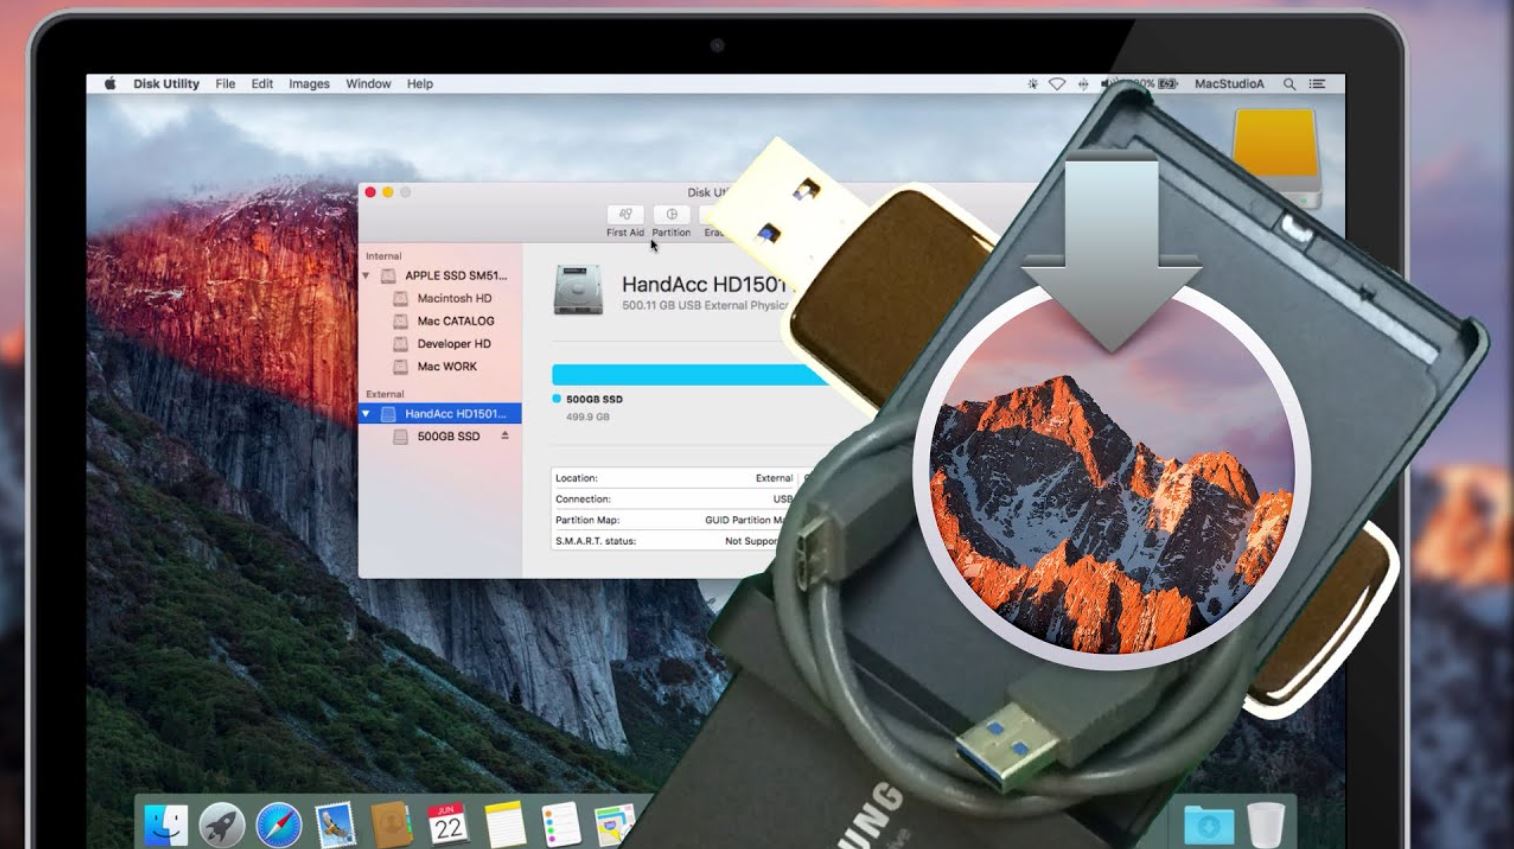
- Connect the External Hard Drive: Make sure the external hard drive is connected to your computer. Ensure that it appears as a recognized drive in your file explorer or operating system.
- Install Native Instruments Software: In the Native Access application, browse the available Native Instruments software and select the ones you want to install on your external hard drive. Choose the external hard drive as the destination for installation.
- Follow the Installation Wizard: Proceed through the installation wizard, carefully reviewing and accepting any license agreements or prompts. Choose your desired installation options, such as sample library locations or plugin formats.
- Wait for the Installation to Complete: The installation process may take some time, depending on the size of the software and your computer’s performance. Do not disconnect or unplug the external hard drive during installation.
- Verify and Activate: Once the installation is complete, launch the Native Instruments software from the external hard drive to ensure it is working correctly. If necessary, follow the activation process outlined by Native Instruments to authorize and activate your software.
Congratulations! You have successfully installed Native Instruments software on your external hard drive. Now you can enjoy the benefits of increased storage capacity, portability, and improved performance without sacrificing valuable internal storage space on your computer.
Remember to keep your external hard drive connected and accessible whenever you want to use Native Instruments software. This will ensure seamless access to your installed instruments, sound libraries, and projects. Now that you’ve completed the installation, let’s address common issues that may arise during the process and provide troubleshooting solutions.
Troubleshooting Common Issues During Installation
While the installation process for Native Instruments on an external hard drive is typically straightforward, some common issues may arise. Here is a list of potential problems you might encounter during the installation process, along with troubleshooting solutions to help you overcome them:
1. External Hard Drive Not Detected: If your computer fails to recognize the external hard drive, ensure that it is properly connected and powered on. Try connecting the drive to a different USB or Thunderbolt port on your computer. If the issue persists, check the drive’s compatibility with your operating system and consider updating the external hard drive’s drivers or firmware.
2. Insufficient Permissions: If you encounter permission issues while installing Native Instruments, ensure that you have the necessary administrative privileges on your computer. Right-click on the Native Access application and select “Run as administrator” to grant the required permissions. If using macOS, ensure that you have read and write permissions for the external hard drive.
3. Interrupted Installation: In the event of a disrupted installation process, such as a power outage or accidental disconnection of the external hard drive, the installation may fail or become corrupted. Restart the installation process and make sure to keep the external hard drive connected and powered throughout the entire installation. If the issue persists, try reinstalling Native Access.
4. Incompatible Operating System: Verify that your operating system meets the minimum requirements for Native Instruments software. If your operating system is not compatible, you may encounter errors or issues during the installation process. Check the Native Instruments website for the supported operating systems and consider updating your system if necessary.
5. Insufficient Disk Space: If you receive a “disk space full” error during installation, check the available storage space on both your computer’s internal hard drive and the external hard drive. Ensure that the external hard drive has enough free space to accommodate the Native Instruments software and any additional content you plan to install. Consider removing unnecessary files or transferring some files to free up space.
6. Corrupted Installation Files: If you encounter errors or anomalies during the installation process, the installation files may be corrupted. Download a fresh copy of the Native Instruments software and try reinstalling. It’s also a good practice to verify the integrity of the downloaded files by comparing their checksums or running a virus scan.
If you encounter persistent issues or encounter errors not listed above, consult the Native Instruments support website or contact their customer support for further assistance. They have dedicated resources available to help troubleshoot and resolve any installation-related issues you may face. By addressing these common installation problems, you can ensure a successful installation of Native Instruments on your external hard drive, allowing you to access its full potential.
Now that we have addressed potential installation issues, let’s proceed to the next section, which provides tips for optimizing the performance of Native Instruments software on an external hard drive.
Tips for Optimizing Native Instruments Performance on an External Hard Drive
To ensure optimal performance and a seamless experience when using Native Instruments software on an external hard drive, consider implementing the following tips and best practices:
1. Choose a High-Quality External Hard Drive: Invest in a reliable, high-performance external hard drive with fast transfer speeds. Look for drives with solid-state drives (SSDs) or high RPM (revolutions per minute) hard disk drives (HDDs) to minimize latency and maintain smooth playback.
2. Keep Your Drive Organized: Maintain a tidy file structure on your external hard drive to help improve file access and loading times. Create separate folders for each Native Instruments software, instrument libraries, sample packs, and projects. This organization will make it easier to locate specific files and ensure efficient workflow.
3. Regularly Update Your Software: Stay up to date with the latest updates and patches for your Native Instruments software. Regular updates often contain performance enhancements, bug fixes, and compatibility improvements that can boost the overall performance of your software on the external hard drive.
4. Adjust Buffer Size: If you experience audio dropouts or latency issues, try adjusting the audio buffer settings in your Native Instruments software. Increasing the buffer size can reduce CPU load and improve overall performance, but it may introduce a slight delay in real-time monitoring. Experiment with different buffer sizes to find the optimal balance between performance and latency.
5. Optimize Plugin Settings: Within your Native Instruments software, optimize the settings of individual plugins for better performance. Disable any unnecessary effects or settings that you are not using in your current project. This will reduce the strain on your computer’s resources and improve overall performance.
6. Manage Sample Libraries: If you have a large collection of sample libraries, consider keeping frequently used libraries on the internal hard drive of your computer while storing less-used libraries on the external hard drive. This will help reduce loading times and prevent the external hard drive from becoming overloaded with data.
7. Regularly Defragment External Hard Drive: Over time, the files on your external hard drive can become fragmented, affecting the overall performance. Consider defragmenting the drive periodically to optimize data access and improve read/write speeds.
8. Use Multiple External Hard Drives: If you have an extensive collection of Native Instruments libraries and sound packs, consider spreading them across multiple external hard drives. This will distribute the workload and avoid overburdening a single drive, leading to improved performance and faster access times.
9. Keep External Hard Drive Connected and Powered: It is crucial to keep your external hard drive connected and powered whenever you’re using Native Instruments software. Disconnecting or powering off the drive during a session can lead to errors and interruptions in your workflow.
10. Regularly Back Up Your Data: Backup your Native Instruments projects, presets, patches, and sample libraries to ensure your valuable work is protected. Create backup copies of your files on an external storage device or a cloud-based backup service to guard against data loss.
By utilizing these tips, you can optimize the performance of Native Instruments software on your external hard drive, ensuring an efficient and enjoyable music production experience. Now that you’re equipped with these optimization techniques, you can unleash the full potential of your Native Instruments software and create music to your heart’s content.
Conclusion
Installing Native Instruments on an external hard drive provides musicians, producers, and DJs with a range of advantages. By utilizing the extra storage space and portability offered by an external hard drive, you can boost your creative capabilities while optimizing your computer’s performance. The step-by-step guide provided in this article ensures a smooth installation process, while the troubleshooting tips help address common issues that may arise along the way.
By considering important factors such as compatibility, drive speed, and storage capacity, you can make an informed decision when selecting an external hard drive for your Native Instruments software. Keeping your files organized, keeping the drive connected and powered, and performing regular backups will help maintain a seamless workflow and protect your valuable data.
With Native Instruments installed on an external hard drive, you can enjoy the freedom to work on projects across multiple computers, collaborate with others easily, and enable smooth system migration when required. By optimizing the performance of Native Instruments on the external hard drive through adjusting buffer sizes, managing sample libraries, and regularly updating the software, you can ensure a smooth and efficient music production experience.
Remember that the installation and optimization tips provided in this article are meant as general guidelines. It is always important to consult the official documentation and support resources provided by Native Instruments for specific questions or technical issues.
Now that you have a comprehensive understanding of the benefits, considerations, installation process, troubleshooting tips, and performance optimization techniques, you can confidently install Native Instruments on an external hard drive. Unlock the full potential of your music production endeavors with the flexibility, storage space, and enhanced performance that comes with this setup. Start enjoying the seamless experience of working with Native Instruments on your external hard drive today!