Introduction
Creating a website using PHP is a great way to add dynamic functionality and interactivity to your web pages. Whether you’re a seasoned web developer or just getting started, hosting your PHP website requires careful consideration and configuration. In this article, we’ll guide you through the process of hosting your PHP website, from installing PHP on your host to testing your website.
Hosting your PHP website involves a few key steps, including installing PHP on your host, configuring PHP settings, uploading your website files, creating a database, configuring the database connection, setting up a domain name, and testing your website to ensure everything is functioning properly.
By following this step-by-step guide, you’ll be able to host your PHP website with ease and ensure that it runs smoothly for your visitors. So, let’s dive in and get started with the first step: installing PHP on your host.
Note: This tutorial assumes that you have already chosen a hosting provider and have access to their control panel or file manager.
Installing PHP on your Host
Before you can host your PHP website, you’ll need to ensure that PHP is installed on your hosting server. Most hosting providers offer PHP as part of their hosting packages, but it’s important to check their documentation or contact support to confirm.
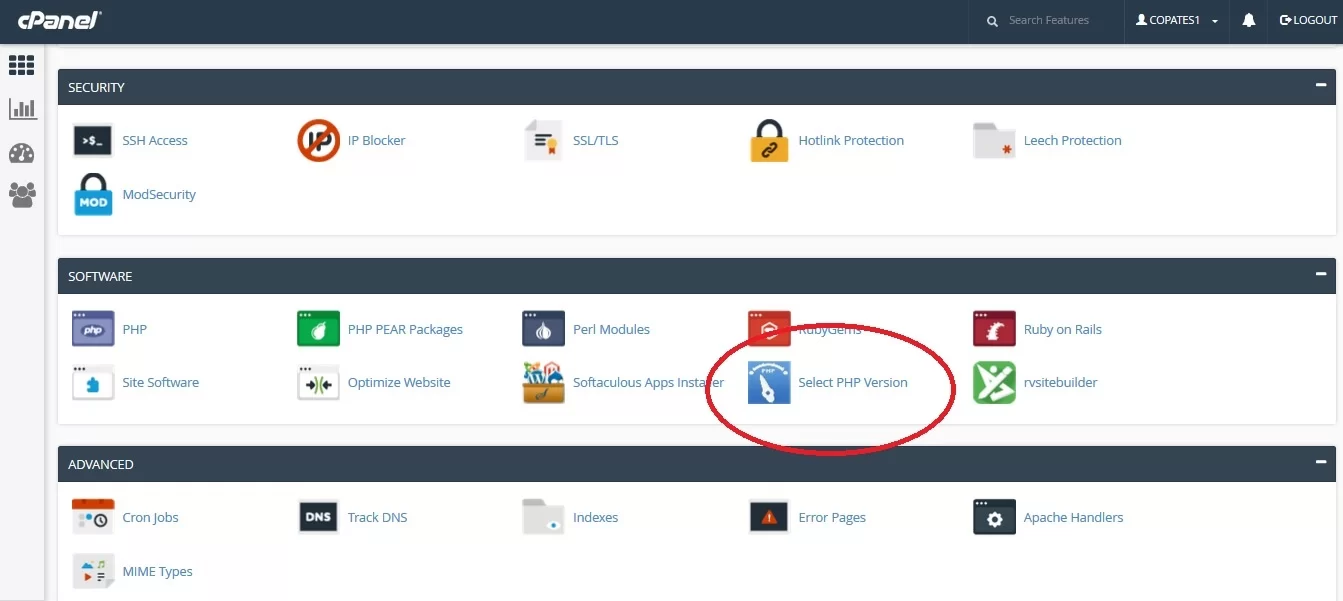
If PHP is not already installed on your host, you can easily install it using the control panel or file manager provided by your hosting provider. Here’s a step-by-step guide to installing PHP:
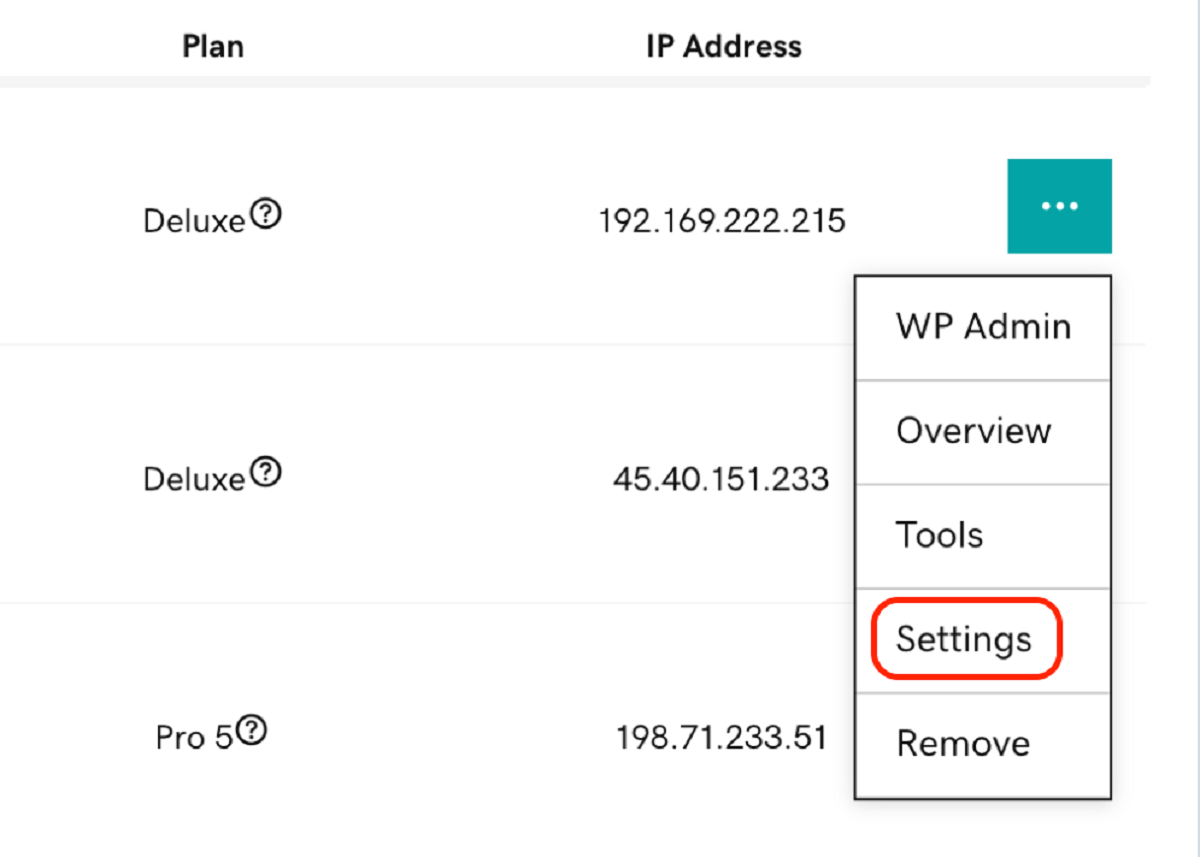
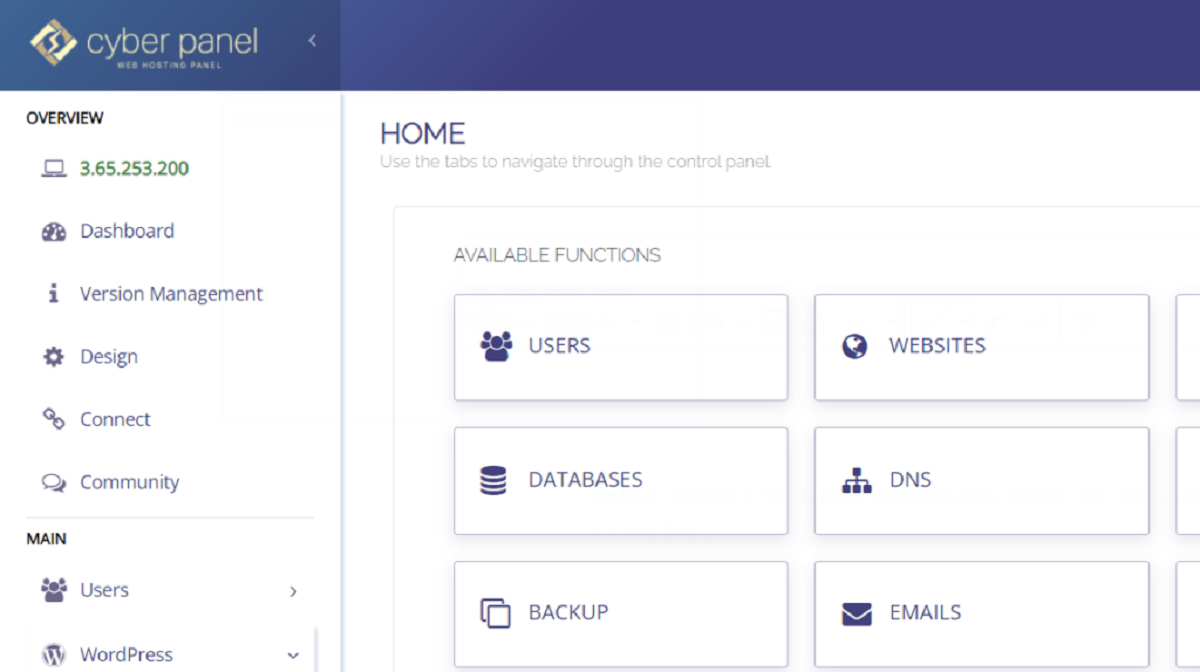
- Log in to your hosting control panel or access the file manager.
- Locate the section or option for installing software or managing server settings.
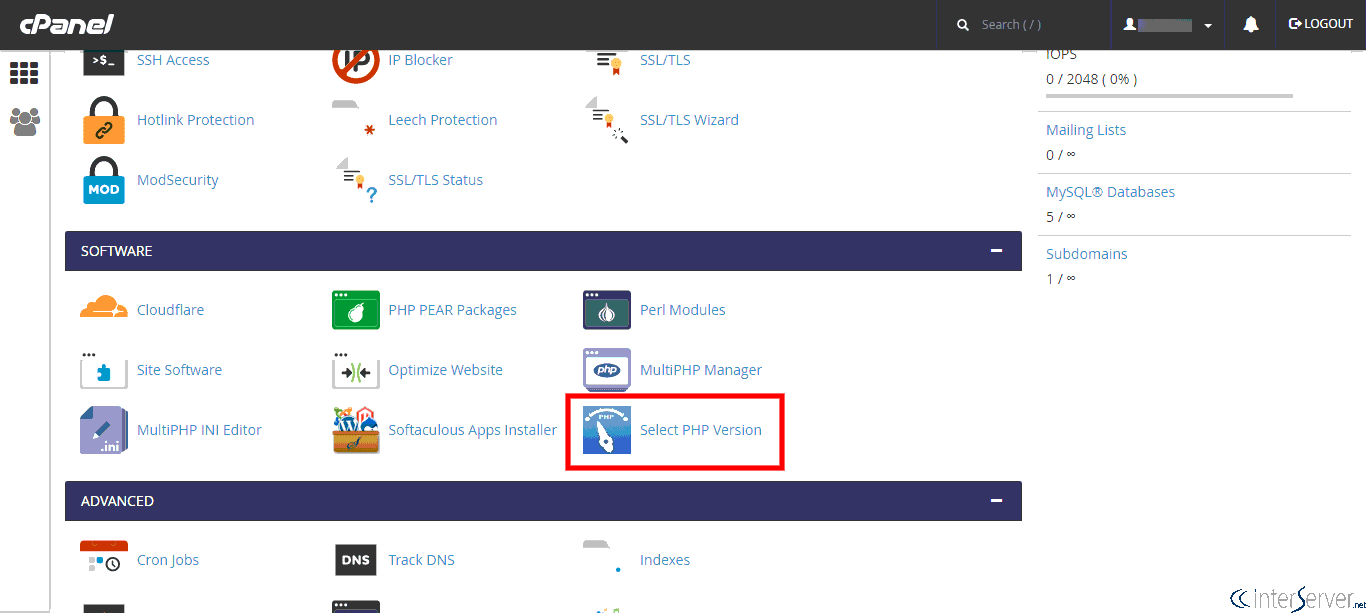
- Look for the PHP installation option and click on it.
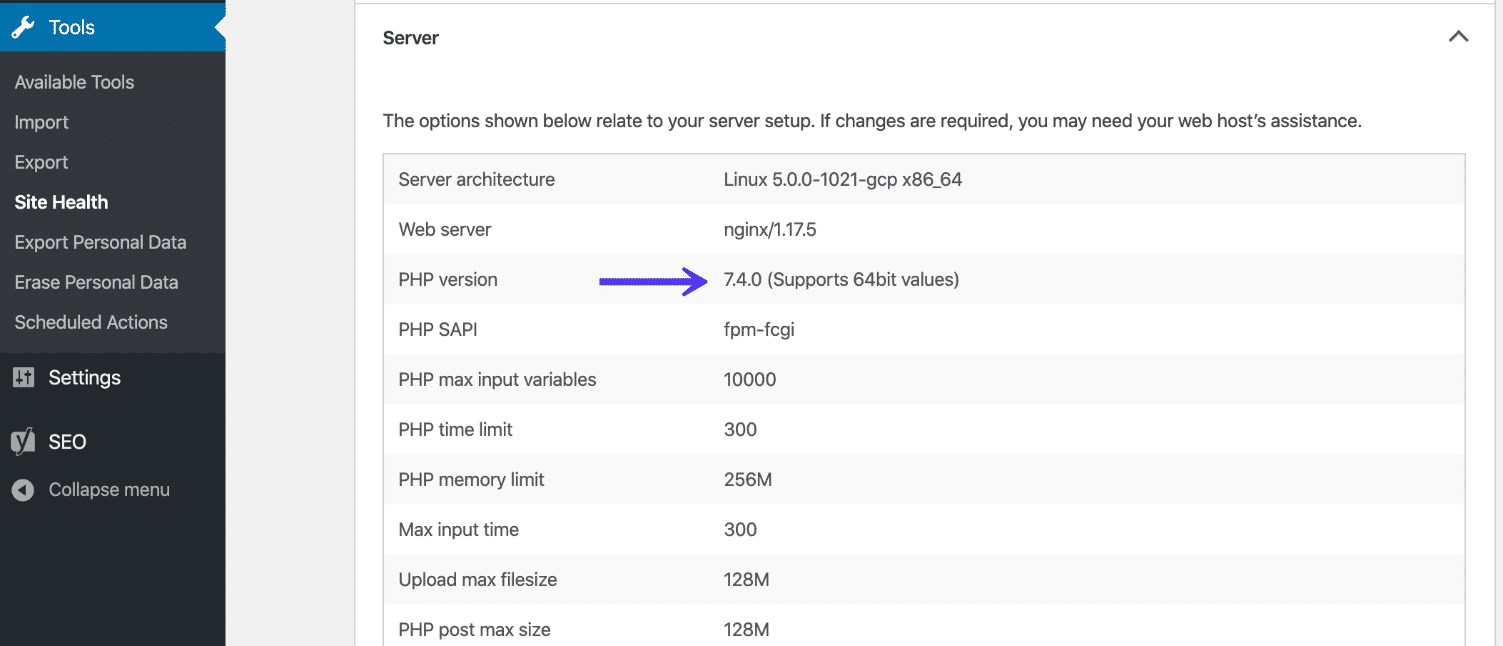
- Select the PHP version you want to install (choose the latest stable version for optimal performance and security).
- Click on the “Install” or “Activate” button to begin the installation process.
- Wait for the installation to complete. This may take a few minutes.
Once the installation is finished, PHP will be set up on your host, and you’ll be ready to configure it to work with your PHP website. In the next section, we’ll discuss how to configure PHP settings on your host.
Configuring PHP on your Host
After installing PHP on your hosting server, the next step is to configure its settings to ensure compatibility and optimal performance for your PHP website. Configuring PHP involves modifying the php.ini file, which contains various configuration options. Here’s how you can configure PHP on your host:
- Access the file manager or FTP client provided by your hosting provider.
- Locate the php.ini file in the root directory of your website.
- Download a copy of the php.ini file to your local computer for backup purposes.
- Edit the php.ini file using a text editor (such as Notepad++) to modify the desired settings.
- Common settings you may want to configure include the maximum file upload size, maximum execution time, and error reporting level.
- Save the changes to the php.ini file and upload it back to the root directory of your website, overwriting the existing file.
It’s important to note that some hosting providers may not allow direct access to the php.ini file. In such cases, you’ll need to look for options in the hosting control panel to modify the PHP settings or contact support for assistance.
Once you have configured PHP settings to your preference, you’re ready to upload your PHP website files to your host. We’ll cover this step in the next section.
Uploading Files to your Host
Now that PHP is installed and configured on your host, it’s time to upload your PHP website files to the server. This step requires a file transfer protocol (FTP) client, which allows you to transfer files between your local computer and the hosting server. Here’s a step-by-step guide to uploading your files:
- Download and install an FTP client such as FileZilla, Cyberduck, or WinSCP.
- Launch the FTP client and enter the FTP credentials provided by your hosting provider.
- Connect to the hosting server by entering the FTP hostname, username, and password.
- Once connected, you’ll see the local directories on your computer on the left side of the FTP client and the remote directories on the hosting server on the right side.
- Navigate to the directory where you want to upload your PHP website files on the hosting server.
- Select the files and folders from your local computer that you want to upload.
- Drag and drop the selected files and folders from the local directory to the remote directory in the FTP client.
- Wait for the FTP client to transfer the files to the hosting server. The time taken depends on the size of your files and the speed of your internet connection.
Once the file transfer is complete, you have successfully uploaded your PHP website files to your host. In the next sections, we’ll cover the steps for creating a database and configuring the database connection for your PHP website.
Creating a Database for your PHP Website
In order to store and retrieve data for your PHP website, you’ll need to create a database. Databases provide a structured way to organize and manage your website’s information. Here’s how you can create a database for your PHP website:
- Log in to your hosting control panel or database management system provided by your hosting provider.
- Find the option to create a new database and click on it.
- Enter a name for your database. Make sure to choose a descriptive name that is easy to remember.
- Choose the database type, usually MySQL or MariaDB, depending on your hosting provider’s offerings.
- Click on the “Create” or “Add” button to create the database.
Once the database is created, you’ll also need to create a database user and assign them appropriate privileges. The database user will be used to establish a connection between your PHP website and the database. Here’s how you can create a database user and assign privileges:
- Find the option to create a new database user or manage database users.
- Enter a username and password for the database user.
- Assign the necessary privileges to the database user. Typically, you’ll need to grant them “All Privileges”.
- Save the changes and make note of the database name, username, and password. You’ll need these details to configure the database connection in your PHP code.
With the database and database user created, you’re ready to configure the database connection in your PHP code. We’ll cover this step in the next section.
Configuring Database Connection
Once you have created a database for your PHP website, the next step is to configure the database connection. The database connection allows your PHP code to communicate with the database and perform operations such as retrieving and storing data. Here’s how you can configure the database connection:
- Open the PHP files of your website using a text editor.
- Locate the section of code where the database connection is established.
- Within this section, you will typically find variables holding the database hostname, username, password, and database name.
- Update these variables with the appropriate values you noted down when creating the database and database user.
- Save the changes to the PHP files.
Here’s an example of what the database connection code may look like:
$hostname = "localhost";
$username = "your_username";
$password = "your_password";
$database = "your_database_name";

$conn = mysqli_connect($hostname, $username, $password, $database);

if (!$conn) {
    die("Connection failed: " . mysqli_connect_error());
}
Make sure to replace “your_username”, “your_password”, and “your_database_name” with the actual values for your database connection.
Once you have configured the database connection, you’re ready to move on to the next step of setting up a domain name for your PHP website.
Setting up a Domain Name for your PHP Website
A domain name acts as the address for your PHP website on the internet. It allows visitors to access your website using a memorable and unique URL. To set up a domain name for your PHP website, follow these steps:
- Choose a domain registrar or use the domain registration service provided by your hosting provider.
- Search for available domain names that match your website’s purpose or brand.
- Select a domain name and proceed with the registration process.
- Provide the necessary information requested by the domain registrar or hosting provider, such as your contact details.
- Complete the registration process by making the necessary payments.
- Once you have registered the domain name, you’ll need to configure the domain’s DNS (Domain Name System) settings.
- Access the DNS management section provided by your domain registrar or hosting provider.
- Add the required DNS records, including an A record or CNAME record, to point the domain to your hosting server’s IP address.
Keep in mind that DNS propagation may take some time, typically a few hours or up to 48 hours, before your domain name becomes fully accessible worldwide. During this time, your website may be intermittently accessible or completely unavailable.
Once the DNS propagation is complete, you can access your PHP website using the domain name you have set up. However, it’s important to note that SSL/TLS certificates are also important to secure your website and establish trust with your visitors. You can obtain an SSL/TLS certificate through your hosting provider or a third-party SSL certificate provider.
With your domain name properly set up, it’s time to move on to the final step of testing your PHP website to ensure everything is working as expected.
Testing your PHP Website
After completing the necessary steps to host your PHP website, it’s crucial to test it to ensure that everything is functioning as expected. Testing allows you to identify any issues or errors and make any necessary adjustments before making your website live to the public. Here’s how you can test your PHP website:
- Open a web browser and enter your domain name in the address bar.
- Press Enter to load your website.
- Navigate through the different pages and functionalities of your website to check for any errors or unexpected behavior.
- Fill in any forms or submit data to test if it is correctly stored in the database.
- Ensure that all links and buttons are working properly and directing to the intended destinations.
- Check the loading speed of your website to ensure optimal performance.
- Test your website on different devices and browsers to ensure compatibility.
During the testing phase, it is crucial to thoroughly examine and evaluate every aspect of your PHP website. Pay attention to any error messages, missing images, or broken functionalities. In addition, it’s helpful to gather feedback from friends, colleagues, or a focus group to gain insights from different perspectives.
If you encounter any issues during testing, review the code, database configuration, and hosting settings to identify and resolve the problems. Debugging tools, error logs, and developer tools in web browsers can assist in identifying and troubleshooting any issues you may encounter.
Once you are confident that your PHP website is working smoothly and all the necessary adjustments have been made, you are ready to officially launch your website and make it available to the public.
Remember, maintaining and updating your PHP website regularly is crucial to ensure its security, functionality, and overall performance. Stay up to date with the latest PHP versions, security patches, and best practices to keep your website running smoothly and protect it from potential vulnerabilities.