html
Introduction
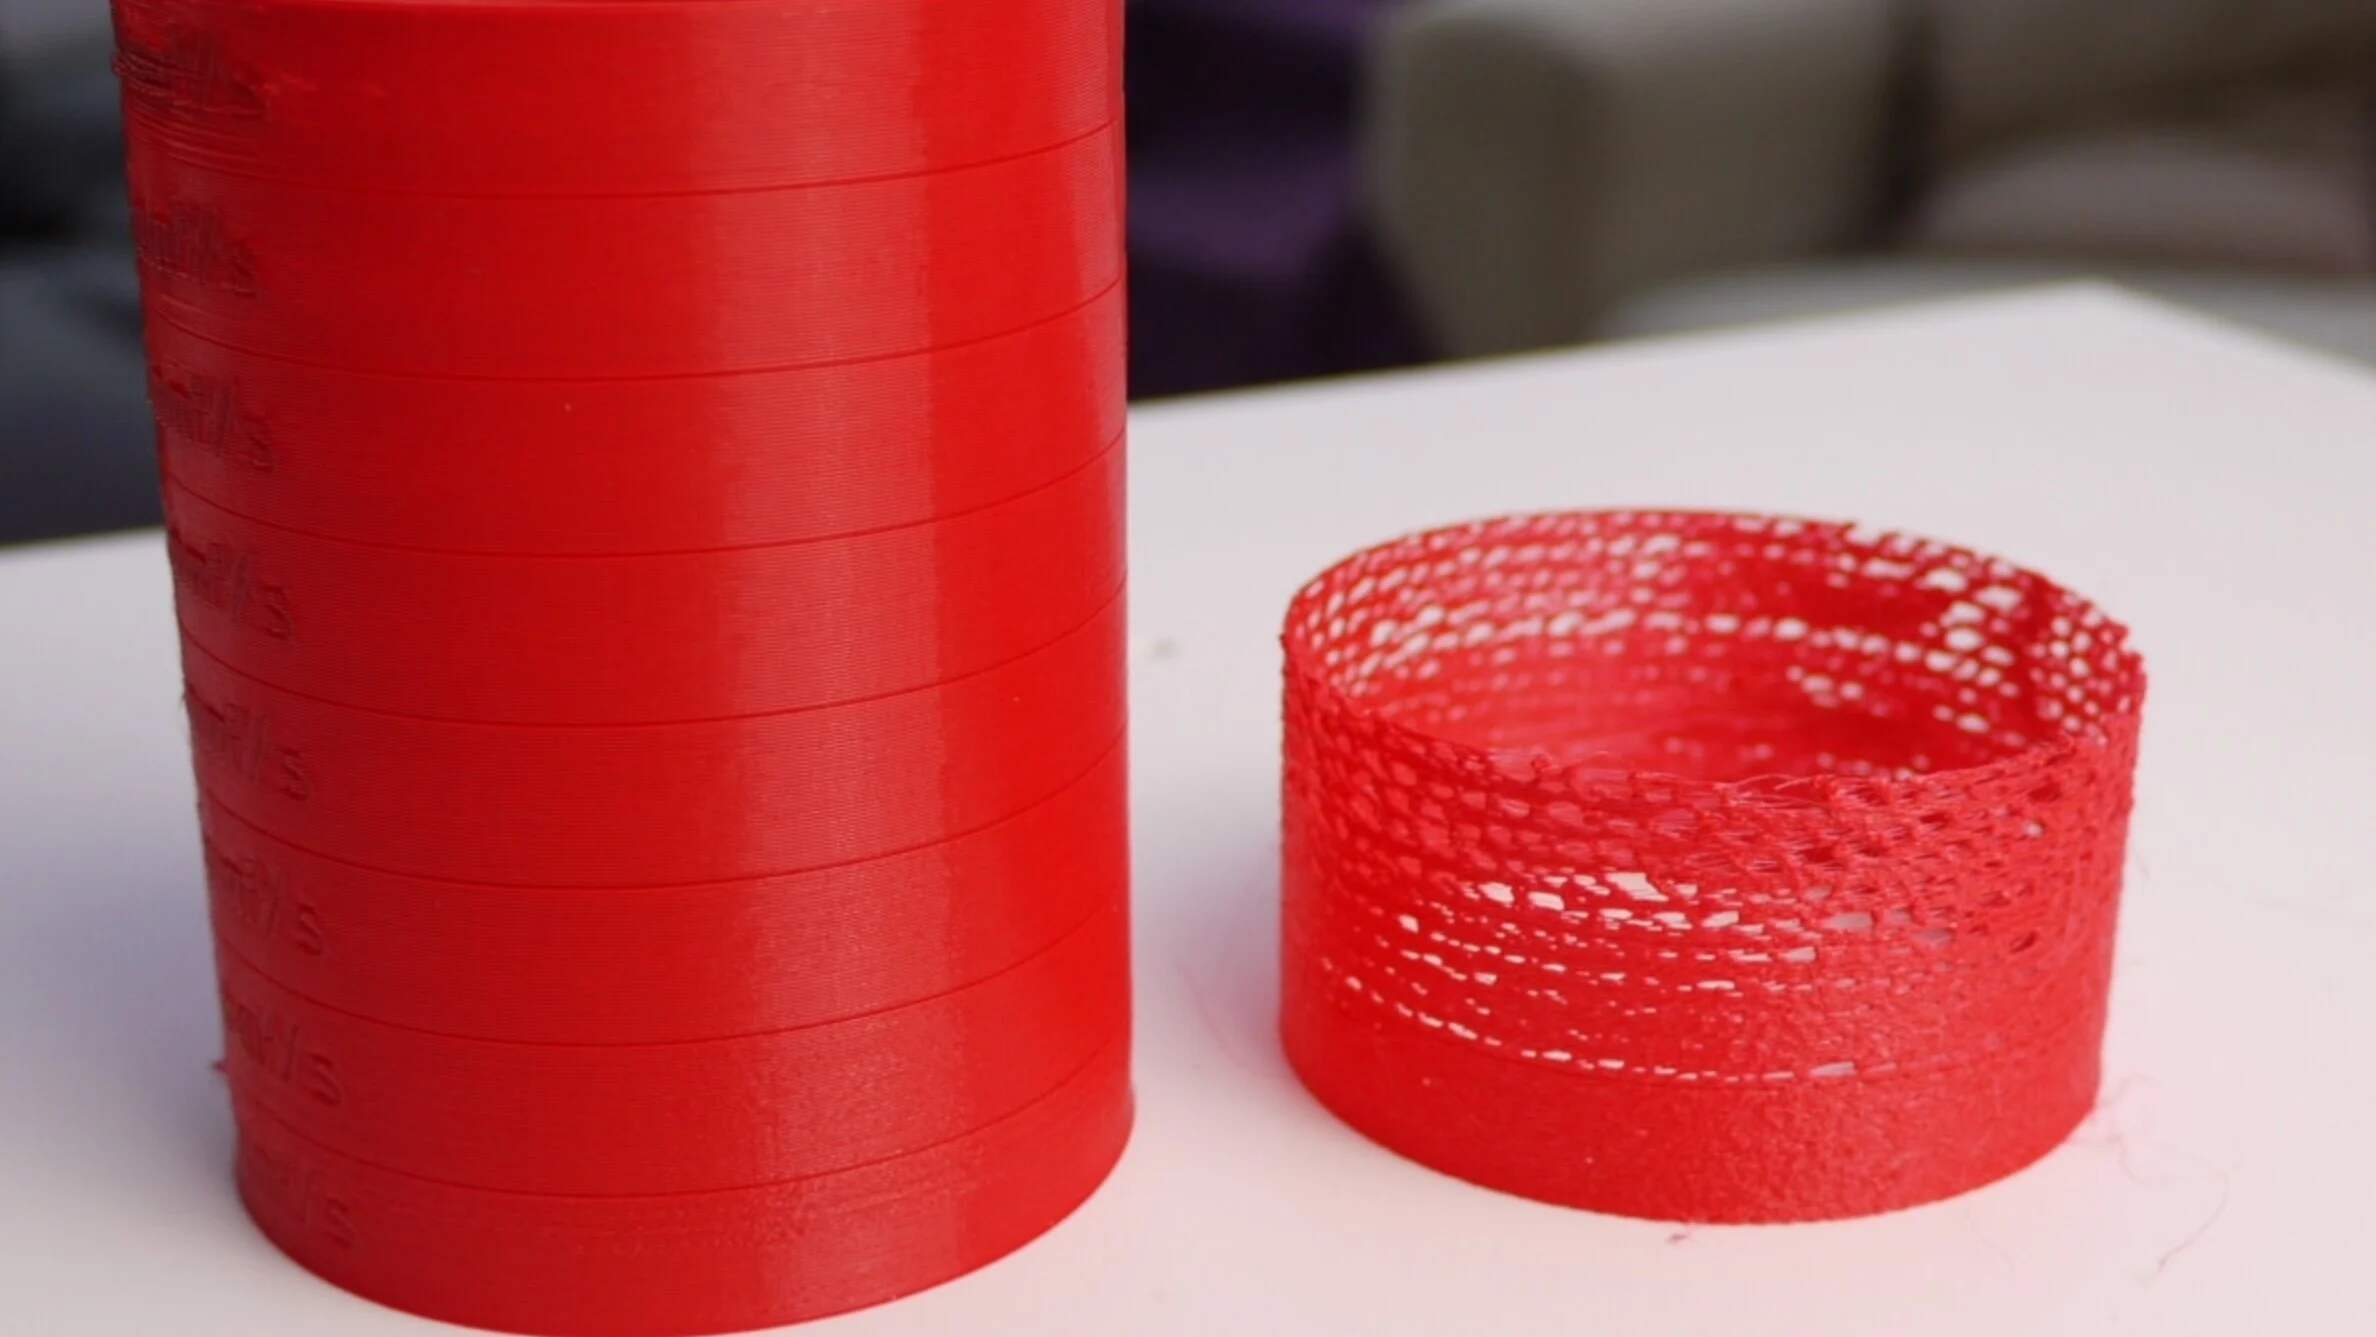
When it comes to 3D printing, there’s nothing more frustrating than dealing with under-extrusion. Imagine spending hours designing or downloading a 3D model, only to have your printer not deliver the desired amount of filament, leading to weak and incomplete prints.
Under-extrusion occurs when the 3D printer fails to push out enough filament through the nozzle during the printing process. This issue can result in thin and fragile layers, uneven surfaces, and overall poor print quality.
Fortunately, there are various steps you can take to address under-extrusion and ensure that your 3D printer delivers consistent and reliable prints. In this guide, we will explore the common causes of under-extrusion and provide practical solutions to fix the problem.
To effectively tackle under-extrusion, it’s essential to understand the factors that contribute to this issue. From filament quality to extruder calibration, we will delve into the reasons behind under-extrusion and provide step-by-step instructions on how to troubleshoot each one.
By following the recommendations in this guide, you will be able to overcome under-extrusion and achieve high-quality prints with your 3D printer. So let’s dive in and explore the solutions to fix under-extrusion once and for all!
html
Understanding Under-Extrusion
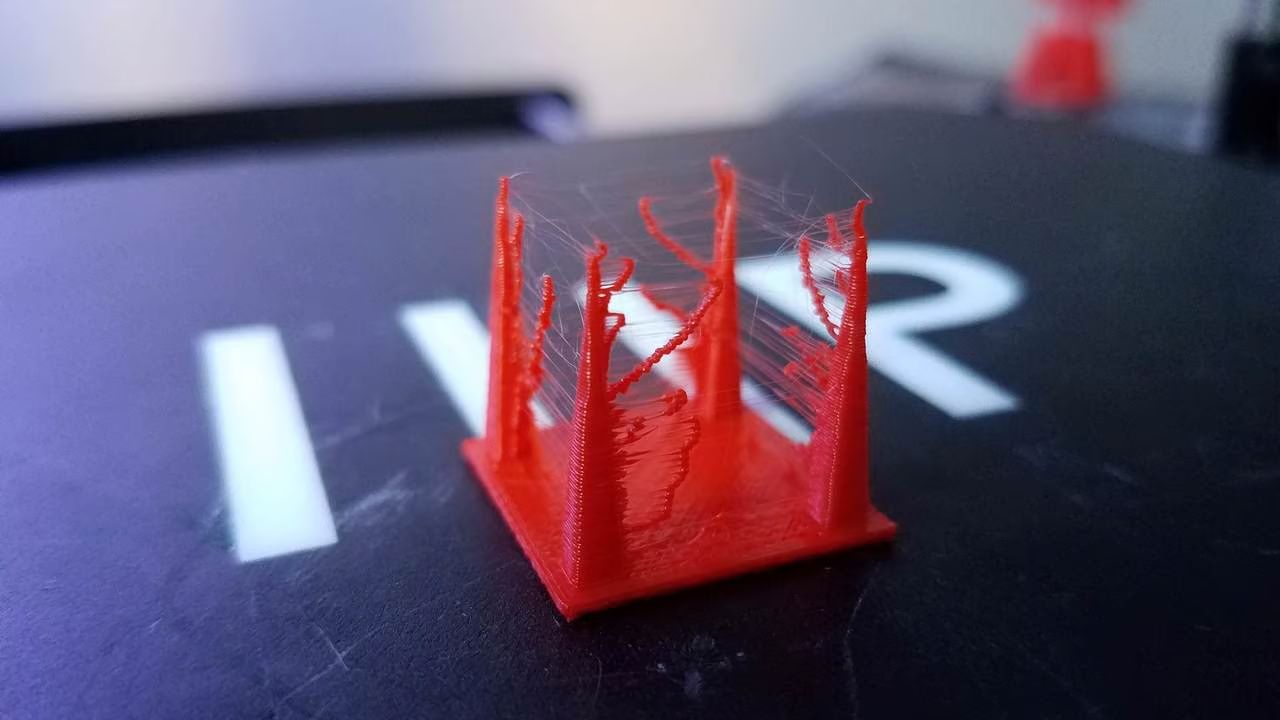
Before we delve into the solutions for under-extrusion, it’s important to have a clear understanding of what it is and how it affects your 3D prints. Under-extrusion occurs when the printer is unable to push out enough filament during the printing process.
There are several consequences of under-extrusion. Firstly, it leads to weakened and incomplete layers, resulting in a structurally compromised print. Secondly, under-extrusion can cause the printed object to have uneven surfaces and gaps, negatively impacting the overall aesthetic appeal.
Under-extrusion can be caused by various factors. A clogged nozzle or a partially blocked filament path can restrict the flow of filament, resulting in reduced extrusion. Another potential cause is improper calibration of the extruder steps, causing it to push out insufficient filament.
It’s important to note that under-extrusion is not always a result of a faulty 3D printer. It can also be caused by low-quality or improperly stored filament. Moisture absorption in the filament can lead to clumping and inconsistent melting, resulting in under-extrusion.
Identifying under-extrusion is relatively easy. You may notice thin or incomplete layers, gaps in your prints, or a decrease in the overall print quality. Monitoring the extrusion process during printing can also be helpful in detecting any under-extrusion issues.
In the next sections, we will explore common causes of under-extrusion and provide step-by-step solutions to address each one. By understanding the underlying causes and implementing the suggested solutions, you’ll be able to overcome under-extrusion and achieve high-quality 3D prints.
html
Common Causes of Under-Extrusion
Understanding the common causes of under-extrusion is crucial in troubleshooting and fixing this issue. By identifying the root cause, you can take the appropriate steps to ensure smooth and consistent filament extrusion.
One common cause of under-extrusion is a clogged or partially blocked nozzle. Over time, filament residue can build up inside the nozzle, restricting the flow of filament. This can lead to inconsistent extrusion or complete blockages. Regular maintenance and cleaning of the nozzle can help prevent under-extrusion caused by nozzle blockages.
Another cause of under-extrusion is improper calibration of the extruder steps. The extruder steps determine the amount of filament that gets pushed out during each step of the printing process. If the steps are not calibrated correctly, the printer may not extrude the desired amount of filament, resulting in under-extrusion. Calibrating the extruder steps can significantly improve print quality and reduce under-extrusion issues.
Under-extrusion can also occur due to improper tension in the extruder. If the tension is too loose, the filament may slip and not get pushed through the extruder properly. On the other hand, if the tension is too tight, it can cause the filament to get crushed, leading to inconsistent extrusion. Adjusting the extruder tension to find the optimal balance is essential in combating under-extrusion.
Low-quality or improperly stored filament can also contribute to under-extrusion. Filament that has absorbed moisture from the environment can lead to clumping and inconsistent melting, resulting in poor extrusion. It’s important to store filament in airtight containers with desiccant to maintain its quality.
Lastly, incorrect slicer settings can cause under-extrusion. The slicer software determines how the 3D model is translated into printable instructions for the printer. Incorrect settings such as layer height, print speed, or filament diameter can lead to under-extrusion. Optimizing the slicer settings according to your printer and filament can help resolve under-extrusion issues.
By considering these common causes, you can narrow down the potential sources of under-extrusion and take the necessary steps to fix them. In the following sections, we will discuss each solution in detail to help you overcome under-extrusion and achieve high-quality 3D prints.
html
Assessing the Filament
When dealing with under-extrusion, one of the first steps to take is to assess the quality of your filament. Low-quality or improperly stored filament can contribute to inconsistent extrusion and under-extrusion issues.
Start by visually inspecting the filament for any signs of moisture absorption or damage. If the filament appears discolored, brittle, or has noticeable clumps, it may have absorbed moisture from the surrounding environment. In such cases, it is recommended to dry the filament using a dedicated filament dryer or by following the manufacturer’s instructions.
Next, check the diameter of the filament using a pair of calipers. Ensure that the filament diameter matches the settings in your slicer software. If the filament diameter is inconsistent or significantly different from the specified value, adjust the slicer settings accordingly to compensate for the variation.
In addition to the diameter, also consider the type and quality of the filament. Different filament materials have different printing characteristics, and using low-quality filament can contribute to under-extrusion. Investing in high-quality filament from reputable manufacturers can improve print results and reduce the likelihood of under-extrusion.
Furthermore, check the condition of the filament spool. Ensure that the filament is wound tightly and securely on the spool, without any tangles or knots. Loose or tangled filament can cause friction and hinder the smooth flow of filament through the extruder, resulting in under-extrusion.
By assessing the quality and condition of your filament, you can eliminate any potential issues related to filament quality or storage. It’s important to maintain a consistent supply of high-quality filament to achieve reliable and consistent extrusion during the 3D printing process.
In the next sections, we will explore further solutions to address under-extrusion, focusing on steps that can be taken within the printer itself, such as checking the nozzle, calibrating the extruder steps, and adjusting the extruder tension.
html
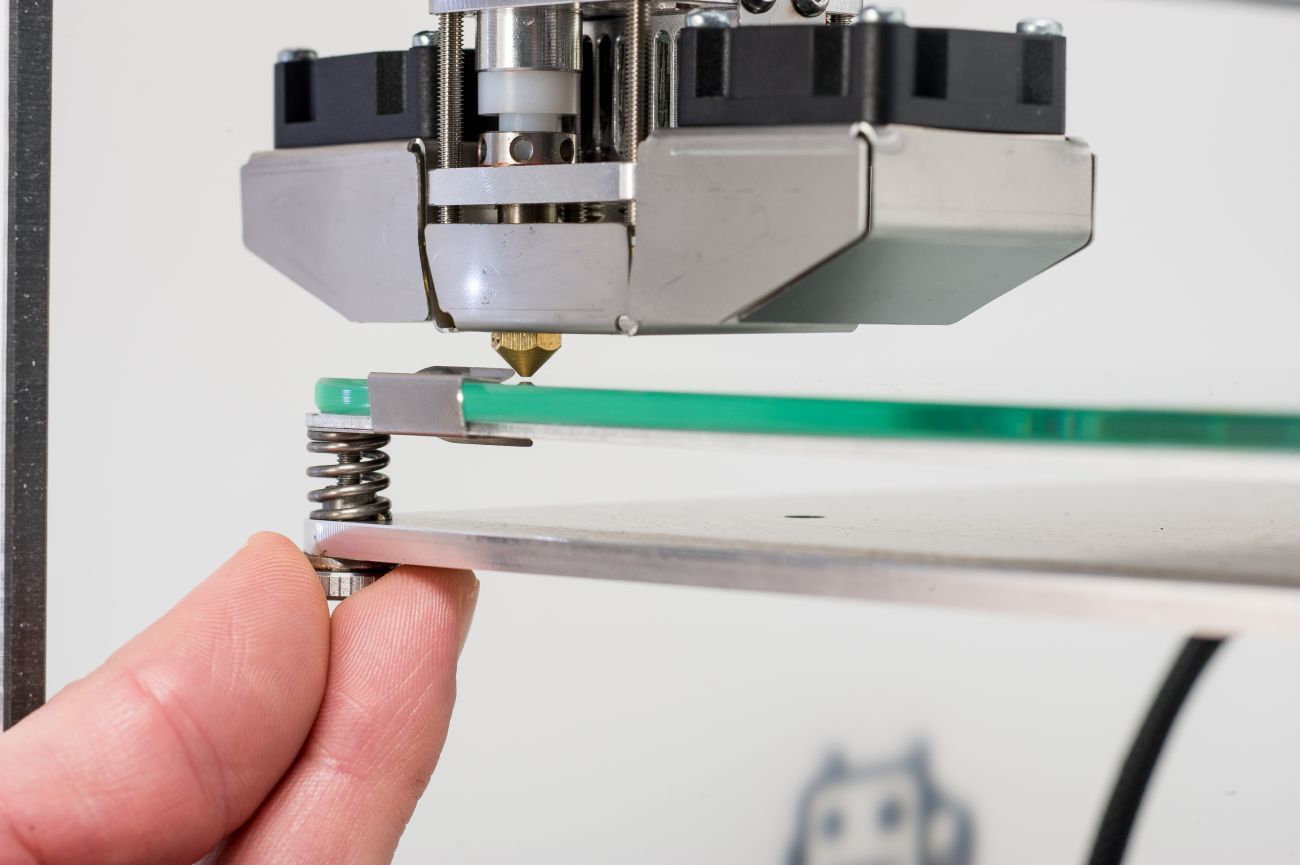
Checking the Nozzle
The nozzle is a critical component of the 3D printer and can contribute to under-extrusion if it becomes clogged or damaged. Checking the nozzle for any blockages or issues is an essential step in troubleshooting under-extrusion.
To check the nozzle, start by heating up the printer to the recommended printing temperature for the filament you are using. Once the printer has reached the desired temperature, gently remove any filament that might be present in the extruder.
Next, carefully inspect the nozzle opening. You can use a magnifying glass or a camera with macro capabilities to get a better view. Look for any signs of filament residue or debris that might be obstructing the nozzle opening.
If you notice any blockage, you will need to clear the nozzle. One approach is to use a small needle or cleaning filament to gently remove the obstruction. Insert the needle or filament into the nozzle opening and apply slight pressure to dislodge any clogs or debris. Be cautious not to damage the nozzle while performing this step.
Alternatively, you can perform a cold pull, also known as a “cold atomic pull,” to clear the nozzle. This method involves heating the printer to a specific temperature and then quickly cooling it down while pulling on the filament. This action helps remove any debris or clogs that might be present in the nozzle.
Once you have cleared the nozzle, it’s recommended to perform a test print to ensure that the under-extrusion issue has been resolved. By clearing any blockages in the nozzle, you improve the filament flow and increase the chances of obtaining consistent extrusion during printing.
In the next sections, we will explore additional steps to address under-extrusion, including calibrating the extruder steps and adjusting the extruder tension. These steps will help fine-tune the 3D printer’s extrusion process and ensure optimal filament delivery.
html
Calibrating the Extruder Steps
Proper calibration of the extruder steps is crucial in ensuring accurate filament delivery and preventing under-extrusion. The extruder steps determine the amount of filament that is pushed through the printer during each step of the printing process.
To begin the calibration process, prepare a small piece of filament measuring precisely 100mm. Mark the filament at a fixed point, such as with a pen or a piece of tape, to create a reference point.
Next, load the filament into the extruder, making sure it is securely fed through the nozzle and into the hotend. Use the printer’s interface or control panel to extrude exactly 100mm of filament.
Measure the remaining length of filament from the reference point. If the measured length is not 100mm, it indicates that the extruder steps are not accurately calibrated.
To adjust the extruder steps, you will need to access your printer’s firmware settings or configuration. Consult your printer’s documentation or the manufacturer’s website for specific instructions on accessing and modifying the firmware settings.
Within the firmware settings, search for the “steps per unit” or “extruder calibration” option. Adjust the value by a small increment (such as ±5 steps) and save the changes. Repeat the calibration process described above with the modified value.
Continue adjusting the extruder steps and repeating the calibration process until the measured length of the extruded filament matches the desired 100mm. This ensures that the printer can accurately push out the desired amount of filament, reducing the chances of under-extrusion.
After completing the extruder steps calibration, it’s recommended to perform a test print to ensure that the under-extrusion issue has been resolved. Adjust the extruder steps as needed based on the print results until the desired print quality is achieved.
In the following sections, we will discuss additional steps to address under-extrusion, such as adjusting the extruder tension and optimizing the slicer settings. These steps work synergistically to improve the printer’s extrusion process and enhance overall print quality.
html
Adjusting the Extruder Tension
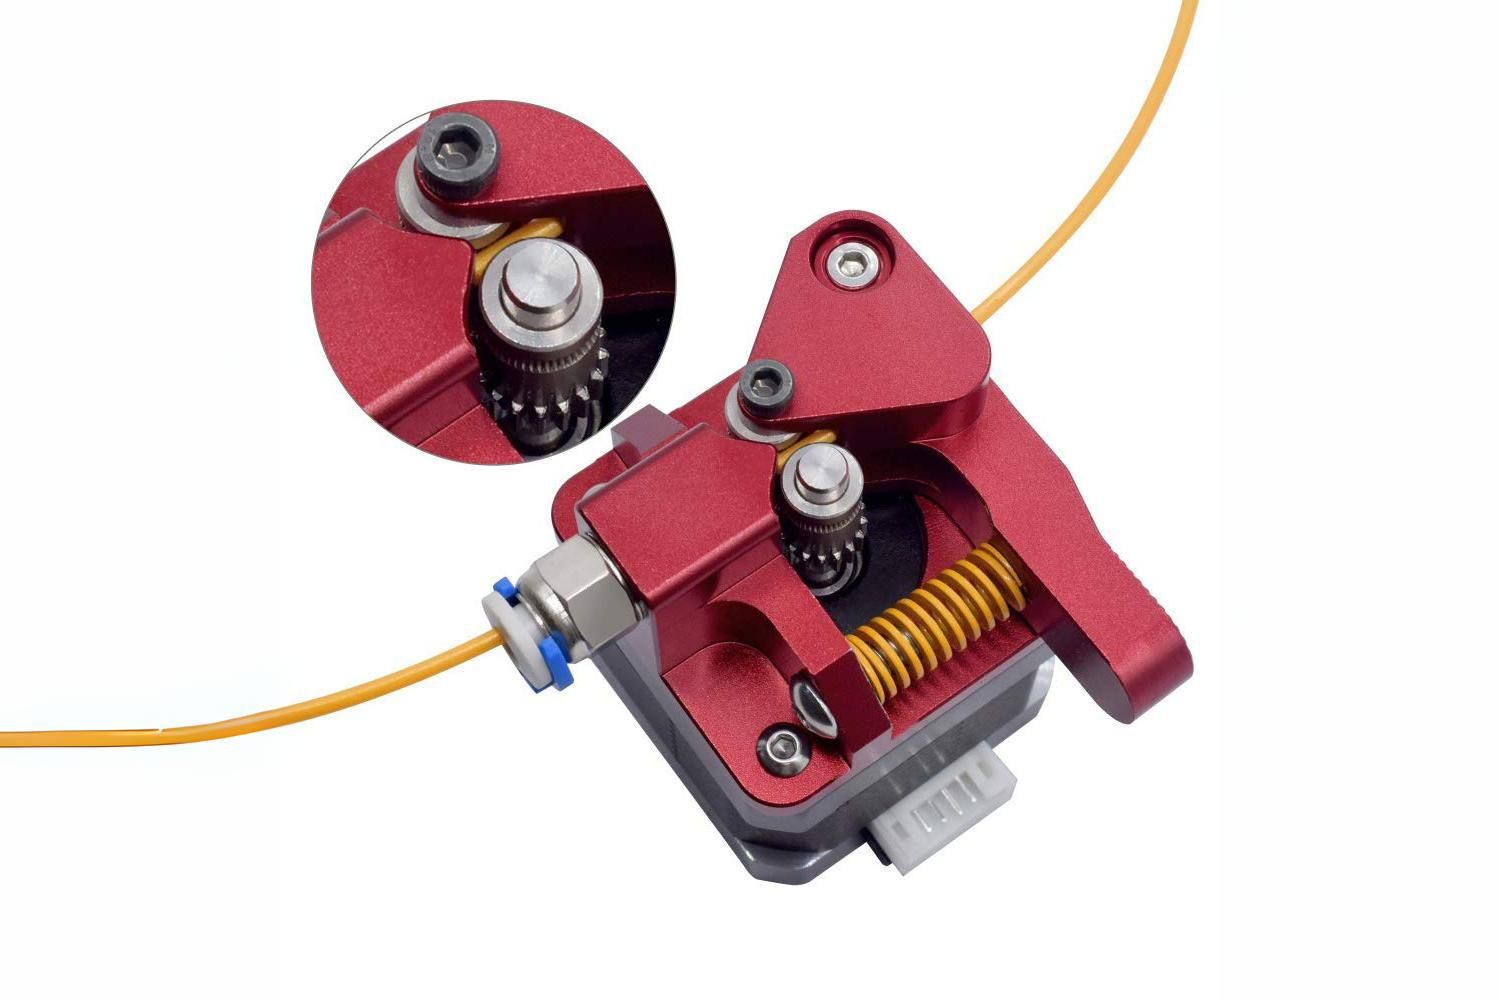
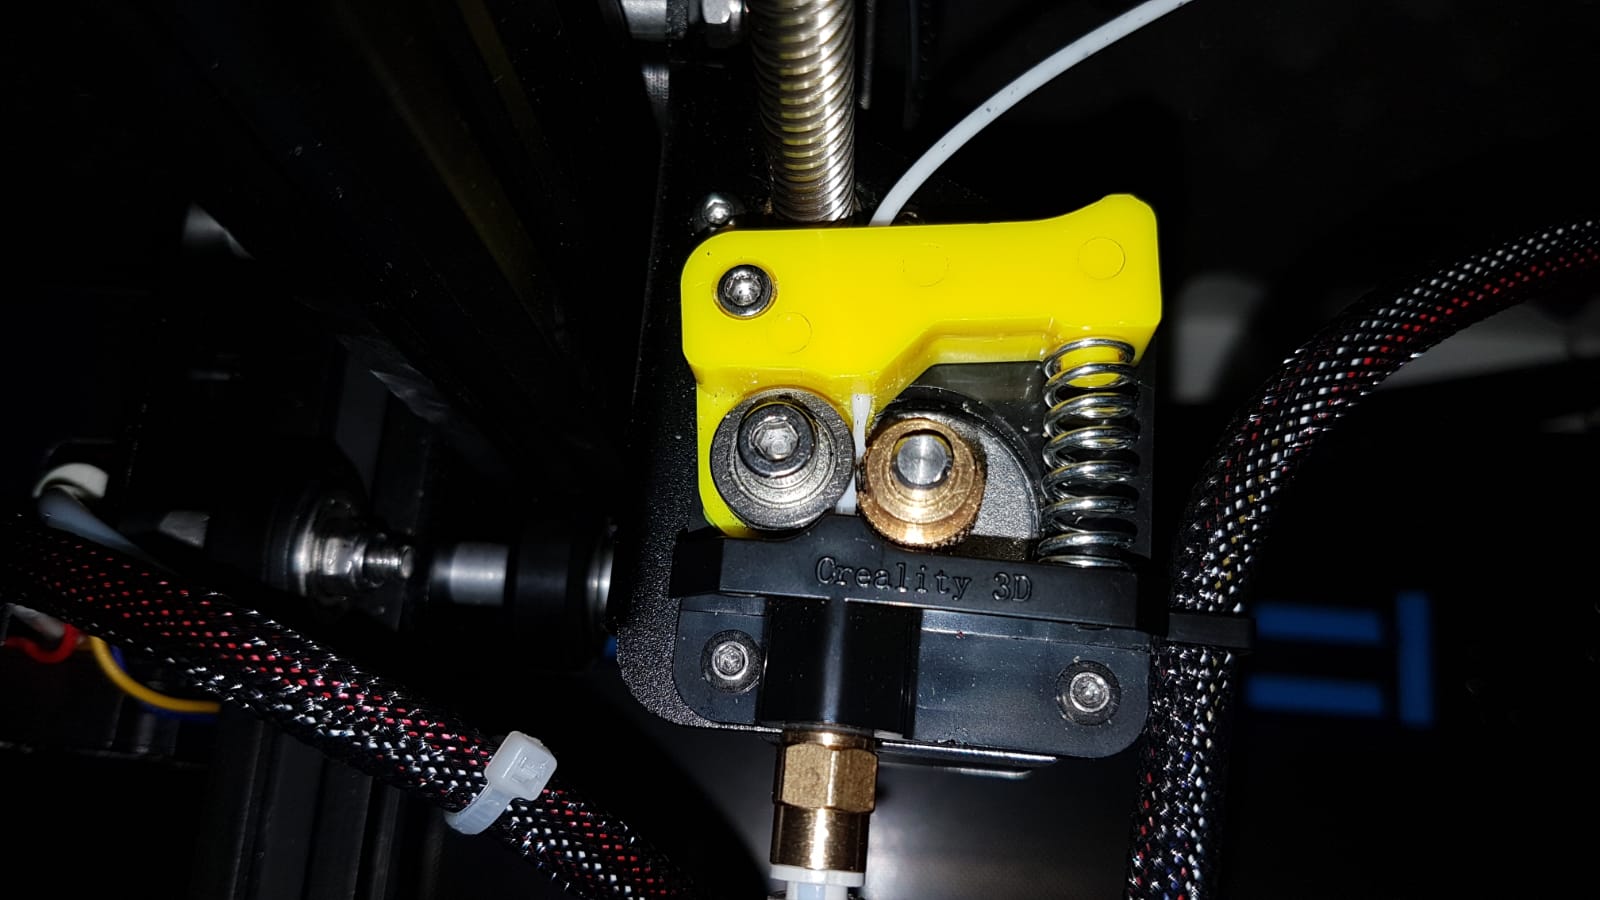
Another potential cause of under-extrusion is improper tension in the extruder. The extruder tension determines how tightly the filament is held and fed through the extruder assembly. Adjusting the extruder tension can help ensure smooth and consistent filament flow, reducing the chances of under-extrusion.
To begin adjusting the extruder tension, locate the tensioning mechanism on your printer’s extruder assembly. This may be in the form of a screw, lever, or spring-loaded mechanism. Consult your printer’s documentation or manufacturer’s website for specific instructions on how to adjust the extruder tension for your particular model.
If the tension is too loose, the filament may slip and not get pushed through the extruder properly, resulting in under-extrusion. To increase the tension, tighten the tensioning mechanism gradually, making small adjustments at a time. Test the extruder by loading filament and performing a test print to assess the impact of the tension adjustments.
Conversely, if the tension is too tight, it can cause the filament to get crushed, leading to uneven extrusion or blockages. To decrease the tension, loosen the tensioning mechanism slightly and verify the impact on filament flow and extrusion quality.
It is important to carefully monitor the extruder tension adjustments and their effect on print quality. Aim for a tension that allows the filament to flow smoothly without slipping or getting squished, ensuring proper filament delivery to the hotend.
Keep in mind that different filaments may require slightly different tension settings due to variations in their stiffness and diameter. Therefore, it’s recommended to test different tension levels with the specific filament you are using to achieve optimal results.
By adjusting the extruder tension, you can fine-tune the filament feeding process and minimize under-extrusion issues. In the subsequent sections, we will explore additional solutions for under-extrusion, including clearing the hotend and optimizing slicer settings, to further enhance print quality.
html
Clearing the Hotend
If you’re experiencing under-extrusion, a potential culprit could be a clogged or partially blocked hotend. The hotend is responsible for melting the filament and extruding it through the nozzle. Clearing any obstructions in the hotend is crucial to ensure smooth filament flow and prevent under-extrusion issues.
To begin clearing the hotend, first heat up the printer to the recommended temperature for the filament you are using. Heating the hotend will soften any filament residue or debris that may be causing the blockage.
Once the hotend has reached the desired temperature, carefully remove the filament from the extruder assembly. Use a pair of tweezers or pliers to grasp the end of the filament and gently pull it out of the hotend.
If the filament does not easily come out or you notice resistance, there may be a clog within the hotend. In this case, you can use a needle or specialized cleaning filament to clear the blockage. Heat the hotend back up to the filament’s melting temperature and then carefully insert the needle or cleaning filament into the nozzle, pushing through the clog to dislodge it.
It’s important to exercise caution when clearing the hotend to avoid damaging the nozzle or other components. Always follow the manufacturer’s recommendations and guidelines when performing any maintenance or cleaning tasks on your specific printer model.
After clearing the hotend, it’s recommended to perform a test print to ensure that the under-extrusion issue has been resolved. Monitor the print closely to ensure that the filament flows smoothly and consistently through the hotend, producing high-quality prints.
In the next sections, we will discuss additional steps to tackle under-extrusion, including optimizing slicer settings and stabilizing print speed. By implementing these solutions, you can further improve print quality and reduce the occurrence of under-extrusion.
html
Optimizing Slicer Settings
One of the key factors influencing under-extrusion is the slicer settings. The slicer software converts your 3D model into instructions that the printer uses to create the print. Optimizing the slicer settings can significantly impact the quality of the final print and help prevent under-extrusion issues.
Start by ensuring that you have the correct filament diameter specified in the slicer settings. Using the wrong diameter can lead to under-extrusion or over-extrusion. Measure the actual filament diameter and update the slicer settings accordingly to ensure accurate filament flow.
Another important setting to consider is the layer height. If the layer height is too small or too large for your printer and nozzle combination, it can lead to under-extrusion. Experiment with different layer heights to find the optimal setting that delivers reliable and consistent extrusion.
Print speed is another crucial parameter to optimize. Printing too fast can strain the extruder and cause under-extrusion. On the other hand, printing too slowly can cause the filament to accumulate and lead to over-extrusion. Adjust the print speed to find the right balance that ensures smooth and consistent extrusion.
Additionally, pay attention to retraction settings. Retraction is the process of pulling the filament back slightly between non-printing moves to prevent oozing and stringing. Incorrect retraction settings can contribute to under-extrusion. Experiment with retraction speed and distance to find the optimal values for your specific printer and filament combination.
It’s also worth checking the infill settings in the slicer. If the infill is too sparse, it can cause under-extrusion in areas where structural support is needed. Increase the infill density or change the pattern to ensure sufficient filament flow in all parts of the print.
Lastly, consider enabling features like “Coast” or “Wipe” if available in your slicer. These features can help reduce under-extrusion by stopping the extrusion slightly before the end of a line or performing additional movements to clean the nozzle.
By optimizing the slicer settings, you can fine-tune various parameters that affect extrusion and enhance print quality. Remember to test and iterate on different settings to find the optimal configuration for your specific printer and filament combination.
In the next section, we will discuss the importance of stabilizing the print speed to further address under-extrusion and achieve consistent print results.
html
Stabilizing the Print Speed
Print speed plays a crucial role in maintaining consistent and reliable extrusion during the 3D printing process. An unstable print speed can lead to under-extrusion and negatively impact the overall print quality. Stabilizing the print speed is important to ensure smooth filament flow and minimize the occurrence of under-extrusion.
One way to stabilize the print speed is by avoiding drastic changes in speed throughout the print. Rapid acceleration or deceleration can cause variations in filament pressure and result in under-extrusion. Configure the slicer settings to gradually change speeds to minimize sudden changes and maintain a more stable extrusion process.
It’s also essential to ensure that the printer’s mechanical components are properly calibrated and aligned. Loose belts, misaligned rods, or inconsistent movement can lead to speed fluctuations and under-extrusion. Regularly check and tighten the belts, lubricate the rods, and perform maintenance tasks to keep the printer in optimal condition.
Moreover, consider the layer cooling fan settings. An inadequate cooling fan can cause filament to soften and warp, leading to inconsistent extrusion and potential under-extrusion. Adjust the fan speed and positioning to provide sufficient cooling to the printed layers, especially on overhangs or bridges.
Monitoring and maintaining a stable extrusion temperature is vital. Fluctuations in temperature can affect the viscosity of the filament, resulting in under-extrusion. Use an accurate and reliable temperature control system and ensure that the printer is operating in a stable environment with minimal temperature fluctuations.
It’s worth noting that different printers and filaments may require different stabilization techniques. Experiment with different print speeds and observe the print quality to determine the optimal speed for your specific setup. Keep in mind that a balance between speed and quality is necessary to prevent under-extrusion while maintaining reasonable print times.
By stabilizing the print speed and optimizing other associated parameters, you can minimize the occurrence of under-extrusion and achieve consistent, high-quality prints. In the next section, we will summarize the key steps discussed throughout this guide to effectively fix under-extrusion on your 3D printer.
html
Final Thoughts
Addressing under-extrusion on your 3D printer may require a combination of various troubleshooting techniques. By understanding the common causes of under-extrusion and implementing the solutions discussed in this guide, you can overcome this frustrating issue and achieve high-quality prints.
Remember to start by assessing the quality of your filament and ensuring it is stored properly to prevent moisture absorption. Checking the nozzle for blockages and clearing the hotend can help maintain smooth filament flow. Calibrating the extruder steps and adjusting the tension in the extruder assembly are critical steps in achieving accurate and consistent extrusion.
Optimizing the slicer settings, including filament diameter, layer height, print speed, and retraction, can further improve print quality and reduce under-extrusion. Stabilizing the print speed and maintaining a stable extrusion temperature are also essential factors to consider.
It’s important to note that every 3D printer setup is unique, and you may need to experiment and make adjustments specific to your printer and filament combination. Patience and persistence are key as you fine-tune these settings to achieve the best results.
Regular maintenance, such as cleaning the nozzle and performing calibration checks, is also crucial to prevent future under-extrusion issues. Keep your printer in good working condition and follow the manufacturer’s guidelines for maintenance tasks.
By following these steps and remaining attentive to the extrusion process, you can overcome under-extrusion and achieve consistent and high-quality prints with your 3D printer.
We hope this guide has provided valuable insights and practical solutions to help you troubleshoot and fix under-extrusion. Happy printing!