Introduction
Graphics processing units (GPUs) play a crucial role in modern computing, powering the graphics and image-intensive tasks of various devices such as computers, laptops, and gaming consoles. However, like any other hardware component, GPUs can encounter issues that affect their performance and functionality. From graphical glitches to overheating problems, these issues can significantly impact the user experience.
In order to ensure the smooth operation of your GPU, it is important to troubleshoot and fix any problems that arise. While some issues may require professional assistance, there are several common GPU problems that you can tackle on your own, saving time and money.
In this article, we will discuss some of the most common GPU problems and provide you with a step-by-step guide on how to fix them. By following these instructions, you can potentially resolve issues such as artifacts on the screen, system freezes, overheating, and more. Whether you are a seasoned computer enthusiast or a beginner, this guide will help you troubleshoot and repair your GPU, restoring its optimal performance.
Before diving into the troubleshooting process, it is important to acquire a few essential tools. These tools will aid in the diagnosis and repair of your GPU issues. You will need a screwdriver set, thermal paste, compressed air canister, and a reliable internet connection for driver updates, among other common computer tools. By gathering these tools beforehand, you will be well-equipped to address the problems with your GPU.
Common GPU Problems
Before we delve into the solutions, let’s take a look at some of the most common GPU problems that users often encounter:
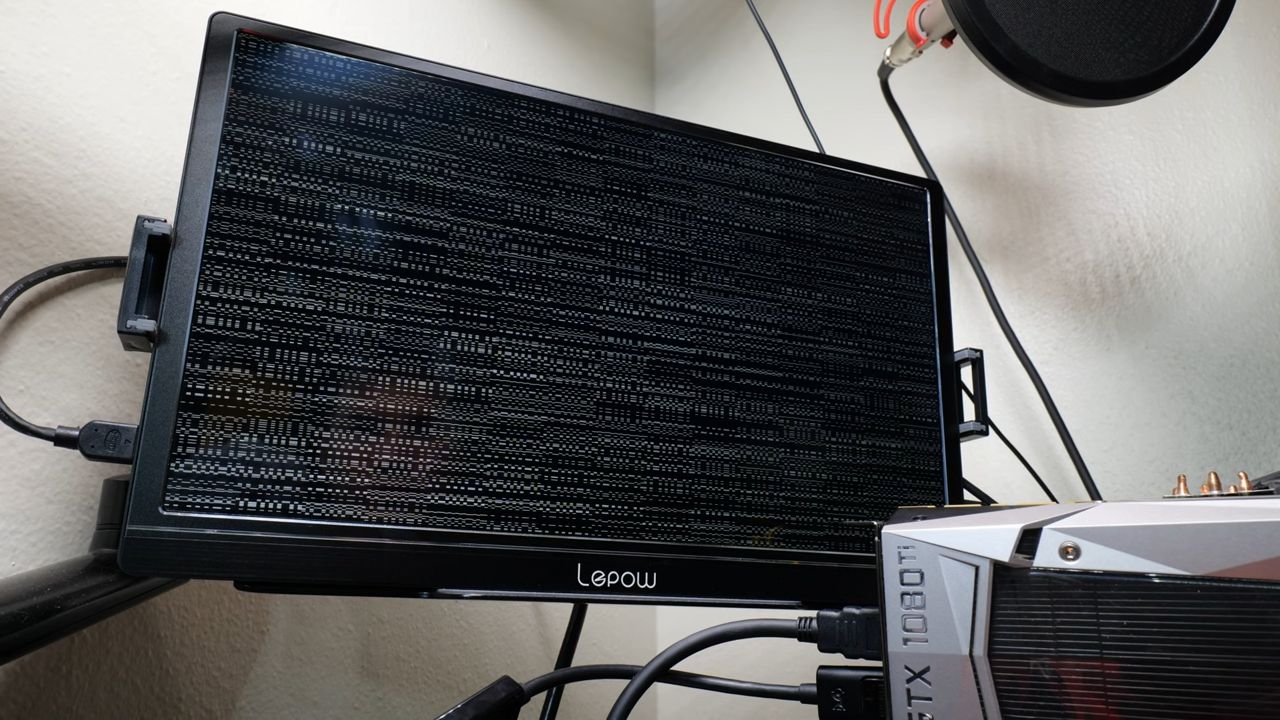
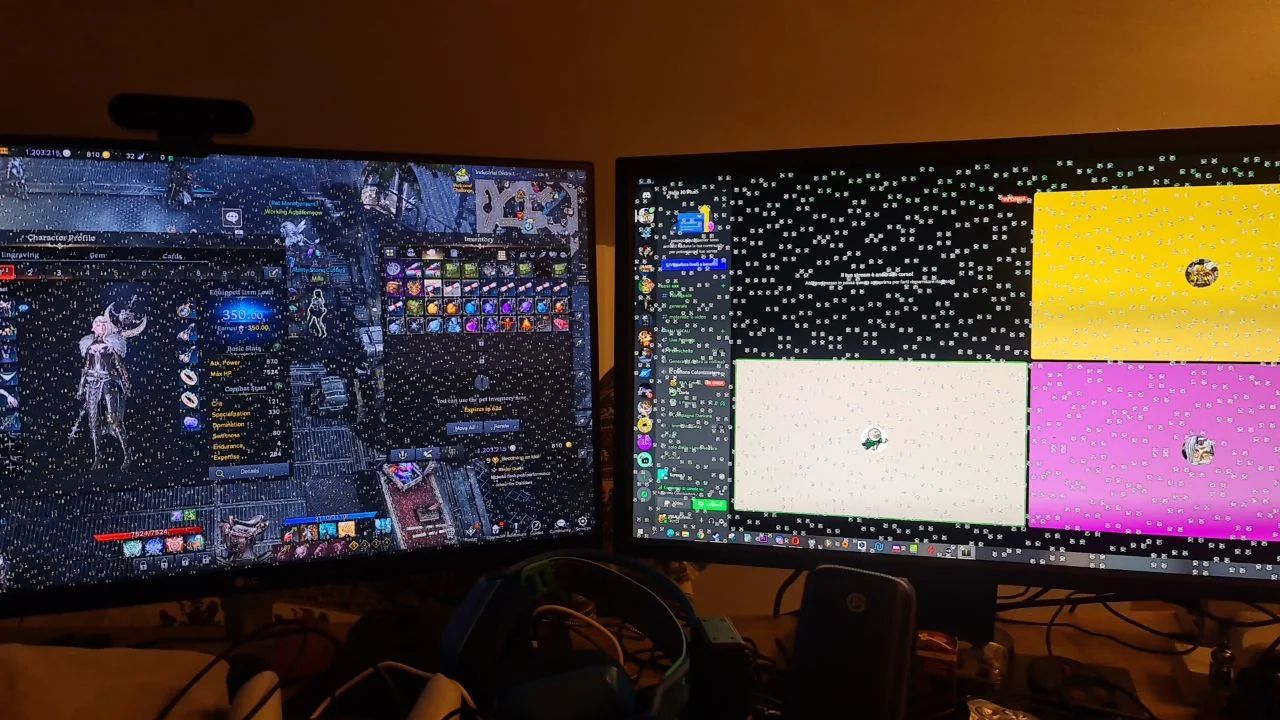
- Artifacting: This problem manifests as graphical glitches on the screen, such as random colored pixels or distorted images. Artifacting is usually caused by faulty GPU memory or inadequate power supply.
- System Freezes and Crashes: If your computer freezes or crashes when performing graphics-intensive tasks or running games, it could indicate a GPU-related issue. This can be caused by outdated drivers, overheating, or a defective GPU.
- Overheating: Overheating is a widespread problem that affects GPUs, especially during prolonged gaming sessions or when the cooling system is clogged with dust. Excessive heat can degrade performance and even lead to permanent damage if left unresolved.
- Driver Issues: Outdated or incompatible GPU drivers can cause various problems, including crashes, reduced performance, and compatibility issues with certain applications or games.
- Hardware Failure: In some cases, the GPU may experience hardware failures such as faulty fan, damaged connectors, or burned-out components. These issues may require professional assistance or replacement of the GPU.
Now that we are aware of the common GPU problems, let’s move on to the step-by-step guide to fixing them.
Tools Required for GPU Fix
Before you embark on fixing your GPU issues, it is important to gather the necessary tools. Having these tools at hand will ensure that you have everything you need to diagnose and resolve the problems effectively. Here are some essential tools you will need:
- Screwdriver Set: A set of precision screwdrivers with various heads will allow you to safely open up your computer case and access the GPU.
- Thermal Paste: Thermal paste is crucial for ensuring optimal heat transfer between the GPU and the heatsink. Over time, the thermal paste can dry out and lose effectiveness, leading to overheating problems. Applying a fresh layer of thermal paste can significantly improve cooling efficiency.
- Compressed Air Canister: Dust accumulation can hamper the performance of your GPU and even cause overheating. A can of compressed air will help in cleaning out the dust from the GPU fans, heatsink, and other critical components.
- Isopropyl Alcohol and Microfiber Cloth: Isopropyl alcohol is useful for cleaning the GPU contacts and removing any dirt or residue that may affect connectivity. A microfiber cloth will help in gentle cleaning without leaving behind any fibers or scratches.
- GPU Drivers: A reliable internet connection is essential for downloading the latest GPU drivers. Outdated drivers can lead to compatibility issues and performance degradation. Updating to the latest drivers can often resolve many GPU-related problems.
While these are the primary tools required for most GPU troubleshooting and repairs, depending on your specific issue, you may need additional tools or materials. It is always a good idea to research and gather any specific tools recommended for your particular GPU model or problem.
By having these tools ready, you will be well-prepared to take on the step-by-step guide to fixing your GPU issues.
Step-by-Step Guide to Fixing GPU
Now that you have gathered the necessary tools, let’s dive into the step-by-step guide to fixing your GPU issues:
- Checking for Loose Connections: Start by powering off your computer and carefully opening the case. Ensure that the GPU is securely seated in its slot. Check all the power cables and connectors to make sure they are firmly attached.
- Cleaning the GPU: Use a can of compressed air to blow away any dust or debris accumulated on the GPU fans, heatsink, and other components. Be thorough but gentle to avoid damaging any delicate parts.
- Updating GPU Drivers: Check the manufacturer’s website for the latest GPU drivers. Download and install them to ensure that you have the most up-to-date software. This can often resolve compatibility issues and improve performance.
- Troubleshooting Overheating Issues: If your GPU is prone to overheating, consider cleaning the heatsink thoroughly and reapplying thermal paste. Ensure that the fans are spinning properly and not obstructed by dust or cables. You can also adjust the fan speed settings in the GPU control panel to enhance cooling.
- Reinstalling GPU: If none of the above steps resolve the issue, try removing the GPU from the slot and reinserting it firmly. This can help establish a better connection and troubleshoot any contact-related problems.
- Repairing or Replacing GPU Components: If your GPU is still not functioning properly after attempting the previous steps, it may require professional repair or replacement of specific components. Contact the manufacturer’s support or consult a technician to assess and fix the problem.
Remember to power off your computer and disconnect it from the power source before performing any repairs or modifications to the GPU. Safety should always be a priority.
By following this step-by-step guide, you can address many common GPU issues and potentially restore your GPU to its optimal performance.
Checking for Loose Connections
If you are experiencing GPU problems, the first step is to check for any loose connections. This is a common issue that can occur due to vibrations or improper handling of the computer. Here’s a step-by-step guide on how to check for loose connections:
- Before you begin, ensure that your computer is powered off and disconnected from the power source to prevent any electrical accidents.
- Open the computer case by removing the screws or latches on the side panel. Refer to your computer’s manual or manufacturer’s website for specific instructions on how to open the case.
- Locate the GPU, which is usually positioned in one of the PCIe slots on the motherboard. Carefully examine the GPU to ensure it is firmly seated in the slot.
- If the GPU appears loose, gently press it down to ensure it is properly connected. You may hear a click or feel a slight resistance when the GPU is securely in place.
- Check the power cables connected to the GPU. Ensure that they are firmly attached and properly inserted into the connectors.
- If there are any additional connectors like SLI or Crossfire bridges, verify that they are connected securely.
- Inspect the PCIe slot itself for any dust or debris. If present, use a can of compressed air to blow away any particles that may affect the connection.
- Once you have ensured that all connections are secure, carefully close the computer case and fasten any screws or latches to secure it in place.
- Connect your computer to the power source and power it on. Check if the GPU problem has been resolved.
By checking for loose connections, you can often fix GPU issues caused by poor contact or disrupted power supply. If this step does not resolve the problem, proceed to the next troubleshooting step.
Cleaning the GPU
Over time, dust and debris can accumulate on your GPU, hindering its performance and potentially causing overheating issues. Cleaning the GPU is an essential step in maintaining its optimal functionality. Here’s a step-by-step guide on how to clean your GPU:
- Before you begin, make sure your computer is turned off and disconnected from the power source to avoid any accidents.
- Open the computer case by removing the screws or latches on the side panel. Refer to your computer’s manual or manufacturer’s website for specific instructions on how to open the case.
- Locate the GPU, which is usually positioned in one of the PCIe slots on the motherboard. Take note of the fan or cooling system attached to the GPU.
- Use a can of compressed air to blow away any dust or debris on the GPU. Hold the can upright and use short bursts of air. Be sure to aim the nozzle away from yourself and any sensitive components.
- Pay special attention to the GPU fan(s) and the heatsink fins, as dust tends to accumulate in these areas. Blow air into the fan blades and between the heatsink fins to dislodge any trapped particles.
- If the dust is stubborn and does not come off with compressed air alone, you can use a soft brush or an antistatic brush to gently remove it. Ensure that the brush is clean and free from any static charge.
- After cleaning the GPU, inspect the fans to ensure they spin freely without any obstruction. If they appear to be stuck or are not spinning properly, you may need to consider removing and cleaning them more thoroughly or even replacing them if necessary.
- Once you have finished cleaning, carefully close the computer case and fasten any screws or latches to secure it in place.
- Connect your computer to the power source and power it on. Monitor the GPU’s temperature and performance to see if the cleaning has resolved any overheating or performance issues.
Regularly cleaning your GPU can help maintain its cooling efficiency, prolong its lifespan, and prevent potential problems caused by dust buildup. However, exercise caution and use proper cleaning techniques to avoid damaging any components during the cleaning process.
Updating GPU Drivers
Outdated or incompatible GPU drivers can cause various issues, including system crashes, reduced performance, and compatibility problems with certain applications or games. Updating your GPU drivers is an important step in resolving these issues and ensuring your GPU functions optimally. Here’s a step-by-step guide on how to update your GPU drivers:
- Start by identifying the make and model of your GPU. You can typically find this information in the device manager on your computer or by checking the manufacturer’s website.
- Visit the website of the GPU’s manufacturer. Look for the “Drivers” or “Support” section. Choose your GPU model and operating system to find the appropriate drivers for your GPU.
- Download the latest drivers for your GPU. Be sure to download the drivers that are compatible with your specific operating system version.
- Once the drivers have finished downloading, run the installer. Follow the on-screen instructions to complete the installation process.
- During the installation process, you may be prompted to choose between a standard installation or a custom installation. It is generally recommended to choose the standard installation unless you have specific requirements or preferences.
- After the installation is complete, restart your computer to ensure that the new drivers are fully applied.
- Once your computer has restarted, verify that the new drivers have been installed correctly. You can do this by opening the device manager and checking the driver version listed for your GPU.
- Test your GPU’s performance and functionality to see if the driver update has resolved any issues you were experiencing. Monitor for stability, improved performance, and compatibility with applications or games.
Updating your GPU drivers regularly is important to keep up with software advancements and bug fixes. It can significantly enhance the performance and stability of your GPU, ensuring a smoother computing experience.
Troubleshooting Overheating Issues
Overheating is a common problem that can impact the performance and lifespan of your GPU. Excessive heat buildup can cause system crashes, graphical artifacts, and even permanent damage. If you suspect overheating as the cause of your GPU issues, follow these steps to troubleshoot and resolve the problem:
- Ensure that your computer is powered off and disconnected from the power source to prevent any electrical accidents.
- Open the computer case by removing the screws or latches on the side panel. Refer to your computer’s manual or manufacturer’s website for specific instructions on how to open the case.
- Locate the GPU and inspect the cooling system, including the fans, heatsink, and thermal pads/paste. Dust accumulation can obstruct airflow and reduce cooling efficiency.
- Use a can of compressed air to blow away any dust or debris on the GPU fans and heatsink. Pay careful attention to clearing the gaps between the heatsink fins to ensure proper heat dissipation.
- If the dust is stubborn and not easily removed, you may need to remove the GPU and clean it more thoroughly. Consult your GPU’s manual or manufacturer’s instructions on how to safely remove the GPU for cleaning.
- Examine the thermal paste on the GPU. If it appears dried out or cracked, it may need to be replaced. Carefully clean off the old thermal paste using isopropyl alcohol and a microfiber cloth, then apply a fresh layer of thermal paste.
- Check the GPU fan(s) to ensure they spin freely without any obstruction. If they do not spin or make unusual noises, they may need to be replaced.
- After cleaning and reassembling the GPU, ensure that the case is closed properly and all screws or latches are tightened. Reconnect the power source and power on the computer.
- Monitor your GPU’s temperature using monitoring software or built-in utilities. Ensure that the temperature stays within safe limits, avoiding excessive heat levels.
- If the overheating issue persists, you may need to consider additional cooling solutions such as adding more case fans, using liquid cooling, or upgrading to a higher-performing cooler.
By troubleshooting and resolving overheating issues, you can improve the stability and performance of your GPU. Regular maintenance and monitoring of your GPU’s temperature are essential to prevent overheating-related problems in the future.
Reinstalling GPU
If you have encountered persistent GPU issues and other troubleshooting steps have not resolved the problem, reinstalling the GPU may help. Reinstalling the GPU ensures a fresh installation, potentially fixing any software-related issues or faulty connections. Follow these steps to reinstall your GPU:
- Shut down your computer and disconnect it from the power source to prevent any electrical accidents.
- Open the computer case by removing the screws or latches on the side panel. Refer to your computer’s manual or manufacturer’s website for specific instructions on how to open the case.
- Locate the GPU, which is typically inserted into one of the PCIe slots on the motherboard. Gently release the retention clip or screws holding the GPU in place.
- Carefully remove the GPU from the slot, ensuring you do not damage any connectors or components.
- Inspect the PCIe slot for any dust or debris. Use a can of compressed air to blow away any particles that may affect the connection.
- If there are any residual thermal paste on the GPU or heatsink, use isopropyl alcohol and a microfiber cloth to clean it off.
- Reinsert the GPU firmly into the PCIe slot, aligning it with the slot and applying gentle pressure until it clicks into place.
- Secure the GPU by latching the retention clip or tightening the screws.
- Carefully close the computer case and fasten any screws or latches to secure it in place.
- Reconnect the power source and power on the computer. Install the necessary GPU drivers if prompted to do so.
- Test your GPU’s performance and functionality to see if the reinstallation has resolved the issues you were experiencing.
Reinstalling the GPU can help resolve issues related to faulty connections or incorrect software installation. If the problem persists even after reinstalling the GPU, consider seeking professional assistance or checking for potential hardware failures.
Repairing or Replacing GPU Components
If none of the previous troubleshooting steps have resolved the GPU issues you are facing, it may be necessary to consider repairing or replacing specific components of the GPU. This step should only be attempted if you have experience with computer hardware or if you are seeking assistance from a professional technician. Here are some considerations for repairing or replacing GPU components:
- Identify the specific component causing the problem. This could be a faulty fan, damaged connectors, or burned-out components on the GPU.
- If you suspect a defective fan, you can purchase a replacement fan from the GPU manufacturer or a third-party supplier. Follow the manufacturer’s instructions or consult a technician to safely replace the faulty fan.
- If the issue is related to damaged connectors, inspect the connectors on the GPU for bent pins or visible damage. In some cases, gently straightening bent pins may resolve the issue. If there is severe damage, the GPU may need to be replaced.
- In the case of burned-out components, identifying and replacing these components is a complex task that should only be undertaken by experienced technicians. Consider reaching out to the manufacturer’s support or a professional repair service for assistance.
- If repairing the GPU is not feasible or cost-effective, you may need to consider replacing the GPU entirely. Research compatible GPU models and ensure that your system meets the necessary requirements for the new GPU.
- When replacing the GPU, follow the manufacturer’s instructions for installation. This typically involves removing the old GPU, inserting the new one into the PCIe slot, securing it, and connecting power cables as required.
- After installing the new GPU, power on the computer and install the necessary drivers for the new GPU if prompted to do so.
- Test the functionality and performance of the new GPU to ensure that the issues have been resolved.
Repairing or replacing GPU components should be approached with caution and expertise. If you are unsure about performing these tasks yourself, it is advisable to seek assistance from a professional technician.
Conclusion
Dealing with GPU problems can be frustrating, but with the right knowledge and tools, many issues can be resolved effectively. In this guide, we have explored some of the most common GPU problems and provided a step-by-step approach to fixing them.
By checking for loose connections, cleaning the GPU, updating GPU drivers, troubleshooting overheating issues, and reinstalling or repairing GPU components, you can address a wide range of GPU-related issues. These troubleshooting steps can often restore the performance and stability of your GPU, allowing you to enjoy a seamless computing experience.
It is important to remember that while these steps can resolve many GPU problems, there may be situations where professional assistance or even replacing the GPU is necessary. If you are unsure about performing any of the troubleshooting steps, it is always safer to consult a professional technician.
Maintaining regular maintenance and monitoring of your GPU can help prevent recurring issues. Keeping your GPU clean, ensuring proper ventilation, and updating drivers regularly can contribute to optimal performance and longevity.
With this guide, you now have the knowledge and tools to tackle common GPU problems and resolve them effectively. By following the steps outlined, you can troubleshoot, fix, and maintain a healthy GPU, ensuring your system functions at its best.