Introduction
Welcome to the world of Chromebooks! These sleek and lightweight devices have become increasingly popular for their simplicity, speed, and affordability. While Chromebooks excel in web-based tasks and productivity, you may find yourself wondering how to download and use apps on your Chromebook.
Unlike traditional PCs, Chromebooks run on Chrome OS, a lightweight operating system developed by Google. This means that not all apps and software programs designed for Windows or macOS are readily available on Chromebooks. However, fear not! Chromebooks have their own set of apps, both from the Google Play Store and other sources, that cater specifically to their operating system.
In this guide, we will walk you through the process of downloading and installing apps on your Chromebook. Whether you’re looking for productivity apps, entertainment options, or specialized tools for your work or hobbies, we will cover it all. So, grab your Chromebook, and let’s get started!
Section 1: Checking Compatibility
Before diving into the world of apps, it is important to ensure that your Chromebook is compatible with the applications you wish to download. Although most Chromebooks support a wide range of apps, there are some limitations to be aware of.
The first thing to check is whether your Chromebook is capable of running Android apps. Not all Chromebooks have this feature, so it’s essential to verify if yours does. To do this, go to the “Settings” on your Chromebook, click on “Apps,” and look for the “Google Play Store” option. If it’s present, you’re in luck – your Chromebook can run Android apps. If not, it means your device doesn’t support Android apps.
Another consideration is the availability of Linux apps. Some Chromebooks have the capability to run Linux applications, which opens up a whole new world of software options. To check if your Chromebook supports Linux apps, head to the “Settings,” click on “Linux (Beta),” and follow the instructions to enable Linux app support. If this option is available, you’ll be able to download and install Linux software on your Chromebook.
Furthermore, it’s worth noting that certain apps may have specific hardware requirements. For instance, some high-performance games or video editing apps may require a Chromebook with a more powerful processor or larger storage capacity. Before downloading such apps, make sure your Chromebook meets the minimum system requirements mentioned in the app’s description.
Lastly, it’s a good idea to keep your Chromebook updated with the latest software updates. These updates often include bug fixes, security enhancements, and compatibility improvements, ensuring a smoother app experience. To check for updates, go to “Settings,” click on “About Chrome OS,” and select “Check for Updates.” If there are any available updates, follow the prompts to install them.
By performing these compatibility checks and keeping your Chromebook up to date, you can make sure that you have access to a wide range of apps that are fully compatible with your device. Now that you have confirmed compatibility, it’s time to move on to enabling the Google Play Store on your Chromebook.
Section 2: Enabling Google Play Store
The Google Play Store is home to millions of apps, including popular games, productivity tools, and entertainment applications. Enabling the Google Play Store on your Chromebook will allow you to download and install a vast array of apps that are compatible with your device. Here’s how you can do it:
1. Start by clicking on the time in the bottom-right corner of your Chromebook’s screen. Then, click on the gear icon to access the settings.
2. In the settings menu, scroll down and click on “Apps.”
3. Look for the “Google Play Store” option and click on it. If it’s already enabled, great! You can skip to the next section. If it’s not enabled, click on the “Turn on” button to enable the Google Play Store.
4. A dialog box will appear with the terms of service. Read through the terms and click on “Accept” to proceed.
5. Once you’ve accepted the terms, the Google Play Store will start downloading and installing on your Chromebook. This may take a few minutes, so be patient.
6. Once the Google Play Store is installed, you will find its icon in your Chromebook’s app launcher. Click on the icon to open it.
7. The first time you open the Play Store, you will need to sign in with your Google account. If you don’t have one, you can create a new account right from the Play Store sign-in screen.
8. After signing in, you can browse through the vast collection of apps available on the Play Store. You can search for specific apps using the search bar or explore different categories and top charts to discover new and popular apps.
That’s it! You have successfully enabled the Google Play Store on your Chromebook. Now you can start exploring and downloading your favorite apps directly from the Play Store.
It’s important to note that not all apps available on the Play Store may be optimized for Chromebooks. Some apps may not work as expected due to differences in screen size, input methods, or other hardware factors. However, most popular apps are optimized for Chromebooks, offering a seamless user experience.
In the next section, we will dive deeper into the process of downloading apps from the Play Store and explore alternative sources for downloading apps on your Chromebook.
Section 3: Downloading Apps from the Play Store
Now that you have enabled the Google Play Store on your Chromebook, it’s time to start downloading and installing your favorite apps. The Play Store offers a wide range of apps for various purposes, from productivity and communication to entertainment and gaming. Here’s how you can download apps from the Play Store:
1. Open the Play Store app on your Chromebook by clicking on its icon in the app launcher.
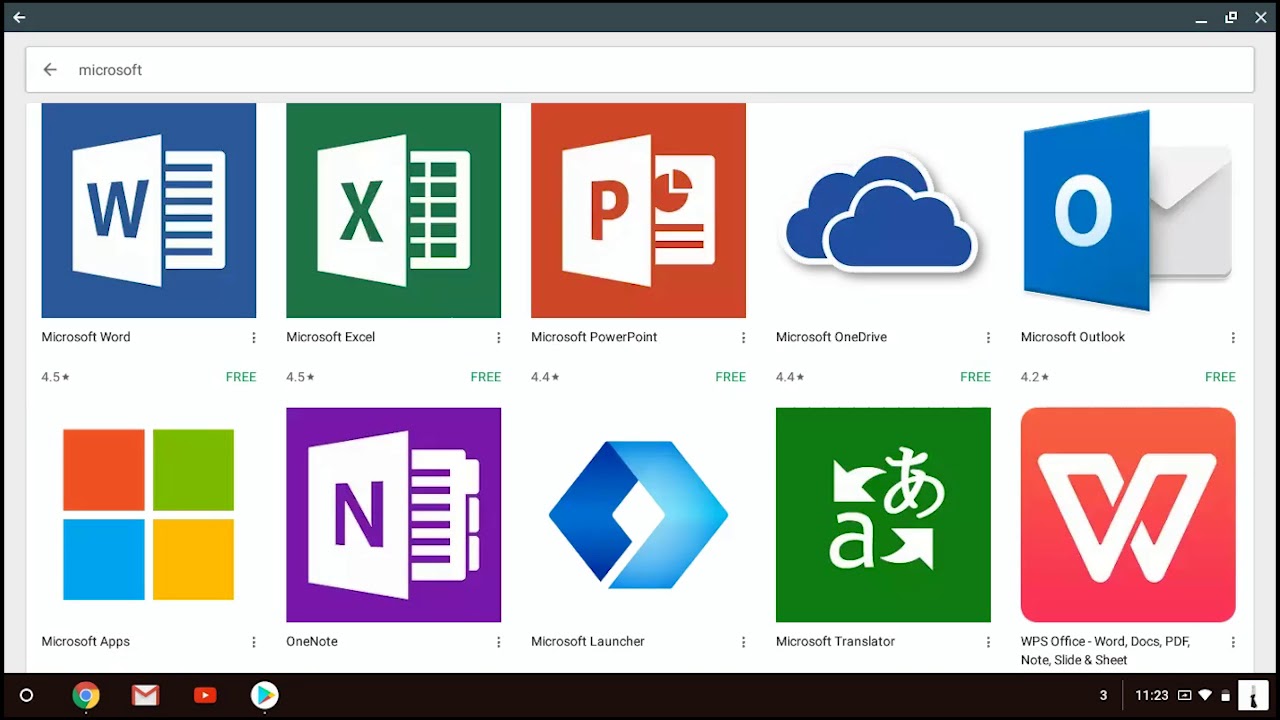
2. You can browse through popular and recommended apps on the home screen. Alternatively, you can use the search bar located at the top of the screen to search for specific apps.
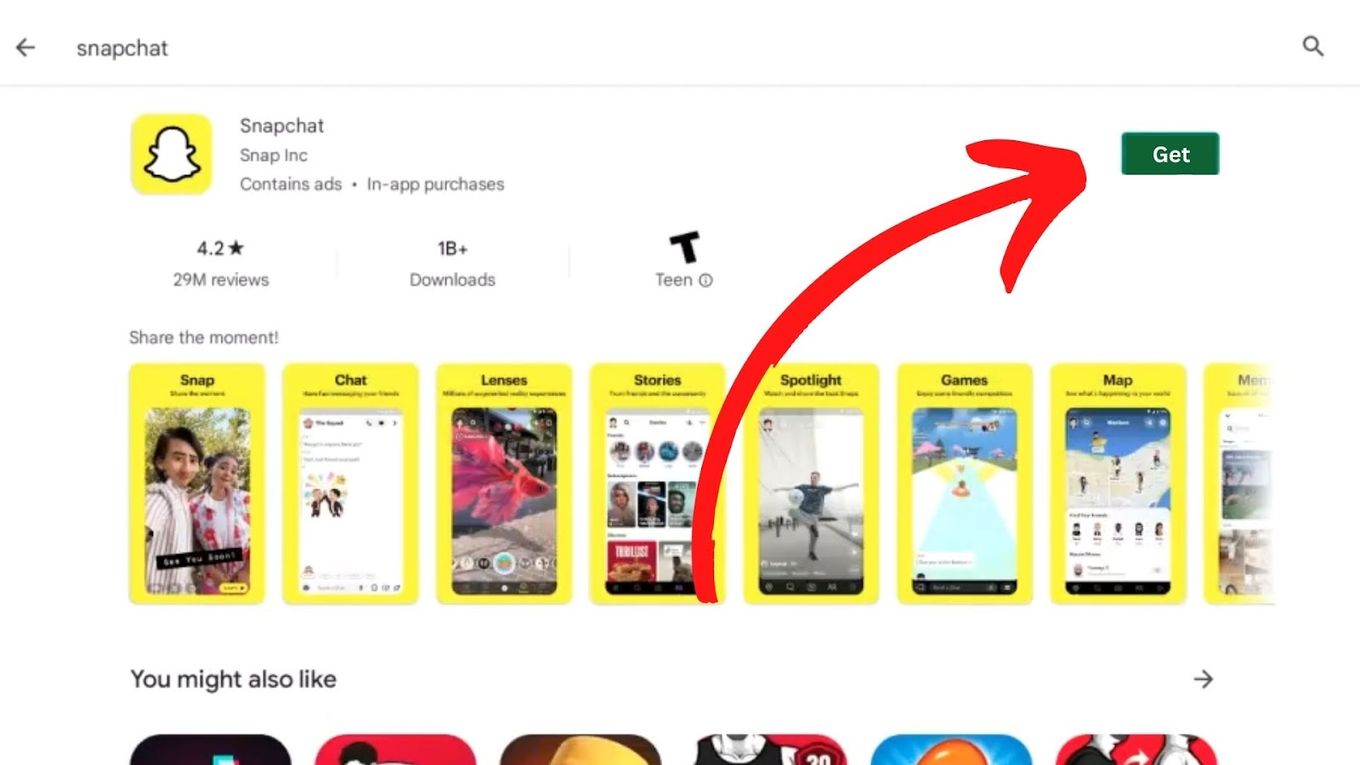
3. Once you find an app you want to download, click on its icon to open the app’s page. Here, you can read the app’s description, check user reviews, and view screenshots or videos of the app in action.
4. If the app meets your requirements and you want to download it, click on the “Install” button. The button may display “Get” on some apps.
5. The app will start downloading and installing on your Chromebook. You can track the progress in the notification area located at the bottom-right corner of the screen.
6. Once the app is installed, you can open it from the app launcher or by searching for its name in the search bar.
7. Some apps may require additional permissions or settings to function properly. If prompted, grant the necessary permissions or follow any on-screen instructions to configure the app.
8. Repeat the process for any other apps you wish to download from the Play Store.
It’s important to note that some apps may require a one-time purchase or offer in-app purchases. If you wish to make a purchase, you will need to have a payment method linked to your Google account.
While the Play Store is the primary source for downloading apps on Chromebooks, there are also alternative sources available. In the next section, we will explore how you can download and install apps from other sources on your Chromebook.
Section 4: Installing Apps from Alternative Sources
While the Google Play Store is the main hub for downloading apps on Chromebooks, there are instances where you may come across apps that are not available on the Play Store. In such cases, you can explore alternative sources to download and install apps on your Chromebook. Here are a few options:
1. Chrome Web Store: The Chrome Web Store is a store specifically designed for Chrome OS apps and extensions. It offers a variety of web-based apps and browser extensions that can enhance your Chromebook experience. To access the Chrome Web Store, open your Chrome browser and type “chrome://extensions” in the address bar. From there, you can search for apps and extensions and install them directly to your Chromebook.
2. APK files: APK files are the installation files for Android apps. If you come across an APK file from a trusted source, you can manually install it on your Chromebook. To do this, first, download the APK file to your device. Then, open the file manager app on your Chromebook, locate the APK file, and double-click on it to install the app.
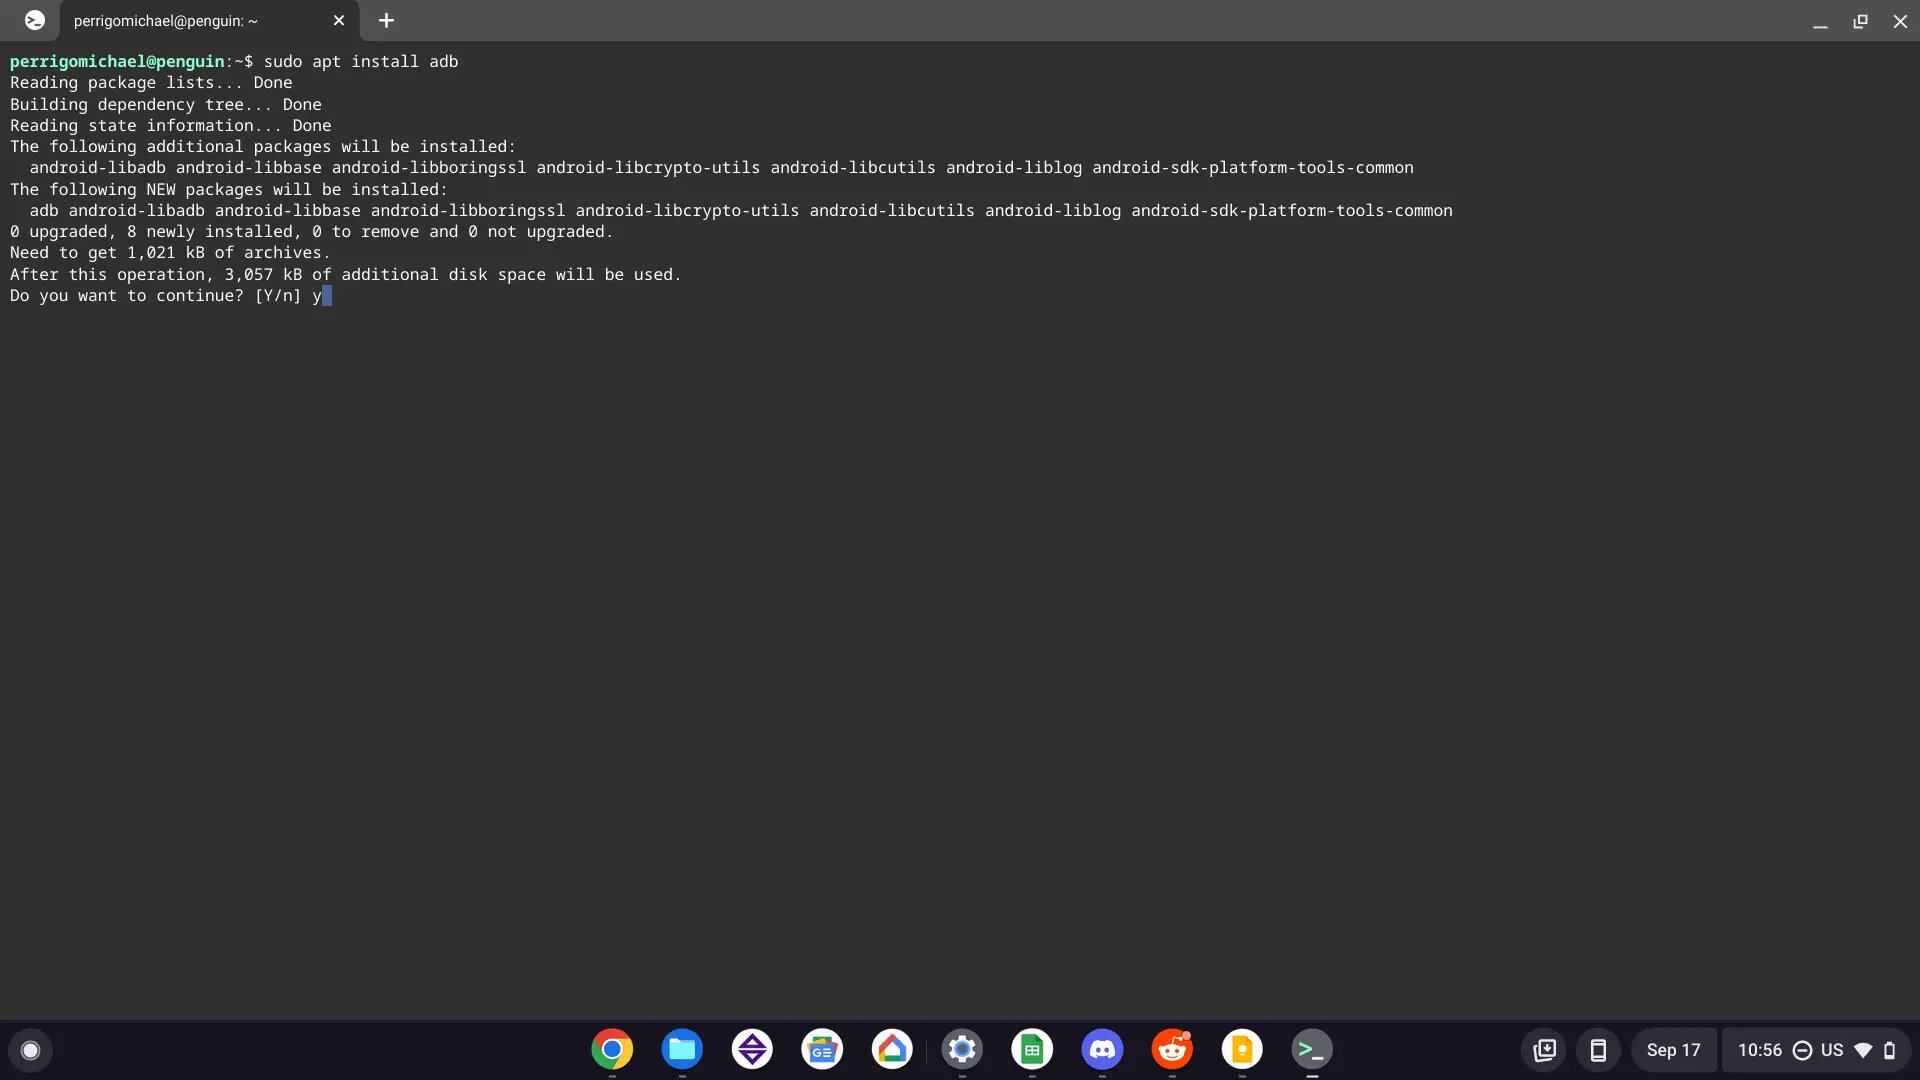
3. Linux repositories: If your Chromebook supports Linux apps, you can access various Linux repositories to install applications. These repositories, such as the Ubuntu Software Center or the Debian package repository, offer a wide range of Linux software that can be installed on your Chromebook. You can use the Terminal or a package manager like Apt to install these applications.
Before installing apps from alternative sources, it’s important to exercise caution and only download from trusted sources to avoid any security risks. Additionally, keep in mind that apps from alternative sources may not receive automatic updates like apps from the Play Store, so you may need to manually update them when new versions become available.
Now that you know how to install apps from alternative sources, let’s move on to the next section, where we will explore how to manage and organize the apps you’ve downloaded on your Chromebook.
Section 5: Managing and Organizing Downloaded Apps
As you download and install various apps on your Chromebook, it’s important to learn how to effectively manage and organize them. This will make it easier for you to access your favorite apps and keep your Chromebook’s app library neat and tidy. Here are some tips for managing and organizing your downloaded apps:
1. App Launcher: The app launcher is where you can find all the apps installed on your Chromebook. To access the app launcher, click on the circle icon located in the bottom-left corner of the screen, or press the “Search” key on your keyboard. From here, you can browse through your apps or use the search bar at the top to quickly find a specific app.
2. Pin Apps: You can pin frequently used apps to the shelf at the bottom of your Chromebook’s screen for easy access. To do this, right-click on the app icon in the app launcher and select “Pin to Shelf” from the context menu. The pinned app icon will then appear on the shelf for quick access.
3. Create App Folders: If you have a large number of apps, it can be helpful to organize them into folders based on categories or usage. To create a folder, click and hold on an app icon, then drag it onto another app icon. A folder will be created, and you can give it a name. You can then drag and drop other apps into the folder to keep them organized.
4. Remove Unwanted Apps: Over time, you may find that some apps are no longer needed or used. You can easily remove these apps from your Chromebook. Right-click on the app icon in the app launcher and select “Uninstall” from the context menu. Confirm the removal, and the app will be uninstalled from your Chromebook.
5. Manage App Permissions: Some apps may require certain permissions to access certain features or data on your Chromebook. To manage app permissions, go to “Settings” and click on “Apps.” From there, you can select an installed app and view or change its permissions as needed.
By organizing and managing your downloaded apps, you can quickly find and access the apps you need, keeping your Chromebook’s app library clutter-free and efficient.
In the next section, we will explore common troubleshooting tips for resolving any issues you may encounter with app installations or usage on your Chromebook.
Section 6: Troubleshooting Common Issues
While using apps on your Chromebook, you may encounter some common issues that can hinder your experience. Don’t worry, as most of these issues can be quickly resolved with a few troubleshooting steps. Here are some common problems and their solutions:
1. App Crashes: If an app crashes or freezes frequently, try closing it and reopening it. If the issue persists, restart your Chromebook. If the problem continues, uninstall and reinstall the app from the Play Store to ensure you have the latest version.
2. App Incompatibility: Some apps may not be fully optimized for Chromebook’s hardware or Chrome OS. In such cases, try searching for alternative apps in the Play Store that are known to work well on Chromebooks.
3. Storage Issues: If you’re running low on storage, consider periodically uninstalling apps or moving files to an external storage device or cloud storage. To free up space, go to “Settings,” click on “Storage,” and review the usage of each app. You can also clear cached data by going to “Settings,” clicking on “Privacy and Security,” and selecting “Clear browsing data.”
4. Play Store Not Working: If the Play Store isn’t functioning properly, try clearing its cache and data. Go to “Settings,” click on “Apps,” then find the Play Store and click on it. Locate the “Storage” section and click on “Clear cache” and “Clear data.” Restart your Chromebook and try accessing the Play Store again.
5. App Permissions: Make sure apps have the necessary permissions to function correctly. You can check and manage app permissions by going to “Settings,” clicking on “Apps,” and selecting the app. Click on “Permissions” and ensure the required permissions are granted.
6. Restart Chromebook: If you’re experiencing issues with multiple apps or the overall performance of your Chromebook, a simple restart can often resolve the problem. This helps clear any temporary glitches or conflicts that may be affecting the app’s functionality.
Remember to keep your Chromebook’s operating system and apps updated to ensure compatibility and stability. These updates often provide bug fixes, security patches, and performance improvements that can enhance your app experience.
If you’re still encountering issues after trying these troubleshooting steps, it may be helpful to reach out to the app developer or consult Chromebook Support for further assistance with your specific problem.
By following these troubleshooting tips, you can resolve common issues and enjoy a smooth app experience on your Chromebook.
Now that you have learned how to troubleshoot common issues, let’s wrap up this guide with a short recap of the key points.
Conclusion
Congratulations! You have now become well-equipped with the knowledge of downloading and managing apps on your Chromebook. We explored the steps to check compatibility, enable the Google Play Store, and download apps from both the Play Store and alternative sources. Additionally, we discussed how to manage and organize your downloaded apps for easy access. Lastly, we covered common troubleshooting tips to resolve any issues you may encounter.
With the Google Play Store and other app sources at your fingertips, your Chromebook can become a versatile tool for productivity, entertainment, and more. Whether you need to stay organized with productivity apps, stay connected with communication tools, or unwind with gaming or streaming apps, you now have the capability to customize your Chromebook experience to suit your needs.
Remember to regularly check for updates to keep your Chromebook’s operating system and apps up to date, ensuring compatibility, security, and improved performance. Additionally, exercise caution when downloading apps from alternative sources to avoid security risks.
With your newfound knowledge, you can confidently explore the vast world of apps available for your Chromebook. From useful productivity tools to entertaining games and everything in between, the possibilities are endless. Enjoy the convenience and flexibility that apps bring to your Chromebook experience!