Introduction
Welcome to the world of ultrabooks! These sleek and powerful laptops are compact, lightweight, and perfect for both work and play. As an ultrabook user, you may occasionally need to capture screenshots for various purposes, such as documenting an error message, sharing a funny meme, or saving important information. In this article, we will explore four different methods to help you easily take screenshots on your ultrabook – no technical expertise required!
Capturing screenshots can come in handy in a variety of situations. Whether you need to provide visual instructions to a friend, report a software bug, or simply save an interesting image for later use, knowing how to take a screenshot is an essential skill for any ultrabook user.
We will walk you through each method step by step, providing clear instructions and helpful tips along the way. By the end of this article, you will be a screenshot-taking pro, ready to capture and share your screen with confidence.
So, let’s dive in and explore the different methods available to take screenshots on your ultrabook! Whether you’re a seasoned user or just starting with your new device, you’ll find these methods easy to follow and implement.
Remember, each ultrabook may have its own unique keyboard layout or software features, so be sure to adapt the instructions to your specific device. Don’t worry – we’ve got you covered with alternate methods, just in case.
Method 1: Using the PrtScn (Print Screen) key
The PrtScn (Print Screen) key is a commonly used method to take screenshots on an ultrabook. It captures the entire screen and saves it to the clipboard, allowing you to paste it into an image editing software or directly into a document. Follow these simple steps to take a screenshot using the PrtScn key:
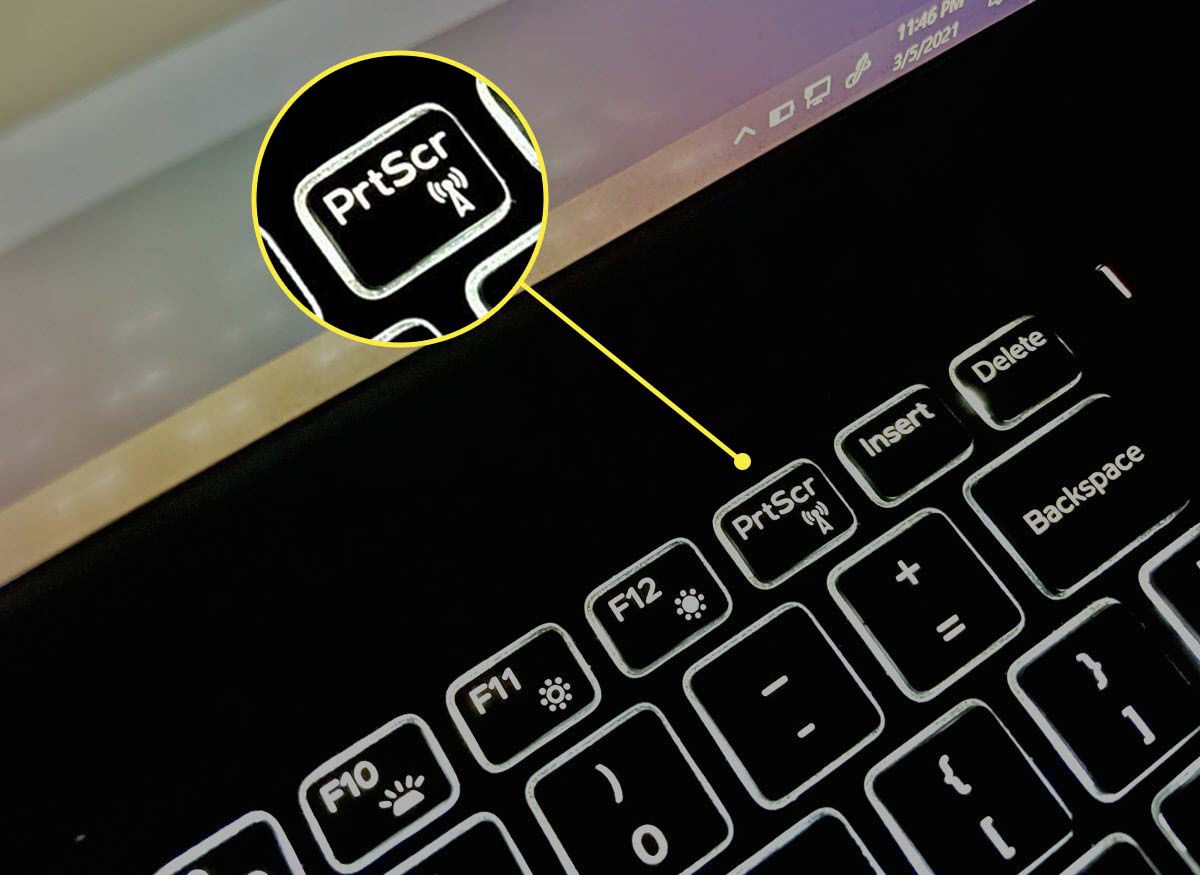
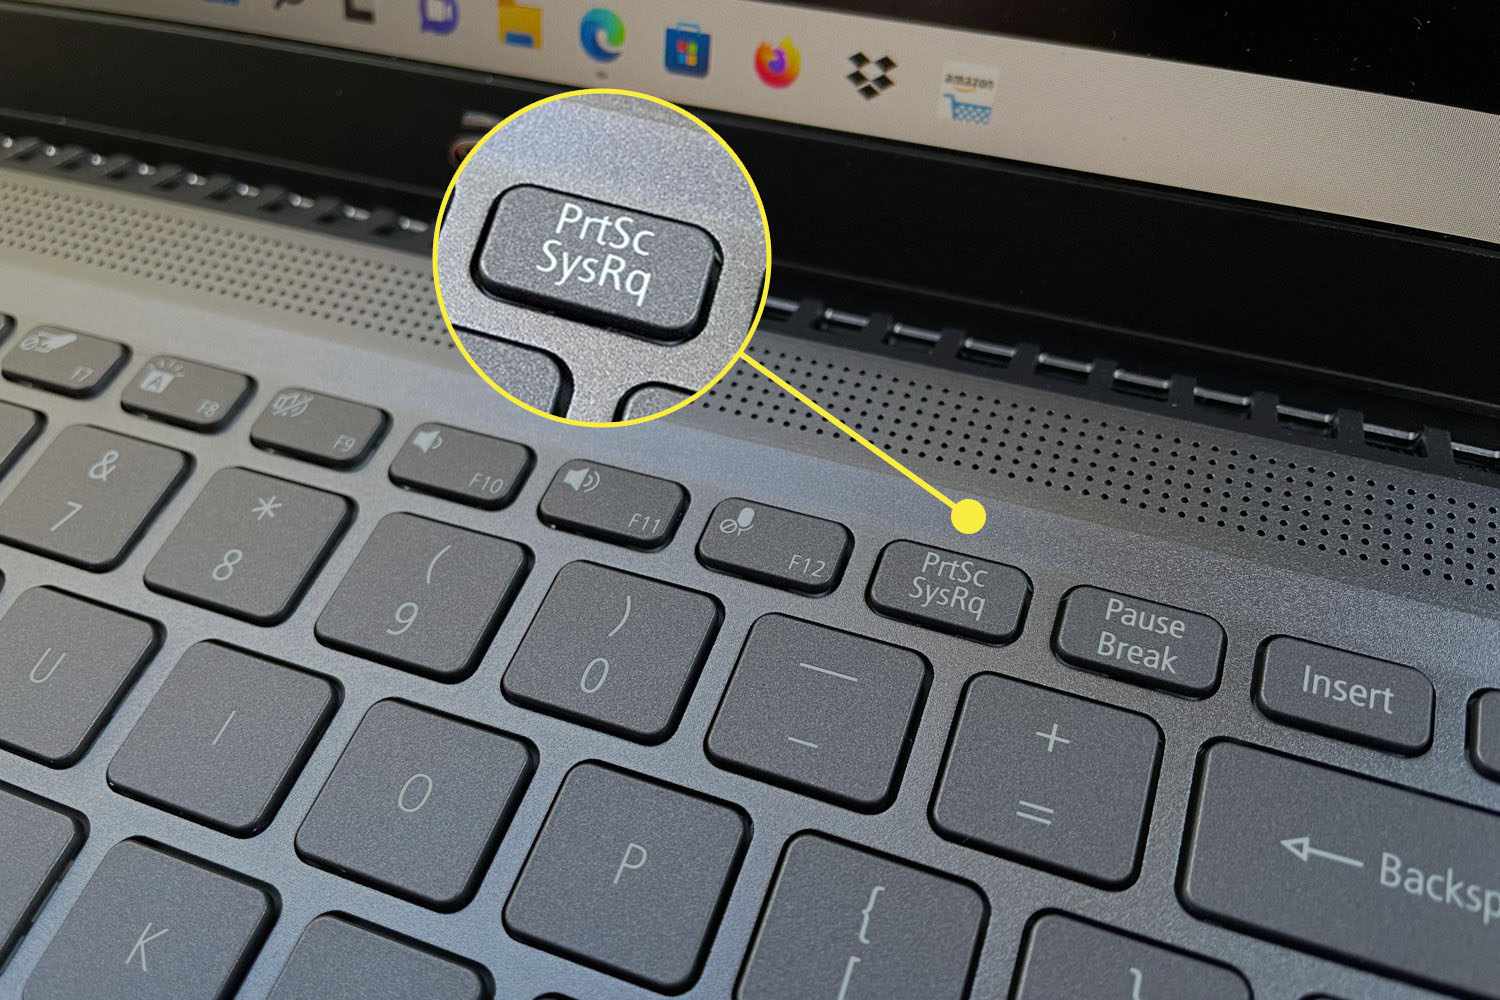
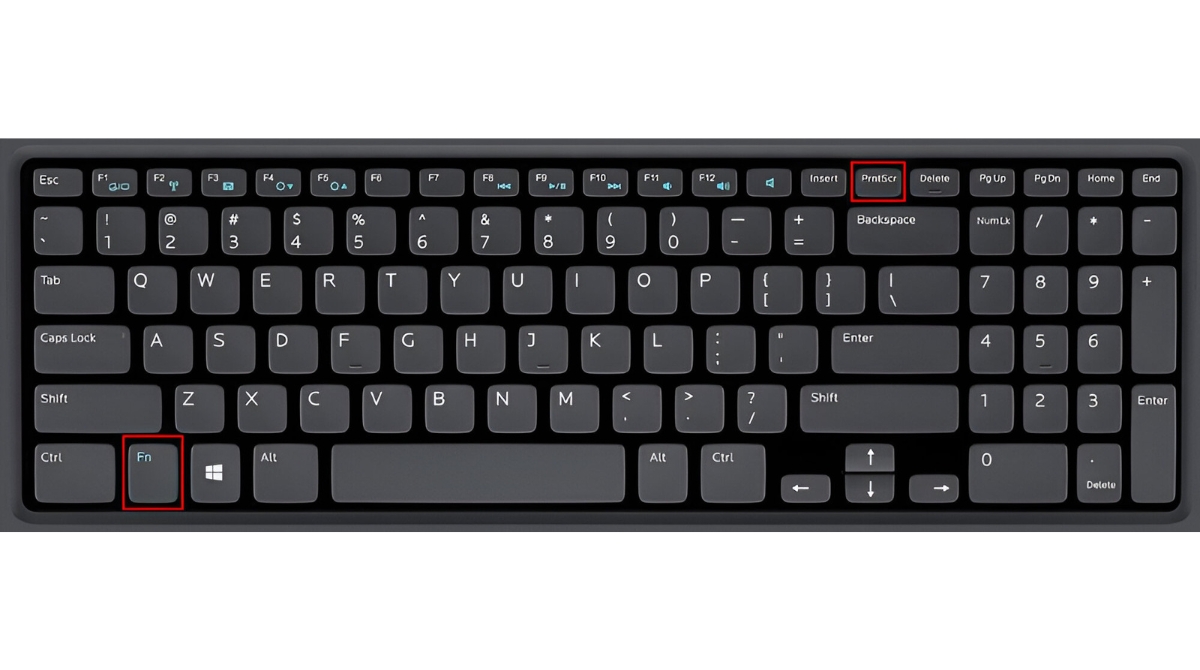
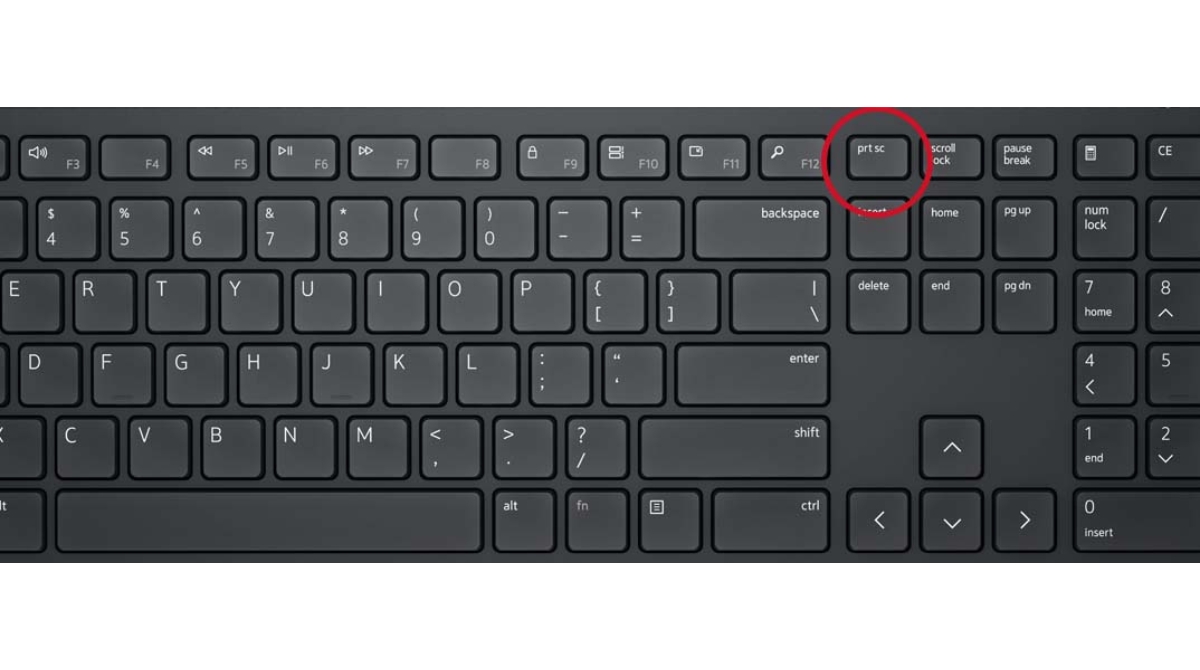
- Locate the PrtScn key on your ultrabook’s keyboard. It is typically located in the upper-right corner, labeled “PrtScn” or “Print Screen”.
- Ensure that the screen you want to capture is visible on your ultrabook’s display.
- Press the PrtScn key. You won’t notice any visible changes, but the screenshot has been saved to your clipboard.
- Open a blank document in an image editing software or any document editor, such as Microsoft Word or Paint.
- Press Ctrl + V or right-click and select “Paste” to paste the screenshot from the clipboard into the document.
- Save the document to your desired location on your ultrabook.
That’s it! You have successfully taken a screenshot using the PrtScn key. Now you can edit, annotate, or share the screenshot as needed.
Keep in mind that this method captures the entire screen, including multiple windows or other content outside of your desired area. If you only want to capture a specific portion of the screen, consider using one of the other methods described in this article.
Please note that the PrtScn key may have additional functions on certain ultrabook models. In some cases, you may need to use the Fn (Function) key in combination with the PrtScn key. Refer to your ultrabook’s user manual or keyboard documentation to determine any specific requirements.
Method 2: Using the Windows key + PrtScn key
If you’re looking for a quick and convenient way to capture a screenshot on your ultrabook, using the Windows key + PrtScn key combination is a great option. This method captures the entire screen and automatically saves the screenshot to a specific folder on your computer. Follow the steps below to use this method:
- Make sure the desired screen you want to capture is visible on your ultrabook’s display.
- Locate the Windows key on your keyboard. It is typically located between the Ctrl and Alt keys, with the Windows logo.
- Press the Windows key and the PrtScn key simultaneously. You may need to hold down the Fn (Function) key on certain ultrabook models.
- You may notice a brief dimming of your screen, indicating that the screenshot has been taken.
- Go to the default save location for screenshots on your ultrabook. Typically, this is the “Pictures” folder, and the screenshots will be automatically saved in a subfolder called “Screenshots”.
- Locate and open the “Screenshots” folder to find your captured screenshot.
That’s it! You have successfully used the Windows key + PrtScn key combination to capture a screenshot on your ultrabook. Now you can easily access and share your screenshot from the designated folder.
This method is especially useful if you frequently take screenshots and want them to be automatically saved to a specific location on your ultrabook. However, keep in mind that this method captures the entire screen, so if you only need to capture a specific portion or window, you may want to consider using other methods mentioned in this article.
Remember, the combination key may vary depending on your ultrabook’s model and keyboard layout. If the Windows key + PrtScn key combination doesn’t work, consult your device’s user manual or keyboard documentation for the correct key combination.
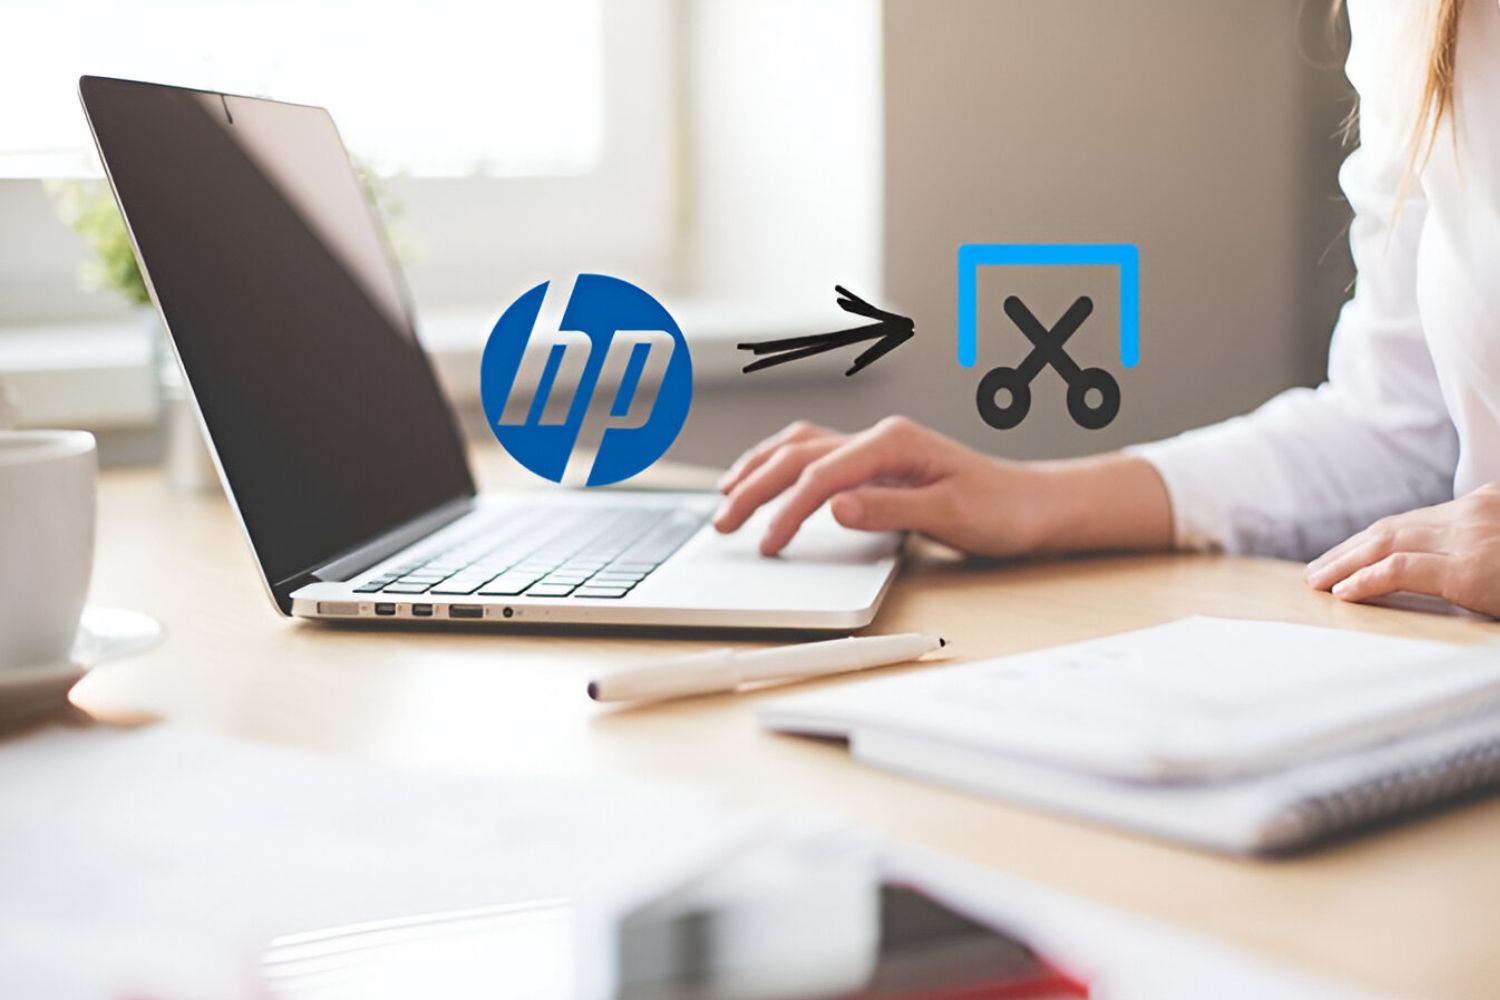
Method 3: Using the Snipping Tool
If you prefer more flexibility in capturing screenshots on your ultrabook, the Snipping Tool is a fantastic built-in utility that allows you to select and capture specific portions of your screen. It offers various capture modes and editing features, making it perfect for capturing precise screenshots. Follow the steps below to use the Snipping Tool:
- Open the Start menu on your ultrabook and search for “Snipping Tool.”
- Click on the Snipping Tool app to open it.
- In the Snipping Tool window, click on “New” to start a new snip.
- Your screen will now be dimmed, and the Snipping Tool overlay will appear.
- Using your mouse or finger (if you have a touchscreen), select the specific portion of your screen you want to capture.
- Release the mouse button or remove your finger to capture the selected portion.
- The captured screenshot will automatically open in the Snipping Tool window, where you can annotate, save, or share it.
- Click on the “Save” icon in the Snipping Tool window to save the screenshot to your desired location on your ultrabook.
That’s it! You have successfully used the Snipping Tool to capture a screenshot on your ultrabook. With the various snip modes available, you can capture full-screen snips, rectangular snips, free-form snips, and even window snips.
The Snipping Tool also provides basic editing tools, such as a pen, highlighter, and eraser, allowing you to mark up your screenshots if needed. This makes it convenient for adding annotations or emphasizing certain areas.
Note that the Snipping Tool may have different features or user interfaces depending on your version of Windows. For Windows 10 users, the Snipping Tool will eventually be replaced by the newer Snip & Sketch tool. However, the Snipping Tool is still available and functional on most ultrabook systems.
Method 4: Using the Windows Game Bar
If you’re a gamer or want a quick way to capture screenshots while playing games or using applications on your ultrabook, the Windows Game Bar is a convenient feature that can help. It allows you to capture screenshots without interrupting your gameplay or workflow. Follow the steps below to use the Windows Game Bar:
- Open the application or game you want to capture a screenshot of on your ultrabook.
- Press the Windows key + G to open the Windows Game Bar.
- If prompted, check the box that says “Yes, this is a game” to enable the Game Bar overlay.
- Once the Game Bar overlay appears, you will see various options, including a camera icon for taking screenshots.
- Click on the camera icon or press the default key combination Windows key + Alt + PrtScn to capture a screenshot.
- The screenshot will be automatically saved to your default screenshots folder, typically located in the “Videos” folder.
- To access your screenshots, open the “Videos” folder and look for a subfolder named “Captures.”
That’s it! You have successfully used the Windows Game Bar to capture a screenshot on your ultrabook. The Game Bar is a convenient option for gamers or users who want quick access to screenshot functionality without having to use external applications or keyboard shortcuts.
It’s worth noting that the Windows Game Bar is available on Windows 10 and may not be present on older versions of Windows. Additionally, some applications or games may not be compatible with the Game Bar overlay. In such cases, you may need to use alternative methods mentioned earlier in this article.
Remember, the key combination Windows key + Alt + PrtScn is the default shortcut for capturing screenshots using the Windows Game Bar. If this combination doesn’t work on your ultrabook, you can customize the key combination by going to “Settings” > “Gaming” > “Game Bar” and selecting the desired shortcut under “Capture shortcuts.”
Conclusion
Congratulations! You have now learned four different methods to take screenshots on your ultrabook. Whether you prefer using the PrtScn key, the Windows key + PrtScn key combination, the Snipping Tool, or the Windows Game Bar, you have a variety of options at your disposal to capture screenshots quickly and easily.
Remember, each method has its advantages and is suited for different situations. If you need to capture the entire screen without any additional features, using the PrtScn key is a simple and straightforward option. On the other hand, if you want automatic saving or more precise selections, the Windows key + PrtScn key combination or the Snipping Tool are great choices. And for gamers or users who want quick access to screenshot functionality, the Windows Game Bar is a convenient solution.
When taking screenshots, it’s important to consider the purpose and context of the screenshot. Whether you’re documenting an error, sharing important information, or simply capturing a memorable moment, screenshots can be invaluable tools in various scenarios.
So go ahead, experiment with the different methods and find the one that suits your needs best. Start capturing and sharing screenshots effortlessly on your ultrabook today!
Remember to refer back to this article whenever you need a refresher on how to take screenshots on your ultrabook. And don’t forget to explore your ultrabook’s user manual or keyboard documentation for any specific features or variations in the methods mentioned.
Enjoy capturing and sharing your screen with ease on your ultrabook!