Introduction
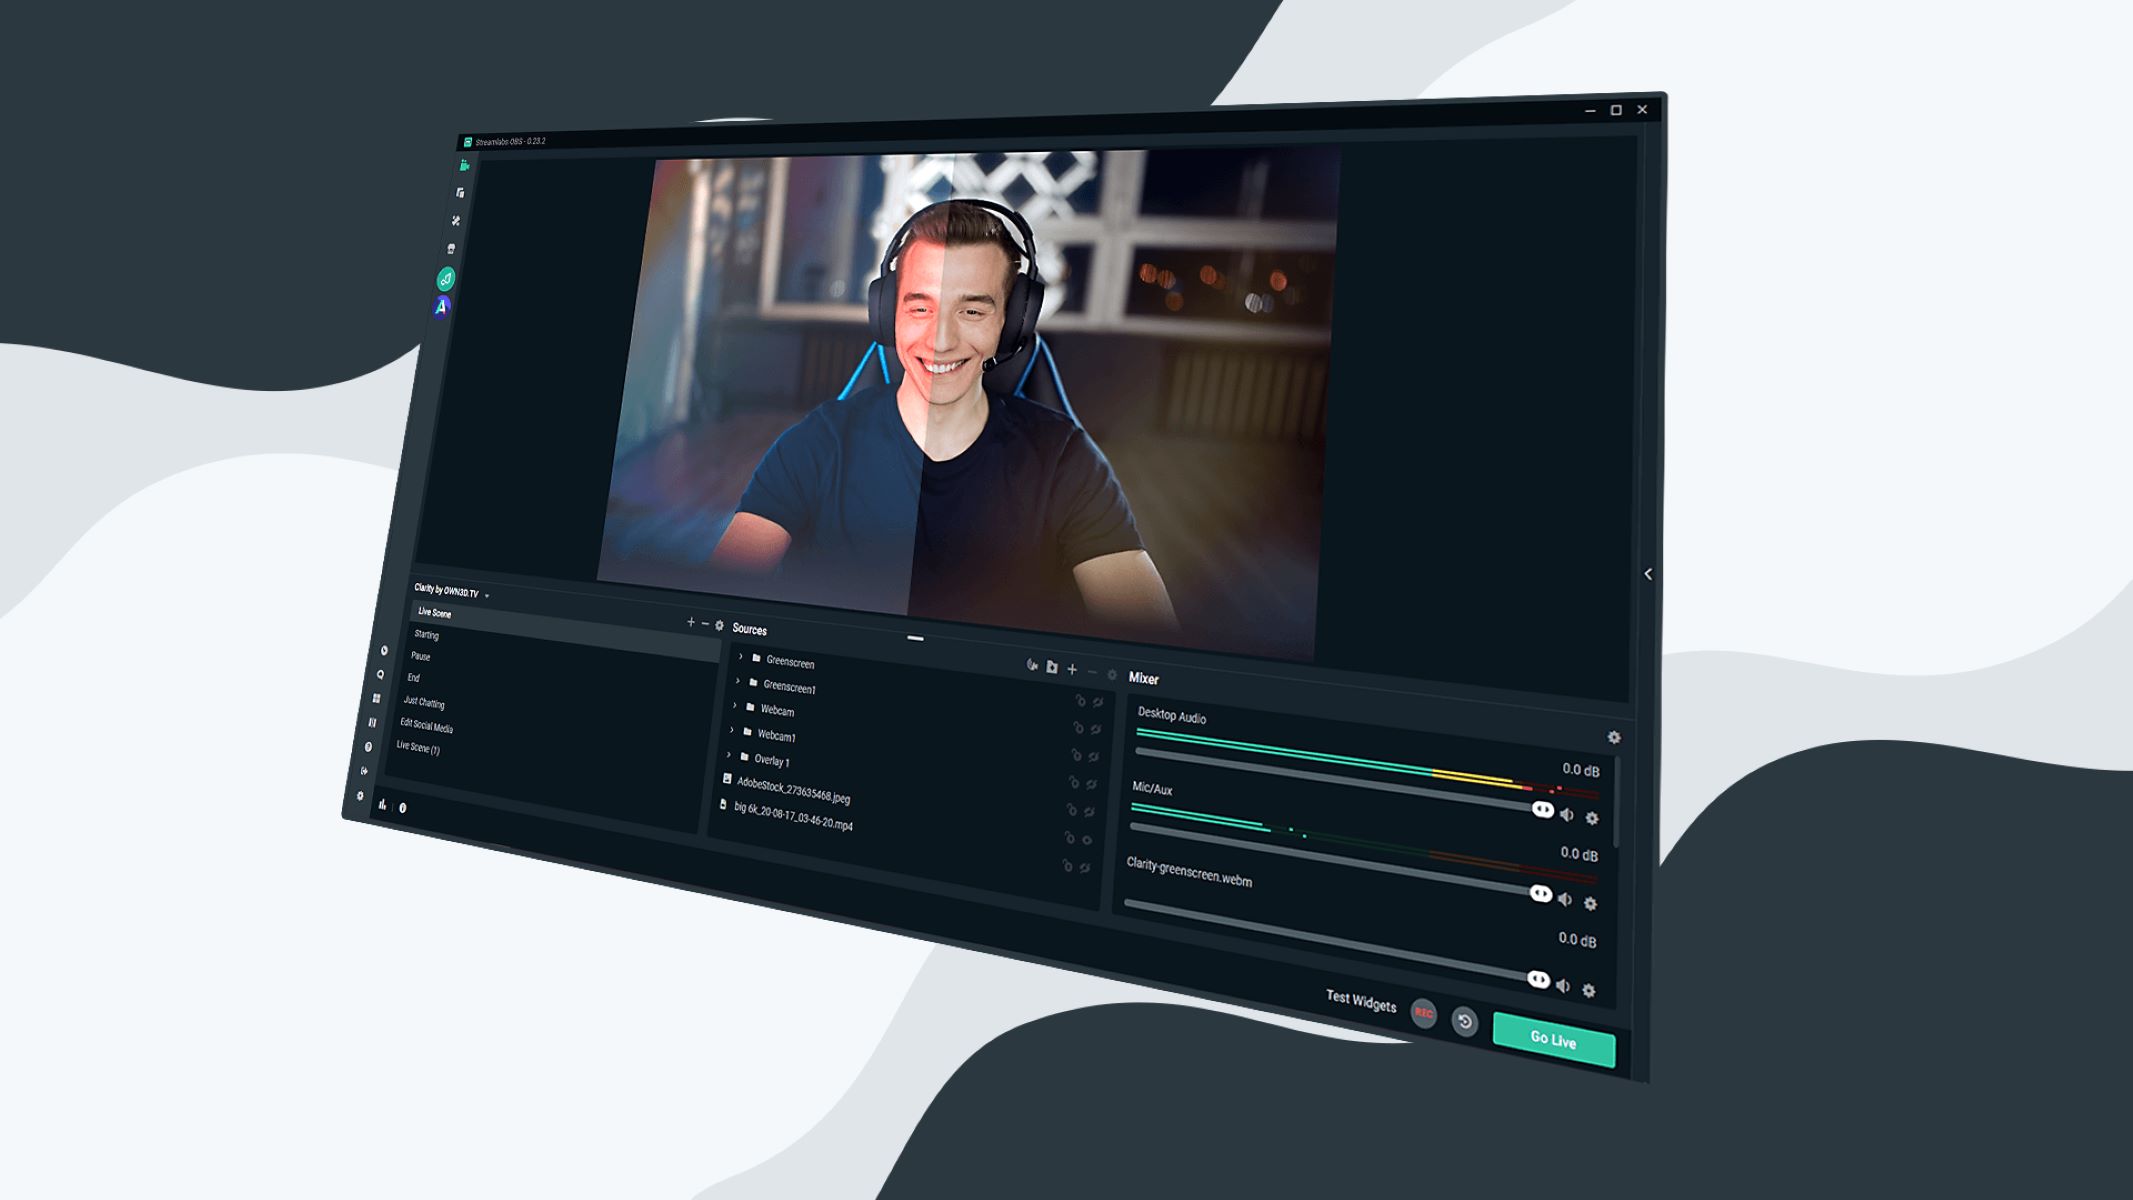
Welcome to this step-by-step guide on how to crop your webcam in Streamlabs! If you’re a streamer or content creator, chances are you’ve come across the need to adjust your webcam display to suit your stream layout or video recording. Streamlabs, a popular streaming software, offers a range of customization options, including the ability to crop your webcam feed.
By cropping your webcam, you can eliminate any unwanted background elements and focus on your face or any specific area you want to highlight. This can help in creating a cleaner and more professional look for your stream or video. Whether you’re a beginner or an experienced user, this guide will walk you through the process of cropping your webcam in Streamlabs, step by step.
In the following sections, we will cover everything you need to know to crop your webcam in Streamlabs. This includes launching the software, setting up your webcam source, adjusting its position, and finally, cropping the webcam to your desired dimensions. So, let’s jump right in and get started with cropping your webcam in Streamlabs!
Step 1: Launching Streamlabs
The first step in cropping your webcam in Streamlabs is to launch the Streamlabs software. If you haven’t already installed Streamlabs, head over to their official website and download the software for your operating system. Once the installation is complete, follow these simple steps to launch it:
- Locate the Streamlabs icon on your desktop or in your program files.
- Double-click on the icon to open the Streamlabs application.
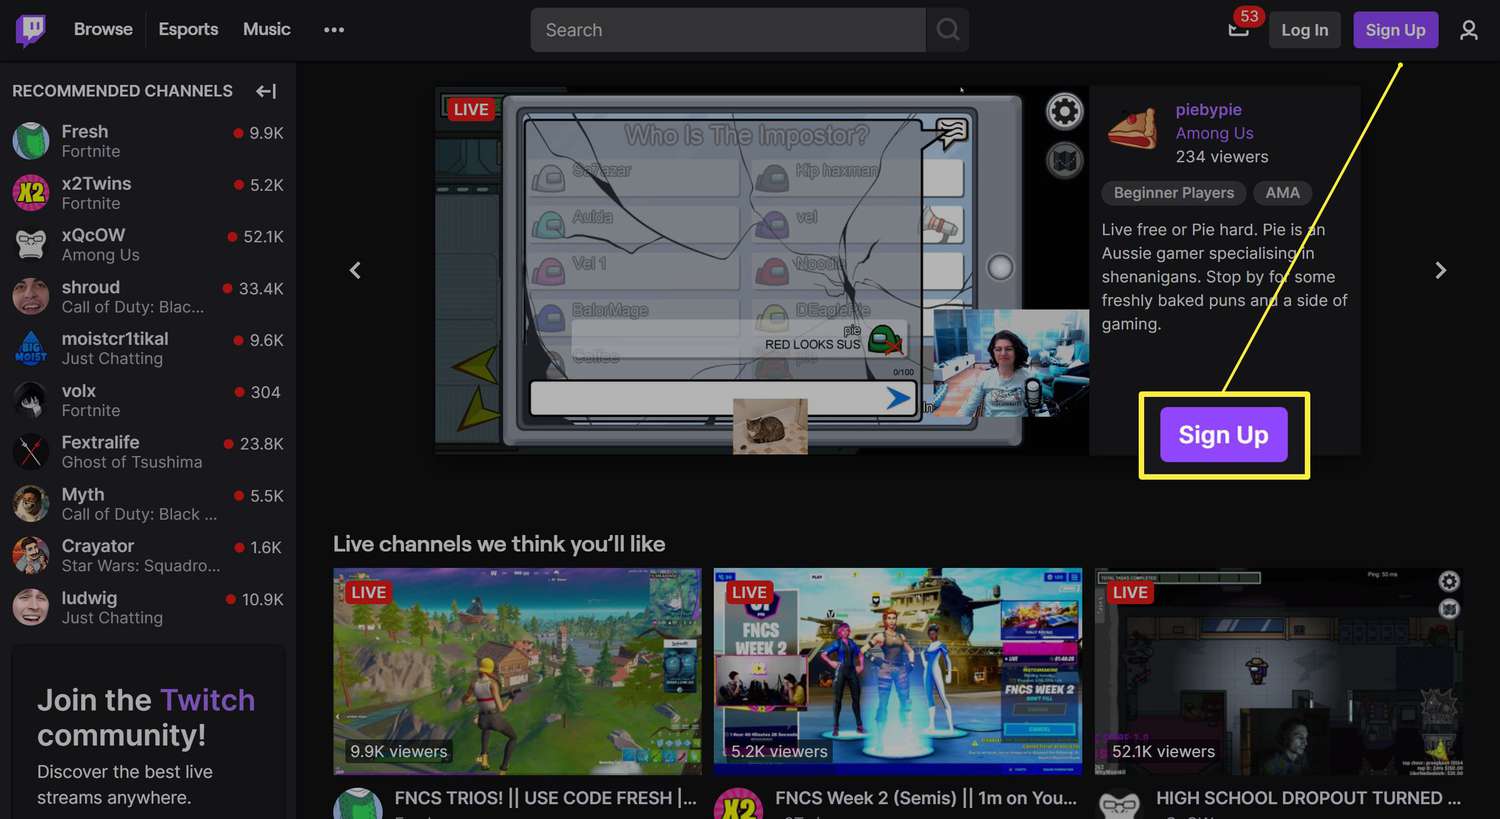
- If prompted, enter your Streamlabs login credentials to access your account. If you don’t have an account, you can create one by clicking on the “Sign Up” option.
- Once you’re logged in, you will be greeted with the Streamlabs dashboard, which serves as the hub for all your streaming and recording needs.
Now that you’ve successfully launched Streamlabs, you’re ready to proceed to the next step and set up your webcam source.
Step 2: Setting up Webcam Source
After launching Streamlabs, the next step is to set up your webcam source. This will allow Streamlabs to recognize and capture the video feed from your webcam. Here’s how you can do it:
- On the Streamlabs dashboard, locate the “Sources” tab and click on it.
- In the Sources tab, click on the “+” button to add a new source.
- A menu will appear with different source options. Select “Video Capture Device” from the list. This will open the settings for your webcam source.
- In the Video Capture Device settings, enter a name for your webcam source in the “Device” field. This can be any name that helps you identify the source easily.
- Below the “Device” field, select your webcam from the drop-down menu. If your webcam is not listed, make sure it is properly connected to your computer.
- Adjust the settings such as resolution and frame rate according to your preferences. Streamlabs will usually detect and set the optimal settings by default, but you can make adjustments if needed.
- Click on the “Done” button to save your webcam source settings.
With your webcam source set up, Streamlabs is now configured to capture the video feed from your webcam. The next step is to adjust the position of your webcam within the stream layout.
Step 3: Adjusting Webcam Position
Once you have set up your webcam source in Streamlabs, it’s time to adjust its position within your stream layout. This step is crucial in ensuring that your webcam is properly positioned and aligned with the other visual elements in your stream. Follow these steps to adjust the webcam position:
- On the Streamlabs dashboard, locate your webcam source in the list of sources.
- Click and drag the webcam source to move it around the stream layout. You can place it anywhere you like, such as in the bottom-left corner, top-right corner, or any other position that suits your preferences.
- Resize the webcam source by clicking and dragging the edges or corners of the source. This allows you to make it larger or smaller depending on your desired size.
- Use the alignment tools in Streamlabs to help you position the webcam source accurately. The alignment tools provide guides and snap points that assist in aligning the webcam with other elements in your stream, such as overlays or text.
- Preview your webcam position by clicking on the “Preview Stream” button. This allows you to see how the webcam looks within your stream layout and make any necessary adjustments.
- Repeat the above steps until you are satisfied with the position and size of your webcam within the stream layout.
By taking the time to adjust the position of your webcam, you can ensure that it integrates seamlessly with your stream design, enhancing the overall visual appeal of your content. Once you’re happy with the webcam position, it’s time to move on to the next step and learn how to crop the webcam feed.
Step 4: Cropping the Webcam
Now that you have positioned your webcam source within your stream layout, you can proceed to crop the webcam feed in Streamlabs. Cropping allows you to remove any unwanted parts of the webcam video and focus on the specific area you want to display. Follow these steps to crop your webcam:
- On the Streamlabs dashboard, select your webcam source from the list of sources.
- Click on the gear icon next to the webcam source. This will open the settings for your webcam.
- In the webcam source settings, navigate to the “Crop/Pad” tab.
- Here, you will see options to adjust the cropping of the webcam feed. The options may vary depending on the version of Streamlabs you are using.
- Use the sliders or input boxes to set the values for the cropping dimensions. You can adjust the top, bottom, left, and right cropping values to customize the crop area according to your needs.
- Preview the cropped webcam feed by clicking on the “Preview Stream” button. This will show you how the webcam feed looks with the applied cropping.
- Make any necessary adjustments to the cropping values until you are satisfied with the cropped output.
- Click on the “Done” button to save the cropping settings for your webcam source.
By cropping your webcam feed, you can remove any distractions or unwanted background elements, ensuring that your viewers’ focus is on you. Once you have successfully cropped your webcam, it’s time to preview the changes and fine-tune the crop if necessary. This is covered in the next step.
Step 5: Previewing the Webcam Crop
After cropping your webcam in Streamlabs, it’s crucial to preview the changes you’ve made to ensure that the crop is aligned properly and looks as intended. The preview feature allows you to see the live output of your stream or recording before going live or publishing the content. Follow these steps to preview your webcam crop:
- On the Streamlabs dashboard, click on the “Preview Stream” button. This will open a separate window or tab displaying the live preview of your stream.
- Locate your webcam feed within the preview window. Take note of the frame, position, and size of the webcam to ensure that it aligns with your expectations.
- Check for any issues or anomalies with the webcam crop, such as uneven edges, misalignment, or unwanted elements still visible.
- If you encounter any issues, go back to the webcam source settings and make the necessary adjustments to the cropping dimensions.
- Toggle between the preview mode and the webcam source settings window to make real-time adjustments and observe the changes reflected in the live preview.
- Repeat the process until you are satisfied with the appearance of your cropped webcam feed in the preview window.
Previewing the webcam crop allows you to identify any potential issues and make adjustments on-the-fly, ensuring that your final output looks professional and visually appealing. Once you are confident with the webcam crop, it’s time to fine-tune it further, if needed, in the next step.
Step 6: Fine-tuning Webcam Crop
After previewing the webcam crop in Streamlabs, you have the opportunity to fine-tune the crop further to achieve the desired result. Fine-tuning allows you to make precise adjustments to the crop dimensions, ensuring that your webcam feed is perfectly framed within your stream layout or recording. Follow these steps to fine-tune your webcam crop:
- Access the webcam source settings in Streamlabs by selecting the webcam source from the list of sources and clicking on the gear icon.
- Navigate to the “Crop/Pad” tab within the webcam source settings.
- Review the current values for the cropping dimensions.
- Make subtle adjustments by using the sliders or input boxes to refine the crop area. You can tweak the top, bottom, left, and right cropping values to achieve the desired frame.
- Continue to toggle between the webcam source settings and the preview window to observe the effects of your adjustments in real-time.
- Pay careful attention to the position, size, and alignment of the webcam feed within the preview window.
- Make multiple iterations of adjustments and previewing until you achieve the optimal crop for your webcam feed.
- Once you are satisfied with the fine-tuned webcam crop, click on the “Done” button to save the settings.
By fine-tuning your webcam crop, you can ensure that your webcam feed is precisely framed without any distractions or visual inconsistencies. Take your time to make the necessary adjustments and regularly review the preview window to assess the changes. With a well-cropped webcam, you are now ready to go live or record your content with confidence!
Conclusion
Cropping your webcam in Streamlabs is a simple yet powerful technique that allows you to enhance the visual quality of your streams and recordings. It enables you to remove unwanted background elements, focus on specific areas, and create a more professional and polished look for your content.
In this guide, we walked you through the step-by-step process of cropping your webcam in Streamlabs. We started by launching the Streamlabs software and setting up the webcam source. Then, we learned how to adjust the position of the webcam within the stream layout.
Next, we covered the process of cropping the webcam feed itself, allowing you to remove any distractions and highlight the essential areas. We emphasized the importance of previewing the crop to ensure it aligns with your expectations and provided tips on fine-tuning the crop for optimal results.
Remember, while cropping can significantly improve the visual appeal of your webcam feed, it’s essential to find a balance between showcasing your face or desired area and maintaining a natural composition. Experimentation and regular reviews in the preview window will help you achieve the perfect crop that suits your streaming or recording style.
Now that you have the knowledge and understanding of how to crop your webcam in Streamlabs, go ahead and put it into practice. Explore different layouts, try out various crop dimensions, and find what works best for you and your content.
Happy streaming and recording!