Why Cook a Pork Roast in an Electric Pressure Cooker?
When it comes to cooking a pork roast, using an electric pressure cooker can be a game-changer. This modern kitchen appliance is designed to seal in flavors and cook food quickly, making it perfect for cooking a tender and succulent pork roast. Here’s why you should consider using an electric pressure cooker for your next pork roast:
1. Time-saving convenience: One of the biggest advantages of using an electric pressure cooker is its ability to significantly reduce cooking time. Compared to traditional cooking methods such as slow roasting in the oven or using a slow cooker, the pressure cooker can cook a pork roast in a fraction of the time. This is great for busy individuals or those who want to enjoy a delicious meal without spending hours in the kitchen.
2. Retained flavors and nutrients: The airtight seal in an electric pressure cooker helps to lock in the flavors, juices, and nutrients of the pork roast. As the pressure builds inside the cooker, the steam penetrates the meat, resulting in a tender and moist roast. This method of cooking ensures that the flavors are intensified and the essential nutrients are preserved, providing a satisfying and nutritious meal.
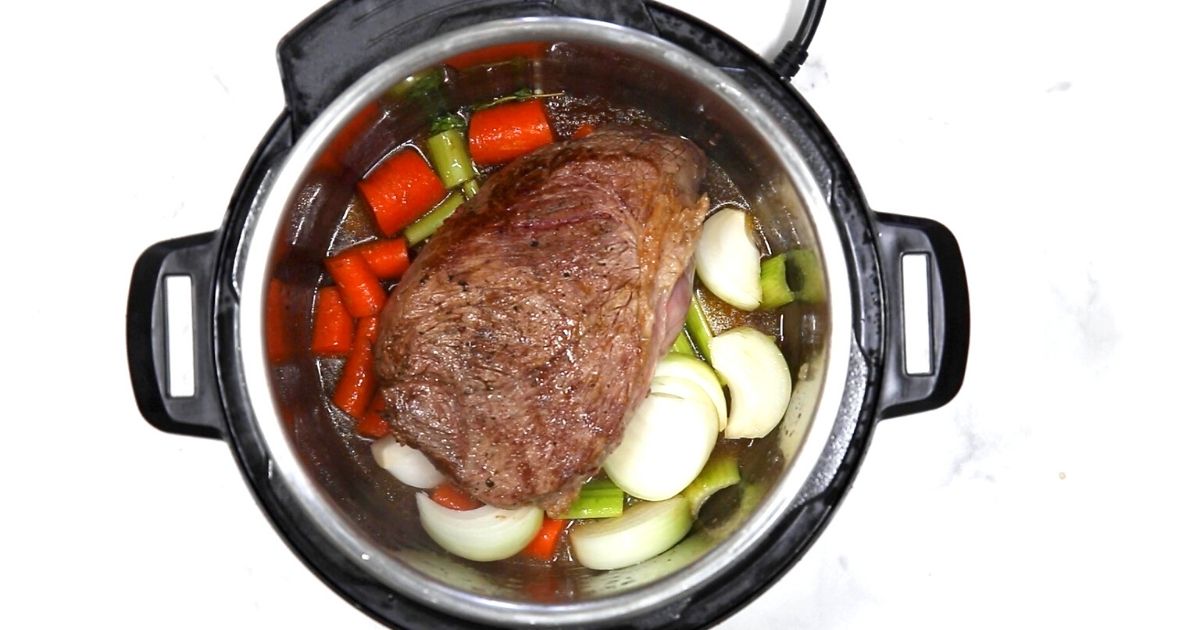
3. Versatile cooking options: With an electric pressure cooker, you have the flexibility to experiment with different cooking techniques. You can choose to brown the pork roast beforehand to enhance its flavors or add vegetables and aromatics to create a complete one-pot meal. The pressure cooker can also be used to make sauces or gravies using the cooking liquid from the roast, adding an extra depth of flavor to your dish.
4. Reduced energy consumption: Cooking a pork roast in an electric pressure cooker requires less energy compared to traditional cooking methods. The shorter cooking time means less time spent using electricity or gas, resulting in energy and cost savings. Additionally, the pressure cooker’s efficient heat distribution prevents excessive heat loss, further reducing energy consumption.
5. Tender and delicious results: The combination of pressure and steam in an electric pressure cooker ensures that the pork roast is cooked evenly and thoroughly. This results in a tender and flavorful roast that melts in your mouth with each bite. Whether you prefer a classic pork loin roast or a savory pulled pork, the pressure cooker will deliver consistently delicious results.
Overall, cooking a pork roast in an electric pressure cooker offers a myriad of benefits. From saving time and energy to producing tender and flavorful results, using this modern kitchen appliance will revolutionize your pork roast cooking experience.
Choosing the Right Cut of Pork
When it comes to cooking a pork roast in an electric pressure cooker, selecting the right cut of pork is essential for achieving the best results. Here are some factors to consider when choosing the perfect cut of pork for your pressure cooker:
1. Shoulder or Boston Butt: The shoulder or Boston Butt is a popular choice for cooking in an electric pressure cooker. This flavorful and marbled cut is well-suited for slow cooking methods, such as pressure cooking, as it becomes tender and moist when cooked under pressure. It’s an excellent option for pulled pork or braised dishes.
2. Pork Loin: Pork loin is a leaner cut of meat that is known for its tenderness. Cooking a pork loin roast in an electric pressure cooker results in a juicy and succulent roast. It is important to note that lean cuts like pork loin can dry out more quickly, so be mindful of the cooking time to prevent overcooking.
3. Pork Tenderloin: If you’re looking for a lean and tender option, consider using pork tenderloin in your pressure cooker. This cut is perfect for quick meals and can be cooked in a relatively short amount of time. However, it’s important to be cautious not to overcook it, as it can easily become dry and tough.
4. Spare Ribs: If you’re in the mood for some flavorful and fall-off-the-bone ribs, spare ribs can be cooked to perfection in an electric pressure cooker. They benefit from the moist and high-pressure cooking environment, resulting in tender meat that easily separates from the bones. Finish them off with your favorite BBQ sauce for a finger-licking meal.
5. Pork Shoulder Roast: Similar to the Boston Butt, a pork shoulder roast is a great choice for slow cooking in an electric pressure cooker. This cut is known for its rich marbling and connective tissues, which break down and result in a deliciously tender and flavorful roast. It’s ideal for pulled pork sandwiches or stews.
When choosing your cut of pork, consider the type of dish you want to make and the cooking time required. Fattier cuts like the shoulder and Boston Butt are more forgiving and result in tender, flavor-packed meat. Leaner cuts like pork loin or tenderloin require more attention to prevent dryness. Selecting the right cut of pork ensures that your electric pressure cooker will work its magic and deliver a mouthwatering pork roast every time.
Preparing the Pork Roast for Cooking
Before cooking a pork roast in an electric pressure cooker, proper preparation is key to ensure optimal flavor and tenderness. Here are the steps to follow when preparing your pork roast:
1. Trim excess fat: Begin by trimming any excessive fat from the pork roast. While some fat can add flavor and juiciness, too much fat may result in a greasy consistency. Aim to leave a thin layer of fat to enhance the flavor and moisture of the roast.
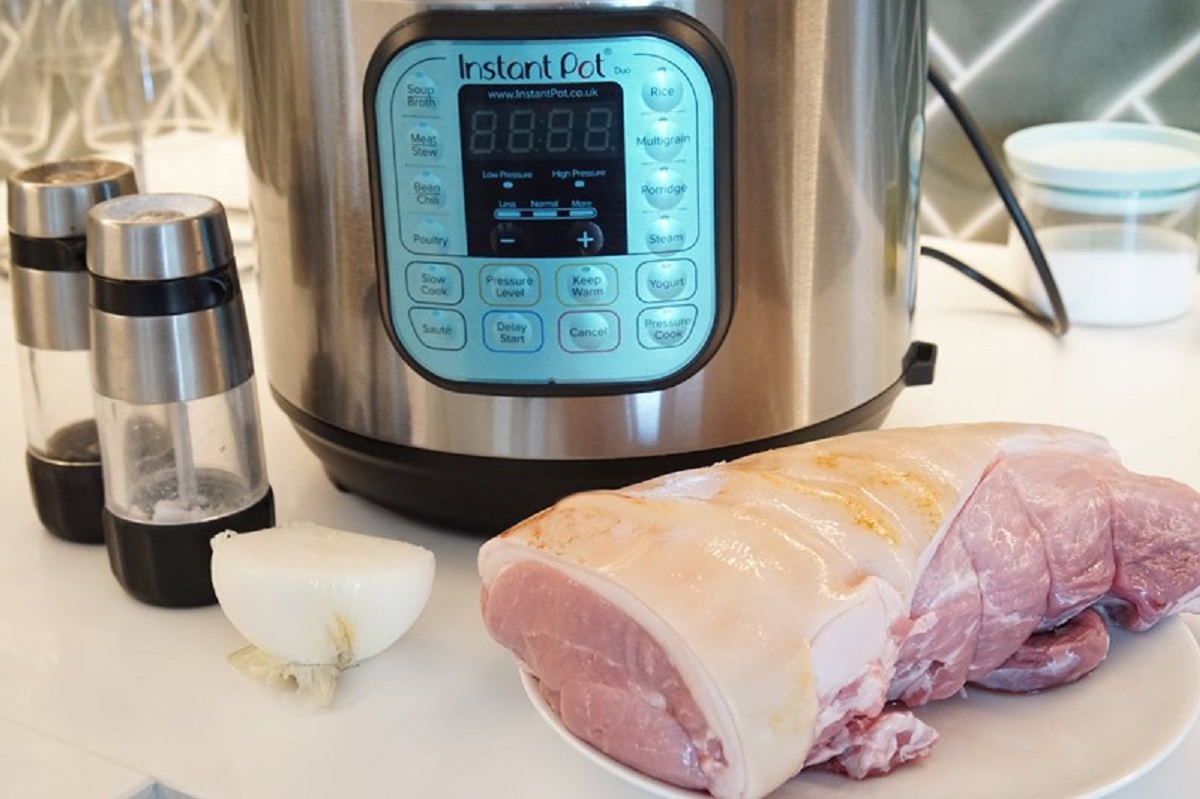
2. Season with salt and pepper: Generously season the pork roast on all sides with salt and pepper. This simple seasoning enhances the natural flavors of the meat and provides a solid base of seasoning for additional spices or herbs that you might add later.
3. Optional marinade or dry rub: If desired, you can marinate the pork roast overnight or apply a dry rub to infuse it with additional flavors. Whether it’s a tangy BBQ marinade or a savory herb and spice rub, this step adds depth to the overall taste. Make sure to use a marinade or rub that complements the flavors of pork.
4. Allow the pork roast to come to room temperature: Before cooking, it is recommended to let the pork roast sit at room temperature for about 30 minutes. This allows for more even cooking and prevents the meat from seizing up when introduced to high heat. Take the roast out of the refrigerator and let it rest on the counter, covered, during this time.
5. Preheat the pressure cooker: While the pork roast is coming to room temperature, take the opportunity to preheat the electric pressure cooker. Follow the manufacturer’s instructions to ensure proper heating. Preheating helps to ensure even cooking and prevents the meat from sticking to the pot.
6. Prepare any additional ingredients: If you plan to cook the pork roast with other ingredients, such as vegetables or aromatic herbs, now is the time to prepare them. Chop vegetables, gather seasonings, and have all the necessary ingredients within reach for easy and seamless cooking.
By following these preparation steps, you’ll be well on your way to creating a delicious and flavorful pork roast in your electric pressure cooker. Properly seasoning the pork, allowing it to come to room temperature, and preheating the pressure cooker are crucial steps that contribute to a successful cooking process. Now, you’re ready to move on to the next steps of browning the pork roast and getting it ready for pressure cooking.
Seasoning the Pork Roast
Seasoning the pork roast properly is essential for enhancing its flavor and creating a delicious meal. Here’s how to season your pork roast for optimal taste:
1. Salt and pepper: Begin by generously seasoning the pork roast on all sides with salt and pepper. This simple seasoning combination helps to enhance the natural flavors of the meat and bring out its savory notes. Be sure to cover the entire surface of the roast evenly.
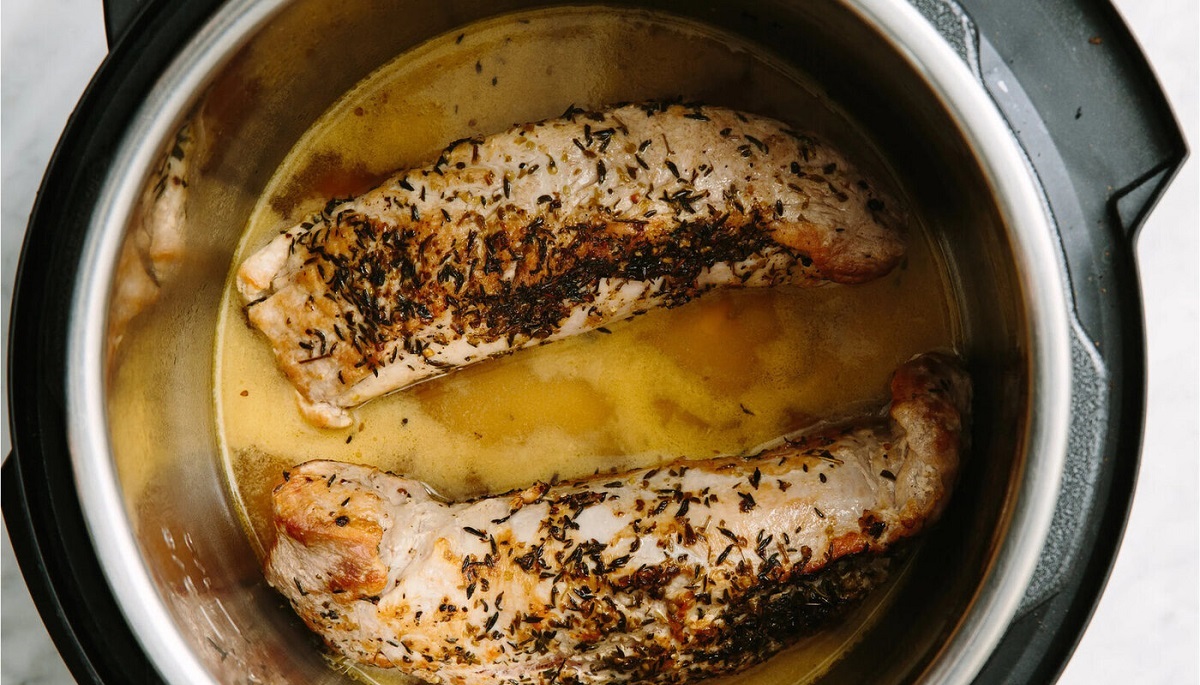
2. Additional spices and herbs: To add more depth of flavor, consider incorporating additional spices and herbs. This can include ingredients like garlic powder, paprika, thyme, rosemary, or a pre-made spice blend. Adjust the amount to suit your personal preference, keeping in mind that flavors can intensify during the cooking process.
3. Marinade or rub: If you have time, marinating the pork roast or applying a dry rub can infuse it with even more flavor. Marinating involves soaking the roast in a mixture of seasonings, such as soy sauce, vinegar, herbs, and spices, for a few hours or overnight. Alternatively, a dry rub can be made by combining spices, herbs, and even a touch of sugar for a caramelized crust.
4. Patting dry before cooking: Before browning or placing the pork roast into the electric pressure cooker, it’s important to pat it dry. Excess moisture can interfere with the browning process and prevent a desirable crust from forming. Use paper towels to absorb any moisture on the surface of the roast.
5. Adjust to personal taste: Seasoning is a subjective process, so feel free to adjust the flavors to your personal taste preferences. If you enjoy bold flavors, don’t be afraid to be generous with the spices and herbs. On the other hand, if you prefer milder flavors, use a lighter hand with the seasonings.
By properly seasoning the pork roast, you’ll be able to create a flavor profile that suits your preferences. The combination of salt, pepper, and additional spices and herbs will enhance the natural flavors of the meat, resulting in a delicious and well-seasoned pork roast. Remember to adjust the seasonings according to your taste and enjoy the flavorful outcome!
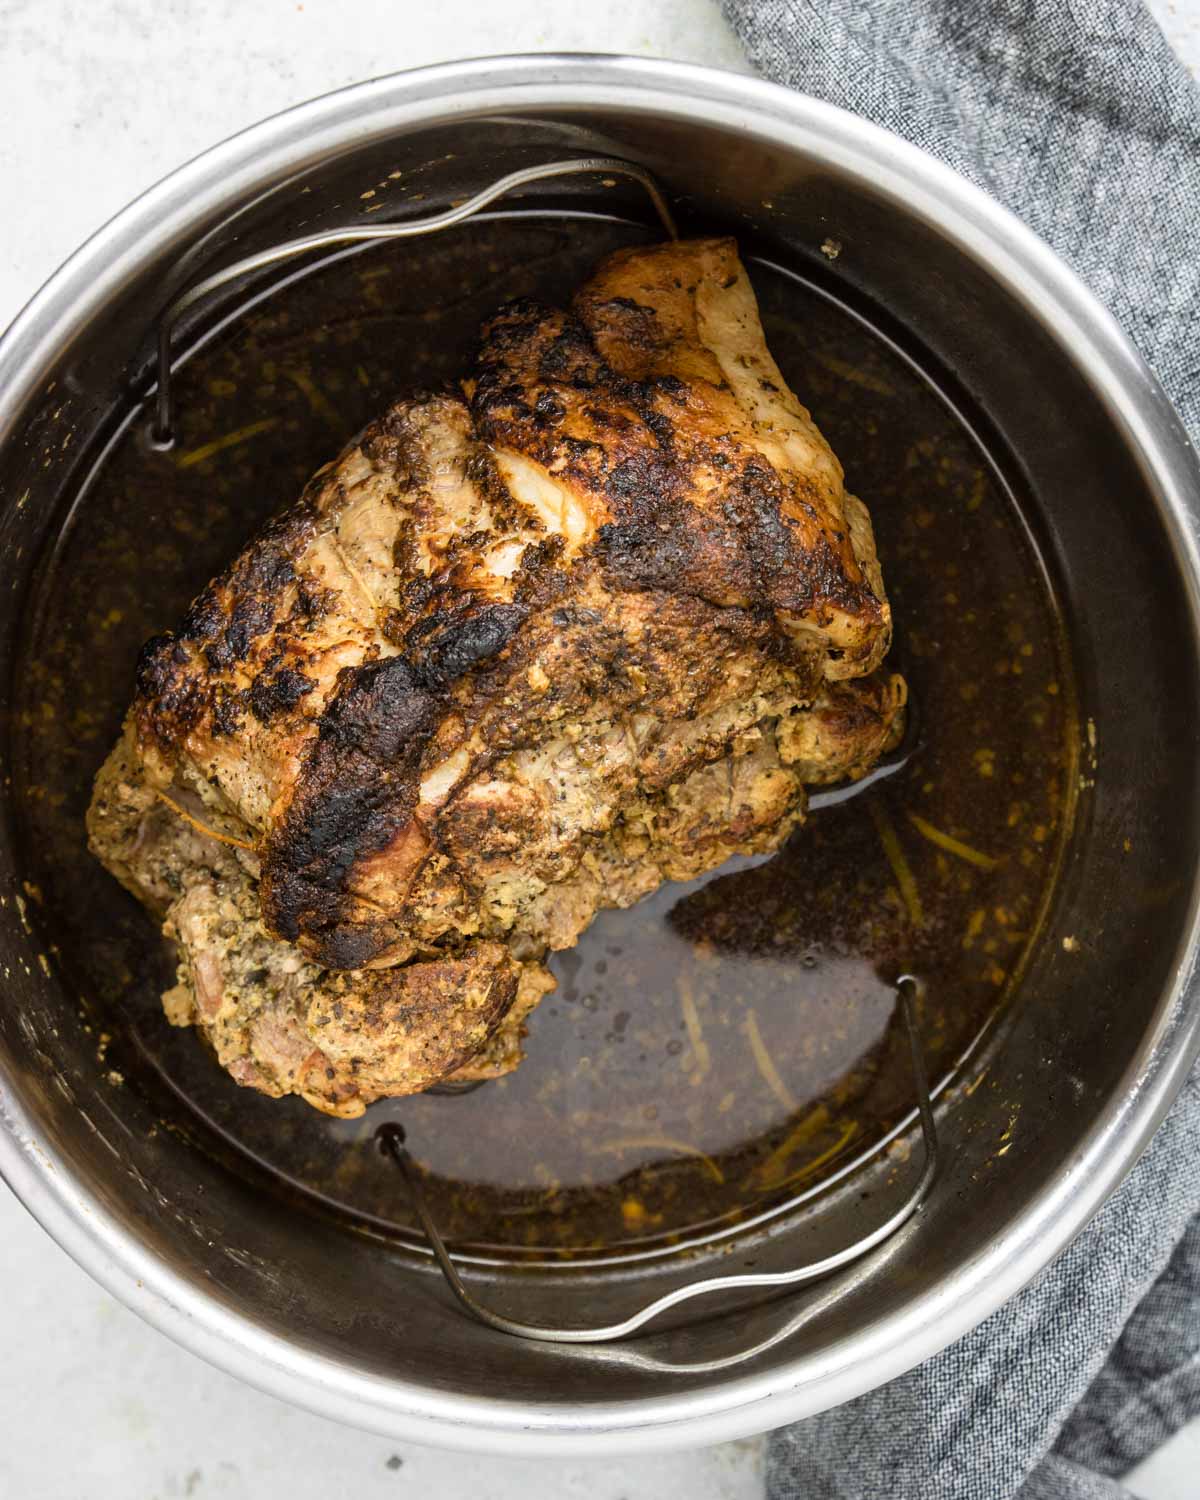
Browning the Pork Roast
Browning the pork roast before pressure cooking is an essential step that adds depth of flavor and texture to the final dish. It helps to develop a rich caramelized crust and enhances the overall taste. Follow these steps to properly brown your pork roast:
1. Preheat the pressure cooker: Start by preheating your electric pressure cooker on the sauté or browning function. This will ensure that the pot is hot and ready for browning the pork roast.
2. Add oil or fat: Once the cooker is preheated, add a small amount of oil or fat. Choose an oil with a high smoke point, such as vegetable or canola oil, or use a small piece of pork fat to render and create a flavorful cooking medium.
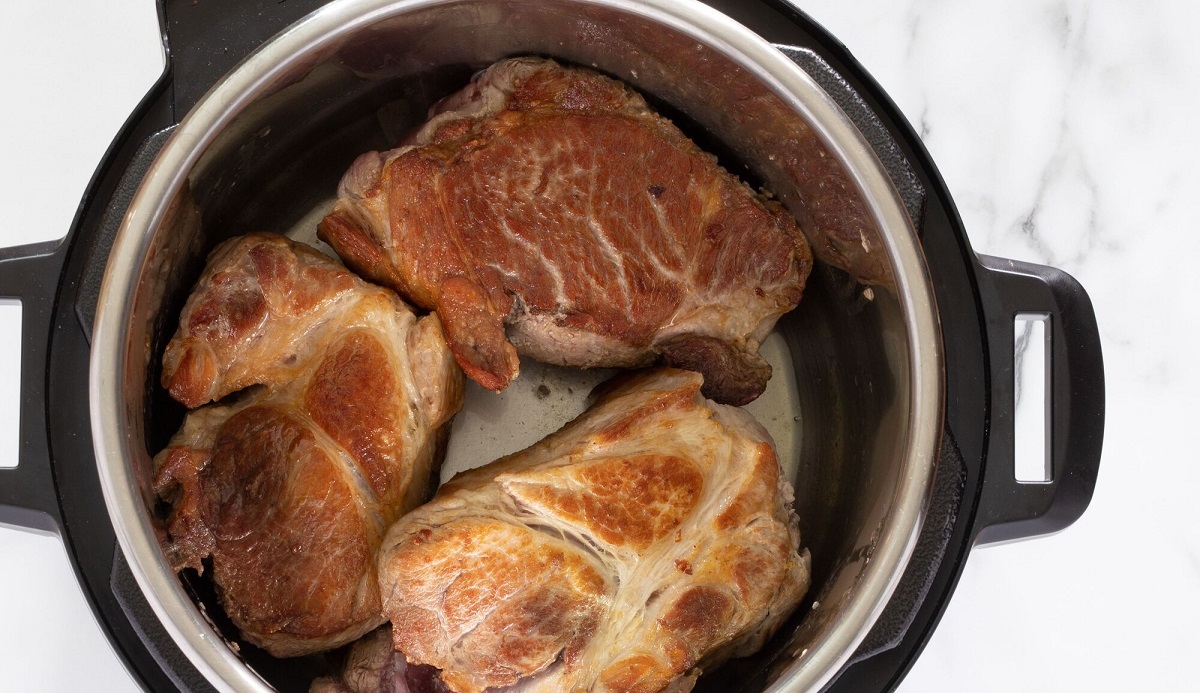
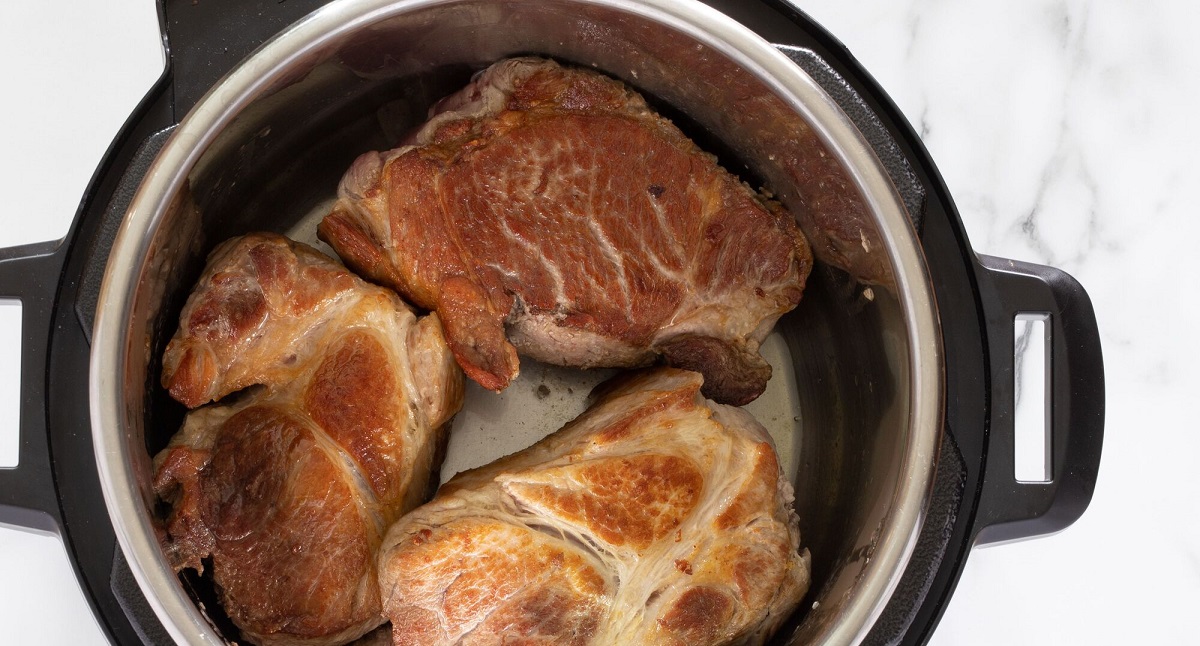
3. Sear all sides: Place the seasoned pork roast into the hot pressure cooker and sear it on all sides until golden brown. Use tongs to carefully turn the roast, ensuring that each side gets evenly browned. This process helps to lock in the juices and develop a delicious crust on the meat.
4. Don’t overcrowd the cooker: It’s important not to overcrowd the pressure cooker to ensure proper browning. If you’re cooking a large roast, you may need to cut it into smaller pieces and brown them in batches. Overcrowding the pot can prevent the meat from browning properly and may result in steaming instead.
5. Remove excess fat: After browning the pork roast, carefully remove any excess fat that has rendered. This step helps to reduce the greasiness of the final dish and allows you to control the overall fat content of the meal.
6. Deglaze the pot: To capture all the flavorful browned bits stuck to the bottom of the pot, deglaze it with a small amount of liquid. This can be water, broth, wine, or any other liquid of your choice. Scrape the bottom of the pot with a wooden spoon to release the delicious flavor incorporated into the liquid.
Browning the pork roast not only adds a beautiful caramelization and depth of flavor but also plays a crucial role in the overall taste and texture of the dish. By taking the time to properly sear the meat, you’ll enhance its visual appeal and create a mouthwatering pork roast that will impress your family and guests.
Adding Liquid to the Pressure Cooker
Adding liquid to the pressure cooker is an important step in cooking a pork roast to ensure the meat remains moist and flavorful. The liquid not only helps to create steam for pressure cooking but also infuses the pork with additional flavors. Here’s what you need to know about adding liquid to the pressure cooker:
1. Choose the right liquid: The type of liquid you add can greatly impact the final taste of the pork roast. Common options include water, broth, stock, wine, or a combination of these. Each type of liquid imparts its own unique flavors, so choose the one that complements your recipe. For example, using vegetable or chicken broth can add depth and richness to the dish.
2. Determine the amount: The amount of liquid needed depends on the size of the pressure cooker and the specific recipe you’re following. As a general guideline, you’ll typically need around 1 to 2 cups of liquid for pressure cooking a pork roast. This is necessary for creating the steam that builds pressure and cooks the meat evenly.
3. Consider additional flavorings: To further enhance the taste of the pork roast, you can add additional flavorings to the liquid. This can include ingredients like herbs, spices, garlic, onions, or even citrus zest. These flavorings will infuse into the meat during the cooking process and create a more complex and aromatic dish.
4. Deglaze the pot: If you’ve browned the pork roast and there are flavorful browned bits stuck to the bottom of the pressure cooker, you can deglaze it with a small amount of liquid. This step not only helps to release the stuck-on bits but also adds more flavor and richness to the overall dish.
5. Be mindful of the liquid’s purpose: Remember that the liquid in the pressure cooker serves two main purposes – creating steam for cooking and flavoring the pork roast. Make sure to add enough liquid for the pressure cooker to come to pressure, but also consider the desired intensity of flavors in your recipe. Too much liquid may dilute the flavors, while too little can result in an dry or undercooked pork roast.
Adding the right amount and type of liquid to the pressure cooker is crucial for achieving a moist and flavorful pork roast. Whether you’re using broth, stock, wine, or a combination of flavors, the liquid plays a vital role in both the cooking process and the overall taste of the dish. By carefully considering these factors, you’ll be on your way to creating a succulent and delicious pork roast in your electric pressure cooker.
Cooking the Pork Roast in the Electric Pressure Cooker
Now that your pork roast is seasoned, browned, and the liquid is added, it’s time to cook it in the electric pressure cooker. Follow these steps to ensure a perfectly cooked pork roast:
1. Place the pork roast in the pressure cooker: Carefully place the browned pork roast into the pressure cooker, making sure to position it in the center and away from the sides to ensure even cooking.
2. Set the cooking time: Consult your electric pressure cooker’s manual or recipe guidelines to determine the appropriate cooking time for your specific cut and size of pork roast. Set the cooking time accordingly, taking into account the desired level of tenderness and the thickness of the meat.
3. Close and lock the lid: Securely close the lid of the pressure cooker and ensure it is properly locked. This is crucial for building pressure and creating the ideal cooking environment for the pork roast.
4. Select the appropriate pressure setting: Depending on your electric pressure cooker, you may have different pressure settings such as high or low pressure. Choose the appropriate setting for your pork roast recipe.
5. Start the cooking process: Start the pressure cooking process by selecting the appropriate setting on your electric pressure cooker. The cooker will begin to build pressure and the cooking time will start counting down. Follow the instructions provided by your specific appliance to initiate the cooking process.
6. Stay cautious and monitor the cooking: While the pork roast is cooking in the pressure cooker, it’s important to remain cautious and monitor the process. Avoid opening the lid during cooking, as this can release pressure and prolong the cooking time. Trust the cooking time indicated in the recipe or manual, and be patient while the pressure cooker does its job.
7. Allow for natural release or quick release: Once the cooking time has elapsed, you have the option of allowing the pressure to release naturally or using the quick release method. Natural release involves letting the pressure cooker release the pressure on its own, while quick release entails manually releasing the pressure using the pressure release valve. Follow the recommended method for your specific recipe.
8. Carefully remove the pork roast: Once the pressure has fully released, you can carefully open the lid of the pressure cooker. Use tongs to remove the pork roast, taking care as it will be extremely hot. Place it on a cutting board and let it rest for a few minutes before carving.
By following these steps, you’ll be able to successfully cook a tender and flavorful pork roast in your electric pressure cooker. The pressure cooking method helps to infuse the meat with moisture and create a delicious meal with minimal effort and time.
Natural Release vs Quick Release
When cooking a pork roast in an electric pressure cooker, the method used to release the pressure after cooking can have an impact on the texture and tenderness of the meat. There are two main methods for releasing pressure in a pressure cooker: natural release and quick release. Here’s what you need to know about these two methods:
Natural Release: Natural release involves allowing the pressure inside the cooker to gradually decrease on its own without any intervention. After the cooking time has elapsed, turn off the heat and let the pressure cooker sit without adjusting the pressure release valve. As the pressure naturally subsides, the floating valve on top of the lid will drop, indicating that it is safe to open the lid. This process typically takes around 10 to 20 minutes, but it can vary depending on the size of the pork roast and the amount of pressure built up.
Natural release is preferred for delicate cuts of meat, such as pork loin or tenderloin, as it allows the meat to continue cooking in the residual heat and gradually relaxes the muscle fibers. This results in a more tender and juicy pork roast.
Quick Release: Quick release involves manually releasing the pressure from the cooker immediately after the cooking time is complete. To perform a quick release, carefully move the pressure release valve to the “Venting” position using a long-handled utensil or oven mitt to protect your hand from the steam. The steam will escape rapidly, releasing the pressure inside the cooker in just a few minutes.
Quick release is suitable for cuts of meat that are less sensitive to overcooking, such as pork shoulder or Boston Butt. It provides a way to quickly stop the cooking process and prevent the meat from becoming overly tender or mushy.
It’s important to note that regardless of which method you choose, always exercise caution when releasing the pressure from the cooker. Keep your face, hands, and other body parts away from the steam to prevent burns.
Deciding whether to use natural release or quick release depends on the type of pork roast you are cooking and the desired texture you want to achieve. For lean cuts that benefit from a gentler cooking method, opt for natural release. For cuts that can handle slightly more pressure, quick release is a suitable option that allows for a faster cooking process.
Understanding these two pressure release methods will help you determine the best approach for releasing pressure when cooking your pork roast in an electric pressure cooker, resulting in a tender and delicious final dish.
Checking for Doneness
Checking for doneness is a crucial step when cooking a pork roast in an electric pressure cooker to ensure that the meat is cooked to perfection. Here are some methods to help you determine if your pork roast is done:
1. Internal temperature: The most accurate way to check the doneness of a pork roast is by using a meat thermometer to measure the internal temperature. The USDA recommends cooking pork to an internal temperature of 145°F (63°C), followed by a 3-minute rest time. Insert the meat thermometer into the thickest part of the roast, away from any bone, and ensure that it reaches the desired temperature for safety and quality.
2. Meat texture: Another indicator of doneness is the texture of the meat. A properly cooked pork roast should be tender and easily pull apart with a fork. If the meat is tough and resistant, it may need additional cooking time. Use a fork to gently pull apart a small section of the roast to check the tenderness.
3. Visual cues: The color of the pork roast can also be a helpful visual cue. Pork that is properly cooked will have an appealing golden brown exterior. However, color alone is not always a reliable indicator of doneness, as some cuts may retain a pink hue even when fully cooked. It’s best to rely on internal temperature and meat texture for accurate results.
4. Juice color: When pricking the pork roast with a fork or slicing into it, pay attention to the color of the juices that come out. The juices should run clear or have a slight pink tint. If the juices appear significantly pink or have a reddish hue, the pork may need more cooking time to ensure it is fully cooked.
5. Recipe guidelines: If you’re following a specific recipe, it may provide additional tips or guidelines for checking the doneness of the pork roast. Some recipes may have specific visual cues or cooking times that will help you determine when the roast is ready to be removed from the pressure cooker.
Remember that the recommended internal temperature for pork is 145°F (63°C) for safe consumption. However, if you prefer your pork to be more well-done, you can cook it to a higher temperature. Keep in mind that higher cooking temperatures may result in a slightly drier texture.
By using a combination of these methods, you’ll be able to confidently check for doneness and ensure that your pork roast is cooked to perfection. Whether relying on internal temperature, meat texture, visual cues, or following a specific recipe’s guidelines, checking for doneness is crucial for a satisfying and delicious pork roast.
Letting the Pork Roast Rest
Allowing the pork roast to rest after cooking is an important step that should not be overlooked. Resting allows the meat to retain its juices, resulting in a more flavorful and tender pork roast. Here’s why letting the pork roast rest is crucial:
1. Redistribution of juices: During the cooking process, the heat causes the juices in the pork roast to be redistributed within the meat. Resting allows the juices to settle back into the muscle fibers, making the roast more succulent and evenly flavored. If you cut into the pork immediately after cooking, the juices will be released, leading to a drier final result.
2. Improved tenderness: Allowing the pork roast to rest for a period of time helps to improve its tenderness. As the meat rests, the proteins relax and the fibers become more tender. This brief resting period allows the pork roast to become more juicy and provides a better texture when sliced or pulled apart.
3. Temperature equilibrium: Resting the pork roast allows it to reach a temperature equilibrium throughout the meat. The internal temperature continues to rise slightly during the resting period, ensuring that the roast is cooked to the desired level of doneness and remains hot when it is time to serve it.
4. Enhanced flavor development: Resting gives the flavors in the pork roast a chance to meld and develop further. The rest period allows the spices, seasonings, and natural juices to infuse into the meat, resulting in a more harmonious and flavorful final dish. The flavors become more pronounced and balanced, enhancing the overall taste experience.
5. Easier carving and slicing: Letting the pork roast rest makes it easier to carve and slice. When the meat has had time to rest and relax, it becomes more firm and holds its shape better. This allows for cleaner and more precise slicing, ensuring each portion of the pork roast is beautifully presented.
For optimal results, let the pork roast rest for about 10 to 15 minutes before carving or serving. This allows enough time for the meat to settle and the juices to redistribute. While the pork roast rests, you can use this time to prepare any accompanying side dishes or finish up any remaining meal preparations.
Remember, the resting period is a critical step in the cooking process. By allowing the pork roast to rest, you’ll ensure a more flavorful, tender, and visually appealing dish for you and your guests to enjoy.
Serving and Enjoying the Pork Roast
After all the cooking and resting, it’s time to savor the deliciousness of your perfectly cooked pork roast. Here are some tips for serving and enjoying your pork roast:
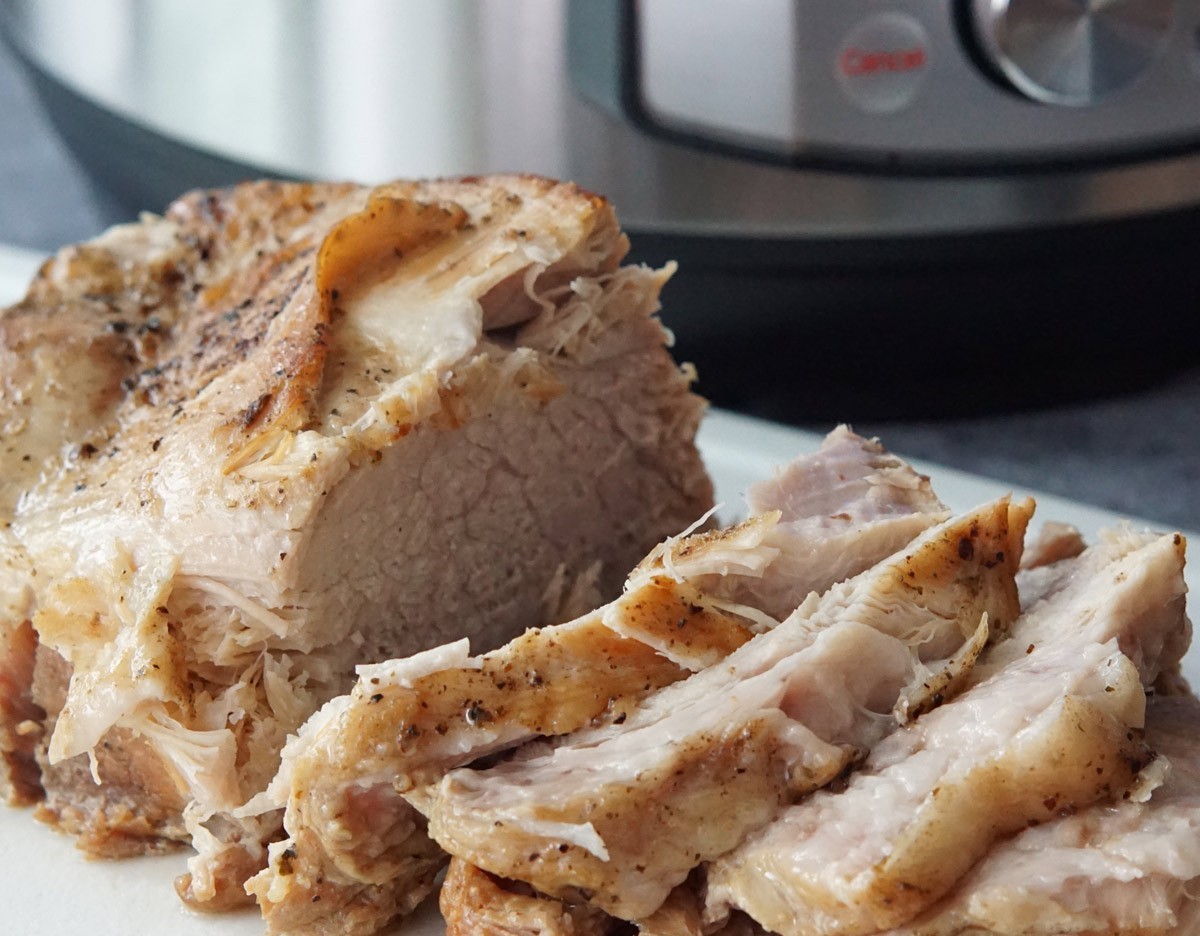
1. Carving the pork roast: Start by transferring the rested pork roast to a cutting board. Use a sharp knife to carve the roast into thin slices or pull it apart for a more rustic presentation. Cutting across the grain of the meat will result in more tender slices.
2. Plating and garnishing: Arrange the sliced or pulled pork on a serving platter or individual plates. Consider garnishing the dish with fresh herbs, such as parsley or cilantro, to add a touch of color and freshness. You can also drizzle the pork roast with any cooking juices or sauce leftover from the pressure cooking process for added flavor.
3. Pairing with sides: A pork roast pairs well with a variety of side dishes. Consider serving it with classic accompaniments such as roasted potatoes, steamed vegetables, or a fresh salad. You can also serve it with bread rolls or wraps to make flavorful sandwiches or sliders.
4. Sauces and condiments: Enhance the flavors of your pork roast by serving it with some delicious sauces or condiments. BBQ sauce, apple sauce, or a tangy mustard-based sauce are popular choices that add a burst of flavor to the meat. Consider offering a variety of sauces for guests to choose from to customize their pork roast experience.
5. Enjoying the leftovers: Leftover pork roast can be incredibly versatile. Use the leftover meat in sandwiches, wraps, tacos, stir-fries, or even add it to a hearty soup or stew. The possibilities are endless, allowing you to continue enjoying the flavors of the pork roast in different culinary creations.
6. Sharing and savoring: Lastly, share the joy of your perfectly cooked pork roast with family and friends. Gather around the table, savor the flavors, and create fond memories as you enjoy each bite. The time and effort put into cooking the pork roast will be well worth it when everyone is delighted by the deliciousness of the final dish.
Remember that serving and enjoying the pork roast is all about creating a delightful dining experience. Take the time to savor the flavors, appreciate the textures, and enjoy the company of your loved ones as you relish in the success of your pork roast masterpiece.
Tips and Variations for Perfect Pork Roast
To elevate your pork roast cooking game, here are some tips and variations to help you achieve the perfect pork roast:
1. Brine the pork: Consider brining the pork roast before cooking to enhance its juiciness and flavor. Brining involves soaking the meat in a saltwater solution for several hours or overnight. The solution can be customized with additional herbs, spices, and even sugar to impart extra flavors. Rinse the pork roast before seasoning and cooking.
2. Experiment with marinades: Move beyond traditional seasonings and try marinating the pork roast in different flavor combinations. From Asian-inspired soy-based marinades to Mexican-inspired citrus and spice blends, there are endless possibilities to infuse unique flavors into your pork roast.
3. Add aromatics: Enhance the aroma and taste of your pork roast by adding aromatic ingredients to the cooking liquid. Garlic cloves, onions, fresh herbs like rosemary or thyme, or even citrus slices can impart a wonderful fragrance and flavor to the meat while cooking.
4. Use different cooking liquids: Experiment with different types of cooking liquids to impart distinct flavors to your pork roast. Swap water with broth, apple cider, beer, or even pineapple juice for added depth and complexity. Pair the liquid with complementary herbs and spices to create a cohesive flavor profile.
5. Try different cuts of pork: While traditional cuts like pork shoulder and loin are popular, venture into other cuts such as pork belly, tenderloin, or even pork rib roasts for new flavor experiences. Each cut offers its own unique texture and taste, and cooking methods can be adjusted accordingly.
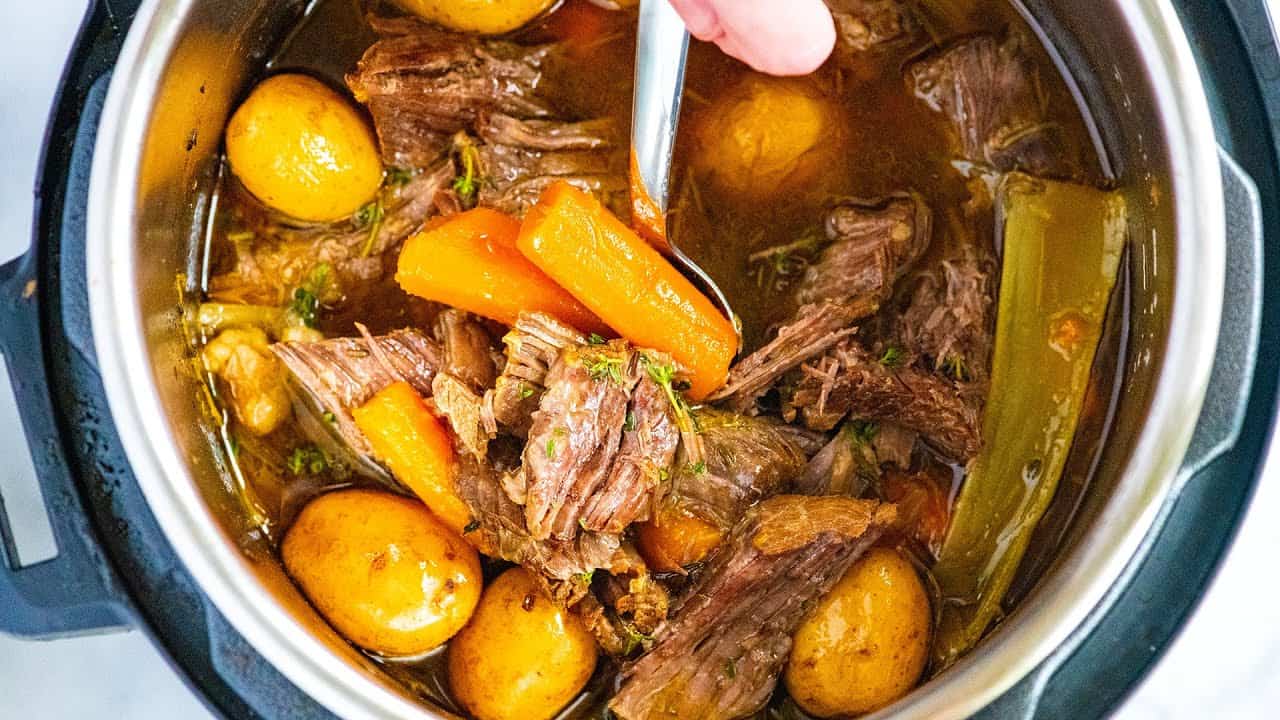
6. Add vegetables: Make your pork roast a complete meal by cooking it along with vegetables. Potatoes, carrots, onions, and bell peppers are classic choices. Toss them in the cooking liquid with the pork roast or place them in a steamer basket on top of the roast. This allows the flavors to meld together, creating a delicious one-pot meal.
7. Experiment with spice rubs: Create your own custom spice rubs using a variety of herbs, spices, and seasonings. Whether it’s a smoky BBQ rub, a spicy Cajun blend, or an aromatic Mediterranean mix, spice rubs can impart a complex and tantalizing flavor to your pork roast.
8. Sous-vide cooking: For those seeking precise temperature control and exceptional tenderness, consider using the sous-vide method for cooking your pork roast. This technique involves vacuum-sealing the meat in a bag and immersing it in a water bath at a controlled temperature for an extended period. Finish the roast by searing it in a hot skillet or on a grill for a caramelized exterior.
9. Use a meat thermometer: Invest in a good-quality meat thermometer to ensure your pork roast reaches the desired internal temperature for optimal safety and taste. This will help you avoid undercooked or overcooked meat, allowing you to achieve perfect doneness each time.
10. Rest and carve properly: Remember to let your pork roast rest before carving to allow the juices to redistribute and the meat to become more tender. Additionally, always carve the roast against the grain to maximize the tenderness of the meat.
By incorporating these tips and variations, you can elevate your pork roast to new heights. From experimenting with different cuts and flavors to exploring alternative cooking methods, these suggestions will help you create a perfect pork roast that suits your taste preferences and impresses your guests.
Cleaning and Maintenance of the Electric Pressure Cooker
Proper cleaning and maintenance of your electric pressure cooker are essential for its longevity and continued performance. Follow these tips to keep your pressure cooker in excellent condition:
1. Regular cleaning: After each use, clean the cooking pot, lid, and sealing ring of the pressure cooker. Most electric pressure cooker parts are dishwasher safe, but it’s recommended to check the manufacturer’s instructions for specific cleaning guidance. Wash the parts with warm water and mild dish soap to remove any residue or food particles.
2. Sealing ring maintenance: The sealing ring is an important component that creates a tight seal during pressure cooking. Regularly inspect the sealing ring for any signs of wear or damage. If needed, remove it from the lid and wash it thoroughly. It’s also a good practice to occasionally remove and clean the valve at the top of the pressure cooker lid, following the manufacturer’s instructions.
3. Check and clean the pressure release valve: The pressure release valve is crucial for maintaining the appropriate pressure inside the cooker. Make sure it is clean and free from any blockages. Regularly check the valve to ensure it moves freely and is not stuck or clogged. If necessary, remove and clean it according to the manufacturer’s instructions.
4. Clean the exterior: Wipe the exterior of the electric pressure cooker with a damp cloth or sponge to remove any grease or stains. Avoid using abrasive cleaners or scrubbing pads that can damage the surface. Dry the cooker thoroughly before storing it to prevent moisture buildup.
5. Descaling: If you notice mineral deposits or scaling on the interior of the cooking pot or the heating element, you may need to descale your pressure cooker. Follow the manufacturer’s instructions to safely remove the buildup using a vinegar-water solution or a descaling solution specifically made for pressure cookers. Regular descaling will help maintain the efficiency and performance of your cooker.
6. Store properly: When the pressure cooker is not in use, ensure it is stored in a clean, dry, and well-ventilated area. Make sure the lid is not closed tightly to allow air circulation and prevent any unpleasant odors. Keep all the parts together in one place to avoid misplacing them.
7. Read the user manual: It’s essential to familiarize yourself with the specific cleaning and maintenance instructions provided in the user manual for your electric pressure cooker. Different models may have different care requirements, so always refer to the manufacturer’s guidelines for the best practices to follow.
By following these cleaning and maintenance tips, you’ll keep your electric pressure cooker in optimal condition for years to come. Regular cleaning and proper care will not only extend the life of your appliance but also ensure safe and efficient cooking every time you use it.