Introduction
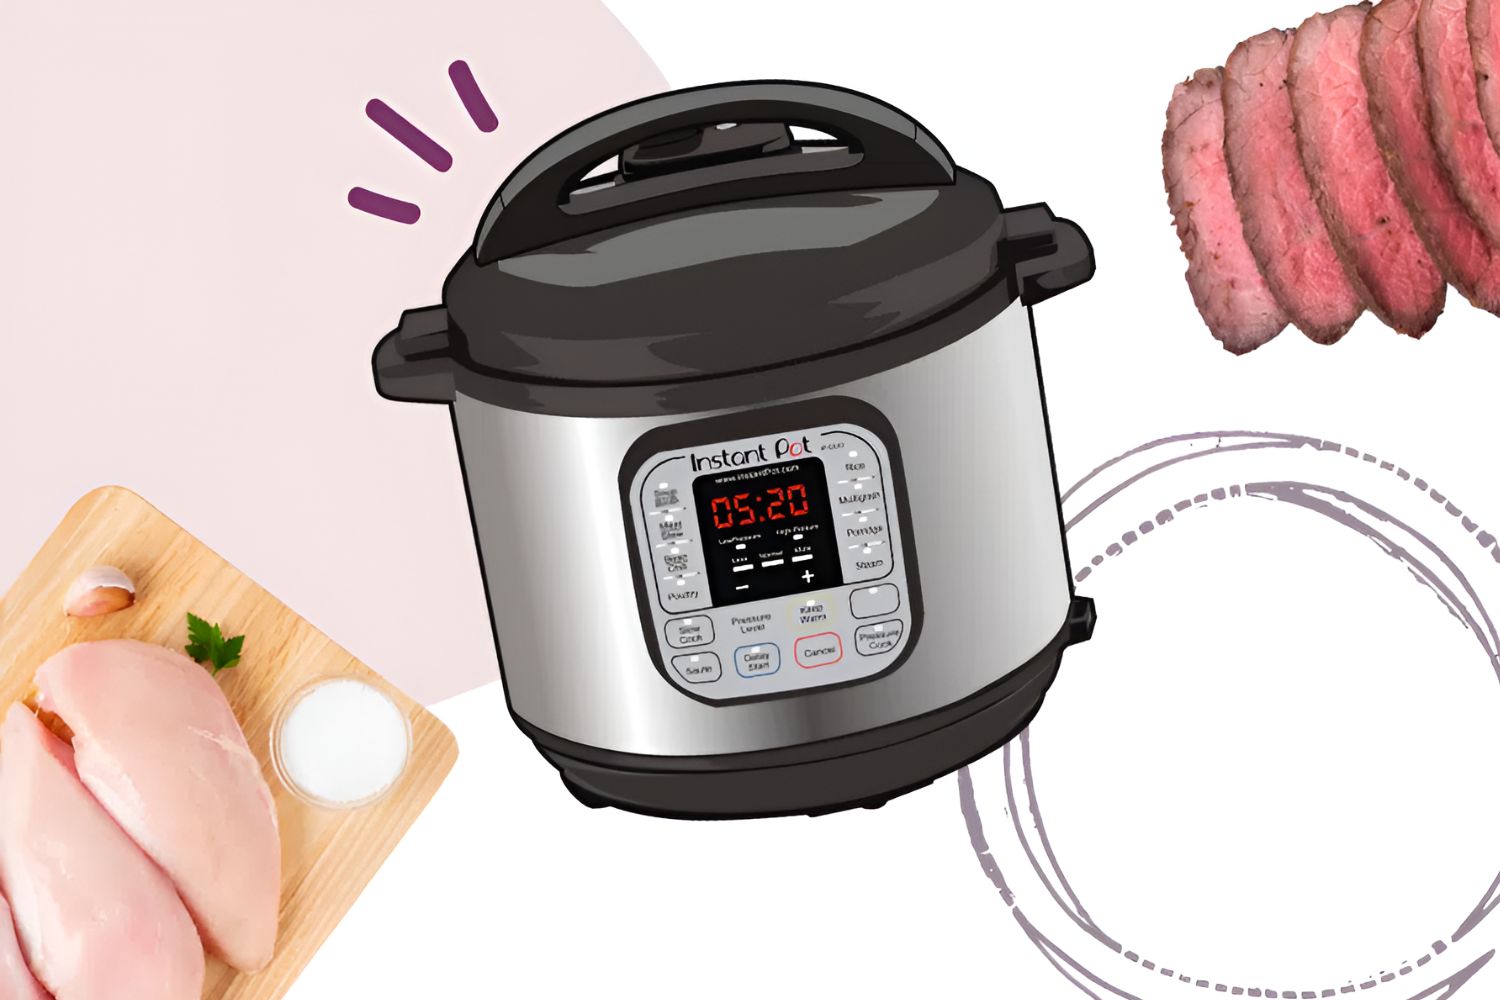
Welcome to the world of electric pressure cooking! If you’re a meat lover and have recently purchased an electric pressure cooker, you’re in for a treat. Electric pressure cookers are excellent for cooking meat, as they not only save time and energy, but they also help to lock in the flavors and moisture, resulting in tender and succulent dishes.
Whether you’re a novice or an experienced cook, using an electric pressure cooker to make meat dishes is a breeze. In this article, we will guide you through the process and provide you with tips and tricks to ensure your meat comes out perfectly every time.
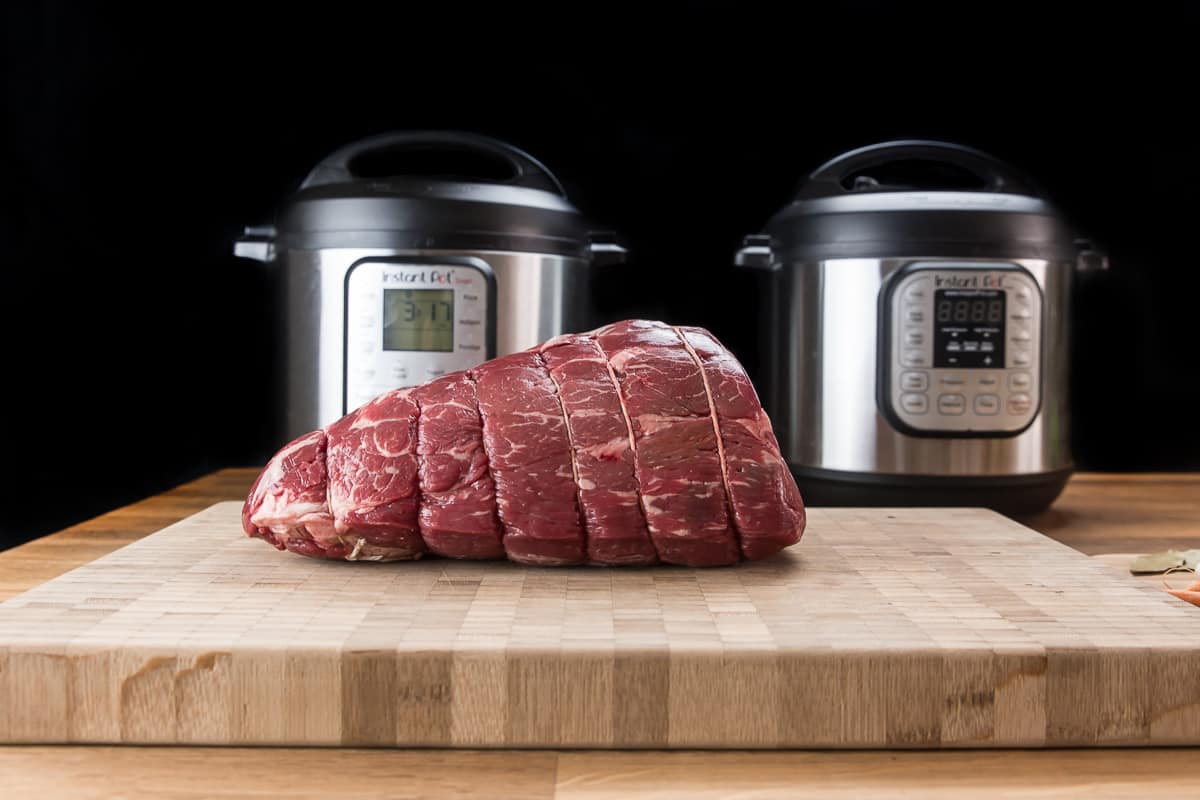
Before we dive into the nitty-gritty of cooking meat in an electric pressure cooker, it’s essential to choose the right cut of meat. The type of meat you select will greatly impact the final outcome of your dish. For tender and juicy results, opt for cuts such as chuck roast, pork shoulder, or chicken thighs. These cuts have more connective tissue, which breaks down during the cooking process, resulting in flavorful and fork-tender meat.
Once you have chosen the perfect cut of meat, it’s time to prepare it for cooking. Trim off any excess fat or silver skin to prevent the dish from becoming greasy. Additionally, you can marinate the meat for a few hours or overnight to infuse it with your favorite flavors and tenderize it further.
Now that your meat is prepped and ready, the next step is to brown it. Browning the meat helps to develop a rich and deep flavor profile. Simply set your electric pressure cooker to the “sauté” or “brown” mode and sear the meat on all sides until it forms a golden crust. This step is optional, but highly recommended for optimal taste.
With the meat browned and full of flavor, it’s time to add in your preferred aromatics, herbs, and seasonings. This step allows you to customize the dish to your liking. Whether you prefer a classic combination of garlic, onions, and herbs, or want to experiment with spices like paprika or cumin, the choice is yours. Be generous with your seasonings, as the pressure cooking process will meld the flavors together.
Now comes the exciting part – using the electric pressure cooker! Place the meat back into the pot of the pressure cooker along with any liquid or broth specified in the recipe. Remember not to overfill the pot and carefully follow the manufacturer’s guidelines to ensure a safe cooking process. Set the cooking time and pressure level according to the recipe, and let the magic happen.
Once the meat is cooked, you have two options for releasing the pressure – natural release or quick release. Natural release involves allowing the pressure to release slowly on its own, which is ideal for delicate cuts of meat. Quick release, on the other hand, involves manually venting the pressure using the release valve. Use caution when performing a quick release to avoid steam burns.
After the pressure has been released, it’s important to let the meat rest for a few minutes before serving. This allows the juices to redistribute and results in a more flavorful and tender end product. Tent the meat with foil to keep it warm during the resting period.
Finally, it’s time to serve and enjoy your perfectly cooked meat! Whether you’re slicing it for sandwiches, shredding it for tacos, or serving it as a main course alongside your favorite sides, you can rest assured that your electric pressure cooker has delivered a delicious and hassle-free meal.
So, fire up your electric pressure cooker, grab your favorite cut of meat, and get ready to embark on a journey of flavorful and effortlessly cooked dishes. With the tips and techniques outlined in this article, you’ll soon become a master of meat in your electric pressure cooker.
Choosing the Right Cut of Meat
When it comes to cooking meat in an electric pressure cooker, selecting the right cut of meat is crucial. The type of meat you choose will greatly impact the tenderness and flavor of the final dish. Here are some factors to consider when deciding on the perfect cut:
1. Marbling: Look for cuts of meat with good marbling. Marbling refers to the small streaks of fat throughout the meat. This intramuscular fat melts during the cooking process, resulting in juicier and more flavorful meat.
2. Connective Tissue: Cuts of meat that have more connective tissue, such as chuck roast or pork shoulder, are ideal for electric pressure cooking. The pressure cooker breaks down the collagen in the connective tissue, resulting in tender and melt-in-your-mouth meat.
3. Thickness: Opt for cuts of meat that are at least 1 inch thick. Thicker cuts will hold up better under pressure and retain their moisture and tenderness.
4. Bone-in vs. Boneless: Both bone-in and boneless cuts can be cooked in an electric pressure cooker, but bone-in cuts tend to have more flavor due to the marrow and cartilage. However, boneless cuts are easier to work with and may cook faster.
5. Intended Use: Consider how you plan to use the meat. If you’re making pulled pork or shredded beef, go for cuts like pork shoulder or chuck roast. For stir-fries or quick-cooking dishes, lean cuts like sirloin or chicken breast work well.
Some popular cuts of meat that are well-suited for electric pressure cooking include:
– Chuck Roast: This cut comes from the shoulder region and is marbled with fat, making it perfect for slow cooking and braising. The result is incredibly tender and flavorful meat.
– Pork Shoulder: Also known as pork butt or Boston butt, this cut is perfect for pulled pork or stew. It has a rich flavor and plenty of connective tissue that breaks down during cooking, yielding succulent and fall-apart meat.
– Chicken Thighs: Chicken thighs are economical and packed with flavor. They can handle pressure cooking well and remain juicy and tender. They are also versatile, working well in a variety of recipes.
– Beef Short Ribs: These meaty, bone-in ribs are incredibly flavorful and become tender and delicious when pressure cooked. They are often braised or simmered for an extended period, but with an electric pressure cooker, you can achieve the same results in a fraction of the time.
Remember, the quality of the meat is just as important as the cut. Opt for fresh, high-quality meat from a reputable source for the best results. Additionally, make sure to trim off any excess fat or silver skin to prevent the dish from becoming greasy.
By selecting the right cut of meat for your electric pressure cooker, you can ensure tender, flavorful, and mouthwatering dishes that will impress your family and friends.
Preparing the Meat
Before you start cooking the meat in your electric pressure cooker, it’s essential to take a few moments to prepare it properly. Proper preparation ensures that your meat cooks evenly, maximizes flavor absorption, and results in a delicious final dish. Here are some steps to follow when preparing your meat:
1. Trimming: Take a close look at the meat and trim off any excess fat or silver skin. While a moderate amount of fat can add flavor and moisture to the dish, too much fat can make it greasy. Remove any thick or tough connective tissue as well.
2. Seasoning: Season the meat generously with salt and pepper to enhance its natural flavors. You can also add additional spices or herbs according to your preferences and the recipe you’re following.
3. Marinating: If time allows, consider marinating the meat before cooking. Marinating not only adds additional flavor but also helps to tenderize the meat. Choose a marinade that complements the flavors you want to highlight in your dish. Place the meat and marinade in a sealed container or resealable plastic bag and refrigerate for at least 1-2 hours, or overnight for more intense flavors.
4. Resting: After marinating or seasoning, let the meat rest at room temperature for about 30 minutes. This allows the seasoning to penetrate the meat and ensures more even cooking.
5. Patting dry: Before browning the meat, pat it dry using paper towels. Moisture on the surface of the meat can hinder browning and may result in steaming rather than searing.
By following these preparation steps, you’ll set the foundation for a flavorful and perfectly cooked meat dish. Remember to handle raw meat with care, practice proper food safety precautions, and wash your hands and utensils thoroughly after handling meat.
Now that your meat is prepped and ready, it’s time to move on to the next step – browning the meat. Browning adds a depth of flavor and enhances the appearance of the final dish. In the following section, we’ll explore the process of browning the meat in your electric pressure cooker.
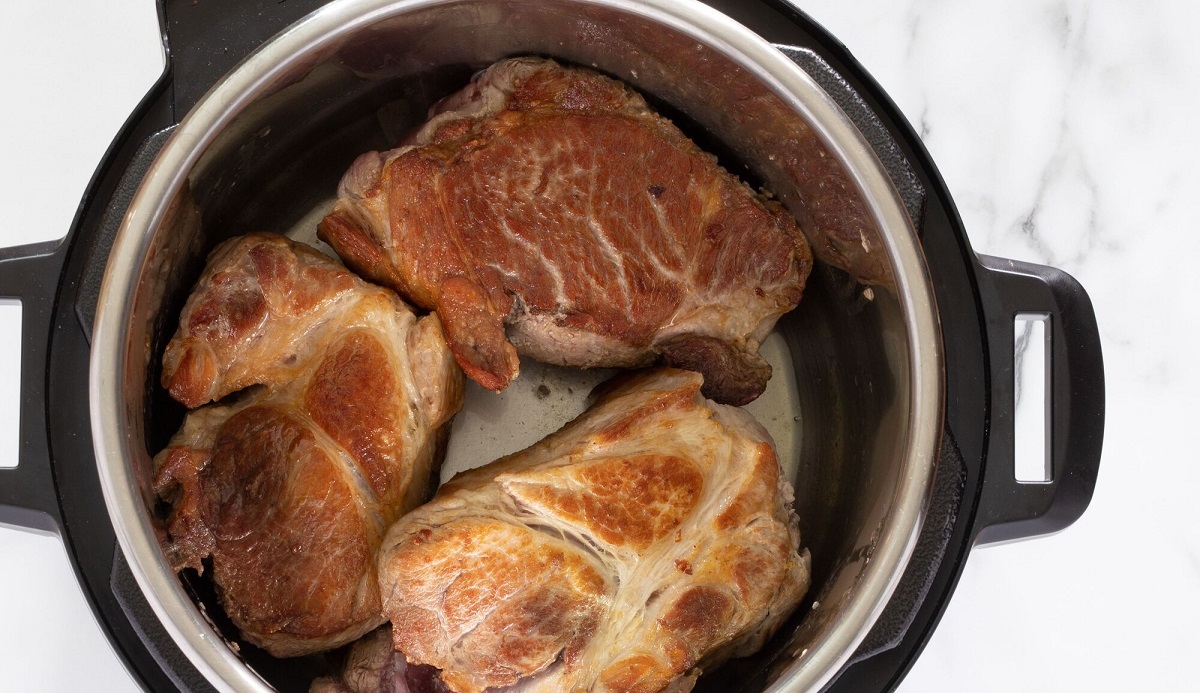
Browning the Meat
Browning the meat before pressure cooking is an optional but highly recommended step. It adds a rich, caramelized flavor and creates a beautiful golden crust on the surface of the meat. Here’s how to achieve the perfect browned meat in your electric pressure cooker:
1. Preheat the Pressure Cooker: Set your electric pressure cooker to the “sauté” or “brown” mode, depending on the model. Preheating the cooker ensures that the meat browns quickly and evenly.
2. Add Cooking Oil: Add a small amount of cooking oil like vegetable oil or olive oil to the pot of the pressure cooker. Swirl the oil around to coat the bottom evenly.
3. Heat the Oil: Allow the oil to heat up for a minute or two until it shimmers or starts to smoke slightly. This indicates that the oil is hot enough to sear the meat.
4. Sear the Meat: Carefully place the prepared meat into the hot oil. Let it sear undisturbed for a few minutes on each side until a golden brown crust forms. Avoid overcrowding the pot, as this can prevent proper browning. If needed, sear the meat in batches.
5. Adjust Heat if Necessary: If the meat is browning too quickly or burning, reduce the heat slightly. Remember, browning is about achieving a rich color and flavor, not charring the meat.
6. Remove the Meat: Once the meat is nicely browned, carefully remove it from the pressure cooker and transfer it to a plate or cutting board. Set it aside while you prepare the remaining ingredients or deglaze the pot if necessary.
Browning not only enhances the visual appeal of the meat but also adds depth of flavor by caramelizing the natural sugars and proteins. The Maillard reaction that occurs during browning creates complex flavor compounds that elevate the taste of the final dish.
While browning is an extra step in the cooking process, it’s worth the effort for the improved taste and appearance of the meat. However, if you’re short on time or prefer to skip the browning step, you can still achieve delicious results in your electric pressure cooker by proceeding directly to the next step – adding flavors and seasonings.
In the following section, we’ll explore how to infuse your meat with a variety of flavors and seasonings to create a truly mouthwatering dish.
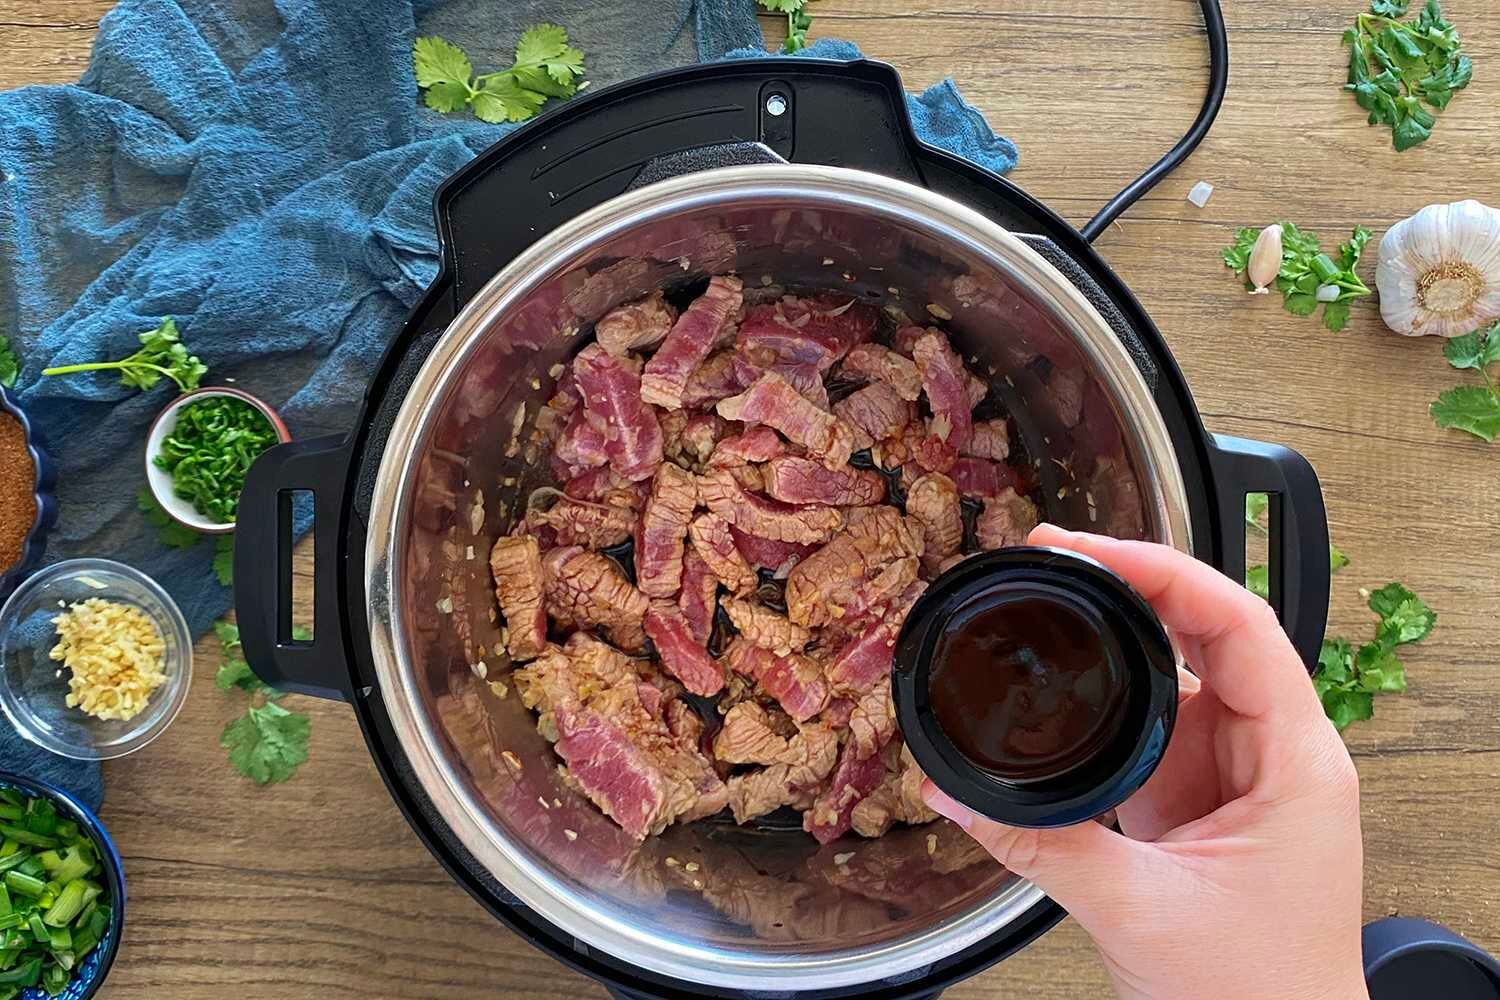
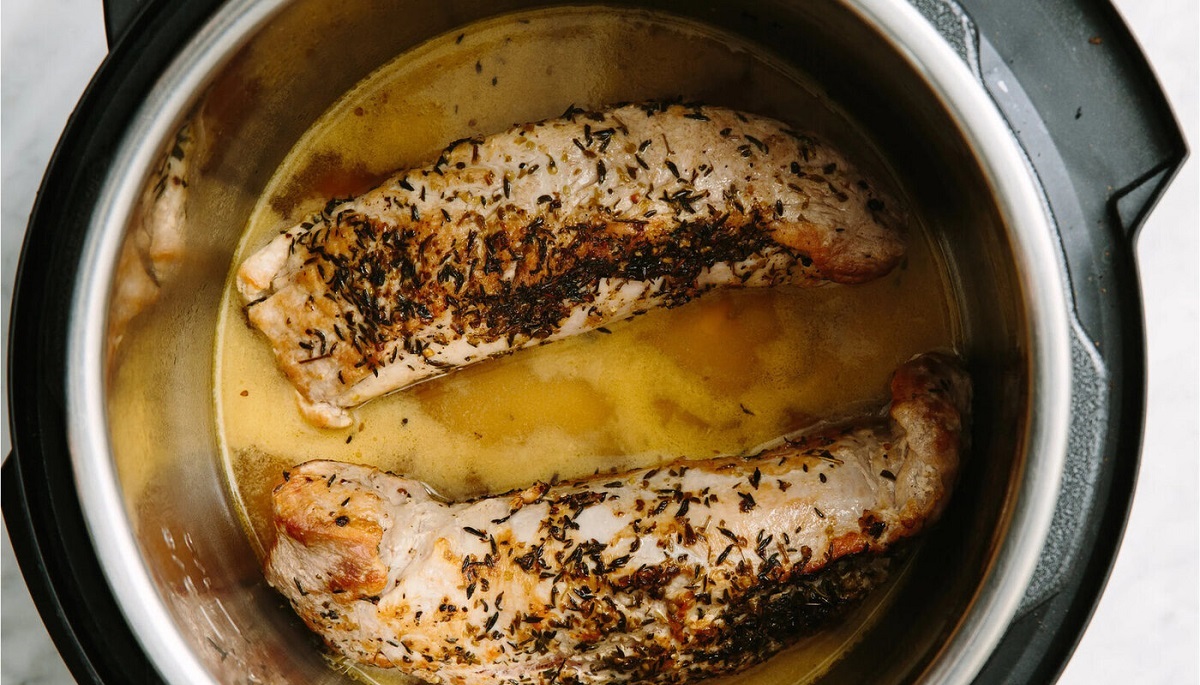
Adding Flavors and Seasonings
Adding flavors and seasonings to your meat is the key to creating a delicious and memorable dish. Electric pressure cookers have the advantage of intensifying flavors and infusing them deeply into the meat. Here are some tips on how to enhance the taste of your pressure-cooked meat:
1. Aromatics: Start by adding aromatics like garlic, onions, and ginger to your meat. These aromatic ingredients provide a strong base of flavor and complement a variety of meat types. Sauté them after browning the meat or add them directly to the pressure cooker, depending on the recipe.
2. Herbs and Spices: Experiment with herbs and spices to create unique flavor profiles. Common choices include rosemary, thyme, oregano, cumin, paprika, and chili powder. Add them to the dish based on your personal preferences and the type of meat you’re cooking.
3. Liquid Components: Add liquid components such as broth, stock, wine, or vinegar to enhance the flavors of the meat. The liquid not only adds moisture but also helps to distribute the flavors throughout the meat. Be sure to choose a liquid that complements the dish you are preparing.
4. Sauces and Condiments: Incorporate your favorite sauces and condiments to add depth and complexity to the flavor profile. BBQ sauce, soy sauce, Worcestershire sauce, and hot sauce are just a few examples that can elevate the taste of your meat. Adjust the amounts based on your taste preferences and the intensity of the sauce or condiment.
5. Sweet and Tangy Flavors: Consider adding a touch of sweetness or tanginess to balance out the flavors. Ingredients like honey, brown sugar, lemon juice, or lime juice can brighten up the dish and provide a pleasing contrast to the savory flavors.
6. Salt and Pepper: Season your meat with salt and pepper to bring out the natural flavors. Be mindful of the salt content in the other ingredients you’re using and adjust accordingly.
Remember, you can always adjust the flavors and seasonings according to your taste preferences. Taste the dish and make any necessary adjustments before sealing the pressure cooker.
Don’t be afraid to get creative and experiment with different combinations of flavors and seasonings. Keep notes of your favorite combinations so that you can recreate them in future recipes.
Now that your meat is well-seasoned and prepared, it’s time to move on to using the electric pressure cooker to cook the meat to perfection. In the next section, we’ll explore the ins and outs of using the pressure cooker for meat dishes.
Using the Pressure Cooker
Now that you’ve properly prepared and seasoned your meat, it’s time to put your electric pressure cooker to work. Here are the steps to follow when using the pressure cooker to cook your meat:
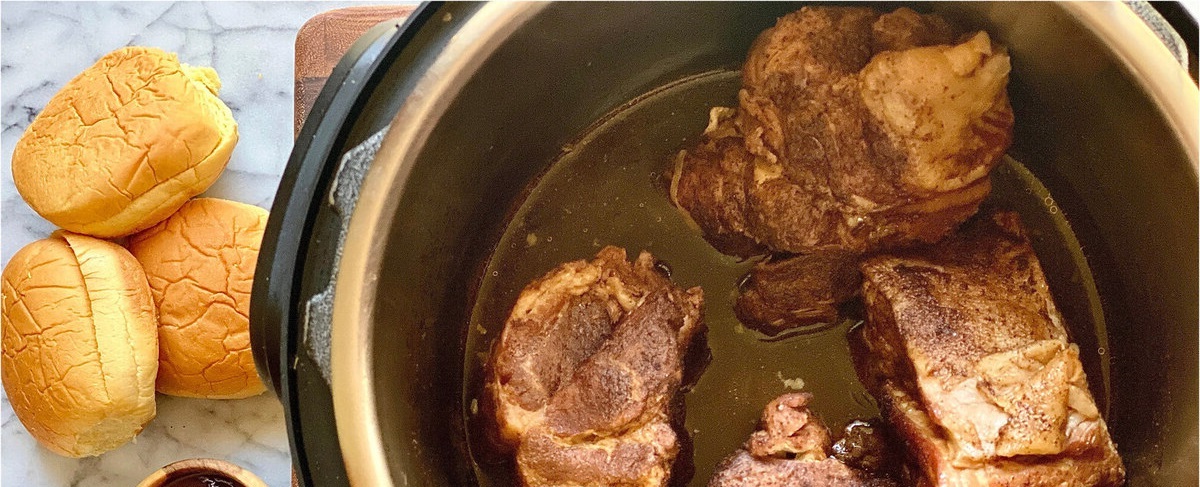
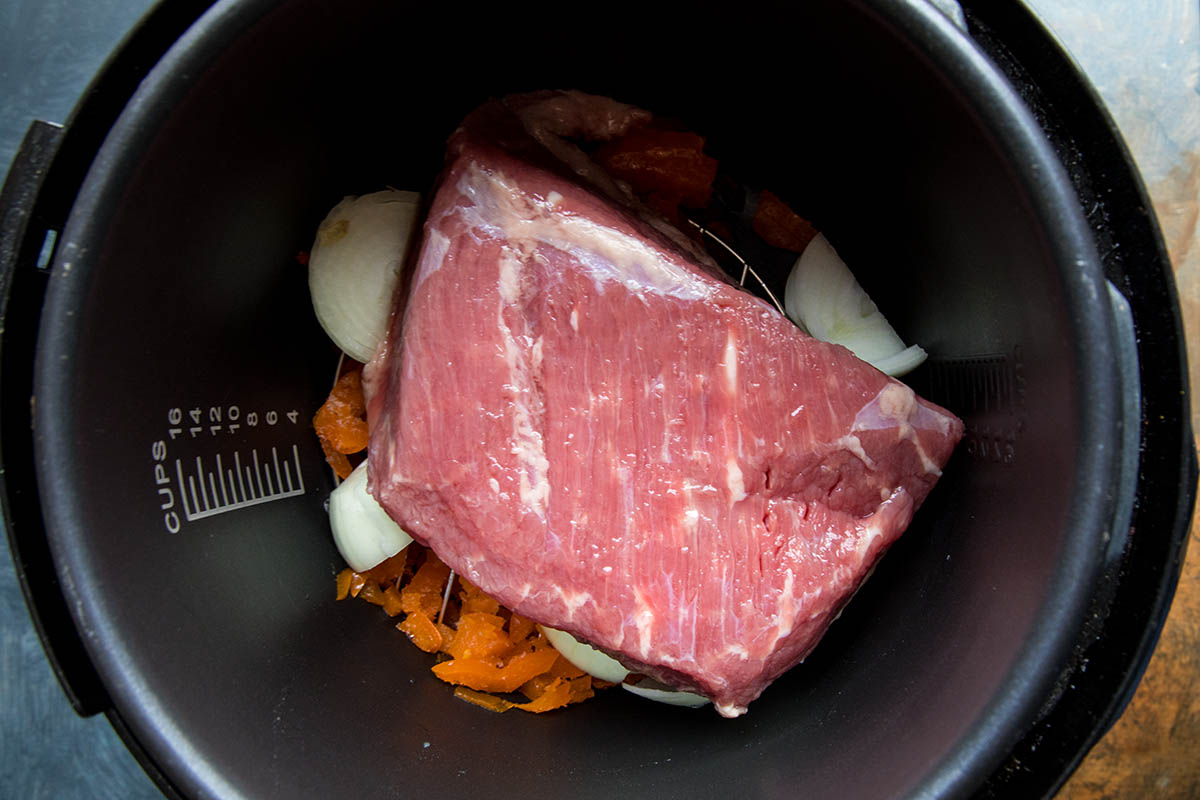
1. Place the Meat in the Pot: Return the browned meat to the pot of the pressure cooker. Make sure not to overfill the pot, as there should be enough space for the pressure to build.
2. Add Liquid: Pour in the appropriate amount of liquid specified in your recipe. This liquid is necessary to generate steam and create the pressure needed for cooking. It also helps to prevent the meat from drying out.
3. Secure the Lid: Double-check that the sealing ring is properly in place, and then secure the lid onto the pressure cooker. Ensure that the lid is tightly sealed to maintain the pressure during cooking.
4. Set Pressure and Cooking Time: Adjust the pressure setting and cooking time according to the specific requirements of your recipe. Most electric pressure cookers have preset options for high or low pressure, as well as different cooking modes for various types of meat.
5. Start the Cooking Process: Once you’ve set the pressure and cooking time, start the pressure cooker. The appliance will begin building pressure and then automatically switch to the cooking mode. At this point, the magic happens as the pressure and heat work together to tenderize the meat.
6. Avoid Opening the Lid: During the cooking process, resist the temptation to open the lid. Opening the lid releases the pressure and prolongs the cooking time. Only open the cooker when the cooking time is complete and the pressure has been released.
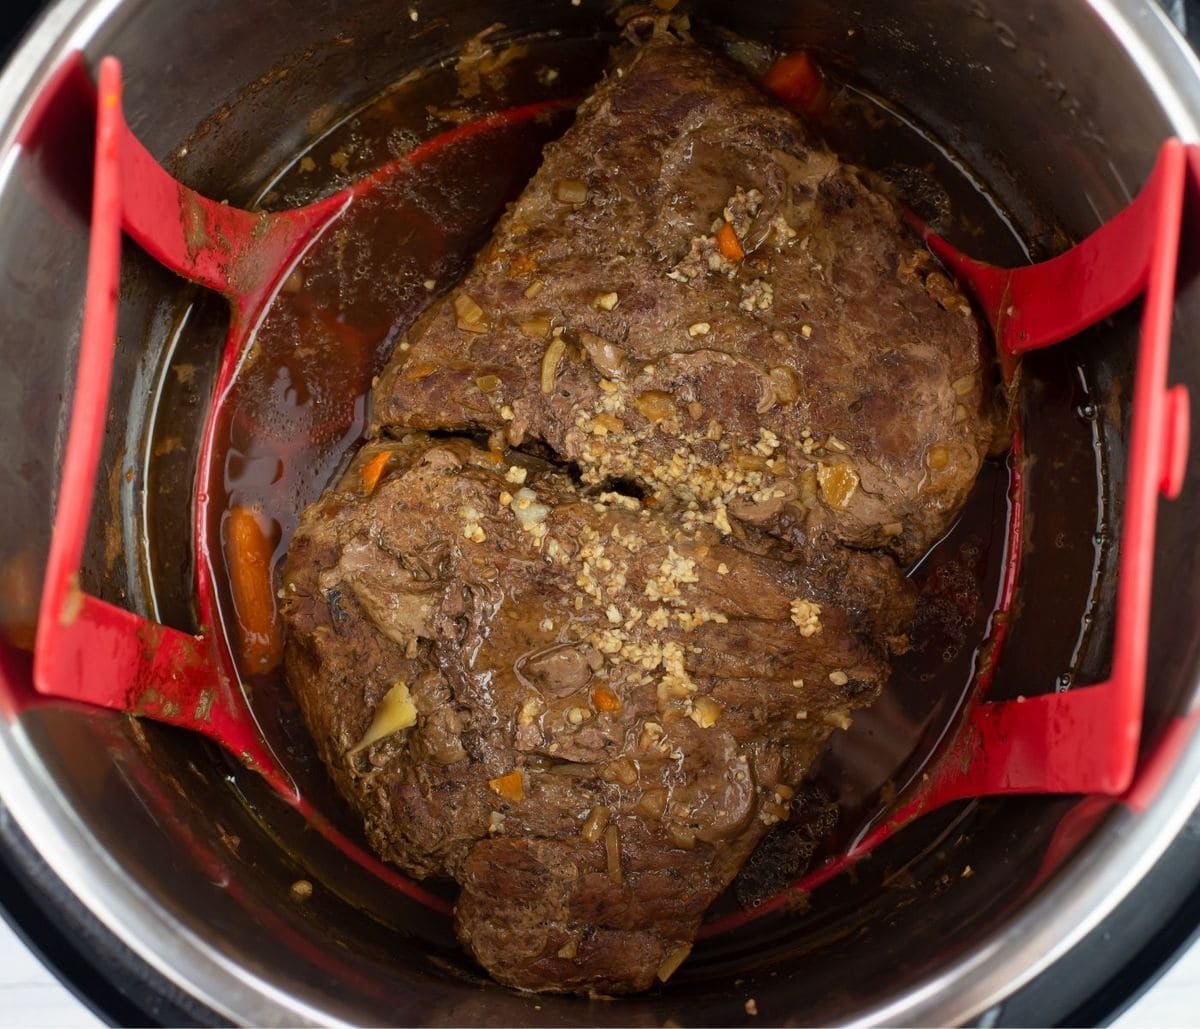
7. Check for Doneness: After the set cooking time has elapsed, carefully release the pressure from the cooker according to the recipe instructions. Check the internal temperature of the meat with a meat thermometer to ensure it has reached the desired level of doneness.
8. Let the Meat Rest: Once the meat is cooked, remove it from the pressure cooker and let it rest for a few minutes before slicing or serving. Resting allows the juices to redistribute and ensures a moist and flavorful result.
By following these steps and utilizing the features of your electric pressure cooker, you can achieve tender, flavorful, and perfectly cooked meat every time. Familiarize yourself with the specific functionalities and safety measures of your model for the best results.
Now that your meat is cooked and ready to be enjoyed, let’s discuss the next crucial step – the choice between natural release and quick release methods to release the pressure inside the cooker.
Natural Release vs. Quick Release
After the meat is cooked to perfection in your electric pressure cooker, it’s time to release the pressure. There are two primary methods for releasing the pressure – natural release and quick release. Let’s explore each method and when to use them:
Natural Release: Natural release involves allowing the pressure to decrease naturally over time. After the cooking time is complete, turn off the pressure cooker and leave it undisturbed. As the pressure inside the cooker gradually decreases, you will notice the float valve dropping down, indicating that the pressure has released. This process can take anywhere from 10 to 30 minutes, depending on the quantity of food and the level of pressure used. Natural release is best suited for delicate cuts of meat or dishes with a higher liquid content. This method allows the meat to continue cooking gently and allows the flavors to fully develop. It is particularly useful for cuts that tend to toughen up if subjected to a rapid pressure release.
Quick Release: Quick release, as the name suggests, is a faster method to release the pressure inside the cooker. Once the cooking time is complete, carefully move the pressure release valve to the venting position. This will rapidly release the steam and pressure from the cooker. Quick release is ideal when you are short on time or when the recipe calls for it. However, it’s crucial to exercise caution when performing a quick release to avoid steam burns. Stand back and use a long utensil to move the valve, ensuring your hands and face are away from the hot steam.
Some recipes may require a combination of both techniques. They may call for a natural release for a certain period, followed by a quick release to finish the process or vice versa. Always follow the instructions provided in the recipe to ensure the best results.
Keep in mind that certain foods, like soups or dishes with a high liquid content, may release some steam or liquid during the pressure release process. To avoid any accidental spills or messes, place a towel or cloth over the pressure release valve to absorb any excess moisture.
Once the pressure has been released, and it is safe to do so, remove the lid from the pressure cooker. The meat is now ready to be transferred to a serving dish or integrated into your desired recipe.
Now that your meat has been successfully cooked and the pressure has been released, let’s move on to the important step of letting the meat rest before serving.
Resting the Meat
Resting the meat after cooking is a crucial step that should not be overlooked. Resting allows the meat to relax and the juices to redistribute throughout the fibers, resulting in a more tender and flavorful final dish. Here’s why resting is essential and how to do it properly:
1. Redistribution of Juices: When meat is subjected to heat during cooking, the juices inside move towards the center. Resting the meat for a few minutes after removing it from the pressure cooker allows those juices to redistribute more evenly throughout the meat. This helps to maintain juiciness and ensures that every bite is full of flavor.
2. Retention of Moisture: Resting the meat helps to retain its moisture. When you cut into meat immediately after cooking, the juices tend to escape, leaving the meat dry. Allowing the meat to rest ensures that it retains its natural moisture, resulting in a more succulent and enjoyable eating experience.
3. Flavor Enhancement: Resting allows the flavors of the meat to meld and intensify. During the cooking process, the flavors are vibrant but not fully developed. Resting gives the meat time to settle, allowing the flavors to harmonize and become more pronounced. This resting period enhances the overall taste of the dish.
4. Warmth and Carryover Cooking: While resting, the internal temperature of the meat continues to rise, a phenomenon known as carryover cooking. The residual heat from the cooking process evenly distributes throughout the meat, ensuring that it is cooked through. This carryover cooking also helps to kill any harmful bacteria present in the meat, ensuring it is safe to eat.
To properly rest the meat, follow these steps:
1. Transfer the Meat: Carefully remove the meat from the pressure cooker and place it on a cutting board or a serving platter. Use tongs or a spatula to handle the hot meat without piercing the surface and releasing the juices.
2. Tent with Foil: Loosely tent the meat with aluminum foil to keep it warm during the resting period. The foil also helps to retain the heat and prevents the meat from cooling too quickly.
3. Resting Time: The ideal resting time varies depending on the size and type of meat. Generally, a resting time of 5 to 10 minutes for smaller cuts, such as chicken thighs or pork chops, and 10 to 15 minutes for larger cuts, such as roasts or whole poultry, is sufficient. However, for larger roasts, the resting time can extend up to 20 to 30 minutes to allow the meat to reach its optimum tenderness.
4. Patience: While it may be tempting to dive right into the delicious meat, exercise patience and resist the urge to cut into it immediately. The short waiting period will be well worth it when you experience the juicy and tender results of a properly rested dish.
By letting the meat rest, you are ensuring that all your efforts of cooking and seasoning result in a truly delightful and flavorful meal. So, use this resting time to prepare any accompanying sides or garnishes, and get ready to serve the perfectly cooked meat to your eager diners.
Now that the meat has rested, it’s time to move on to the exciting part – serving and enjoying your delicious creation!
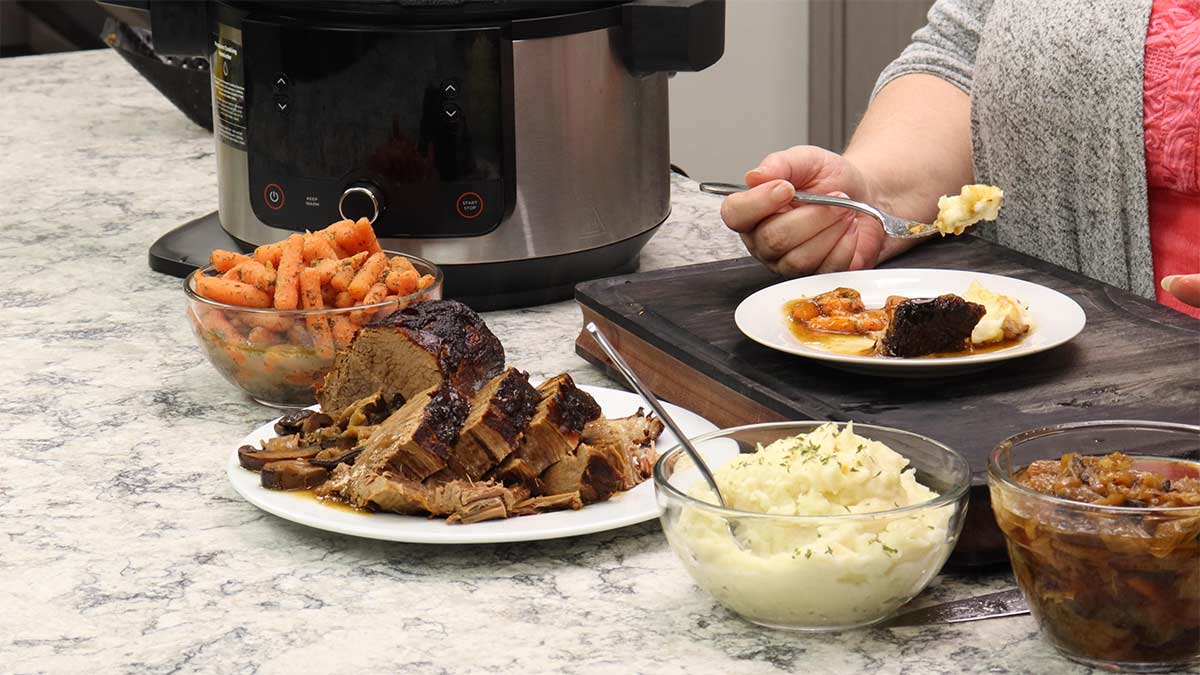
Serving and Enjoying
After all the effort and anticipation, it’s time to savor the fruits of your labor and enjoy the delicious meat dish you’ve prepared in your electric pressure cooker. Here are some tips on serving and enjoying your masterpiece:
1. Slice or Shred: Depending on the type of meat and your desired presentation, slice or shred it as needed. Use a sharp knife to carve through roasts or cut chicken into pieces. For pulled pork or shredded beef, use forks to easily pull the meat apart into tender, juicy strands.
2. Sauce and Glaze: If desired, serve the meat with a flavorful sauce or glaze. Drizzle it over the meat or use it as a dipping sauce on the side. Consider the flavors of the meat and choose a sauce that complements and enhances the taste.
3. Pair with Sides: Complete the meal by serving the meat alongside your favorite sides. Whether it be a crisp salad, roasted vegetables, creamy mashed potatoes, or fluffy rice, choose sides that complement and balance the flavors of the meat.
4. Garnish with Fresh Herbs: Sprinkle freshly chopped herbs such as parsley, cilantro, or basil over the meat before serving. The vibrant colors and aromatic flavors of the herbs add a fresh and appealing touch to the dish.
5. Quantity and Portion: Consider the portion size when serving your meat dish. Adjust the quantity based on the number of people you’re serving, appetites, and any additional dishes being served. Leftover meat can be stored in the refrigerator for future meals.
6. Presentation: Pay attention to the presentation of your dish. Arrange the meat on a platter or individual plates in an appealing and appetizing manner. Garnish with additional herbs or a sprinkle of spices to make it look even more enticing.
7. Enjoy the Flavors: Take a moment to truly savor the flavors and enjoy each bite. Appreciate the tenderness, the seasoning, and the deliciousness of the perfectly cooked meat. Share the enjoyment with family and friends.
8. Get Creative: Don’t be afraid to get creative with your leftovers. Use the meat in sandwiches, wraps, tacos, or salads. Incorporate it into other recipes, like casseroles or stir-fries, to create new and exciting dishes.
Remember, the purpose of your hard work is not only to enjoy the meal but also to relish the time spent in the kitchen and appreciate the art of cooking. As you serve and enjoy your delectable meat dish, reflect on the satisfaction that comes with creating a delightful and memorable culinary experience.
Congratulations, you’ve successfully cooked and served a delicious meat dish using your electric pressure cooker. Now, share your newfound skills and enjoy the admiration of your guests as you continue to explore the world of flavorful and tender meat creations!