Introduction
Cooking meat in an electric pressure cooker has become increasingly popular for its speed, convenience, and the tender and flavorful results it produces. Whether you’re a busy professional, a home cook looking to save time, or someone who wants to experiment with new cooking techniques, an electric pressure cooker is a game-changer in the kitchen.
Gone are the days of spending hours slow-cooking meat to achieve the desired tenderness. With an electric pressure cooker, you can achieve the same results in a fraction of the time, thanks to the high pressure and heat generated inside the pot. This method of cooking locks in the flavors and juices, resulting in moist and succulent meat dishes.
Not only does an electric pressure cooker save you time, but it also helps retain the nutritional value of the meat. The high-pressure environment breaks down tough fibers and connective tissues, making it easier for the body to digest and absorb the nutrients. This makes it an ideal cooking method for those looking for a healthy and efficient way to prepare meat.
Whether you want to cook a tender roast, juicy chicken, or flavorful ribs, an electric pressure cooker can deliver impressive results. In this article, we will explore the benefits of cooking meat in an electric pressure cooker, discuss the different cuts of meat suitable for pressure cooking, explain the steps to prepare and season the meat, and guide you on how to set the cooking time and pressure level for optimal results.
So, get ready to dive into the world of meaty delights, as we unlock the secrets of cooking meat to perfection in an electric pressure cooker. Your taste buds will thank you!
Benefits of Cooking Meat in an Electric Pressure Cooker
Cooking meat in an electric pressure cooker offers a variety of benefits that make it an attractive option for home cooks. Here are some of the key advantages:
1. Time-saving: Time is a precious commodity, and the electric pressure cooker can help you save it. The intense pressure and heat created inside the cooker reduce cooking times significantly compared to traditional cooking methods. You can enjoy tender and flavorful meat dishes in a fraction of the time.
2. Tender and flavorful results: The high pressure and heat generated in the electric pressure cooker break down tough connective tissues and fibers in the meat. This results in incredibly tender and juicy meat that is infused with the flavors of your seasonings and ingredients.
3. Convenience: With an electric pressure cooker, you can set it and forget it. Once you lock the lid and set the cooking time and pressure level, the cooker takes care of the rest. You can go about your day or attend to other tasks while your meat cooks to perfection.
4. Versatile cooking options: Electric pressure cookers often come with various cooking functions and settings, allowing you to cook meats in different ways. You can opt for pressure cooking, slow cooking, sautéing, or even steaming, offering you a wide range of cooking options for different cuts of meat and recipes.
5. Retains nutrients: Unlike traditional cooking methods that may lead to nutrient loss, pressure cooking helps retain the nutritional content of the meat. The shorter cooking time and sealed environment ensure that vitamins, minerals, and flavors are preserved, resulting in healthier and more delicious meals.
6. Energy-efficient: Electric pressure cookers use less energy than conventional cooking methods. The shorter cooking time and the ability to trap heat and pressure inside the pot reduce energy consumption, making it not only a time-saving but also an eco-friendly cooking option.
7. Cost-effective: Using an electric pressure cooker can be cost-effective in the long run. The reduced cooking time means less electricity or gas consumption, which can result in lower utility bills. Additionally, pressure cooking is ideal for using economical cuts of meat that may otherwise require longer cooking times to become tender.
8. Enhanced safety features: One of the advantages of electric pressure cookers is the built-in safety mechanisms. These features, such as pressure release valves and locking lids, ensure that the pressure is safely released before opening the cooker, reducing the risk of accidents and making it a safer cooking option.
With these numerous benefits, it’s no wonder that electric pressure cookers have become a staple in many kitchens. They offer a convenient and efficient way to cook meat, producing delicious and tender results every time.
Choosing the Right Cuts of Meat
Choosing the right cuts of meat is crucial when cooking in an electric pressure cooker. Certain cuts are better suited for pressure cooking due to their tenderness and ability to withstand the high-pressure cooking environment. Here are some cuts of meat that work well:
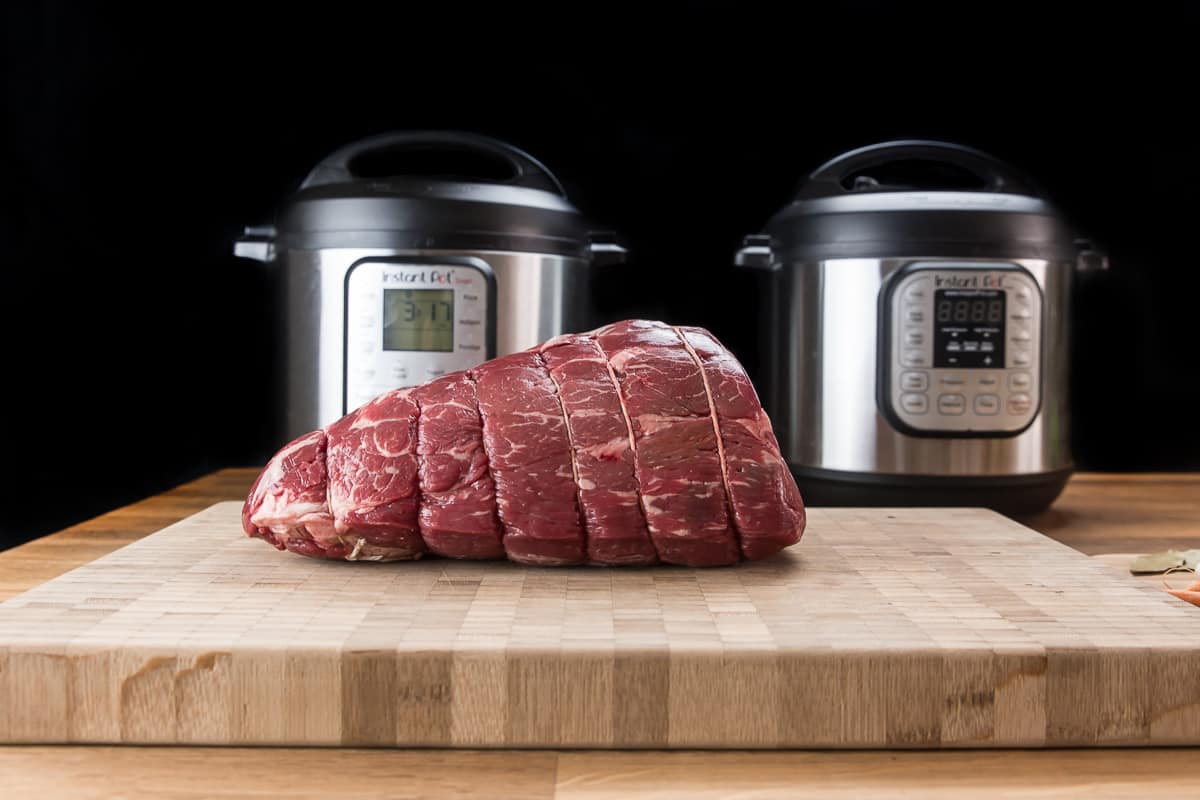
1. Chuck Roast: Chuck roast is a popular choice for pressure cooking. It is a flavorful and well-marbled cut from the shoulder area of the cow. The connective tissues in chuck roast break down during pressure cooking, resulting in tender and succulent meat.
2. Brisket: Brisket, typically used for barbecue, is another excellent cut for the electric pressure cooker. It is a tougher cut from the lower chest area of the cow and benefits from the long, slow cooking process of pressure cooking. The result is incredibly tender and flavorful meat.
3. Short Ribs: Short ribs are full of rich marbling and connective tissues, which makes them perfect for pressure cooking. They become fall-off-the-bone tender and develop a deep, rich flavor when cooked under pressure.
4. Pork Shoulder: Pork shoulder, also known as pork butt or Boston butt, is a versatile cut that works well in the electric pressure cooker. It is a fattier cut that becomes incredibly tender and juicy when pressure cooked, making it ideal for pulled pork or other braised dishes.
5. Chicken Thighs: Chicken thighs are a moist and flavorful cut of meat that is well-suited for pressure cooking. They retain their juiciness and develop a tender texture when cooked under pressure. Chicken breasts, on the other hand, can easily become dry in the pressure cooker, so it’s best to avoid using them unless combined with other ingredients or for shorter cooking times.
6. Stew Meat: Stew meat, typically a combination of beef cuts like chuck or round, is already cut into small pieces, making it perfect for stews, soups, and other pressure cooker dishes. It cooks quickly and becomes fork-tender in the high-pressure environment.
When choosing cuts of meat for the electric pressure cooker, it’s important to consider the level of marbling and connective tissues. These factors contribute to the tenderness and flavor of the final dish. Lean cuts of meat, such as sirloin or tenderloin, are not ideal for pressure cooking as they may become dry and tough. It’s essential to choose cuts with enough fat and connective tissues that can break down and create a succulent and flavorful meal.
Experimenting with different cuts of meat in the electric pressure cooker can open up a world of possibilities and help you discover delicious and tender creations. Take advantage of the benefits of pressure cooking and enjoy mouthwatering meals with minimal effort.
Preparing and Seasoning the Meat
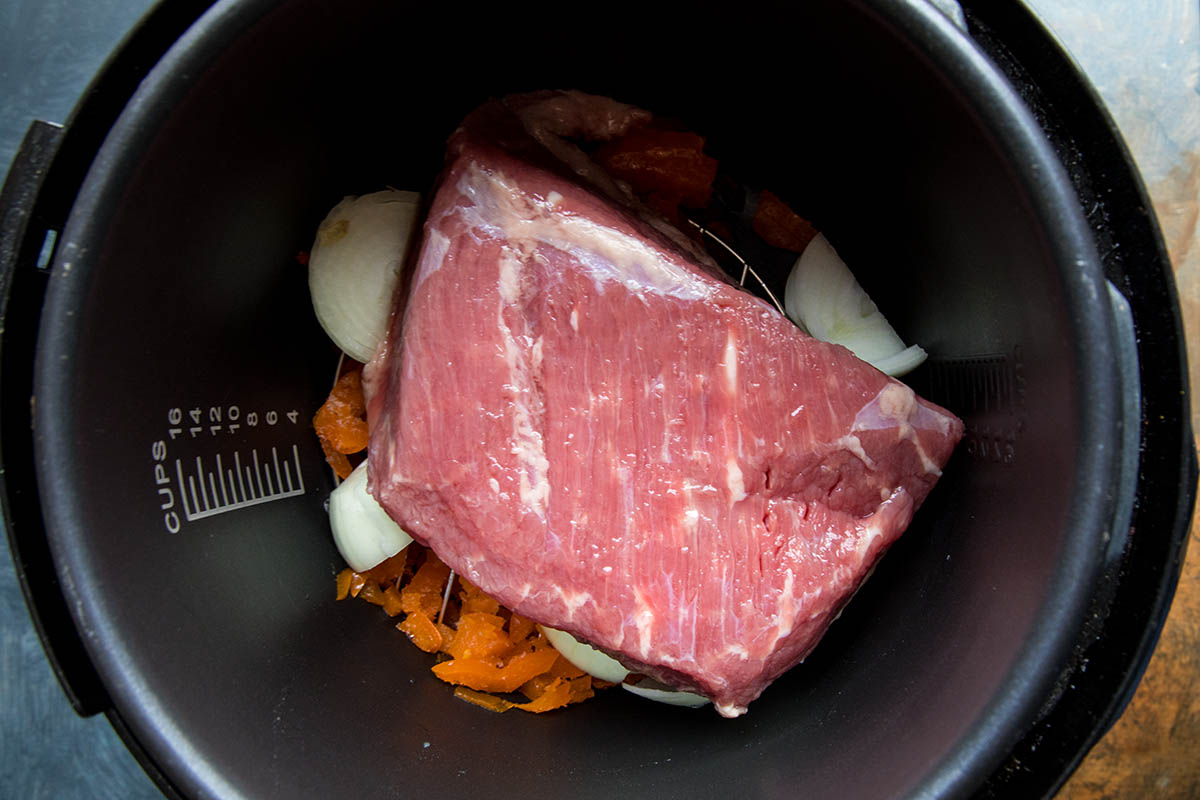
Properly preparing and seasoning the meat is key to achieving delicious and flavorful results when cooking in an electric pressure cooker. Here are some steps to follow:
1. Trim excess fat: Before cooking, trim any excess fat from the meat. While some fat adds flavor, too much can make the dish greasy. Remove visible fat to achieve a leaner and healthier meal.
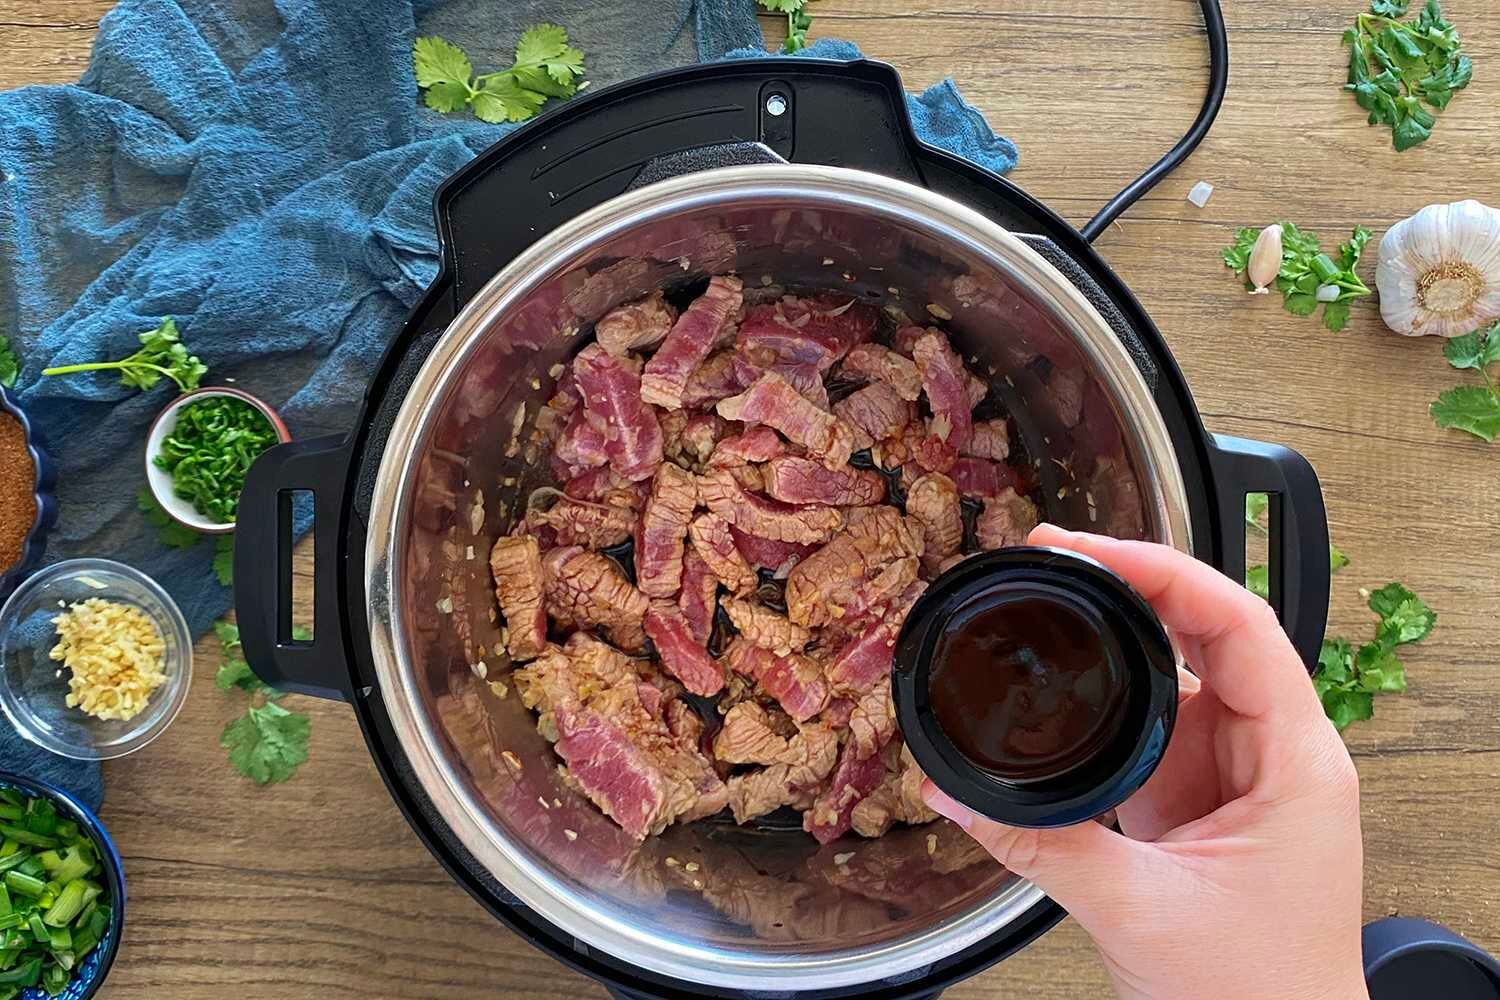
2. Season generously: Season the meat with your preferred seasonings, such as salt, pepper, herbs, spices, or marinades. The high-pressure cooking method intensifies the flavors, so don’t be shy with the seasonings. Consider adding flavor enhancers like garlic, onions, or citrus to add depth to the dish.
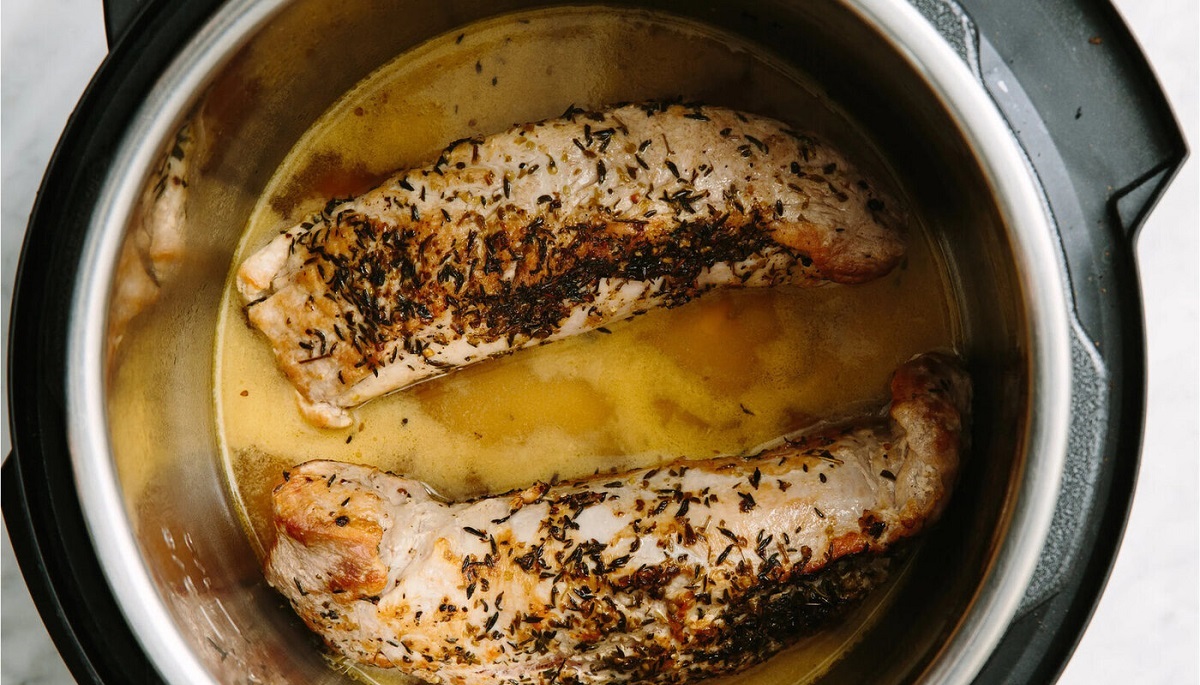
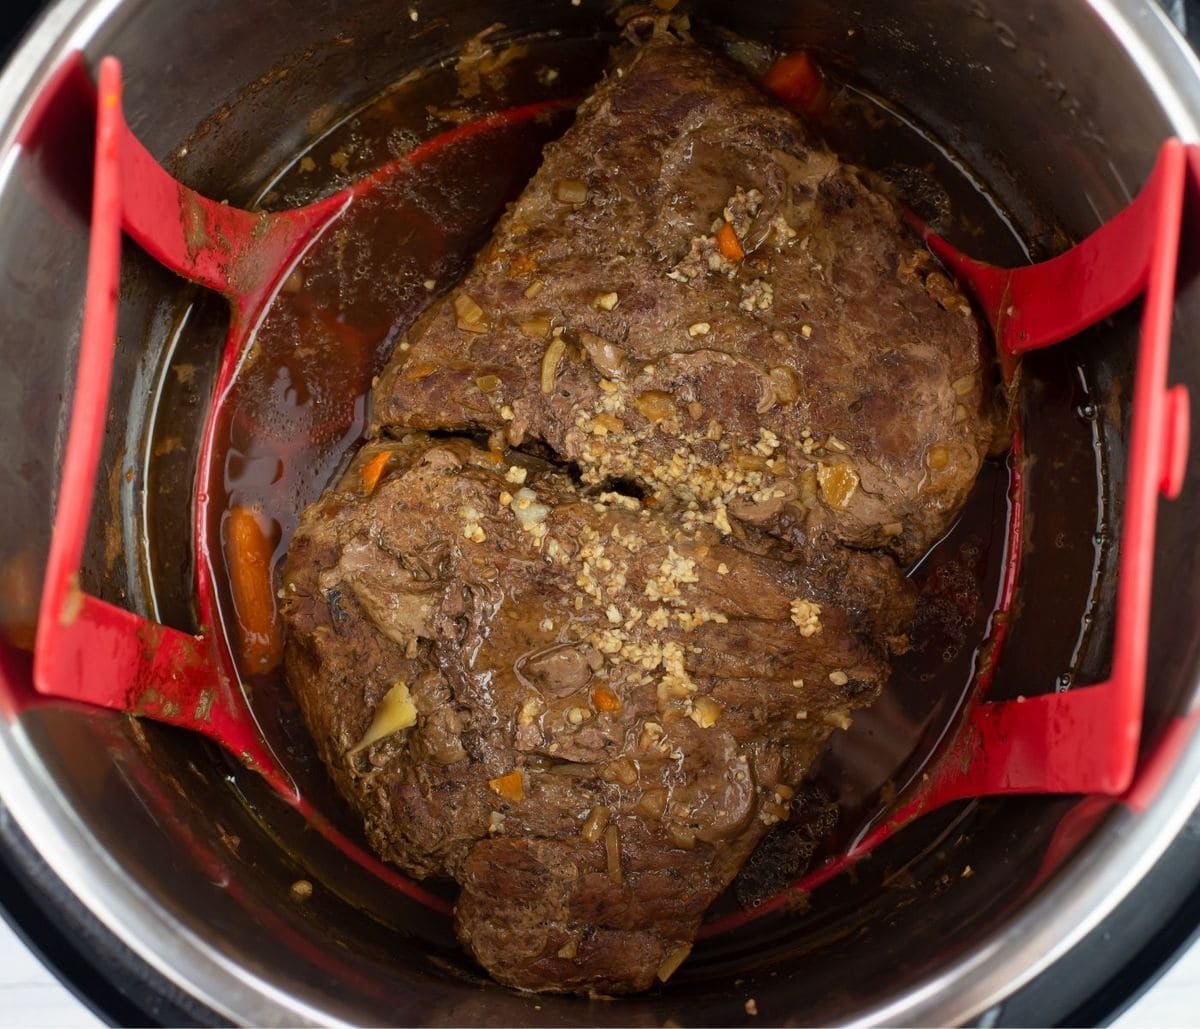
3. Sear the meat (optional): To enhance the flavor and texture, you can sear the meat before pressure cooking. Heat some oil in the electric pressure cooker using the sauté function. Sear the meat on all sides until browned. This will add a delicious caramelized flavor and a pleasing crust to the meat.
4. Let the meat marinate (optional): For maximum flavor infusion, you can marinate the meat for a few hours or overnight in the refrigerator. This is especially beneficial for tougher cuts that need more time to tenderize. Use a marinade of your choice or a combination of acidic ingredients like vinegar, citrus juice, or wine, along with herbs, spices, and aromatics.
5. Consider using a trivet or rack: Elevate the meat by using a trivet or rack inside the pressure cooker. This prevents the meat from sitting directly in the cooking liquid, allowing for more even heat distribution and preventing it from becoming soggy. It also makes it easier to remove the meat from the cooker after cooking.
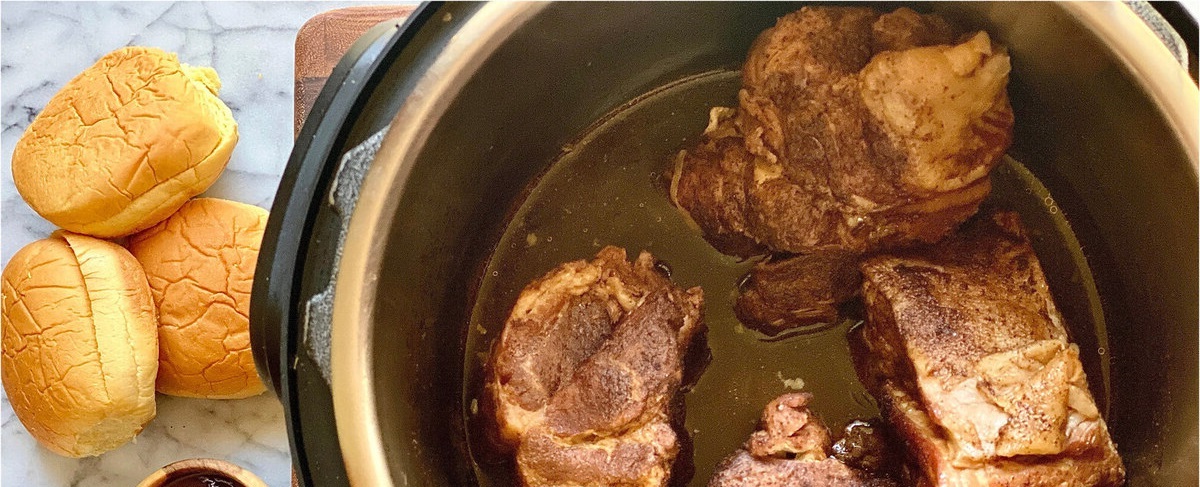
6. Add aromatics and liquids: Along with the meat, add aromatic ingredients like onions, garlic, or herbs to enhance the flavor profile. It is essential to add enough liquid, such as broth, wine, water, or sauces, to create steam and maintain the pressure inside the cooker. The liquid not only helps with the cooking process but also ensures the meat stays moist during cooking.
7. Follow the recipe guidelines: When using specific recipes, follow the recommended guidelines for preparing and seasoning the meat. Some recipes may require additional steps or specific seasoning combinations for optimal flavor and tenderness.
Remember, the preparation and seasoning of meat play a vital role in creating a delicious and satisfying meal. Take the time to season and prepare the meat properly, and your efforts will be rewarded with a flavorful and tender dish that will impress your taste buds.
Adding Liquid to the Electric Pressure Cooker
Adding the right amount and type of liquid to the electric pressure cooker is crucial for achieving optimal cooking results. The liquid creates steam, which builds pressure inside the cooker, allowing the meat to cook properly. Here are some important points to keep in mind when adding liquid:
1. Follow the recipe: When using a specific recipe, it’s important to follow the recommended guidelines for liquid measurements. Recipes typically specify the amount of liquid needed based on the cooking time and the amount of meat being cooked. This ensures that there is enough liquid to produce the necessary steam and maintain pressure throughout the cooking process.
2. Use flavorful liquids: Consider using flavorful liquids such as broth, stock, wine, or even a combination of these. These liquids will add depth and richness to the final dish, enhancing the overall flavor of the meat. Avoid using plain water, as it may dilute the flavors, especially when pressure cooking for longer durations.
3. Use the minimal amount of liquid needed: While it’s important to add enough liquid for the pressure cooker to function properly, it’s also essential to use the minimum amount necessary. This prevents the meat from becoming overly watery and helps concentrate the flavors during cooking. Keep in mind that the meat will release its own juices as it cooks, contributing to the liquid content.
4. Be mindful of thickening agents: If your recipe requires the addition of thickening agents such as flour, cornstarch, or tomato paste, make sure to dilute them in a small amount of liquid separately before adding them to the pressure cooker. This prevents the thickening agents from settling at the bottom and potentially causing scorching or burning.
5. Adjust seasoning in the liquid: Since the liquid will penetrate and flavor the meat as it cooks under pressure, it’s a good idea to season the liquid generously. Add salt, pepper, herbs, and spices to the liquid in the pressure cooker, enhancing the overall flavor of the dish.
6. Don’t exceed the maximum fill line: Pay attention to the maximum fill line indicated inside the pressure cooker. Overfilling the cooker with liquid can lead to safety hazards and may interfere with the pressure release function. It’s important to leave enough space for the steam to build up and for the pressure to be regulated properly.
By carefully considering the type and amount of liquid you add to the electric pressure cooker, you can ensure that your meat cooks to perfection with exceptional flavor and tenderness. Follow recipe guidelines, use flavorful liquids, and be mindful of the balance between liquid and meat to achieve the desired results.
Setting the Cooking Time and Pressure Level
Setting the correct cooking time and pressure level is essential for achieving perfectly cooked meat in an electric pressure cooker. The cooking time ensures that the meat reaches the desired level of tenderness, while the pressure level determines the intensity of the cooking process. Here are some guidelines on how to set these parameters:
1. Follow the recipe: When using a recipe, carefully follow the recommended cooking time and pressure level specified. These guidelines are usually tested and optimized for the specific cut of meat and desired result. Adjusting the time and pressure level without understanding the implications may lead to undercooked or overcooked meat.
2. Consider the thickness and size of the meat: Thicker cuts of meat will require longer cooking times to ensure they are fully cooked. Keep in mind that the cooking time starts once the pressure cooker reaches the required pressure level and not when the timer is set. Also, remember that smaller pieces of meat will generally require less time compared to larger cuts.
3. Adjust for desired tenderness: The cooking time and pressure level can be adjusted based on personal preference for meat tenderness. Increasing the cooking time or pressure level will result in a more tender and fall-off-the-bone texture. Conversely, reducing the cooking time or pressure level can yield meat that is firmer and less tender. Experiment with different settings to discover your preferred level of tenderness.
4. Take into account the meat’s fat content: Meat with higher fat content, such as marbled cuts or cuts with visible fat, may require slightly longer cooking times to allow the fat to render and contribute to the overall tenderness. Leaner cuts will generally require less cooking time, so adjust accordingly to avoid overcooking and drying out the meat.
5. Use the recommended pressure release method: Some recipes will specify a specific pressure release method, either quick pressure release or natural pressure release. Quick pressure release involves manually venting the steam after cooking, while natural pressure release allows the pressure to decrease naturally over a specified period. Both methods have their advantages and may affect the tenderness and texture of the meat. Follow the recipe instructions for the recommended pressure release method.
6. Adjust based on personal experience: Over time, you will develop a better understanding of how your electric pressure cooker performs and how it affects different cuts of meat. Take note of the outcomes of previous cooking attempts and adjust the cooking time and pressure level accordingly when repeating recipes or trying new ones.
By setting the cooking time and pressure level correctly, you can ensure that your meat dishes come out tender, flavorful, and perfectly cooked. Consider the recipe recommendations, meat thickness, desired tenderness, fat content, and experience with your pressure cooker to fine-tune the cooking process to suit your preferences.
Cooking Meat with High Fat Content
When it comes to cooking meat with high fat content in an electric pressure cooker, such as cuts that are well-marbled or have visible fat, there are a few important factors to consider. Cooking high-fat meats requires careful attention to ensure optimal cooking results and to make the most of the rich flavors that come from the fat. Here are some tips for cooking meat with high fat content in your electric pressure cooker:
1. Trim excessive fat: While fat adds flavor and moisture to the meat, it’s important to trim off any excessive fat before cooking. Leaving a reasonable amount of fat can enhance the meat’s flavor and tenderness, but too much fat can make the dish greasy or compromise the final texture and presentation.
2. Sear the meat: Searing the meat, especially high-fat cuts, before cooking them in the pressure cooker can help enhance the flavors and create a desirable texture. Preheat the electric pressure cooker on the sauté mode and add a small amount of oil. Brown the meat on all sides until a golden crust forms. This process adds depth and caramelization to the meat, complementing the rich fat content.
3. Use caution with additional fats: When using high-fat meats, it’s important to be mindful of added fats in the recipe. The meat itself already has a significant amount of fat, which will render during cooking. Adjust the amount of added oil, butter, or other fats accordingly to prevent the dish from becoming excessively greasy.
4. Plan for rendered fat: High-fat meats will produce more rendered fat during pressure cooking. If the recipe includes a cooking liquid, keep in mind that the rendered fat will mix with it. You may want to skim the excess fat off the top before serving, depending on personal preference and dietary considerations.
5. Adjust cooking time for tenderness: High-fat meats generally become tender and flavorful with pressure cooking. However, they may require slightly longer cooking times to allow the fat to render and contribute to the overall tenderness and richness. Ensure the meat reaches a safe internal temperature for the specific cut before considering it fully cooked.
6. Consider natural pressure release: When pressure cooking high-fat meats, the natural pressure release method is often recommended. Allowing the pressure to release naturally for a few minutes before manually releasing the remaining pressure helps prevent excessive moisture loss and maintains the succulence of the meat.
7. Adjust seasonings: Keep in mind that high-fat meats can produce a rich flavor on their own. Adjust the seasoning accordingly to avoid overpowering the natural flavors. Opt for herbs, spices, or marinades that complement the meat’s profile without overwhelming it.
By taking these factors into consideration when cooking high-fat meats in your electric pressure cooker, you can achieve tender, flavorful results that highlight the richness of the meat’s fat content. Experiment with different cuts, seasonings, and cooking times to find your perfect balance of flavors and textures.
Cooking Meat with Low Fat Content
Cooking meat with low fat content in an electric pressure cooker requires special attention to prevent the meat from drying out and becoming tough. While low-fat cuts may not have the same inherent tenderness and flavor as high-fat cuts, there are techniques and considerations that can help you achieve delicious and moist results. Here are some tips for cooking meat with low fat content in your electric pressure cooker:
1. Choose the right cuts: Select cuts that are naturally more tender, such as tenderloin, chicken breasts, veal cutlets, or lean pork loins. These cuts have lower fat content but are inherently tender, making them well-suited for pressure cooking.
2. Use a marinade: Marinating the low-fat meat before pressure cooking can add moisture and enhance its flavor. Acidic marinades, such as ones with citrus juices or vinegar, can help tenderize the meat and add a tangy flavor. Consider adding herbs, spices, and aromatics to the marinade for additional depth of flavor.
3. Be cautious with cooking times: With low-fat meats, it’s crucial to be mindful of the cooking time. Overcooking can result in dry and tough meat. Follow recipe guidelines or adapt cooking times to ensure the meat reaches the correct internal temperature for your desired level of doneness.
4. Add moisture through liquids: Low-fat meats benefit from the addition of flavorful liquids to keep them moist during pressure cooking. Consider using broths, stocks, wine, or even a combination of these to infuse the meat with moisture and enhance its taste. Avoid using excessive amounts of liquids that may dilute the flavors or result in a watery final dish.
5. Utilize the trivet: Placing the low-fat meat on a trivet or rack inside the pressure cooker can prevent it from sitting in direct contact with the cooking liquid. This helps maintain the meat’s texture and prevents it from becoming overly mushy. It also makes it easier to remove the meat from the cooker after cooking.
6. Incorporate moist ingredients: Consider including ingredients with higher moisture content alongside the low-fat meat. This can range from vegetables, fruits, or even adding a small amount of fatty ingredients, such as bacon or pancetta, to contribute some richness and moisture to the dish.
7. Natural pressure release: Opting for natural pressure release after cooking can help preserve the moisture in the low-fat meat. Allowing the pressure to release naturally for a few minutes before manually releasing the remaining pressure helps prevent excessive moisture loss and maintains the juiciness of the meat.
By following these tips, you can successfully cook meat with low fat content in your electric pressure cooker without sacrificing flavor or moisture. By selecting the right cuts, using marinades or flavorful liquids, and monitoring the cooking time carefully, you can enjoy tender and tasty low-fat meat dishes that are satisfying and good for your health.
Quick Pressure Release vs. Natural Pressure Release
Understanding the difference between quick pressure release and natural pressure release methods is essential when cooking meat in an electric pressure cooker. These methods affect the final texture, moisture level, and overall cooking experience. Here’s a breakdown of quick pressure release and natural pressure release and when to use each:
Quick Pressure Release:
The quick pressure release method involves manually releasing the pressure from the cooker as soon as the cooking time is complete. This is done by turning the release valve to release the steam quickly. The pressure inside the cooker drops rapidly, allowing you to open the lid and access the cooked meat.
Quick pressure release is suitable for recipes where you want to halt the cooking process immediately, especially for delicate meats or vegetables that may overcook or become mushy if left under pressure for too long. It is also handy when you’re short on time and want to proceed with other steps in the recipe or when you want to prevent further cooking after achieving the desired texture.
However, keep in mind that quick pressure release can lead to moisture loss, especially for cuts of meat with low fat content. The sudden release of pressure can cause the meat to contract quickly, squeezing out some of its juices. This method is not recommended for very tender or delicate meats that may benefit from a gentler pressure release.
Natural Pressure Release:
Natural pressure release involves allowing the pressure to decrease naturally without manually venting the steam. After the cooking time is complete, the cooker remains sealed, and the pressure gradually reduces over a period of time. This can take anywhere from 10 to 20 minutes or sometimes longer.
Natural pressure release is ideal for recipes that require a longer cooking time or cuts of meat that benefit from additional resting time. It allows the meat to continue cooking slowly in its residual heat and retains more moisture compared to quick pressure release. Natural pressure release is particularly beneficial for tougher cuts of meat that need more time to tenderize and become more flavorful.
Be aware that the meat may continue cooking slightly during natural pressure release, so consider this when determining the cooking time. It is important to note that recipes using high-fat meats or dishes with ample liquid may still benefit from a natural pressure release, as it allows the flavors to meld together and can result in more tender and succulent meat.
In summary, the choice between quick pressure release and natural pressure release depends on the recipe, meat type, and desired outcome. Quick pressure release is suitable for delicate meats or when you need to halt cooking immediately, while natural pressure release is ideal for longer cooking times or when you want the meat to have additional resting and tenderizing time. Understanding and utilizing both methods will help you achieve the best results when cooking meat in your electric pressure cooker.
Checking the Meat for Doneness
Checking the doneness of meat is crucial to ensure it is cooked to perfection and safe for consumption. While electric pressure cookers provide precise cooking times, it is still important to verify the doneness using reliable methods. Here are some indicators to help you determine if your meat is cooked to the desired level:
1. Use a meat thermometer: The most accurate and reliable way to check the doneness of meat is by using a meat thermometer. Insert the thermometer into the thickest part of the meat, avoiding any bones or fat. Different types of meat have different recommended internal temperatures for safe consumption. Refer to a meat temperature guide to determine the appropriate temperature for your specific cut of meat.
2. Look for color changes: Visual cues can also help you assess the doneness of meat. Well-done meats, especially beef, will have little to no pinkness and may appear brown throughout. However, note that other factors like marinades or smoking agents can affect the color of the meat. It’s always a good idea to double-check the internal temperature with a thermometer to ensure accurate doneness verification.
3. Check for firmness: Gently press the meat with a fork or tongs to determine its firmness. Well-done meat will be firmer and offer more resistance when pressed compared to rarer cuts. However, this method is less reliable than using a meat thermometer as it relies on personal judgment and can vary based on the meat’s thickness, fat content, and personal preference.
4. Observe the meat’s juices: Cutting into the meat or piercing it with a fork can help you evaluate its doneness based on the color and clarity of the juices. Well-done meat will release clear juices with no traces of pinkness or blood. However, this method is not as accurate as using a meat thermometer since other factors like marinades or seasonings can also affect the color of the juices.
5. Perform a bone test: When cooking meats with bones, such as chicken or ribs, check the meat near the bone to ensure doneness. For fully cooked meat, the bones should be easily removed, and the meat should pull apart effortlessly. This is a good indicator of well-done meat, but again, it’s best to confirm with a meat thermometer for accurate temperature readings.
Remember, the cooking times provided in recipes are guidelines, and the exact cooking time required for your specific cut of meat may vary. By using a meat thermometer, you can ensure the meat is cooked to the desired level of doneness, whether it’s rare, medium-rare, medium, or well-done.
By incorporating these methods to check the meat’s doneness, you can confidently serve perfectly cooked meat with optimal flavors, textures, and safety for a delicious dining experience.
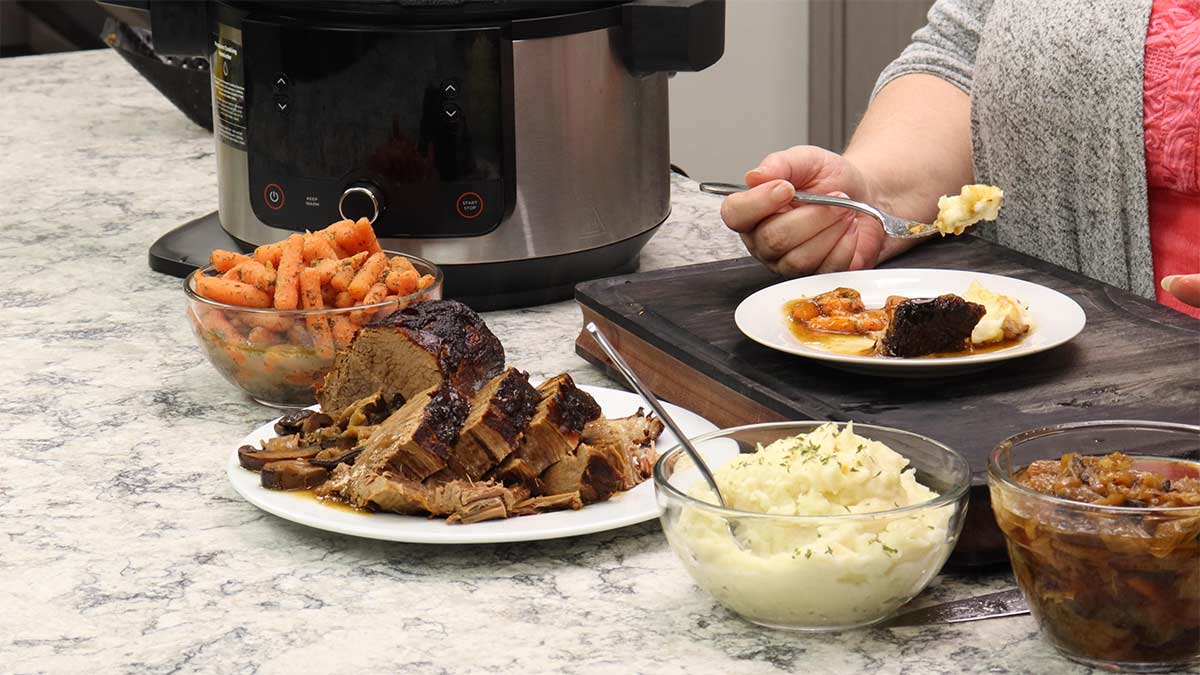
Resting and Serving the Cooked Meat
The resting period after cooking plays a crucial role in ensuring tender, juicy, and flavorful meat. By allowing the cooked meat to rest before serving, you give it time to redistribute the juices and lock in the flavors. Here are some important steps to follow when resting and serving cooked meat:
1. Remove from the electric pressure cooker: Carefully remove the cooked meat from the pressure cooker using tongs or a slotted spoon. Be cautious as the meat will be hot and tender. Set it on a cutting board or a plate.
2. Tent with foil: Tent the meat loosely with foil to retain its warmth. This will also help to further trap the juices and keep the meat moist during the resting period. Allow the meat to rest undisturbed for at least 5 to 10 minutes, or longer for larger cuts of meat. This resting period allows the meat to relax and the fibers to reabsorb the juices and redistribute them throughout the meat, resulting in a more tender and juicy texture.
3. Avoid cutting immediately: Resist the temptation to cut into the meat right away. Cutting into the meat immediately after cooking will cause the flavorful juices to escape, resulting in drier meat. Letting the meat rest allows the juices to settle, enhancing the overall flavor and tenderness of the dish.
4. Use the resting time wisely: Utilize the resting period to prepare any accompanying side dishes or sauces. It’s also the perfect time to garnish and plate the meal. As the meat rests, you can ensure that all components of the dish are ready to serve, allowing for a more efficient and enjoyable dining experience.
5. Slice and serve: Once the resting period is complete, it’s time to slice and serve the meat. Use a sharp knife to carve the meat into desired portions, taking care to slice against the grain for maximum tenderness. Arrange the slices on a platter or individual plates, and serve hot.
6. Pair with complementary sides: Consider serving the cooked meat with delicious side dishes that complement its flavors. Vegetables, roasted potatoes, grains, or a fresh salad can all be excellent accompaniments to enhance the overall dining experience and provide a well-rounded meal.
By allowing the cooked meat to rest before serving, you ensure that the flavors are at their best and that the meat remains tender, moist, and packed with deliciousness. Remember, the resting period is an essential step in the cooking process that should not be skipped for optimum results.
Cleaning and Maintaining Your Electric Pressure Cooker
To keep your electric pressure cooker in optimal condition and ensure safe and efficient cooking, it is important to follow proper cleaning and maintenance practices. Here are some guidelines to help you clean and maintain your electric pressure cooker:
1. Unplug and cool down: Always unplug the pressure cooker from the power source and allow it to cool down completely before cleaning. This will prevent any electrical accidents and reduce the risk of burns.
2. Disassemble removable parts: Many electric pressure cookers have removable parts, such as the inner pot, sealing ring, steam rack, and valve. Follow the manufacturer’s instructions to safely remove these components for cleaning. Take note of any specific cleaning recommendations provided by the manufacturer.
3. Wash the removable parts: Wash the removable parts with warm soapy water and a soft brush or sponge. Avoid using abrasive cleaners or scouring pads that can damage the non-stick surfaces. Gently scrub the parts to remove any food residue, stains, or odors. Rinse thoroughly to ensure all soap is removed.
4. Clean the inner pot: Pay close attention to cleaning the inner pot as it comes into direct contact with the food. Use a mild dishwashing detergent and a non-abrasive sponge or brush to clean the pot. If there are stubborn stains or burnt-on food, you can soak the pot in warm soapy water before scrubbing. Rinse the pot thoroughly to remove any soap residue.
5. Clean the exterior: Wipe the exterior of the electric pressure cooker with a damp cloth or sponge to remove any spills or splatters. Avoid using abrasive cleaners, harsh chemicals, or abrasive sponges that could damage the surface. Be sure to clean around the control panel and any other buttons or knobs.
6. Clean the sealing ring: The sealing ring is an important component that helps create a tight seal during pressure cooking. After each use, remove the sealing ring and wash it with warm soapy water. Check for any food debris or residue and clean it thoroughly. It is recommended to periodically check the sealing ring for wear and tear and replace it if necessary, following the manufacturer’s instructions.
7. Maintain the pressure release valve: The pressure release valve is critical for controlling the pressure inside the cooker. Ensure that it is clean and free from any food or residue. Check the valve regularly for proper functioning and make sure it moves freely without obstruction. Refer to the manufacturer’s instructions for specific maintenance requirements and any necessary cleaning procedures for the pressure release valve.
8. Store properly: After cleaning and drying all the components, reassemble the electric pressure cooker and store it in a clean and dry location. Make sure the cooker is completely dry to prevent any moisture buildup or potential damage. Store the cooker with the lid placed upside down to allow for proper air circulation. It is also essential to keep the cooker away from extreme heat or humidity.
By following these cleaning and maintenance guidelines, you can ensure the longevity and safe operation of your electric pressure cooker. Regular cleaning and proper care will help you enjoy delicious and hassle-free cooking experiences for many meals to come.
Conclusion
Cooking meat in an electric pressure cooker opens up a world of convenience, tenderness, and flavor. With the ability to cook meals in a fraction of the time compared to traditional methods, an electric pressure cooker is a valuable tool in the kitchen. By following the tips and guidelines outlined in this article, you can maximize the benefits of cooking meat in an electric pressure cooker and create mouthwatering dishes that will delight your taste buds.
From choosing the right cuts of meat to preparing and seasoning them, every step in the process contributes to the final outcome. Adding liquid, setting the cooking time, and deciding between quick pressure release and natural pressure release all play a role in achieving perfectly cooked meat. Checking the meat for doneness, resting it properly, and serving it with complementary sides enhance the overall dining experience.
Furthermore, proper cleaning and maintenance of your electric pressure cooker ensure consistent performance and longevity. By following the necessary steps to clean and maintain the cooker, you can continue to enjoy its benefits for years to come.
Experiment with different cuts of meat, seasonings, and cooking techniques to discover your favorite recipes and personalize them to your preferences. With practice, you will become more confident in using your electric pressure cooker and master the art of cooking tender, flavorful, and delicious meat dishes in no time.
So, embrace the convenience, efficiency, and delectable results that cooking meat in an electric pressure cooker provides. Elevate your cooking experience, save time, and savor incredible meals that will impress both family and friends. Get ready to embark on a culinary journey filled with succulent flavors and tender textures as you unlock the full potential of cooking meat in an electric pressure cooker.