Introduction
With the rise of digital reading devices, more and more people are opting to read books in electronic formats, such as eBooks. While there are countless eBooks available online, you may come across a favorite physical book that you’d like to convert into a digital format. Fortunately, the process of converting a physical book into an eBook is now easier than ever.
In this guide, we will take you through the step-by-step process of transforming a physical book into an eBook. From choosing the right scanner to finalizing the formatting of the eBook, we will cover all the essential steps to ensure a seamless conversion.
Converting a physical book into an eBook offers several advantages. Firstly, it grants you the convenience of carrying your favorite book collection in a single device, allowing you to read anytime and anywhere. Additionally, eBooks are searchable, making it easy to find specific information or quotes without flipping through pages. Lastly, by digitizing your books, you’re contributing to the preservation of literature by ensuring that your library remains intact even if the physical books deteriorate over time.
Before we delve into the technicalities of the conversion process, it’s important to note that not all books can be easily converted into eBooks. Complex layouts, illustrations, or handwritten text may pose challenges during the scanning and digitization processes. However, for most standard books with straightforward text formatting, the following steps will guide you through the conversion process.
Whether you’re a book lover, a student, or a teacher looking to digitize educational materials, this guide will equip you with the necessary knowledge and skills to convert your physical books into brilliant eBooks. Let’s get started!
Step 1: Choose the Right Scanner
The first step in converting a physical book into an eBook is to choose the right scanner. The scanner you select will play a crucial role in the quality and efficiency of the conversion process.
When selecting a scanner, consider the following factors:
- Type of Scanner: There are different types of scanners available, including flatbed scanners, sheet-fed scanners, and portable scanners. Flatbed scanners are ideal for scanning individual book pages, while sheet-fed scanners are more suited for scanning multiple pages at once. Portable scanners are compact and can be convenient if you’re often on the go.
- Resolution: Opt for a scanner with a high resolution to ensure clarity and legibility in the scanned pages. A resolution of at least 300 DPI (dots per inch) is recommended for optimal results.
- Automatic Document Feeder (ADF): If you’re scanning a book with numerous pages, an ADF can save you time by automatically feeding pages into the scanner. This feature eliminates the need for manually flipping each page, making the process faster and more efficient.
- Software Compatibility: Ensure that the scanner you choose is compatible with the software you plan to use for editing and converting the scanned images into text. This will streamline the overall process and ensure compatibility.
Before purchasing a scanner, read online reviews and compare different models to find one that meets your specific requirements and budget. If possible, visit a store to test out the scanning quality and features firsthand.
Remember, the quality of the scanned images will determine the final quality of your eBook. Investing in a good scanner will improve the readability and overall experience of the digital version of your book.
Now that you have chosen the right scanner, let’s move on to the next step: preparing your physical book for scanning.
Step 2: Prepare Your Physical Book
Before you start scanning your physical book, it’s important to prepare it properly to ensure accurate and efficient scanning. Proper preparation will help minimize errors and produce high-quality scanned pages.
Follow these steps to prepare your physical book:
- Clean the book: Dust and debris on the pages can interfere with the scanning process and affect the quality of the final eBook. Use a clean, dry cloth to gently wipe the book pages, ensuring that they are free from any dirt or smudges.
- Straighten the pages: If the pages of your book are warped or bent, gently flatten them using your hands or a clean weight. This will help ensure that the pages lie flat when scanning, resulting in clearer images.
- Remove any markings: If the book has any handwritten notes, bookmarks, or other inserts, remove them before scanning. These markings can cause distractions and affect the readability of the scanned pages.
- Choose the right lighting: Proper lighting is essential for obtaining clear and sharp scanned images. Ensure that the scanning area is well-lit without any harsh shadows or reflections. Natural light or evenly distributed artificial light is recommended for optimal results.
- Choose the right angle: Position the book in a way that the pages are perpendicular to the scanner bed. This will help capture the entire page without any distortion or loss of text.
By taking the time to prepare your physical book before scanning, you will improve the accuracy and quality of the scanned pages. This will save you time and effort during the later stages of the conversion process.
Once your physical book is properly prepared, you can proceed to the next step: setting up the scanning area.
Step 3: Set Up the Scanning Area
Setting up the scanning area is a crucial step in converting a physical book into an eBook. A well-organized and properly illuminated scanning area will ensure accurate and high-quality scans.
Follow these steps to set up your scanning area:
- Clean the scanner bed: Before placing your book on the scanner, make sure that the scanner bed is clean and free from dust or smudges. Use a soft, lint-free cloth to wipe the surface gently.
- Position the book: Place the book carefully on the scanner bed, ensuring that the pages are aligned with the edges of the scanner bed. If necessary, use a weight or a bookend to hold the pages flat during scanning.
- Adjust the cover: If the book has a thick or bulky cover, gently lift it so that only the pages are in contact with the scanner bed. This will help prevent any distortion or loss of text during scanning.
- Avoid shadows and reflections: Position the book and scanner in a way that there are no shadows or reflections on the pages. These can affect the clarity and legibility of the scanned images.
- Ensure proper lighting: Good lighting is essential for accurate scans. Make sure that the scanning area is well-lit, preferably with natural light or evenly distributed artificial light. Avoid using harsh, direct light sources that can create glares or shadows.
By taking the time to properly set up your scanning area, you will ensure that the scans are clear, readable, and of high quality. This will save you time and effort during the editing and conversion stages.
Once you have set up your scanning area, you are ready to move on to the next step: starting the scanning process.
Step 4: Start Scanning
Now that you have prepared your physical book and set up the scanning area, it’s time to start the scanning process. This step involves using the chosen scanner to capture digital images of each page of the book.
Follow these steps to scan your physical book:
- Open the scanning software: Launch the scanning software provided with your scanner or use a third-party scanning program that is compatible with your device.
- Set the scanning preferences: Adjust the settings in the scanning software to fit your preferences. Specify the desired resolution, file format, and color settings. For most cases, a resolution of 300 DPI (dots per inch) is recommended for clear and readable scans.
- Select the scanning mode: Choose either the single-page mode or the multi-page mode, depending on the capabilities of your scanner and your preference. Single-page mode allows you to scan one page at a time, while multi-page mode can handle multiple pages simultaneously.
- Position the book: Place the book open on the scanner bed, aligning the pages with the edges of the scanner. If necessary, use a weight or a bookend to hold the pages flat and prevent movement during scanning.
- Scan each page: Press the scan button in the software or on the scanner itself to start the scanning process. Allow the scanner to capture the image of each page, ensuring that the entire page is included in the scan.
- Save the scanned images: Once the scanning is complete, save each scanned image as a separate file. Organize the files in a logical order, maintaining the sequence of the book pages.
Take your time to scan each page accurately, ensuring that the images are clear and legible. If any pages are not captured properly, rescan them to maintain the quality and consistency of the eBook.
Now that you have successfully scanned all the pages, it’s time to move on to the next step: reviewing and editing the scanned pages.
Step 5: Review and Edit Scanned Pages
After completing the scanning process, the next step is to review and edit the scanned pages to ensure accuracy and improve the overall quality of your eBook. This step involves checking for any errors or imperfections in the scanned images and making necessary adjustments.
Follow these steps to review and edit the scanned pages:
- Check for clarity: Examine each scanned page to ensure that the text is clear and legible. If any pages appear blurry or distorted, consider rescanning them to improve the quality.
- Inspect for missing or duplicate pages: Go through the scanned pages to verify that all pages have been properly captured. Look out for any missing or duplicate pages and make the necessary adjustments.
- Remove any artifacts: Artefacts such as specks of dust or smudges may appear in the scanned images. Use image editing software to remove any unwanted elements from the pages, enhancing the overall appearance.
- Check page orientation: Ensure that all pages are correctly oriented and in the right order. Use image editing software to rotate any pages that may be scanned upside down or in the wrong direction.
- Consider cropping: If there are any extra margins or unwanted sections in the scanned pages, use image editing software to crop them out, focusing only on the content of the book.
- Save the edited pages: Once you have reviewed and made the necessary edits, save the edited pages as new files. Keep the original scanned images separately in case you need to refer back to them.
By carefully reviewing and editing the scanned pages, you can ensure that your eBook is error-free and visually appealing. This step is crucial in transforming the scanned images into a polished and professional-looking eBook.
Once you have reviewed and edited the scanned pages, you’re ready to move on to the next step: converting the scanned images into text.
Step 6: Convert Scanned Images to Text
After reviewing and editing the scanned pages, the next step in converting a physical book into an eBook is to convert the scanned images into editable text. This process involves using Optical Character Recognition (OCR) technology to extract the text from the scanned images.
Follow these steps to convert the scanned images to text:
- Choose an OCR software: Select a reliable OCR software that is compatible with your operating system and supports the file format of your scanned images. There are several OCR software options available, both free and paid.
- Import the scanned images: Open the OCR software and import the scanned images into the software’s interface. Ensure that the pages are imported in the correct order.
- Adjust OCR settings: Configure the OCR settings according to your requirements. This may include selecting the language of the text, adjusting the recognition accuracy, and specifying the output format.
- Start the OCR process: Initiate the OCR process, allowing the software to analyze the scanned images and extract the text. Depending on the software and the number of pages, the process may take some time.
- Review and correct any errors: Once the OCR process is complete, carefully review the extracted text. Check for any errors or inaccuracies and correct them manually.
- Save the text file: Save the extracted text as a separate file, ensuring that it is properly formatted and organized. You may also consider saving a backup copy of the scanned images along with the text file.
Keep in mind that OCR technology is not perfect, and there may be some errors or inconsistencies in the extracted text. Take the time to carefully review and correct any mistakes to ensure the accuracy and readability of your eBook.
Once you have successfully converted the scanned images into editable text, the next step is to format and finalize the eBook, which we will explore in the next section.
Step 7: Format and Finalize the eBook
After converting the scanned images into editable text, the next step in converting a physical book into an eBook is to format and finalize the eBook. Proper formatting is crucial to ensure a visually appealing and user-friendly reading experience.
Follow these steps to format and finalize your eBook:
- Select an eBook format: Choose the eBook format that you want to publish your book in. Popular formats include EPUB, MOBI, and PDF. Consider the compatibility of the format with different reading devices and platforms.
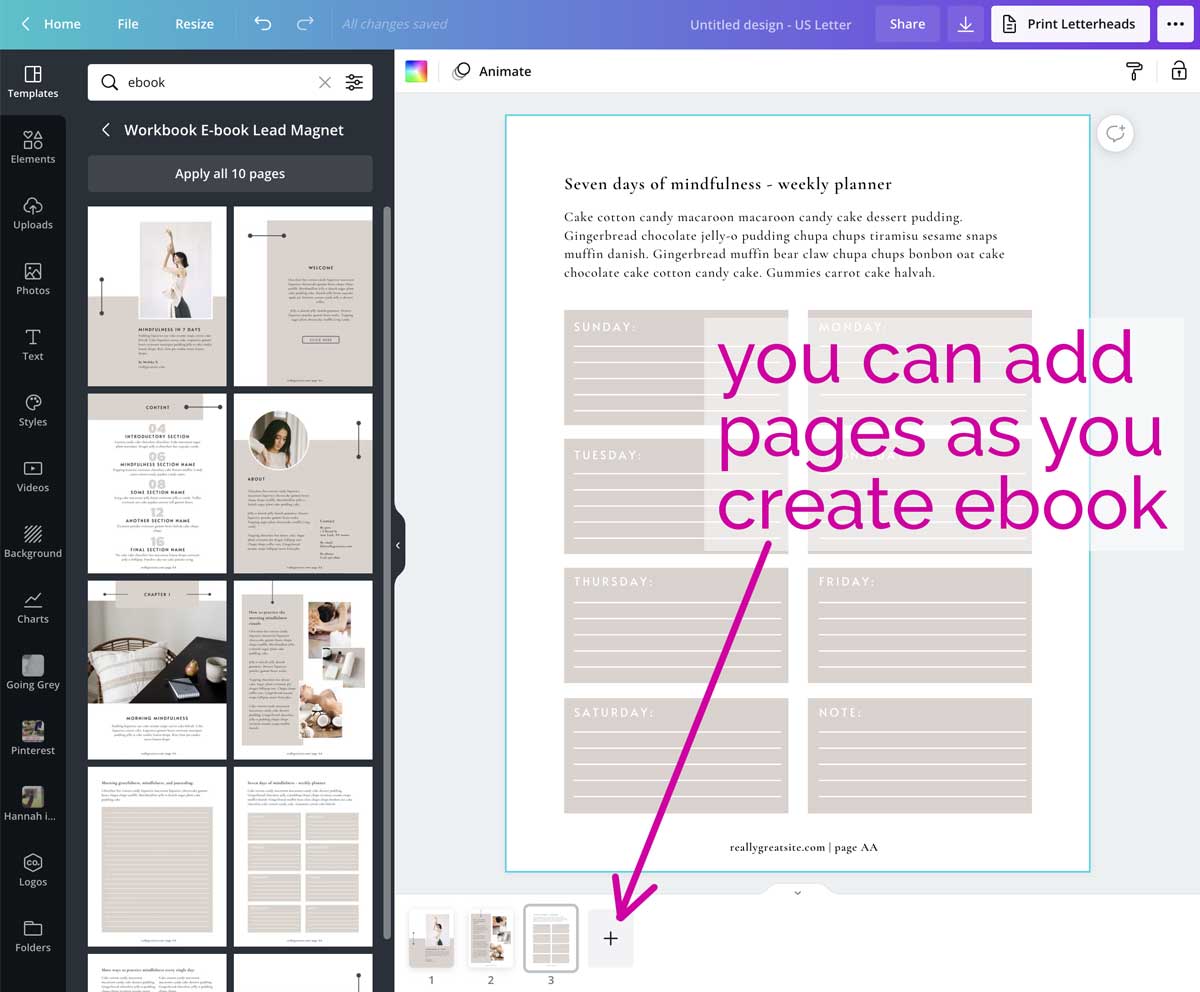
- Import the text into an eBook editor: Open an eBook editor software or use a web-based platform that allows you to import and format the text. Copy and paste the edited text into the editor, ensuring that the formatting is preserved.
- Apply formatting styles: Use the formatting options in the eBook editor to format the text. This may include adjusting font styles, sizes, paragraph spacing, and alignment. Consider using headings, subheadings, and bullet points to enhance readability.
- Insert images and illustrations: If your physical book contained any images or illustrations, insert them into the eBook at the appropriate places. Ensure that the images are properly sized and aligned.
- Add a table of contents: Create a table of contents that provides a clear outline of the eBook’s chapters and sections. Link each entry in the table of contents to the corresponding page for easy navigation.
- Check for consistency: Proofread the eBook to ensure consistency in formatting, font styles, headings, and other elements. Ensure that there are no missing or misplaced pages.
- Test the eBook: Before finalizing the eBook, test it on different eBook readers or devices to ensure that the formatting appears as intended. Make any necessary adjustments based on the test results.
- Save the final eBook: Once you are satisfied with the formatting and finalization, save the eBook in the desired format. Consider optimizing the file size without compromising the quality of the content.
Formatting and finalizing your eBook is a crucial step to ensure a professional and user-friendly reading experience. Take the time to carefully review and make any necessary changes before proceeding.
Now that your eBook is formatted and finalized, the last step is to proofread and test the eBook before publishing it, which we will discuss in the next section.
Step 8: Proofread and Test the eBook
The final step in converting a physical book into an eBook is to thoroughly proofread and test the eBook to ensure its accuracy, readability, and functionality. This step helps identify any remaining errors or issues that need to be addressed before publishing the eBook.
Follow these steps to proofread and test your eBook:
- Proofread the entire eBook: Read through the entire eBook, paying close attention to grammar, spelling, punctuation, and formatting. Correct any errors or inconsistencies that you come across.
- Check for formatting issues: Review the formatting of the eBook on different devices and platforms to ensure that it appears as intended. Check for any alignment issues, font inconsistencies, or misplaced images.
- Test navigation: Click through the table of contents and internal links to ensure that they take you to the correct pages. Test the navigation features, such as the ability to jump to specific chapters or bookmark pages.
- Inspect the eBook on multiple devices: Test the eBook on different e-readers, tablets, or smartphones to ensure compatibility and readability across various devices. Check for any display or formatting issues specific to certain devices.
- Test search functionality: If your eBook includes a search feature, use it to search for specific keywords or phrases. Confirm that the search functionality works accurately and efficiently.
- Seek feedback from others: Share the eBook with a few trusted individuals and ask for their feedback. Encourage them to report any errors, formatting issues, or suggestions for improvement.
- Make necessary revisions: Based on the feedback received and your own observations, make any necessary revisions to the eBook. Proofread and test it again to ensure that all issues are resolved.
Proofreading and testing your eBook is essential to deliver a polished and high-quality product to your readers. Taking the time to thoroughly review and address any issues will result in a better reading experience.
Once you are satisfied with the proofreading and testing, your eBook is ready to be published and enjoyed by readers around the world!
Conclusion
Converting a physical book into an eBook may seem like a daunting task, but with the right steps and tools, it can be a rewarding process. By following the step-by-step guide outlined in this article, you can successfully transform your beloved physical books into digital formats accessible on various devices.
From selecting the right scanner to proofreading and testing the final eBook, each step plays a crucial role in ensuring a seamless and high-quality conversion. Remember to take the time to prepare your physical book, set up a well-lit scanning area, and choose the appropriate scanning settings to capture clear and accurate images. Editing and converting the scanned images into editable text using OCR technology is the next essential step to preserve the content of your book.
Formatting and finalizing the eBook require attention to detail and an eye for consistency. Properly aligning the text, inserting images, and creating a table of contents will enhance the readability and navigability of the eBook. Lastly, proofreading and testing the eBook on different devices and platforms will help identify and address any remaining errors or issues.
By following these steps, you can successfully convert your physical book into a digital masterpiece, making it accessible to a wider audience and preserving its content for future generations. Whether you’re a book lover, a student, or a teacher, converting your books into eBooks opens up a world of convenience and accessibility.
Start the journey of converting your physical books into eBooks today and enjoy the benefits of carrying your entire library with you wherever you go. Embrace the digital age and share your literary treasures with readers around the globe!


