Introduction
Your laptop and smart TV are undoubtedly two essential devices in your tech arsenal. While they serve different purposes, you may sometimes find the need to connect them for a more immersive viewing experience or to share content effortlessly.
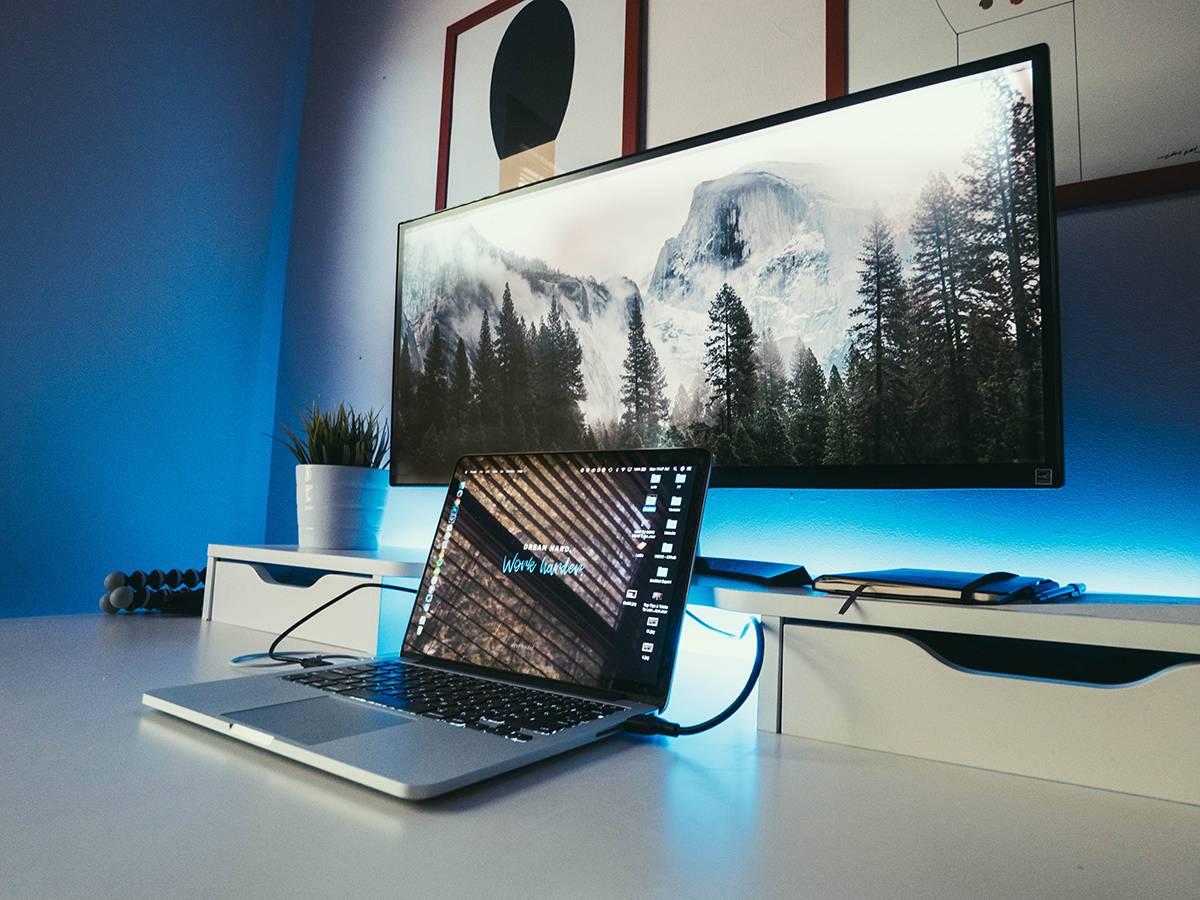
Connecting your laptop to a smart TV allows you to enjoy your favorite movies, TV shows, photos, and even presentations on a bigger screen, turning your living room into a home theater. Whether you want to stream videos, play games, or give a presentation, the ability to connect these devices opens up a world of possibilities.
In this guide, we will walk you through the steps on how to connect your laptop to your smart TV. We will cover the different ports and cables you might need, display settings adjustments, and troubleshooting tips to ensure a smooth connection process.
Before diving into the technicalities, it’s essential to note that the specific steps may vary depending on the make and model of your laptop and smart TV. Keep your user manuals handy in case you need to refer to them. Without further ado, let’s explore the exciting journey of connecting your laptop to your smart TV!
Step 1: Check the available ports on your laptop and smart TV
The first step in connecting your laptop to your smart TV is to identify the available ports on both devices. The ports you have will determine the type of cable or adapter you need to establish the connection.
On your laptop, you can typically find various ports on the sides or the back. The most common ports include HDMI, VGA, DVI, and DisplayPort. HDMI is the preferred option as it supports both audio and video signals, providing a high-definition connection.
Now, turn your attention to your smart TV. Look for the ports on the back or side panel. There might be multiple ports available, including HDMI, VGA, and composite video. Make sure your TV has at least one HDMI port, as this will offer the best quality and compatibility for connecting your laptop.
Once you have identified the available ports on both devices, take note of their specific names or numbers. This will come in handy when selecting the correct cable or adapter in the next step.
Keep in mind that some laptops and smart TVs may have additional limitations or requirements. For example, certain laptops may only have a mini HDMI or USB-C port, while older TVs may not support HDMI input. In such cases, you may need specific adapters or converters to bridge the connection.
By taking the time to identify the available ports on your laptop and smart TV, you are one step closer to connecting these devices and enjoying a seamless multimedia experience. Now that you have a clear understanding of the ports, let’s move on to the next step of choosing the appropriate cable or adapter to establish the connection.
Step 2: Choose the appropriate cable or adapter
Now that you know the ports available on your laptop and smart TV, it’s time to select the appropriate cable or adapter to connect them.
If both your laptop and smart TV have HDMI ports, the simplest and most common option is to use an HDMI cable. This cable transmits both high-definition video and audio signals, providing a seamless connection between the two devices. Simply plug one end of the HDMI cable into the HDMI port on your laptop and the other end into the HDMI port on your smart TV.
However, if your laptop or smart TV does not have an HDMI port, you may need to consider other options. For example, if your laptop has a VGA port and your smart TV has a VGA input, you can use a VGA cable to establish the connection. Keep in mind that VGA only transmits video signals, so you will need to use an additional audio cable to transmit the audio.
Alternatively, you might require an adapter to bridge the connection between different port types. For instance, if your laptop has a USB-C port and your smart TV has an HDMI port, you’ll need a USB-C to HDMI adapter. This adapter converts the USB-C signal to HDMI, allowing you to connect your laptop to the TV with an HDMI cable.
When selecting the appropriate cable or adapter, it’s important to consider the specific requirements of your devices. Look for cables or adapters that are compatible with the ports available on both your laptop and smart TV. Consider the length of the cable as well, ensuring it’s long enough to provide flexibility in positioning your devices.
With the appropriate cable or adapter in hand, you are now ready to connect your laptop to your smart TV. In the next step, we will guide you through the process of physically connecting the cable or adapter to the respective ports on both devices.
Step 3: Connect the cable or adapter to your laptop and smart TV
With the appropriate cable or adapter in hand, it’s time to physically connect your laptop to your smart TV.
If you’re using an HDMI cable, simply plug one end of the cable into the HDMI port on your laptop. Make sure it’s securely inserted. Then, take the other end of the cable and connect it to the HDMI port on your smart TV. Verify that both ends of the cable are properly connected and snug.
If you’re using a VGA cable, plug one end of the cable into the VGA port on your laptop. Again, ensure it’s inserted correctly. Then, take the other end of the cable and connect it to the VGA input on your smart TV. Remember, VGA only carries video signals, so you’ll also need to connect an audio cable between your laptop’s audio output and the corresponding audio input on the TV.
If you’re using an adapter, connect one end of the adapter to the appropriate port on your laptop. For example, if you’re using a USB-C to HDMI adapter, insert the adapter into the USB-C port on your laptop. Then, connect the other end of the adapter to the HDMI cable, and plug the HDMI cable into the HDMI port on your smart TV.
Once the cable or adapter is connected to both your laptop and smart TV, power on both devices if they’re not already on. Your laptop should automatically recognize the external display (your smart TV), but if not, you may need to adjust the display settings, as we will discuss in the next step.
Before moving on to the next step, ensure that the connections are secure and properly inserted. A loose or faulty connection can result in no signal or poor quality display. Take a moment to double-check the connections and make any necessary adjustments.
Now that the cable or adapter is successfully connected, we can proceed to the next step of adjusting the display settings on your laptop to ensure optimal visual output on your smart TV.
Step 4: Adjust the display settings on your laptop
After connecting your laptop to your smart TV, it’s time to adjust the display settings on your laptop to ensure the best visual output on the bigger screen.
First, go to the “Display Settings” on your laptop. The method to access these settings may vary depending on your operating system. In Windows, you can right-click on the desktop and select “Display settings,” while on a Mac, you can go to “System Preferences” and choose “Displays.”
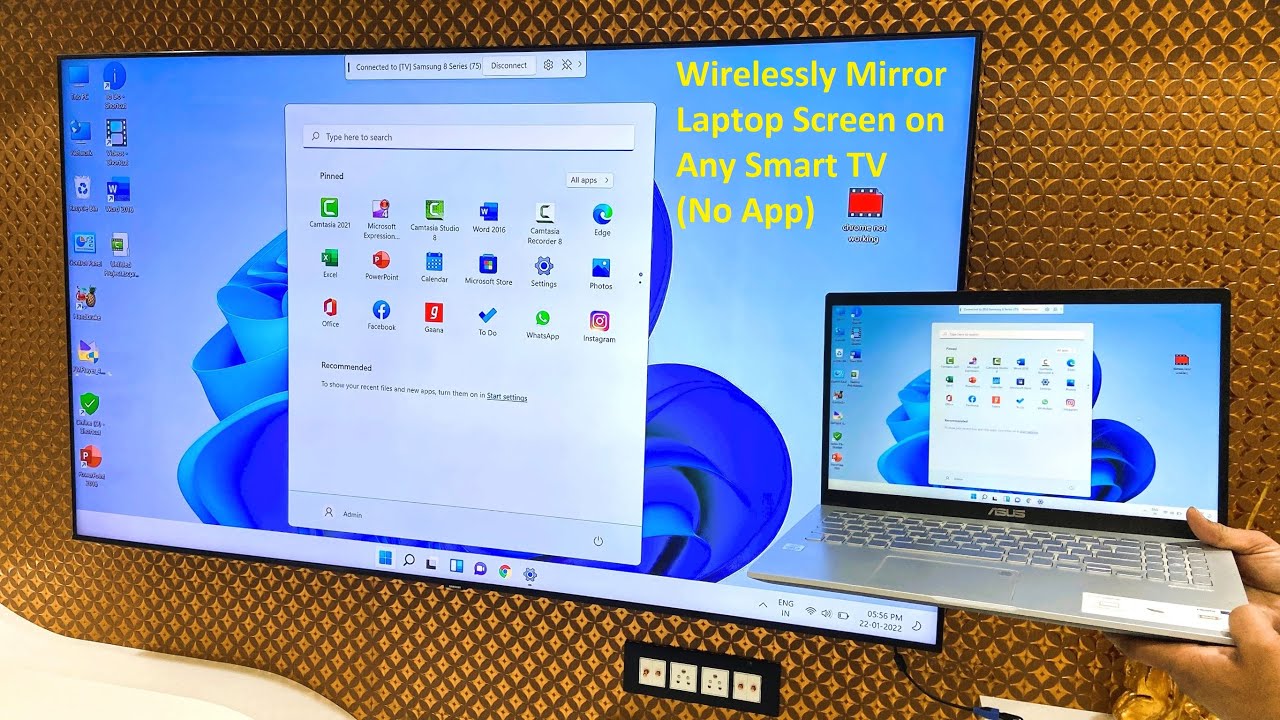
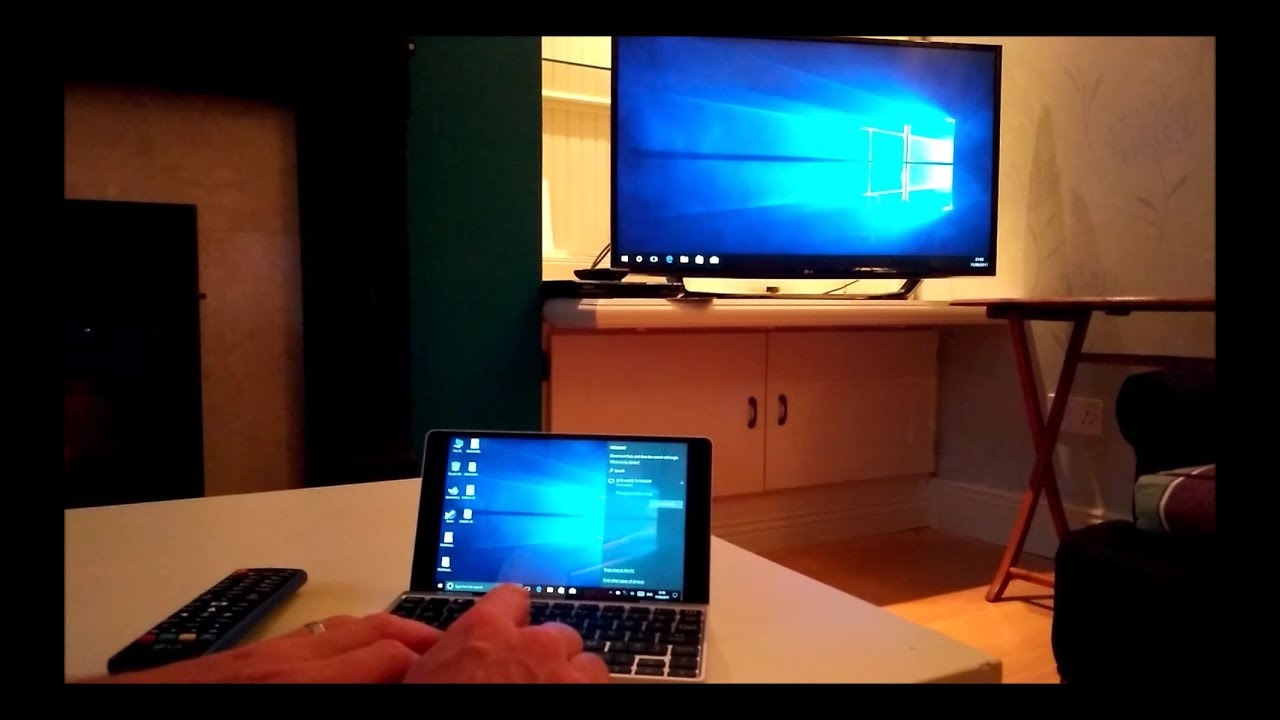
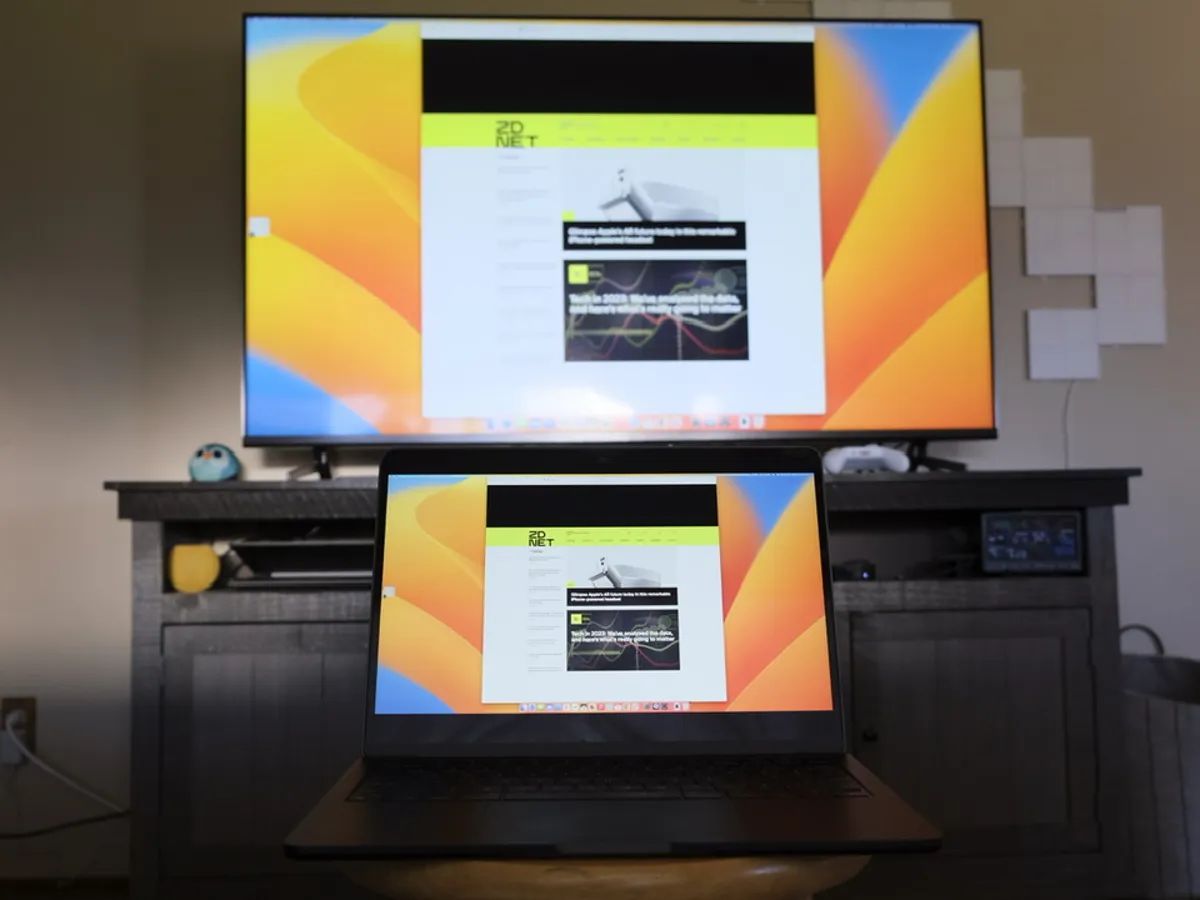
Once you’re in the display settings, you should see options related to multiple displays. Select the option that allows you to extend or duplicate the display. “Extend” will treat your smart TV as an additional display, giving you the ability to drag windows and content from your laptop screen to the TV screen. “Duplicate” will mirror your laptop screen onto the smart TV.
Next, choose the appropriate resolution for your smart TV. Look for the recommended resolution, which is usually the native resolution of the TV. Select this resolution to ensure the sharpest and most accurate display quality.
As you make these adjustments, you may also come across options related to aspect ratio, refresh rate, and color calibration. These settings can be adjusted based on personal preferences and the capabilities of your smart TV. Experiment with these settings to find the configuration that best suits your needs.
Once you’ve made the necessary display settings adjustments, apply the changes and close the display settings window. Your laptop should now be ready to deliver a visually stunning experience on your smart TV.
It’s worth mentioning that some laptops may require you to restart the system for the display settings to take effect. If you don’t see any changes immediately, try restarting your laptop and see if the changes are applied afterwards.
Now that you’ve optimized the display settings on your laptop, it’s time to move on to the next step, which involves adjusting the display settings on your smart TV to ensure a seamless and enjoyable viewing experience.
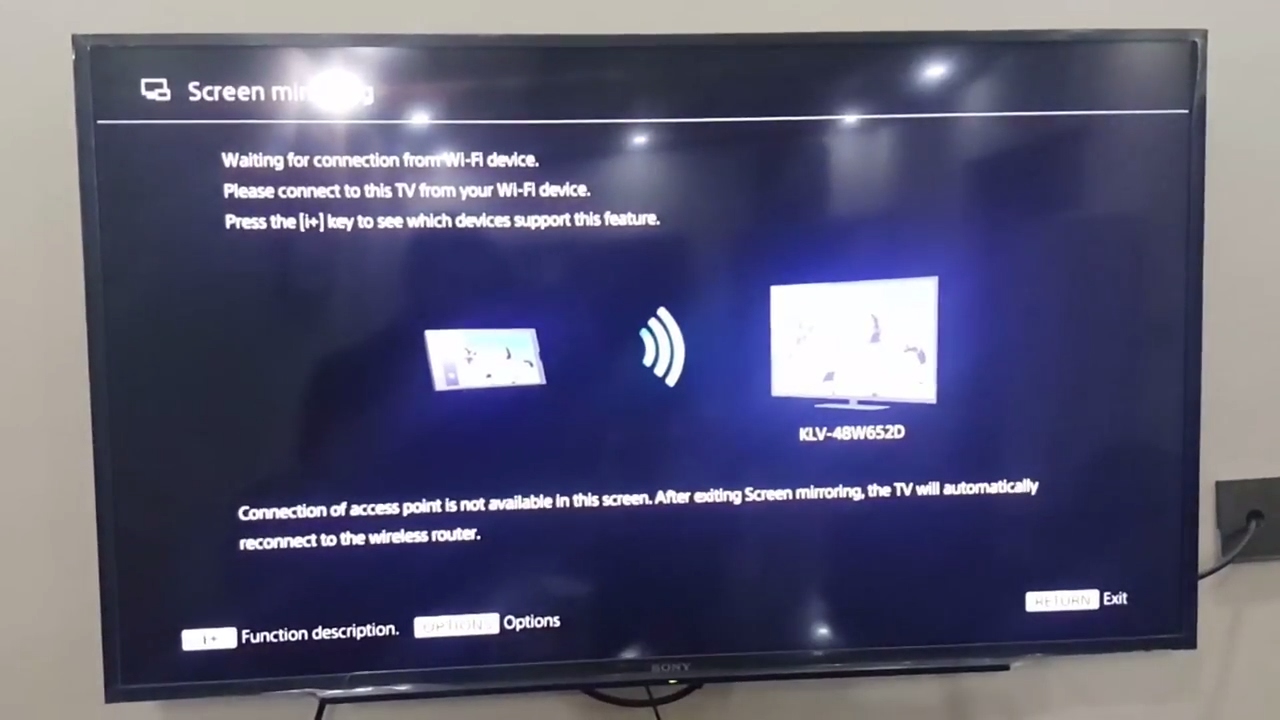
Step 5: Adjust the display settings on your smart TV
Now that you have successfully adjusted the display settings on your laptop, it’s time to fine-tune the display settings on your smart TV to optimize the viewing experience.
Start by accessing the settings menu on your smart TV. The location and layout of the settings menu may vary, so refer to your TV’s user manual if you’re unsure how to navigate to the settings.
Within the settings menu, look for display or picture settings. These options will allow you to adjust various aspects of the display, such as brightness, contrast, and color settings.
Most smart TVs also offer preset picture modes, such as Standard, Cinema, Sports, or Game, that are optimized for different types of content. Experiment with these picture modes to find the one that best suits your preferences and the nature of the content you’ll be consuming.
If your smart TV has advanced display settings, you may have the option to adjust more specific parameters, such as sharpness, color temperature, or motion smoothing. These settings can be fine-tuned based on personal preference, but be cautious not to overdo certain adjustments, as they might result in an artificial or unnatural viewing experience.
While adjusting the display settings on your smart TV, you may also come across audio settings. Take this opportunity to ensure that the audio output is set to the correct source, whether it’s through the TV’s internal speakers or an external audio system connected to the TV.
Once you’ve made the necessary adjustments to the display and audio settings on your smart TV, navigate through the settings menu and save or apply the changes. The TV should now be optimized to provide the best possible visual and audio experience for your laptop content.
It’s important to note that each smart TV model may have slightly different display settings and options available. Take your time to explore the settings menu and experiment with different adjustments until you find the settings that deliver the desired viewing experience.
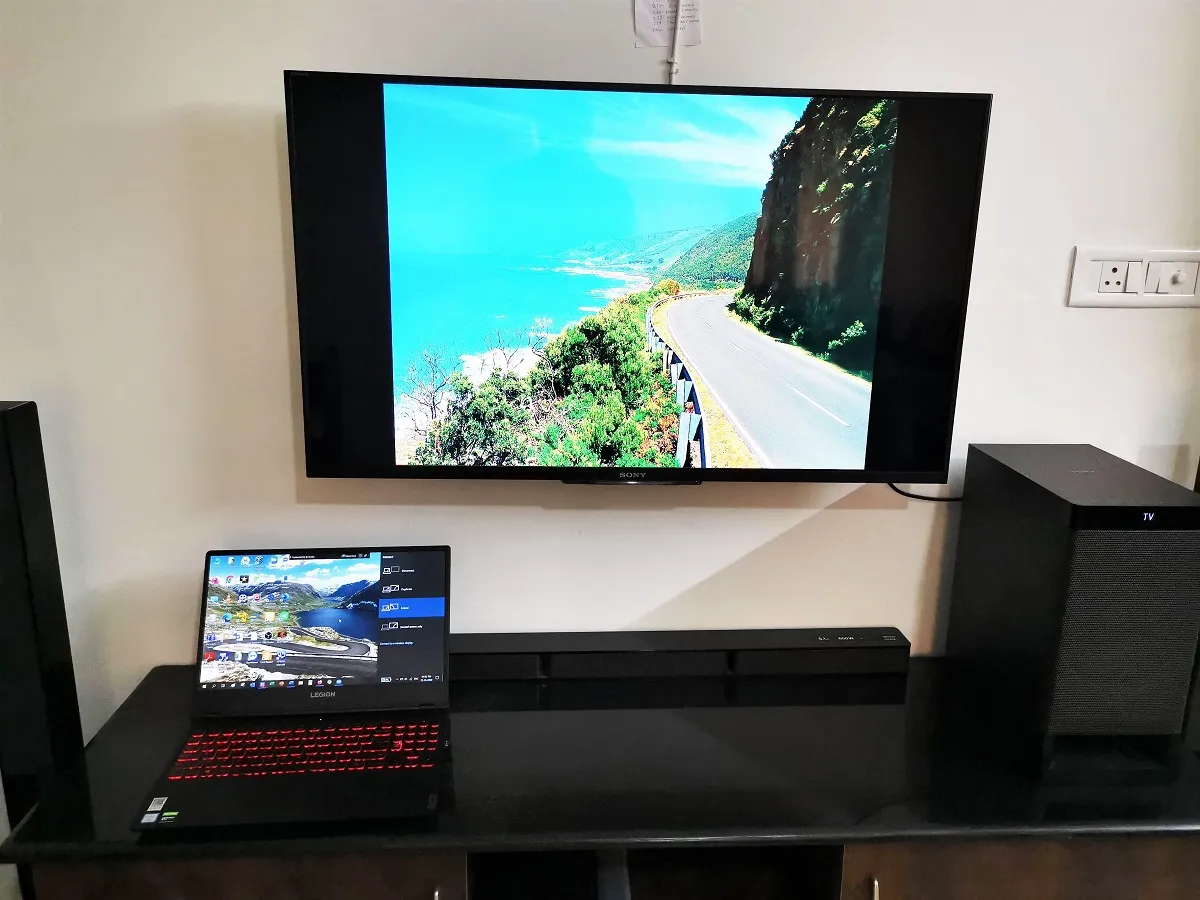
With the display settings on both your laptop and smart TV properly adjusted, you’re now ready to test the connection and start enjoying your favorite content on the big screen. In the next step, we will discuss how to troubleshoot any potential issues that may arise during the process.
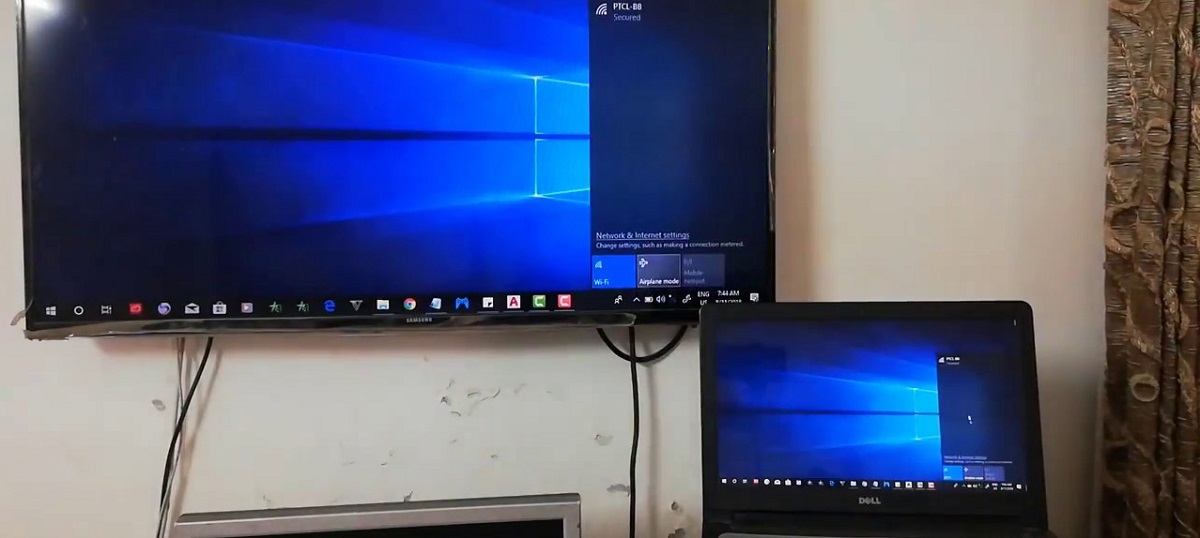
Step 6: Test the connection and troubleshoot any issues
After completing the previous steps to connect and adjust the display settings, it’s time to test the connection between your laptop and smart TV and ensure everything is working smoothly. Here’s how:
Start by turning on your laptop and smart TV. Make sure both devices are powered up and functioning properly.
Next, select the appropriate input source on your smart TV. Use your TV’s remote control to navigate to the input or source button and select the HDMI or VGA input that corresponds to the port you connected your laptop to.
On your laptop, check if the external display is detected. Depending on your operating system, you may need to press the “Windows key + P” on a Windows laptop or go to the display settings in the Apple menu on a Mac.
If your laptop recognizes the smart TV as an external display, you should see the laptop screen extended or mirrored on the TV screen. If not, try the following troubleshooting steps:
- Double-check the connections: Ensure that all the cables and adapters are securely plugged in and properly inserted.
- Restart your laptop and smart TV: Sometimes a simple restart can resolve any temporary software glitches.
- Update drivers: Visit the official website of your laptop’s manufacturer and update the graphics drivers to the latest version. Outdated drivers can cause compatibility issues.
- Try a different cable or adapter: If you have access to alternative cables or adapters, swap them out to determine if the issue lies in the connection equipment.
If you still encounter issues, consult the user manual for your laptop and smart TV or reach out to the respective manufacturers’ support for further assistance.
Once you have successfully tested the connection and resolved any issues, you can start enjoying the benefits of having your laptop connected to your smart TV. Whether it’s streaming movies, playing games, or delivering presentations, you now have the capability to enjoy a larger and more immersive viewing experience.
Congratulations, you have successfully connected your laptop to your smart TV and are ready to explore the endless possibilities!
Conclusion
Connecting your laptop to your smart TV opens up a world of possibilities, allowing you to enjoy your favorite content on a bigger screen and transforming your living room into a personal entertainment hub. By following the steps outlined in this guide, you can easily establish a connection between your devices and enhance your viewing experience.
Starting with identifying the available ports on your laptop and smart TV, you can determine the type of cable or adapter needed for the connection. Choosing the appropriate cable or adapter is crucial for ensuring compatibility and optimal performance.
After connecting the cable or adapter to both devices, adjusting the display settings on your laptop is essential to ensure the best visual output on your smart TV. Fine-tuning parameters such as resolution, aspect ratio, and color calibration can greatly enhance the viewing experience.
Similarly, adjusting the display settings on your smart TV, including brightness, contrast, and picture modes, allows for further optimization and customization. Don’t forget to also check the audio settings to ensure the audio output is set correctly.
Once you have made all the necessary adjustments, testing the connection and troubleshooting any issues is the final step. Double-checking the connections and exploring potential software-related problems can help ensure a smooth and uninterrupted connection between your laptop and smart TV.
With the connection successfully established, you can now enjoy the benefits of a larger display and immersive experience. Whether you’re streaming movies, playing games, or giving presentations, the combination of your laptop and smart TV provides a new level of entertainment and versatility.
Remember, each laptop and smart TV model may have slight variations in terms of ports, settings, and troubleshooting methods. Always refer to the user manuals or contact the manufacturers’ support if you encounter any specific issues or require further assistance.
Now that you have the knowledge and steps to connect your laptop to your smart TV, it’s time to sit back, relax, and enjoy your favorite content on the big screen!