Introduction
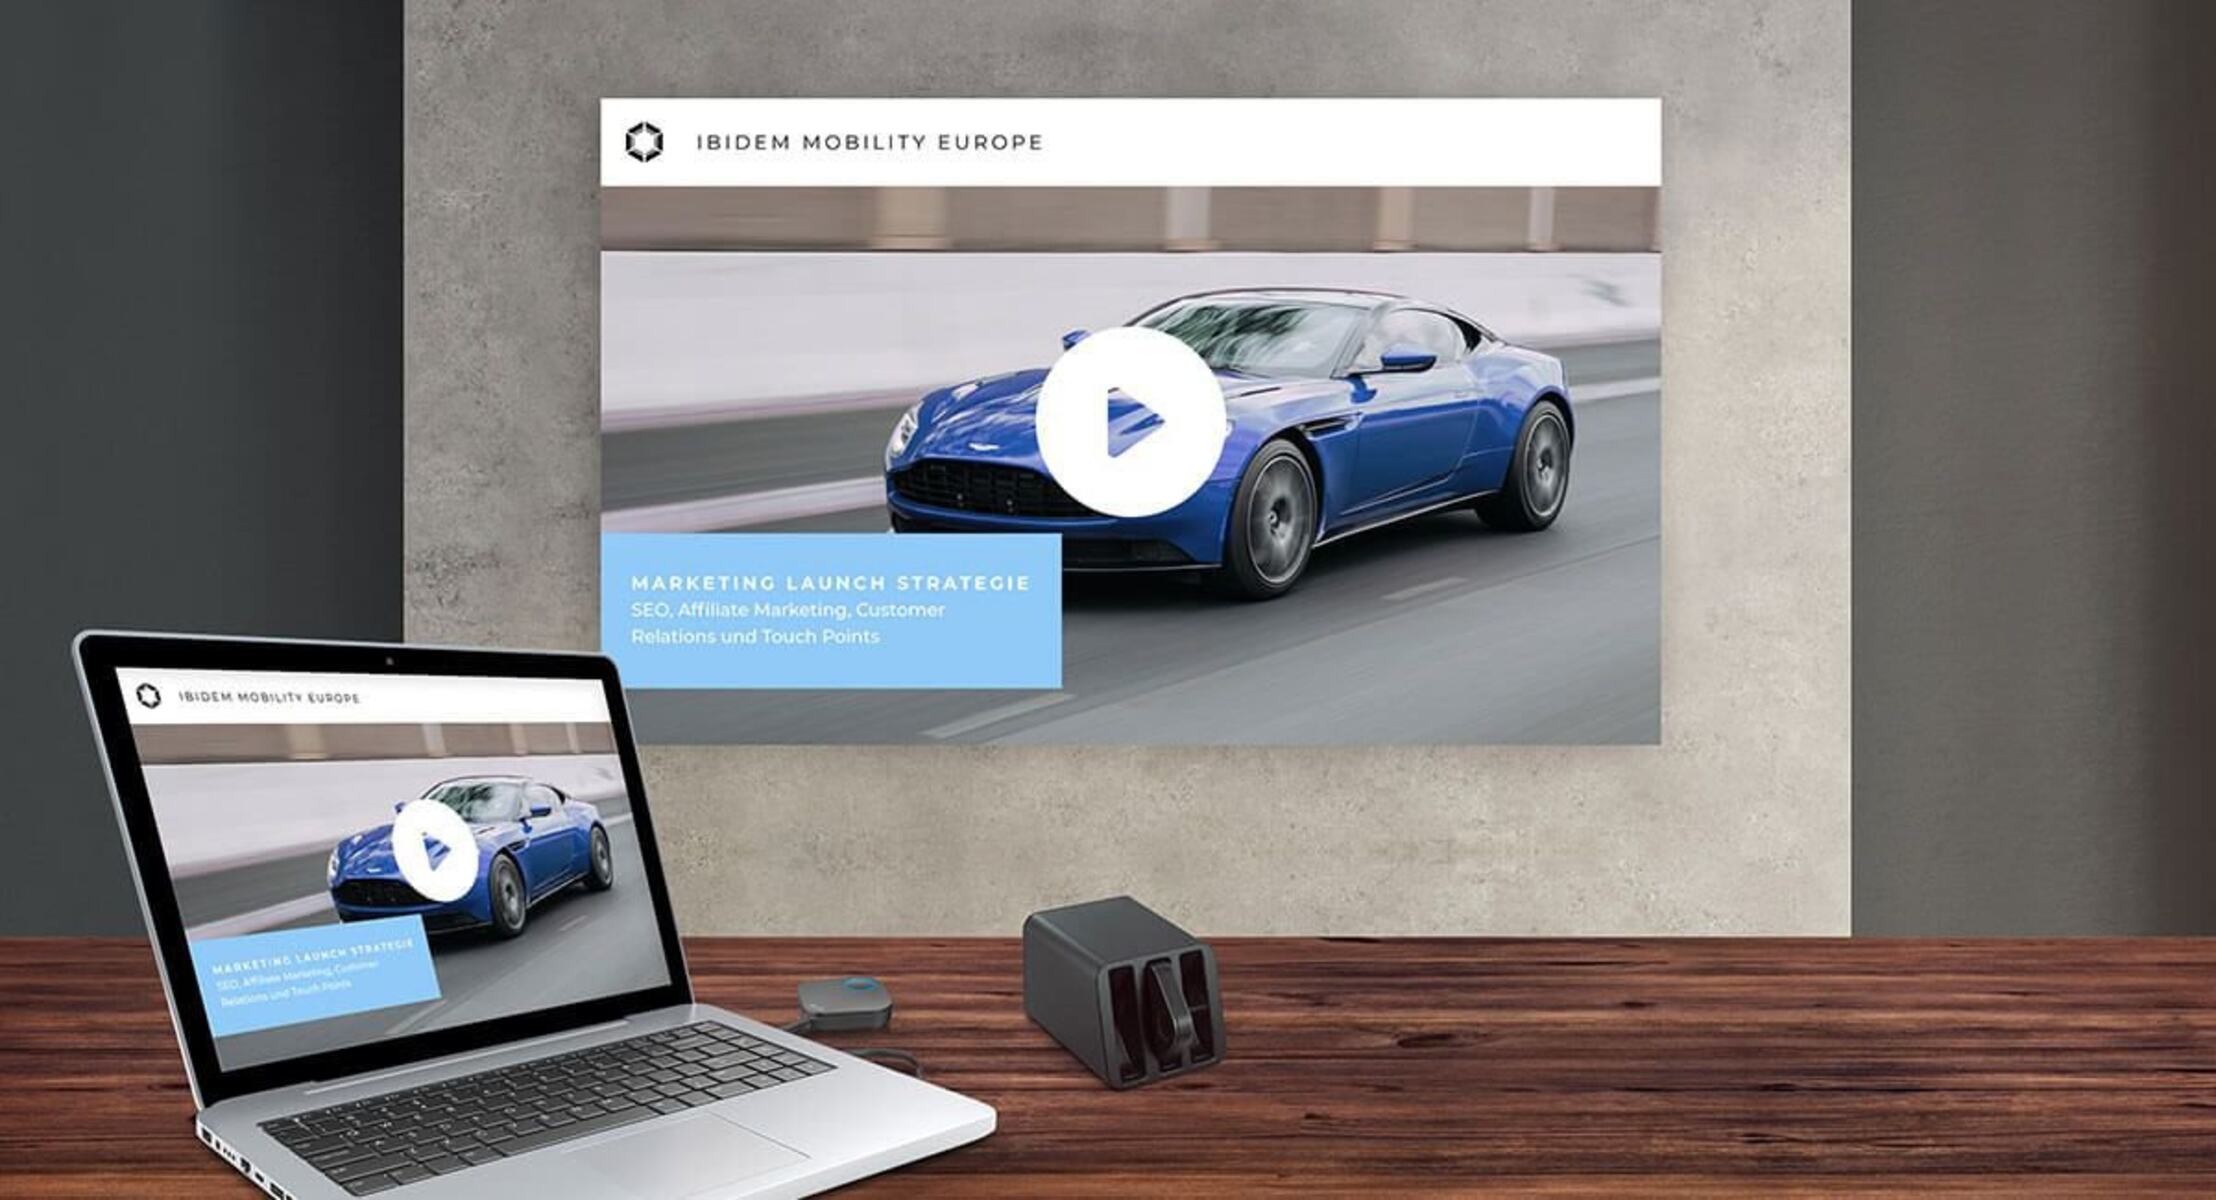
Connecting a Mac to a projector using an HDMI cable is a convenient way to display your screen on a larger display for presentations, movies, or gaming. Whether you’re a student, professional, or simply want to enjoy your favorite content on a bigger screen, knowing how to connect your Mac to a projector is a useful skill to have.
With the rise in popularity of HDMI as a standard video interface, most modern projectors come equipped with HDMI ports. Mac computers, including MacBook Air, MacBook Pro, and iMac, also feature HDMI ports to connect to external displays. This compatibility makes connecting a Mac to a projector hassle-free and ensures high-quality video and audio output.
In this guide, we’ll walk you through the step-by-step process of connecting your Mac to a projector using an HDMI cable. We’ll also provide tips and troubleshooting techniques to help you resolve any common issues that may arise during the connection process.
Before we begin, it’s important to note that the specific steps may vary slightly depending on the model and operating system of your Mac, as well as the brand and model of the projector you are using. However, the general principles outlined in this guide will apply to most Macs and projectors.
Now, let’s dive in and learn how to connect your Mac to a projector using an HDMI cable!
Step 1: Check the compatibility
Before connecting your Mac to a projector using an HDMI cable, it’s essential to ensure compatibility between your devices. This involves checking the HDMI port availability on your Mac and verifying that your projector has an HDMI input.
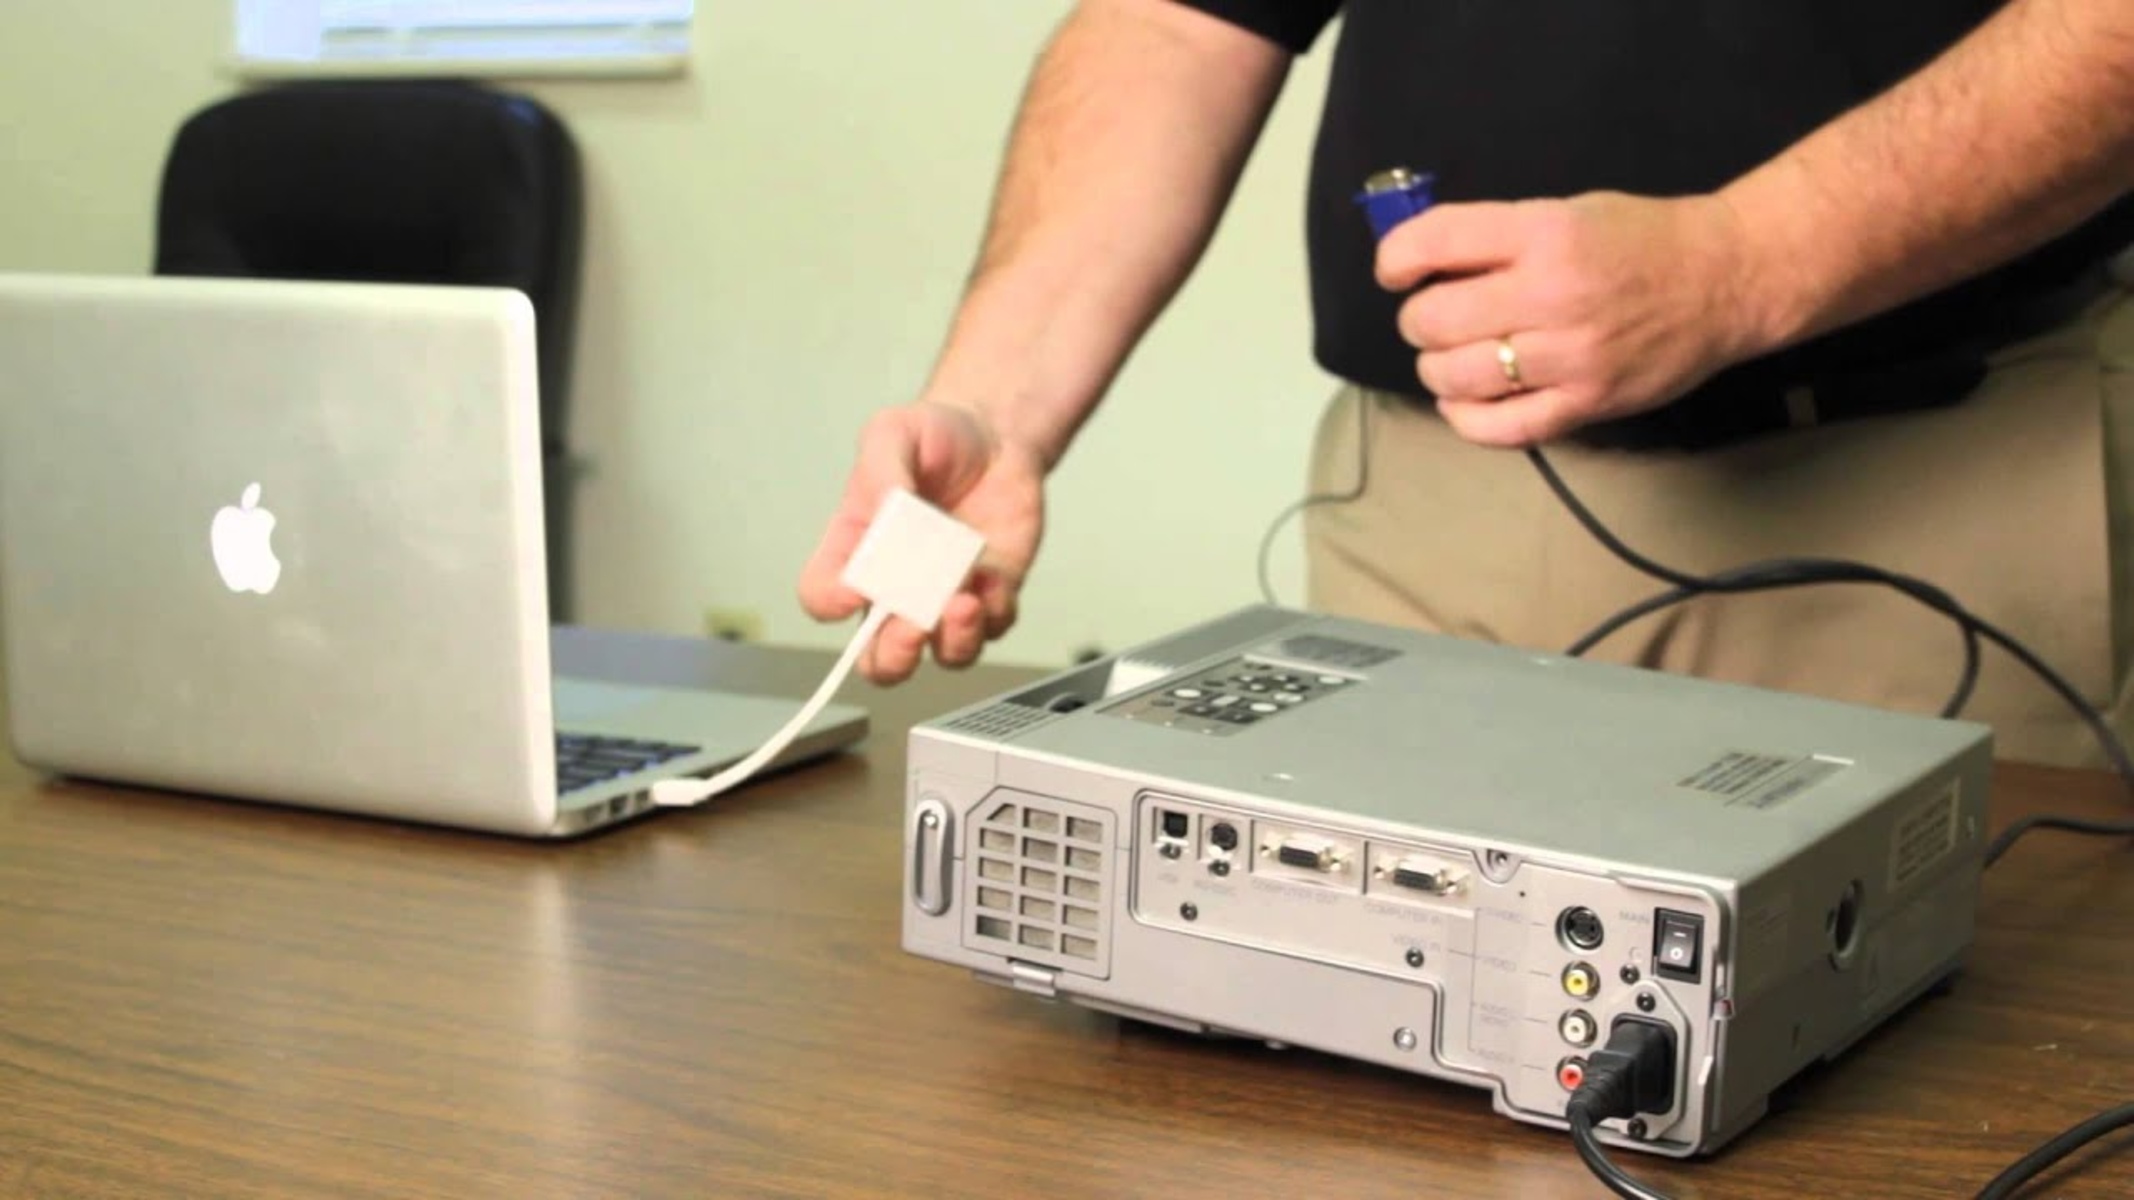
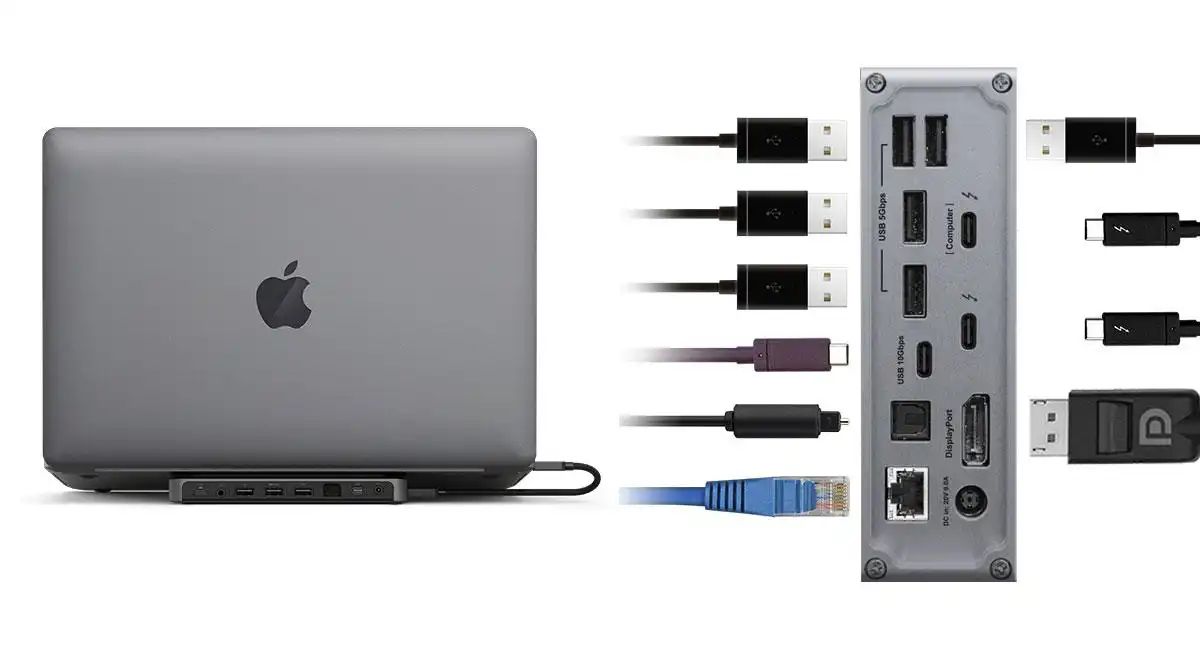
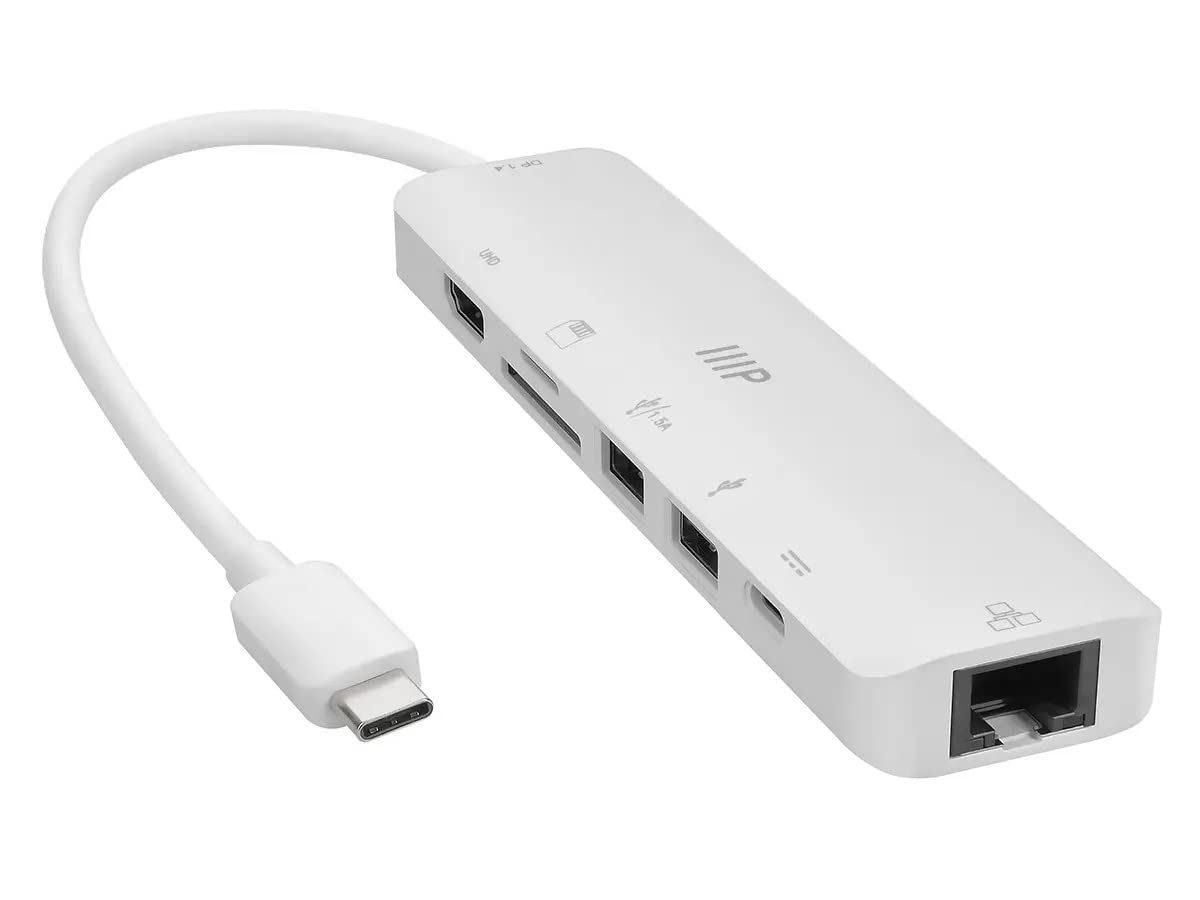
Start by examining your Mac’s ports. Depending on the model, you may find an HDMI port labeled with the standard HDMI logo on the side or back of your Mac. If your Mac doesn’t have a built-in HDMI port, you may need to use an adapter that converts other ports, such as Thunderbolt or USB-C, to HDMI.
Next, explore your projector’s ports. Look for an HDMI input port on the back or side of the projector. This port is usually labeled as “HDMI” or represented by an HDMI logo. If your projector doesn’t have an HDMI input, check if it has a VGA or DVI input and consider using the appropriate adapter to connect to your Mac.
Once you’ve confirmed that both your Mac and projector have HDMI compatibility, you’re ready to move on to the next step. It’s worth noting that some older Mac models may have Mini DisplayPort or Thunderbolt ports instead of HDMI. In such cases, you’ll need the respective adapters to connect to the projector.
Now that you’ve checked the compatibility between your Mac and the projector, you can proceed with gathering the necessary equipment to establish a successful connection.
Step 2: Gather the necessary equipment
Before you can connect your Mac to a projector using an HDMI cable, it’s essential to assemble the required equipment. Here’s a list of items you’ll need:
- An HDMI cable: Ensure that you have a high-quality HDMI cable that is long enough to connect your Mac to the projector. If your devices have different HDMI port sizes, you may need an adapter or HDMI cable with different connectors on each end.
- A Mac with HDMI output or the necessary adapter: Make sure your Mac has an HDMI output port. If not, you may need an adapter that converts your Mac’s display port to HDMI. Check the specific ports on your Mac model and acquire the appropriate adapter if needed.
- A compatible projector with HDMI input: Verify that the projector you’re using has an HDMI input port. Some projectors may have multiple HDMI ports, so choose the one that suits your setup. If your projector doesn’t have an HDMI input, consider using the appropriate adapter to connect your Mac to the available VGA or DVI input.
- Power cables: Ensure that both your Mac and projector are plugged into power outlets. This will provide the necessary power to operate both devices effectively.
Once you have gathered these essential items, you’re ready to proceed to the next step and physically connect your Mac to the projector using the HDMI cable.
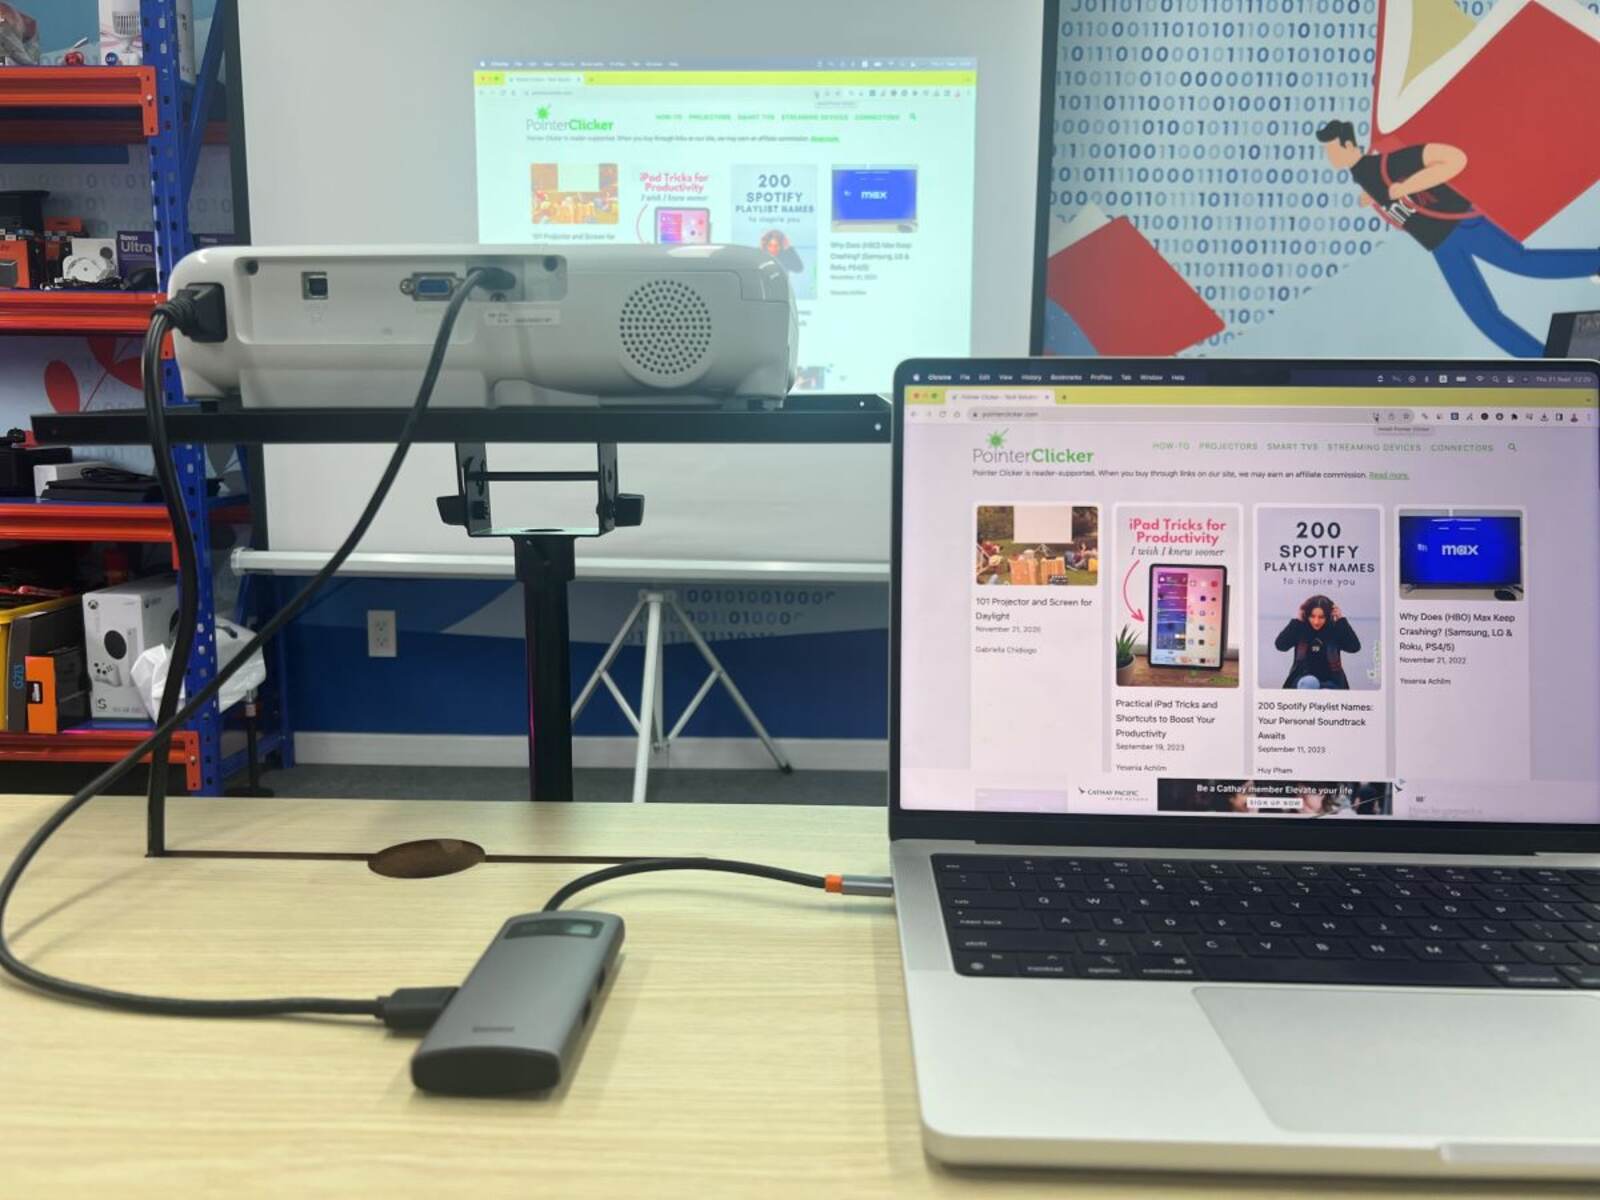
Step 3: Connect the Mac to the projector using an HDMI cable
Now that you have your equipment ready, it’s time to connect your Mac to the projector using an HDMI cable. Follow these simple steps:
- Locate the HDMI port on your Mac. It is usually found on the side or back of the device and is labeled with the HDMI logo.
- Take one end of the HDMI cable and securely plug it into the HDMI port on your Mac.
- Next, locate the HDMI input port on the projector. It is usually located at the back or side of the projector and labeled as “HDMI” or represented by the HDMI logo.
- Take the other end of the HDMI cable and connect it to the HDMI input port on your projector.
- Ensure that both ends of the HDMI cable are securely plugged in to avoid any connection issues or signal disruptions.
Once you have successfully connected your Mac to the projector using the HDMI cable, you can proceed to the next step and adjust the display settings on your Mac.
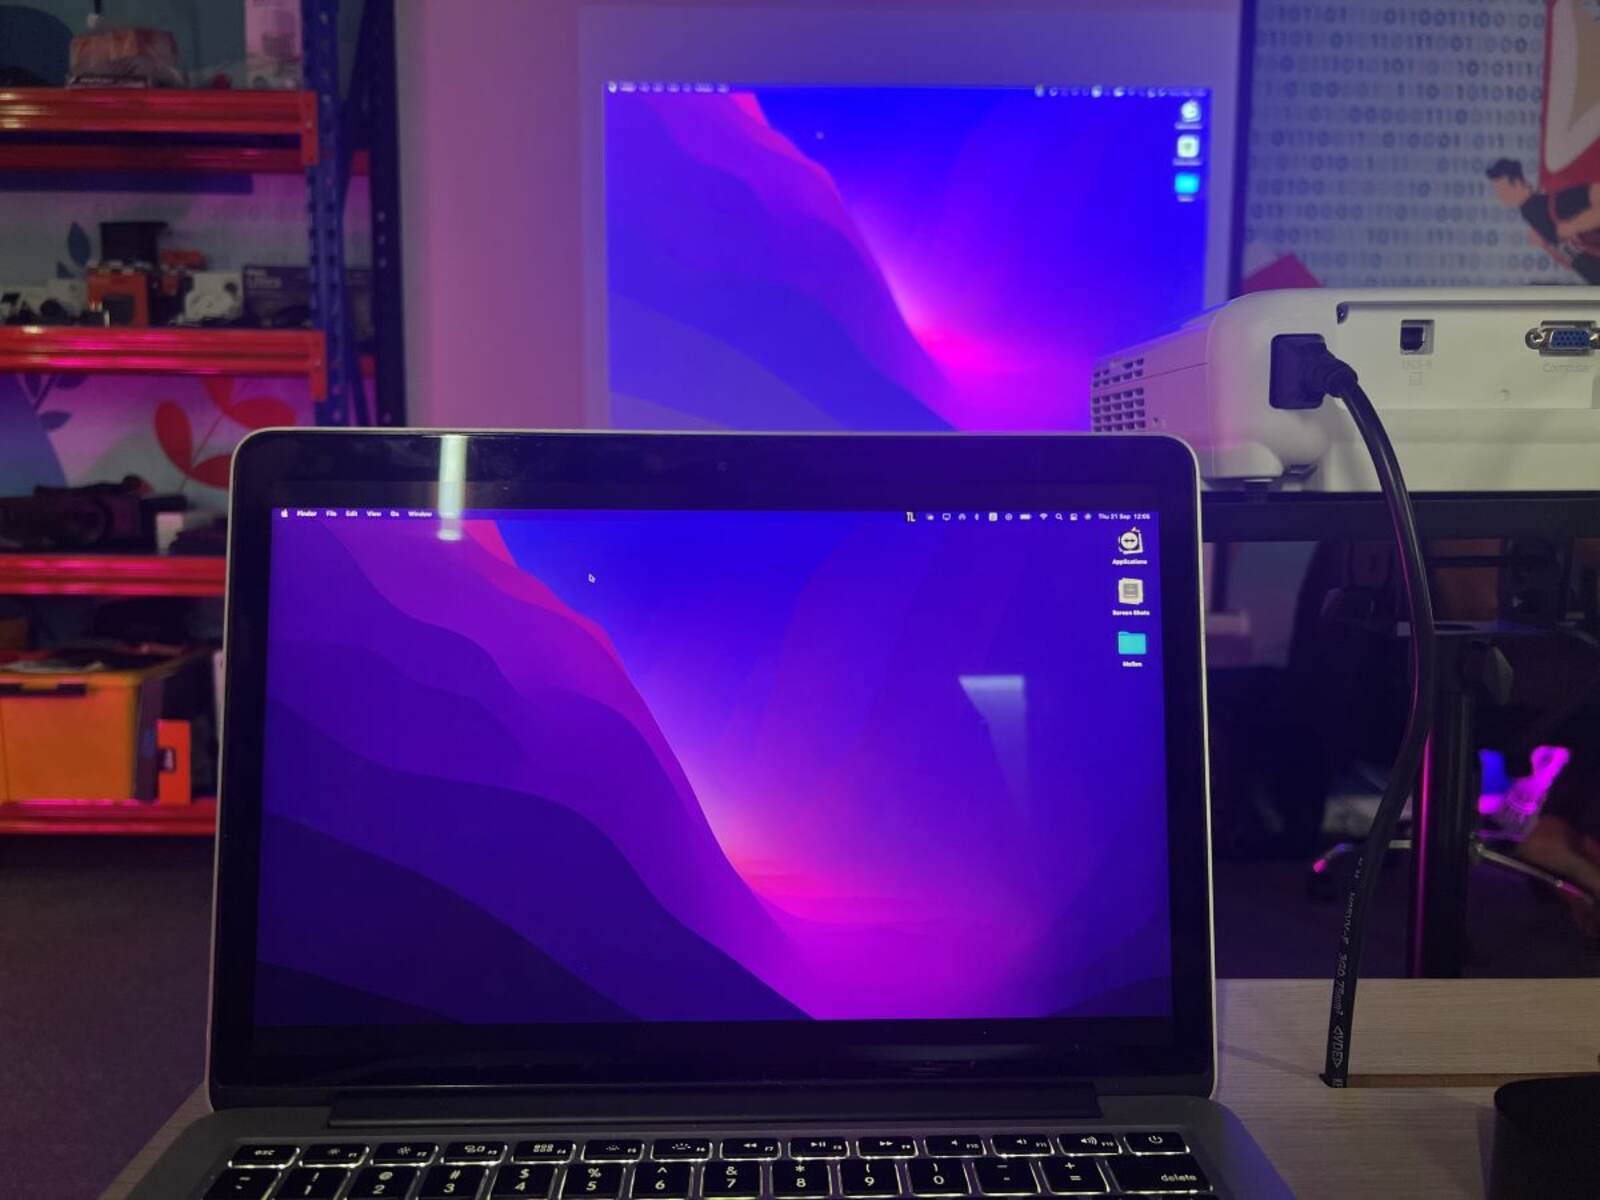
Step 4: Adjust the display settings on your Mac
After connecting your Mac to the projector using an HDMI cable, it’s important to adjust the display settings on your Mac to ensure the optimal viewing experience. Here’s how you can do it:
- On your Mac, go to the Apple menu located in the top-left corner of your screen and select “System Preferences.”
- In the System Preferences window, click on the “Displays” option.
- A new window will open with display settings. Click on the “Arrangement” tab.
- Check the “Mirror Displays” option if you want the same content to appear on both your Mac’s screen and the projector. If you prefer to extend your desktop and have separate content on each display, leave this option unchecked.
- Adjust the resolution and refresh rate settings if needed. The recommended resolution for your projector will vary depending on its specifications, so choose the appropriate setting for optimal display quality.
- Once you have made the necessary adjustments, close the System Preferences window.
At this point, your Mac should be successfully connected to the projector, and the display settings should be adjusted according to your preferences. If you’re experiencing any issues with the display, double-check the connections and try restarting your Mac to ensure a proper connection.
Now that you’ve adjusted the display settings on your Mac, you’re almost ready to start using your Mac with the connected projector. However, if you encounter any common issues during the process, don’t worry. We’ll provide troubleshooting tips in the next step to help you overcome them.
Step 5: Troubleshooting common issues
While connecting your Mac to a projector using an HDMI cable is usually a straightforward process, you may encounter some common issues along the way. Here are some troubleshooting tips to help you overcome these challenges:
- No signal or blank screen: If you don’t see any content on the projector screen, ensure that both ends of the HDMI cable are securely plugged in. Also, check if the projector is set to the correct input source (HDMI). Restarting your Mac and the projector can also help resolve any temporary issues.
- Poor display quality: If the display quality on the projector is not satisfactory, consider adjusting the resolution and refresh rate settings on your Mac’s display preferences. You can experiment with different settings to find the optimal configuration for your specific projector model.
- No audio: If you’re not getting audio from the projector, check if the audio output is set to the HDMI connection on your Mac’s sound preferences. Also, ensure that the volume on the projector and your Mac is not muted or set too low. If the issue persists, try using a separate audio cable to connect your Mac’s audio output to the projector’s audio input.
- Adapter issues: If you’re using an adapter to connect your Mac to the projector, ensure that it is compatible with your specific Mac model and the projector. Some adapters may require additional drivers or software updates to function correctly. Check the manufacturer’s instructions or website for any necessary updates or troubleshooting steps.
- Unstable connection: If the connection between your Mac and the projector is intermittent or unstable, try using a different HDMI cable. Sometimes, faulty or low-quality cables can cause connection issues. Additionally, avoid placing any devices or objects near the HDMI cable that may interfere with the signal.
By following these troubleshooting tips, you can resolve common issues that may arise when connecting your Mac to a projector using an HDMI cable. However, if the problems persist or you encounter more complex issues, it may be helpful to consult the user manual or reach out to the support team of your Mac or projector manufacturer for further assistance.
Now that you’re equipped with troubleshooting knowledge, you can confidently connect your Mac to a projector and enjoy a seamless viewing experience.
Conclusion
Connecting your Mac to a projector using an HDMI cable opens up a world of possibilities for presentations, movie nights, gaming, and more. In this guide, we walked you through the step-by-step process of connecting your Mac to a projector using an HDMI cable. We started with checking the compatibility between your Mac and the projector, gathered the necessary equipment, physically connected the devices, adjusted the display settings on your Mac, and provided troubleshooting tips for common issues.
Remember to ensure that both your Mac and the projector have HDMI compatibility or use the appropriate adapters for compatibility. Gather the necessary equipment, including an HDMI cable, a Mac with HDMI output or the necessary adapter, and a compatible projector with an HDMI input.
Connect your Mac to the projector using the HDMI cable, making sure to securely plug both ends. Adjust the display settings on your Mac to enhance the viewing experience, and troubleshoot common issues such as no signal, poor display quality, no audio, adapter issues, and unstable connections.
By following these steps and troubleshooting tips, you can confidently connect your Mac to a projector using an HDMI cable and enjoy your favorite content on a larger, more immersive screen. Whether you’re giving a presentation, watching a movie, or playing games, this connection method provides a seamless and high-quality experience.
Remember, compatibility may vary depending on your specific Mac model and the projector you are using, so refer to the user manuals or contact the manufacturers for additional support if needed.
Now that you have mastered the process, unleash the full potential of your Mac and projector setup and enjoy the captivating visuals and immersive sound that comes with it!