Introduction
Welcome to this guide on how to connect a graphics card to the power supply. If you’re a computer enthusiast or a gamer looking to upgrade your machine’s graphics capabilities, you’ve come to the right place. The graphics card is a crucial component for any modern computer that is responsible for rendering and displaying high-quality graphics, whether you’re playing the latest AAA games or working on graphic-intensive projects. However, to ensure that your graphics card gets the power it needs to perform at its best, it needs to be properly connected to the power supply.
In this step-by-step guide, we’ll walk you through the process of connecting your graphics card to the power supply. By following this guide, you will be able to effectively power your graphics card and eliminate any compatibility or performance issues.
Before we get started, it’s important to note that different graphics cards and power supplies may have different connectors and cables. Make sure to consult the user manuals for your specific graphics card and power supply to ensure you’re using the correct cables and connectors. Additionally, it’s essential to take safety precautions while working inside your computer. Ensure that your computer is turned off and unplugged before making any connections.
Now, let’s dive into the step-by-step process of connecting your graphics card to the power supply and unleash its full potential.
Step 1: Gather the necessary equipment
Before you begin connecting your graphics card to the power supply, it’s important to gather all the necessary equipment. Here’s what you’ll need:
- A compatible graphics card: Make sure you have a graphics card that is compatible with your computer and meets your specific requirements. Consult the user manual or manufacturer’s website for details on compatibility.
- A suitable power supply: Ensure that your power supply has enough wattage to support the power requirements of your graphics card. Refer to the graphics card’s specifications or consult the manufacturer’s website for the recommended power supply wattage.
- Power cables: Depending on your power supply and graphics card, you may need specific power cables or adapters. Check the user manual or the manufacturer’s website for the required cables.
- Proper workspace: Find a well-lit and properly grounded workspace where you can comfortably work on your computer. Make sure to have all the necessary tools within reach.
- Static protection: To prevent any damage from static electricity, it’s recommended to use an anti-static wristband or touch a grounded metal surface before handling any sensitive computer components.
By having these essential tools and equipment ready, you’ll be well-prepared to efficiently connect your graphics card to the power supply.
Step 2: Locate the graphics card power connector
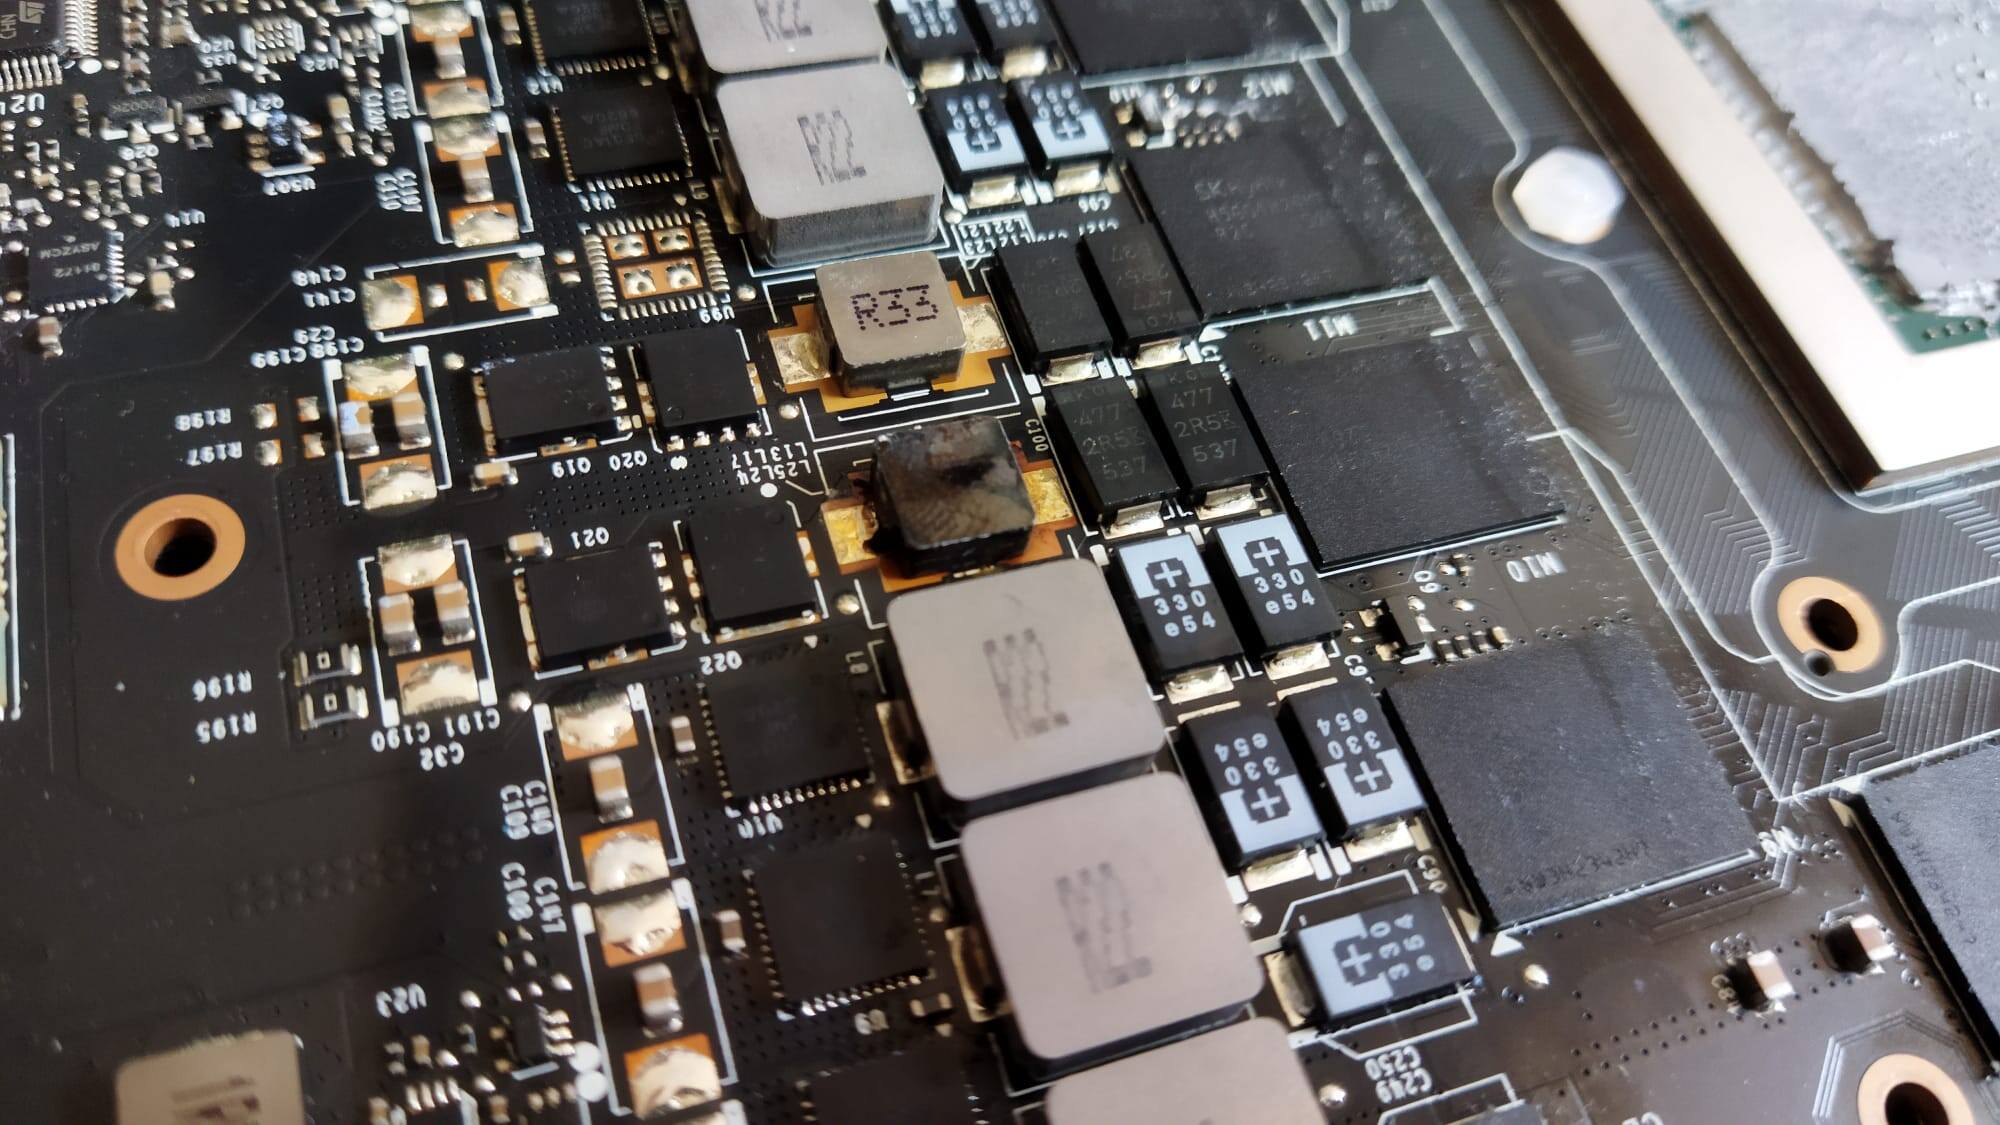
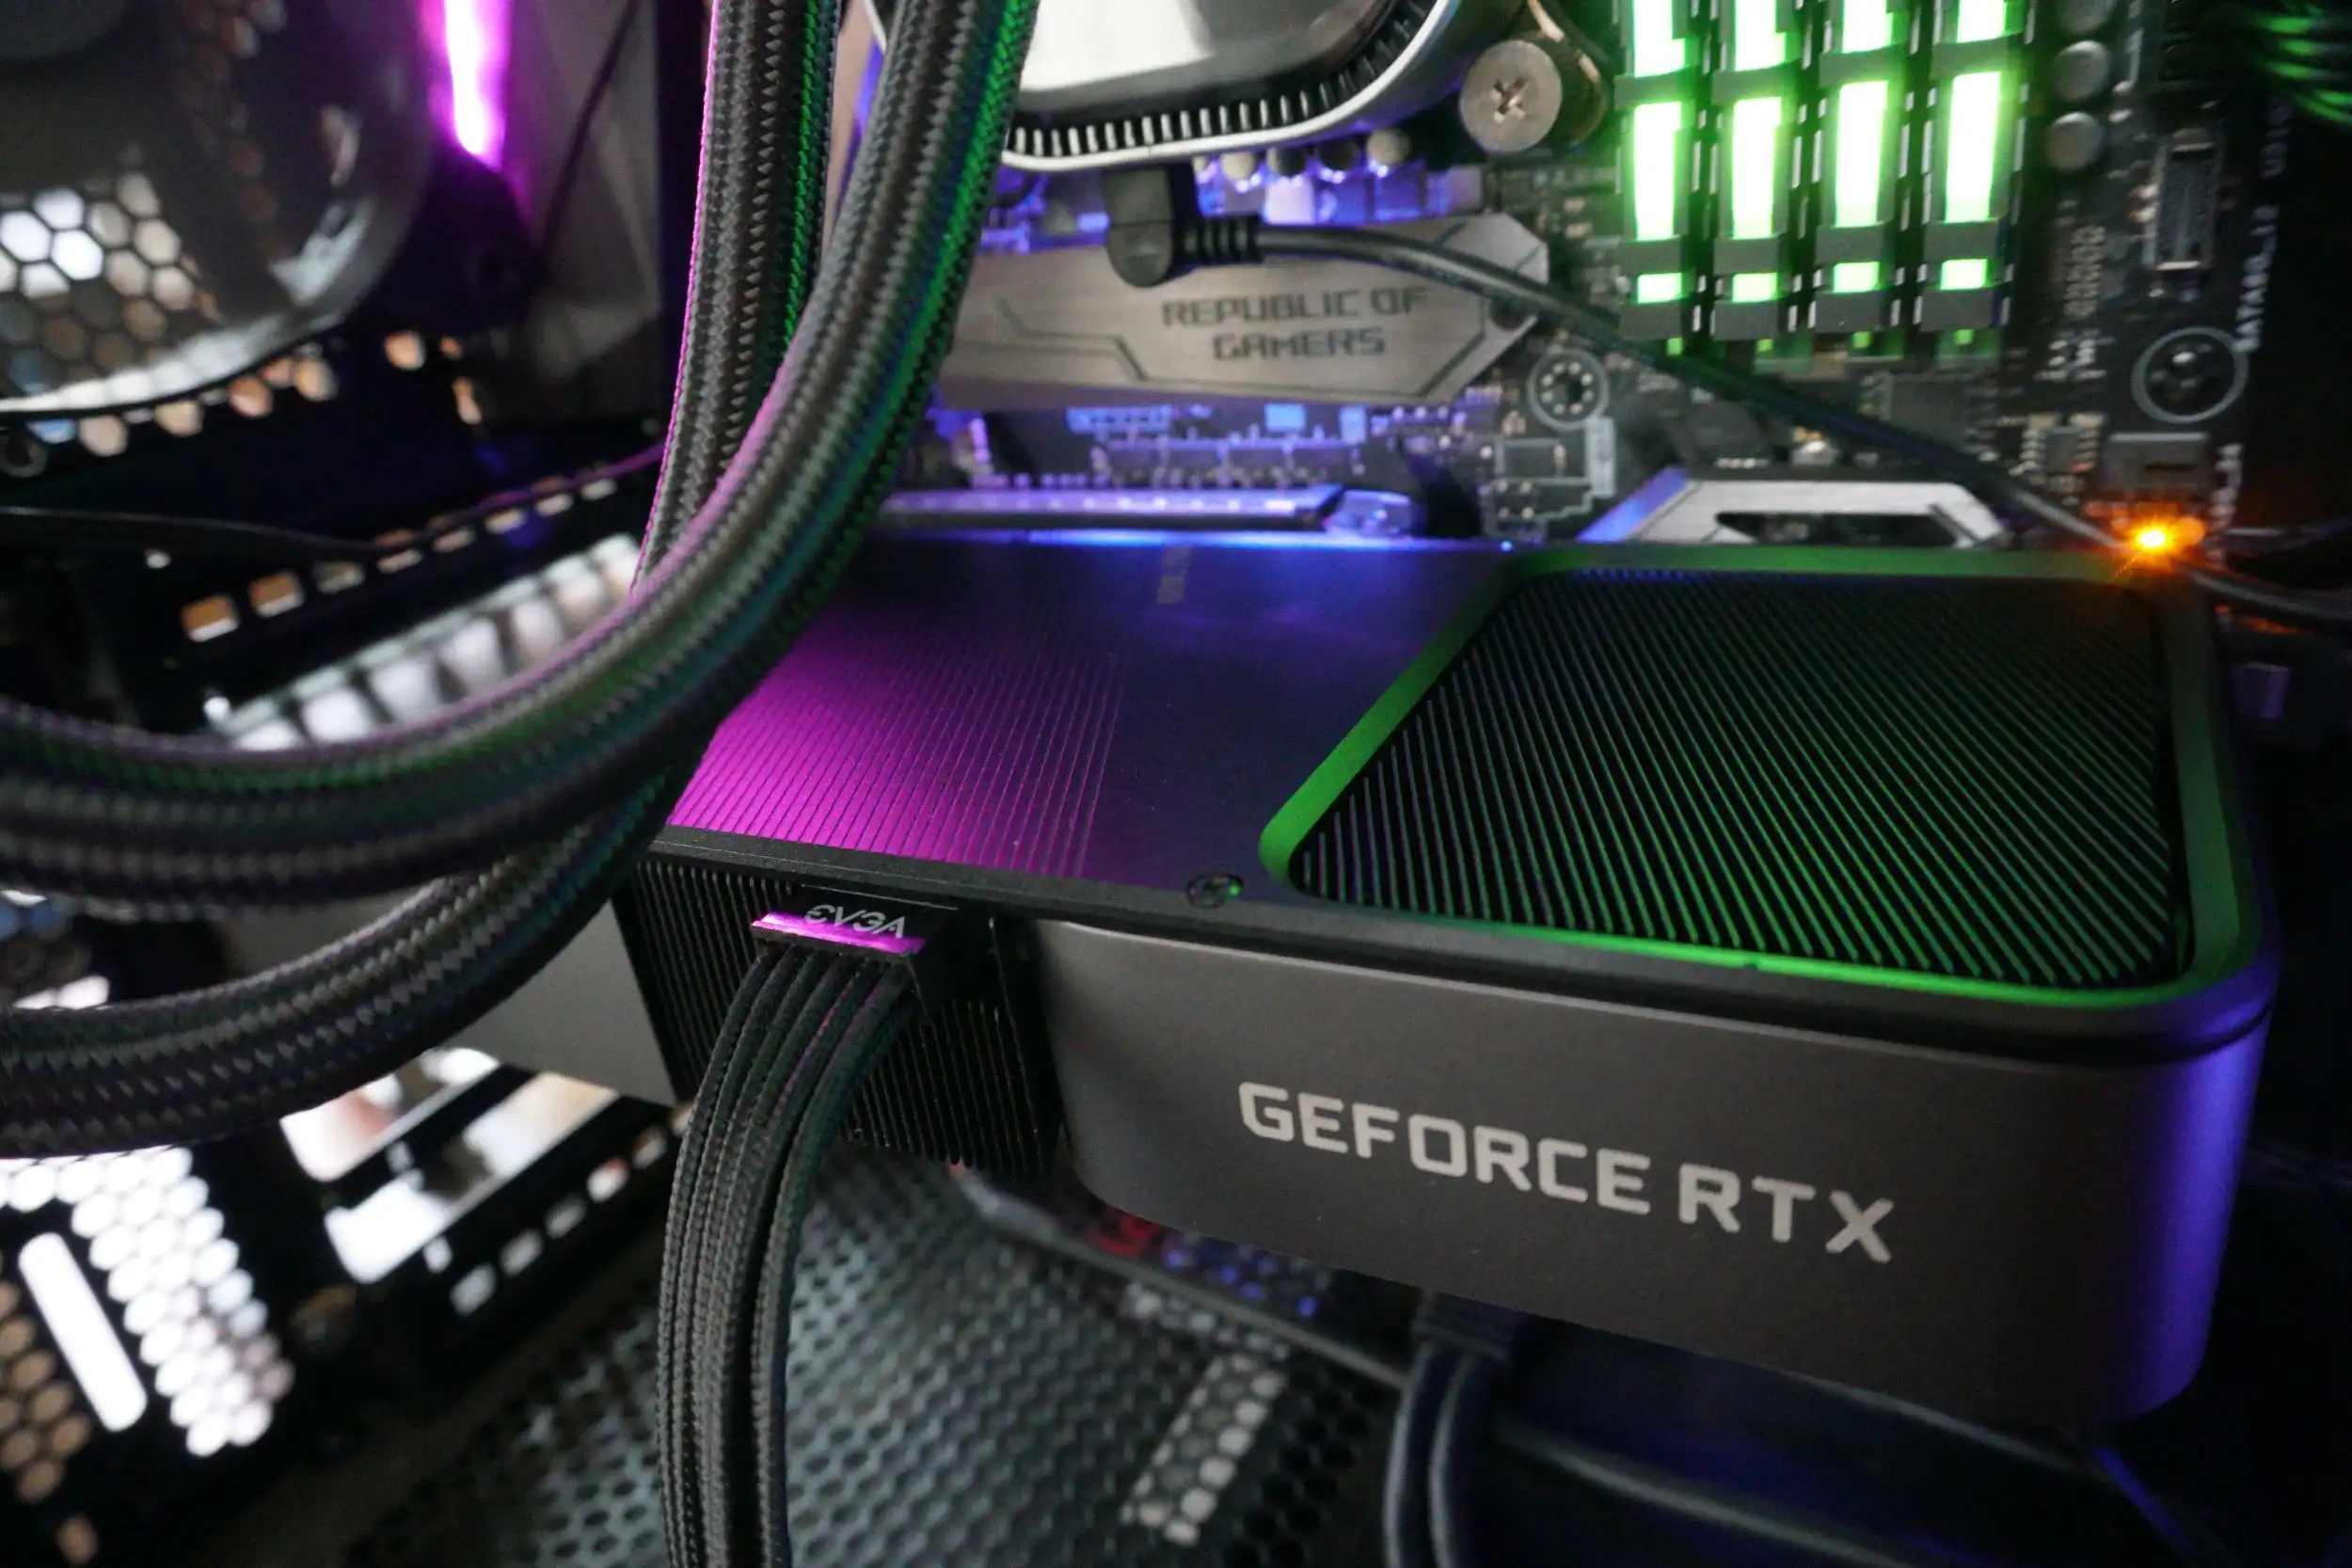
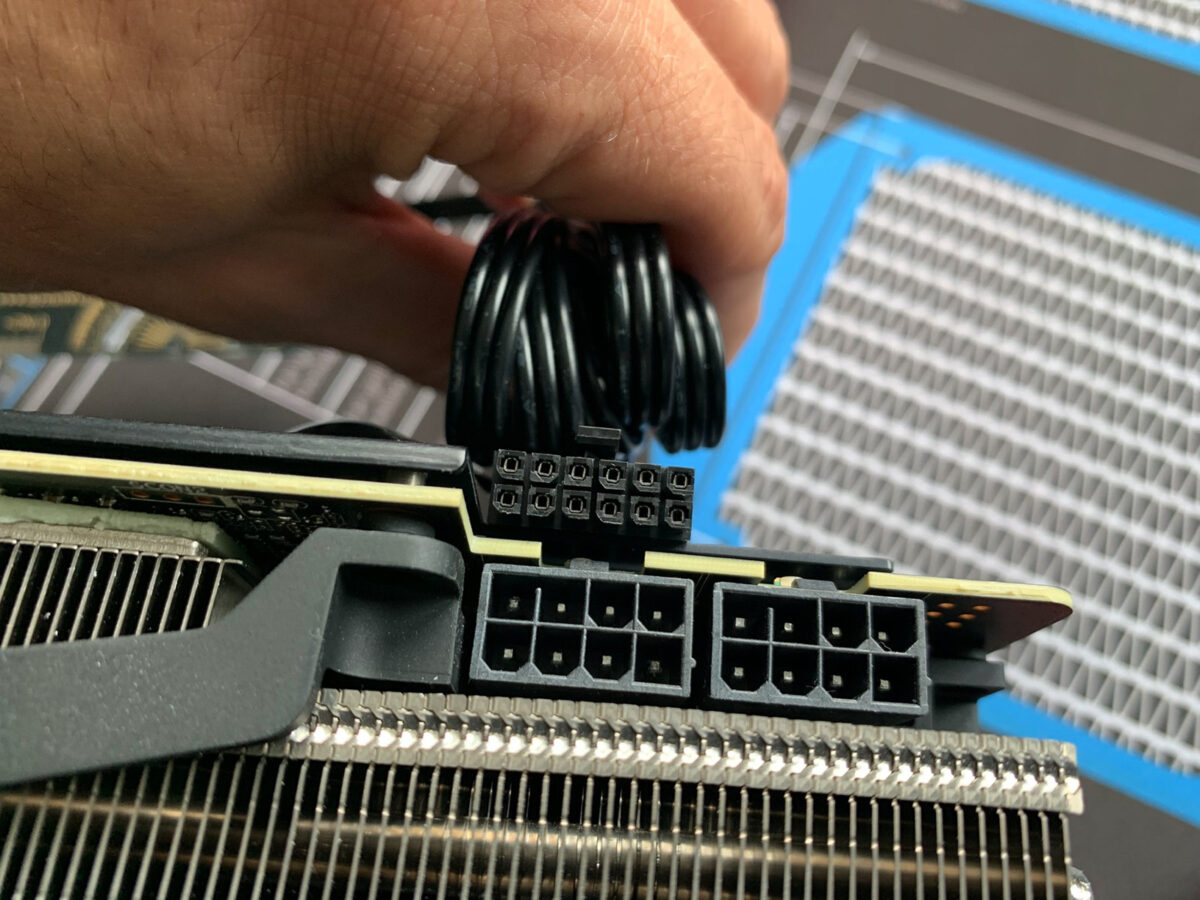
Once you have gathered all the necessary equipment, the next step is to locate the power connector on your graphics card. The power connector is where you will attach the power cable from the power supply to provide the necessary power for your graphics card to function properly.
The location of the graphics card power connector may vary depending on the make and model of your graphics card. In most cases, you will find the power connector located on the side or top-edge of the graphics card. It is typically a rectangular-shaped socket with multiple pins or connectors.
Refer to the user manual or documentation that came with your graphics card to identify the exact location and type of power connector. It’s important to ensure that you are using the correct power connector for your graphics card, as using the wrong connector can result in compatibility issues or damage to your components.
Take a close look at your graphics card and identify any labels or indications near the power connector that specify the required input voltage or the type of power connector to use. This information will guide you in selecting the appropriate power cable from your power supply.
Locating the graphics card power connector is an essential step in the process of connecting your graphics card to the power supply. Once you have identified the power connector, you can proceed to the next step of connecting the power cables from the power supply.
Step 3: Identify the power supply cables
Now that you have located the power connector on your graphics card, the next step is to identify the power supply cables that you will need to connect to the graphics card. The power supply cables are responsible for delivering the necessary power from the power supply unit to your graphics card.
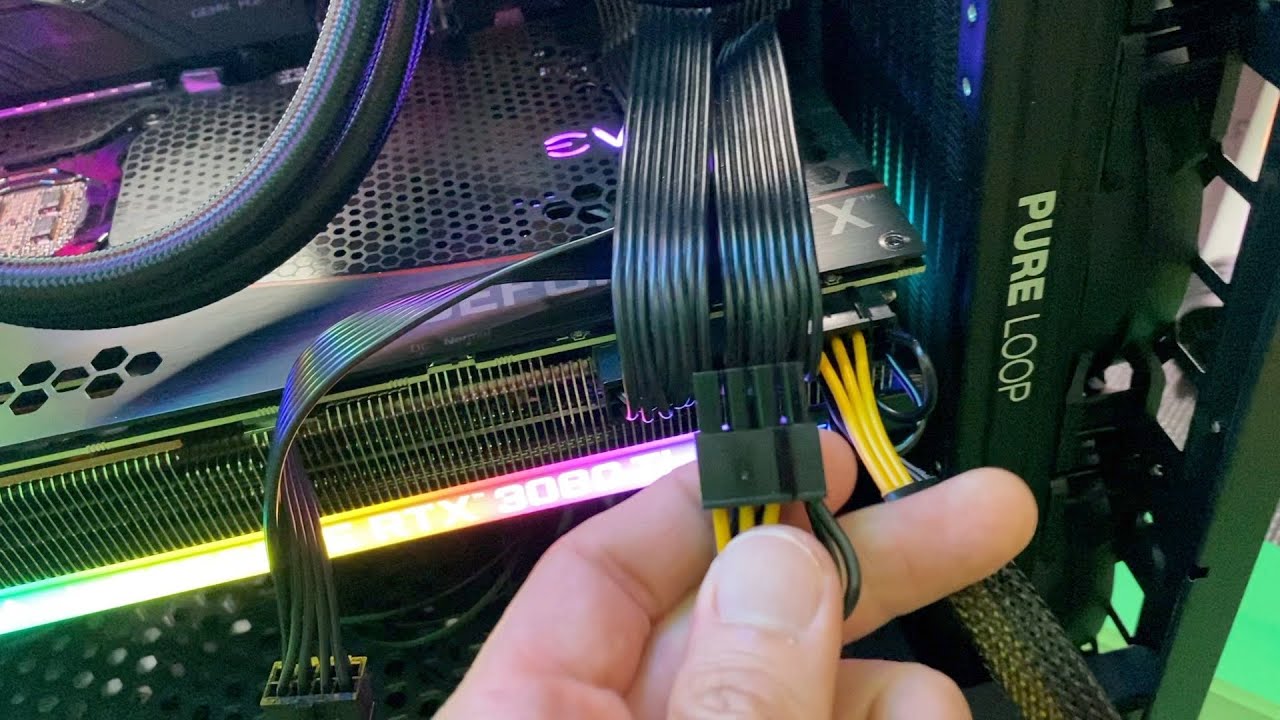
Look at the cables coming from your power supply and identify the cables that have the appropriate connectors for your graphics card. Most power supplies come with a variety of cables, including PCIe cables that are specifically designed for graphics cards.
Typically, the power supply cables used for graphics cards have a 6-pin or 8-pin connector on one end and a standard connector that plugs into the power supply unit on the other end. The connectors may be labeled as PCIe or GPU connectors.
It’s important to ensure that you are using the correct cables for your specific graphics card. Refer to the user manual or documentation provided with your graphics card for the recommended power supply cables and connector types.
If you are unsure about which cables to use or if your power supply does not have the necessary cables, you may need to purchase additional cables or adapters that are compatible with your power supply and graphics card.
By properly identifying the power supply cables that are compatible with your graphics card, you will be one step closer to connecting your graphics card to the power supply and unlocking its full potential.
Step 4: Connect the graphics card power cable to the power supply
Now that you have identified the power supply cables, it’s time to connect the graphics card power cable to the power supply. This step will ensure that your graphics card receives the necessary power to operate efficiently.
First, locate the appropriate power connectors on your power supply unit. These connectors are usually labeled as PCIe or GPU connectors. They may be in the form of 6-pin or 8-pin connectors, depending on your specific graphics card requirements.
Next, take the power cable that corresponds to your graphics card and connect it to the appropriate power connector on the power supply unit. Ensure that the connectors are aligned correctly and securely inserted. You may need to apply gentle pressure to ensure a snug fit. Be careful not to force the connection as it may cause damage to the connectors.
Once the power cable is securely connected to the power supply, route the cable through the back of your computer case using cable management techniques. This helps improve airflow and keeps your system neat and organized. Use cable ties or clips to secure the cable and prevent it from obstructing other components or fans inside the case.
Keep in mind that if your graphics card requires additional power cables, such as multiple 6-pin or 8-pin connectors, you will need to repeat this process for each required cable. Ensure that each cable is connected to the corresponding power connector on the power supply.
By properly connecting the graphics card power cable to the power supply, you are ensuring that your graphics card has access to the necessary power it needs to perform optimally.
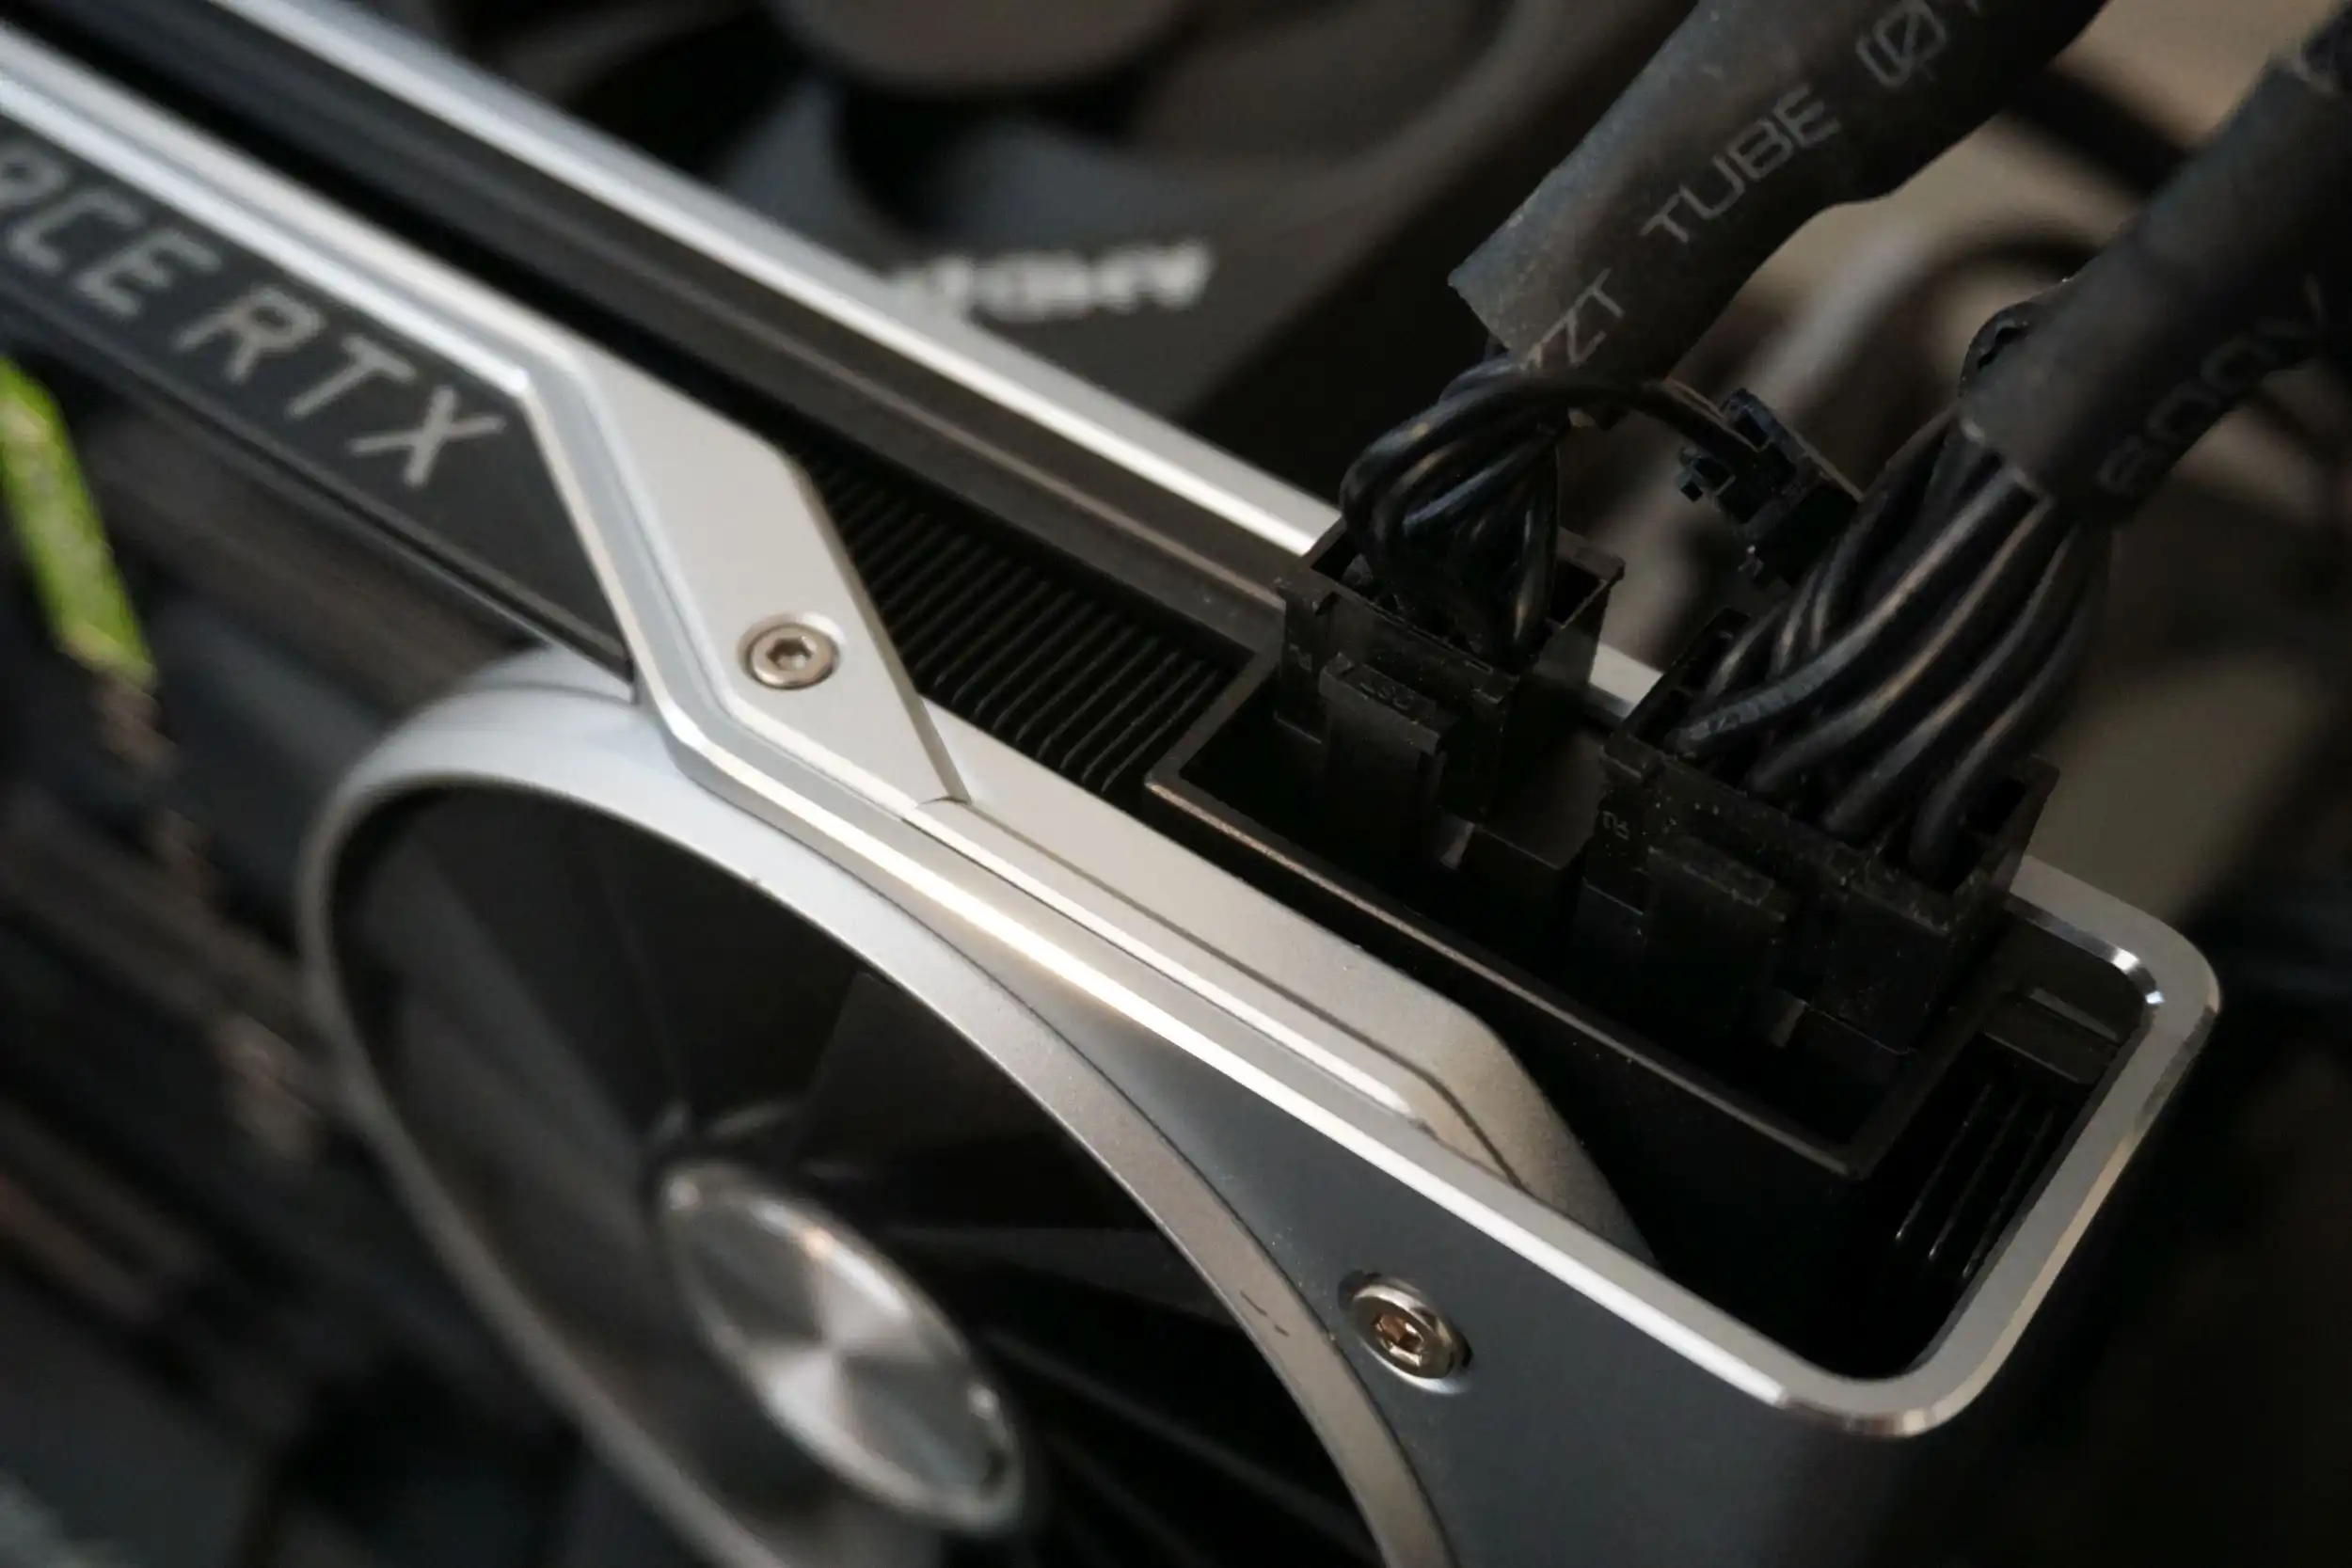
Step 5: Attach the graphics card power cable to the graphics card
Now that you have connected the power cable to the power supply, the next step is to attach the graphics card power cable to the graphics card itself. This step provides the necessary power from the power supply to the graphics card, allowing it to function properly.
Locate the power connector on your graphics card, which you identified in the earlier steps. It is typically a rectangular-shaped socket with multiple pins or connectors. Align the power cable connector with the graphics card power connector and gently insert it until it is securely connected. Ensure that the connectors are properly aligned and inserted.
If your graphics card requires multiple power connectors, repeat this process for each connector. Make sure each power cable is securely connected to its corresponding power connector on the graphics card. Take your time to ensure proper alignment and insertion to prevent any damage.
Once all the power cable connections are made, check that they are secure by gently tugging on them. If they are properly connected, they should not come loose or disconnect. However, be cautious not to apply excessive force while checking the connections.
After attaching the graphics card power cable to the graphics card, you can now proceed to the next step, where we will secure the connections to ensure they remain stable during operation.
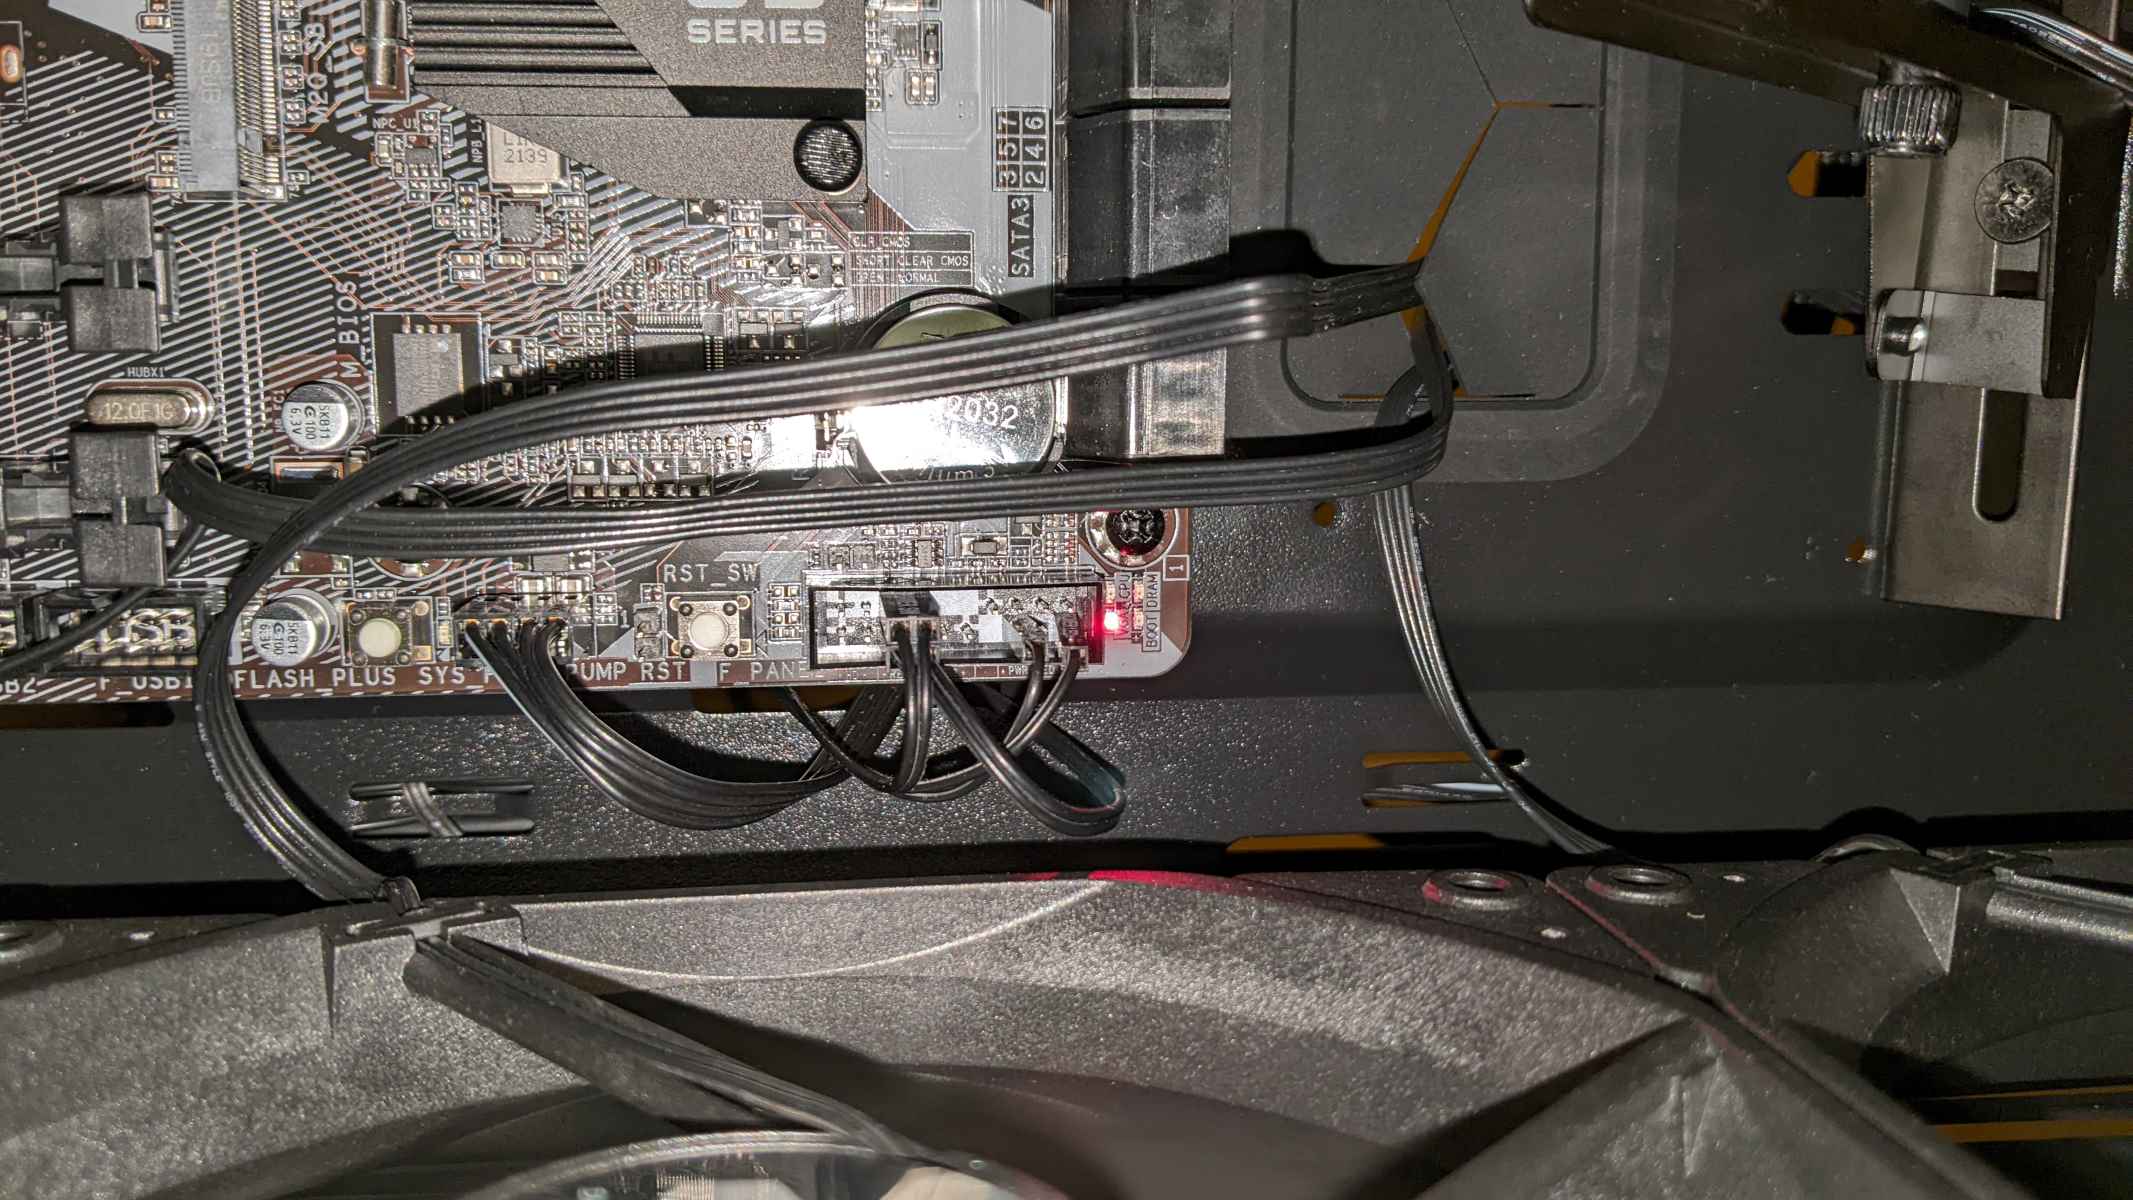
Step 6: Secure the connections
After connecting the power cable to both the power supply and the graphics card, it’s important to secure the connections to ensure they remain stable during operation. This will prevent any accidental disconnections that can disrupt the power supply to the graphics card.
Start by organizing the cables inside your computer case. Use cable ties, clips, or cable management solutions to neatly bundle and route the cables away from sensitive components and obstructing airflow. This will help maintain a clean and well-organized system.
Ensure that the power cables are not taut or pulled tightly, as this can put unnecessary strain on the connectors. Allow some slack in the cables to accommodate for any movements or adjustments that may be required in the future.
Next, check the connections between the power cable and both the power supply and the graphics card. Gently wiggle and push on the connectors to ensure they are securely attached. If any of the connections feel loose, double-check and reseat them to ensure a snug fit.
If your computer case has a side panel, carefully close and secure it. Avoid putting excessive pressure or tension on the power cables as you close the case to prevent accidental disconnections.
It’s important to note that securing the connections not only ensures a stable power supply to your graphics card but also helps with overall system maintenance and longevity.
Once you have securely connected and organized the cables, you can move on to the final step of this process, which is to turn on the computer and test the graphics card.
Step 7: Turn on the computer and test the graphics card
Now that you have successfully connected the graphics card to the power supply and secured the connections, it’s time to turn on your computer and test the graphics card. This step will verify that the power supply is providing sufficient power to the graphics card and that it is functioning correctly.
Before turning on the computer, double-check that all other components, such as RAM modules, are properly seated and all cables are connected securely.
Once you have confirmed that everything is in order, plug in the power cable and turn on the computer. Pay close attention to the startup process and any on-screen messages or indicators.
If your computer boots up without any issues and you can access the desktop or BIOS, it is a good sign that your graphics card is receiving power and functioning correctly.
To further confirm the functionality of your graphics card, you can perform various tests such as running graphic-intensive applications or playing demanding games. Monitor the system to ensure that the graphics card is performing as expected and that there are no overheating or stability issues.
If you encounter any problems during the testing phase, ensure that all connections are secure and that the power supply is capable of supplying enough power to the graphics card. You may need to consult the user manual or reach out to the manufacturer’s support for further troubleshooting steps.
Congratulations! You have successfully connected and tested your graphics card. Enjoy the enhanced graphics performance and improved visual experience on your computer!
Conclusion
Connecting a graphics card to the power supply is a crucial step in maximizing its performance and ensuring smooth operation. By following the steps outlined in this guide, you should now have a clear understanding of how to connect your graphics card to the power supply.
Remember to gather all the necessary equipment, including a compatible graphics card, a suitable power supply, and the appropriate power cables. Take your time to locate the graphics card power connector and identify the correct power supply cables.
Once you have made the necessary connections, securing them and organizing the cables will help maintain stability and longevity. Finally, don’t forget to turn on your computer and test the graphics card to ensure it is functioning correctly.
If you encounter any issues during the process, consulting the user manuals for your graphics card and power supply or seeking assistance from the manufacturer’s support can be helpful.
Now that you have successfully connected your graphics card to the power supply, you can enjoy the enhanced graphics performance and immerse yourself in the world of high-quality visuals, whether you’re gaming or using graphic-intensive applications.
Remember to always exercise caution when working with computer components and ensure your safety by working in a properly grounded environment. Enjoy your newly powered graphics card and the fantastic visuals it can bring to your computing experience!