Introduction
Welcome to the world of technology, where gadgets continue to evolve and offer us greater convenience. The iPad, a versatile device that revolutionized the way we use tablets, has become a popular choice for many individuals. With its sleek design and powerful features, the iPad is not only a great tool for consuming content, but also for creating it. However, one limitation that iPad users often encounter is the lack of storage space.
Luckily, there is a solution – connecting an external hard drive to your iPad. By doing so, you can expand your storage capacity and have access to all your important files, photos, and videos on the go. Whether you’re a professional who needs to access large files or a regular user who wants to store a vast media library, connecting an external hard drive to your iPad can greatly enhance your productivity and entertainment experience.
In this guide, we will walk you through the step-by-step process of connecting an external hard drive to your iPad. We will cover everything from checking compatibility and preparing the external hard drive to accessing and managing files, ensuring you have a seamless and hassle-free experience using your external storage with your iPad.
Before we dive into the detailed steps, it’s important to note that not all iPads support external hard drives. You’ll need to check your iPad model to ensure compatibility. Additionally, please keep in mind that connecting an external hard drive to your iPad may require additional accessories or software, depending on your specific setup. With that said, let’s get started on connecting your external hard drive to your iPad!
Step 1: Check iPad Model and Storage Compatibility
Before you begin the process of connecting an external hard drive to your iPad, it is crucial to verify that your specific iPad model supports external storage devices. Not all iPad models are equipped with this capability, so it’s important to check compatibility to ensure a successful connection.
To determine if your iPad supports external storage, follow these steps:
- First, find out the exact model of your iPad. You can do this by going to the “Settings” app and selecting “General”. From there, tap on “About” and you will see the model name and number listed.
- Once you have the model number, research whether your specific iPad model supports external storage. You can visit Apple’s official website or use a reliable online resource to find the specifications for your particular model.
- Check for features such as USB-C or Lightning ports, as these are the primary ports used for connecting external hard drives to iPads. Also, see if your model supports the latest version of iPadOS, as some older models may have limited compatibility.
If your iPad model is compatible with external storage devices, you’re one step closer to expanding your storage capacity. However, keep in mind that even if your iPad supports external hard drives, there might be limitations on the types and capacities of storage you can connect. Some iPads may support only certain file systems, such as FAT32 or exFAT, while others may have restrictions on the maximum storage capacity.
Therefore, it’s important to thoroughly research the storage requirements and limitations specific to your iPad model. This will ensure that you choose an external hard drive that is compatible and can meet your storage needs.
Now that you have confirmed your iPad model’s compatibility, it’s time to move on to the next step: preparing the external hard drive for connection.
Step 2: Prepare the External Hard Drive
Before you connect your external hard drive to your iPad, there are a few crucial steps to ensure that your device is properly prepared. This will help optimize the performance and compatibility of your external storage with your iPad.
Follow these guidelines to prepare your external hard drive:
- Format the external hard drive: In most cases, external hard drives come formatted for Windows systems, which may not be compatible with your iPad. To ensure compatibility, it is recommended to reformat the external hard drive to a file system that is supported by iPadOS, such as exFAT or FAT32. Keep in mind that reformatting will erase all existing data on the drive, so make sure to back up any important files before proceeding.
- Choose the appropriate file system: Different file systems have varying compatibility with iPads. If you plan to use your external hard drive with both Windows and macOS devices, exFAT is the recommended file system, as it offers seamless cross-compatibility. However, if your primary use is with your iPad, FAT32 is a more widely compatible option.
- Connect any necessary power: Some external hard drives may require additional power to operate when connected to an iPad. Make sure to check the power requirements of your specific external hard drive and ensure that it is adequately powered. This may involve plugging in the hard drive to a power source or using an external power adapter.
- Organize your files: While not mandatory, organizing your files and creating specific folders on your external hard drive can help you easily locate and manage your data. Consider creating separate folders for documents, photos, videos, and any other file types you commonly use.
- Keep your firmware updated: It’s a good practice to check for any firmware updates for your external hard drive. Many manufacturers release firmware updates to fix bugs, improve performance, and enhance compatibility. Visit the manufacturer’s website or use their dedicated software to ensure that your external hard drive has the latest firmware installed.
By following these preparation steps, you will ensure that your external hard drive is ready to be connected to your iPad. Once your external hard drive is properly prepared, you can move on to the next step of the process: connecting the external hard drive to your iPad and accessing your files.
Step 3: Connect the External Hard Drive to iPad
Now that your external hard drive is prepared, it’s time to connect it to your iPad. Depending on your iPad model and the type of external hard drive you have, there are a few different methods to establish a connection. Here are the most common ways to connect an external hard drive to your iPad:
- USB-C to USB-C connection: If your iPad has a USB-C port, and your external hard drive has a USB-C port as well, you can simply use a USB-C to USB-C cable to establish a direct connection between the devices. This method offers a fast and straightforward way to connect your external storage.
- USB-C to USB-A connection: If your external hard drive has a USB-A port instead of USB-C, you will need an adapter or dongle to connect it to your iPad. There are many USB-C to USB-A adapters available in the market that allow you to connect your external hard drive to your iPad’s USB-C port.
- Lightning to USB-A connection: For older iPad models with a Lightning port, you can use a Lightning to USB-A adapter and connect your external hard drive using a USB-A to USB cable. This method allows you to establish a connection between your iPad and the external storage.
- Wireless connection: Some external hard drives support wireless connectivity, allowing you to connect them to your iPad using Wi-Fi or Bluetooth. This method eliminates the need for cables and provides greater flexibility in accessing your files. With a wireless connection, you can access your external hard drive from your iPad without physically connecting them.
Once you have chosen the appropriate method to connect your external hard drive to your iPad, follow these steps:
- Plug one end of the cable or adapter into the USB-C or Lightning port of your iPad, depending on the port type.
- Connect the other end of the cable or adapter to the corresponding port on your external hard drive.
- Give your iPad a moment to detect the external hard drive. During this time, you may see a pop-up notification or a new icon appearing in the Files app, indicating that the external storage is connected.
- If prompted, enter any necessary passwords or unlock your external hard drive to establish a secure connection.
Once the connection is established, you can proceed to the next step: accessing and managing files on your external hard drive using your iPad.
Step 4: Access and Manage Files on the External Hard Drive
Now that your external hard drive is connected to your iPad, you have the convenience of accessing and managing your files directly from your device. Here’s how you can navigate and use your external storage:
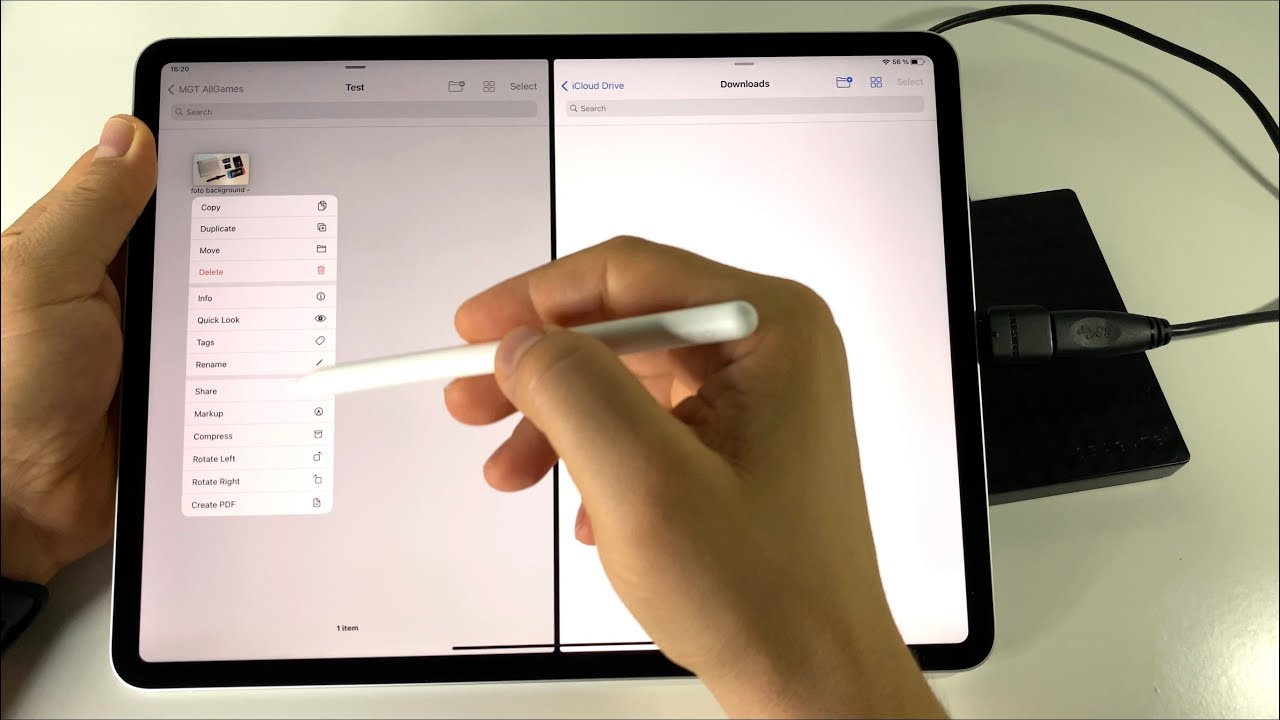
- Accessing Files: Open the “Files” app on your iPad, which is the built-in file manager. You should see the external hard drive listed under the “Locations” section. Tap on the external hard drive to browse its contents and access your files.
- Organizing Files: Use the “Files” app to organize your files on the external hard drive. You can create new folders, move files between folders, rename files, and even delete unwanted files. This allows you to keep your external storage organized and easily find the files you need.
- Working with Files: With the external hard drive connected, you can directly open files stored on it using compatible apps on your iPad. For example, if you have a document saved on the external hard drive, you can open it with a word processing app. Similarly, you can access photos, videos, and other file types using their respective apps.
- Transferring Files: You can also transfer files between your iPad’s internal storage and the external hard drive. Simply select the files you want to transfer and use the sharing options in the “Files” app to move them between locations. This allows you to free up storage space on your iPad, offloading less frequently used files to the external storage.
- Streaming Media: If your external hard drive contains media files, such as music or videos, you can stream them directly to your iPad. Use media player apps that support network streaming or file browsing to access and play media files stored on the external storage.
Remember to safely eject the external hard drive from your iPad once you’re done accessing or managing files. This helps prevent data corruption and ensures that all changes are saved. To safely disconnect the external hard drive, go to the “Files” app, tap on the external hard drive name, and choose the “Eject” or “Disconnect” option.
By following these steps, you can seamlessly access, organize, and manage files stored on your external hard drive using your iPad.
Step 5: Safely Disconnect the External Hard Drive
Once you have finished working with your external hard drive on your iPad, it is important to properly disconnect it to avoid any potential data loss or corruption. Safely disconnecting the external hard drive ensures that all changes are saved and the device is ready to be disconnected without any issues.
Here’s how you can safely disconnect your external hard drive from your iPad:
- Close any open files: Before disconnecting the external hard drive, make sure that you have closed all files that were being accessed or modified. This ensures that any changes you’ve made are properly saved and prevents any data loss or corruption.
- Go to the “Files” app: Open the “Files” app on your iPad, which is the file manager app used to access your external storage. Make sure you are in the external hard drive section.
- Tap on the external hard drive name: In the “Locations” section of the “Files” app, tap on the name of your external hard drive to select it.
- Select “Eject” or “Disconnect”: Look for the “Eject” or “Disconnect” option, usually located in the toolbar at the top of the screen or in the context menu. Tap on it to initiate the disconnection process.
- Wait for confirmation: After tapping the “Eject” or “Disconnect” option, wait for the confirmation message that it is safe to disconnect the external hard drive. This message ensures that all data has been saved and any active connections between the devices have been terminated.
- Physically disconnect the external hard drive: Once you receive the confirmation that it is safe to do so, physically disconnect the external hard drive from your iPad. Gently unplug the cable or adapter from both devices, ensuring not to force any movements that could damage the ports.
It is important to note that abruptly disconnecting the external hard drive without following the proper steps may result in data loss or corruption. Therefore, always make sure to safely disconnect the device to maintain the integrity of your files.
By safely disconnecting your external hard drive, you can ensure that your data remains intact and your iPad is ready for use without any issues. With this final step completed, you have successfully finished connecting, accessing, and safely disconnecting your external hard drive from your iPad.
Conclusion
Expanding the storage capacity of your iPad by connecting an external hard drive is a game-changer, allowing you to carry large amounts of data and access files on the go. By following the steps outlined in this guide, you can easily connect, access, and manage files on your external hard drive using your iPad.
Remember to check the compatibility of your iPad model and prepare the external hard drive by formatting it to a supported file system. Once connected, you can use the “Files” app to access, organize, and work with files stored on your external storage. Safely disconnecting the external hard drive ensures that your data is safely saved and the connection is properly terminated.
Keep in mind that each iPad model may have different capabilities and requirements when it comes to connecting external storage. It’s always a good idea to refer to the official documentation provided by Apple and the manufacturer of your external hard drive for specific details and troubleshooting steps.
Whether you’re a student, professional, or a media enthusiast, connecting an external hard drive to your iPad opens up a world of possibilities. You can store all your important documents, photos, videos, and more, without worrying about running out of space on your iPad. It’s a simple yet effective way to have all your essential files with you, no matter where you go.
So go ahead and unleash the full potential of your iPad by connecting an external hard drive. Enjoy the freedom of limitless storage and a seamless user experience that enhances your productivity and entertainment on the go!