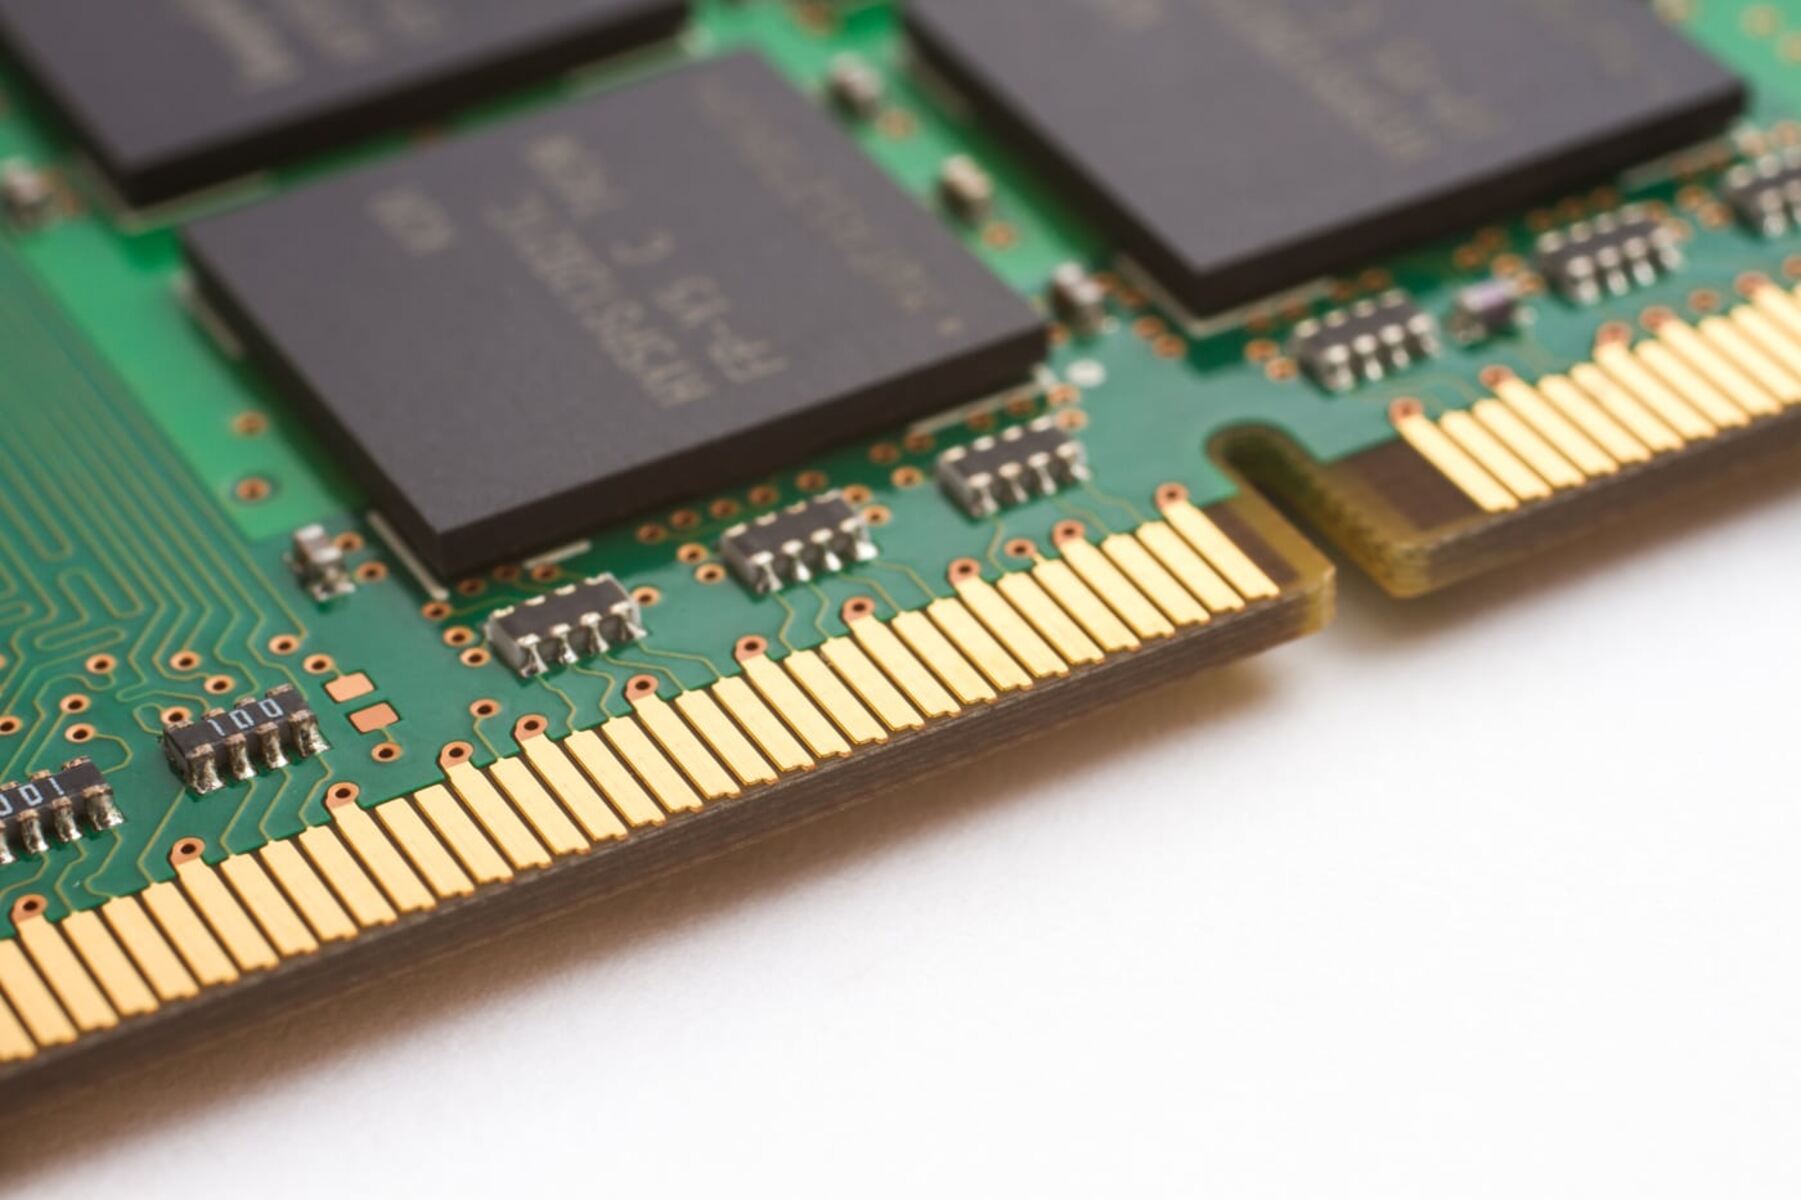
What is RAM Cache?
RAM Cache, also known as Memory Cache, is a component of your computer’s Random Access Memory (RAM) that stores frequently accessed data to improve system performance. When you open files or applications, your computer temporarily stores a portion of that data in the RAM Cache, allowing for faster access in case you need to retrieve it again.
The RAM Cache works on the principle that accessing data from RAM is faster than retrieving it from the main storage drive. By storing frequently used data in the cache, the computer can quickly fetch it when needed, reducing the time it takes to load programs or access files. This results in a smoother and more efficient user experience.
When you open multiple programs or websites at once, the RAM Cache dynamically allocates more space to accommodate the increased data demand. However, as you continue to use your computer, the cache can become cluttered with unused or outdated data. This can lead to decreased performance and slower overall system response times.
Clearing the RAM Cache periodically is a good practice to maintain optimal system performance. By doing so, you are essentially freeing up space in the cache and allowing it to store fresh data, which can improve the responsiveness and speed of your computer.
Why and When do you need to clear RAM Cache?
While RAM Cache can significantly improve system performance, there are instances where clearing the cache becomes necessary. Here are a few reasons why you might need to clear the RAM Cache:
1. Free up Memory: As you use your computer, the RAM Cache accumulates data from various applications and processes. Over time, this can consume a significant amount of memory, potentially causing your system to slow down. Clearing the cache helps free up memory and allows your computer to allocate resources more efficiently.
2. Resolve Software Issues: In some cases, the RAM Cache can become corrupted or contain outdated information. This can lead to unpredictable behavior and errors in the operation of software programs. Clearing the cache can help resolve such issues by starting with a clean slate and ensuring that programs are accessing the most up-to-date data.
3. Optimize Performance: If you notice a decline in your computer’s performance, clearing the RAM Cache can help improve responsiveness and speed. By removing cached data that is no longer relevant, you allow the cache to store fresh data that is more likely to be accessed frequently. This can result in faster program launches, quicker file access, and smoother multitasking.
4. Troubleshoot Memory-related Problems: In some cases, certain applications or processes can have memory leaks, which means they continuously consume an excessive amount of memory. This can lead to system instability and slowdowns. Clearing the RAM Cache can help identify and resolve such issues by freeing up memory resources and preventing excessive memory usage.
5. Prepare for Resource-intensive Tasks: Before performing resource-intensive tasks such as gaming or video editing, it can be beneficial to clear the RAM Cache. By doing so, you ensure that your computer has sufficient memory available to handle the demanding processes without any unnecessary performance bottlenecks.
While there is no fixed frequency for clearing the RAM Cache, it is recommended to do it periodically or whenever you encounter performance issues. Additionally, clearing the cache before engaging in resource-intensive tasks can help maximize your computer’s capabilities.
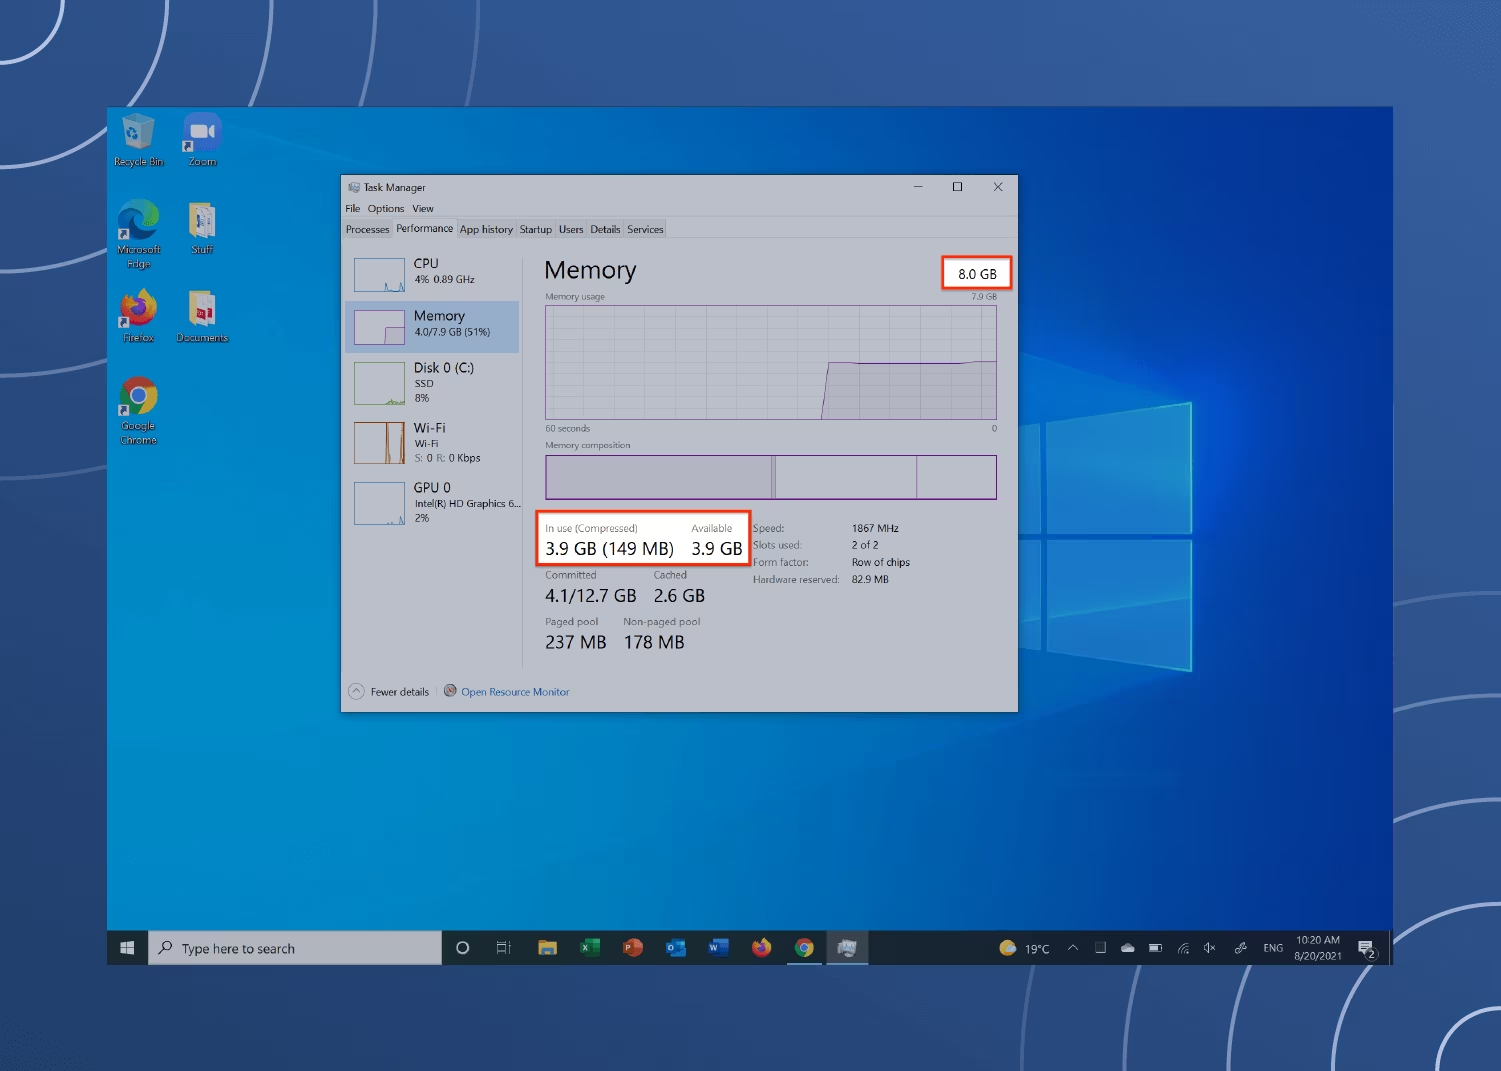
Method 1: Using Windows Task Manager
Windows Task Manager is a built-in utility that allows you to monitor and manage various aspects of your computer’s performance. It also provides a straightforward way to clear the RAM Cache. Here’s how you can use Windows Task Manager to clear the cache:
Step 1: Right-click on the taskbar at the bottom of your screen and select “Task Manager” from the menu that appears. Alternatively, you can press “Ctrl + Shift + Esc” on your keyboard to open Task Manager directly.
Step 2: In the Task Manager window, click on the “More details” button to expand the view if it’s not already expanded.
Step 3: In the “Processes” tab, locate the column labeled “Memory”. Click on the “Memory” column header to sort the processes by memory usage, with the highest at the top.
Step 4: Look for processes that are using a large amount of memory. These processes may indicate the presence of a memory leak or excessive cache usage. Select the processes you want to clear by clicking on them while holding the “Ctrl” key. You can click on multiple processes to select them simultaneously.
Step 5: Once you have selected the processes you want to clear, click on the “End Task” button at the bottom right corner of the Task Manager window. This will terminate the selected processes and clear their associated cache.
Step 6: After closing any processes, you can also clear the overall system cache by clicking on the “Performance” tab in Task Manager and selecting “Memory” in the left sidebar. Then, click on the “Empty Standby List” button to clear the cache.
By following these steps, you can effectively clear the RAM Cache through Windows Task Manager. This method provides a quick and convenient way to free up memory and improve your computer’s performance.
Method 2: Using Command Prompt
If you prefer using the command line interface, you can clear the RAM Cache using Command Prompt, a powerful tool available in Windows. Here’s how you can do it:
Step 1: Press the “Windows key + R” on your keyboard to open the Run dialog box. Type “cmd” and press Enter to launch Command Prompt.
Step 2: In the Command Prompt window, type the following command and press Enter:
echo off && cls && echo Clean RAM cache… && start %windir%\system32\rundll32.exe advapi32.dll,ProcessIdleTasks && exit
This command will initiate the cleaning process of the RAM Cache.
Step 3: Wait for the command to complete its execution. You will see the “Clean RAM cache…” message displayed on the screen.
Step 4: Once the cleaning process is finished, the Command Prompt window will close automatically.
By using Command Prompt, you can quickly clear the RAM Cache without the need for additional software or graphical interfaces. It provides a direct and efficient way to optimize your computer’s memory usage and improve overall performance.
Method 3: Using a Third-Party Cleaner Software
If you prefer a more automated approach to clear the RAM Cache, you can consider using a third-party cleaner software. These programs are specifically designed to optimize and maintain the performance of your computer. Here’s how you can clear the RAM Cache using a third-party cleaner software:
Step 1: Research and choose a reputable cleaner software that offers RAM Cache cleaning functionality. There are several options available, such as CCleaner, Wise Care 365, and CleanMyPC.
Step 2: Download and install the selected cleaner software on your computer. Follow the installation instructions provided by the software.
Step 3: Launch the cleaner software. Depending on the software, you may need to perform an initial system scan for it to analyze your computer’s performance and identify areas that require optimization.
Step 4: Once the scan is complete, locate the option to clear the RAM Cache. It may be labeled as “RAM Cleaner” or “Memory Optimizer.” Click on this option to initiate the cache clearing process.
Step 5: Allow the software to clear the RAM Cache. The duration of this process may vary depending on the size and complexity of the cache. You may also have the option to customize the cleaning process by selecting specific cache types to clear.
Step 6: Once the cache clearing process is complete, the cleaner software may display a notification or summary of the actions performed. Close the cleaner software when finished.
Using a third-party cleaner software provides a convenient and automated way to clear the RAM Cache. These programs often offer additional features, such as disk cleanup, registry cleaning, and system optimization, that can further enhance your computer’s performance.
However, it is important to choose a reliable cleaner software from a trusted developer to ensure the security and effectiveness of the cleaning process.
Pro Tips for Clearing RAM Cache Efficiently
Clearing the RAM Cache is an essential maintenance task for optimizing your computer’s performance. Here are some pro tips to help you clear the cache efficiently:
1. Close Unnecessary Applications: Before clearing the RAM Cache, close any unnecessary applications and processes running in the background. This reduces the amount of data stored in the cache and ensures that you are clearing only the cache related to the programs you actively use.
2. Perform Regular Reboots: Restarting your computer periodically can help clear the RAM Cache effectively. When you reboot, the cache is flushed, and memory is freed up. This allows your computer to start fresh and ensures optimal performance.
3. Use Shortcut Keys: Instead of manually navigating through menus, you can use shortcut keys to access Task Manager or other utilities to clear the RAM Cache. For example, you can press “Ctrl + Shift + Esc” to open Task Manager directly or use the “Windows key + X” combination to access a menu that includes Task Manager among other options.
4. Schedule Automatic Cache Clearing: Some third-party cleaner software allows you to schedule automatic cache clearing at specific intervals. Setting up a regular schedule ensures that the cache is cleared consistently and helps maintain optimal performance without manual intervention.
5. Monitor Memory Usage: Keep an eye on your computer’s memory usage through Task Manager or other system monitoring tools. If you notice excessive memory usage or a significant decrease in performance, it may be a sign that clearing the RAM Cache is necessary to optimize your system’s performance.
6. Upgrade Your RAM: If you consistently find your computer struggling with memory-intensive tasks or if clearing the RAM Cache doesn’t result in significant performance improvements, consider upgrading your RAM. A larger RAM capacity allows your computer to store more data in the cache, leading to smoother multitasking and improved overall performance.
By following these pro tips, you can ensure efficient and effective clearing of the RAM Cache, leading to improved system performance and a more seamless computing experience.
Conclusion
Clearing the RAM Cache is a vital maintenance task that can significantly improve your computer’s performance. By freeing up memory and removing unnecessary data, you can optimize system responsiveness and reduce slowdowns.
In this article, we explored three methods to clear the RAM Cache: using Windows Task Manager, using Command Prompt, and using third-party cleaner software. Each method offers its own advantages and can be chosen based on personal preference and familiarity with the tools.
Windows Task Manager provides a simple and accessible way to clear the cache, allowing you to manually end processes and free up memory. Command Prompt offers a command-line alternative for those who prefer a more hands-on approach. Third-party cleaner software provides automated cache clearing and additional system optimization features.
It’s important to note that clearing the RAM Cache is just one aspect of computer maintenance. Regularly rebooting your system, closing unnecessary applications, and monitoring memory usage are all practices that contribute to maintaining optimal performance.
Ultimately, the choice of when and how to clear the RAM Cache depends on your specific needs and usage patterns. Whether you’re a casual user looking to improve everyday performance or a power user engaged in resource-intensive tasks, periodically clearing the cache can make a noticeable difference in your computer’s performance.
Remember to choose reputable software and follow recommended best practices to ensure the safe and efficient clearing of the RAM Cache. By implementing these strategies, you can enjoy a faster and more reliable computing experience.