Introduction
Having a slow PC can be frustrating, especially when it hampers your productivity. Waiting for applications to load, experiencing lag while browsing the internet, and dealing with unresponsive software can significantly impact your work and overall computer experience. Fortunately, there are several steps you can take to speed up your PC and improve its performance. In this article, we will explore various methods to optimize your computer’s speed and restore its efficiency.
Over time, your computer can accumulate unnecessary files, programs, and background processes that consume valuable system resources. This buildup can slow down your PC and affect its overall performance. By following some simple steps, such as cleaning up your hard drive, disabling startup programs, and managing background apps, you can declutter your system and reclaim its speed.
System updates also play a crucial role in maintaining optimal performance. Outdated operating systems can cause compatibility issues and inhibit your PC’s speed. Regularly updating your operating system ensures that you have the latest bug fixes, security patches, and performance improvements. Additionally, upgrading your hardware, such as increasing RAM or installing a solid-state drive (SSD), can significantly enhance your PC’s speed and responsiveness.
Performing regular maintenance tasks, such as running disk cleanups, disabling unnecessary visual effects, and clearing browser cache and cookies, can further optimize your PC’s performance. Additionally, it is essential to protect your computer from malware and viruses by using reliable antivirus software and regularly scanning your system.
In this article, we will explore these methods and more in detail, providing you with step-by-step instructions on how to speed up your PC. By implementing these strategies, you can breathe new life into your computer and enjoy a faster, more efficient user experience. So, let’s dive in and discover the various ways to optimize your PC’s performance and reclaim its speed.
Clean Up Your Hard Drive
One of the primary reasons for a slow PC is a cluttered hard drive filled with unnecessary files and data. Over time, your computer accumulates temporary files, duplicate documents, and unused applications, taking up valuable disk space and slowing down the system. Cleaning up your hard drive regularly can help improve your PC’s speed and overall performance.
Start by removing any unwanted or unused programs from your computer. Go to the Control Panel and access the “Programs and Features” or “Add or Remove Programs” section, depending on your operating system. From there, you can uninstall applications that you no longer need.
Next, use the built-in Windows Disk Cleanup utility to delete temporary files and clean up system files. To access this tool, go to the Start menu, search for “Disk Cleanup,” and open the application. Select the drive you want to clean up (usually the C drive) and let the utility scan for unnecessary files. Once the scan is complete, you can choose which files to delete, such as temporary internet files, system error memory dumps, and Windows update files.
Another effective way to free up space on your hard drive is by deleting old or unnecessary files manually. This includes clearing out your Downloads folder, emptying the Recycle Bin, and removing old or unused documents, pictures, and videos. You can also consider transferring large files to an external storage device or cloud storage to free up disk space.
Furthermore, it is advisable to organize your files and folders in a logical and efficient manner. Creating separate folders for different types of files (e.g., documents, pictures, videos) and regularly organizing and deleting unnecessary files can help keep your hard drive clean and organized.
Cleaning up your hard drive is a simple yet effective way to optimize your PC’s speed. By removing unnecessary files and applications and organizing your data, you can free up valuable disk space and improve the overall performance of your computer. Regularly cleaning your hard drive is a good habit to maintain, as it prevents your system from becoming cluttered and sluggish.
Uninstall Unnecessary Programs
Over time, you might accumulate a multitude of programs and applications on your PC that you no longer use or need. These unwanted programs can take up valuable system resources, including memory and processing power, which can result in a slower computer. By uninstalling unnecessary programs, you can free up resources and improve the performance of your PC.
To begin, go to the Control Panel on your Windows computer. Depending on your version of Windows, you may find the Control Panel by searching for it in the Start menu or accessing it through the Settings app. Once in the Control Panel, locate the “Programs” or “Programs and Features” section.
In the Programs section, you will find a list of all the installed applications on your PC. Take the time to review each program and identify those that you no longer use or need. Look for applications that were pre-installed by the manufacturer, trial versions that have expired, or programs that you have installed but never actually used. Be careful not to uninstall any critical system files or programs that are necessary for your PC’s operation.
To uninstall a program, simply select it from the list and click on the “Uninstall” or “Remove” button. Follow the on-screen instructions to complete the uninstallation process. Some applications may require you to confirm your decision or provide additional information.
It’s also worth noting that some programs may not appear in the Programs section of the Control Panel. In such cases, you can use third-party uninstaller tools to remove them. These tools help identify and uninstall programs that are not listed in the standard uninstallation menu.
By uninstalling unnecessary programs, you can free up valuable space on your hard drive and reduce the strain on your computer’s resources. This can lead to improved system performance and a faster PC. Regularly reviewing and removing unwanted programs is a good practice to maintain, ensuring that your computer remains clutter-free and optimized.
Disable Startup Programs
When you start your computer, various programs and applications may automatically launch and run in the background. While some of these startup programs are essential for your computer’s operation, others may be unnecessary and can slow down your PC’s startup time. By disabling unnecessary startup programs, you can improve the boot time of your computer and free up system resources.
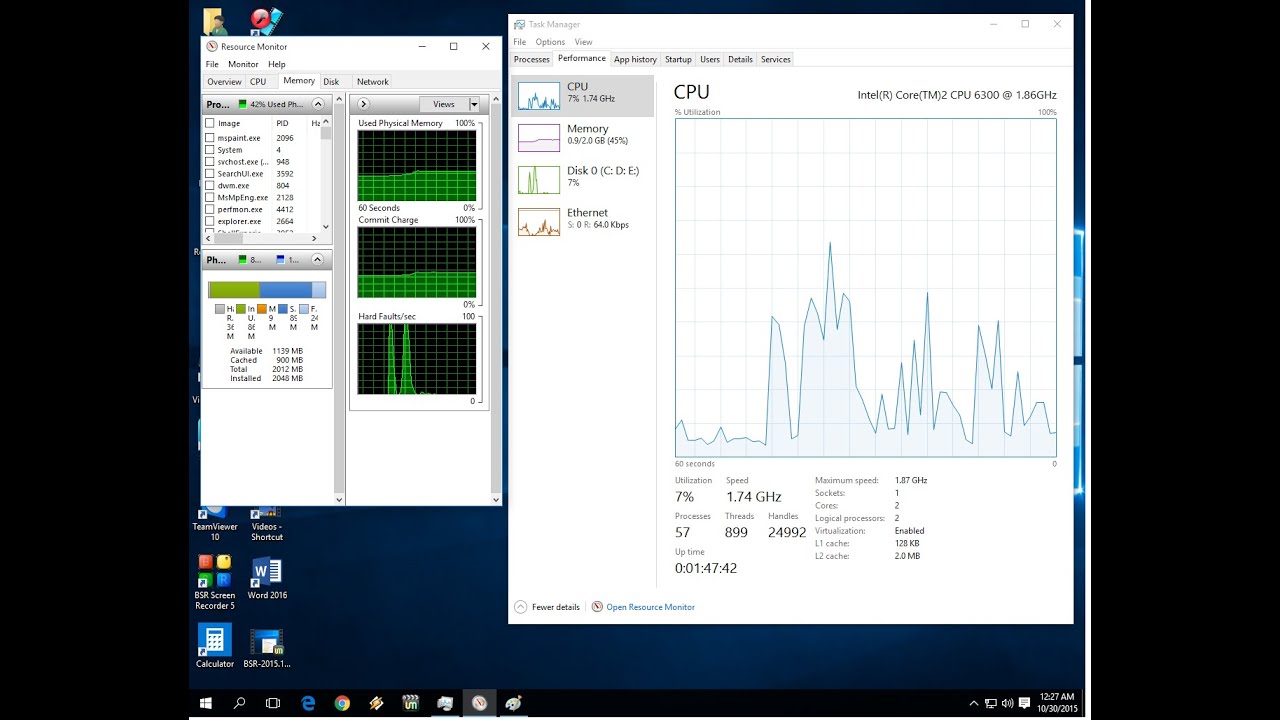
To manage startup programs, you can use the built-in Task Manager on Windows. To open Task Manager, simply right-click on the taskbar and select “Task Manager” from the menu. Alternatively, you can use the keyboard shortcut “Ctrl + Shift + Esc” to quickly open Task Manager.
Once Task Manager is open, click on the “Startup” tab. Here, you will see a list of all the programs that are set to launch on startup. Evaluate each program and determine whether it is necessary to have it start automatically with your computer.
To disable a startup program, right-click on it and select “Disable”. This will prevent the program from launching at startup. Be cautious not to disable any critical system components or programs that you rely on for your daily activities.
It’s important to note that some programs may not have an option to disable them from within Task Manager. In that case, you can check the program’s settings or options menu to see if there is an option to disable automatic startup.
By disabling unnecessary startup programs, you can significantly reduce the time it takes for your computer to boot up and become usable. This not only improves the startup speed but also frees up system resources, allowing your PC to perform more efficiently. Regularly reviewing and managing your startup programs is recommended to ensure that only essential programs are running in the background.
Manage Background Apps
In addition to startup programs, many applications continue to run in the background even when you’re not actively using them. These background apps consume system resources and can slow down your PC. By managing and limiting the number of background apps, you can improve the overall performance and responsiveness of your computer.
To manage background apps on Windows 10, go to the Start menu and click on “Settings”. In the Settings menu, select “Privacy”. From there, choose “Background Apps” located in the left-hand sidebar.
You will see a list of apps that are allowed to run in the background. Evaluate each app and decide whether it is necessary for it to run in the background. For example, communication apps like messaging or email services may need to run in the background to receive notifications, but other apps may not be crucial.
To disable a background app, simply toggle the switch next to it to the “Off” position. This prevents the app from running in the background and consuming system resources when not in use.
It’s worth noting that some background apps provide useful functionality or services, so exercise caution when deciding which apps to disable. It may be necessary to keep certain apps running in the background, depending on your needs and preferences.
By managing background apps, you can reduce the strain on your computer’s resources, such as CPU and memory utilization. This can result in faster performance, improved multitasking, and a smoother user experience. Regularly reviewing and adjusting your background app settings can help optimize your PC’s performance and ensure that system resources are allocated efficiently.
Update Your Operating System
Keeping your operating system up to date is crucial for maintaining optimal performance and security on your PC. Operating system updates often include bug fixes, performance improvements, and security patches that can significantly impact your computer’s speed and overall functionality.
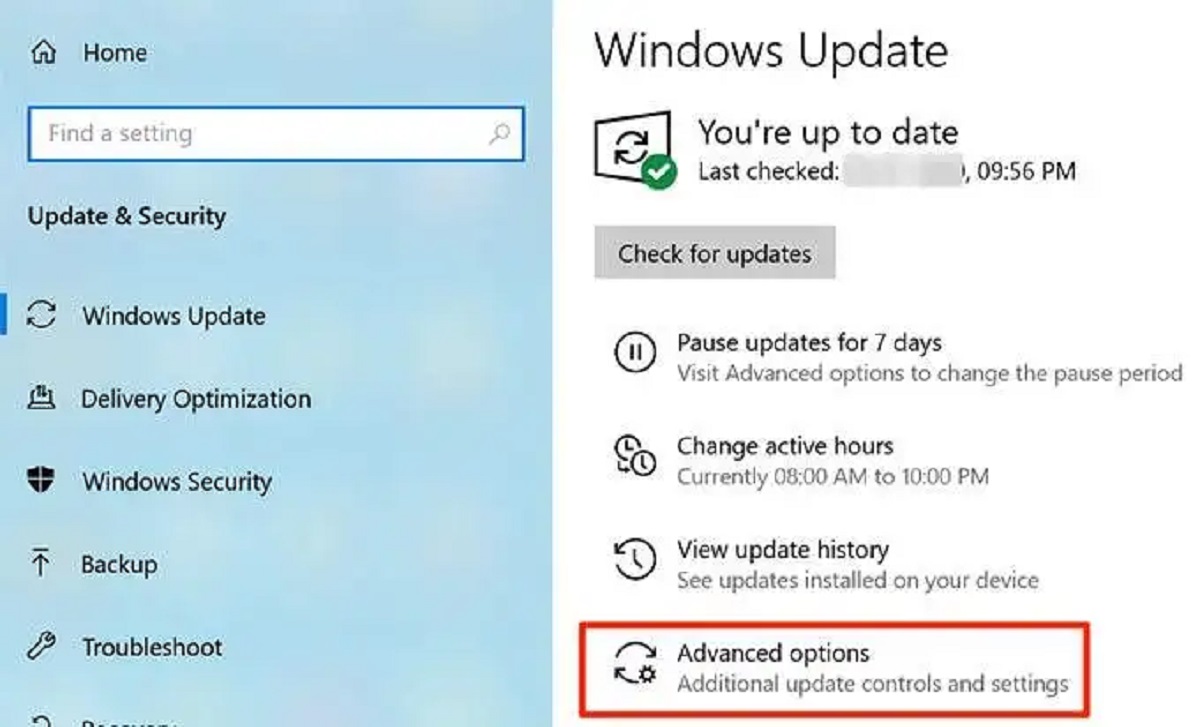
On Windows, you can check for and install updates by going to the Start menu and clicking on “Settings”. In the Settings menu, select “Update & Security”. From there, click on “Windows Update” and choose “Check for updates”. Windows will then scan for available updates and prompt you to install them. It’s important to ensure that you have a stable internet connection while performing this update.
In addition to operating system updates, it’s essential to keep your drivers and software up to date. Drivers are software components that allow your operating system to communicate with hardware devices, such as printers, graphics cards, or network adapters. Outdated drivers can cause compatibility issues and decrease system performance.
To update drivers on Windows, you can use the built-in Device Manager. Open Device Manager by right-clicking on the Start menu and selecting “Device Manager” from the menu. In Device Manager, locate the device category you want to update (e.g., Display adapters, Network adapters) and right-click on the specific device. Select “Update driver” and choose the option to search automatically for updated driver software.
Additionally, regularly updating your installed software, such as web browsers, productivity suites, and media players, can ensure that you have the latest features, performance enhancements, and security updates. Most software applications provide an option to check for updates within their settings or help menus.
By keeping your operating system, drivers, and software up to date, you can benefit from improved performance, enhanced security, and compatibility with newer technologies. Regularly check for updates and install them promptly to ensure that your PC operates at its best and remains protected against vulnerabilities.
Upgrade Your Hardware
If your PC is still experiencing sluggishness and you’ve exhausted software-based solutions, it may be time to consider upgrading your hardware. Upgrading certain components of your computer can significantly improve its speed and performance, allowing for a smoother and more efficient user experience.
One of the most impactful hardware upgrades you can make is increasing the amount of random-access memory (RAM) in your computer. RAM is responsible for storing temporary data that your computer needs to access quickly. Insufficient RAM can lead to slow performance, especially when running multiple programs or working with resource-intensive applications like video editing or gaming. Upgrading from 4GB to 8GB or 16GB of RAM can provide a noticeable boost in performance.
Another hardware upgrade that can greatly enhance your PC’s speed is installing a solid-state drive (SSD) as your primary storage device. Unlike traditional hard drives, which use spinning disks, SSDs use flash memory to store data, resulting in significantly faster read and write speeds. By replacing your old hard drive with an SSD, you’ll experience faster boot times, quicker file transfers, and overall snappier system performance.
Aside from RAM and storage upgrades, you can consider upgrading other components, such as your processor (CPU) or graphics card (GPU), depending on your specific needs. A more powerful CPU can handle complex tasks and multitasking more efficiently, while a better GPU can enhance graphics performance in games or multimedia applications.
Before upgrading any hardware, make sure to check the compatibility requirements and specifications of your computer. Not all systems can accommodate certain upgrades, so it’s important to do your research and consult your computer’s manufacturer or a reputable technician if necessary.
While hardware upgrades can be costlier compared to software optimizations, they can significantly extend the lifespan of your computer and provide a substantial performance boost. Consider your budget, the specific requirements of your tasks, and the potential benefits before making any hardware upgrade decisions.
Run a Disk Cleanup
Running a disk cleanup is an effective way to free up disk space on your computer and improve its overall performance. Over time, your hard drive can become cluttered with temporary files, system files, and other unnecessary data that take up valuable space. By using the built-in Disk Cleanup utility, you can easily identify and remove these files, resulting in a faster and more efficient PC.
To run a disk cleanup on Windows, you can access the Disk Cleanup utility through the Start menu. Simply search for “Disk Cleanup” and open the application. The utility will typically prompt you to select the drive you want to clean up. It’s recommended to choose the drive where your operating system is installed (usually the C drive).
Once you select the drive, Disk Cleanup will analyze the drive and present you with a list of options for cleaning up various file types. This can include temporary files, system files, old Windows updates, and more. You can check the boxes next to the options you want to clean up and click “OK” to initiate the cleaning process.
It’s important to review the options carefully before proceeding, as some files may be necessary for the smooth operation of certain applications or features. For instance, if you use the hibernation feature, it’s recommended not to delete the hibernation file.
Disk Cleanup will remove the selected files, freeing up disk space and potentially improving your computer’s speed and performance. It’s a good idea to run a disk cleanup on a regular basis, especially if you notice your hard drive is filling up or your PC is starting to slow down.
In addition to the Disk Cleanup utility, there are also third-party disk cleaning tools available that often offer more advanced cleaning options and additional features. These tools can help you identify and remove even more unnecessary files from your computer, further optimizing its performance.
By running a disk cleanup, you can remove unnecessary and space-consuming files from your computer, allowing for better disk space management and improved overall performance. Keeping your hard drive clean and organized is essential for maintaining an efficient and responsive PC.
Disable Visual Effects
While visual effects can enhance the aesthetics of your computer’s interface, they can also consume valuable system resources and have an impact on its overall performance. Disabling or reducing visual effects can help speed up your PC, particularly if you have a less powerful hardware configuration.
To adjust visual effects on Windows, right-click on the Start menu and select “System”. In the System settings, click on “Advanced system settings” on the left-hand side. This will open the System Properties window. Within the advanced settings tab, click on the “Settings” button under the “Performance” section.
In the Performance Options window that appears, you have several options. You can either choose to “Adjust for best performance”, which will disable all visual effects, or you can manually select which visual effects you want to keep enabled. If you choose the latter, you can uncheck specific options such as animations, fade effects, or shadows to reduce the visual effects on your PC.
Disabling visual effects can make your computer interface appear more basic, but it can significantly improve performance, especially on older or slower hardware configurations. By reducing the strain on your computer’s resources, it can allow for smoother and more responsive operations.
Note that the specific steps and available options may vary depending on your Windows version. It’s always a good idea to research the guidelines specific to your operating system to ensure compatibility and proper adjustment of visual effects.
If you prefer a more streamlined and minimalist look, disabling visual effects is a great way to optimize your PC’s performance. It may take some time to get used to the new appearance of your computer, but the overall improvement in speed and responsiveness will be worth it.
Clear Browser Cache and Cookies
Web browsers store temporary files and data, known as cache and cookies, to enhance your browsing experience. However, over time, these files can accumulate and slow down your browsing speed. Clearing your browser’s cache and cookies regularly can help improve the performance of your browser and ensure a smoother internet experience.
The process of clearing cache and cookies varies depending on the browser you’re using. Here are some general steps to clear cache and cookies in popular web browsers:
- Google Chrome: Click on the three-dot menu at the top-right corner, go to “More Tools”, and select “Clear browsing data”. In the pop-up, choose the desired time range and check the boxes for “Cookies and other site data” and “Cached images and files”. Click on “Clear data” to complete the process.
- Mozilla Firefox: Click on the three-line menu at the top-right corner, go to “Options”, and select “Privacy & Security”. In the Cookies and Site Data section, click on “Clear Data” and make sure the boxes for “Cookies and Site Data” and “Cached Web Content” are checked. Click on “Clear” to remove the data.
- Microsoft Edge: Click on the three-dot menu at the top-right corner, go to “Settings”, and select “Privacy, search, and services”. Under the Clear browsing data section, click on “Choose what to clear” and ensure the boxes for “Cookies and other site data” and “Cached images and files” are checked. Click on “Clear” to complete the process.
- Safari: On a Mac, click on “Safari” in the menu bar, select “Preferences”, and go to the “Privacy” tab. Click on “Manage Website Data” and then “Remove All”. Confirm the action by clicking on “Remove Now”. On iOS devices, go to “Settings” > “Safari” > “Clear History and Website Data” and confirm the action.
By clearing your browser cache and cookies, you remove temporary files and data that can accumulate and slow down your browsing experience. This process can help reduce page loading times, prevent slow loading or freezing of web pages, and improve overall browser performance.
It’s important to note that clearing cache and cookies will log you out of websites and remove saved preferences. You may have to re-enter usernames and passwords on websites that require login. Additionally, clearing cookies will remove web tracking data, improving your privacy and security online.
Regularly clearing cache and cookies is a simple yet effective way to optimize your browsing experience. Consider setting a routine to perform this task on a monthly or quarterly basis, depending on your browsing habits and the amount of data you accumulate.
Use a Solid-State Drive (SSD)
Replacing your traditional hard drive with a solid-state drive (SSD) can have a remarkable impact on your computer’s speed and overall performance. Unlike traditional hard drives, which use spinning disks to read and write data, SSDs use flash memory, resulting in significantly faster data access speeds and improved system responsiveness.
The read and write speeds of SSDs are considerably faster than those of traditional hard drives. This means that applications and files load more quickly, resulting in a faster boot-up time and reduced loading times for software and files.
Installing an SSD can be done by either replacing your existing hard drive or adding the SSD as an additional storage drive. If you choose to replace your hard drive, you’ll need to transfer your operating system and files to the new SSD. This can be done using backup and cloning tools, which help duplicate the contents of your hard drive to the new SSD.
Once the SSD is installed, you will notice a significant improvement in your computer’s overall speed and performance. Boot-up times will be faster, applications will launch quickly, and file transfers will occur at lightning speed. Additionally, SSDs have no moving parts, making them more durable and less susceptible to failure than traditional hard drives.
It’s worth mentioning that SSDs come in various storage capacities, so it’s important to consider your needs and budget when selecting the size of the SSD. Smaller capacities are suitable for installing the operating system and essential applications, while larger capacities allow for storing a larger number of files and software.
While SSDs offer numerous benefits, they can be more expensive than traditional hard drives. However, the investment is often worth it, given the significant performance gains and improved user experience. If you’re looking to upgrade your computer’s speed and performance, an SSD is a highly recommended solution.
Before purchasing an SSD, make sure to check the specifications and compatibility with your computer or consult with a professional. This ensures that the SSD is compatible with your system and can be installed without any compatibility issues.
By using an SSD, you can enjoy the benefits of faster data access, improved system responsiveness, and overall better performance. Whether you opt for a full replacement or an additional SSD for storage, upgrading to an SSD is one of the most effective ways to speed up your computer and optimize its performance.
Perform Regular Maintenance
Regular maintenance is crucial for keeping your PC running smoothly and efficiently. By performing routine checks and maintenance tasks, you can prevent issues from arising and optimize your computer’s performance. Here are some key maintenance tasks to incorporate into your regular routine:
Check Disk Health: Use disk diagnostic tools to check the health and integrity of your hard drive. These tools can detect and repair any errors or bad sectors that may be affecting the performance of your drive.
Update Software: Regularly update your operating system, drivers, and software applications to ensure you have the latest bug fixes, security patches, and performance improvements. Most software programs provide automatic update options for convenience.
Scan for Malware and Viruses: Run comprehensive scans with a reputable antivirus program to detect and remove any malware or viruses that may be slowing down your PC or compromising your security.
Manage Startup Programs: Review and disable unnecessary startup programs to prevent them from slowing down your computer’s boot time and consuming system resources. This can be done using the Task Manager or third-party startup management tools.
Clean Dust and Dirt: Dust can accumulate inside your computer, leading to heat buildup and possibly causing performance issues. Regularly clean the dust from your computer’s vents, fans, and components using compressed air or a soft brush.
Check for Software Bloat: Over time, software installations can lead to an accumulation of unnecessary files and registry entries, which can slow down your computer. Uninstall any unused programs and use software uninstallation tools to remove leftover files and registry entries.
Optimize Hard Drive: Run regular disk optimization or defragmentation tools to reorganize data on your hard drive, improving read and write speeds. Note that this is not necessary for solid-state drives (SSDs).
By incorporating these regular maintenance tasks into your computer care routine, you can keep your PC in top shape and ensure optimal performance. Performing preventive measures and addressing issues promptly can save you time and frustration in the long run.
Check for Malware and Viruses
Keeping your computer protected from malware and viruses is essential for maintaining its performance and safeguarding your personal information. Malware and viruses can slow down your PC, cause crashes, and compromise your privacy. Regularly checking for malware and viruses can help you detect and remove any malicious threats, ensuring the smooth operation of your computer.
To check for malware and viruses, it’s essential to have reliable antivirus software installed on your PC. There are both free and paid antivirus programs available, each with their own set of features and capabilities. It’s important to choose a reputable program and keep it up to date with the latest virus definitions.
Schedule regular scans with your antivirus software to thoroughly examine your system for any potential threats. Full system scans can take some time to complete, but they will thoroughly analyze every file and folder on your computer to ensure comprehensive protection.
In addition to regular scans, it’s crucial to keep your antivirus software enabled in real-time, providing continuous protection against malware and viruses. Real-time scanning actively monitors files and processes, preventing malicious activities from occurring on your system.
It’s also worth noting that safe browsing practices play a vital role in keeping your computer protected. Avoid clicking on suspicious links, downloading files from untrusted sources, and opening email attachments from unknown senders. These actions can introduce malware and viruses onto your computer.
If your antivirus software detects any malware or viruses during scans, follow the recommended actions to remove or quarantine them. It’s important to take prompt action to prevent further damage to your system and protect your personal data. In some cases, advanced malware may require the assistance of a professional to remove completely.
Remember to keep your operating system and other software applications up to date with the latest security patches. Software vulnerabilities can be exploited by malware and viruses to gain unauthorized access to your system. Regular updates ensure that known vulnerabilities are patched, reducing the risk of infection.
By regularly checking for malware and viruses, you can maintain the performance of your computer and protect your personal information. Implementing safe browsing practices and keeping your antivirus software up to date are essential steps in keeping your computer secure. Stay proactive in your cybersecurity efforts to ensure a secure and optimized computing experience.
Disable Search Indexing
Search indexing is a feature built into operating systems like Windows that helps you find files and documents more quickly by creating an index of their locations and contents. While search indexing can be beneficial, it can also consume system resources and slow down your PC, particularly on older or slower hardware configurations. Disabling search indexing can help improve your computer’s performance, especially if you don’t heavily rely on the search feature.
To disable search indexing on Windows, open the Control Panel and go to “Indexing Options”. In the Indexing Options window, click on the “Modify” button. From there, uncheck the boxes next to the locations or drives that you want to exclude from indexing. You can also click on the “Show all locations” button to view and modify other indexed locations. Once you’ve made the necessary changes, click on “OK” to apply the settings.
Disabling search indexing can reduce unnecessary CPU and disk usage, leading to improved overall performance. However, keep in mind that disabling search indexing means that searching for files and documents on your computer may be slower or less efficient. If you frequently rely on the search feature to find your files or documents, it’s recommended to assess the trade-off between improved performance and search functionality.
If you decide to disable search indexing, there are alternative methods to find files and documents on your computer. You can use file explorers or third-party search tools that provide similar search capabilities with less impact on system resources. Additionally, organizing your files in well-structured folders and using descriptive file names can help facilitate manual searches.
It’s important to note that the process and options for disabling search indexing may vary depending on your operating system version. Take the time to research specific instructions for your system to ensure accurate steps and settings.
Disabling search indexing can be beneficial if you’re looking to optimize your computer’s performance and don’t heavily rely on the search feature. By reducing the strain on system resources, you can experience improved responsiveness and more efficient resource allocation.
Remember that search indexing can be re-enabled at any time if you decide to restore the search functionality. Assess your needs and priorities to determine the best approach for disabling or enabling search indexing on your PC.
Adjust Power Settings
Adjusting power settings on your computer can have a significant impact on its performance and energy efficiency. By fine-tuning your power settings, you can optimize how your computer uses and manages power, resulting in improved system responsiveness and longer battery life (for laptops). Here are some tips for adjusting power settings:
Power Plans: Windows provides several pre-configured power plans, such as “High Performance,” “Balanced,” and “Power Saver.” These plans control various settings like screen brightness, sleep mode, and processor performance. Selecting the appropriate power plan based on your needs can help strike a balance between performance and energy efficiency.
Processor Power Management: Within your power plan settings, you can access advanced power options to tweak processor power management. Adjusting settings like “Minimum Processor State” and “Maximum Processor State” can control how your processor scales its speed and power usage based on demand. Setting lower values for energy-saving or higher values for performance can tailor your CPU’s behavior.
Display Settings: Dimming your screen brightness can help conserve power, especially on laptops. Lowering the display timeout duration controls how quickly your screen turns off when idle, reducing power consumption. Adjust these settings based on your preference and power needs.
Sleep and Hibernate: Choosing appropriate sleep and hibernate settings can strike a balance between convenience and energy usage. Sleep mode allows your computer to quickly resume from a low-power state, while hibernate mode saves your current session to disk and powers off the computer entirely. Adjust these settings based on your usage patterns.
Advanced Power Options: In addition to the basic power settings, Windows provides advanced power options where you can further customize power management. You can control USB power, hard disk power, system cooling policy, and other settings to optimize power usage and performance.
It’s important to find the right balance between power efficiency and performance. Selecting the “High Performance” power plan can provide maximum performance but may drain your battery quicker, while the “Power Saver” plan prioritizes energy efficiency but may lead to reduced performance. The “Balanced” plan offers a middle-ground option suitable for most users.
Adjusting power settings can also be beneficial for desktop computers as it allows you to control power consumption and potentially reduce electricity costs. Optimizing energy usage not only benefits the environment but can also extend the lifespan of your computer components.
Experiment with different power settings and monitor the impact on performance and battery life (if applicable) to find the ideal balance for your needs. Regularly review and adjust your power settings to ensure they align with your usage requirements and preferences.
Optimize Your PC for Performance
Optimizing your PC for performance involves various tweaks and adjustments to maximize its speed, responsiveness, and efficiency. By following these optimization tips, you can enhance your computer’s overall performance and enjoy a smooth and efficient user experience. Here are some key areas to focus on:
Disable Unnecessary Background Processes: Task Manager or third-party software can help you identify and disable unnecessary processes running in the background. By reducing the number of background processes, you free up system resources and improve performance.
Manage Startup Programs: Review the programs that launch at startup and disable any unnecessary ones. This helps reduce the burden on your computer’s resources and decreases startup time.
Clean Up Your Desktop: Having too many icons, files, or folders on your desktop can slow down your computer. Organize your desktop by moving files into appropriate folders or using virtual desktops to reduce clutter and improve performance.
Keep Your System and Software Updated: Regularly install updates for your operating system and software applications to ensure you have the latest bug fixes, security patches, and performance enhancements. Updates often address known issues and improve overall system performance.
Manage Virtual Memory (Page File) Settings: Adjust the virtual memory settings to improve system performance. Virtual memory uses a portion of your hard drive as additional memory when physical memory (RAM) is full. Setting an appropriate initial and maximum size can help optimize performance.
Remove Unnecessary Browser Extensions and Plugins: Extensions and plugins can slow down your browser’s performance. Remove any unnecessary or outdated ones to improve browsing speed and responsiveness.
Check for Hardware Driver Updates: Outdated or incompatible hardware drivers can cause performance issues. Regularly check for and install driver updates from the manufacturer’s website to ensure compatibility and optimal performance.
Ensure Adequate Free Disk Space: Keep a sufficient amount of free space on your hard drive to allow for smooth operation. A large amount of data and a nearly full hard drive can slow down your computer. Remove unnecessary files, uninstall unused programs, and consider using external storage or cloud-based solutions for file backup.
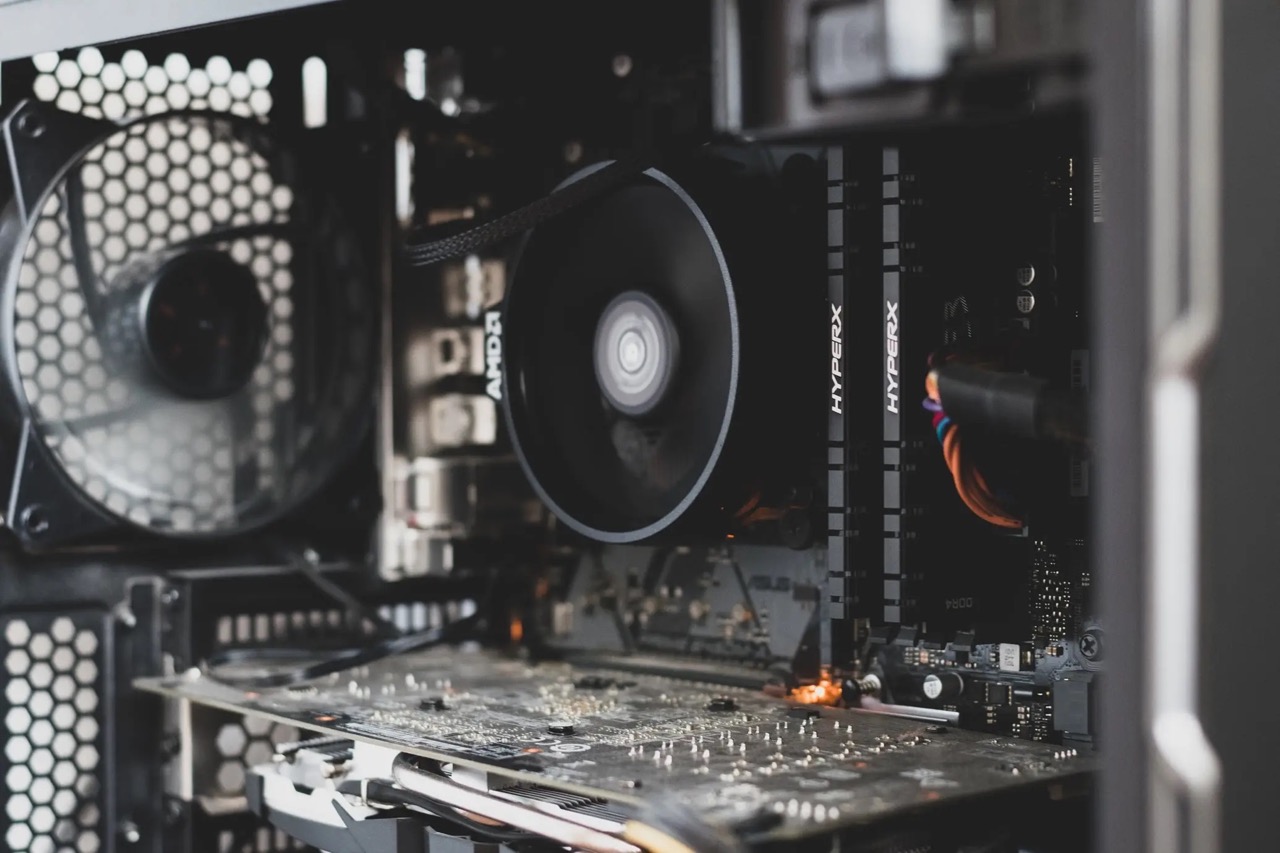
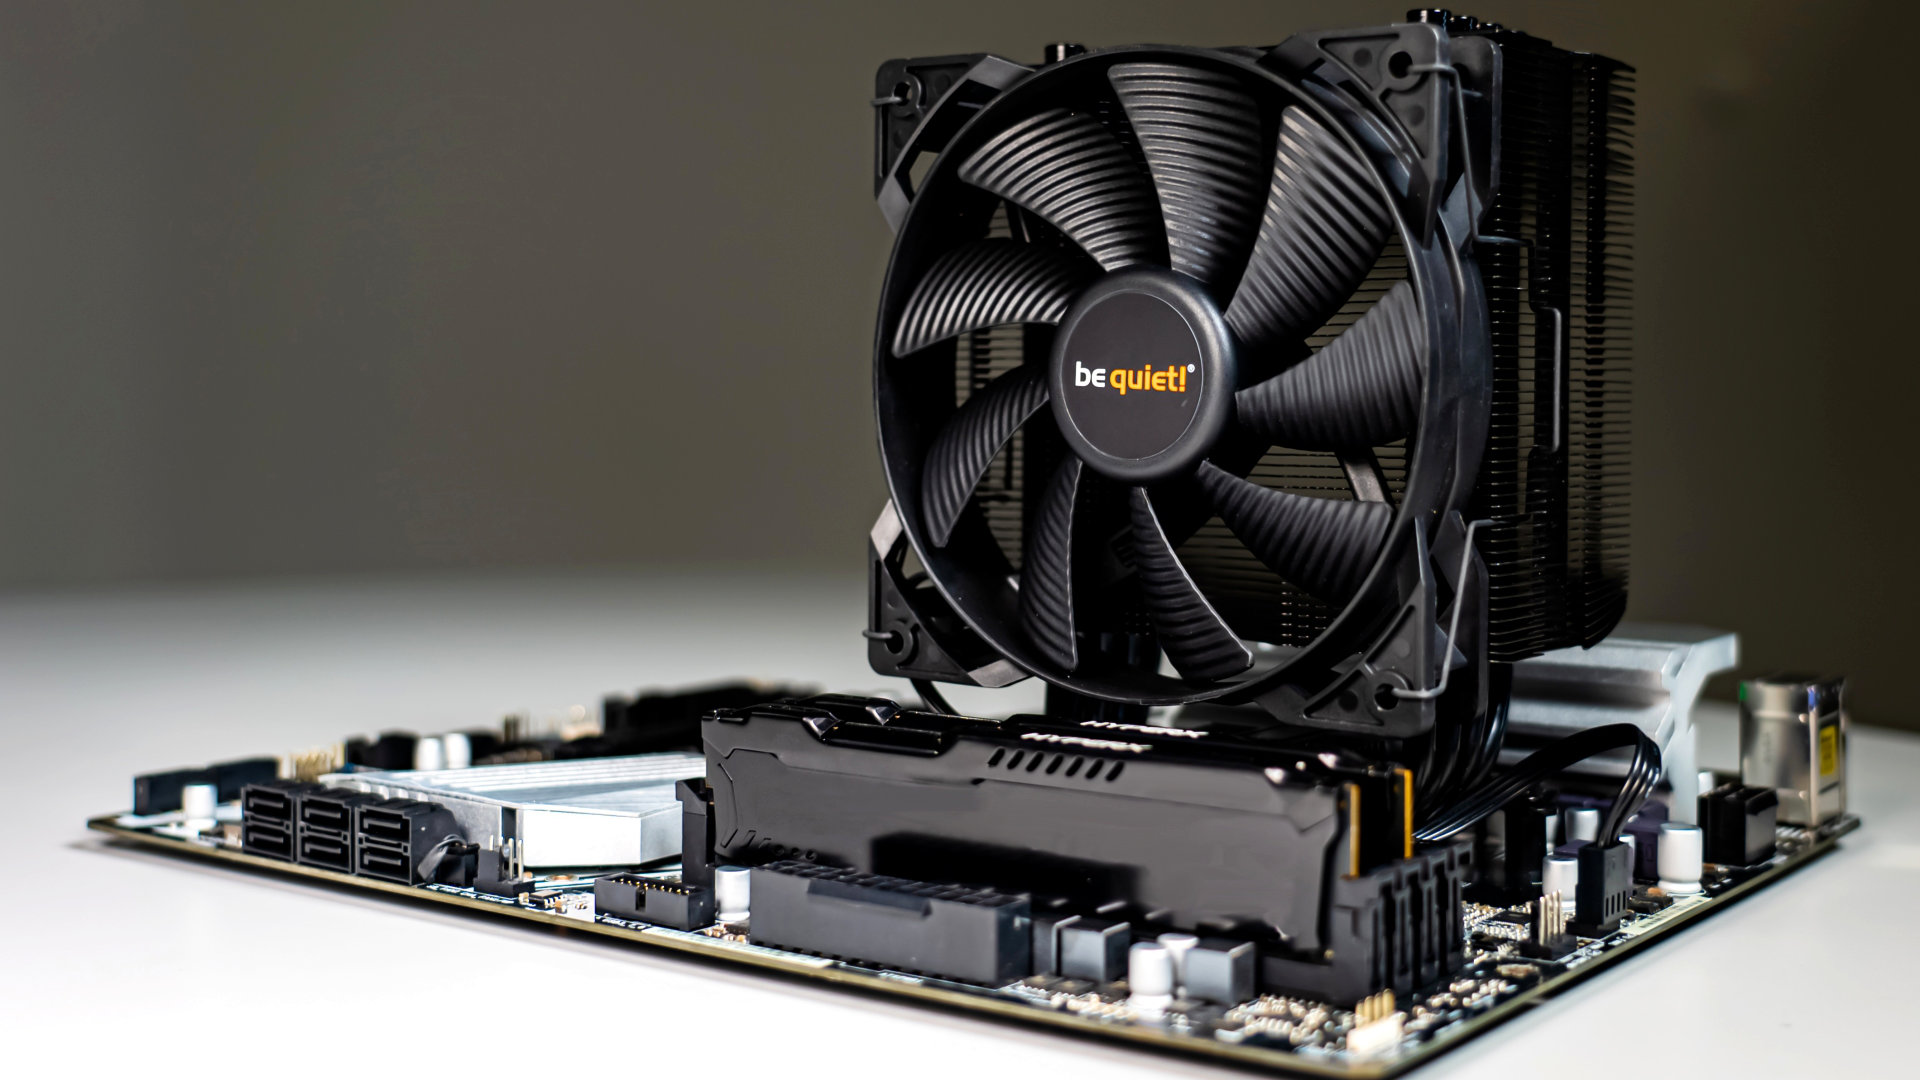
Keep Your Computer Cool: Overheating can cause performance issues and even hardware damage. Ensure proper airflow and ventilation by cleaning dust from fans and using cooling pads or stands for laptops.
It’s important to remember that every computer’s configuration is different, and what works for one may not work for another. Experiment with these optimization tips, monitor the impact on performance, and find the right balance that suits your specific needs and hardware capabilities.
Regular maintenance, optimization, and keeping your system updated contribute to the long-term performance and health of your computer. These practices can extend its lifespan and ensure a smooth and efficient computing experience for years to come.
Defragment Your Hard Drive
Over time, the files on your hard drive can become fragmented, meaning that they are stored in non-contiguous sectors. This fragmentation can lead to decreased performance as your computer needs to search for and access different parts of a file across the hard drive. Defragmenting your hard drive helps optimize file storage and improve overall performance.
Windows provides a built-in Disk Defragmenter utility that you can use to defragment your hard drive. To access it, open the Start menu, search for “Defragment and Optimize Drives,” and open the application. Select the drive you want to defragment and click on “Optimize” or “Analyzing” to check its current fragmentation level.
The time it takes to defragment a drive depends on the size and the level of fragmentation. It’s recommended to defragment when your computer is idle or during times when you don’t need to access important files, as the process can take a while.
Defragmentation rearranges files on your hard drive to occupy contiguous sectors, allowing for faster and more efficient file access. This can result in improved overall system performance, faster file loading times, and smoother multitasking.
It’s important to note that SSDs (solid-state drives) do not require defragmentation. In fact, defragmenting an SSD can actually reduce its lifespan. SSDs have their own mechanisms for optimizing file storage and access, so you don’t need to defragment them.
While defragmenting your hard drive can be beneficial, modern Windows operating systems now perform automatic background defragmentation on a regular basis. However, you can still manually initiate the process or schedule it to run at specific times if desired.
If you find that your computer’s performance is decreasing or if you’ve recently added or removed a significant number of files, defragmenting your hard drive can be an effective way to optimize performance. Regularly assessing the fragmentation level of your hard drive and performing defragmentation when necessary can keep your computer running smoothly and efficiently.
Keep in mind that solid-state drives (SSDs) have become increasingly popular due to their faster performance and higher reliability compared to traditional hard drives. If you have an SSD as your primary storage device, you do not need to defragment it.
Always monitor your computer’s performance before and after defragmentation to assess the impact and determine if it improves system responsiveness and file access time.
Note: The process and steps for defragmenting your hard drive may vary depending on your operating system version. Make sure to research specific instructions or consult your operating system’s documentation for accurate guidance.
Adjust Virtual Memory
Virtual memory, also known as the page file, is a portion of your hard drive that acts as extra memory when your computer’s physical memory (RAM) is full. Adjusting the virtual memory settings can help optimize your computer’s performance, particularly when you have limited RAM. By correctly configuring virtual memory, you can ensure efficient memory management and prevent slowdowns caused by excessive memory usage. Here’s how to adjust virtual memory:
On Windows, you can access the virtual memory settings by opening the Control Panel and navigating to “System and Security” or “System.” From there, click on “Advanced system settings” and select the “Advanced” tab. Under the “Performance” section, click on “Settings” and go to the “Advanced” tab once again. Here, you will find the “Virtual Memory” section with the option to “Change” the settings.
By default, Windows sets the virtual memory size to be managed automatically, but you can also opt to customize the settings. It’s generally recommended to allow the system to manage the virtual memory size automatically, as it can adjust it based on the available resources and specific usage patterns. However, if you prefer to set a custom size, you can deselect the “Automatically manage paging file size for all drives” option and choose the “Custom size” option.
When setting a custom size, you’ll have to specify the initial and maximum size of the virtual memory. It’s generally advised to set the initial size to be the same as the recommended size displayed by the system. The maximum size can be set higher but should not exceed three times the size of your physical RAM.
Properly adjusting the virtual memory size can prevent performance issues caused by a lack of physical memory. However, it’s important to note that relying heavily on virtual memory can still result in reduced performance compared to having sufficient physical RAM. Upgrading your RAM may provide a more significant performance boost, especially if you frequently encounter memory-intensive tasks or use resource-demanding applications.
Make sure to monitor your computer’s performance before and after adjusting virtual memory settings. If you notice significant improvements or if you experience less frequent occurrences of system slowdowns, you’ve likely optimized the virtual memory configuration successfully.
Remember that the optimal virtual memory settings can vary based on your system’s specific needs and resources. Regularly assessing and adjusting the virtual memory size can help maintain optimal performance as your computing needs evolve.
Note: The process and steps for adjusting virtual memory may differ based on your operating system. Consult the documentation or search for specific instructions related to your OS version for accurate guidance.
Clean Dust and Dirt from Your Computer
Over time, dust and dirt can accumulate inside your computer, especially in the fans, vents, and heat sinks. This buildup can restrict airflow and cause your computer to overheat, leading to decreased performance, system instability, and even hardware damage. Cleaning the dust and dirt from your computer is essential for maintaining optimal performance and prolonging its lifespan. Here’s how you can do it effectively:
1. Gather the necessary tools: Before you begin, make sure you have a can of compressed air, a soft brush, and lint-free cloths ready. It’s important to avoid using a vacuum cleaner or any abrasive materials that can damage sensitive components.
2. Power down and unplug your computer: To ensure your safety, turn off your computer completely and unplug it from the power source before starting the cleaning process.
3. Open your computer’s case: If you have a desktop computer, you’ll need to open the case to access the internal components. Refer to your computer’s manual or search online for specific instructions on how to open your particular model.
4. Use compressed air to blow away dust: With the case open, aim the nozzle of the compressed air can at the fans, heat sinks, and other components to blow away the accumulated dust and dirt. Be careful not to tip the can or spray the air too forcefully, as this can damage the delicate components. Hold the fans in place with a finger or a soft brush to prevent them from spinning uncontrollably.
5. Brush away stubborn dust: For areas where compressed air is not effective, use a soft brush to gently remove the remaining dust and dirt. Be cautious and avoid applying excessive pressure to prevent damage.
6. Clean external surfaces: Use a lint-free cloth lightly dampened with water or a mild cleaning solution to wipe down the external surfaces of your computer, including the case, keyboard, and mouse.
7. Close your computer’s case: Once you’ve finished cleaning, carefully close the case of your desktop computer and ensure that all screws or fasteners are securely tightened.
If you have a laptop, you can still clean the exterior surfaces using a lint-free cloth and compressed air to clean the keyboard and vents. Avoid disassembling your laptop unless you have experience or are comfortable doing so.
Performing this cleaning routine on a regular basis, such as every three to six months, can help you keep your computer free from dust and dirt. However, if you notice your computer heating up more frequently or experiencing performance issues, it’s recommended to clean it more often or seek professional help if necessary.
By keeping your computer free from dust and dirt, you promote better cooling performance and optimize system stability. This maintenance practice extends the life of your components and ensures that your computer continues to operate at its best.
Disable Unnecessary Windows Services
Windows services are background programs that run on your computer and perform various tasks to support the operating system and installed applications. However, some services may not be essential for your specific needs and can consume system resources, impacting your computer’s performance. By disabling unnecessary Windows services, you can reclaim system resources and optimize your computer’s performance. Here’s how you can do it:
1. Access the Services app: To manage Windows services, press the Windows key + R to open the Run dialog box, type “services.msc,” and press Enter. This will open the Services app.
2. Identify unnecessary services: In the Services app, you’ll see a list of services along with their status (running or stopped) and startup type. It’s important to exercise caution and perform thorough research before disabling any services, as some may be necessary for the proper functioning of your computer or specific applications.
3. Stop and disable services: To stop a service, right-click on it, select “Stop,” and wait until it fully stops. Once stopped, you can right-click on it again, select “Properties,” and change the startup type to “Disabled” if you determine that the service is unnecessary for your needs. Be sure to read the service description and consult reliable resources or Microsoft documentation for guidance.
4. Experiment with disabling services: If you are unsure about disabling a particular service, you can change its startup type to “Manual” instead. This way, the service won’t start automatically with Windows, but it will still be available for manual activation if needed. Monitor your computer’s performance and functionality after disabling or modifying services to ensure they don’t cause any unwanted issues.
5. Regular updates and caution: It’s important to regularly update your operating system and review the list of services as new updates may introduce new services or change their functionality. Additionally, exercise caution when modifying services and make backups or system restore points before making any significant changes to ensure you can revert back if necessary.
Disabling unnecessary Windows services can help reduce system resource usage, improve startup times, and enhance overall performance. However, be aware that disabling critical system services or those required by certain applications can lead to functionality issues or impact the stability of your computer. Exercise caution and thoroughly research the purpose and importance of each service before making any modifications.
Note that the specific services available may vary depending on your Windows version and the applications you have installed. Take the time to research and understand the services relevant to your system to make informed decisions.
Regularly reviewing and disabling unnecessary Windows services can result in a more streamlined and efficient system, allowing your computer to allocate resources more effectively and improve its overall performance.
Use a Reliable Antivirus Software
Protecting your computer from malware, viruses, and other malicious threats is crucial for maintaining its performance and safeguarding your data. Using a reliable antivirus software provides an essential layer of defense against these security risks. Here’s why you should use antivirus software and how to choose the right one:
The Importance of Antivirus Software:
Malware and viruses pose significant threats to your computer and can cause a variety of problems, including system slowdowns, data loss, identity theft, and unauthorized access to personal information. Antivirus software scans and detects these threats, quarantines or removes them, and safeguards your computer from further infections.
Antivirus software provides real-time protection by constantly monitoring your system for suspicious activities and potential malware threats. It also scans files, emails, and downloads to ensure they are safe. Regular updates keep the software’s virus definitions current, enabling it to detect new malware strains and protect against emerging threats.
Choosing the Right Antivirus Software:
When selecting an antivirus software, consider the following guidelines:
1. Reputation and Reliability: Choose a well-known and reputable antivirus software with positive reviews and a track record of delivering reliable protection against malware and viruses.
2. Features: Look for antivirus software that offers a comprehensive range of features, such as real-time scanning, regular updates, email protection, web browsing protection, and firewall capabilities.
3. User-Friendliness: Opt for antivirus software with a user-friendly interface and intuitive controls. It should be easy to navigate and configure, allowing you to customize settings based on your preferences and needs.
4. System Resource Usage: Consider the impact on your computer’s performance. Choose antivirus software that strikes a balance between robust protection and minimal resource usage, ensuring it doesn’t excessively slow down your system.
5. Compatibility: Ensure the antivirus software is compatible with your operating system version and other software applications you use to ensure seamless integration.
6. Support and Updates: Check if the antivirus software provides timely updates and reliable customer support in case you encounter any issues or need assistance.
Remember that antivirus software is a critical tool, but it shouldn’t be the sole component of your cybersecurity strategy. Practicing safe browsing habits, being cautious with email attachments, and regularly updating your operating system and other software are equally important.
By using a reliable antivirus software solution, you can proactively protect your computer from malware and viruses, ensuring its optimal performance and preserving your privacy and data integrity.
Conclusion
Optimizing your computer’s performance is essential for maximizing productivity and enjoying a smooth user experience. By implementing the tips and techniques mentioned in this article, you can significantly improve the speed, responsiveness, and overall efficiency of your PC.
Cleaning up your hard drive, uninstalling unnecessary programs, and managing background apps can free up valuable system resources and declutter your computer. Updating your operating system, drivers, and software ensures you have the latest bug fixes, security patches, and performance enhancements.
Hardware upgrades like increasing RAM or installing an SSD can provide a substantial boost to your computer’s speed and performance. Regular maintenance tasks such as disk cleanup, adjusting visual effects, and clearing browser cache and cookies are essential for maintaining optimal system health.
Taking steps to secure your computer, such as checking for malware and viruses, disabling unnecessary Windows services, and using reliable antivirus software, protects your data, safeguards your privacy, and prevents performance issues caused by harmful threats.
Remember that each computer is unique, and the specific optimization techniques that work best for your system will depend on factors such as hardware configuration, usage patterns, and personal preferences. It’s advisable to experiment with different strategies and monitor the impact on your computer’s performance to find the combination that suits your needs best.
Regular maintenance, updates, and optimization are ongoing processes. Make it a habit to periodically review and assess your computer’s performance, address any emerging issues promptly, and stay informed about new technologies and optimization techniques that can further enhance your PC’s performance.
By implementing these tips and maintaining a proactive approach to computer optimization, you can ensure that your PC operates at its best, allowing you to work, play, and browse the internet with speed, efficiency, and peace of mind.