Introduction
Keyboard history refers to the records of the words and phrases you have typed on your device’s keyboard. Every keystroke leaves a trace, and over time, this can accumulate and pose various risks to your privacy. Whether you are using a Windows computer, Mac, Android device, or iOS device, it is essential to know how to clear your keyboard history regularly.
Keyboard history can contain sensitive information, such as passwords, credit card details, or personal messages. Clearing your keyboard history not only helps protect your privacy but also ensures that your device functions smoothly by freeing up storage space and improving overall performance.
In this article, we will guide you through the process of clearing keyboard history on different devices. We will provide step-by-step instructions for Windows, Mac, Android devices, and iOS devices. Additionally, we will share some useful tips on managing keyboard history to prevent it from accumulating in the future.
By following these steps, you can safeguard your personal information and clear any traces of your typing activity on your device. Let’s begin by exploring how to clear keyboard history on Windows devices.
Why Clear Keyboard History?
Clearing keyboard history is an important practice for several reasons. Let’s delve into the key reasons why you should regularly clear your keyboard history on all your devices.
1. Privacy: Keyboard history stores a record of every word you type, including sensitive information like passwords, personal messages, and confidential data. Clearing your keyboard history ensures that this information is not accessible to anyone who gains unauthorized access to your device.
2. Security: By clearing your keyboard history, you can prevent unauthorized users from gaining access to your personal information. It mitigates the risk of identity theft, fraud, or misuse of your confidential data.
3. Performance: Over time, a large keyboard history can impact the performance of your device. It can cause lagging or slow down the keyboard response. By regularly clearing the keyboard history, you can free up storage space, optimize the device’s performance, and ensure smooth operation.
4. Cleanliness: Clearing keyboard history helps maintain cleanliness and organization on your device. It removes clutter and unnecessary data, improving the overall user experience.
5. Prevent Autocomplete Errors: Keyboard history is often used by devices to provide autocomplete suggestions while typing. However, outdated or incorrect suggestions can lead to errors or embarrassing situations. Clearing the keyboard history allows the device to offer accurate and up-to-date suggestions.
6. Protection against Malware: Keyboard history can be a target for malware or keyloggers that track your keystrokes and record sensitive information. Deleting your keyboard history minimizes the risk of malware capturing your personal data.
7. Start Fresh: Clearing keyboard history gives you a fresh start. It allows you to begin with a clean slate, ensuring that old, irrelevant, or inaccurate suggestions and auto-corrections are not affecting your typing experience.
By regularly clearing your keyboard history, you can enjoy enhanced privacy, security, and performance on your devices. Now that we understand the importance of clearing keyboard history, let’s explore how to do it on various platforms.
How to Clear Keyboard History on Windows
Clearing keyboard history on Windows is a straightforward process. Follow these steps to clear your keyboard history on a Windows device:
- Open the Start menu and click on the Settings (gear icon) to open the Windows Settings.
- In the Settings menu, select Privacy.
- In the left-hand menu, choose Typing.
- Scroll down to find the Clear typing history on my device section.
- Click on the Clear button to remove all the keyboard history on your Windows device.
- Additionally, you can toggle off the options below, such as Show text suggestions as I type or Autocorrect misspelled words, if you want to prevent future accumulation of keyboard history.
By following these steps, you can clear your keyboard history and ensure that no trace of your typing activities remains on your Windows device.
It’s essential to note that the steps outlined above may vary slightly depending on the Windows version you are using. Make sure to adapt the instructions accordingly.
Now that you know how to clear keyboard history on Windows, let’s move on to clearing keyboard history on Mac devices.
How to Clear Keyboard History on Mac
If you’re using a Mac, follow these steps to clear your keyboard history:
- Click on the Apple logo in the top-left corner of your screen and select System Preferences from the drop-down menu.
- In the System Preferences window, click on the Keyboard icon.
- Go to the Text tab.
- Click on the Advanced button.
- Under the Spelling tab, click on the Reset button next to Learned words.
- Confirm the action by clicking on Reset in the pop-up window.
- Close the System Preferences window.
By following these steps, you can clear the keyboard history on your Mac, including learned words and auto-corrections. This helps maintain privacy and ensures that your typing suggestions are fresh and accurate.
Keep in mind that the instructions provided above may vary slightly based on the macOS version you are using. Adapt the steps accordingly to clear your keyboard history effectively.
Now that you know how to clear keyboard history on Mac, let’s move on to clearing keyboard history on Android devices.
How to Clear Keyboard History on Android
Clearing keyboard history on an Android device can vary depending on the keyboard app you are using. Most Android devices come with the Google Keyboard (Gboard) as the default keyboard app. Here’s how you can clear keyboard history on Android:
- Go to the Settings on your Android device.
- Scroll down and tap on System (or General Management on some devices).
- Select Language & input (or Language & keyboard).
- Tap on Virtual keyboard (or On-screen keyboard).
- Choose Gboard (or the keyboard app you are using).
- Tap on Keyboard settings (or Advanced settings).
- Look for the Dictionary or Reset to default option and tap on it.
- Confirm the action to clear the keyboard history.
These steps should help you clear the keyboard history on most Android devices. However, if you are using a different keyboard app, the steps might vary slightly. In that case, look for the settings related to the keyboard app and search for options to clear or reset the keyboard history.
Now that you know how to clear keyboard history on Android, let’s move on to clearing keyboard history on iOS devices like iPhones and iPads.
How to Clear Keyboard History on iOS
Clearing keyboard history on iOS devices, such as iPhones and iPads, can be done through the device settings. Follow these steps to clear your keyboard history on iOS:
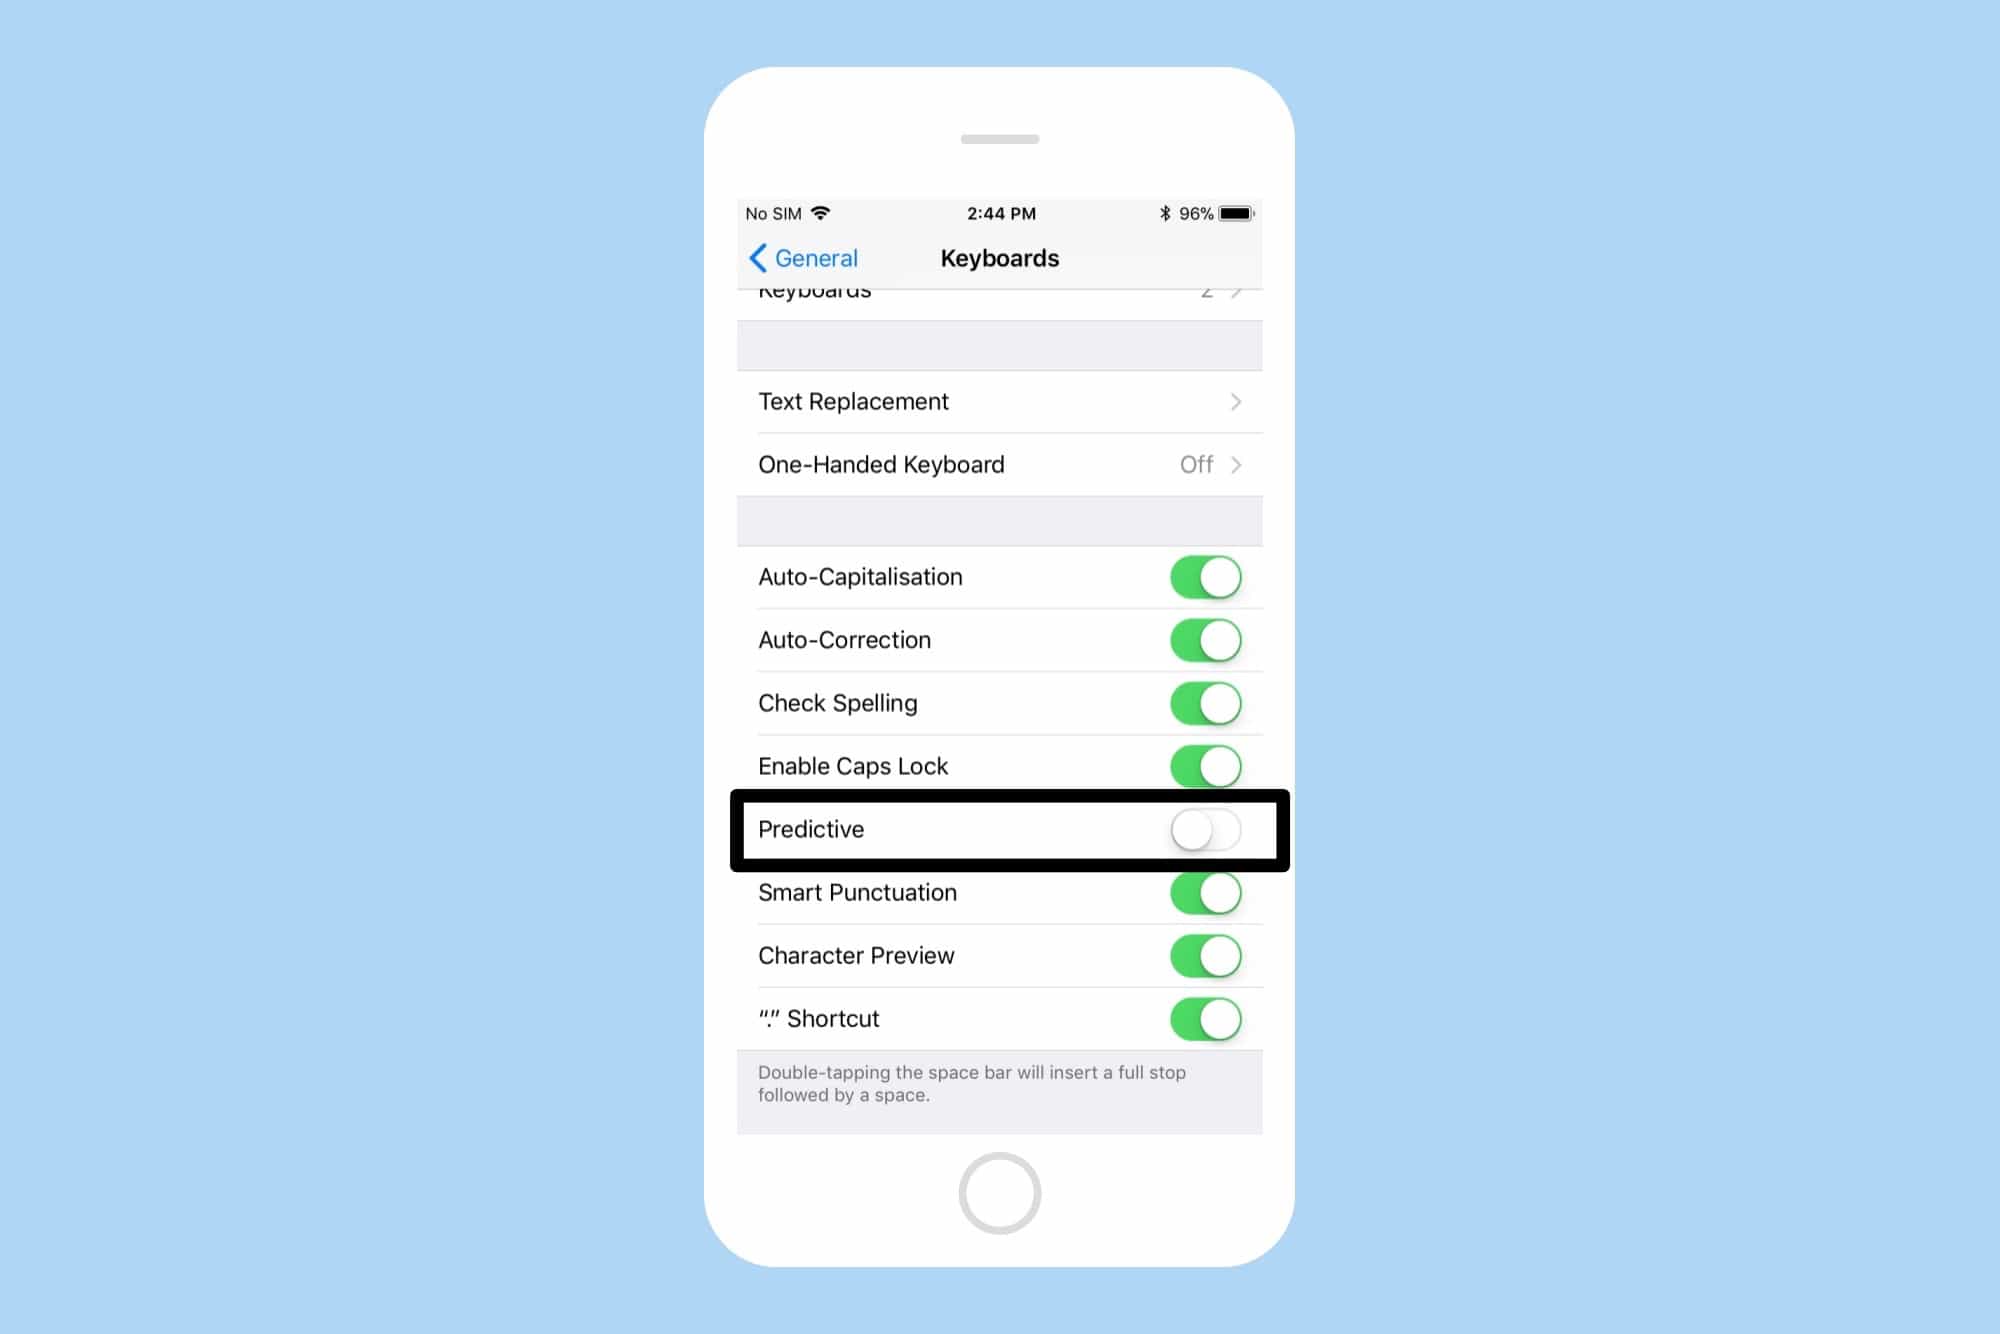
- Open the Settings app on your iOS device.
- Scroll down and tap on General.
- Tap on Keyboard to access the keyboard settings.
- Tap on Keyboards to view the list of keyboards installed on your device.
- Swipe left on the keyboard you want to clear the history for.
- Tap on the Delete button.
- Confirm the action by tapping on Delete in the pop-up window.
By following these steps, you can clear the keyboard history for a specific keyboard on your iOS device. This removes any learned words, auto-corrections, or suggestions associated with that particular keyboard.
Repeat the steps for any other keyboards you want to clear the history for on your iOS device.
Note that these instructions may vary slightly depending on the version of iOS you are using. Make sure to adapt the steps accordingly for your specific device and iOS version.
Congratulations! You now know how to clear keyboard history on iOS devices. These steps help you maintain privacy, accuracy, and an optimal typing experience on your iPhone or iPad.
Additional Tips to Manage Keyboard History
In addition to clearing keyboard history, there are some useful tips you can follow to effectively manage your keyboard history on various devices. These tips will help you maintain privacy, improve accuracy, and optimize your typing experience. Let’s explore them:
1. Use Privacy Mode: Some keyboard apps offer a privacy mode or incognito mode that temporarily disables the collection and storage of keyboard history. Enable this mode when typing sensitive information or if you want to prevent the accumulation of keyboard history temporarily.
2. Regularly Clear Cache: Clearing the cache of your keyboard app can also help clear the keyboard history. Navigate to the app settings on your device, find the keyboard app, and clear its cache. This will delete temporary files, including keyboard history.
3. Disable Cloud Sync: If your keyboard app offers cloud sync functionality, consider disabling it if you want to keep your typing history private. By disabling cloud sync, you limit the chances of your keyboard history being stored on remote servers.
4. Customize Auto-Correct Settings: Adjust the auto-correct settings of your keyboard app according to your preferences. By fine-tuning these settings, you can reduce the chances of incorrect auto-corrections and improve the accuracy of the suggestions provided.
5. Use Third-Party Keyboard Apps: Explore third-party keyboard apps available for your device. Some of these apps offer more advanced privacy and customization features, allowing you to have better control over your keyboard history.
6. Regularly Update Keyboard Apps: Keep your keyboard apps up to date by installing the latest updates from the app store. Updates often include bug fixes and security enhancements, ensuring a safer and smoother typing experience.
7. Set a Strong Device Lock: Use a strong passcode, pattern, or biometric authentication method to protect your device. This ensures that even if someone gains physical access to your device, they won’t be able to access your keyboard history or any other sensitive information.
By following these additional tips, you can proactively manage your keyboard history, enhance privacy, and optimize your typing experience across various devices.
Conclusion
Clearing keyboard history is an important practice to protect your privacy, maintain device performance, and improve your typing experience. In this article, we have provided step-by-step instructions on how to clear keyboard history on different devices.
We started by understanding the reasons why clearing keyboard history is crucial. It helps safeguard your personal information, prevents autocomplete errors, improves device performance, and protects against malware and unauthorized access.
We then explored how to clear keyboard history on Windows, Mac, Android, and iOS devices. Each platform has its own specific process, but by following the provided instructions, you can effectively clear keyboard history and ensure that no traces of your typing activity remain on your devices.
Additionally, we shared some useful tips to manage keyboard history, such as using privacy mode, regularly clearing cache, customizing auto-correct settings, and using third-party keyboard apps.
Remember to adapt the instructions based on your specific device and its operating system version. Keeping your keyboard history clear and managing it effectively will enhance your privacy, security, and overall user experience.
By following the steps outlined in this article, you can confidently clear your keyboard history, maintain privacy, improve performance, and enjoy a more streamlined typing experience on all your devices.