Introduction
Welcome to our guide on how to clean the fan in a Toshiba U840W Series Ultrabook. Over time, dust and debris can accumulate in the fan, hindering its performance and causing the Ultrabook to overheat. Cleaning the fan regularly is crucial to maintaining optimal performance and prolonging the lifespan of your device.
A Toshiba U840W Series Ultrabook is a sleek and powerful device that comes with a compact design and advanced features. However, due to its slim profile, the fan vents can easily attract dust and other particles, leading to reduced airflow and increased temperature inside the device.
In this guide, we will walk you through the step-by-step process of cleaning the fan in your Toshiba U840W Series Ultrabook. You don’t need to be a tech expert to follow this guide; all you need are a few simple tools and a little bit of patience. So let’s get started!
Before we dive into the cleaning process, it’s essential to note that cleaning the fan yourself may void your warranty. If your Ultrabook is still under warranty or if you’re uncomfortable performing the cleaning yourself, we recommend contacting Toshiba support for assistance.
Now, let’s gather the necessary tools and begin the process of cleaning the fan in your Toshiba U840W Series Ultrabook.
Step 1: Gather the necessary tools
Before you start cleaning the fan in your Toshiba U840W Series Ultrabook, it’s important to gather all the necessary tools to ensure a smooth and efficient cleaning process. Here’s a list of the tools you’ll need:
- Cotton swabs or soft brush: These will help you remove dust and debris from small crevices and corners.
- Compressed air canister: This will be used to blow away any stubborn dust from the fan and other components.
- Screwdriver (if required): Depending on the model of your Toshiba U840W Series Ultrabook, you may need a small screwdriver to remove the bottom cover.
- Cleaning solution or rubbing alcohol: In case there are any stubborn stains or sticky residue, a mild cleaning solution or rubbing alcohol can be used to gently clean the surface.
- Microfiber cloth or soft lint-free cloth: This will be used to wipe down the surfaces after cleaning.
Make sure to have all these tools ready before you proceed with the cleaning process. It’s important to use the right tools to prevent any damage to the Ultrabook’s components and ensure a thorough and effective cleaning.
Once you have gathered all the necessary tools, you’re ready to move on to the next step: prepping the workspace. This step will help ensure a clean and organized environment for the cleaning process.
Step 2: Prep the workspace
Preparing the workspace before cleaning the fan in your Toshiba U840W Series Ultrabook is crucial for a smooth and hassle-free process. Follow these steps to ensure a clean and organized workspace:
- Find a clean and well-lit area: Look for a space with good lighting and a clean surface. It’s important to have enough light to see the components clearly and avoid any accidental damage.
- Clear the workspace: Remove any clutter or objects from the area where you’ll be working. This will prevent any accidents or distractions during the cleaning process.
- Use an anti-static mat or wristband (optional): If you have an anti-static mat or wristband, it’s recommended to use it during the cleaning process. This will help prevent any static electricity from damaging the sensitive components of the Ultrabook.
- Keep a soft cloth or paper towels nearby: Having a soft cloth or paper towels readily available will allow you to quickly clean up any spills or excess cleaning solution during the process.
By prepping your workspace, you’ll create an environment that is conducive to a successful cleaning process. With a clean and organized area, you can focus on the task at hand and ensure that your Toshiba U840W Series Ultrabook is cleaned effectively without any unnecessary distractions or accidents.
Once you have prepped your workspace, you’re ready to move on to the next step: shutting down and unplugging the Ultrabook.
Step 3: Shut down and unplug the Ultrabook
Before you proceed with cleaning the fan in your Toshiba U840W Series Ultrabook, it’s important to ensure the device is shut down and unplugged to prevent any potential hazards. Follow these steps to shut down and unplug your Ultrabook:
- Save your work and close all open applications: Make sure you save any unsaved work and close all open applications to avoid any data loss.
- Shut down your Toshiba U840W Series Ultrabook: Locate the power button and press and hold it until the device shuts down completely. This may take a few seconds.
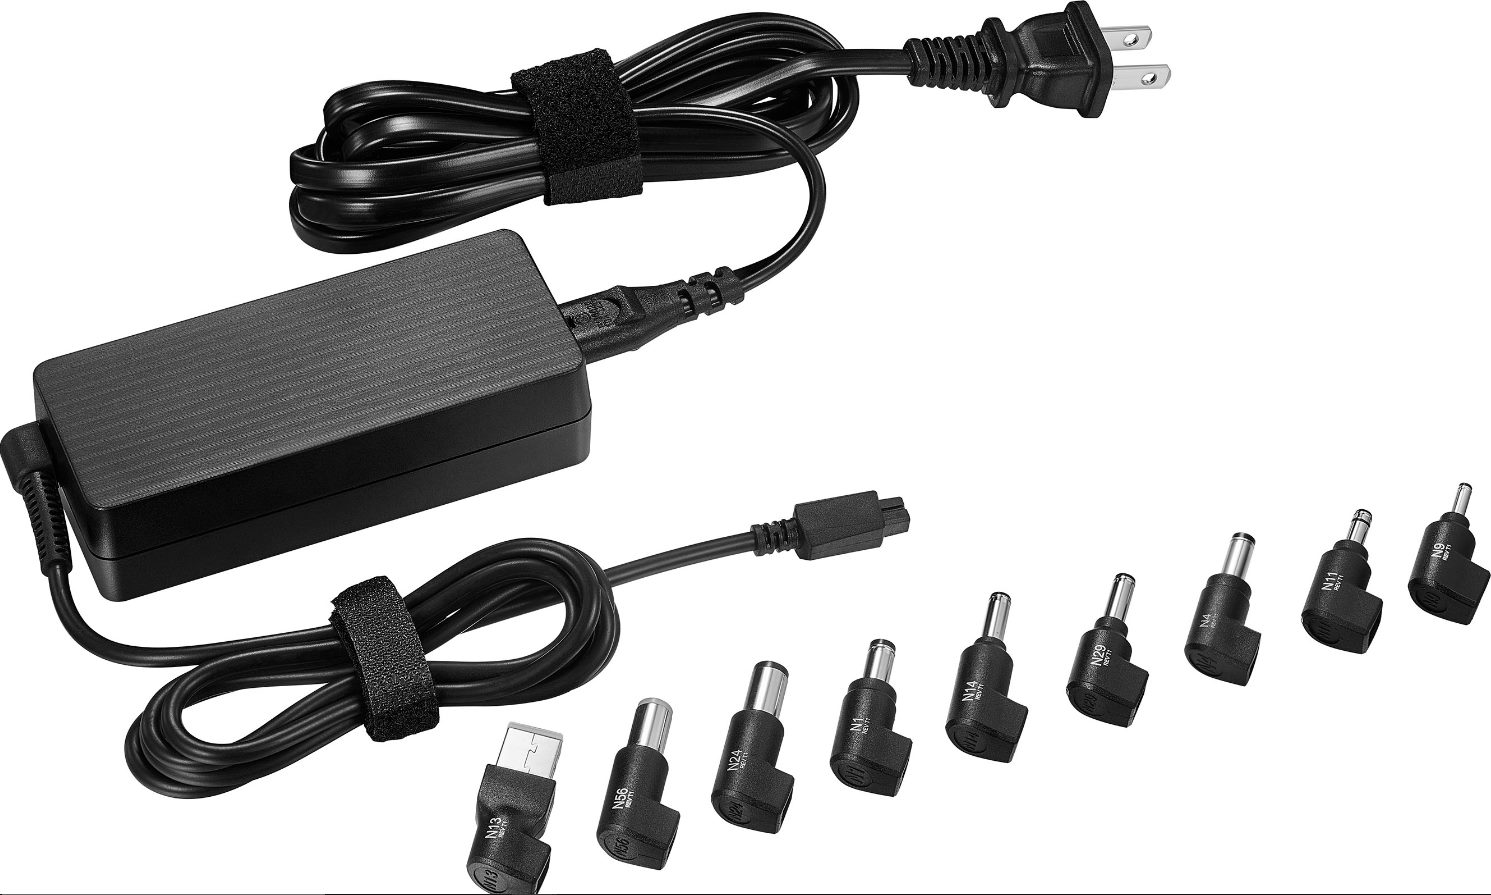
- Unplug the power adapter: Disconnect the power adapter from the Ultrabook and remove it from the electrical outlet. This will ensure that there’s no power supply to the device during the cleaning process.
Ensuring that your Ultrabook is shut down and unplugged is crucial to your safety and the safety of the device. It prevents any potential electrical accidents and allows you to work on the device without any power supply. Remember to wait a few minutes for the device to cool down before proceeding to the next step.
Now that your Toshiba U840W Series Ultrabook is safely shut down and unplugged, you’re ready to move on to the next step: locating the fan vents.
Step 4: Locate the fan vents
Locating the fan vents in your Toshiba U840W Series Ultrabook is an important step in the process of cleaning the fan. The fan vents are where the hot air is expelled and the cool air is drawn into the system. Follow these steps to locate the fan vents:
- Inspect the sides and back of your Ultrabook: Look for small openings or grille-like patterns on the sides and back of your device. These are typically the locations of the fan vents.
- Check the bottom of the Ultrabook: In some models, the fan vents may also be present on the bottom surface of the Ultrabook. Look for any openings or grille-like patterns there as well.
- Refer to the user manual or manufacturer’s website: If you’re unsure about the location of the fan vents, you can refer to the user manual that came with your Ultrabook or visit the manufacturer’s website for specific information about your model.
It’s important to locate the fan vents accurately before proceeding with the cleaning process. Cleaning the wrong areas can be ineffective and may even cause damage to other components. Once you have identified the fan vents, you’re ready to move on to the next step: removing the bottom cover of the Ultrabook.
Step 5: Remove the bottom cover
In order to access the fan in your Toshiba U840W Series Ultrabook, you will need to remove the bottom cover of the device. This step allows you to reach the internal components and clean the fan effectively. Follow these steps to safely remove the bottom cover:
- Flip your Toshiba U840W Series Ultrabook upside down: Carefully turn your Ultrabook over so that the bottom side is facing up. Place it on a soft surface to prevent any scratches or damage to the device.
- Look for the screws on the bottom cover: Inspect the bottom cover of your Ultrabook and locate the screws that are holding it in place. These screws may be indicated by small arrows or symbols next to them.
- Use a screwdriver to remove the screws: Once you have identified the screws, use an appropriate screwdriver to carefully unscrew them. Make sure to keep track of the screws and place them in a safe location to avoid losing them.
- Gently pry open the bottom cover: After removing all the screws, use your fingers or a prying tool to gently lift and separate the bottom cover from the rest of the device. Be cautious and apply gentle pressure to avoid damaging any components.
Removing the bottom cover may vary slightly depending on the model of your Toshiba U840W Series Ultrabook. If you encounter any difficulties or are unsure about the process, it’s recommended to consult the user manual or reach out to the manufacturer for further guidance.
Now that you have successfully removed the bottom cover, you’re ready to move on to the next step: identifying the fan within your Ultrabook.
Step 6: Identify the fan
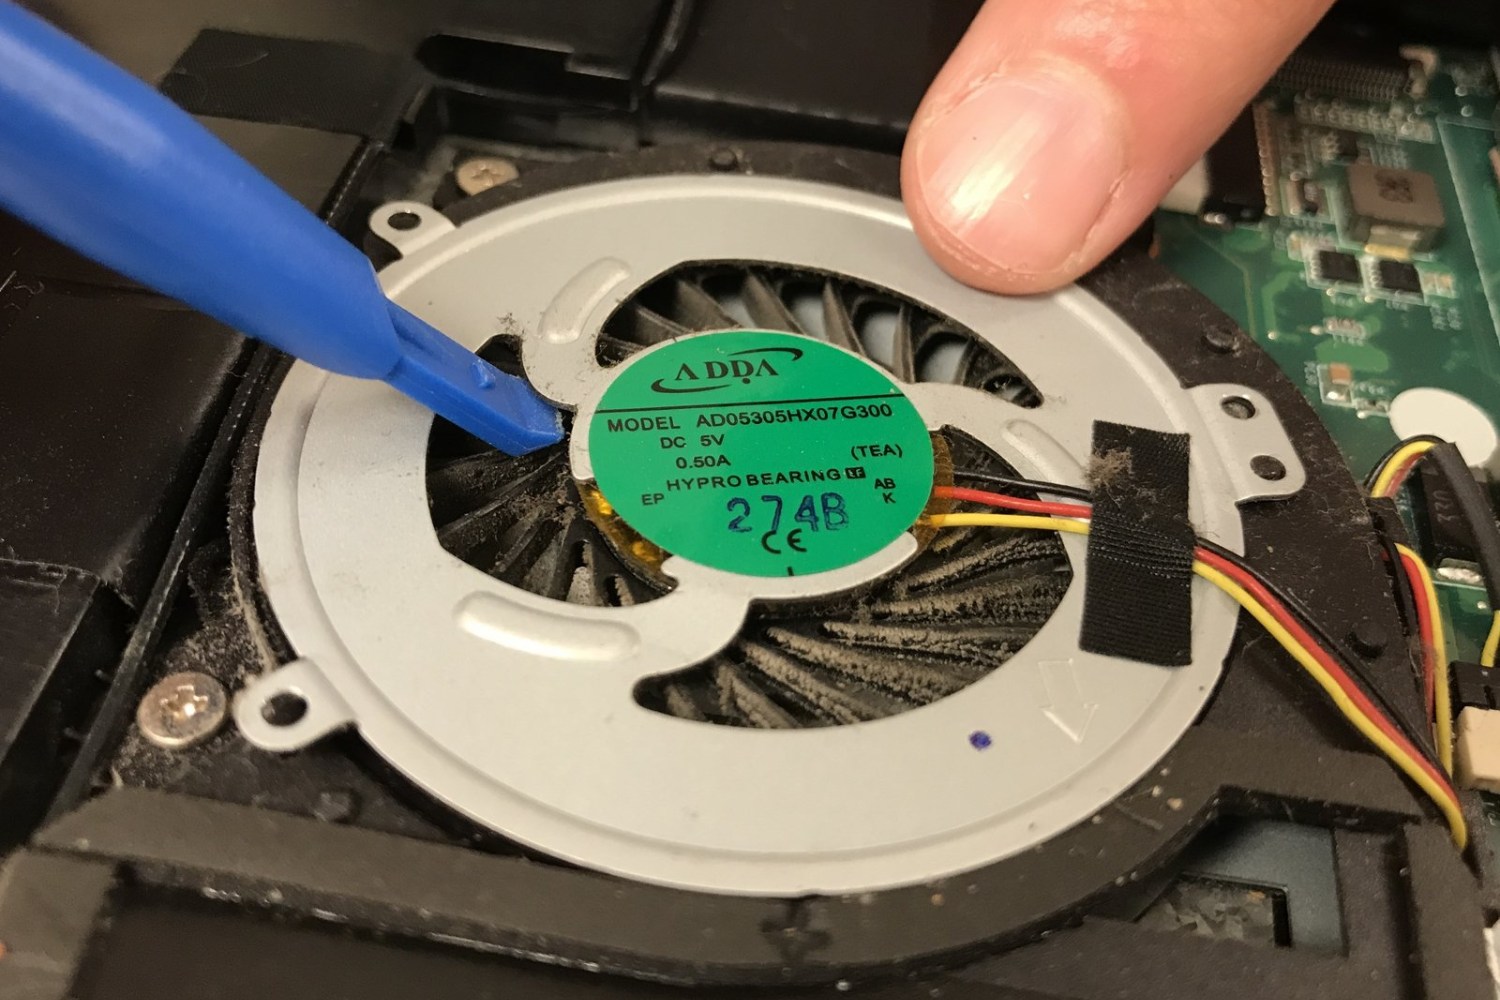
Identifying the fan within your Toshiba U840W Series Ultrabook is crucial before proceeding with the cleaning process. It allows you to pinpoint the location of the fan and ensure that you clean it effectively. Follow these steps to identify the fan:
- Look for a small, cylindrical component: The fan is typically a small, cylindrical device located within the internal components of the Ultrabook. It is responsible for circulating air and cooling the system.
- Check for fan labels or markings: Some fans may have labels or markings that indicate the manufacturer’s name or part number. These can help confirm that you have identified the correct component.
- Refer to the user manual or manufacturer’s website: If you’re having difficulty locating the fan, refer to the user manual that came with your Toshiba U840W Series Ultrabook or visit the manufacturer’s website for specific information about your model.
It’s important to identify the fan accurately to ensure that you clean the correct component. Cleaning any other parts may not provide the desired results and can even cause damage to other internal components. Take your time to locate the fan, and if you’re unsure, seek professional assistance or contact the manufacturer for guidance.
Once you have successfully identified the fan within your Toshiba U840W Series Ultrabook, you’re ready to move on to the next step: using a compressed air canister to blow out dust from the fan and surrounding areas.
Step 7: Use a compressed air canister to blow out dust
Using a compressed air canister is an effective method to remove dust and debris from the fan and surrounding areas of your Toshiba U840W Series Ultrabook. Follow these steps to safely clean the fan using a compressed air canister:
- Ensure the Ultrabook is still powered off and unplugged: It’s important to reiterate the importance of ensuring the device is shut down and disconnected from any power source before proceeding with the cleaning process.
- Hold the compressed air canister upright: Before using the compressed air canister, hold it upright to ensure that it sprays air without any liquid residue. Shake the canister gently to mix up the compressed air inside.
- Locate the fan vents and other dust-prone areas: Direct the nozzle of the compressed air canister towards the fan vents and other areas with visible dust accumulation. This may include the keyboard, ports, and any other crevices on the Ultrabook.
- Apply short bursts of air to blow out the dust: Use short, controlled bursts of compressed air to blow away dust from the fan vents and other areas. Start from a distance of a few inches and gradually move the canister closer if necessary, but be careful not to allow the fan to spin too fast as it may cause damage.
- Work in a well-ventilated area: It’s important to perform this step in a well-ventilated area to prevent inhaling any dust or debris that may be blown out by the compressed air canister.
Using a compressed air canister is a quick and efficient way to remove built-up dust from the fan and surrounding areas of your Toshiba U840W Series Ultrabook. However, it’s important to exercise caution and avoid direct contact with sensitive components or the fan itself while using the compressed air.
Once you’re satisfied with the cleaning of the fan using the compressed air canister, you can proceed to the next step: gently cleaning the fan blades with a soft brush or cloth.
Step 8: Gently clean fan blades with a soft brush or cloth
After using a compressed air canister to blow out dust from the fan and surrounding areas of your Toshiba U840W Series Ultrabook, the next step is to gently clean the fan blades. This will help remove any remaining debris or particles that may be stuck on the blades. Follow these steps to clean the fan blades:
- Ensure the compressed air canister is no longer in use: Make sure you have finished using the compressed air canister and have set it aside.
- Inspect the fan blades for any visible dust or debris: Take a close look at the fan blades and check if there are any remaining dust or debris. Use a flashlight or a well-lit area to help you see any hidden particles.
- Use a soft brush or cloth to gently clean the blades: If you notice any dust or debris on the fan blades, lightly brush them off using a soft brush or cloth. Make gentle strokes in the direction of the blades, being careful not to apply excessive force.
- Be cautious of any delicate components: Take extra care to avoid touching or damaging any delicate components surrounding the fan, such as cables or connectors.
It’s important to be gentle while cleaning the fan blades to avoid causing any damage to the delicate components inside the Toshiba U840W Series Ultrabook. By using a soft brush or cloth, you can effectively remove any remaining dirt or debris without putting excessive pressure on the fan or other components.
Once you’re satisfied with cleaning the fan blades, it’s time to move on to the next step: checking for any loose screws or debris in the Ultrabook.
Step 9: Check for any loose screws or debris
After cleaning the fan and its blades in your Toshiba U840W Series Ultrabook, it’s important to check for any loose screws or debris within the device. This step ensures that all components are secure and functioning properly. Follow these steps to check for loose screws or debris:
- Inspect the internal components: Take a closer look inside your Ultrabook and carefully examine the areas around the fan and other nearby components. Look for any loose screws, cables, or debris that may have inadvertently been displaced during the cleaning process.
- Tighten any loose screws: If you notice any loose screws, use an appropriate screwdriver to carefully tighten them. Ensure that each screw is securely fastened but be cautious not to overtighten and damage the device.
- Remove any debris: If you see any debris, such as bits of dust or lint, use a soft brush or compressed air to gently remove them. Be gentle and avoid applying excessive force to prevent any accidental damage.
- Check cable connections: Inspect the cables connected to the fan or nearby components to make sure they are securely plugged in. If any cable appears loose, carefully reconnect it to the appropriate port.
Checking for any loose screws or debris is essential as it helps prevent any potential performance issues or damage within your Toshiba U840W Series Ultrabook. Keeping all components secure ensures optimal functioning and prolongs the device’s lifespan.
Once you have checked for loose screws and debris, it’s time to move on to the final step: reassembling the Ultrabook.
Step 10: Reassemble the Ultrabook
After completing the cleaning process for your Toshiba U840W Series Ultrabook, the final step is to reassemble the device. Proper reassembly ensures that all components are securely in place, allowing the Ultrabook to function smoothly. Follow these steps to reassemble your Ultrabook:
- Retrieve the bottom cover: Locate the bottom cover that you removed earlier and ensure it is clean and free from any dust or debris.
- Align the bottom cover: Align the bottom cover with the screw holes on the Ultrabook. Ensure that all edges and corners line up properly.
- Secure the bottom cover with screws: Insert and tighten the screws you removed earlier to secure the bottom cover in place. Be careful not to overtighten the screws to avoid damaging the device.
- Double-check all connections: Once the bottom cover is securely fastened, double-check all cable connections and ensure that they are properly plugged in. This includes any cables connected to the fan and other internal components.
- Power on the Ultrabook: After reassembling the device, it’s time to power on your Toshiba U840W Series Ultrabook. Press the power button and wait for the device to boot up. Verify that the fan is running smoothly and that the overall temperature of the device is stable.
By carefully reassembling your Ultrabook, you ensure that all components are in their proper places and that the device will function as intended. Take your time during this step to avoid any mistakes or missed connections.
Congratulations! You have successfully cleaned and reassembled the fan in your Toshiba U840W Series Ultrabook. Regular maintenance and cleaning of the fan will help keep your device running smoothly and prevent overheating issues. Remember to perform this cleaning process periodically to maintain optimal performance.
Conclusion
Congratulations on successfully cleaning the fan in your Toshiba U840W Series Ultrabook! Regularly cleaning the fan is vital to ensure optimal performance and prevent overheating issues in your device. By following the step-by-step process outlined in this guide, you have taken an important step in maintaining the longevity of your Ultrabook.
Throughout the cleaning process, we covered various steps, including gathering the necessary tools, prepping the workspace, shutting down and unplugging the Ultrabook, locating the fan vents, removing the bottom cover, identifying the fan, using a compressed air canister to blow out dust, gently cleaning the fan blades, checking for loose screws or debris, and, finally, reassembling the Ultrabook.
Remember to exercise caution and use the appropriate tools when cleaning the fan to prevent any damage to your device. It’s also crucial to refer to the user manual or consult the manufacturer’s website if you encounter any difficulties or have questions specific to your Toshiba U840W Series Ultrabook.
Regularly cleaning the fan in your Ultrabook helps to maintain proper airflow, prevent overheating, and prolong the device’s lifespan. We recommend performing this cleaning process every few months or as needed, depending on the environment and usage conditions of your Ultrabook.
Thank you for following this guide, and we hope that your Toshiba U840W Series Ultrabook runs smoothly and efficiently after the fan cleaning process. As always, if you have any further questions or concerns, don’t hesitate to seek professional assistance or reach out to the Toshiba support team.
Happy computing and enjoy your refreshed Toshiba U840W Series Ultrabook!


