Introduction
Welcome to our comprehensive guide on how to clean your Logitech keyboard. Your keyboard is an essential tool for productivity and entertainment, but it can easily accumulate dirt, dust, and grime over time. Regular cleaning not only promotes hygienic usage but also helps maintain the performance and longevity of your keyboard.
Whether you use your Logitech keyboard for work, gaming, or everyday tasks, keeping it clean is crucial. Proper cleaning will ensure that every keystroke is smooth, the keys are responsive, and your typing experience remains enjoyable. In this guide, we will walk you through the step-by-step process of cleaning your Logitech keyboard effectively and safely.
Before we dive into the cleaning process, it is important to note that different Logitech keyboard models may have varying designs and features. However, the basic cleaning techniques we will discuss here are applicable to most Logitech keyboards. It’s always a good idea to refer to the user manual or Logitech’s official website for specific instructions related to your model.
In the following sections, we will share the tools and supplies you will need, as well as tips for preparing before cleaning. We will then delve into step-by-step instructions for cleaning the keycaps, keyboard body, and the interior components if necessary. Additionally, we will provide some handy stain removal techniques and conclude with tips on drying and reassembling your Logitech keyboard.
By following these guidelines, you can maintain your Logitech keyboard’s pristine condition, improve its performance, and extend its lifespan. Let’s get started with gathering the necessary tools and supplies for a successful cleaning session.
Recommended Tools and Supplies
Before embarking on the cleaning process, it is essential to gather the necessary tools and supplies. Having the right equipment will ensure a thorough and effective cleaning experience. Here are the recommended items you will need:
- Microfiber cloth: This soft, lint-free cloth is ideal for wiping away dust, dirt, and fingerprints without leaving behind any scratches on your Logitech keyboard.
- Cotton swabs: These small and precise tools are perfect for cleaning hard-to-reach areas such as the gaps between keys or around the keyboard frame.
- Isopropyl alcohol: Look for a high-percentage isopropyl alcohol solution (70% or higher) to remove stubborn stains and disinfect your keyboard.
- Dish soap: A mild liquid dish soap can be used to clean the keycaps and remove any accumulated grime. Ensure that it is diluted properly in water.
- Compressed air duster: This canister releases a powerful jet of compressed air to remove dust and debris from hard-to-reach places, such as underneath the keys.
- Toothbrush: An old toothbrush with soft bristles can be used to gently scrub the keycaps and dislodge any dirt or residue.
- Plastic bag: This will come in handy for soaking the keycaps and preventing them from getting lost during the cleaning process.
It’s worth mentioning that while the above items are highly recommended, they may not be suitable for every situation. Always consider the specific instructions provided by Logitech for your keyboard model to ensure you have the appropriate tools for cleaning.
It’s also important to note that if you’re using any cleaning solutions or chemicals, make sure to read and follow the instructions provided on the packaging. Additionally, it’s wise to test any cleaning solution on a small, inconspicuous area of your keyboard before applying it to the entire surface to avoid any potential damage.
Now that you have gathered all the necessary tools and supplies, let’s move on to the preparations you need to make before cleaning your Logitech keyboard.
Preparation Before Cleaning
Before diving into the cleaning process, it is important to take a few precautionary steps to ensure a successful and safe cleaning session for your Logitech keyboard. Here are some key preparations to consider:
- Power off your keyboard: Disconnect your Logitech keyboard from your computer or any power source. This will prevent any accidental inputs while cleaning and protect your device from potential damage.
- Take a photo: Before removing any keycaps, it’s a good idea to take a photo of your keyboard layout. This will help you remember the exact positioning of the keys when it’s time to reassemble them.
- Remove loose debris: Gently turn your keyboard upside down and gently tap or shake it to dislodge any loose debris, dust, or crumbs. Use a compressed air duster to blow away any stubborn particles from the keys and crevices.
- Secure the keycaps: To prevent the small keycaps from getting lost during the cleaning process, place them in a plastic bag or container. You can also take this opportunity to remove any larger keycaps, such as the spacebar, for a more thorough cleaning.
- Read the user manual: Different Logitech keyboards have unique designs and features, so it’s beneficial to consult the user manual or Logitech’s official website for specific cleaning instructions related to your model. This will ensure you clean your keyboard correctly without causing any damage.
- Prepare the cleaning solution: If you are using a cleaning solution, such as a diluted dish soap or isopropyl alcohol, prepare it according to the instructions provided. Ensure a proper mixture to avoid damaging the keyboard or leaving behind any residue.
- Disconnect cables: If your Logitech keyboard has detachable cables, take this opportunity to remove them. Cleaning the cables separately can prevent any liquid damage and make the cleaning process more manageable.
By following these preparations, you set the stage for a successful cleaning session. Taking these steps will help protect your keyboard, make the cleaning process more efficient, and prevent any unnecessary mishaps. With everything in place, you’re now ready to start cleaning the keycaps of your Logitech keyboard.
Cleaning the Keycaps
The keycaps of your Logitech keyboard are susceptible to dirt, oils, and grime due to constant use. Cleaning them regularly will not only improve their appearance but also ensure smooth and comfortable typing. Here’s how you can clean the keycaps effectively:
- Remove the keycaps: Start by gently prying off the keycaps using a keycap puller or your fingers. For larger keycaps like the spacebar, you may need to use a gentle rocking motion to remove them. Place the keycaps in a plastic bag or container to prevent them from getting lost.
- Prepare a cleaning solution: Fill a bowl with lukewarm water and add a small amount of mild dish soap. Alternatively, you can use isopropyl alcohol diluted with water. Avoid using harsh chemicals as they can damage the keycaps.
- Soak the keycaps: Place the keycaps in the bowl and let them soak for about 15-20 minutes. This will loosen any dirt or grime accumulated on the surface.
- Gently scrub the keycaps: Using a soft toothbrush or a cloth, gently scrub each keycap to remove any stubborn residue. Pay attention to the corners and edges of the keycaps, as they tend to accumulate more dirt.
- Rinse and dry: Rinse the keycaps under running water to remove any soapy residue. Pat them dry using a clean towel or let them air dry completely before reassembling.
While cleaning the keycaps, it’s important to avoid aggressive scrubbing, excessive water, or harsh chemicals that can damage the keycaps or the print on them. Take your time and be gentle to ensure the longevity of your Logitech keyboard’s keycaps.
Once the keycaps are clean and dry, you can proceed to clean the keyboard body. Cleaning the keyboard body will help remove any dust, fingerprints, or other dirt that may have accumulated on the surface. Let’s move on to the next section to learn how to clean the keyboard body effectively.
Cleaning the Keyboard Body
The keyboard body of your Logitech keyboard is just as important to clean as the keycaps. Dust, fingerprints, and dirt can accumulate on the surface, affecting not only the appearance but also the overall performance of your keyboard. Follow these steps to effectively clean the keyboard body:
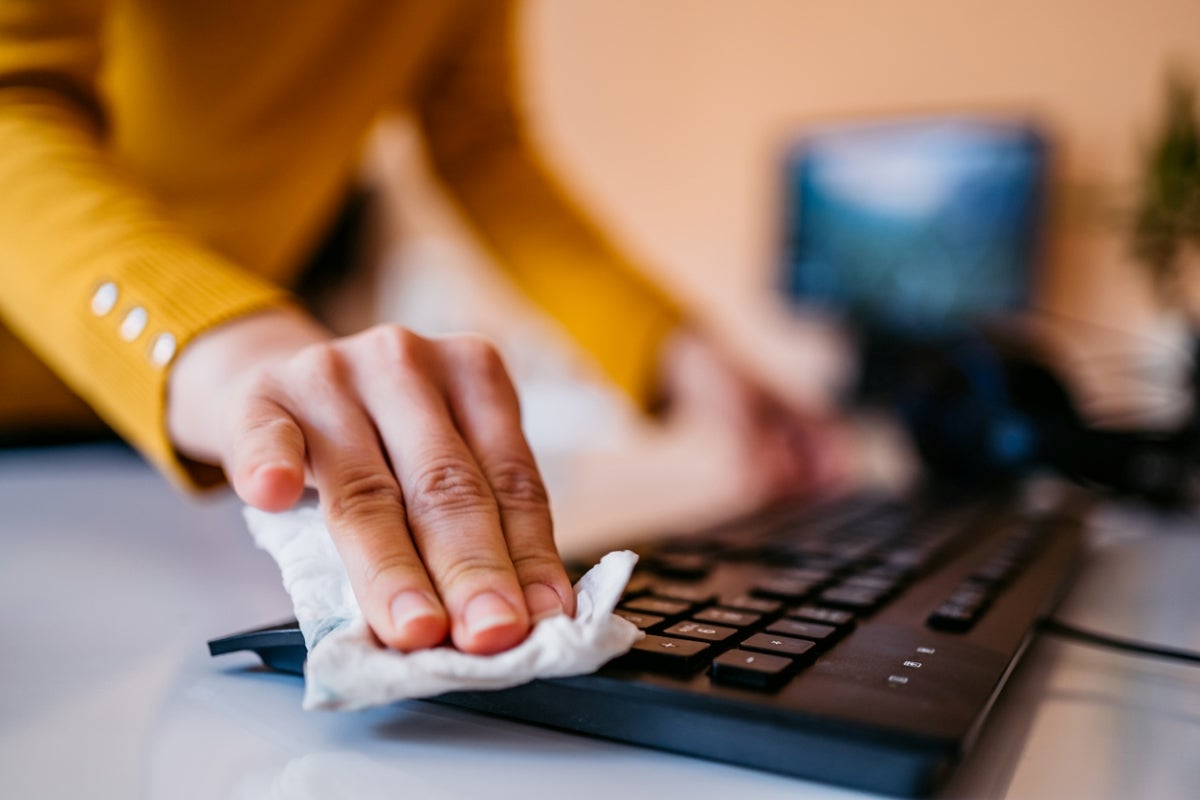
- Use a microfiber cloth: Start by wiping the entire keyboard body with a clean, dry microfiber cloth. This will help remove any loose dust or debris from the surface.
- Focus on the crevices: Pay extra attention to the crevices between the keys, as dirt can easily build up in these areas. Use a cotton swab dipped in isopropyl alcohol or a mild cleaning solution to gently clean these hard-to-reach spots.
- Remove stubborn stains: For stubborn stains or grime, lightly dampen a cloth with isopropyl alcohol or a diluted cleaning solution and gently dab the affected area. Avoid using excessive liquids as they can seep into the keyboard and cause damage.
- Dry the keyboard body: After cleaning, make sure to thoroughly dry the keyboard body with a clean, dry microfiber cloth. Ensure no moisture remains to prevent any potential damage.
It’s worth noting that different Logitech keyboard models may have unique designs, with some featuring backlighting or customizable features. If your keyboard has backlighting, ensure that you follow the manufacturer’s instructions for cleaning it properly without damaging the lighting components.
Now that you have cleaned the keycaps and keyboard body, let’s move on to the next section where we will guide you through cleaning the inside of your Logitech keyboard if necessary.
Cleaning the Inside
Cleaning the inside of your Logitech keyboard may be necessary if you notice that dust and debris have accumulated underneath the keys or if there are any sticky or unresponsive keys. Before proceeding, it is important to note that opening up your keyboard may void any warranty and should be done with caution. If you are unsure or uncomfortable with performing this task, it is advisable to seek professional assistance. If you decide to proceed, follow these steps to clean the inside of your Logitech keyboard:
- Power off and disconnect: Before starting, ensure that your keyboard is powered off and disconnected from any power source, including your computer. This will prevent any accidental electrical damage or short circuits.
- Remove the keycaps: Begin by removing the keycaps as described in the previous section. This will allow you to access the areas beneath the keys that require cleaning.
- Use compressed air: Carefully use a canister of compressed air duster to blow away dust and debris from under the keys. Hold the canister upright and spray short bursts of air, focusing on the affected areas.
- Remove sticky residue: If there is sticky residue on the key switches or circuit board, use a cotton swab lightly dampened with isopropyl alcohol to clean the affected area. Make sure to be gentle and avoid using excessive liquid.
- Allow to dry: After cleaning, allow the inside of the keyboard to dry completely before reassembling it. This will prevent any potential damage or corrosion caused by moisture.
It’s important to exercise caution when cleaning the inside of your keyboard and avoid using excessive force or liquids that could damage the delicate components. If you are uncertain about disassembling or cleaning specific parts of your Logitech keyboard, refer to the user manual or seek professional assistance.
With the keycaps, keyboard body, and inside of your Logitech keyboard thoroughly cleaned, you can now focus on removing any stubborn stains that may have tarnished the appearance of your keyboard. In the next section, we will explore some effective stain removal techniques.
Stain Removal Techniques
Even with regular cleaning, your Logitech keyboard may still encounter stubborn stains or marks. Fear not, as there are effective stain removal techniques that can restore the pristine appearance of your keyboard. Here are a few methods you can try:
- Isopropyl alcohol: Dampen a cloth or cotton swab with isopropyl alcohol and gently rub the stained area. Isopropyl alcohol is known for its ability to dissolve oils and removing stubborn stains. However, it’s important to use it sparingly and avoid excessive moisture that can damage the keyboard.
- Mild dish soap: Create a solution of water and a small amount of mild dish soap. Dip a cloth or sponge into the solution, wring out the excess liquid, and gently rub the stain. Avoid dripping liquid onto the keyboard and ensure the cloth or sponge is only dampened, not soaked.
- Baking soda paste: Mix baking soda with a small amount of water to create a paste. Apply the paste to the stained area and rub gently with a cloth or soft brush. Baking soda is a natural abrasive that can help remove stubborn stains without causing damage.
- Vinegar solution: Dilute white vinegar with water in a 1:1 ratio. Dab a cloth or cotton swab into the solution and gently rub the stain. Vinegar is known for its stain-removing properties, but it’s important to use it in moderation as excessive acidity can damage the keyboard.
Regardless of the stain removal technique you choose, it is crucial to test it on a small, inconspicuous area of your Logitech keyboard before applying it to the entire stained area. This will help ensure that the method is safe and compatible with your keyboard’s materials and finish.
After treating the stains, make sure to thoroughly dry the area before reassembling your keyboard. This will prevent any potential damage caused by moisture and ensure that your Logitech keyboard is clean and ready for use.
Now that you have learned some effective stain removal techniques, we can move on to the final step of the cleaning process — drying and reassembling your Logitech keyboard.
Drying and Reassembling
After completing the cleaning process for your Logitech keyboard, proper drying and reassembling are crucial for ensuring its functionality and longevity. Here are the steps to follow:
- Drying the keycaps: After cleaning and rinsing the keycaps, make sure to place them on a clean towel or allow them to air dry completely. Ensure that no moisture remains to prevent any potential damage or sticking keys.
- Drying the keyboard body: Use a clean, dry microfiber cloth to wipe the keyboard body thoroughly. Pay attention to the areas between the keys and any crevices to remove any remaining moisture.
- Allow for adequate drying time: Before reassembling your Logitech keyboard, it is essential to ensure that all components are completely dry. Moisture can cause damage or malfunctions within the keyboard.
- Reassembling the keycaps: Carefully align each keycap with its corresponding switch and gently press it into place. Use the photo you took earlier as a reference if needed to ensure correct positioning.
- Test the keys: Once all the keycaps are reassembled, test each key to ensure that they are responsive and functioning correctly. This will help identify any keys that may require additional cleaning or adjustment.
- Reconnecting and powering on: If you had disconnected any cables, reconnect them securely. Plug your Logitech keyboard back into your computer or power source and power it on to ensure that it is working properly.
By following these steps, you can effectively dry and reassemble your Logitech keyboard, ensuring that it functions optimally and looks as good as new.
Remember, regular cleaning and maintenance will contribute to the longevity and performance of your Logitech keyboard. It is recommended to clean your keyboard periodically, depending on your usage and the environment in which it is used.
With proper cleaning and care, your Logitech keyboard will continue to provide you with a comfortable and enjoyable typing experience for years to come.
Conclusion
Congratulations! You have successfully learned how to clean your Logitech keyboard and maintain its performance and cleanliness. By keeping your keyboard free from dirt, dust, and stains, you can ensure a comfortable typing experience and prolong its lifespan.
Throughout this guide, we have discussed the recommended tools and supplies, preparations before cleaning, techniques for cleaning the keycaps, keyboard body, and the inside of your Logitech keyboard if necessary. We have also covered stain removal methods and provided guidance on drying and reassembling your keyboard.
Remember, each Logitech keyboard model may have specific cleaning instructions, so always refer to the user manual or Logitech’s official website for any additional guidance.
By incorporating regular cleaning into your keyboard maintenance routine, you can prevent build-up of dirt and grime, keep your keyboard looking pristine, and ensure optimal performance. Taking care of your keyboard will make your typing experience more enjoyable and help extend its lifespan.
Thank you for reading our guide on how to clean your Logitech keyboard. We hope you found it informative and helpful. Now, armed with the knowledge and techniques you’ve learned, you can confidently keep your keyboard in top-notch condition for years to come.


