Introduction
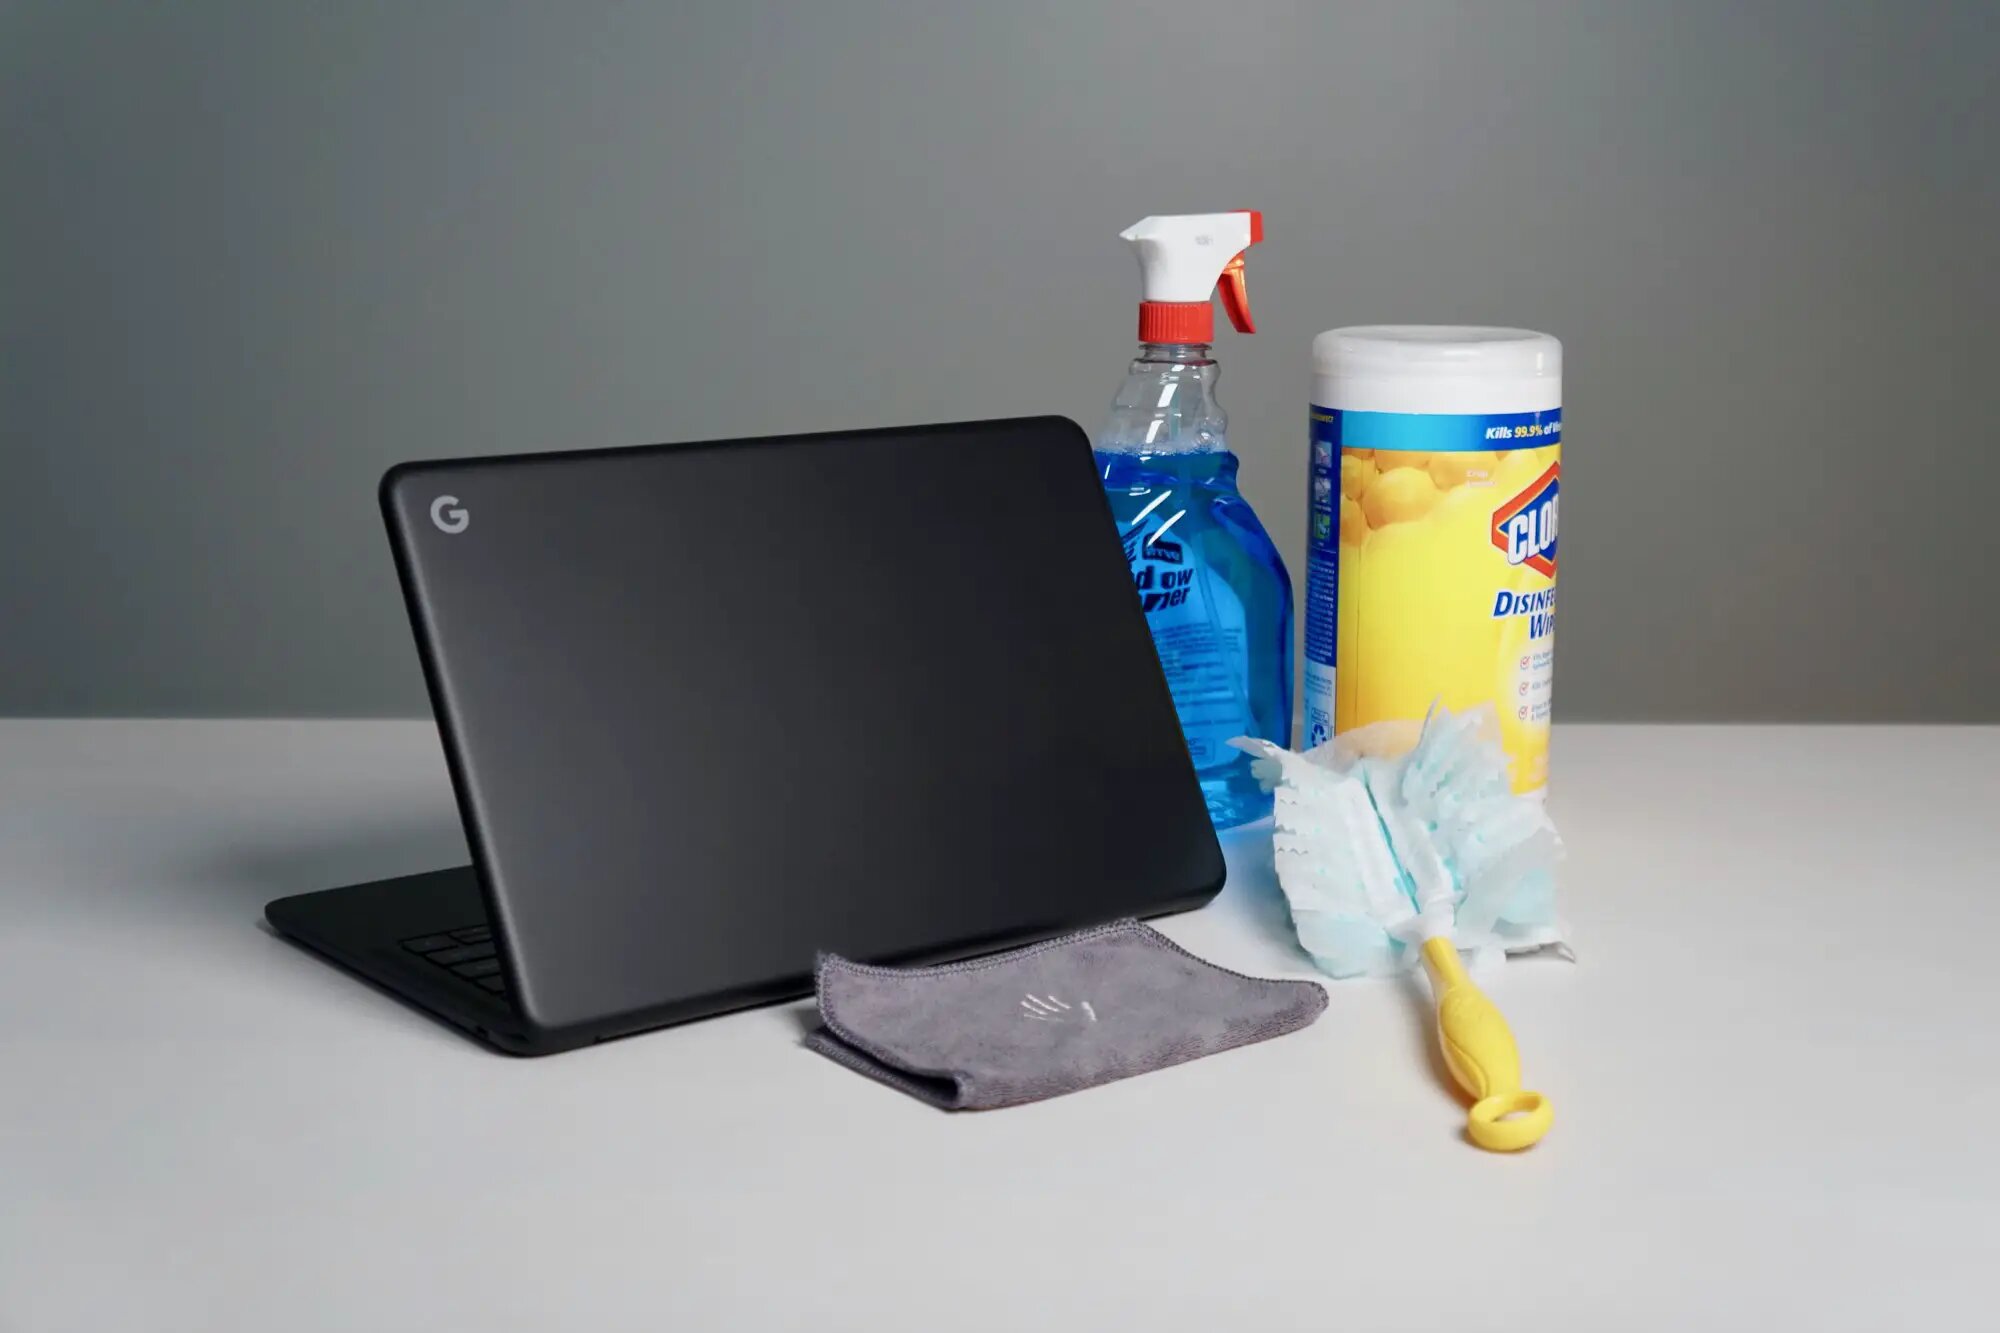
Chromebooks have become increasingly popular due to their user-friendly interface, affordability, and portability. However, like any electronic device, they require regular cleaning and maintenance to ensure optimal performance and longevity. Regular cleaning not only keeps your Chromebook looking pristine but also helps prevent the buildup of dust, dirt, and grime that can impact its functionality.
In this guide, we will walk you through the step-by-step process of cleaning your Chromebook effectively and safely. We will cover everything from cleaning the exterior and keyboard to cleaning the screen, trackpad, ports, fan, vents, battery, and charger. By following these simple cleaning techniques, you can ensure that your Chromebook stays in excellent condition, providing you with a seamless computing experience.
Before we dive into the cleaning process, it’s important to note a few precautions. First, always make sure to turn off your Chromebook and unplug it from the power source before cleaning. This will prevent any accidental damage and ensure your safety. Additionally, avoid using harsh cleaning agents or abrasive materials, as they can potentially damage the delicate surfaces of your Chromebook.
Now that we have covered the necessary precautions, it’s time to get started with the cleaning process. Let’s begin by cleaning the exterior of your Chromebook.
Cleaning Precautions
When it comes to cleaning your Chromebook, it’s crucial to exercise caution to avoid causing any damage. Here are some important cleaning precautions to keep in mind:
- Turn off and unplug: Before you start cleaning, make sure to turn off your Chromebook and unplug it from the power source. This will prevent any possible electrical hazards.
- Use soft materials: Always use soft and lint-free materials, such as microfiber cloths or soft cottons, to clean your Chromebook. Avoid using rough fabrics or paper towels, as they can potentially scratch the surface.
- Avoid liquid contact: Never directly spray liquid cleaners onto your Chromebook. Instead, dampen the cloth with a mild cleaning solution and gently wipe the surfaces. Excessive moisture can seep into the device and cause damage to its internal components.
- Stay cautious with cleaning agents: Be careful when using cleaning agents. Avoid harsh chemicals, alcohol-based solutions, or abrasive cleaners, as they can damage the finish and screen of your Chromebook. Stick to mild, non-abrasive cleaning solutions specifically designed for electronic devices.
- Don’t forget the ports: When cleaning the ports, be gentle and avoid applying excessive force. A small amount of compressed air or a soft brush can be used to remove any dust or debris from the ports.
- Keep liquids away from the keyboard: Be cautious when cleaning the keyboard. Avoid spilling any liquids on the keys, as it can seep into the device and damage the internal components.
- Protect the screen: The screen is a sensitive part of your Chromebook. Use a soft cloth to gently remove fingerprints and smudges. Avoid pressing too hard or using excessive force.
- Be mindful of the charger: When cleaning the charger, make sure it is unplugged from the power source. Use a soft, dry cloth to wipe away any dirt or dust from the charger prongs.
By following these cleaning precautions, you can ensure that your Chromebook remains in excellent condition without any accidental damage. Let’s move on to the next section, where we will discuss the process of cleaning the exterior of your Chromebook.
Cleaning the Exterior
The exterior of your Chromebook is prone to collecting dirt, dust, fingerprints, and other smudges. Cleaning the exterior not only enhances its appearance but also helps maintain its performance. Here’s a step-by-step guide on how to clean the exterior of your Chromebook:
- Prepare a cleaning solution: Mix a small amount of mild dish soap or gentle electronic device cleaner with water in a spray bottle or a bowl. Remember to dilute the solution properly to prevent any damage.
- Turn off and unplug the Chromebook: Make sure your Chromebook is turned off and unplugged from the power source before cleaning. This ensures your safety and prevents any potential electrical hazards.
- Dampen a microfiber cloth: Take a soft microfiber cloth and lightly dampen it with the cleaning solution. Make sure the cloth is not soaked or dripping with liquid.
- Gently wipe the exterior surfaces: Starting from the top, gently wipe the lid, bottom, and the sides of your Chromebook. Pay special attention to areas that are prone to collecting dirt and smudges, such as the touchpad and the edges around the keyboard.
- Remove tough stains: If there are any stubborn stains, you can use a soft toothbrush or a cotton swab lightly dampened with the cleaning solution to gently scrub the affected area. Avoid using excessive force to prevent any damage.
- Dry with a clean cloth: After you have cleaned the exterior surfaces, use a clean, dry microfiber cloth to wipe away any moisture or residue. Ensure that all surfaces are completely dry before turning on your Chromebook.
It’s important to note that you should avoid spraying any liquid directly onto your Chromebook. Excessive moisture can seep into the device and cause damage. Always use a dampened cloth to clean the exterior surfaces.
By following these simple steps, you can effectively clean the exterior of your Chromebook and keep it looking as good as new. Next, let’s move on to cleaning the keyboard of your Chromebook.
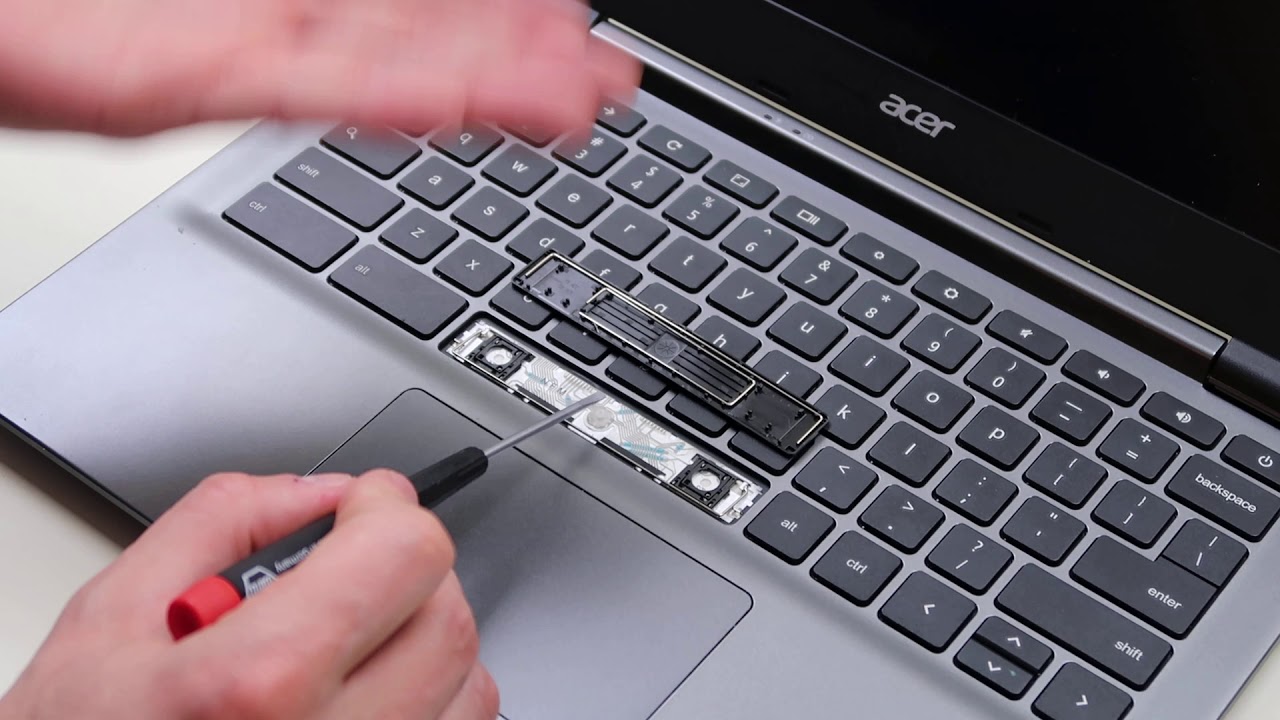
Cleaning the Keyboard
The keyboard of your Chromebook is prone to accumulating dust, crumbs, and other debris over time. Regular cleaning of the keyboard ensures smooth typing and prevents the buildup of dirt that could potentially affect the performance of your device. Here’s a step-by-step guide on how to clean the keyboard of your Chromebook:
- Turn off and unplug the Chromebook: Before cleaning the keyboard, make sure your Chromebook is turned off and unplugged from the power source. This ensures your safety and prevents any accidental activation of keys.
- Shake out loose debris: Hold your Chromebook at a downward angle and gently shake it to dislodge any loose debris, such as crumbs or dust, that may have accumulated between the keys.
- Use compressed air: Purchase a can of compressed air specifically designed for cleaning electronics. Hold the can upright and use short bursts of air to blow out any remaining debris from the keyboard. Pay extra attention to the areas between the keys.
- Disinfect with a cleaning solution: Dampen a soft cloth with a mixture of isopropyl alcohol and water, or use pre-moistened electronic cleaning wipes. Gently wipe down the surface of each key, making sure not to apply excessive pressure. This helps disinfect the keys and remove any remaining dirt or grease.
- Focus on problem areas: If there are sticky or stubborn stains on the keys, use a cotton swab dipped in isopropyl alcohol to gently rub the affected areas. Be careful not to let any liquid drip into the keyboard.
- Dry the keyboard: Use a clean, dry cloth to gently wipe away any moisture or residue from the keyboard. Ensure that the keys are completely dry before turning on your Chromebook.
It’s important to avoid using excessive force or liquids when cleaning the keyboard. Applying too much pressure or spilling liquid onto the keyboard can cause damage to the keys or affect the internal components of your Chromebook.
By following these simple steps, you can keep your Chromebook’s keyboard clean, ensuring a comfortable typing experience and extending the lifespan of your device. In the next section, we will discuss how to clean the screen of your Chromebook.
Cleaning the Screen
The screen of your Chromebook is the main interface through which you interact with the device. Over time, it can accumulate fingerprints, smudges, and dust, which can hinder visibility and affect the overall user experience. Regularly cleaning the screen not only improves its clarity but also helps maintain its longevity. Here’s a step-by-step guide on how to clean the screen of your Chromebook:
- Turn off and unplug the Chromebook: Before cleaning the screen, ensure that your Chromebook is turned off and unplugged from the power source. This eliminates the risk of accidental activation and ensures your safety while cleaning.
- Prepare a cleaning solution: Mix a small amount of mild, non-abrasive cleaning solution specifically designed for electronics with distilled water. Alternatively, you can use pre-moistened electronic screen cleaning wipes.
- Dampen a microfiber cloth: Take a clean, lint-free microfiber cloth and lightly dampen it with the cleaning solution. Make sure the cloth is not dripping with liquid, as excessive moisture can damage the screen.
- Gently wipe the screen: Starting from the top, gently wipe the screen in straight, horizontal or vertical motions. Avoid applying excessive pressure or scrubbing vigorously, as this may damage the screen or leave streaks.
- Pay attention to corners and edges: Take extra care to clean the corners and edges of the screen, as these areas tend to accumulate more dirt and fingerprints. Use gentle circular motions to clean these areas thoroughly.
- Dry the screen: After wiping the screen with the damp cloth, use a clean, dry microfiber cloth to gently remove any remaining moisture. Make sure the screen is completely dry before turning on your Chromebook.
- Avoid using household cleaning products: Never use harsh cleaning agents or household cleaning products, such as window cleaners or abrasive materials, on your Chromebook screen. These can damage the screen’s protective coating and affect its clarity.
By following these simple steps, you can keep the screen of your Chromebook clean and free from smudges or dirt. Regular cleaning will ensure a crisp and clear display, enhancing your overall browsing and viewing experience. Next, let’s move on to cleaning the trackpad of your Chromebook.
Cleaning the Trackpad
The trackpad on your Chromebook is an essential component that allows you to navigate and interact with your device. However, like any touch-sensitive surface, it can accumulate dust, fingerprints, and dirt over time, which can affect its responsiveness. Regular cleaning of the trackpad ensures smooth and accurate cursor movement. Here’s a step-by-step guide on how to clean the trackpad of your Chromebook:
- Turn off and unplug the Chromebook: Before cleaning the trackpad, make sure your Chromebook is turned off and unplugged from the power source. This prevents accidental input and ensures your safety while cleaning.
- Prepare a cleaning solution: Mix a small amount of mild dish soap or electronic device cleaner with water in a bowl. Alternatively, you can use pre-moistened electronic cleaning wipes specifically designed for touch-sensitive surfaces.
- Dampen a microfiber cloth: Take a soft, lint-free microfiber cloth and lightly dampen it with the cleaning solution. Ensure the cloth is not soaked or dripping with liquid.
- Gently wipe the trackpad: Using the damp cloth, gently wipe the trackpad in small, circular motions. Pay attention to the edges and corners, as these areas tend to accumulate more dirt and grime. Be careful not to apply excessive pressure, as it may damage the trackpad.
- Remove tough stains: If there are any stubborn stains or sticky residue on the trackpad, you can use a cotton swab lightly dampened with the cleaning solution to gently scrub the affected area. Use a dry cloth to wipe away any moisture afterwards.
- Dry the trackpad: After cleaning, use a clean, dry microfiber cloth to gently remove any remaining moisture from the trackpad. Ensure that it is completely dry before turning on your Chromebook.
It’s important to avoid spraying any liquid directly onto the trackpad. Excessive moisture can seep into the device and cause damage. Always use a dampened cloth to clean the trackpad gently.
By following these simple steps, you can keep the trackpad of your Chromebook clean and responsive, ensuring smooth navigation and a seamless user experience. Next, let’s move on to cleaning the ports of your Chromebook.
Cleaning the Ports
The ports on your Chromebook, such as USB ports, headphone jacks, and charging ports, are entry points for dust, lint, and debris. Over time, this buildup can interfere with proper connectivity and affect the performance of your device. Regular cleaning of the ports ensures smooth and reliable connection. Here’s a step-by-step guide on how to clean the ports of your Chromebook:
- Turn off and unplug the Chromebook: Before cleaning the ports, make sure your Chromebook is turned off and unplugged from the power source. This eliminates any risk of electrical shock and ensures your safety during the cleaning process.
- Inspect the ports: Take a close look at the ports to check for any visible debris, dust, or lint. Use a flashlight if necessary to get a clear view of the interior.
- Use compressed air: Purchase a can of compressed air specifically designed for cleaning electronics. Hold the can upright and use short bursts of air to blow out any dust or debris from the ports. Be careful not to spray the air too close to the ports, as it can cause damage.
- Use a soft brush: If there are any stubborn debris stuck in the ports, you can use a soft-bristled brush, such as a clean makeup brush or a small paintbrush, to gently remove them. Make sure to brush carefully to avoid scratching the ports.
- Repeat for all ports: Clean each port individually, including USB ports, headphone jacks, and charging ports. Pay attention to the specific needs of each port and take care not to damage the delicate connectors.
- Finishing touches: After cleaning, inspect the ports once again to ensure they are free from any dirt or debris. If necessary, use compressed air or a brush for any remaining particles.
Regularly cleaning the ports of your Chromebook helps maintain proper connectivity and ensures that your devices can be plugged in without any issues. It is recommended to clean the ports every few months or as needed.
Now that we have covered how to clean the ports, let’s move on to cleaning the fan and vents of your Chromebook.
Cleaning the Fan and Vents
The fan and vents of your Chromebook play a crucial role in keeping your device cool by allowing proper airflow. However, over time, these areas can become clogged with dust and debris, hindering the cooling process and potentially causing your Chromebook to overheat. Regularly cleaning the fan and vents is essential to maintain optimal performance. Here’s a step-by-step guide on how to clean the fan and vents of your Chromebook:
- Turn off and unplug the Chromebook: Before cleaning the fan and vents, make sure your Chromebook is turned off and unplugged from the power source. This ensures your safety and prevents any potential electrical hazards.
- Locate the fan and vents: Take a close look at your Chromebook to determine the location of the fan and vents. Common areas include the sides, bottom, and back of the device.
- Use compressed air: Hold a can of compressed air upright and use short bursts of air to blow out any dust or debris from the vents. Start by blowing air into the vents and gradually move towards the fan, following the natural airflow. This helps dislodge any buildup and push it away from the device.
- Hold the fan in place: To prevent the fan from spinning while you clean it, use a toothpick or a small, non-metallic object to hold it in place gently. This helps avoid potential damage to the fan blades.
- Blow out the fan: With the fan held in place, continue blowing air into it to remove any dust or debris that may have accumulated. Be thorough and ensure that the fan is completely clean.
- Clean the exterior vents: Once the fan is clean, use compressed air to blow out any remaining dust or debris from the exterior vents. Pay close attention to the corners and edges of the vents.
- Repeat as needed: Depending on the amount of dust and debris, you may need to repeat the process a few times to ensure that the fan and vents are completely clean and free from any obstructions.
Regularly cleaning the fan and vents of your Chromebook is crucial to prevent overheating and maintain optimal performance. It is recommended to clean these areas every few months or as needed, especially if you notice your device running hotter than usual.
Now that we have covered how to clean the fan and vents, let’s move on to cleaning the battery of your Chromebook.
Cleaning the Battery
The battery of your Chromebook powers your device and allows you to use it on the go. Over time, the battery surface can accumulate dirt, fingerprints, and oils, which can affect its performance and lifespan. Regularly cleaning the battery helps maintain its efficiency and ensures optimal battery life. Here’s a step-by-step guide on how to clean the battery of your Chromebook:
- Turn off and unplug the Chromebook: Before cleaning the battery, make sure your Chromebook is turned off and unplugged from the power source. This ensures your safety and prevents any potential electrical hazards.
- Gently wipe the battery: Use a soft, lint-free cloth lightly dampened with water to gently wipe the surface of the battery. Make sure the cloth is not soaking wet, as excessive moisture can damage the battery.
- Focus on problem areas: Pay special attention to areas where fingerprints, oils, or dirt are visible. Use gentle circular motions to clean these areas effectively. Avoid applying excessive pressure, as it may damage the battery.
- Dry the battery: After wiping the battery, use a clean, dry cloth to gently remove any moisture or residue. Ensure that the battery is completely dry before reinserting it into your Chromebook or connecting it to a power source.
- Avoid using cleaning agents: It’s important to note that you should not use any cleaning agents or harsh chemicals directly on the battery. These substances can potentially damage the battery and affect its performance.
- Charge the battery: Once the battery is clean and dry, you can reconnect it to your Chromebook and charge it as needed. A clean battery surface helps optimize the charging process and improves battery life.
Regularly cleaning the battery of your Chromebook not only helps maintain its appearance but also prolongs its lifespan and ensures optimal performance. It is recommended to clean the battery surface every few months or as needed.
Now that we have covered how to clean the battery, let’s move on to cleaning the charger of your Chromebook.
Cleaning the Charger
The charger is an essential component of your Chromebook that allows you to keep your device powered and ready for use. Over time, the charger can accumulate dust, dirt, and debris, which can affect its performance and charging efficiency. Regularly cleaning the charger helps maintain its functionality and ensures a reliable power supply. Here’s a step-by-step guide on how to clean the charger of your Chromebook:
- Disconnect the charger: Before cleaning the charger, make sure it is disconnected from the power source and unplugged from your Chromebook. This eliminates any risk of electrical shock and ensures your safety.
- Inspect the charger: Take a close look at the charger to check for any visible dust, dirt, or debris. Pay attention to the prongs and the cable, as these areas often accumulate the most dirt.
- Wipe the surface: Use a soft, dry cloth to gently wipe the surface of the charger. If there are stubborn stains or dirt, you can moisten the cloth slightly with water or isopropyl alcohol. Ensure that the cloth is not saturated.
- Clean the prongs: Use a cotton swab lightly dampened with water or isopropyl alcohol to clean the prongs of the charger. Gently wipe the prongs to remove any dirt or residue that may affect the charging connection.
- Remove cable tangles: If the charger cable has any tangles or bends, gently straighten them to ensure proper connectivity and prevent damage to the cable.
- Avoid liquids near the charger: It’s important to note that you should not spray any liquid directly onto the charger or submerge it in water. Moisture can damage the internal components and render the charger unusable.
- Dry the charger: After cleaning, use a clean, dry cloth to wipe away any moisture or residue from the charger. Ensure that the charger is completely dry before reconnecting it to the power source or your Chromebook.
- Inspect for damage: Before using the charger, inspect it for any signs of damage, such as frayed cables or loose connections. If you notice any issues, it’s best to replace the charger to avoid potential hazards.
Regularly cleaning the charger of your Chromebook helps maintain its performance and ensures a reliable power supply. It is recommended to clean the charger every few months or as needed, especially if you notice any visible dirt or deterioration.
Now that we have covered how to clean the charger, you have learned how to effectively clean various components of your Chromebook. With regular maintenance, your Chromebook will stay in excellent condition, providing you with a seamless computing experience for years to come.
Conclusion
Cleaning your Chromebook is an essential part of its maintenance routine. By regularly cleaning the different components of your Chromebook, you can ensure optimal performance, longevity, and an enjoyable user experience. Throughout this guide, we have covered the step-by-step processes of cleaning the exterior, keyboard, screen, trackpad, ports, fan, vents, battery, and charger of your Chromebook.
Remember to exercise caution during the cleaning process by following the necessary precautions. Always turn off and unplug your Chromebook before cleaning, use soft materials, avoid direct contact with liquids, and be gentle with delicate components.
Cleaning your Chromebook not only enhances its visual appearance but also aids in preventing the buildup of dust, dirt, and grime, which can impact its functionality. By keeping the exterior, keyboard, screen, trackpad, ports, fan, vents, battery, and charger of your Chromebook clean, you can ensure that it continues to operate smoothly and efficiently.
Regular maintenance ensures that your Chromebook remains a valuable and reliable companion, providing you with seamless computing experiences and allowing you to make the most of its capabilities. By incorporating cleaning into your Chromebook routine, you can extend its lifespan and enjoy optimal performance for years to come.
Remember, a clean Chromebook is a happy Chromebook!